Category Archives: Design

Design

Spring One Room Challenge Week 4

April 28, 2019

Each week of the One Room Challenge I start off feeling like “oh ya, we can do this is 6 weeks”. And then, halfway through the week, I start to panic and the to-do list doesn’t seem to be getting shorter. Then, by the end of the week, I’m exhausted, but also feeling pretty accomplished and hope is back that we will finish everything in this short turnaround time. It’s the end of the week, so I’m feeling quite good about our renovation.

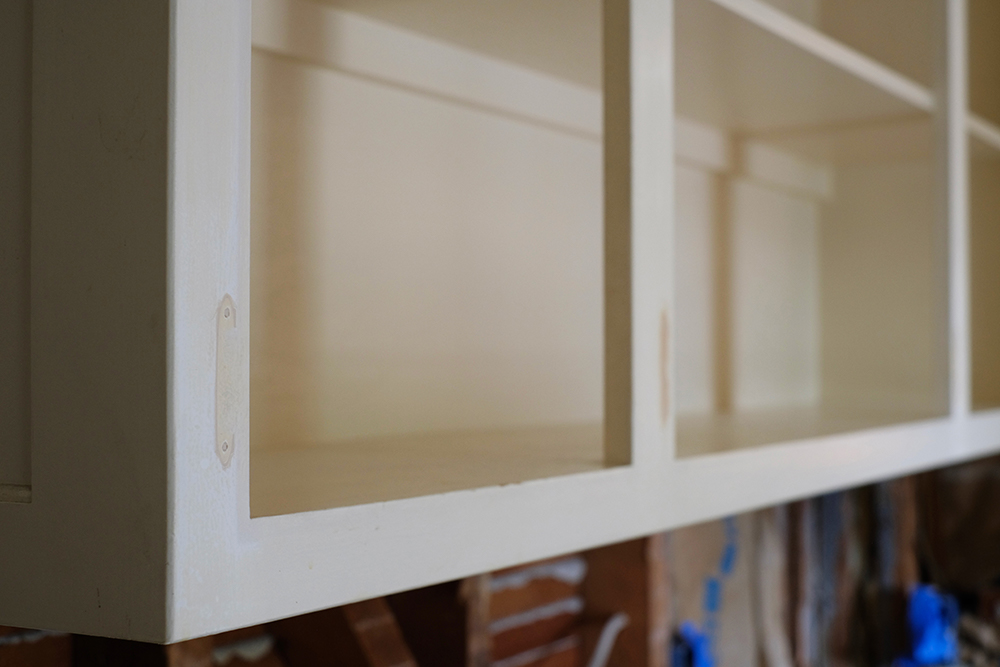
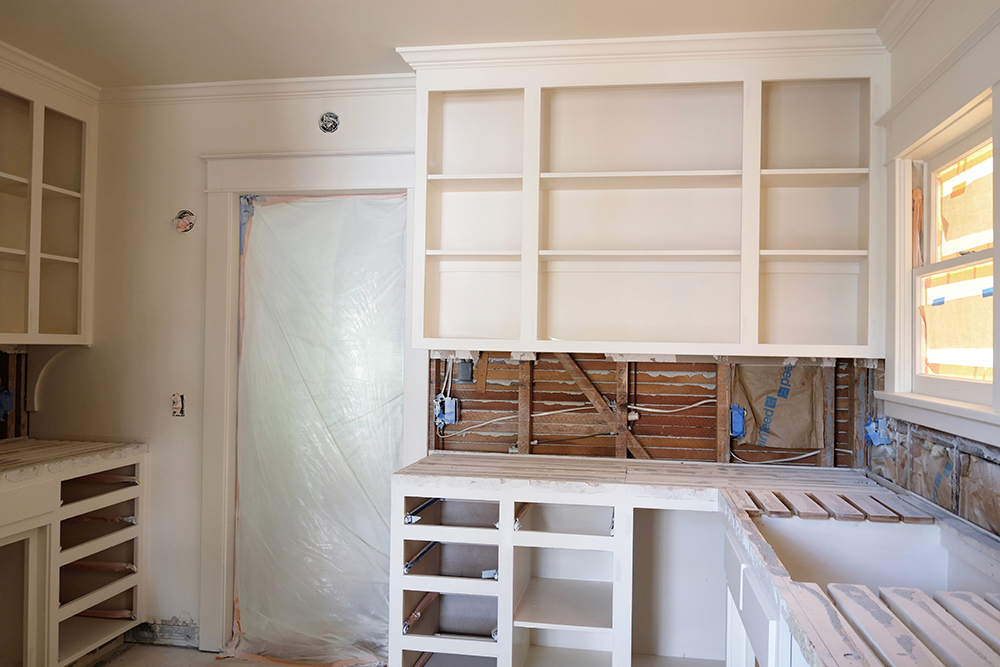
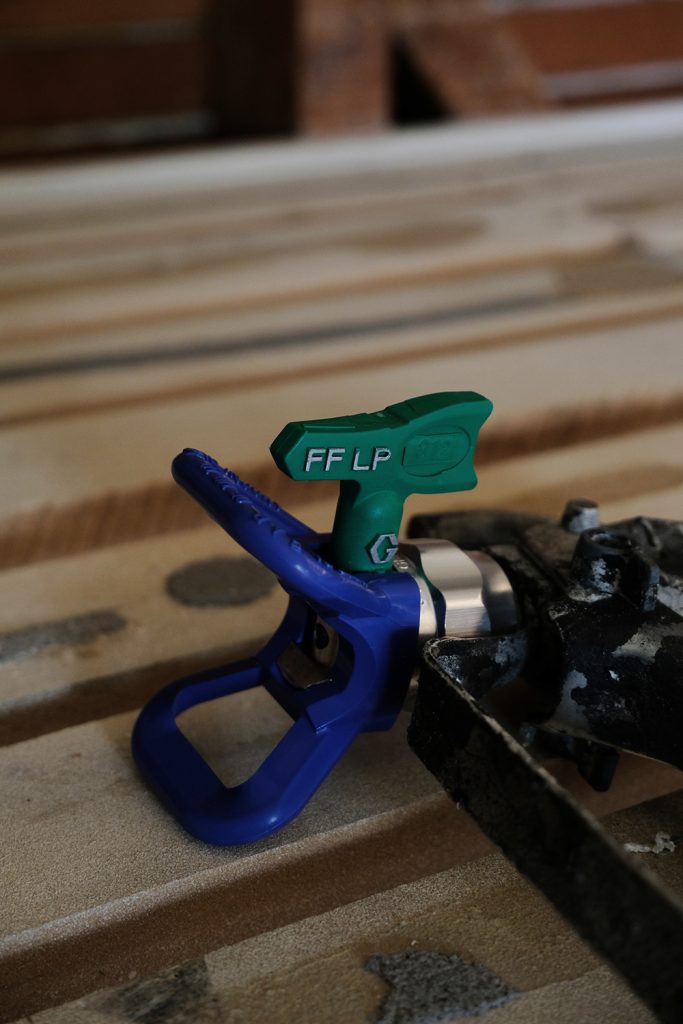
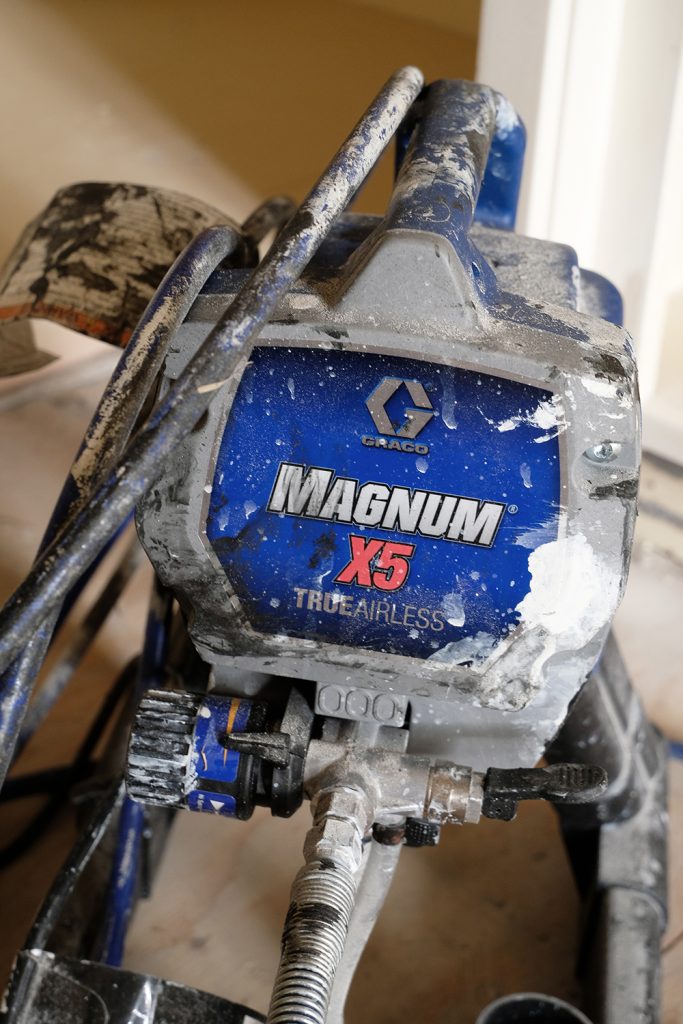
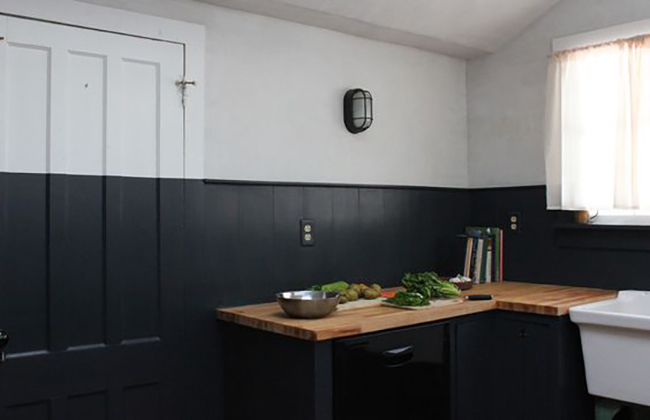
Well, it was a week of painting, painting, and more painting. We were under the gun to get most everything painted before the countertops went in on Thursday. We wanted to save ourselves the headache of masking off everything and trying to protect brand new countertops and floors from paint. So there were many days of paint and actually it was a lot of prep work as well, but all with the goal to get the cabinets, wall, and ceiling painted. And we are sooooo close. Everyone pitched in this week, me, my dad, Lonnie and of course my brother Ash (who are we kidding, he’s doing most of the work). But, I’m happy to say that we are ALMOST done with the painting. Everything is done, except for the cabinet doors and drawers and those are actually sanded and primed, they just need their final coat. I spayed the upper cabinets white, and with Ash’s help, I think I’m feeling a little more confident with my spraying skills.

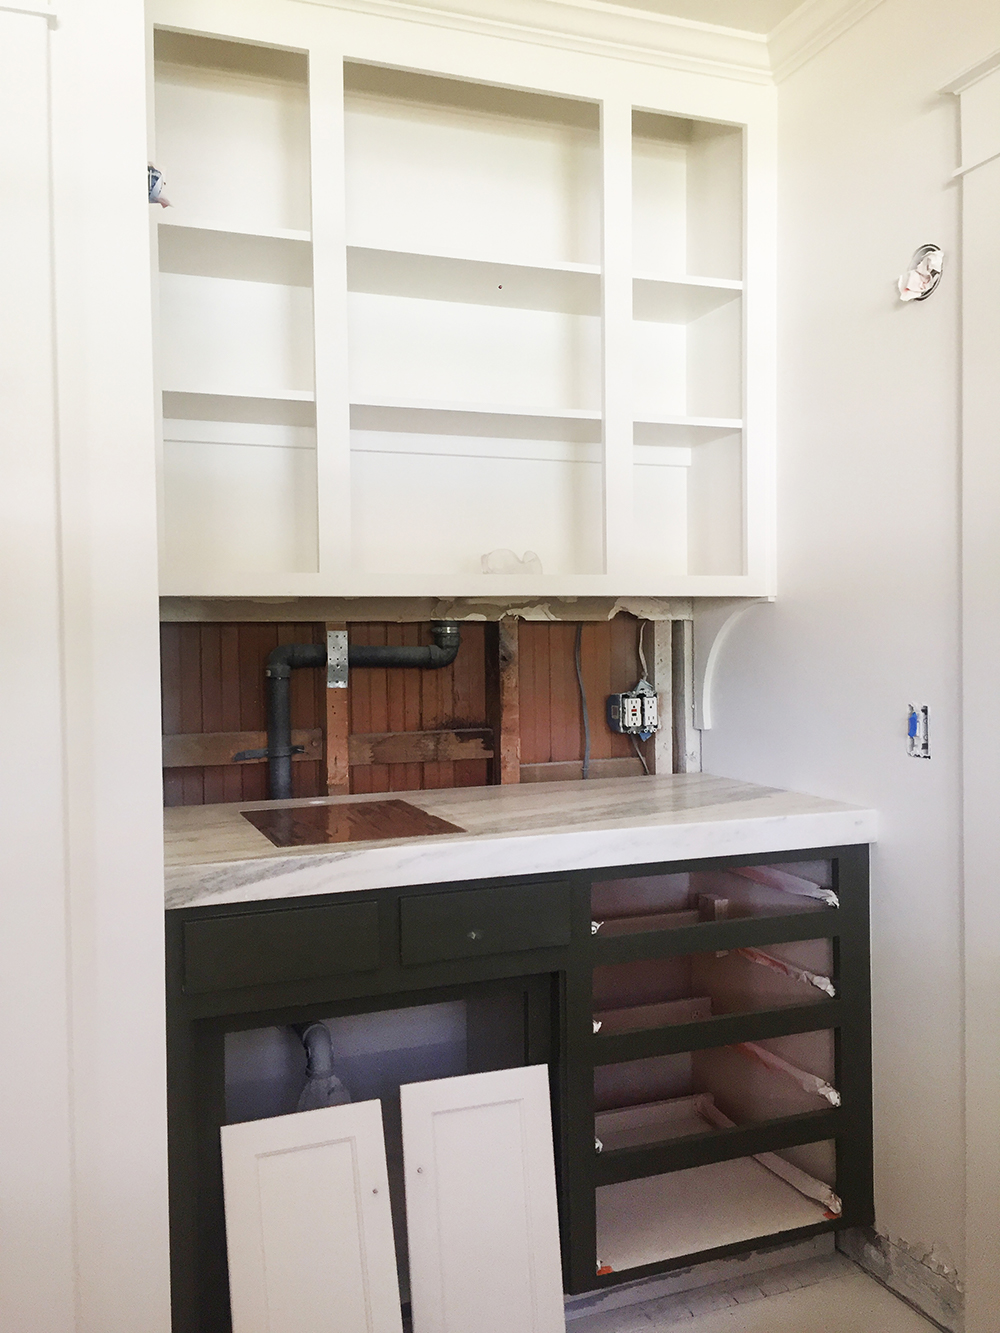
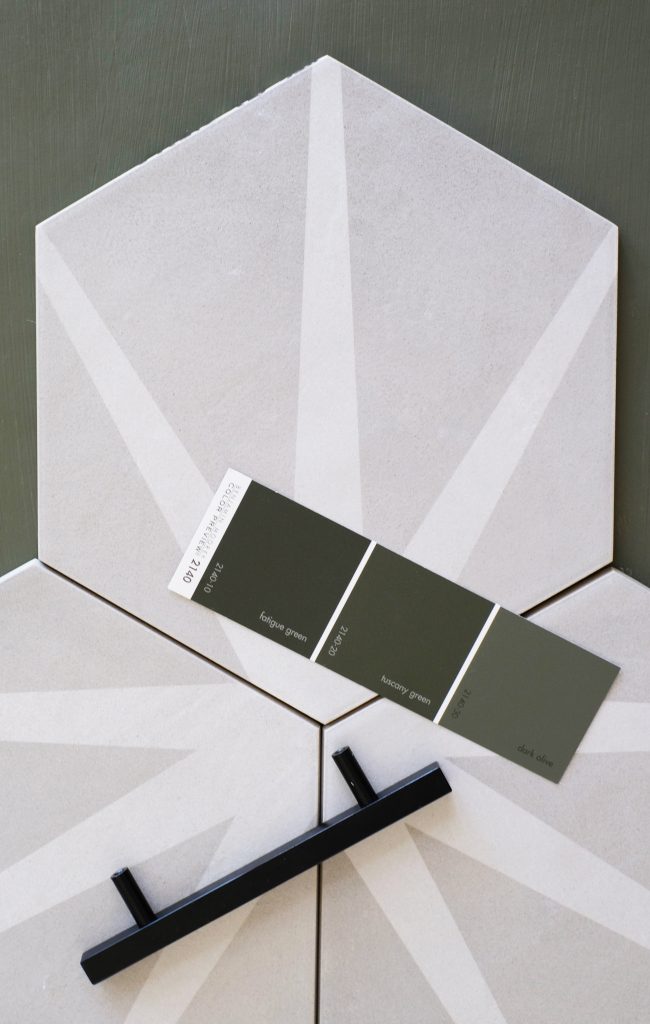
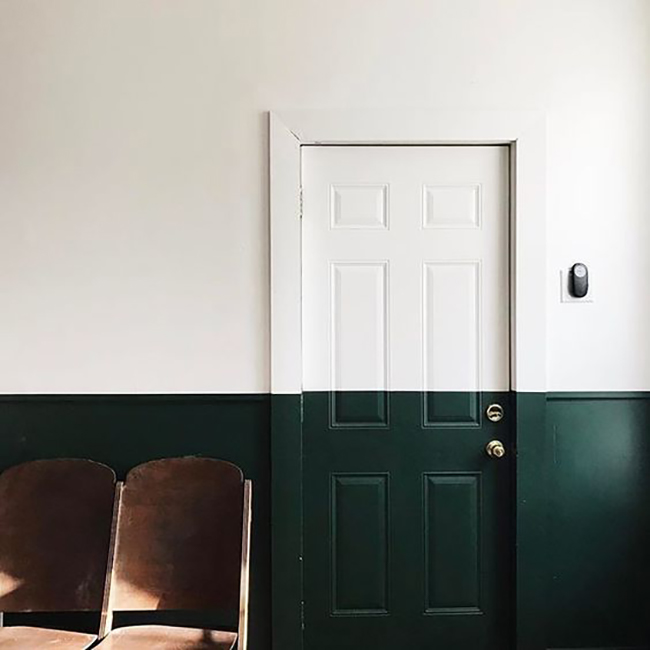
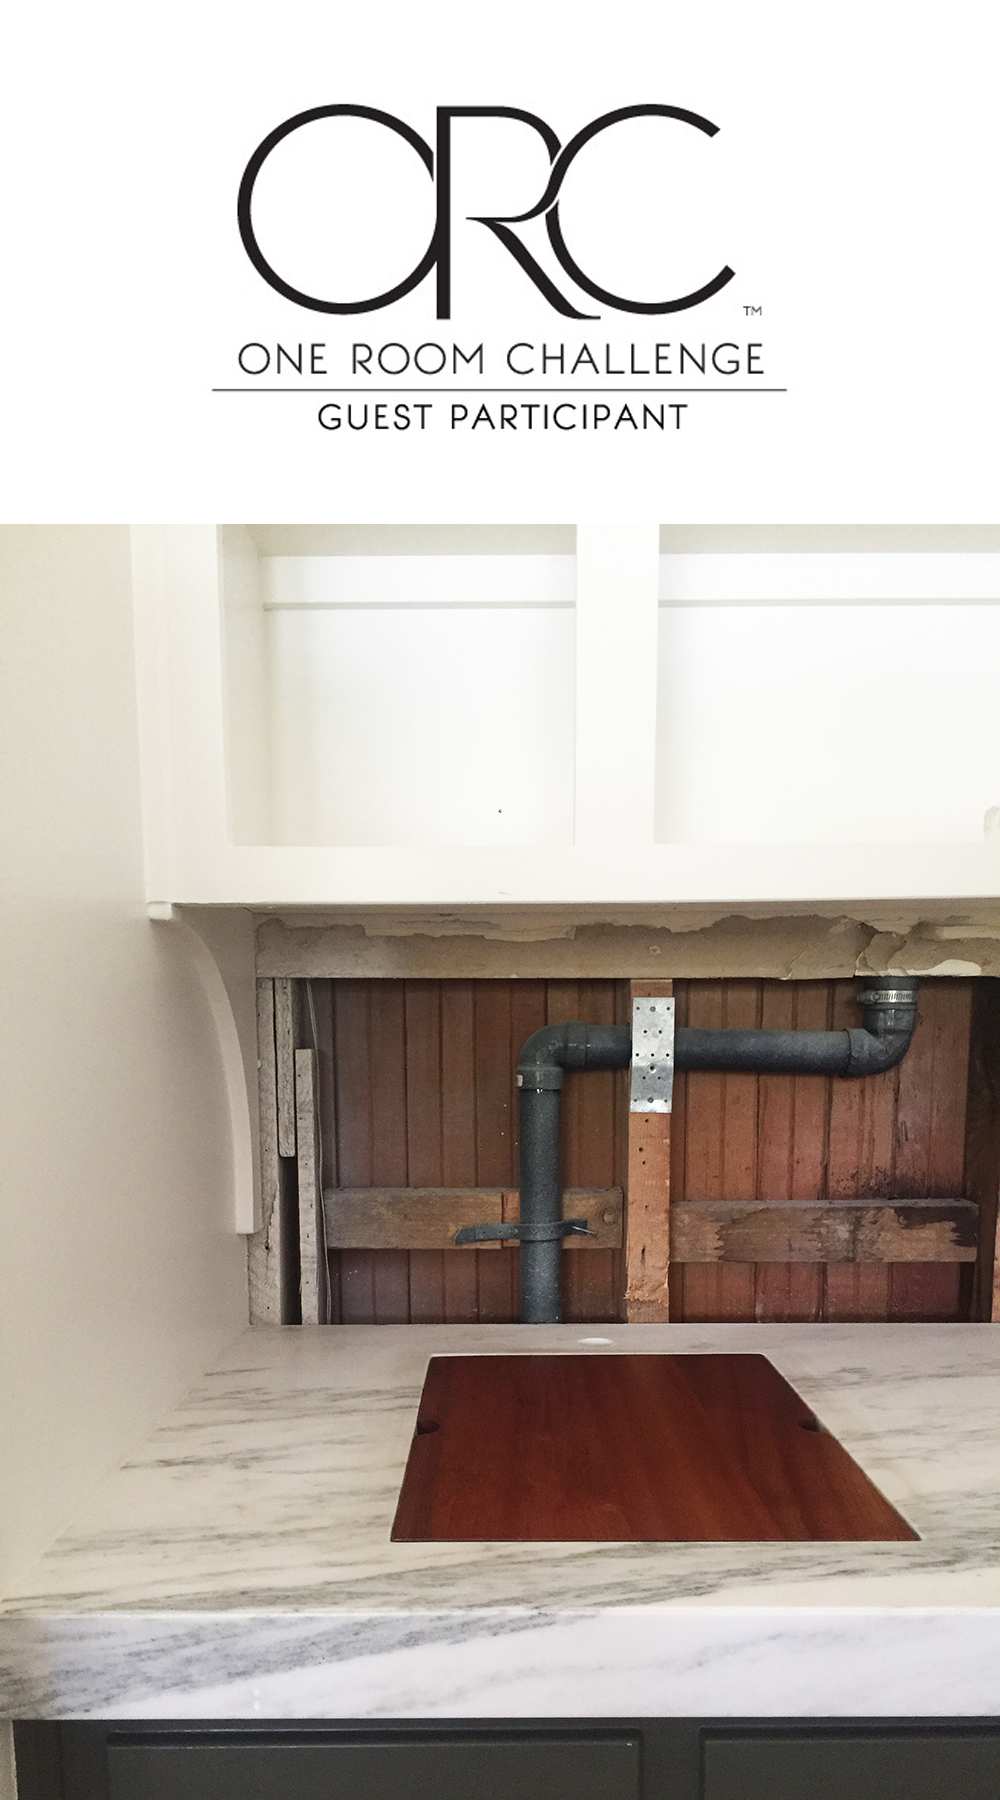
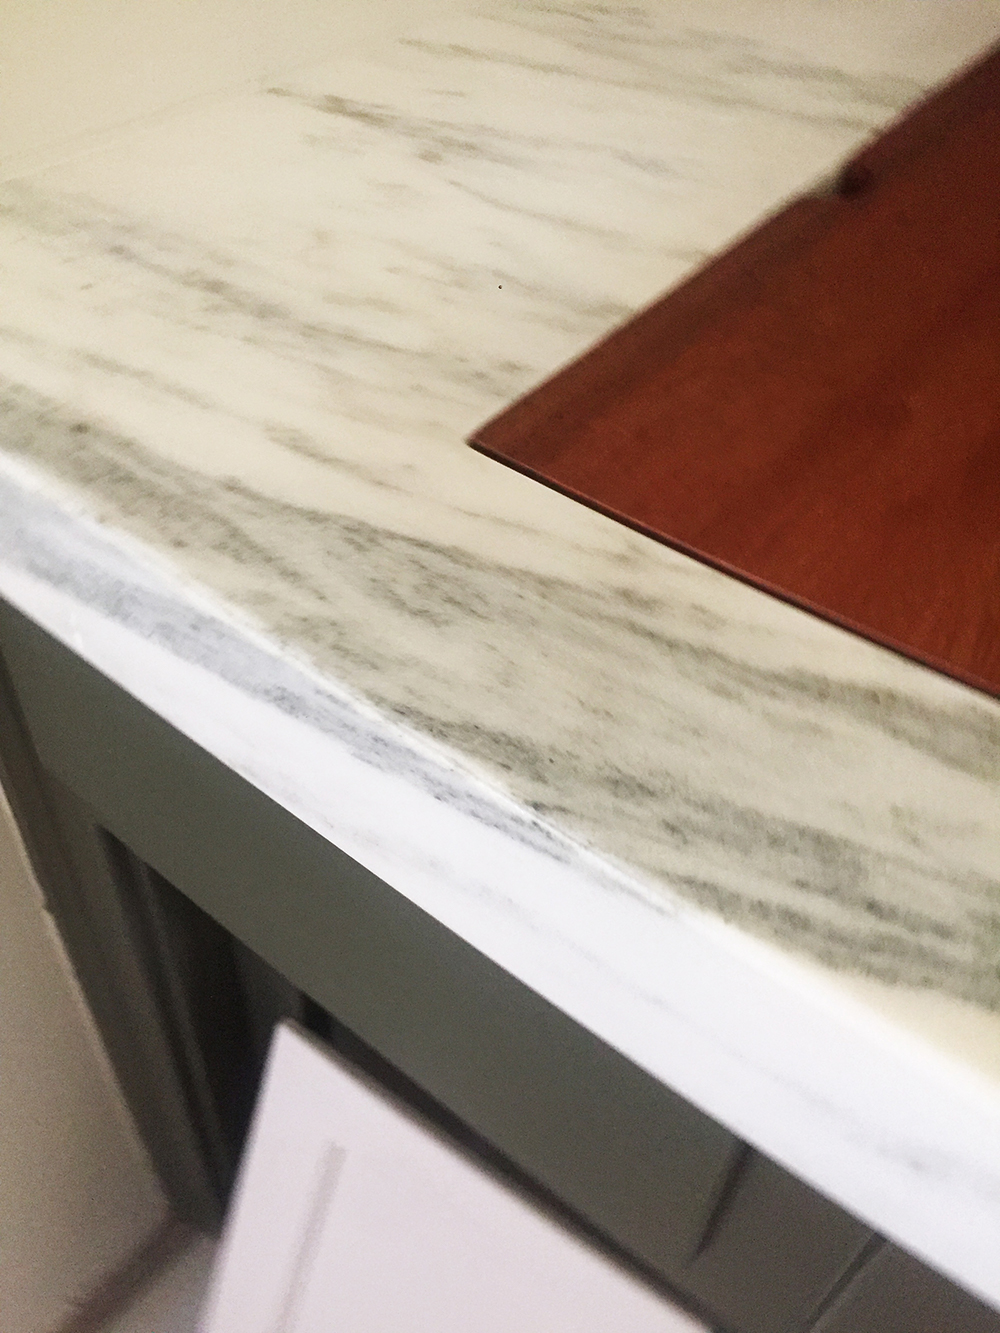
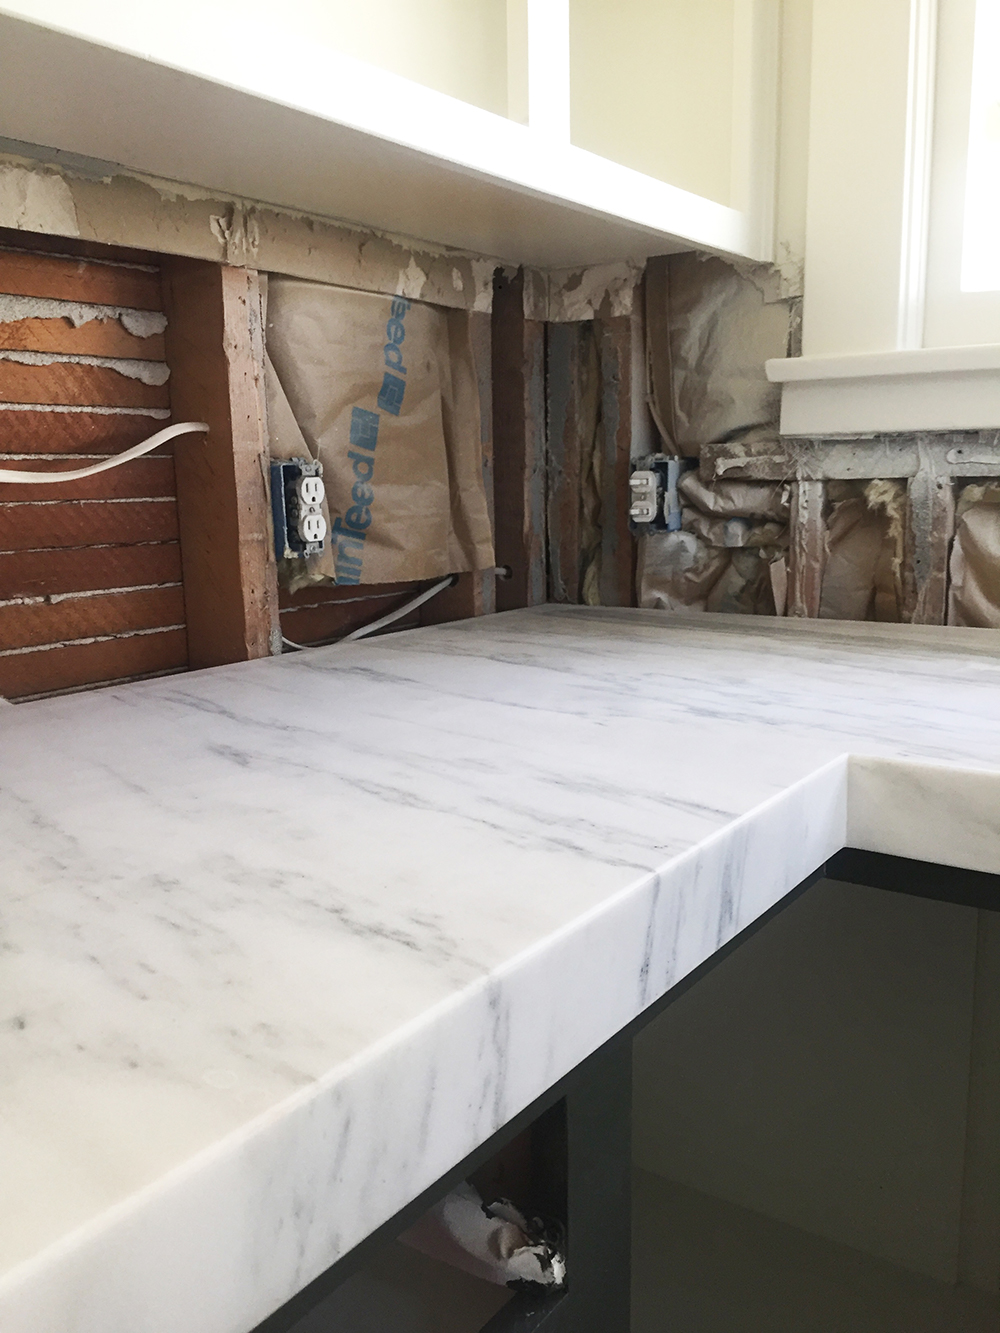
The BIG news is, we have countertops!!!!! Our Honed Montclair Danby Marble from Bedrosians is in and it’s beyond gorgeous. Pat Callahan Tile and Stone did a amazing job with the fabrication of this stone. We ended up having to have quite a wide lip/edge on the stone, to cover up the damage of the old counters on the cabinets. I was worried it might look a little weird, but it’s actually so beautiful. They matched the grain in the stone so that it looks like the stone is waterfalling over the edge. It actually looks like we have really thick countertops. And all my sweating over the exactly right shade of green has totally paid off, the green looks fantastic with the marble. I’m so glad I didn’t go with black for the lower cabinets.

Monday morning, tiling is starting and I’m soooo happy. While tile is going in, Ash and I will be painting the rest of the cabinets.

I few other important details arrived this week as well. The cabinet pulls are here! I found a very inexpensive version on amazon, and I’m really happy with them. Also the wall sconces will be here tomorrow, and fingers crossed, they will fit beside the door trim, because I think I might be cutting it a little close. I’m dragging my feet on the hanging pendants. I still feel like we might regret no having a fan, but I also think they are kind of ugly. And after all of this work, I’d hate to throw in an ugly fan because is “practical”. And finally, we are testing out a new kind of hinge tomorrow to see if we can eliminate the exposed hinge barrel. I think it will really modernize the cabinets if these specific ones work – stay tuned for results.

Ok, I’m going to hit the hay and call it a week. Tomorrow is jam packed, and I want to be ready to take on week 5 of ORC.

Design

Spring One Room Challenge Week 3

April 21, 2019

Well, we are halfway there with the One Room Challenge! Yikes…… there is sooooo much more to do. But, I feel like we are on a good path and we were very productive this week.

Ok, if you are new here, I should give a little update. We are on week 3 (of 6 weeks) to making over our kitchen. If you want to know more of the details, check out the blog posts for week 1 and week 2.

First thing this week, I headed to Bedrosians and picked out the marble slabs that we are using for our counter tops. EEEEKKK!!! They are so gorgeous you guys. I can’t wait for you to see them cut and installed.

We were actually planning on having the tile and countertops installed early this week, but we decided to put off that installation till later next week so that we could get most of the painting done. We felt that it would be the easiest way to tackle this. I don’t know why we thought it would be fun to cover up brand new tile and counter tops in order to paint the cabinets.

Old hinge holes filled with wood fill and then sanded.

This last week we demoed the kitchen (and by we, I mean my brother Ash)! It took two days to rip out all the granite tile countertops and the floor. It was a bit of a beast to remove, the glue and grout used was very tough. Once everything was out of the space, we started sanding and prepping everything for paint. It was a good 2 days to get everything ready. We filled all the old hinge holes with wood fill, caulked all the cracks and holes, sanded and then sanded so more and then wiped everything down with TSP. And then we taped and masked off the room, which takes longer than you think.

We used a new primer, called UMA.

We are new to the sprayer game, but I think I’m a believer. We bought this Graco machine before Lonnie painted our guesthouse. For painting the interiors, we bought a the new blue housing and a FF LP 312 tip. And I’ll be honest, it was much easier to use then I thought. I primed the whole kitchen yesterday in just over an hour. I definitely have lots to learn, because there are a few drips that I need to sand.

And here’s the to-do list from the first week with a little check in of what we have accomplishment so far.

To-Do List:

  • demo countertops + backsplash
  • demo tile floors
  • replace countertops (ordered and being fabricated this week)
  • replace backsplash (tile ordered)
  • install tile floor (tile ordered)
  • replace cabinet hardware (selected, but need to order)
  • replace cabinet hinges (still trying to figure out what will work for our cabinet doors)
  • repaint back door
  • replace 2 wall sconces (selected, but not ordered yet)
  • replace ceiling fan and light fixture (selected, but not ordered yet)
  • paint ceiling (primed)
  • paint lower cabinets black or dark green (Benjamin Moore Dark Olive)
  • paint upper cabinets white
  • paint walls white (primed)
  • select and order sink and prep sink
  • select and order faucets
  • cut large butcher block for work surface
  • source and hang art
  • source rug for under sink and back door
  • replace switch plates and outlets

Tomorrow we are going to start painting everything that will be white, white. Wish us luck!

Be sure to follow along on Instagram for lots of BTS.

Design

Spring One Room Challenge Week 2

April 14, 2019

Well, we are one week into the ORC and it kind of appears like we haven’t done a single thing yet to this room. But, it’s been a week of decision making, ordering, and scheduling – all very important things to a renovation or makeover. And sometimes making those final selections is the hardest part of the process. Once you start making the decisions on color, pattern, finishes, then all the others seem to come a little easier.

I’ve put together a little mood board of our selections so that you can see the direction we are headed with the design. Up until yesterday, I was pretty positive I wanted the lower cabinets to be black. But, then I decided in the wee hours of the morning, that I didn’t want to play it safe and I wanted to have a little fun with color. Green is and always has been my favorite color, but I also think that the earthy tone of a dark army green is really a great color for a California Craftsman house. We have a lot of warm wood tones in our house so adding a little green to cool down the space feels refreshing.

// 1. // 2. // 3. // 4. // 5. // 6. // 7. // 8. // 9. // 10. // 11. // 12. // 13. // 14. //

I’ve linked all the sources for the fixtures and finishings we are using (some do have affiliate links). I am literally geeking out over the kitchen sinks that arrived yesterday. As someone who cooks pretty much everyday of the week, any gadgets and features that make my kitchen more efficient and practical make me super happy. Our kitchen is not huge and there isn’t an abundance of countertop space, so if I can have a little more surface with a cutting board and dish drying rack built into my sink, I’m WINNING! And while these sinks look SUPER expensive, they totally are not! You aren’t going to believe how reasonably priced they are.

My marble counter top dreams are all coming true! GUYS, I’m getting honed marble countertops EVERYWHERE!!!! I’m so excited to be working with Bedrosians Tile and Stone on this One Room Challenge. Their slab selection is insane, but for as long as I can remember, I’ve always wanted marble countertops. The honed finish is just icing on the cake. Honed marble is not polished or shiny, the finish on the stone is smooth and matte with very little reflection. The photographer side of me is giddy about this. Shooting food and recipes will be a breeze, currently I have to set up in my sunroom to avoid the hideous dark granite tiles in my kitchen now.

This week I am making my final selection on the marble slabs we are using for our kitchen, I’ll take you along on IG stories to help me make the selections. I’m not going to lie, it was soooo hard to pick tile for the floors and backsplash. Bedrosians has soooo many amazing options. But, I’ve made up my mind and the tile has been ordered, so no turning back now.

Ok, so we have a big week ahead of us. Demo starts early next week, I’m dreading the mess and having to pack up the kitchen. But, it’s totally going to be worth it!

Design

Spring One Room Challenge Week One

April 4, 2019

Well, I decided to make my come back to the blog with a BIG project. As you might know, I have had a lot of health issues the last couple of months and I’ve mostly been in bed or on the sofa due to two surgeries less than two weeks apart. The second surgery was a hysterectomy just two weeks ago. But, my body is starting to heal and I’m VERY ready to get back to work. So, I decided to go big and join the One Room Challenge this Spring as a guest and makeover our kitchen. Because I am not physically 100% and have another month or so of recovery, I will be hiring some trades to demo, install countertops and lay tile. My DIYing body and strength is not quite there yet, so I need some help. But there is soooo much painting and I’ll be tackling that.

I have been a fan girl of the ORC for a long time, but timing was always off to join in. But, I’m not making any excuses this time, so I’ve registered to be a guest participant. And I’m really looking forward to following along and watching all the amazing designers take on their rooms. Some of my all time favorite bloggers are in this Spring’s line up. I’m so excited to start on our kitchen. This Summer will be our 3rd year in this house, and I spend so much time in that kitchen

This is not a total gut job by any means, it’s really just some cosmetic updates. So, I feel like 6 weeks is doable. The cabinets are in really great condition, they just need a fresh coat of paint and some new hardware and hinges. The countertops and backsplash definitely need to go though. I know it looks like I have granite countertops, but in fact, they are just 12×12 granite tiles and with tile comes GROAT. And groat lines on countertops are the WORST! The groat lines are literally magnets for crumbs, dirt and grime. I feel like I’m ALWAYS cleaning them. And rolling out cookies or pastry dough is terrible. I really can’t wait to have one solid, seamless work surface.

Ok, let’s talk design. I have a look that I’m definitely after. I have always love painted cabinets and feel like they work with my 1918 Craftsman. But, I already had an all-white cabinets before (in our first house), so I’m ready to try something new. I want the kitchen to feel classic and timeless, but I want to play with a trend as well. I still like the look of darker lower cabinets and white uppers. For the last couple of years I’ve thought that I would probably paint the lowers black or charcoal, but I’ve also considered a dark green or olive color as well (this is a topic I’ll go even more into detail about).

I tore this image out of a Rejuvenation catalogue a couple years ago because it really had all the elements of color, texture, pattern that I was looking for. And I still LOVE it, so I’m using it as my inspiration for this kitchen makeover.

source

The to-do list is pretty long, but I think we can move through it in the next 6 weeks. Right now I’m trying to lock down a counter top fabricator and installer and also someone to install the tile. I’ve gotten a few quotes and from my previous experience, I’m not going with the most inexpensive quote, I’m trusting my gut and going with quote of the contractor that seemed to be the most knowledgable. While I love to save money and really do believe you get what you pay for when hiring trades.

To-Do List:

  • demo countertops + backsplash
  • demo tile floors
  • replace countertops
  • replace backsplash
  • install tile floor
  • replace cabinet hardware
  • replace cabinet hinges
  • repaint back door
  • replace 2 wall sconces
  • replace ceiling fan and light fixture
  • paint ceiling
  • paint lower cabinets black or dark green
  • paint upper cabinets white
  • paint walls white
  • select and order sink and prep sink
  • select and order faucets
  • cut large butcher block for work surface
  • source and hang art
  • source rug for under sink and back door
  • replace switch plates and outlets

Here’s a few beautiful black lower and white upper kitchen for inspiration. It’s sharp, right?

first row – 1 // 2 // 3 second row – 1 // 2 // 3 third row – 1 // 2 // 3

Ok, here’s some BEFORE pictures so that you can see what we are working with.

I’m sure I’ll be sharing a lot of behind the scenes over on Instagram stories. I think this is going to be a fun adventure.

Design

Arch Shaped Mirrors

February 27, 2019

Remember when triangles were EVERYWHERE. Gosh, I had so many triangle DIY’s on my blog. Well, I think I found my new triangle. I can’t get enough of arc and arch shapes. When we did a test run of the cutting boards before Christmas, I knew this was the shape I HAD to have.

I’ve been on the hunt for the perfect arch or curved-at-the-top shaped mirror for a while now. A couple months ago I had a local glass shop cut me one for my mantel, but it of course came without any sort of frame or trim. I do love the simplicity of it. But, it’s not so practical for hanging in a bathroom or mounting to a wall. This is a leaning-only situation.

So, since I was on the hunt, I figured you would probably also be interested in some good sources. I’ve found 9 great options in a variety of sizes. Some are perfect for over a vanity others are the perfect full length sizes for a hallway on bedroom.

1 // 2 //3 // 4 // 5 // 6 // 7 // 8 // 9

Ok, let’s take a second and admire how great this shape is. I found some really pretty spaces with lovely arch shaped mirrors.

source
source
source
source

I’m pretty sure you can see why I’m a fan. Could you get behind this shape?

Design

Moody Floral Printables

February 10, 2019

Lately I’ve been having so much fun with dark moody photography. I teamed up my favorite local florists, House of Flowers, to help me create some “Dutch Masters” inspired florals that I could play with.

I think bright and white is still going to be around for awhile, but it feels good to play with something a little more dramatic. And I definitely had a lot of fun with my camera.

I shared 6 versions over on Hunker, but I actually saved a couple just for O+P readers (cuz I love you guys best). I thought you might enjoy some of these versions with the straw hat. You can download these versions HERE.

If you are looking to change up your decor a little, this is a really easy, inexpensive way to do it. So download – print – and then frame! I love printing at Parabo Press and Artifacts Uprising. They both have great quality paper and I love their printing quality.

Design

Half Black (and Green) Walls

January 20, 2019

Half Black Wall

source

I think it’s time to tackle another room in our house. The problem is, I don’t have a very big budget, so trying to get creative. I’m looking for big bang and little bucks (aren’t we all though). I’ve been digging half walls, especially black ones for quite a while now. I love the idea of it being trimmed out with a chair rail, bead board, board and batting or even shiplap – but, that’s an expensive I don’t want to take on right now. So, I’m going to play with paint and create a high contrast, two toned effect with just some blue painters tape.

I REALLY want to do something with our little powder room, so I think this might be a great room to experiment with. My gut says I should go black, because it’s as high contrast as you can go. But, if you keep scrolling, there’s a couple of really great green options as well.

Half Black Wall

source

Half Black Wall

source

Half Black Wall

source

Half Black Wall

source

Half Black Wall

source

And because green always has my heart, let’s admire these foresty, emerald hues as well. I think if I choose the darkest green out there, it will give me that dramatic effect of the black, but just with a hint of my favorite color.

Half Dark Green Wall

source

Half Dark Green Wall

source

Half Green Wall

sourceh

Just for fun, how about a blush and charcoal combo as well. Isn’t this a sophisticated way to play with pink?

Half Blush  + Charcoal Wall

source

Ok, what do you think? Do you have any theories on whether a high contrast half wall will make the walls and ceiling appear higher or lower? I feel like keeping the lower half dark and the upper half white won’t weigh the room down too much. I’d love to hear what you think.

Design / etc.

Happy New Year 2019!

December 31, 2018

Last year I was stuck and just couldn’t come up with a word for the year. And until this morning, I didn’t have a word for this year either. Not that you HAVE TO have a word. I’ve just enjoyed having one that last few years. It’s given me a little focus or goal and that feels good sometimes.

This year I am bracing myself for a rough January. I’ve got a few big things ahead of me that I am not looking forward to. It’s definitely not all doom and gloom, but I do know that these “things” are going to require a lot of my time and energy. I want to feel excited about the year ahead of me, and not have this feeling of dread that I do right now.

Last year I drained myself and invested so much time and energy into client projects and local work. Some of that was great, other parts were definitely learning experiences that I am happy to have behind me. I found myself at a burn out stage more than once last year. And I had no way to quit or take a breather. This year I want to set myself up for some SUSTAINABLE success. So, that’s my word – SUSTAINABLE! It’s a simple, not very glamorous word, but I think it’s exactly what I need.

Sustainable is defined as able to be maintained at a certain rate or level. I really want less up and down in my life. I want to have a little routine and be able to start, see through, and then also finish STRONG. I’m a dreamer and love the idea and concept building stage of projects best. But, I want to sustain that energy and passion I have at the beginning all the way through. Some of that might be dreaming less “BIG”. This probably sounds the opposite of any motivational writing that you’ve seen recently. But, I know myself and I need some limits. I think there is something very practical about sustainability. That might sound boring, but as a natural risk taker and adventure seeker, I think my business and life in general could use some practicality.

January 1st I’m starting my Month of Minimizing with 30 days of cleaning out clutter in our home. I felt like this was a “sustainable” series to start the year with. I hate when I have a great idea and then I don’t follow through and finish it. This new series gives me a little accountability in seeing something through and really practicing my word for the year right off the bat. (Oh, and I’ll have lots more details about this fun new series tomorrow.

Sustainable is a great word in that it can be applied in a lot different ways. Sustainable living is something Lonnie and I have always strived to achieve. Sustainable living a lifestyle that attempts to reduce an individual’s or society’s use of the Earth’s natural resources, and one’s personal resources. Its practitioners often attempt to reduce their carbon footprint by altering their methods of transportation, energy consumption, and/or diet.  We aren’t perfect, but it is always a consideration in the decisions we make (remember I’m married to the biology nerd). Having this word for the year, might help us even more on our quest.

Well, I don’t know if any of this makes sense at all. In my head it does, so I guess that is all that matters. And sometimes I just like to throw ideas out there, because it might be something that resinates with one of you. Maybe SUSTAINABLE is something you are seeking as well. And if it is, feel free to save, pin or even print off one of these “sustainable” images.

So, do you have a word for 2019? I’d love to hear yours and why you chose it. Leave me a comment below.

And now, have a happy and safe New Year’s Eve! We are staying home with out kiddos, grilling a nice steak dinner and Olivia and I are going to make donuts later. Yep, that’s how we party. Thanks for following along all year, this next one is going to be a GREAT one! I know it.

Design

Vintage Christmas Finds

December 25, 2018

Well, Merry Christmas Friends! I hope you are enjoying a wonderful day with your family and friends. We definitely are. But, I promised that I would share a little bit of my Christmas decor this year and some of my vintage Christmas finds as well. So, here you have it!

I fondly refer to all my Christmas stuff as “Christmas Crap” but really they are some of my favorite treasures. I’ve spend years and years (20 to be exact) decking my halls out. Somewhere along the way I found my “Christmas Style” and now most of the things I own kind of go together. A big part of what I own is either something I made or something I found thrifting. Vintage “Christmas Crap” gets me every time. If it’s something that resembles something my Grandma had, then I’ve gotta have it. If you are just starting out, or maybe want to find a common thread to your decor, I think a great way to start is with a collection. It gives you something to hunt for each year. And then I’m only buying a couple ornaments and trinkets here and there each year. I always love Martha Stewart’s Living “Collection” column. Even the tiniest, simple items, when grouped together, can make an awesome display and statement.

My tree definitely has a mixture of ornaments, but for the most part, they are gold, white , silver and green and most of those are glass. And for the last 15 or so years, I’ve collected pine cone glass ornaments. I hang these on a little silver tinsel tree separate from all my other ornaments. I also collect vintage glass ball ornaments, in the same colors (gold, white, silver and green). These are just keep in a big bowl or tray. Sometimes I add a string of battery operated lights to the bowl as well. I buy just 3 or 4 a year at antique malls and flea markets. The more worn and old they look, the better and I love when they have a little hand painting or flocking on the outside. These I pay about $1-$3 for each (therefore I only add a few each year).

I hit the jack post this year with this brass all seasons wreath. I found it at an estate sale, actually the estate sale for the house my parent’s bought. It’s the perfect addition to our mantel mirror.

My santa mugs are a newer collection, and I actually added 4 new ones this year, including the green santa I shared on Instagram. He’s my favorite, of course. I think these mugs are the only Santa themed Christmas items I own. Most of these mugs are from the early 1950’s. I sit them out by my coffee machine, and whenever anyone is in need of some tea, coffee or hot cocoa, a Santa mug is a must. Nothing puts you in a more festive mood then sipping from Santa’s smiling face (that might have come out wrong).

Bottle brush trees are a fun item to collect. The ones pictured here are all vintage, but you can actually find new bottle brush trees everywhere now and in every color. The hunt for vintage ones can still be fun. I added the little gold colored tree to my collection this year.

Little candy dishes and plates are fun to collect. I found this pair of tree shaped dishes for less then $5 at an antique mall. I love when my Christmas decor is not all overly Christmas themed, then I can leave out a lot of these pieces throughout the winter season.

Here’s a few of my glass pinecone ornaments.

And definitely not everything that I own is old, but this vintage pick of mercury glass beads sure looks cute in the new little vase I bought from Dream Green DIY. These are fun to find. I think they are Japanese made, and were intended to be icicles for your tree. But, they can add a little sparkle to a vase and you don’t have to worry about them dying.

So, there you have it. A little look at our holiday decorations. Now, it might be too late for this year, but it’s never too early to plan for next year. And actually this is the best time of year to buy Christmas decor, because it’s all on sale! Even antique malls and thrift stores will put their holiday decor on sale after Christmas. They don’t want to store it all year, so start hunting, and make them an offer, I’m sure they will be willing to give you a discount.

Design

Minted Mural in Nursery

December 3, 2018

This post is sponsored by Minted. Thank you for supporting the companies that help make this blog possible. 

Minted Wall Mural in Naturally Neutral Nursery

I think a lot of you can relate to this if you live in a new build. Often the smaller bedrooms are really just simple square rooms without much for architectural details or interesting moldings. Sometimes these spaces just need a big BANG of color, pattern and texture. I can’t wait to tell you guys about Minted’s new Wall Murals. But, you can see for yourself, these murals are absolutely  STUNNING!

This room definitely went from blank to beautiful!

Gender Neutral Nursery Before

I’ve long been a fan of Minted products and when I heard about the launch of this latest product, I knew I had to get my hands on it. Minted curates designs from a global community of independent artists and designers. So, you always feel like you are getting a one of a kind piece for your home. The model homes I have been working on are almost ready, so I decided the nursery needed a punch of color and this Tomah Wall Mural by Lorent and Leif is one of the prettiest things I’ve ever seen. And I’m actually really kind of sad this isn’t in my home.

Minted Wall Mural in Naturally Neutral NurseryMinted Wall Mural in Naturally Neutral Nursery

This home has a pretty traditional vibe, and I wanted the nursery to be gender neutral and have lots of nature elements to it. It turns out, I just had to pick some pretty neutrals, a couple vintage brass pieces, a few black + white patterns and the wall mural did the rest of the job for me. Walking into this room really changes your mood, it definitely transports you to a lush green landscape. And instead of just having one window, it’s like the whole room is a picture window now.

Naturally Neutral Nursery

The mural was so much easier to put up then I thought. It came in 5 long panels and I had visions of messing up one of them or putting it on crooked. But, really it went up like a breeze and the material was so easy to work with. It laid super flat, was easy to readjust if I needed to reposition it a bit and the seams came together beautifully. I do recommend having a friend to help, you could definitely hang it by yourself, but a second set of hands is really helpful when you are going up a down a ladder. Minted’s site also provided awesome step by step instructions, but I’ll list a couple things we figure out along the way.

Tips + Tricks

  • My assistant Bree helped my put this mural up, her motto is, “When in doubt, squeegee it out!”. And a simple shower squeegee was a handy tool to have, you could work from the center of the panel out and get any bubbles or folds out very easily with a little squeegee action.
  • For the first panel, you can’t trust the the corner of the wall is a totally straight line. So, we measured an inch shy of the width of the panel and used a level to draw a straight line down the wall. They we had a true straight line to follow and if the corner wasn’t completely straight, we had an inch that could be cut away at the end. After that first panel was in place, we just followed it as a guide for the rest.
  • Before we removed the backing at the top of each panel, we first used a little painters tape and taped it in place where the pattern matched up the length of the panel. Then we would peel back about 6 inches of the backing from the top and adhere it in place. The the weight of the panel wasn’t pulling on the top, and we knew that it would line up perfectly even when we got to the bottom.
  • We had a few inches to spare on the both the length and width of our panels. So we didn’t started right at the very first edge of the mural, we gave ourselves 2 inches of play. This way if the ceiling line wasn’t totally straight, we would end up with a gap on one end. They we just trimmed away that excess at the end.

One thing I haven’t mentioned yet is that this wallpaper is completely removable. So, if you are a renter or just afraid of permanent installations, this can be taken down in minutes with no damage to the walls at all.

Minted Wall Mural in Naturally Neutral NurseryTomah Minted Wall Mural

And even once all the panels were up, it was so simple to trim the excess. The lines in the corners, baseboards and ceiling all came out really straight with just a simple x-acto blade cut.

Gender Neutral Green Nursery

I kept the rest of the room pretty quiet with a couple of black and white prints. A simple alphabet chart and an adorable llama was all the room needed. The dresser I bought at a second hand store for $30 and my dad gave it a fresh coat of paint for me. Originally I thought I would put gold hardware on it, but the black pulls just looked so sharp and played nicely with the pretty Jenny Lind black bed.

Gender Neutral Nature Inspired Nursery

I also feel like this is a mural that a child can grow up with. Even though this is a nursery now, it’s not a necessarily a baby-ish scene. I could easily see this being a very cool teenager’s space. Gosh, I want this mural behind my bed.

Gender Neutral Nature Inspired Nursery with Minted Wall Mural

So, the question is, what do you think? Would you put a mural in your home? Is there a room that is just begging for a bold statement wall? You should definitely go check out Minted’s selection of murals, there is literally a color, pattern, and style for any space.

Minted Wall Mural in Naturally Neutral Nursery