Category Archives: DIY

DIY

DIY Round Raised Garden Beds

July 29, 2019

This post is sponsored by Gilmour. Thank you for supporting the companies that help make this blog possible.

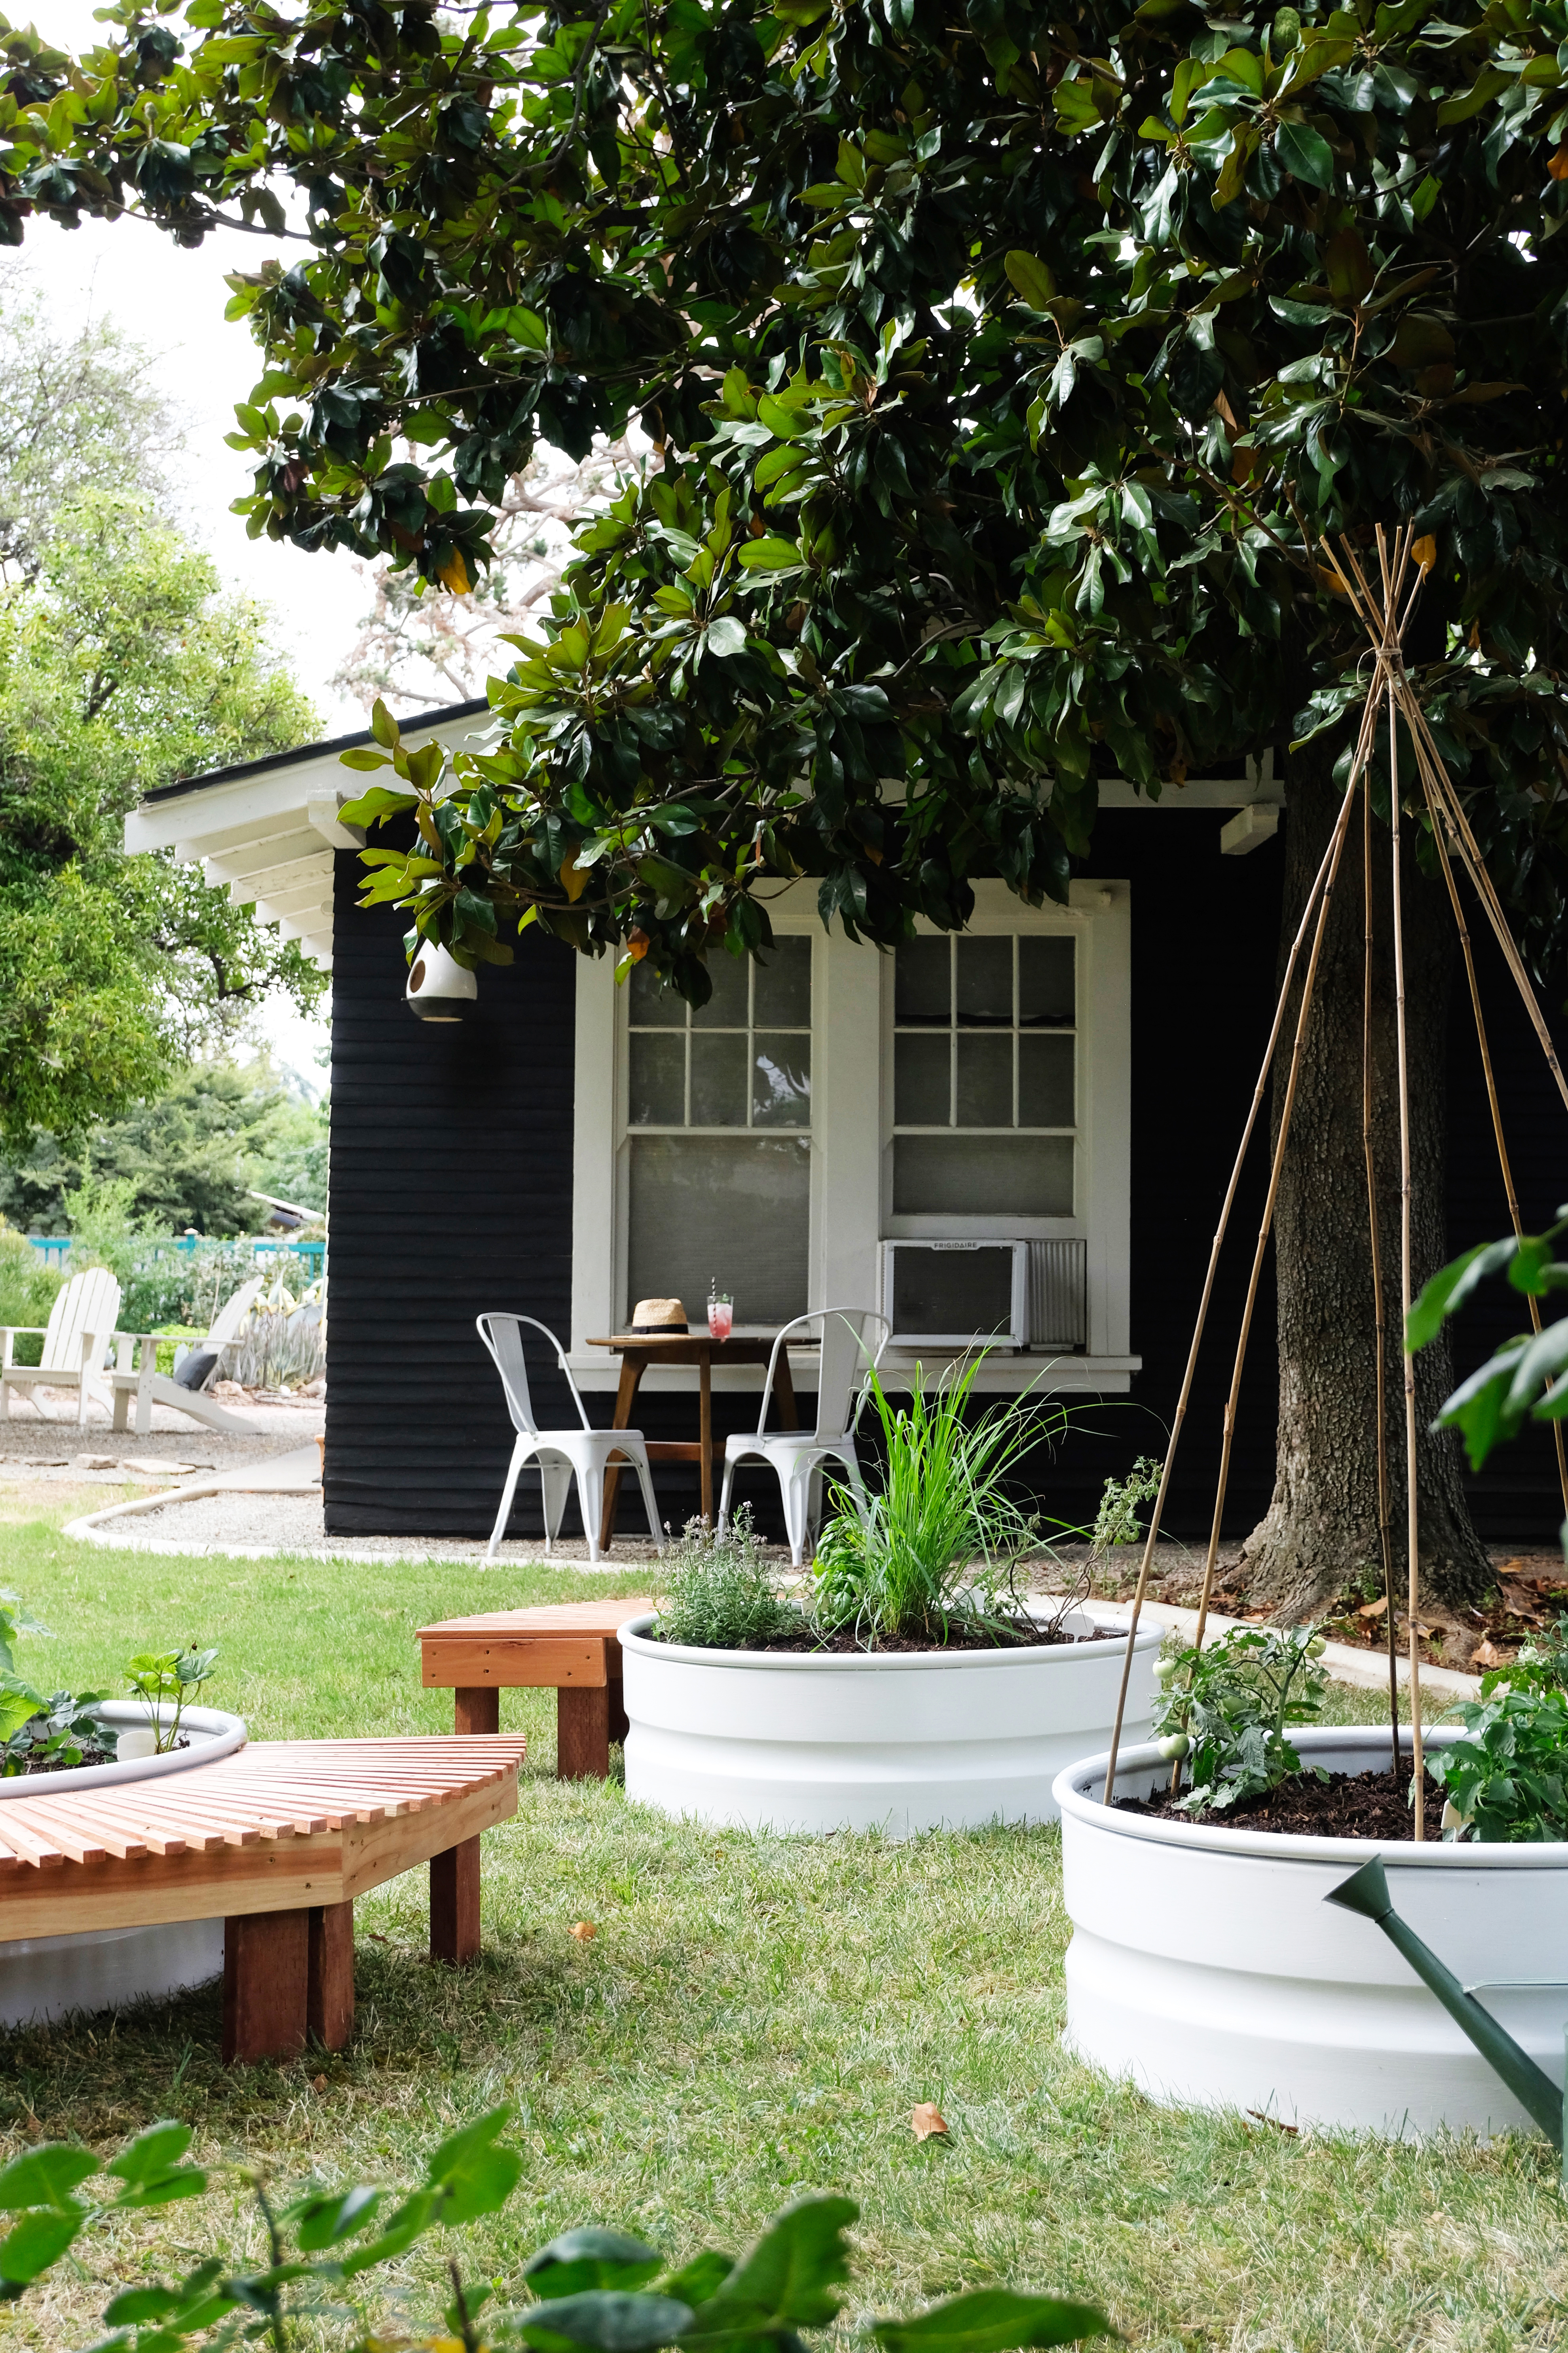
Well, we are back from our big trip and I am inspired more then ever to up my gardening game. Everyone is Papua New Guinea has some sort of garden that is helping feed their families. I want that! I want to know where my veggies are coming from and the best way to do that is to grow my own. My husband and Olivia, my youngest, have always had a little garden spot in our yard, but with us having such a big yard I knew we needed more space allocated for growing food.
DIY Round Raised Garden Beds
DIY Raised Garden Beds

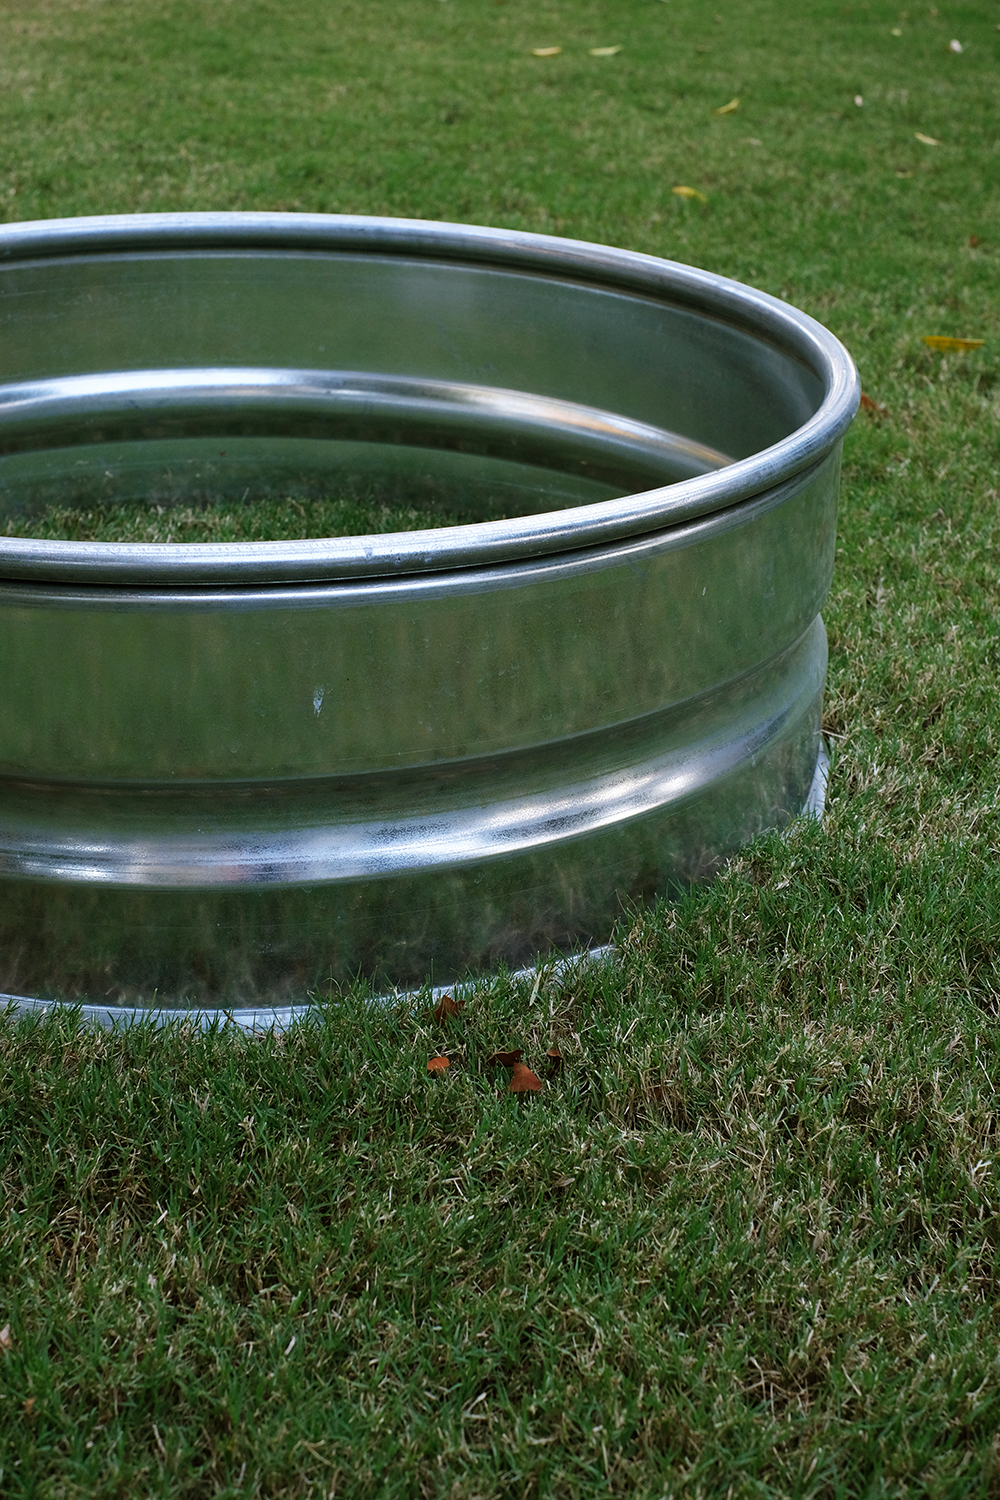
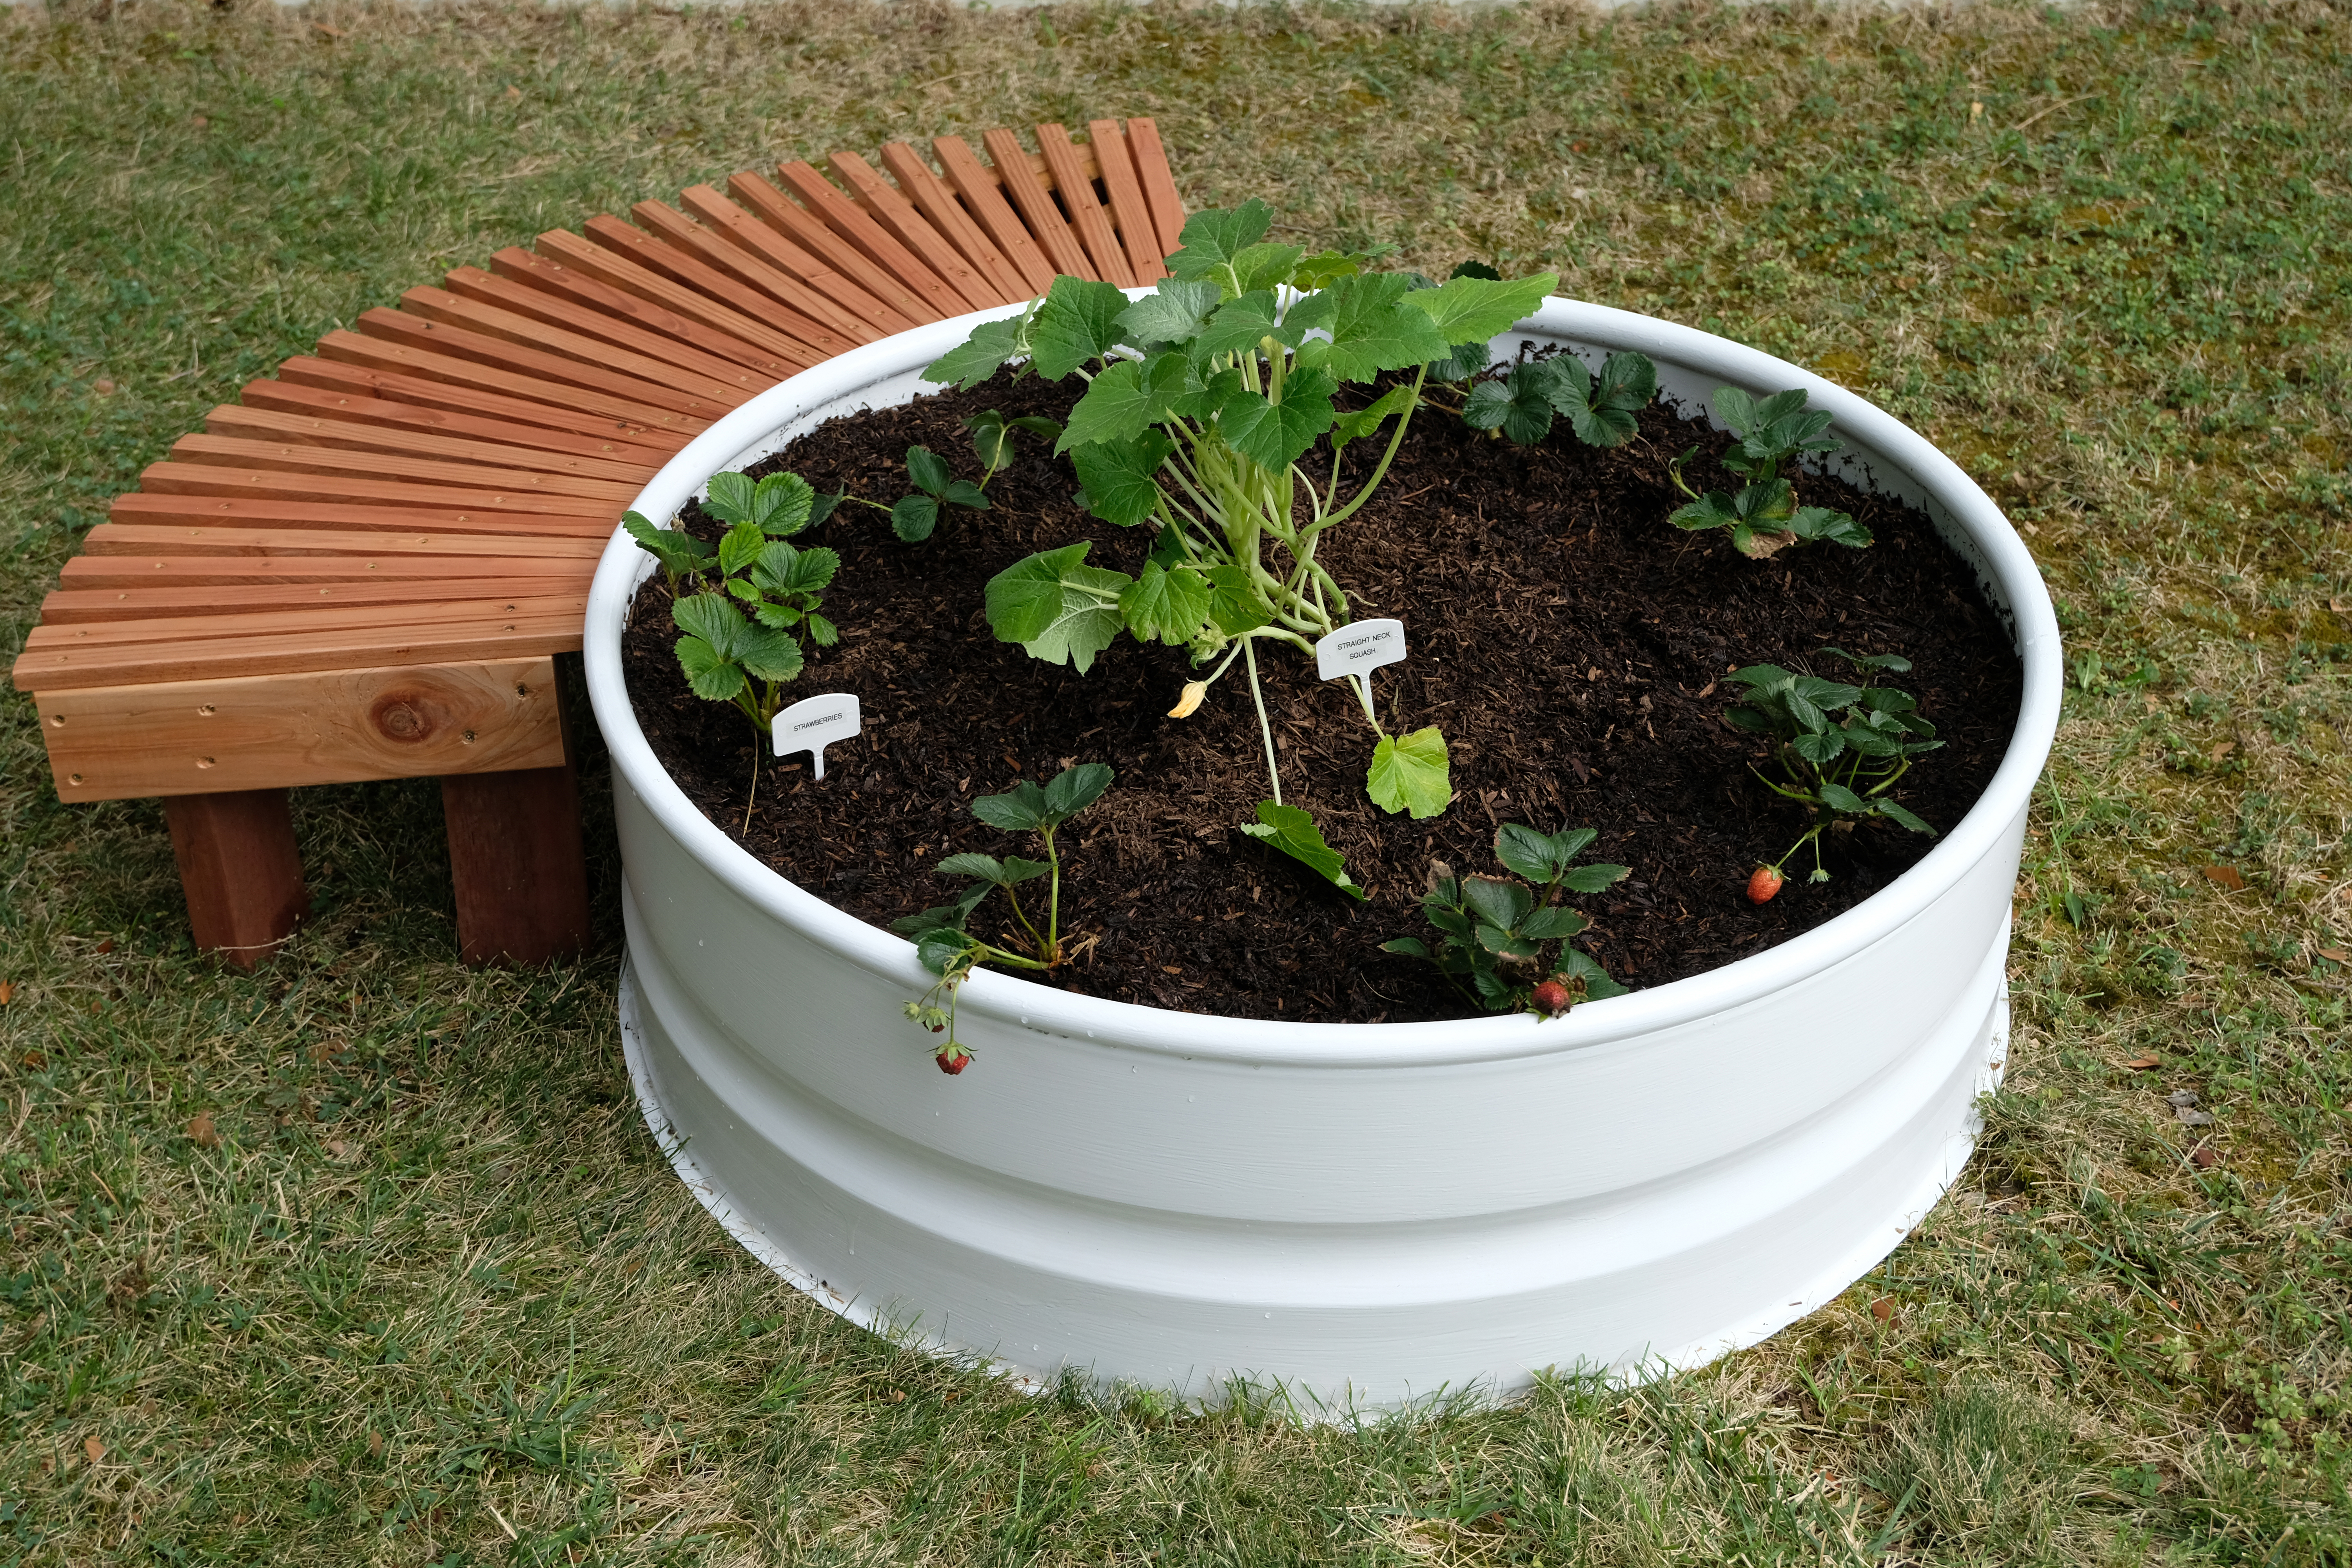
Raised beds are such a nice way to contain a garden. There are a million different designs and shapes out there, but I really wanted to add some garden beds that had both a little form and function. I looked into buying some cattle water tanks, but they were a little more expensive then I wanted to pay. So, I started to look for some other options, and that’s when I found round galvanized fire rings. These do not have a bottom to them, but I decided that wasn’t necessary and at under $45 for each ring, this was way more economical.
Raised Garden Bed

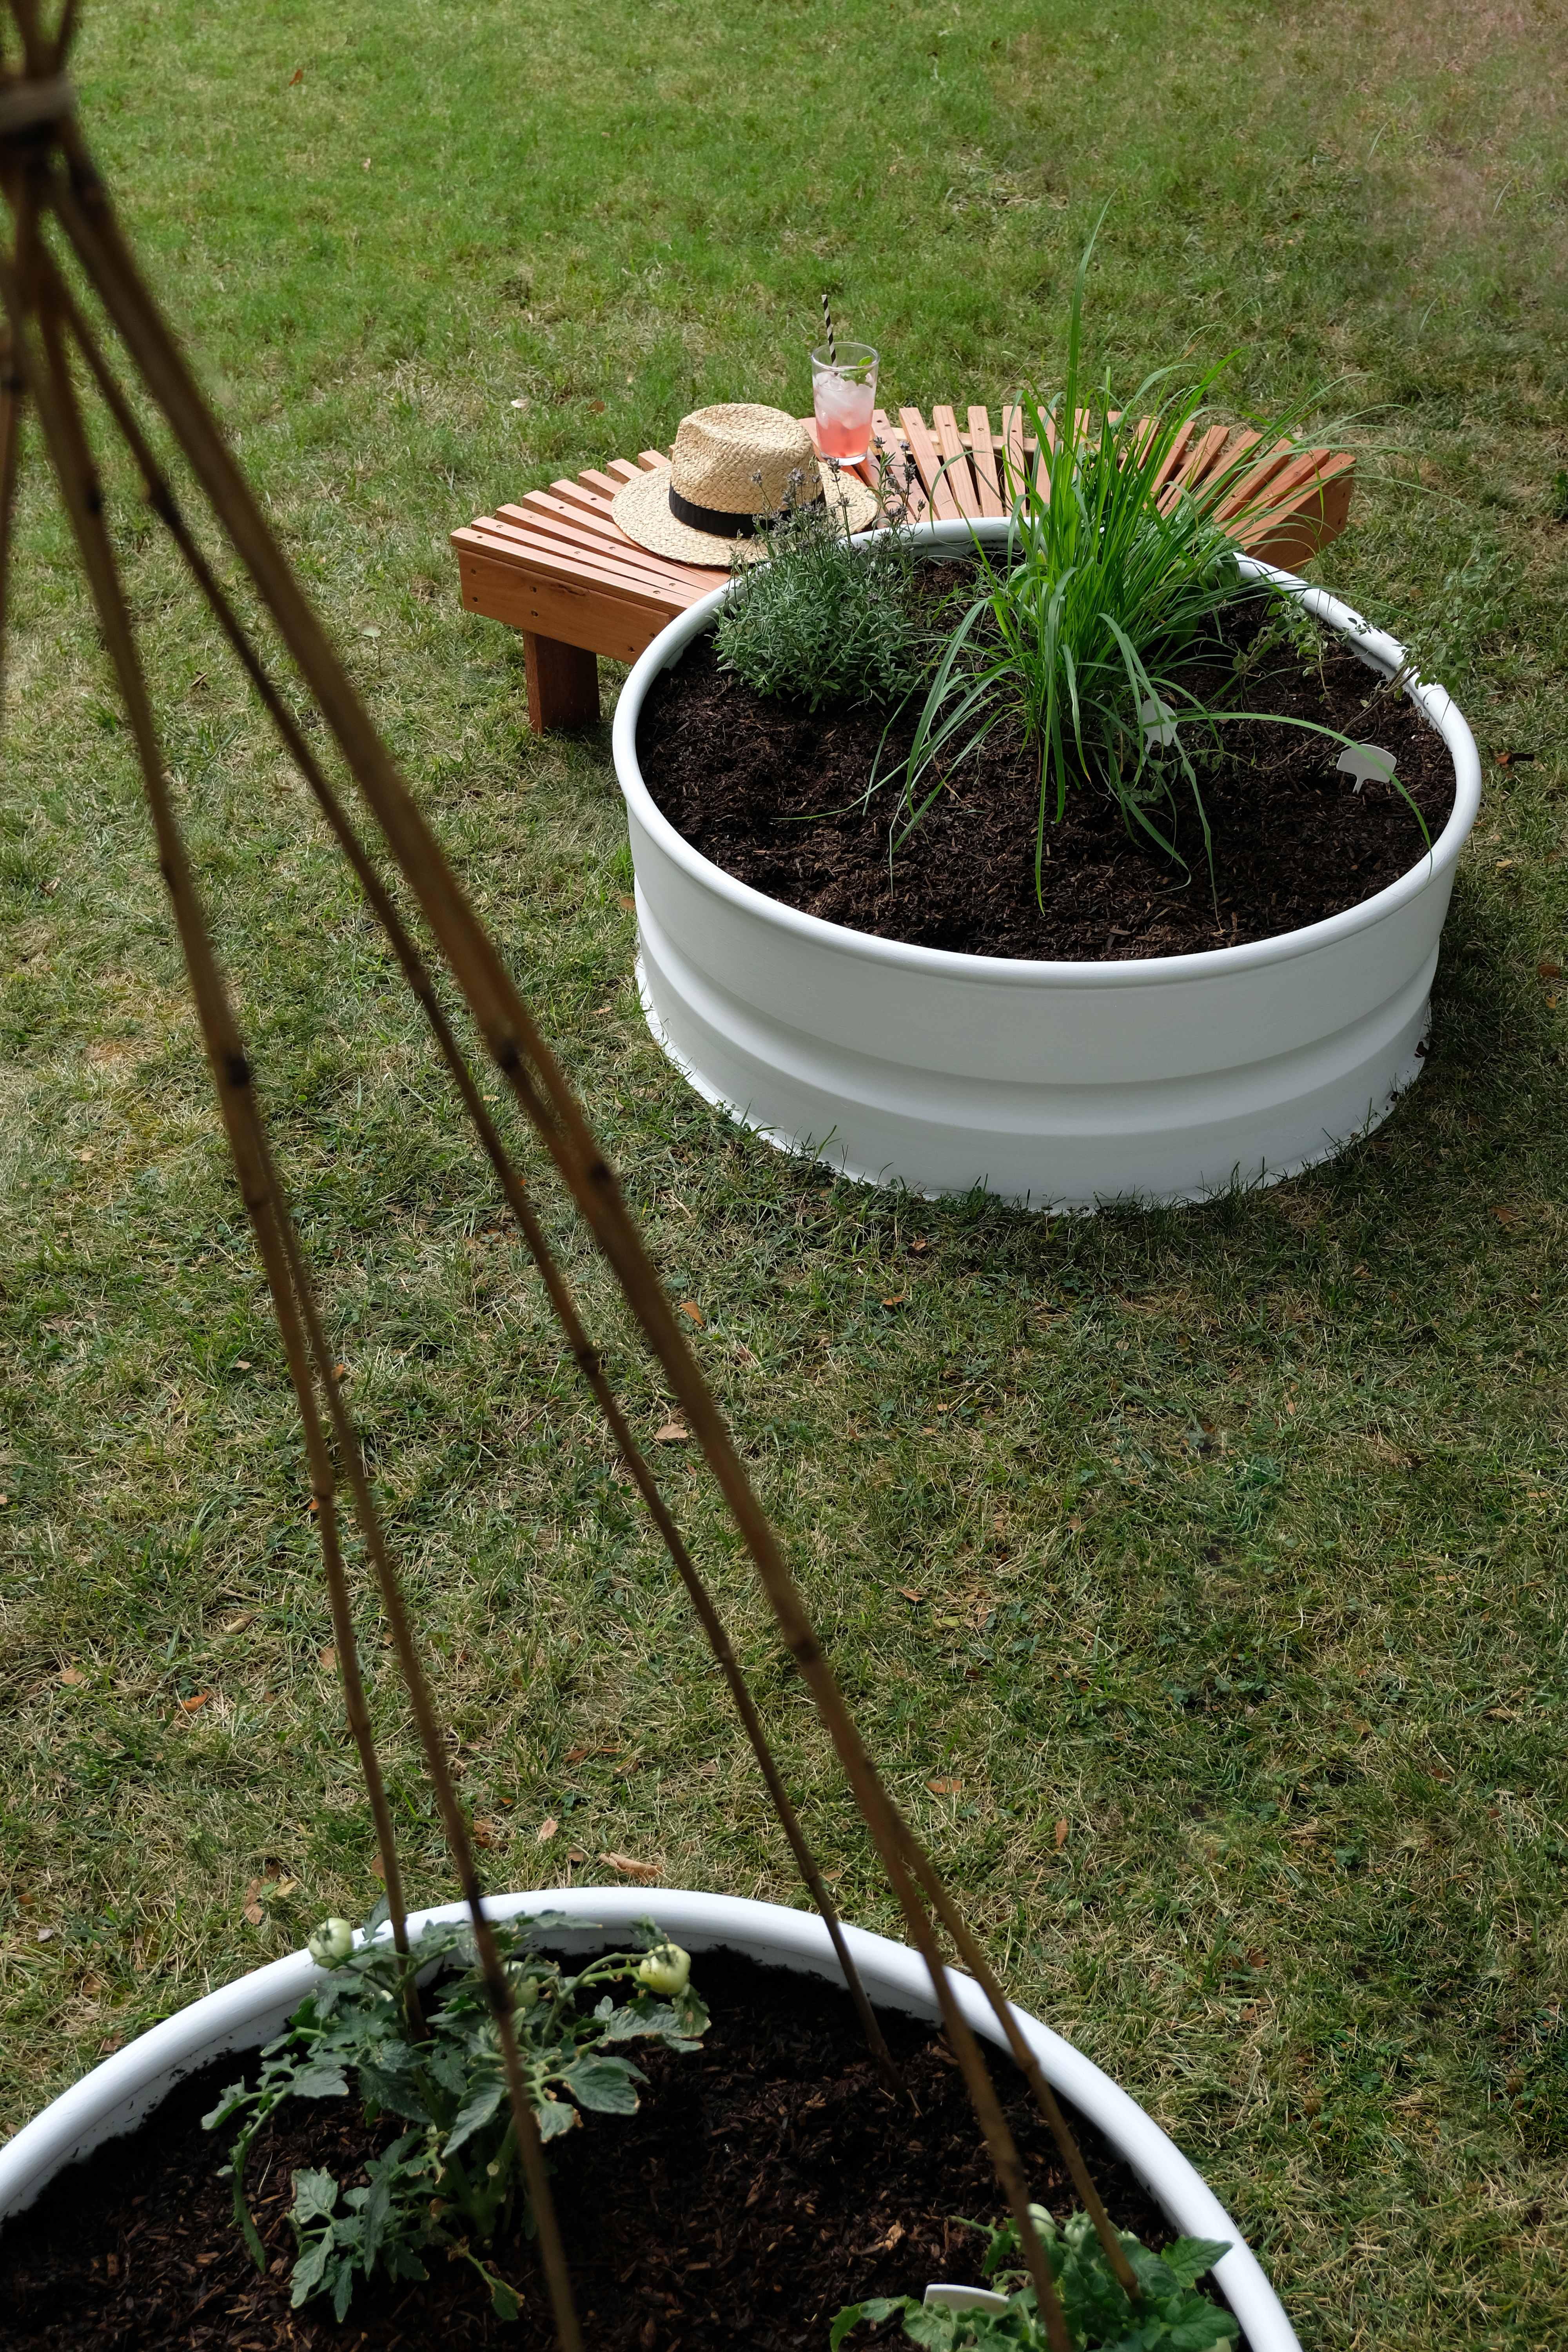
I started with 3 raised beds, but I feel like it would be super easy to add more at anytime. I wanted to give these beds a little modern, clean look, so a coat of white enamel paint did the trick. Plus, I feel like the paint with help protect the metal from water and weather.
Raised Garden Bed
DIY Raised Garden Bed

This is a really easy project and these fire rings need very little prep at all. In just over an hour, you can be ready to plant some flowers or veggies.

Here’s what you’ll need:

Raised Garden Bed

Start by scrubbing down the metal with a little white vinegar and some steel wool. The metal can have a bit of an oiled/greasy finish on it and you want to remove this before painting.
DIY Round Raised Garden Bed

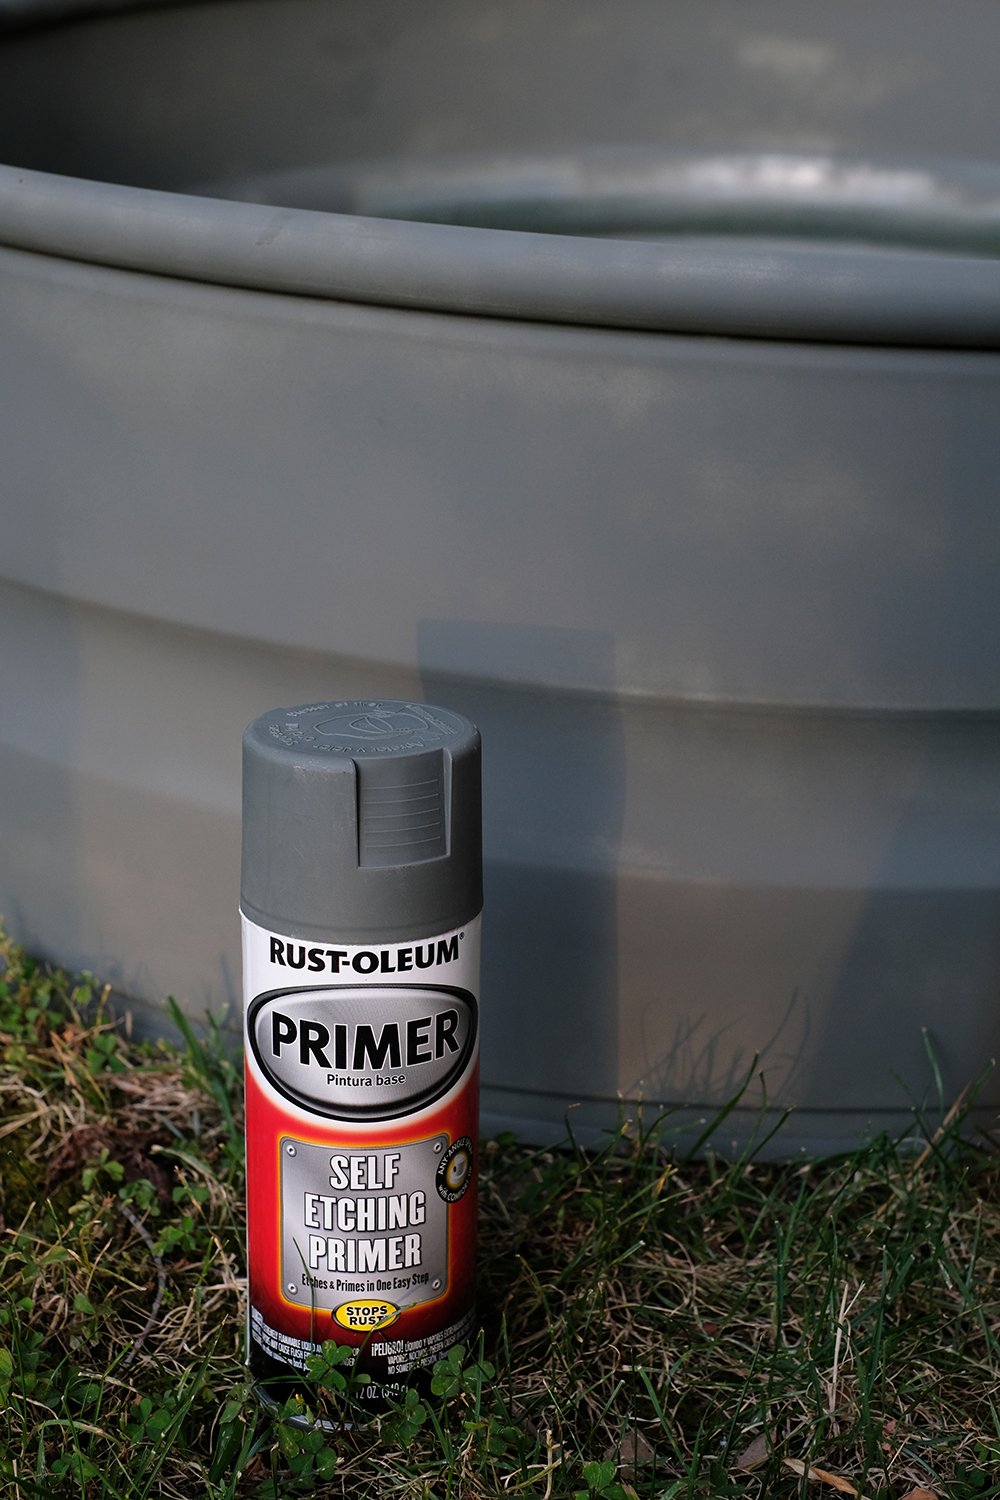
Prime the metal! We loved this easy to use, spray primer. This is just one more layer of prep that will insure you paint adheres really well. The raised bed will be exposed to weather (both heat and cold) and water.
Raised Garden Bed

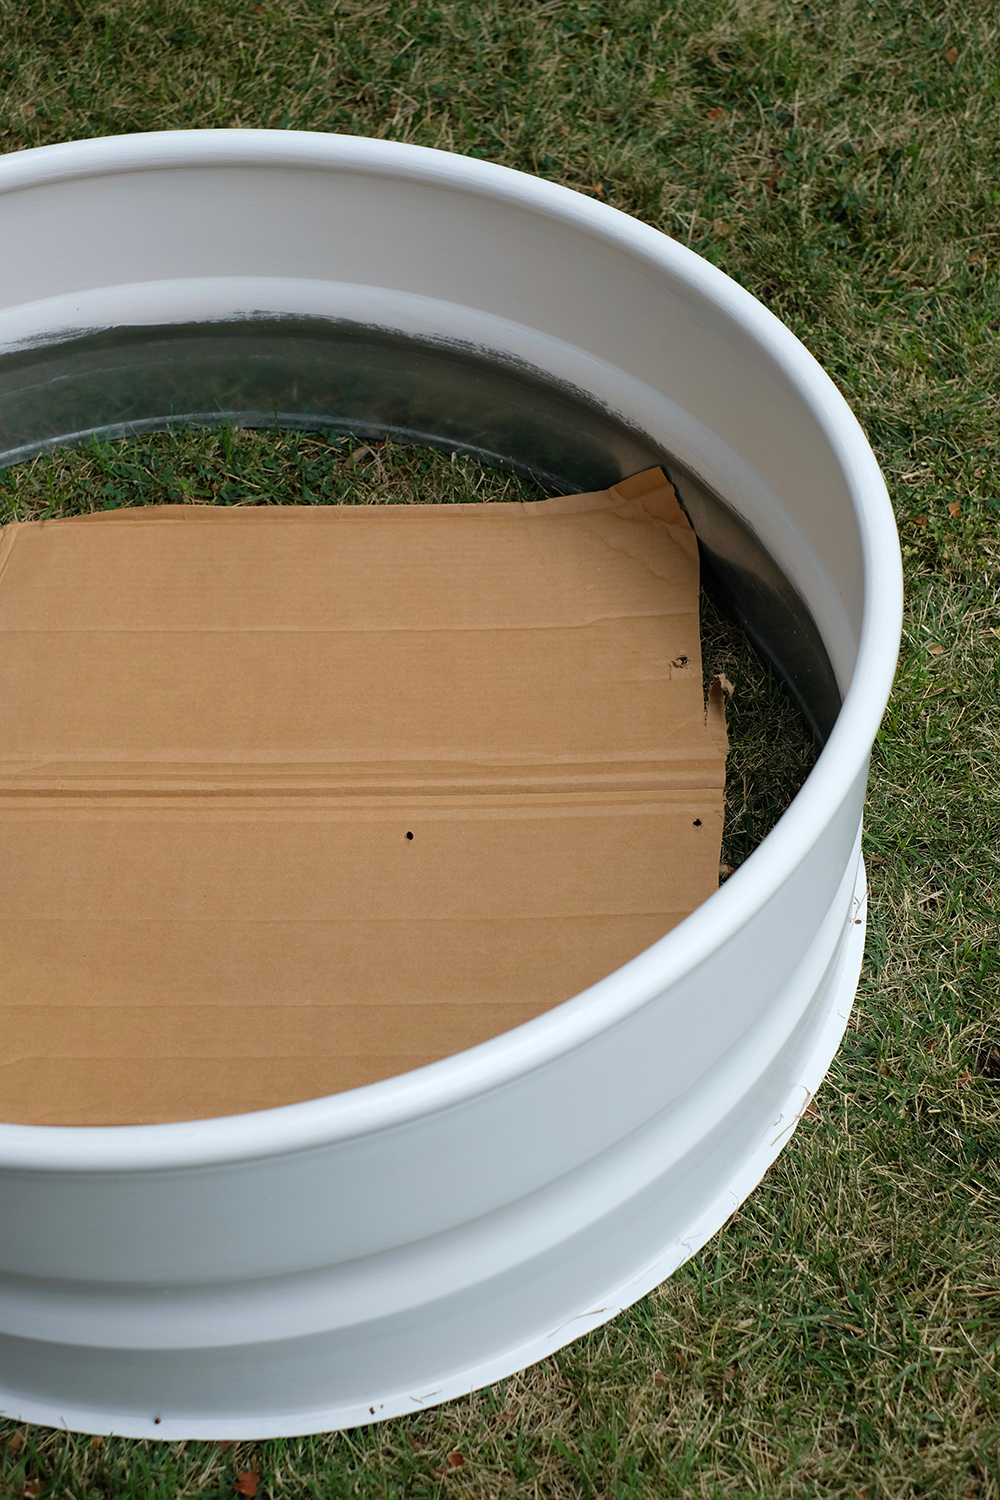
Finally, brush on the oil-based enamel paint with a disposable brush. I don’t know about you, but I don’t want to deal with paint thinner, so I just tossed the brush away after applying the paint. These raised beds took two coats of paint to get a nice bright white finish. Oil-based paint can take a while to dry, but on a warm, sunny day I found they were ready to go in less then an hour.

To create an inexpensive weed barrier at the bottom of the bed. We cut up cardboard boxes and layered them in the bottom of the bed.
Raised Garden Bed

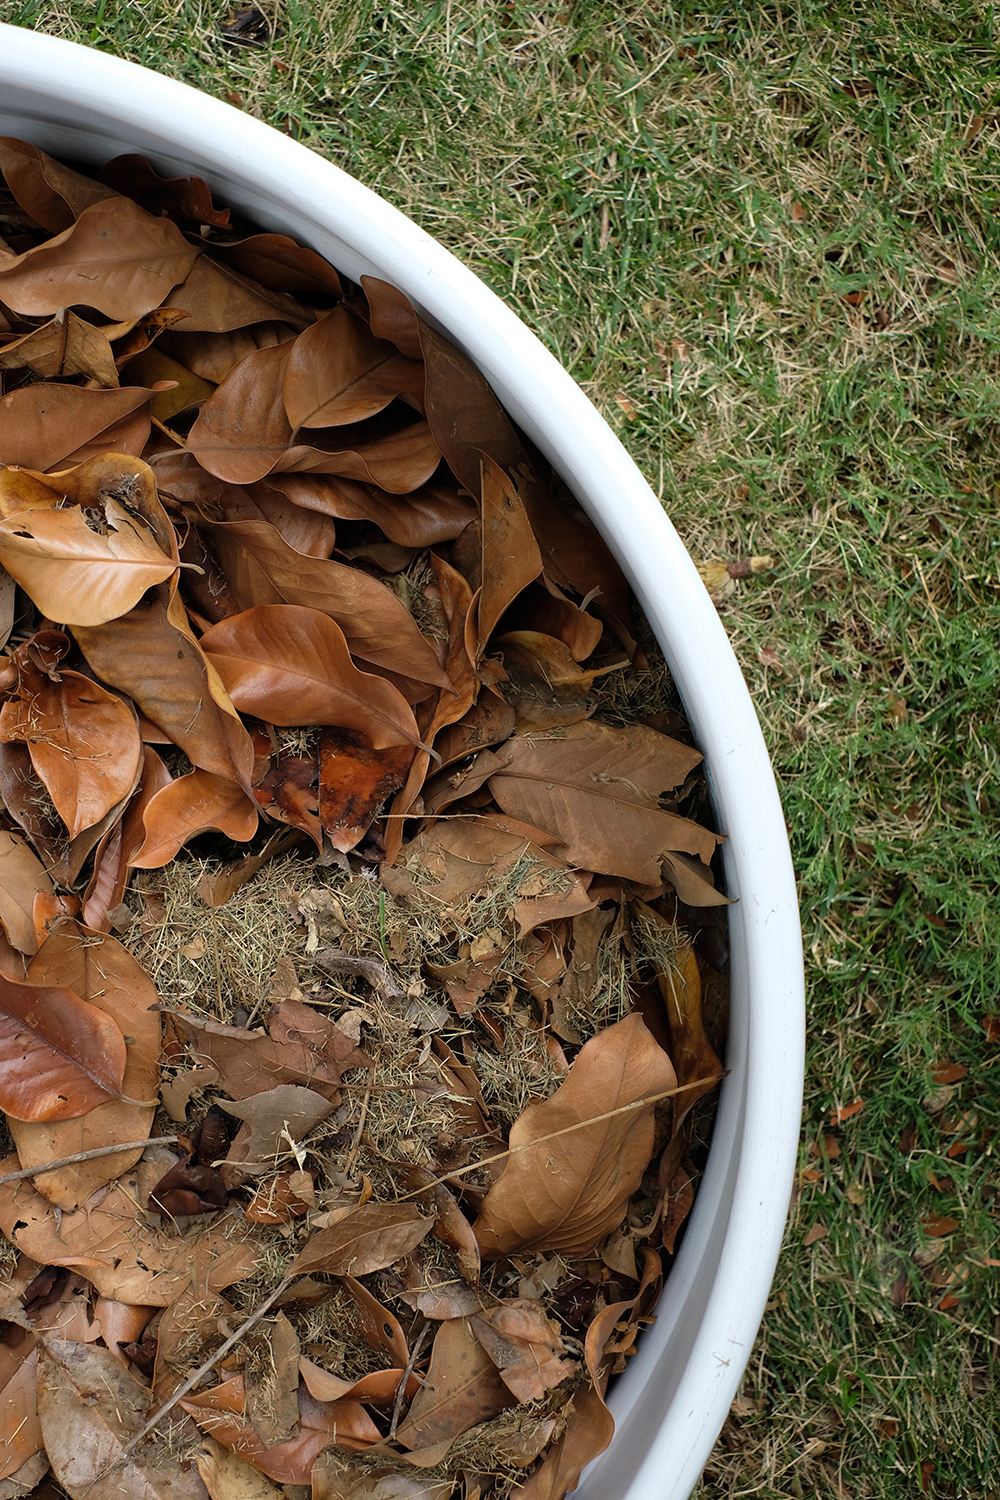
These planters are just over 12 inches deep. To fill these with just soil would require A LOT of dirt. So, we filled the bottom 4-6 inches with leaves, grass clippings and compost from our compost bin. All this green waste with pack down under the weight of the soil and will eventually decompose.
Raised Garden Bed

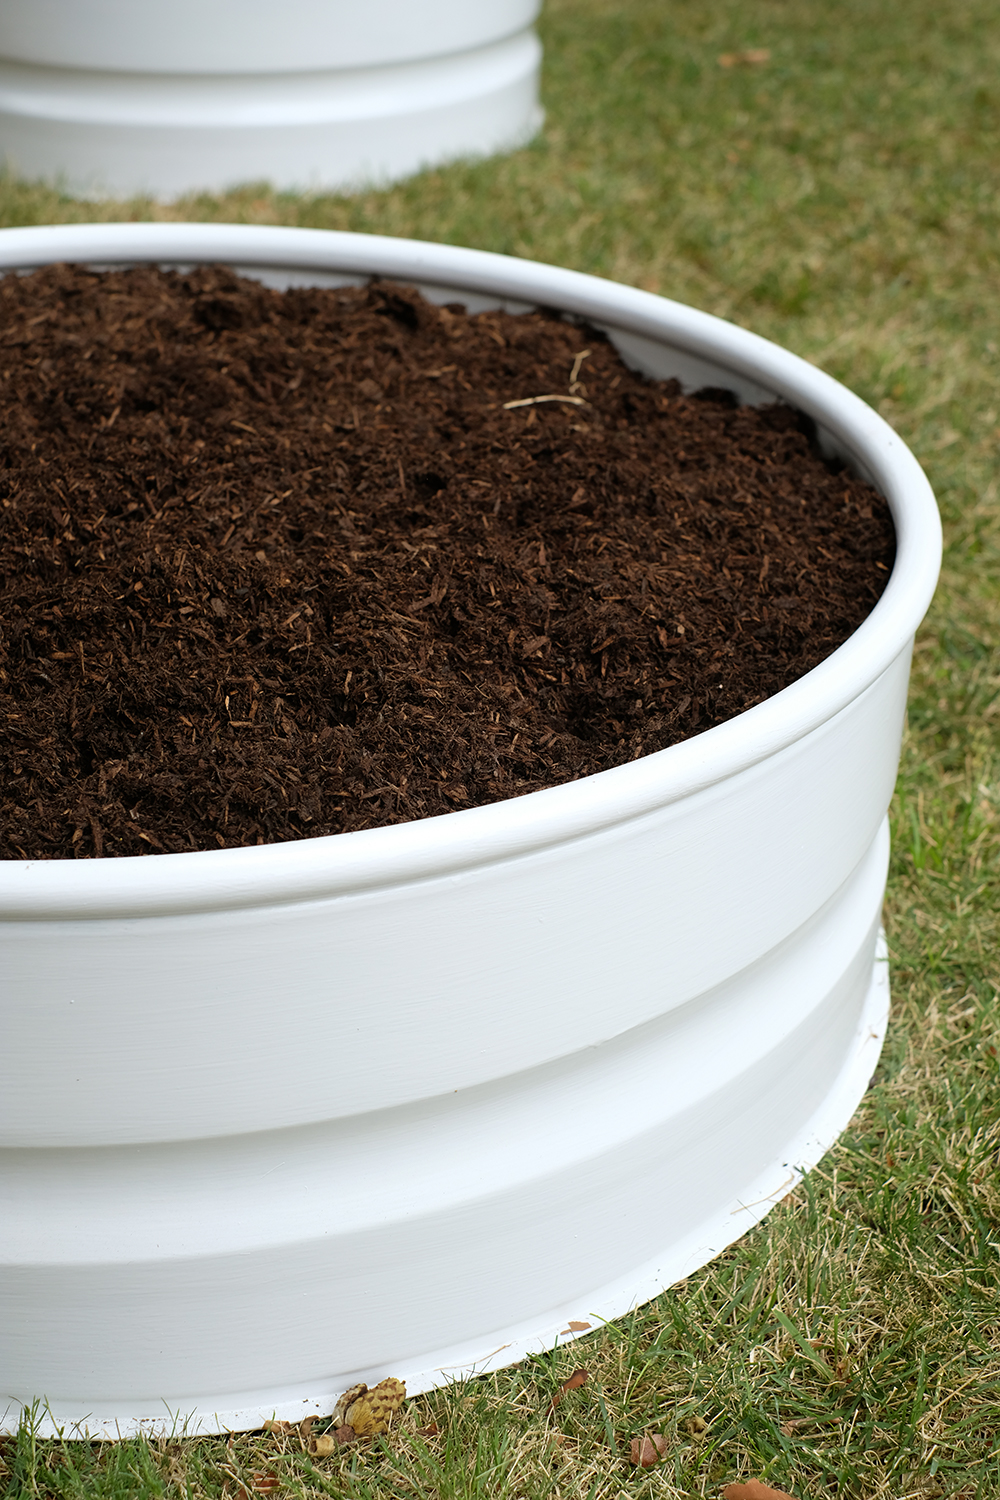
And then finally we filled each raised bed with organic garden soil. I filled each bed with two 3 cubic feet sized bags at the hardware store that cost under $9 for each bag. Then I gave each bed a good soaking of water before I planted my veggies.

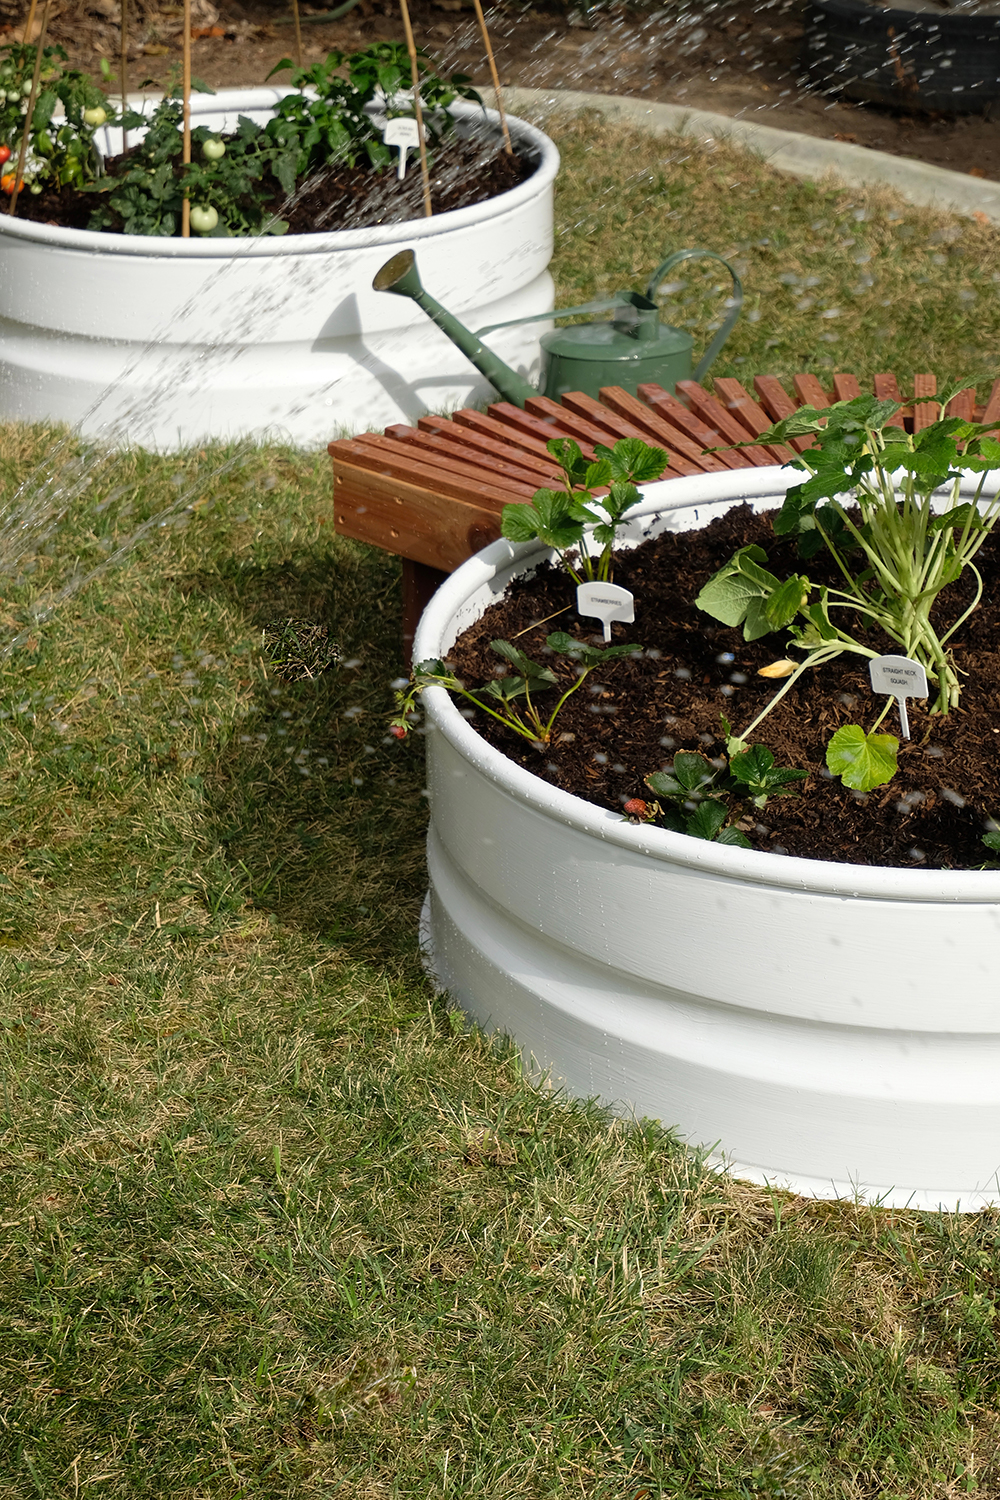
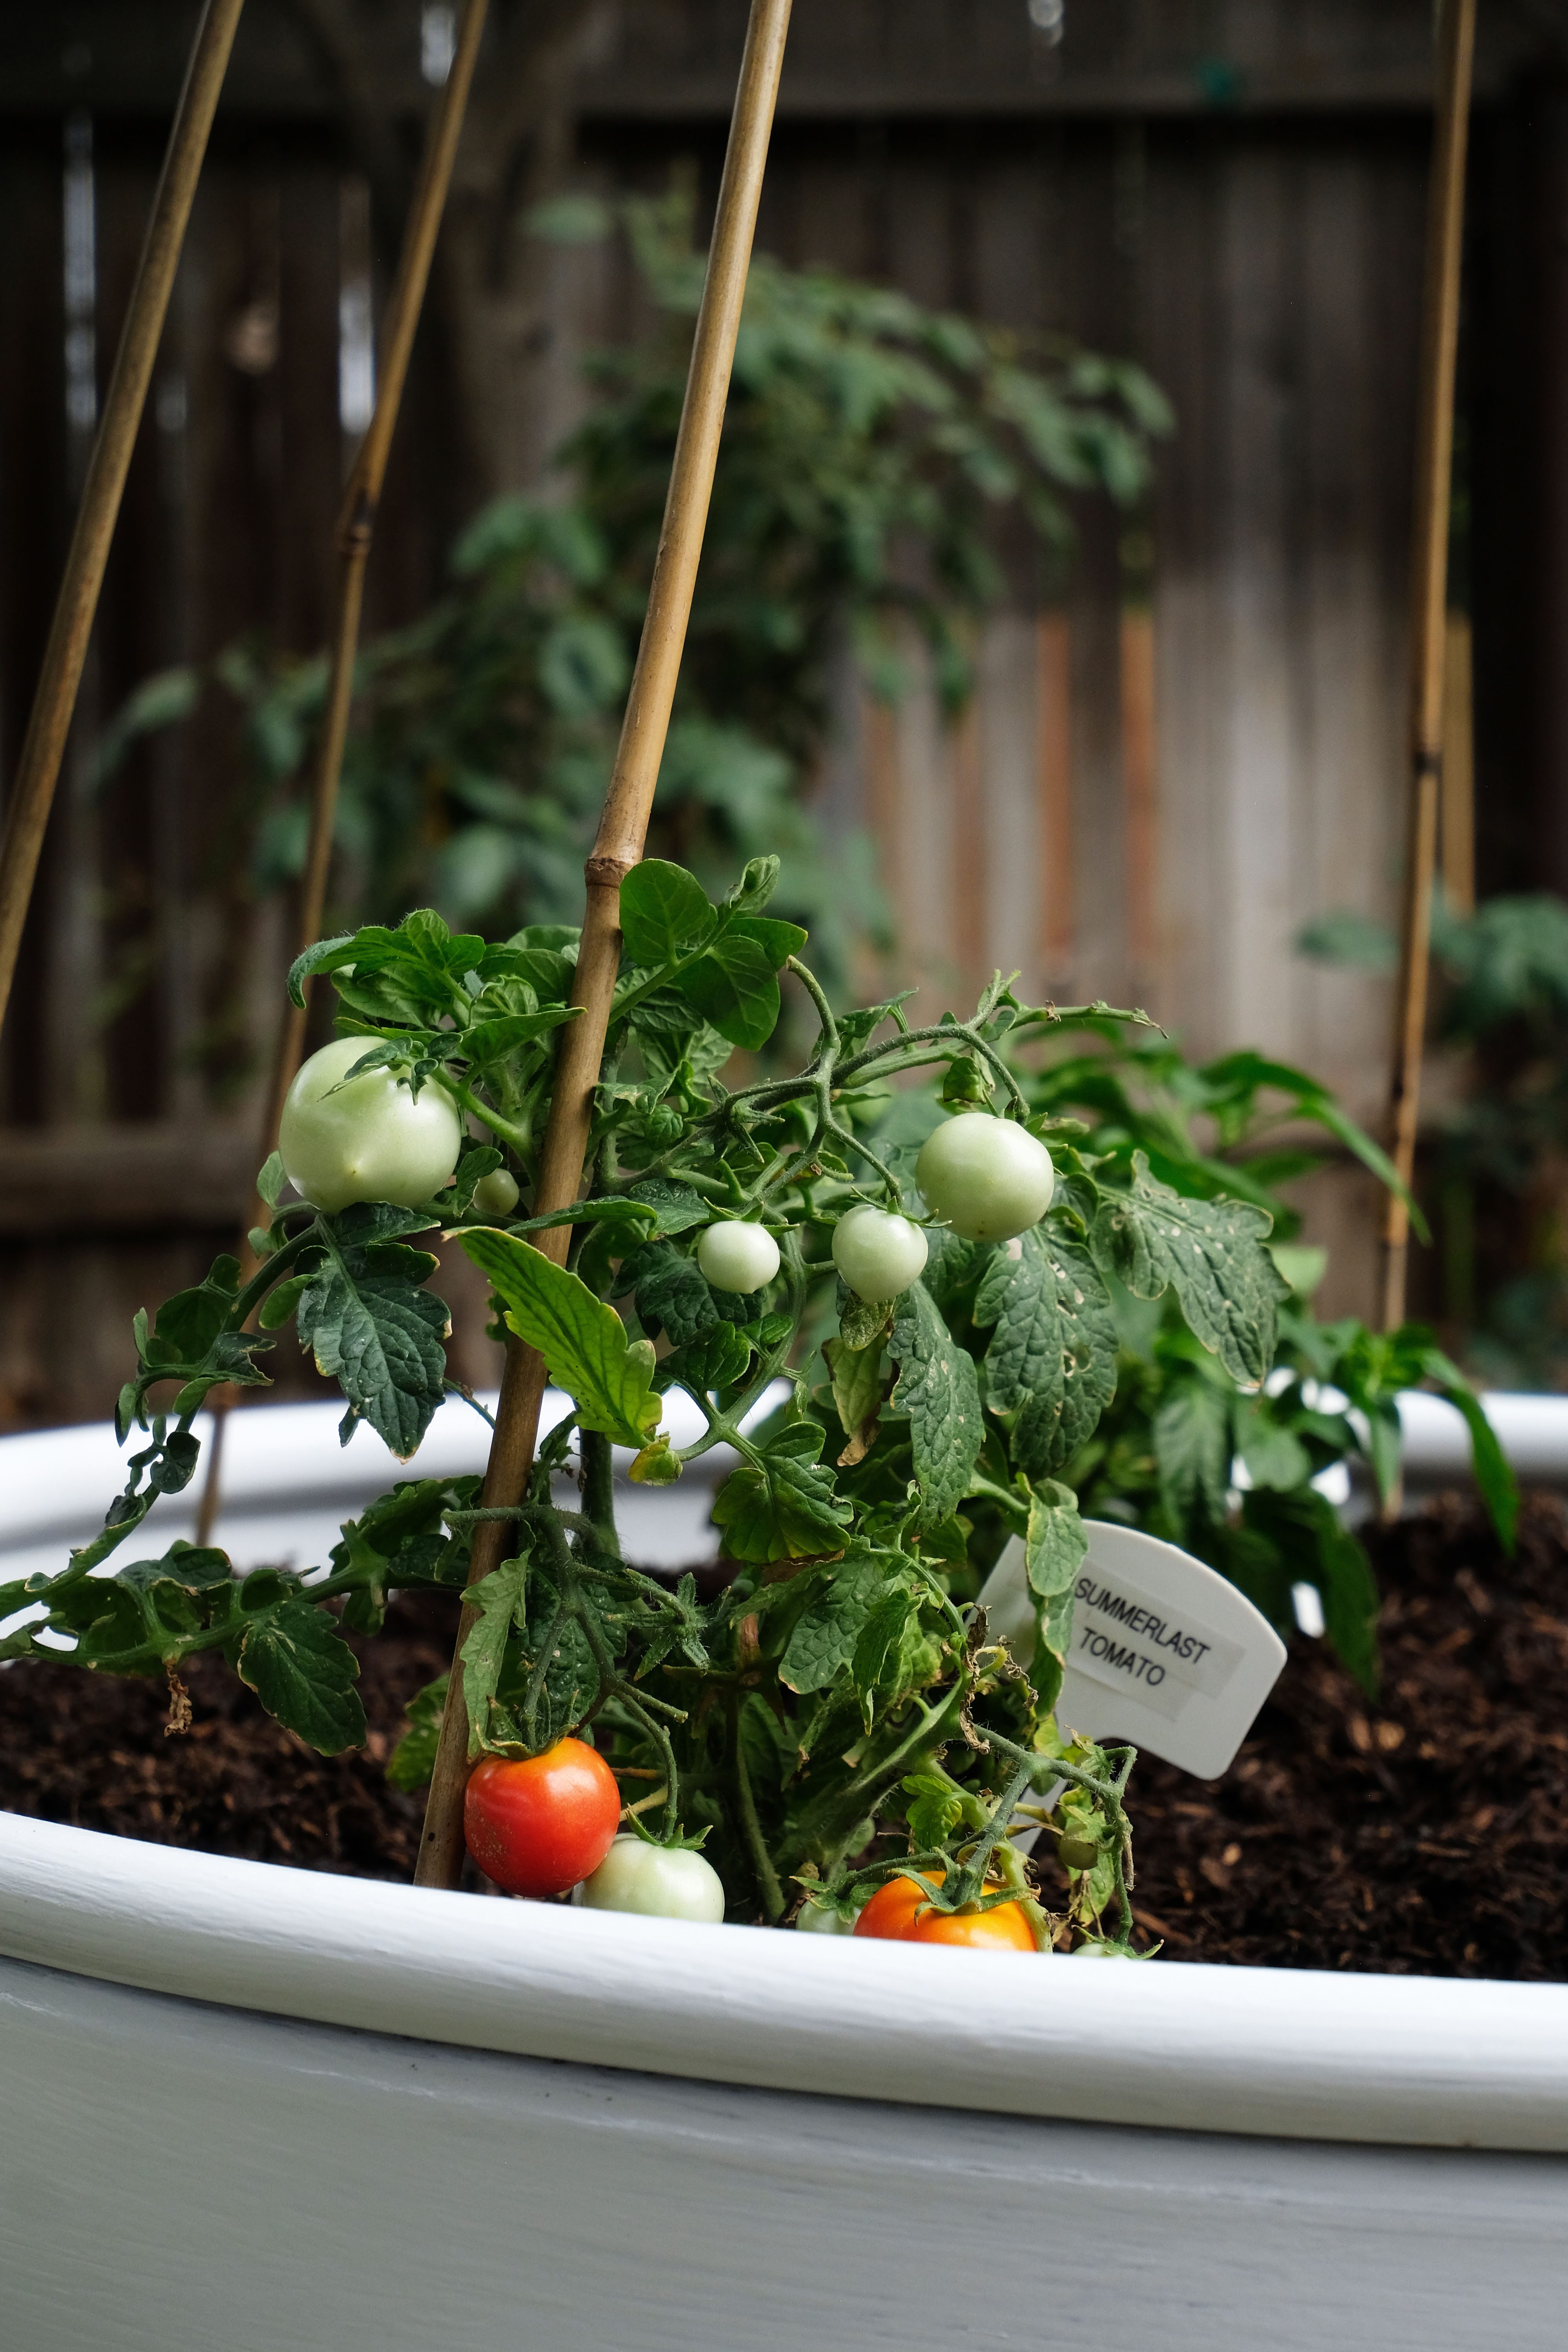
It wasn’t easy to find seedlings this time of year. It’s pretty hot, but I did plant some herbs, stawberries, squash, tomatoes and pepper. Because we live in California, in another month or so I’ll be able to put in a Fall garden as well.
DIY Round Raised Garden Bed

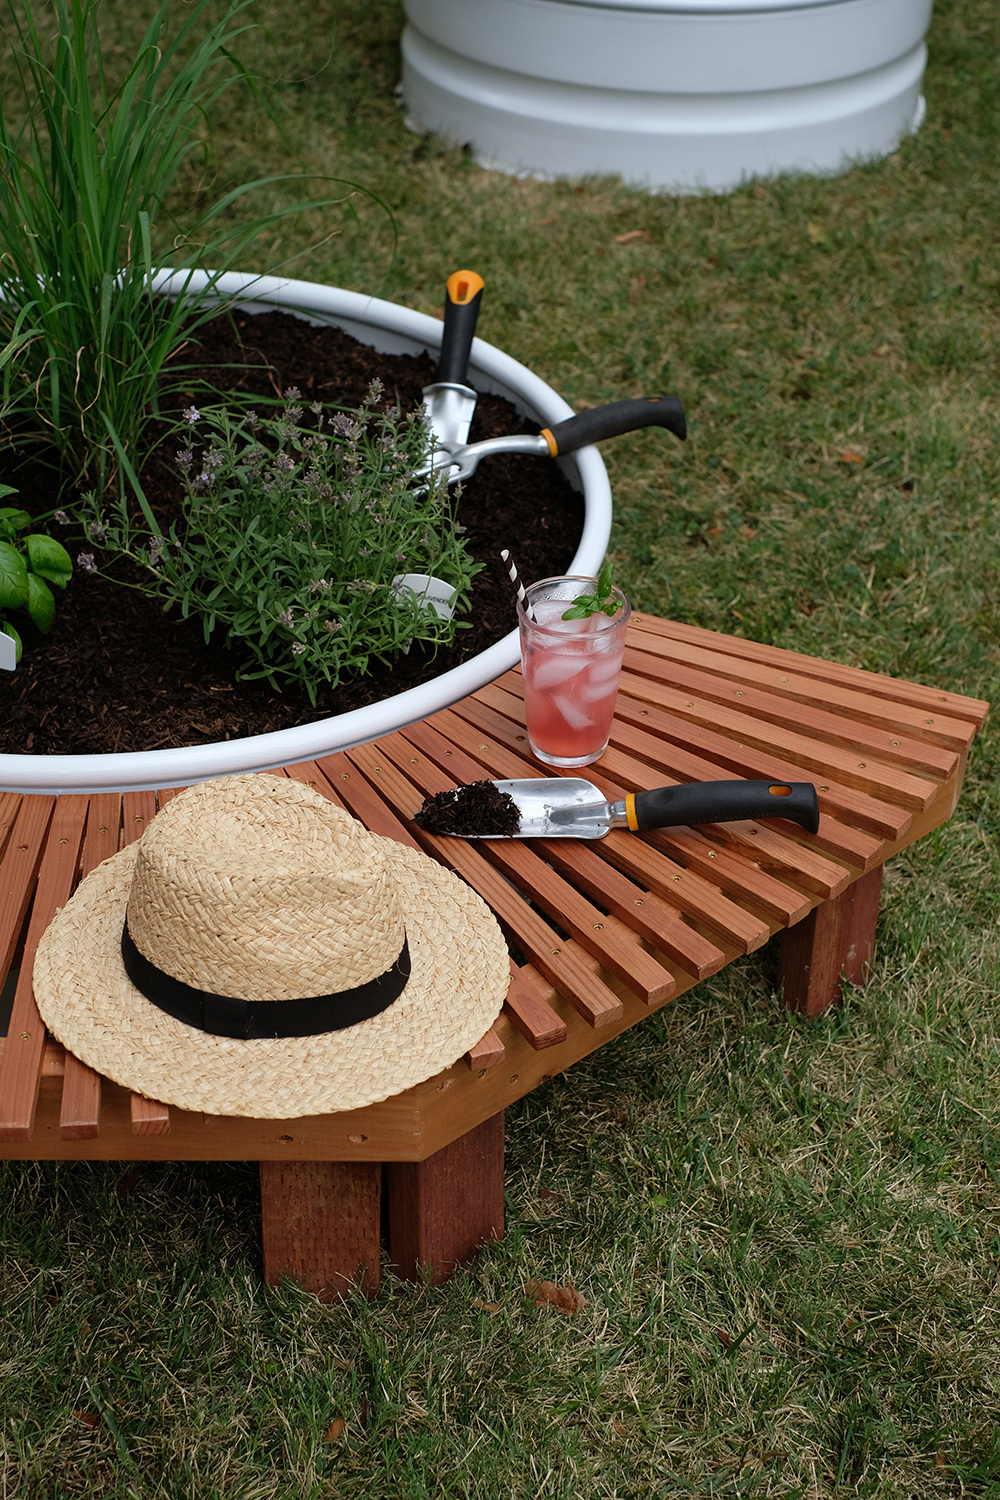
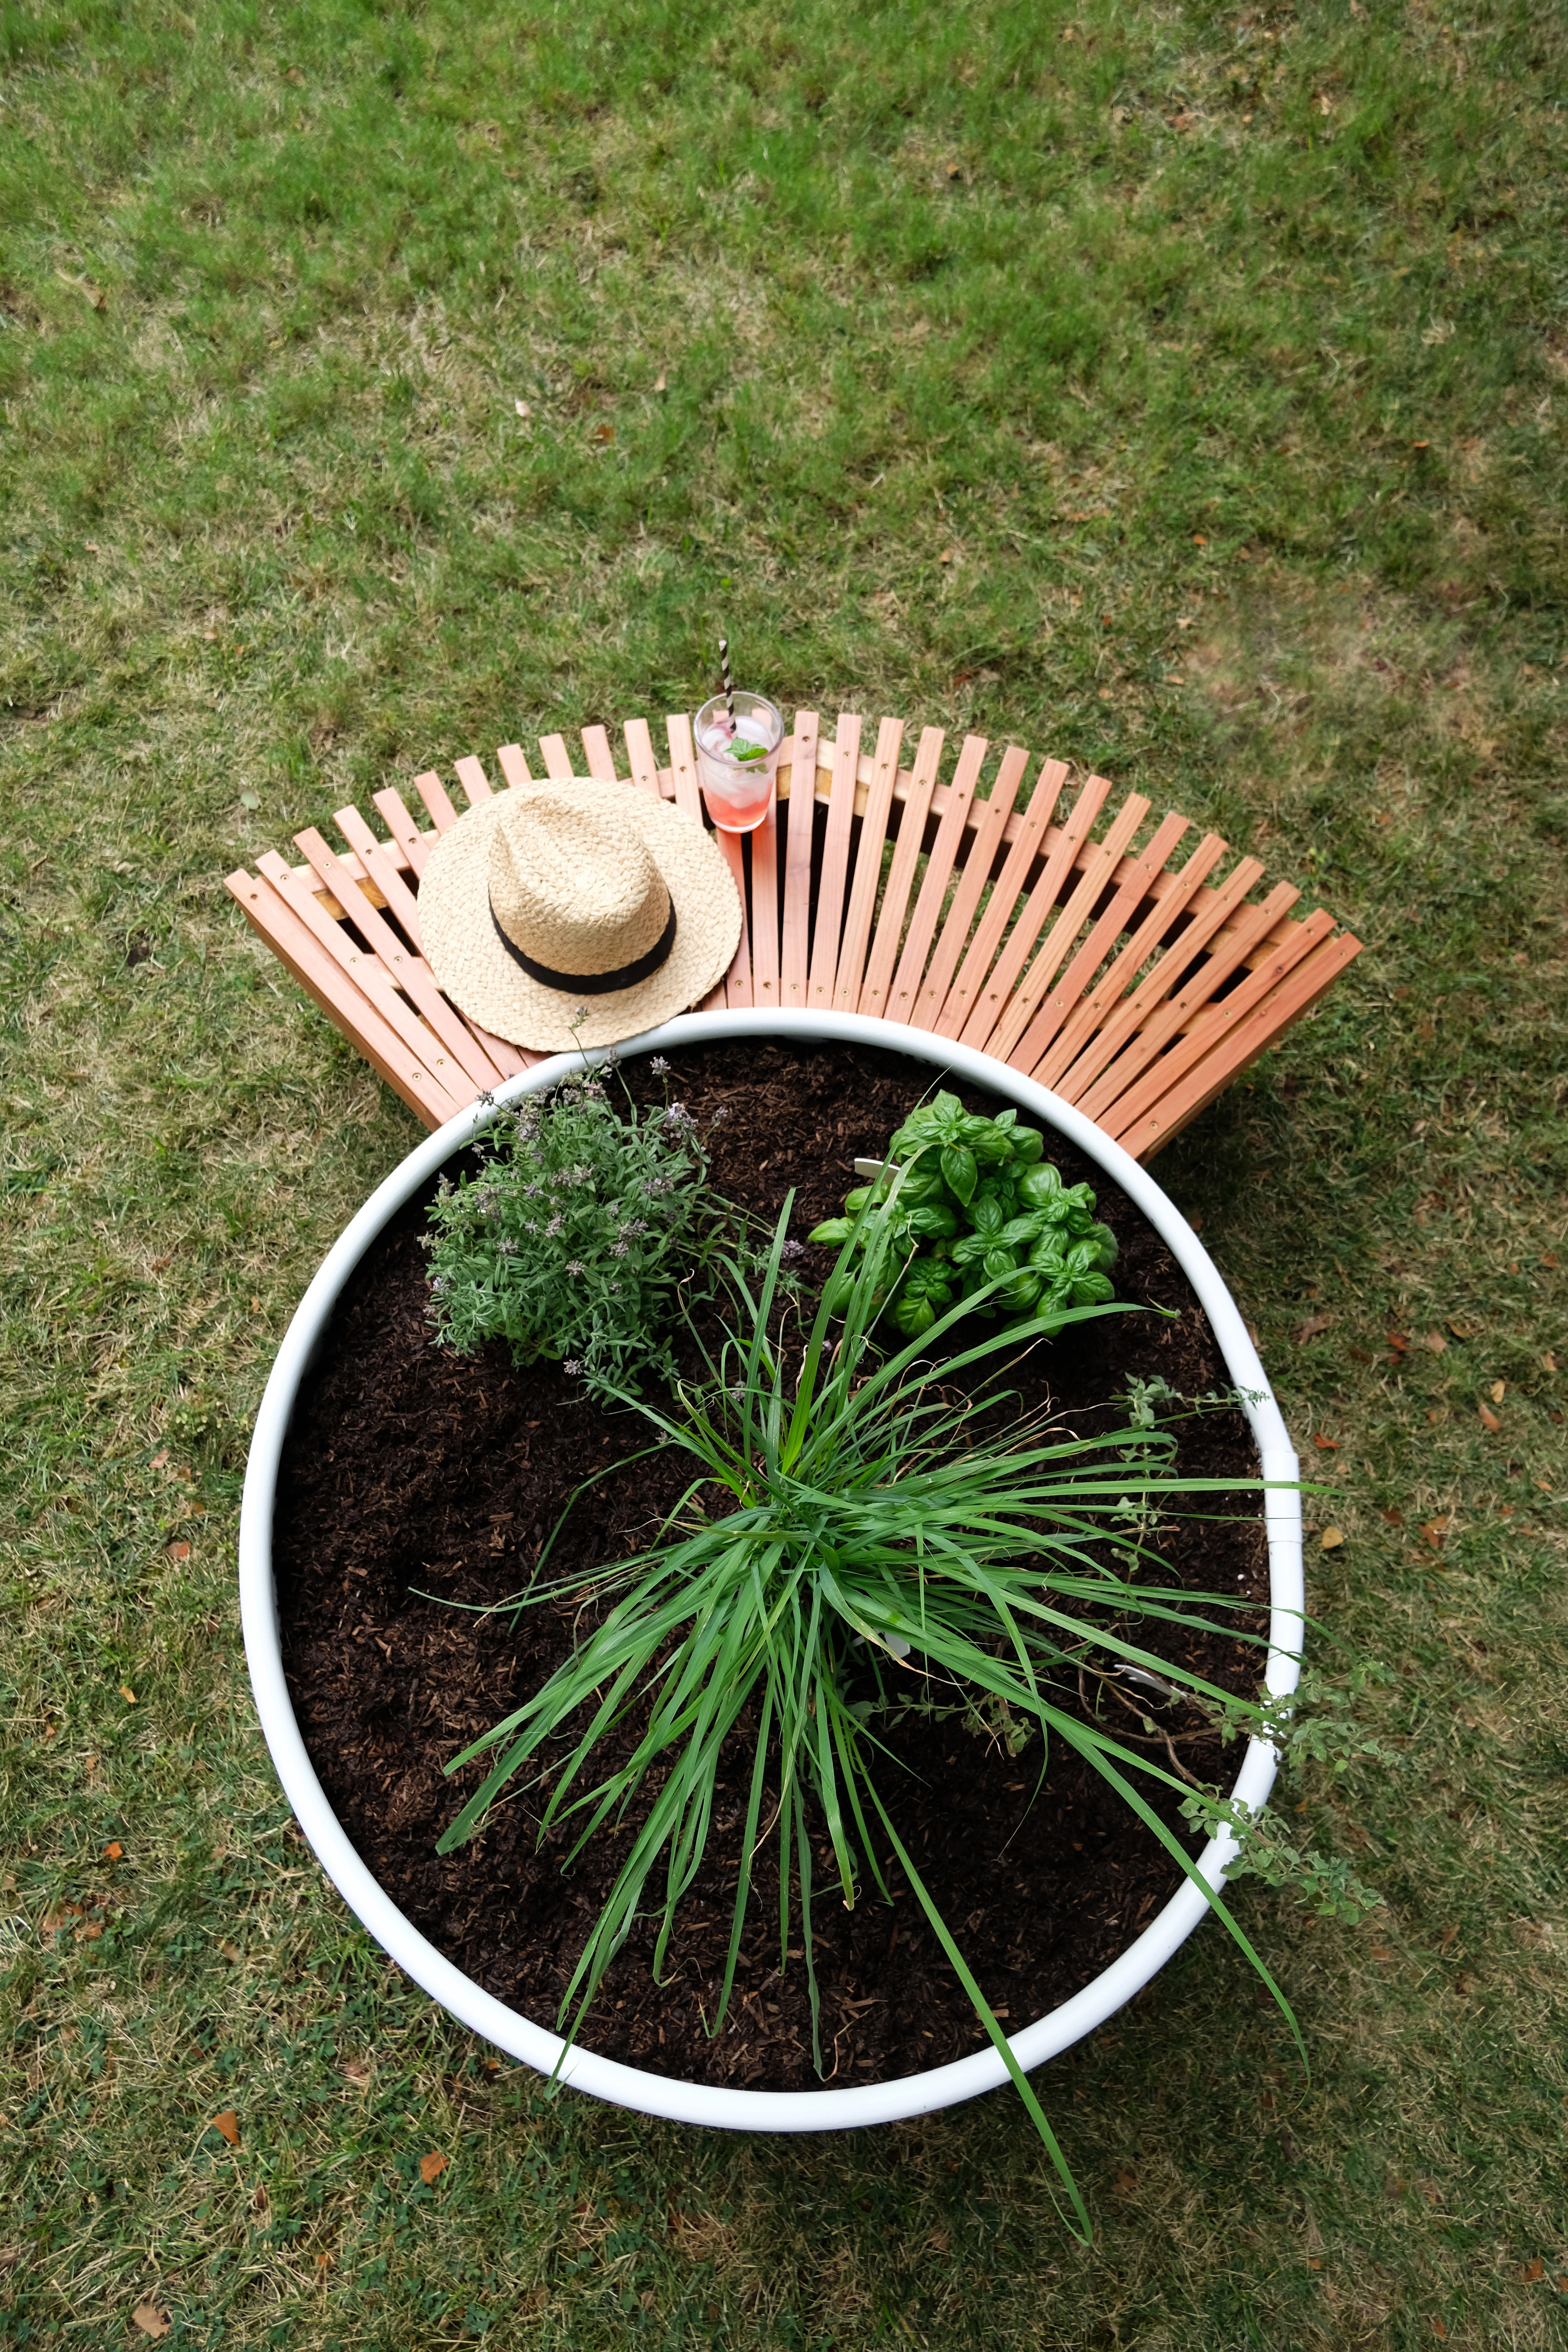
I also wanted this little corner of our yard to be a hangout spot and have some sort of seating. So, because I have access to a very handy brother, Ash, he made me a couple of really awesome redwood curved benches to sit around my new beds. I’m already enjoying my morning coffee out here and really they offer a great place to sit while I’m tending to my new little plant babies.

I will post instructions for these cute little benches soon. I kind of feel like that really make these raised beds. I love how that can be moved, repositioned, and even joined together.
Raised Garden Bed

Watering is a big deal in this part of the world. Our Summers are long and hot and water is usually hard to come by. So, I did a little research and invested in some great watering tools to keep my plants happy, but also no waste any water in the process. Gilmour has every watering tool you could dream up – here’s two of my faves:

  1. The Rectangular Sprinkler with On/Off Flow Control
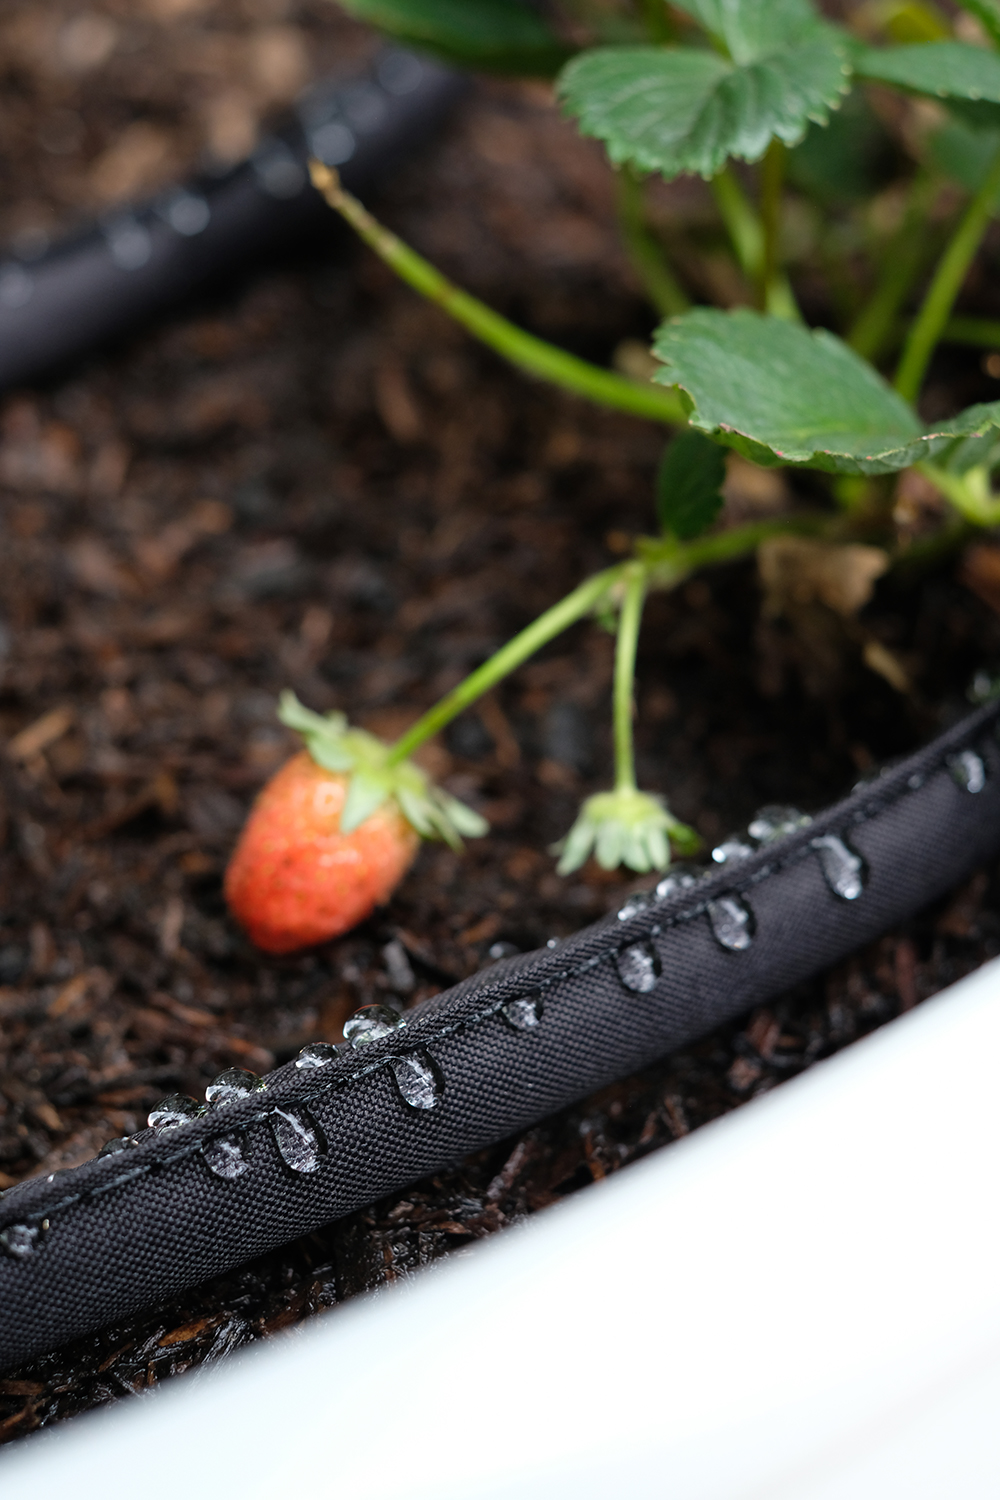
  2. The Flat Soaker Hose

The Rectangular Sprinkler with On/Off Flow Control works like a dream. There is no over watering with this sprinkler, you can adjust and aim the water to exactly where you want it to hit.
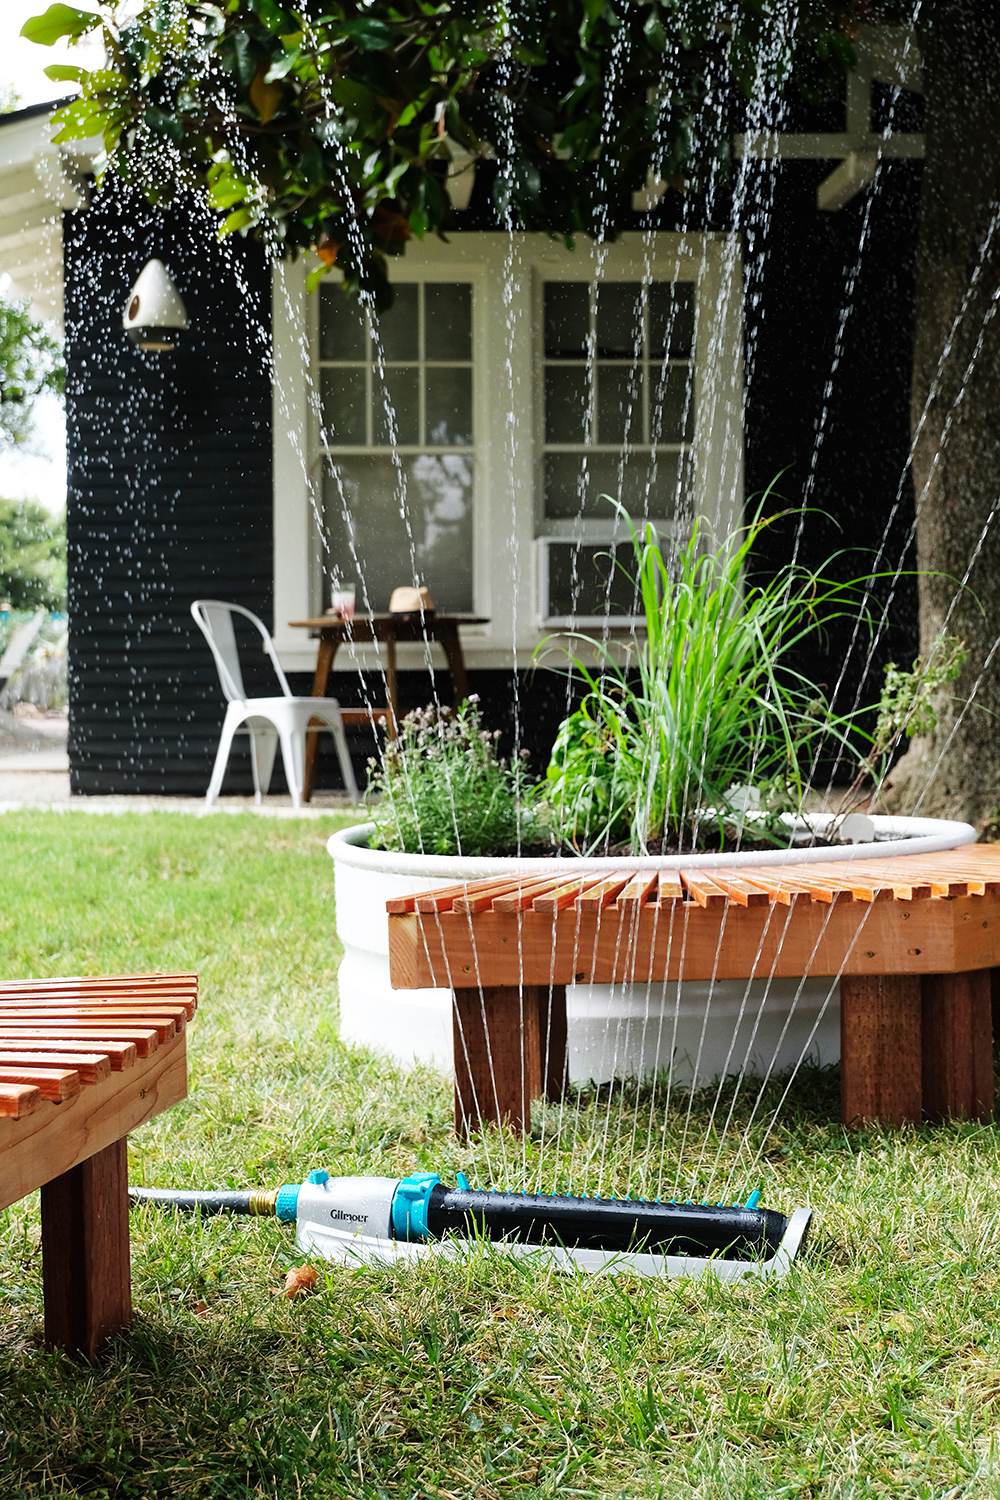
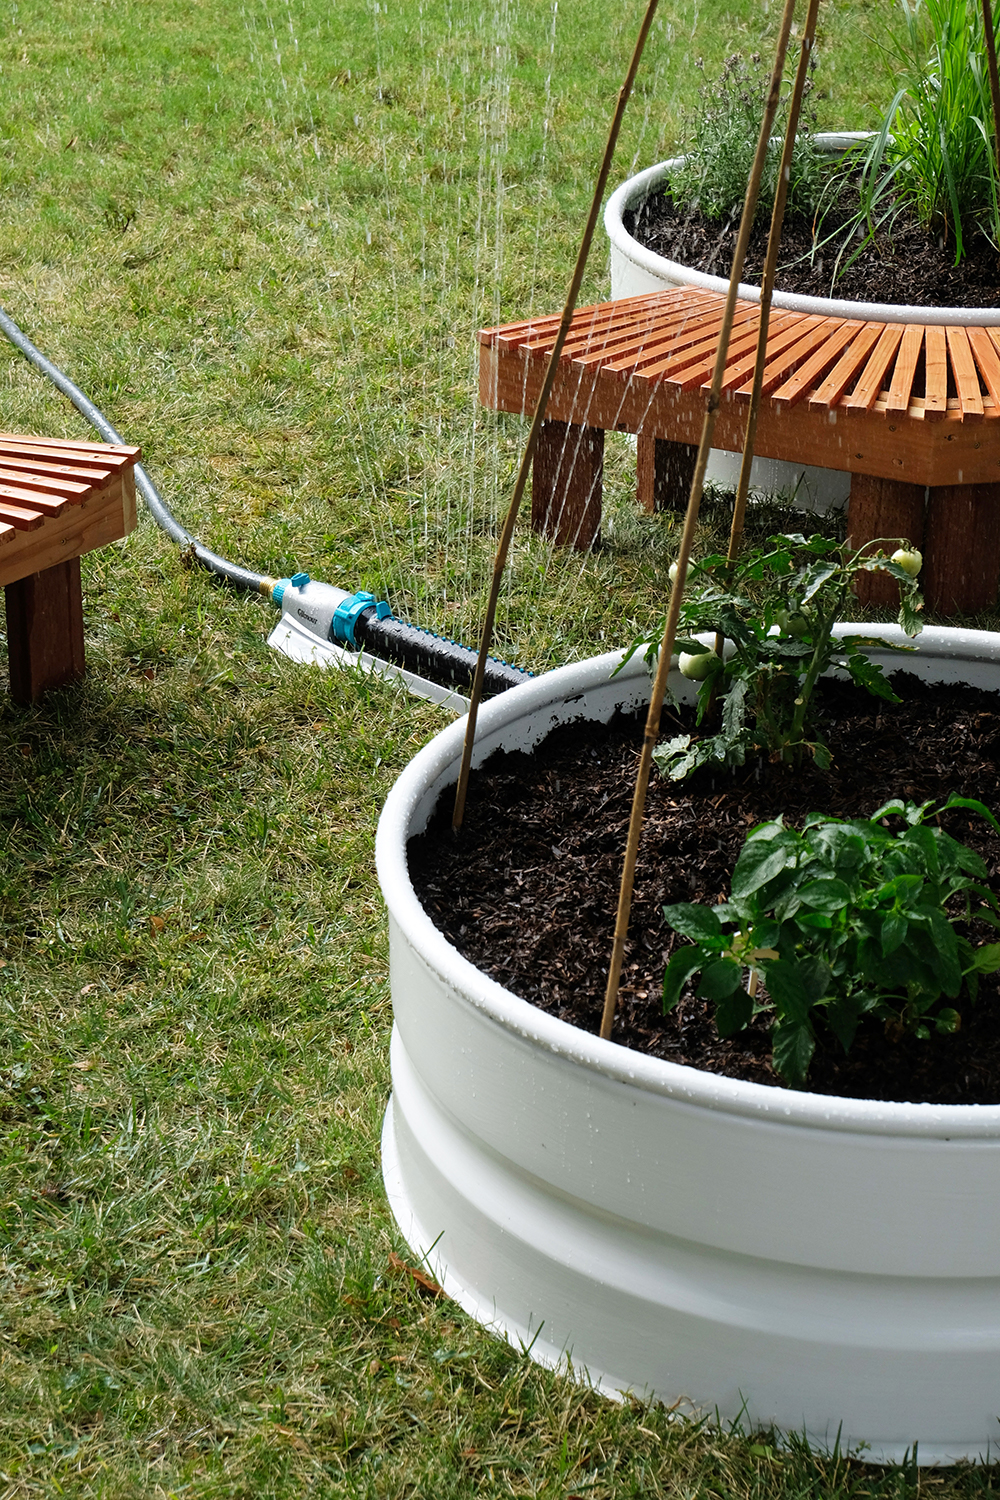
Raised Garden Bed
DIY Round Raised Garden Bed

And the Flat Soaker Hose is perfect to laying right in the raised beds to soak the ground and not just wash away the top layer of soil. We have never owned a soaker hose before and now we find we use it more than any other tool in our garden. It’s perfect for wrapping around our citrus trees and targeting their roots specifically. If you don’t own this hose, I’d definitely highly recommend it.
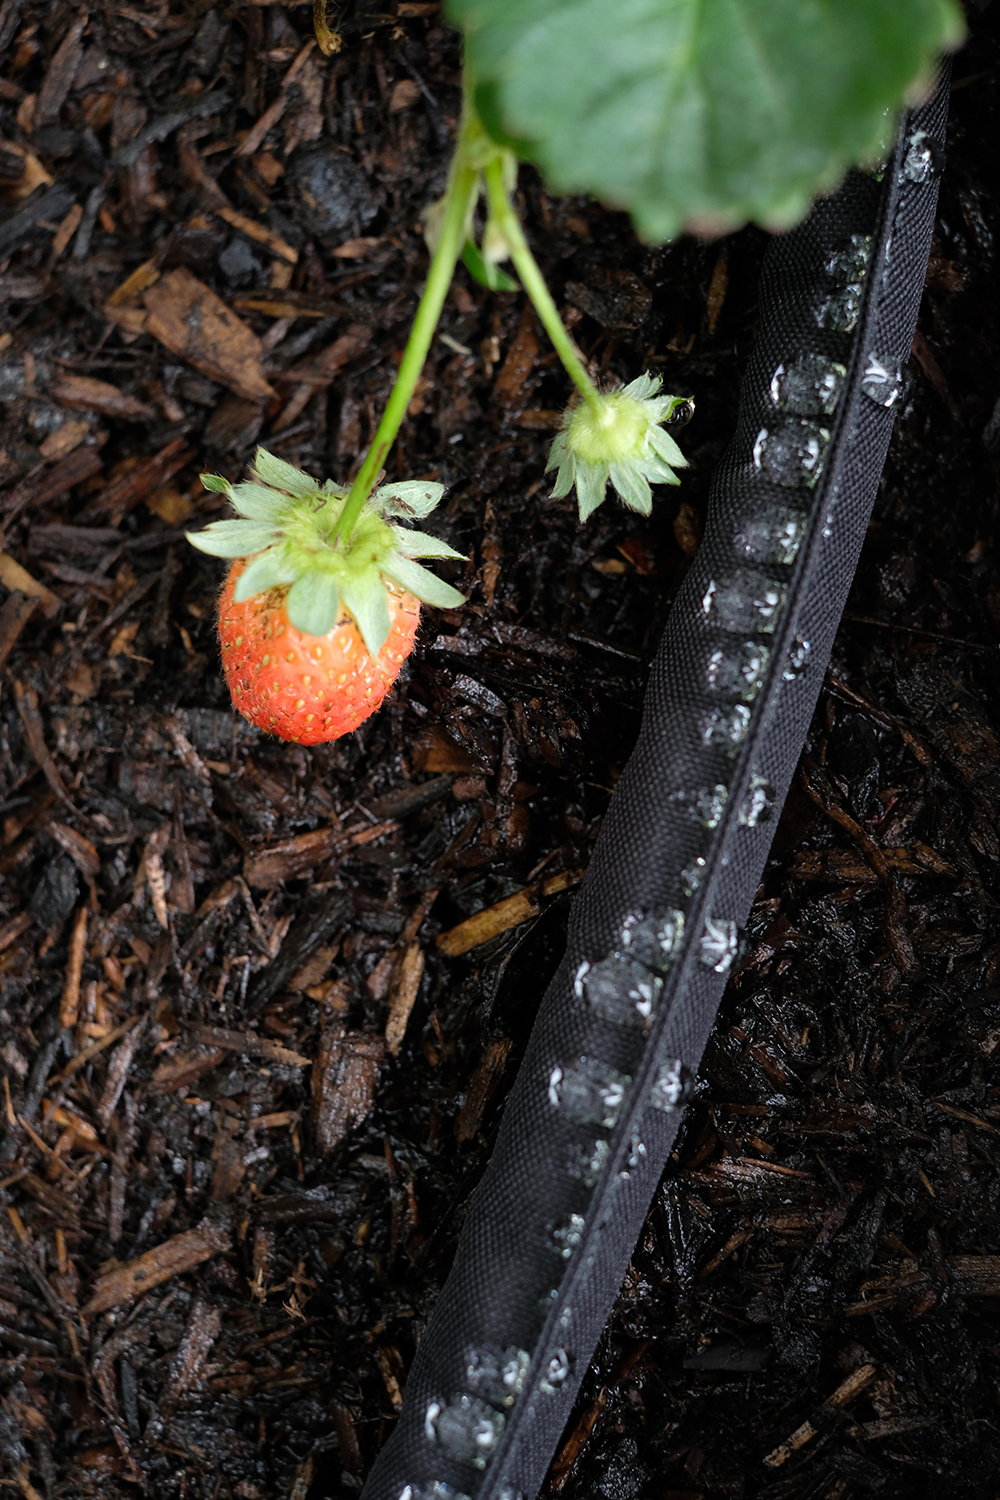
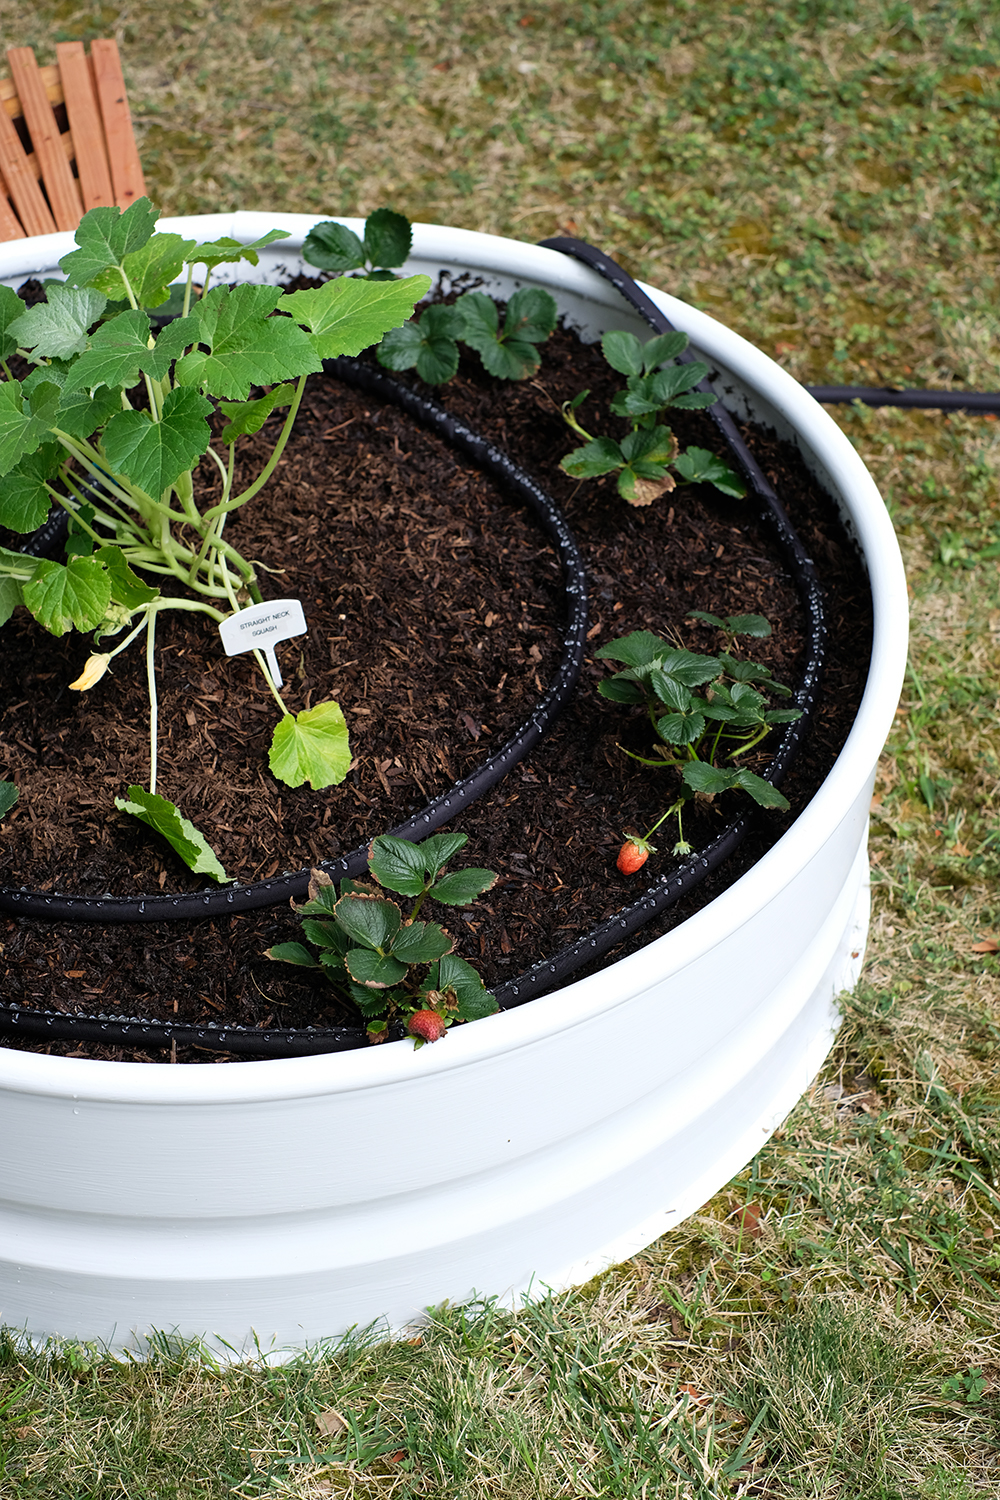
Raised Garden Beds
Raised Garden Beds
Raised Garden Beds

I’m really excited to see my little plant babies take off. I’m looking forward to spending more time outside messing around in the dirt. So, do you have a veggie garden? I’d love to hear about what you are having success growing.

DIY

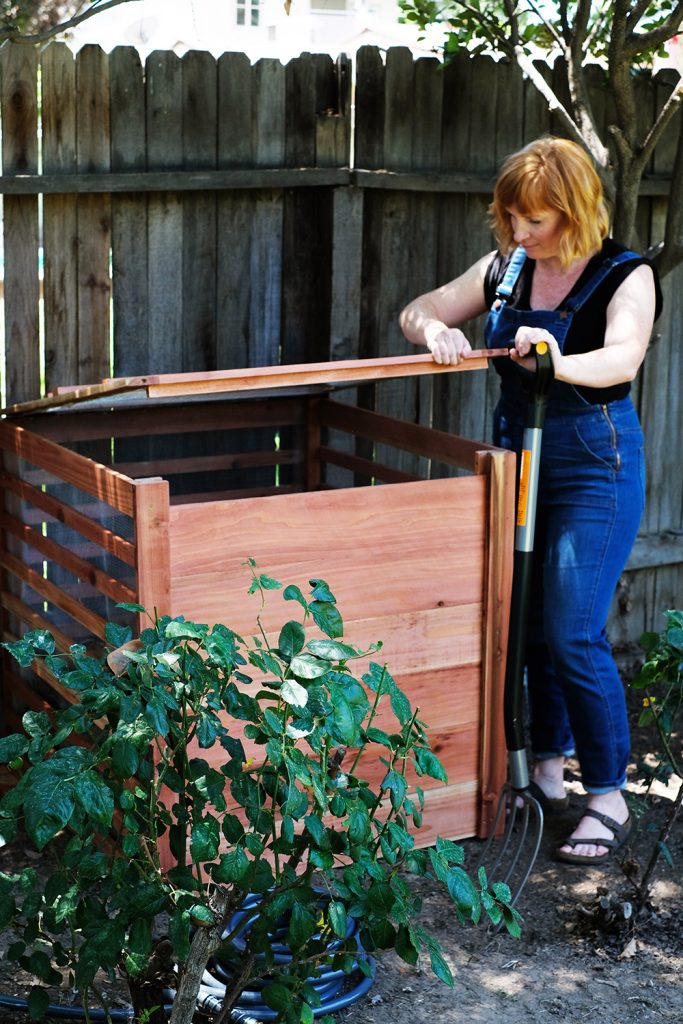
DIY Redwood Compost Bin

June 19, 2019

This post is sponsored by Gilmour. Thank you for supporting the companies that help make this blog possible.

Gardening is one of those things that I WISH I had more time for. I actually really enjoy spending an afternoon weeding a flower bed. It’s one of those tasks that feels good for the soul. You get to be outside and I think digging in the dirt helps keeps you grounded (literally). But, until my life is a little less hectic, it’s actually my husband that spends more time out in the yard planting, weeding, watering and maintaining. Olivia and him have a little garden and they are always growing something weird and wonderful for us to eat.
I’ve shared before, so you probably know that I’m married to a real life biology nerd. Lonnie is an environmentalist, and a High School biology + ecology teacher. Needless to say, we compost! But we actually have just had a compost pile/heap. And I’m a bit of a neat freak, so I wanted to contain the mess just a bit. It was time to build a compost bin!

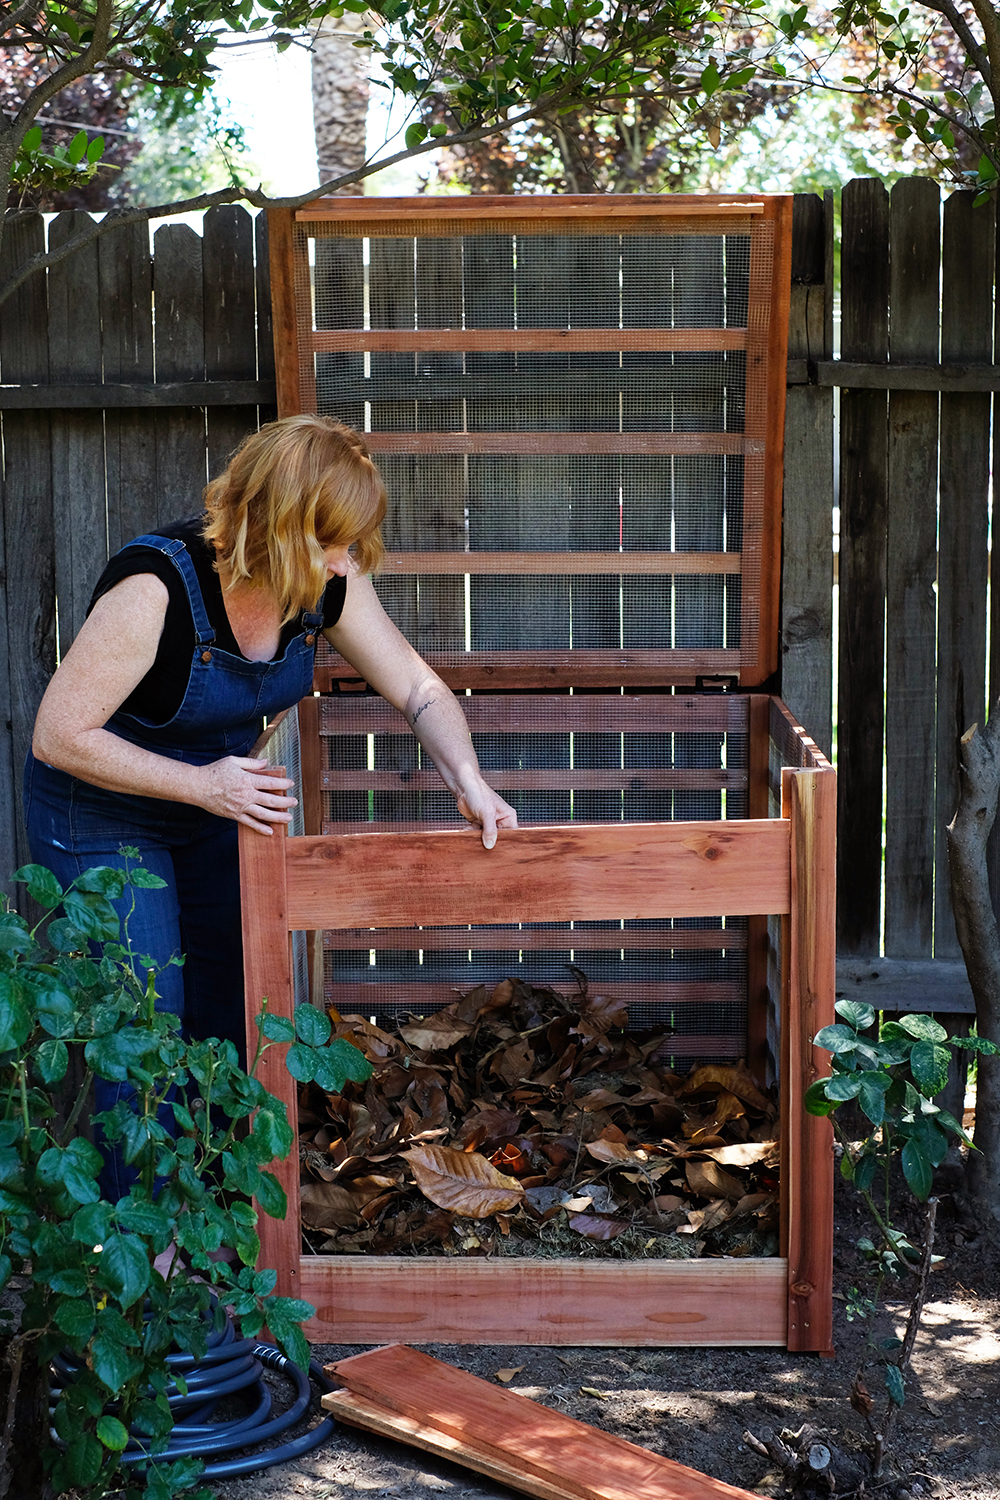
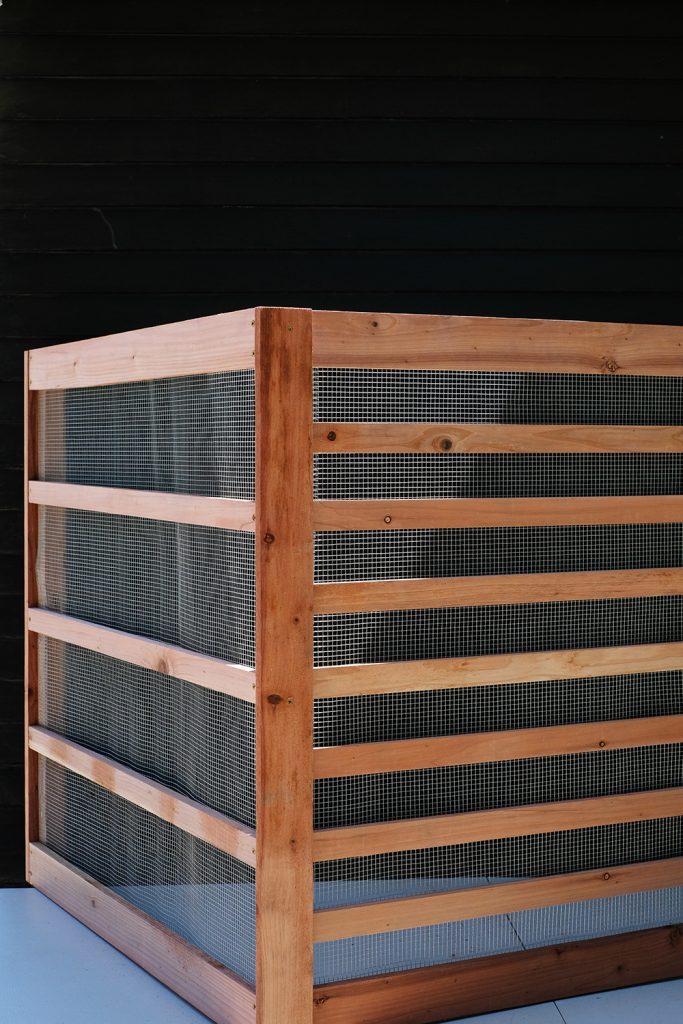
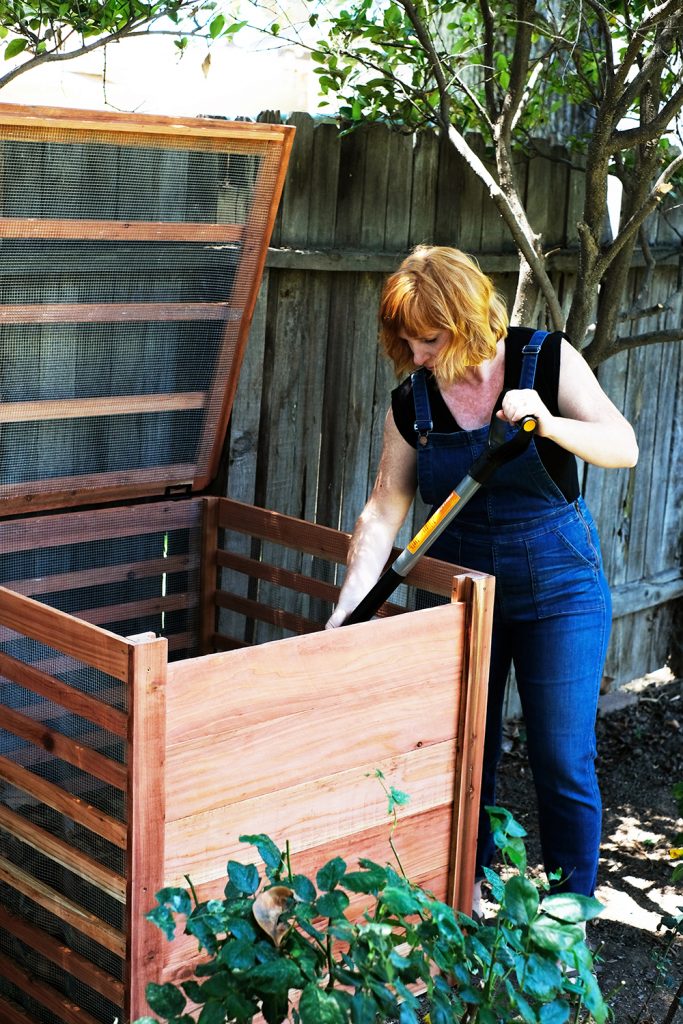
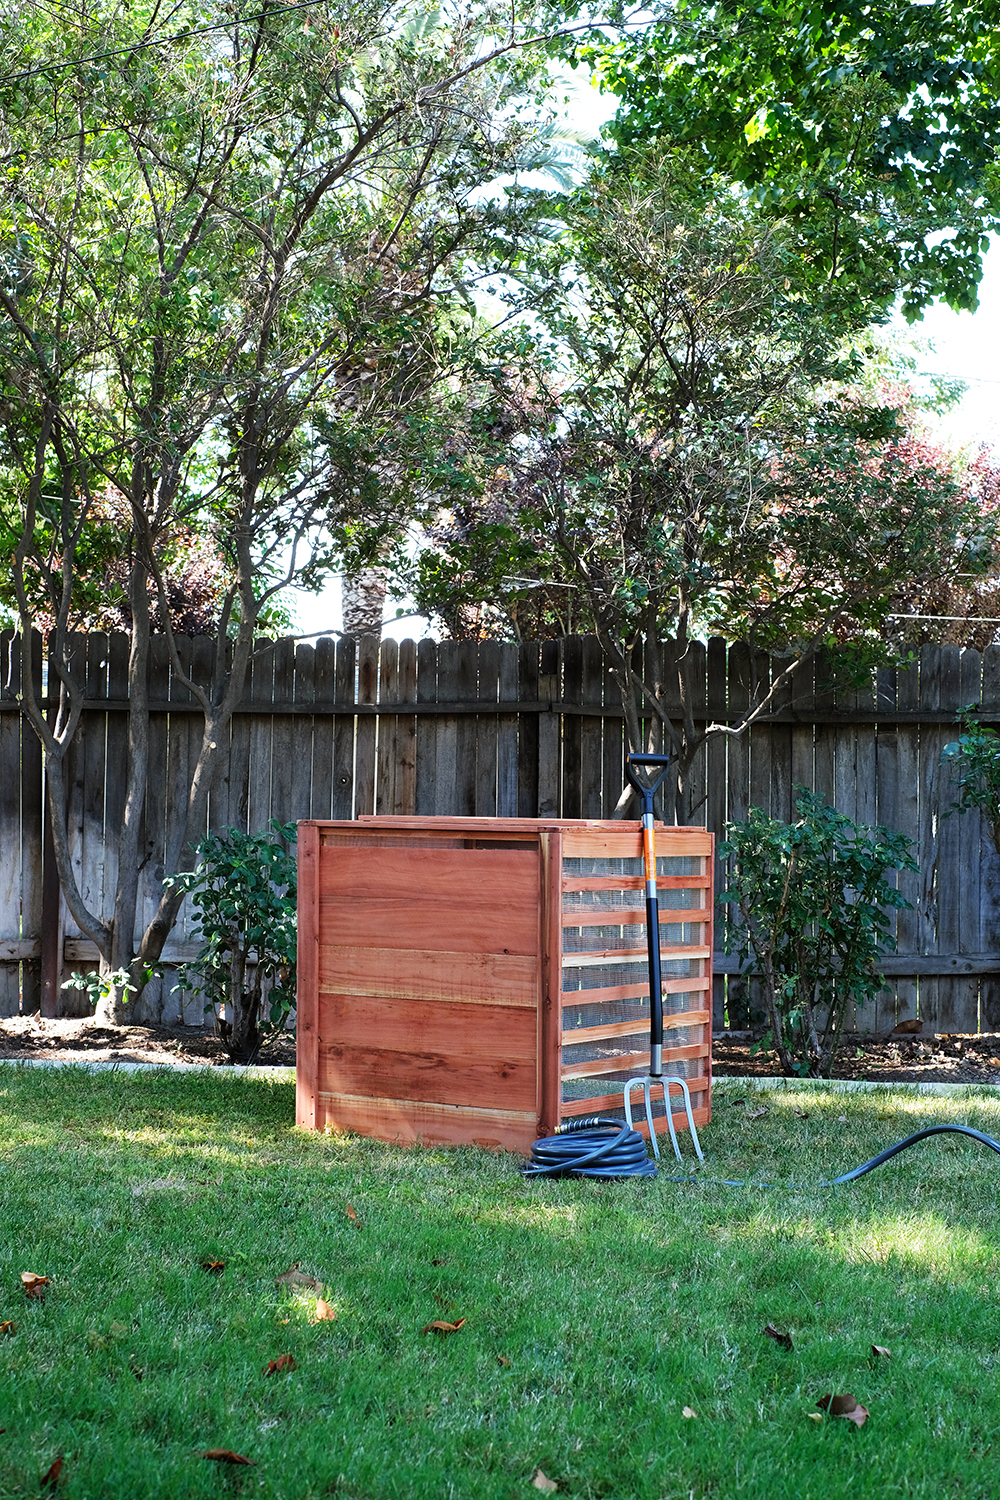
Using inexpensive Redwood fencing boards and some mesh fencing – we built a large compost bin to hold our yard and garden clippings as well as our veggie and fruit scraps. We kept the design simple, but it has all the components you need to compost properly. It has ventilation, a lid to keep out critters and removable front access so that the compost can easily be turned and the bottom decomposed material can be removed.

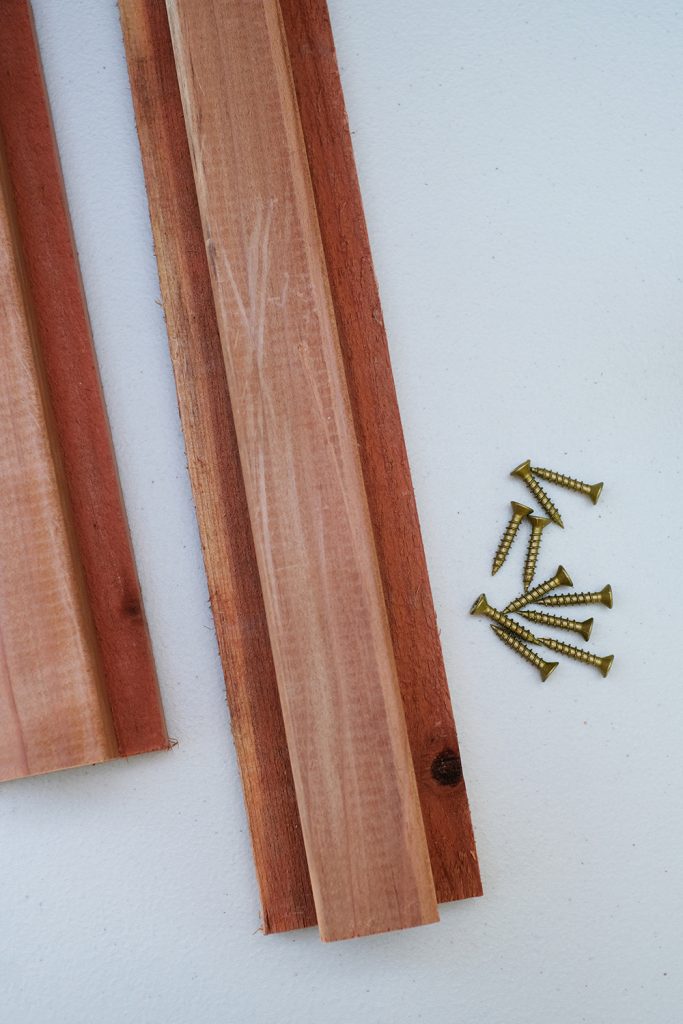
For this project, we used 12 linear feet of 1 1/2″ x 1 1/2″, and then just 1 dozen redwood fence boards. To save money, and also use redwood (because it’s so great for outdoor projects), and we used a table saw to cut all the boards down to 2 inch strips.

This compost bin is 3 ft. x 3ft x 3ft. There is an order to building this bin that makes this very easy to assemble. You are going to start with the back wall of the box. This will give you something sturdy to build the other walls off of.

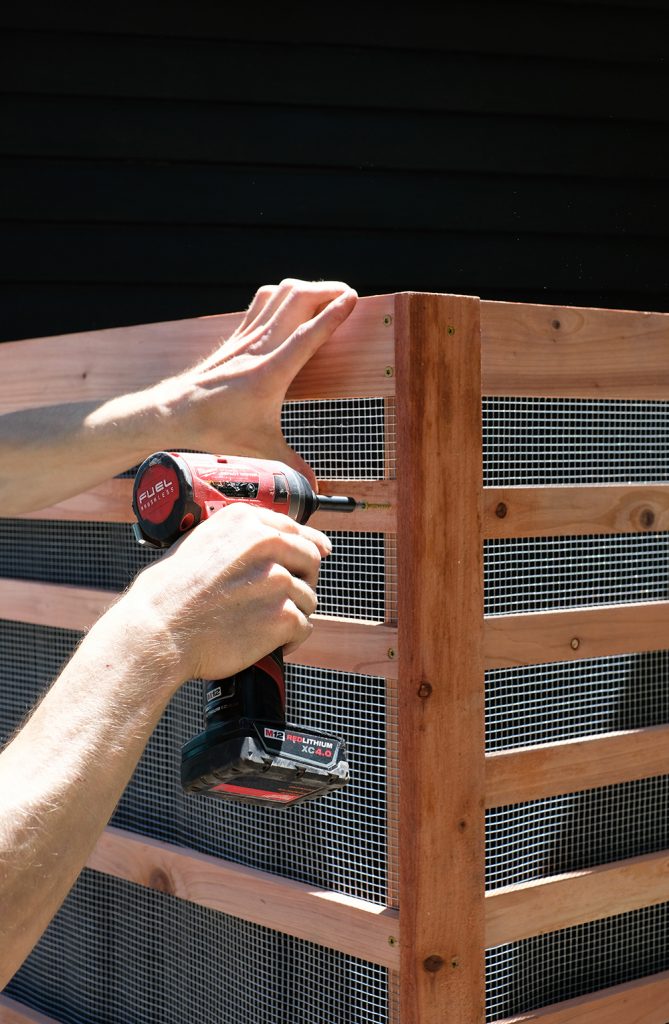
The 1 1/2″ x 1 1/2″ pieces are the four corner posts of the frame. Attach those to two 3″ wide by 3 ft long pieces.

Then you can attach the 2″ rails. We started in the middle and then spaced these out evenly.

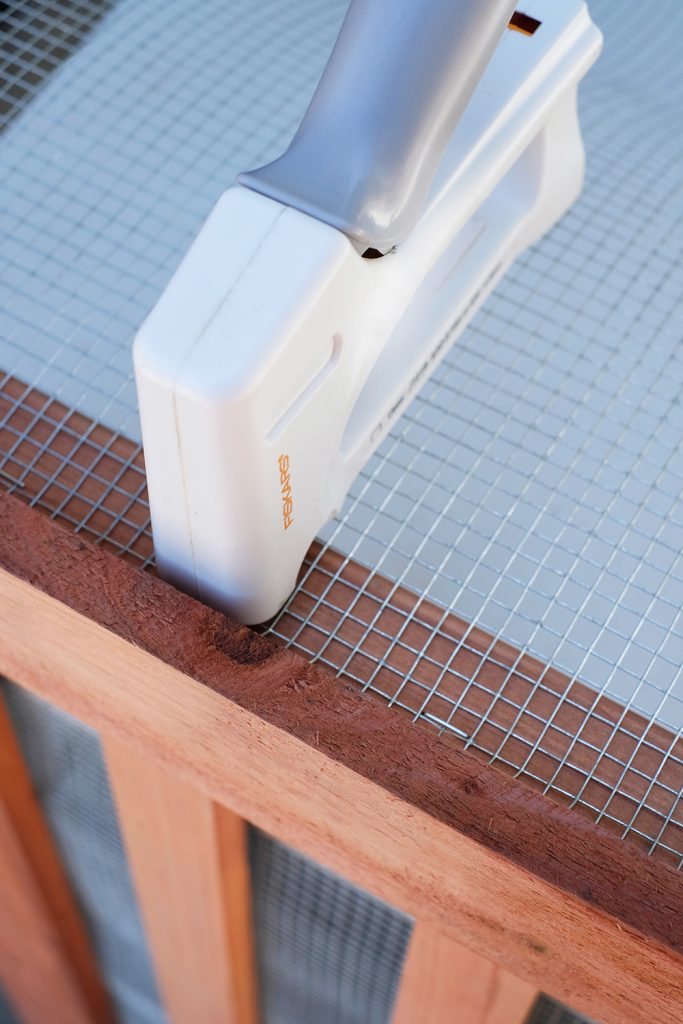
Then you can attach the mesh fencing with a staple gun. I LOVE Fiskar’s new DIY line of tools and this staple gun might be the best one I’ve ever used.

Once the back wall is complete, you can built the two side walls off of it and attach the mesh fencing to the inside. You will then add a lip to the inside of the front of the bin, it needs to be at least 1/2″ wide so that you can slide the fence boards down the front.

The lid is just a repeat of the 3 ft x 3 ft walls and attached at the back with a pair of hinges.

I’m so excited to have this neat and tidy box in our backyard now and I can’t wait to have nutrient rich compost for your garden and flower beds in no time at all.

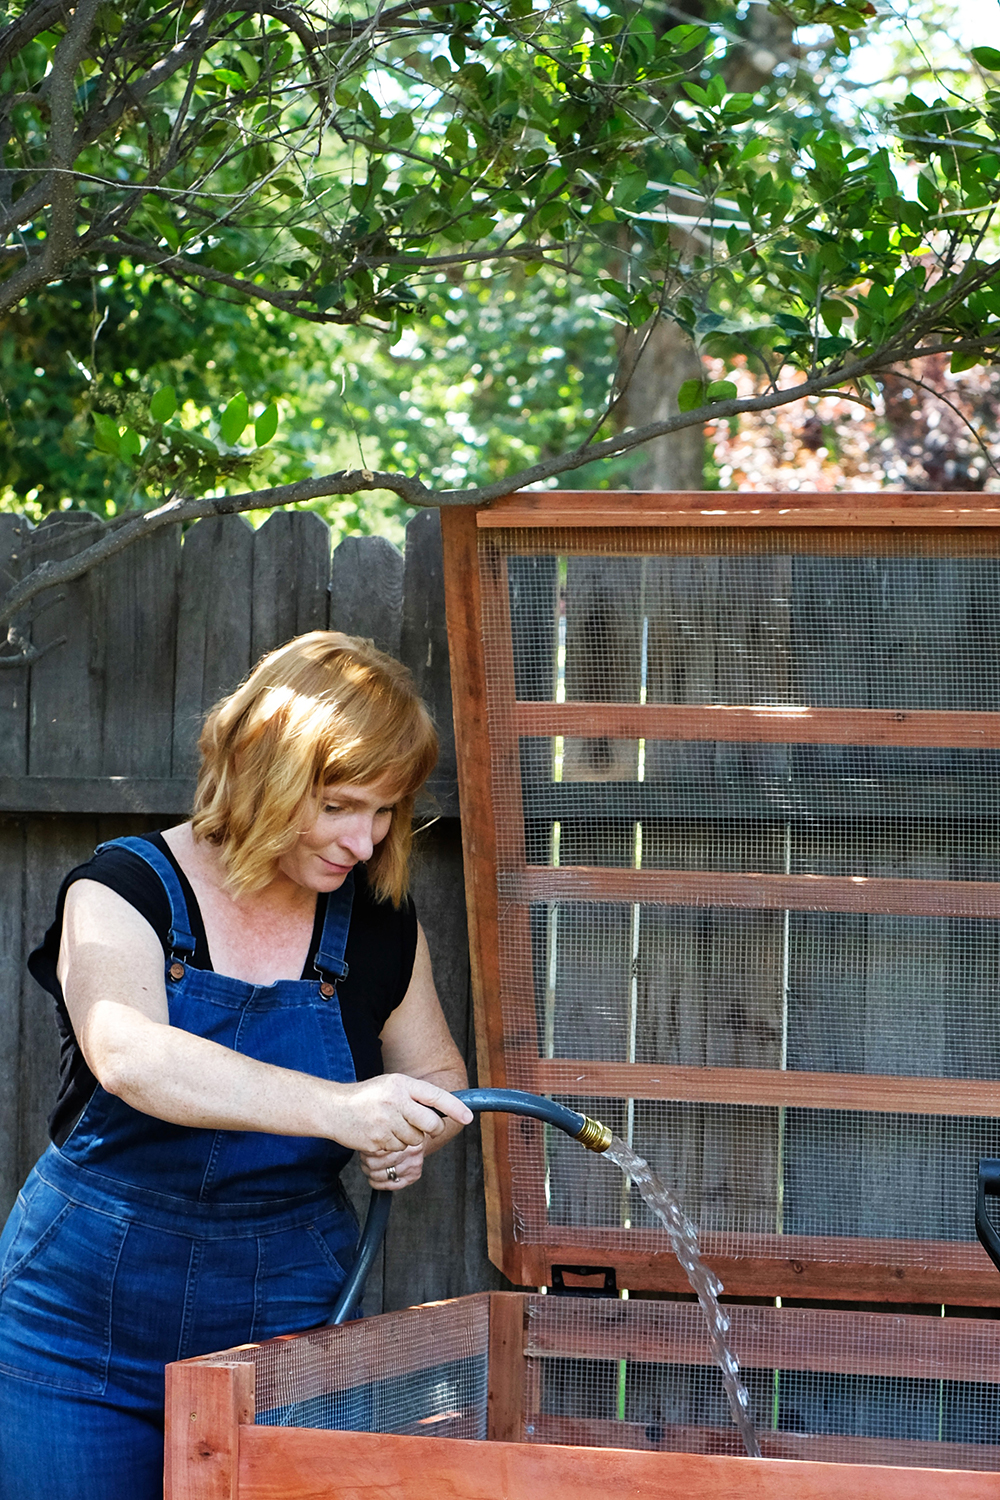
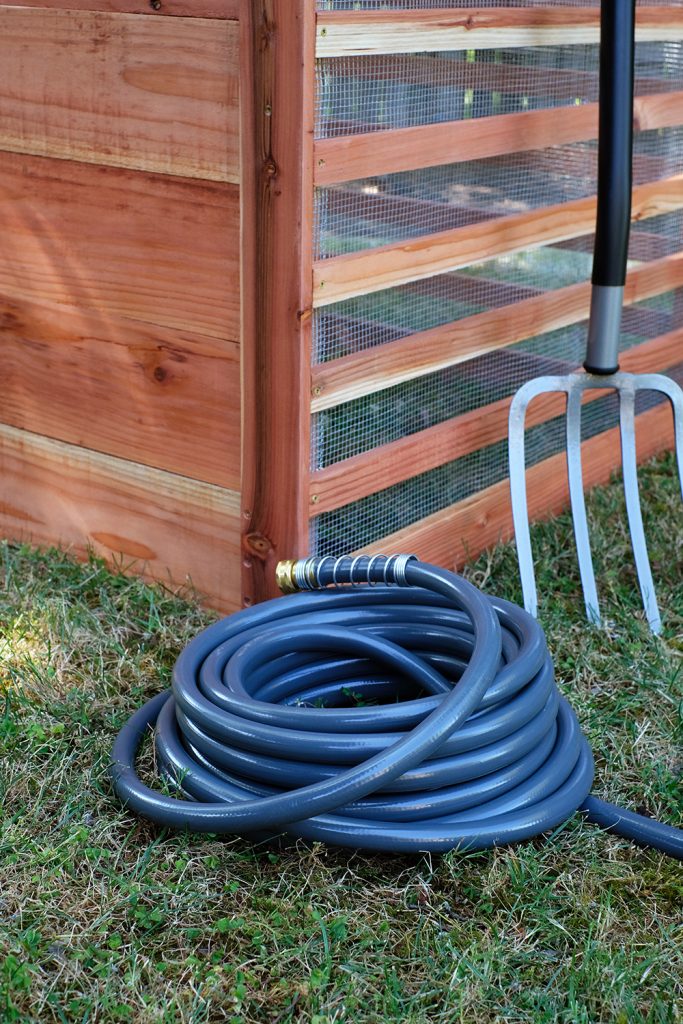
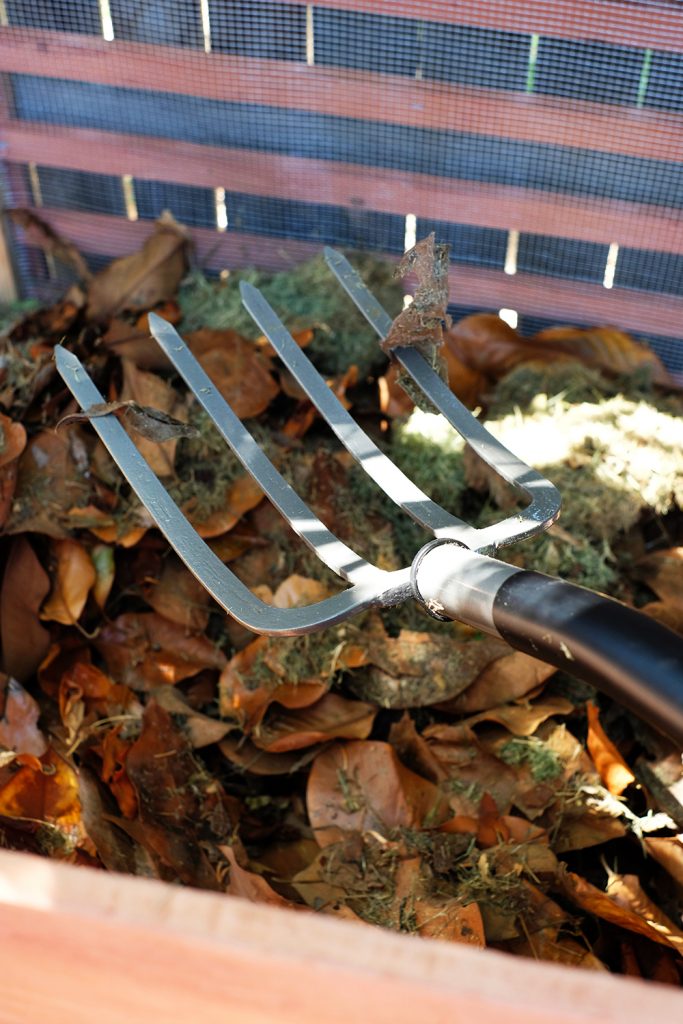
There are really 2 tools you need to help you be on your best compost game – 1. a hose to soak your compost from time to time and 2. a garden/pitch fork to move and rotate your waste. I highly suggest Gilmour’s Flexogen Super Duty Hose and Fiskar’s Garden Fork. Excuse me while I brag about this hose for a second. Because, over the years , we have purchased and invested in so many different hoses hoping to find one that wouldn’t kink or crack with time. The Flexogen Super Duty Hose is the strongest, lightest hose in its class. It has a patented 8-layer construction with reinforced core maximized both durability and kink resistance. And this hose comes with a Lifetime warranty!

We add grass clippings, leaves, and even veggie and fruit scraps from our kitchen. To help the decomposition process, it’s a good idea to move the waste around. This garden fork is the perfect tool for this.

I feel like I’m one step closer to being a legitimate gardener with this new compost bin. Right now we are in the hottest part of the year. In another month of so we will plant some more garden beds so that we can have more produce throughout the Fall months.

Design / DIY

Spring One Room Challenge Week 6 (THE REVEAL!)

May 11, 2019

Well, we made it! I can’t really believe we have a brand new kitchen and we got it done in less then 6 weeks. I’m so glad we took on this One Room Challenge, at times I thought it wasn’t possible, but gosh this room is gorgeous. I’m hoping my pictures do it justice, because it’s really so pretty in person.

Before we look at all the afters, when I say “we” and the work, I mostly mean my brother, Ash. Lonnie and I have been his assistants, but Ash has led this project’s work load and I really can’t thank him enough. The guy is a perfectionist and a jack of all trades (oh and today is his birthday) and this room shows his handy work all over the place.

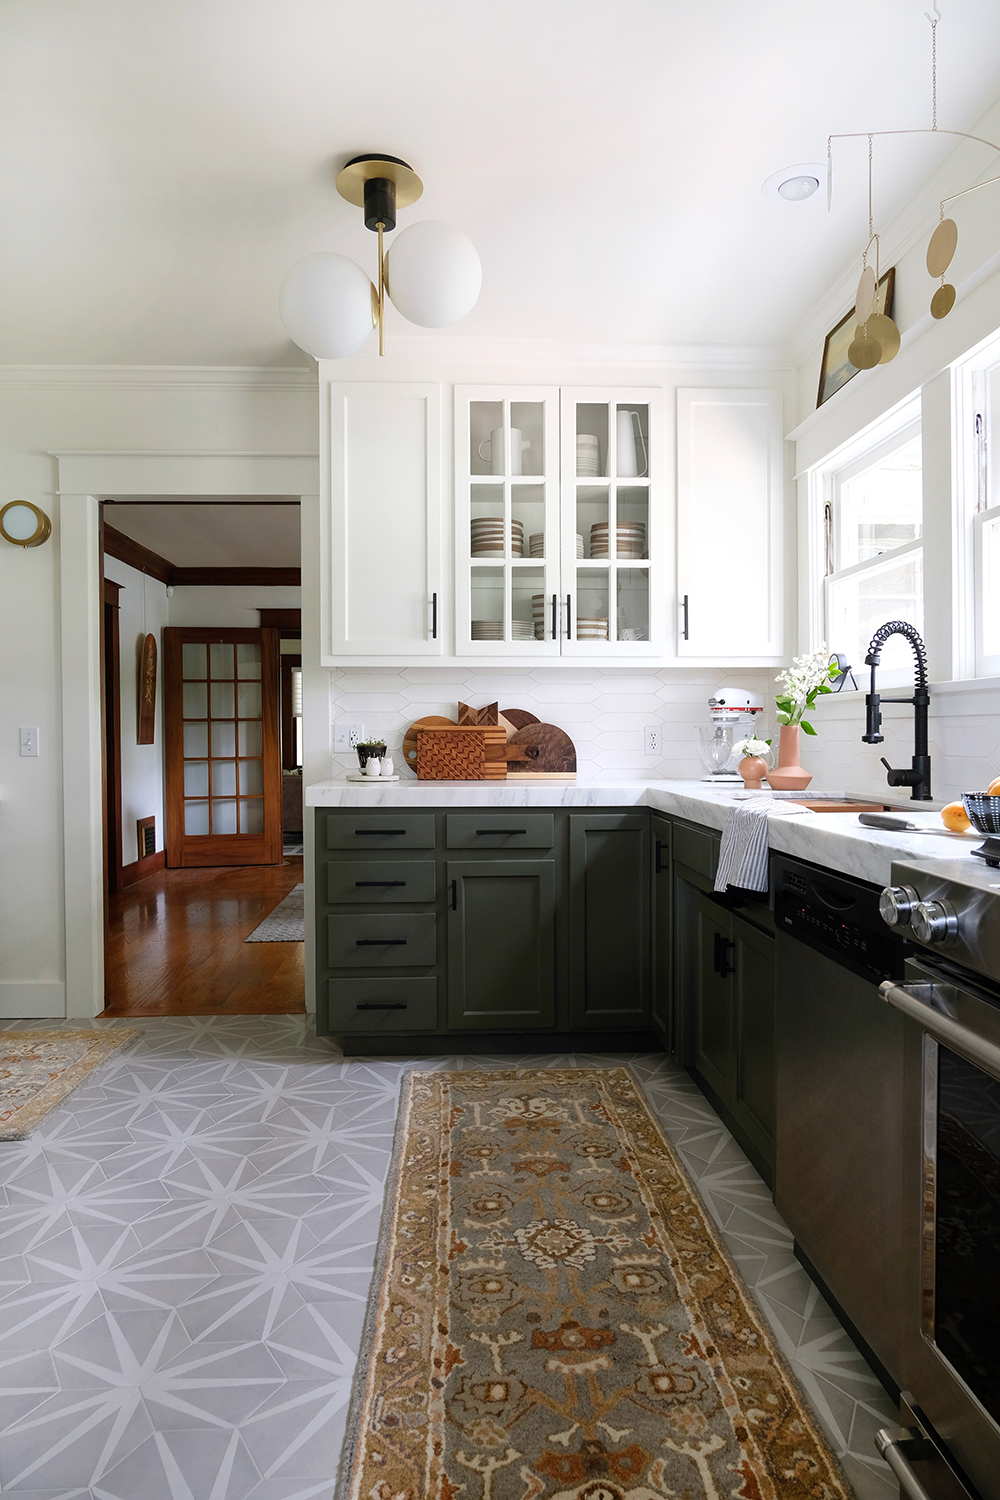
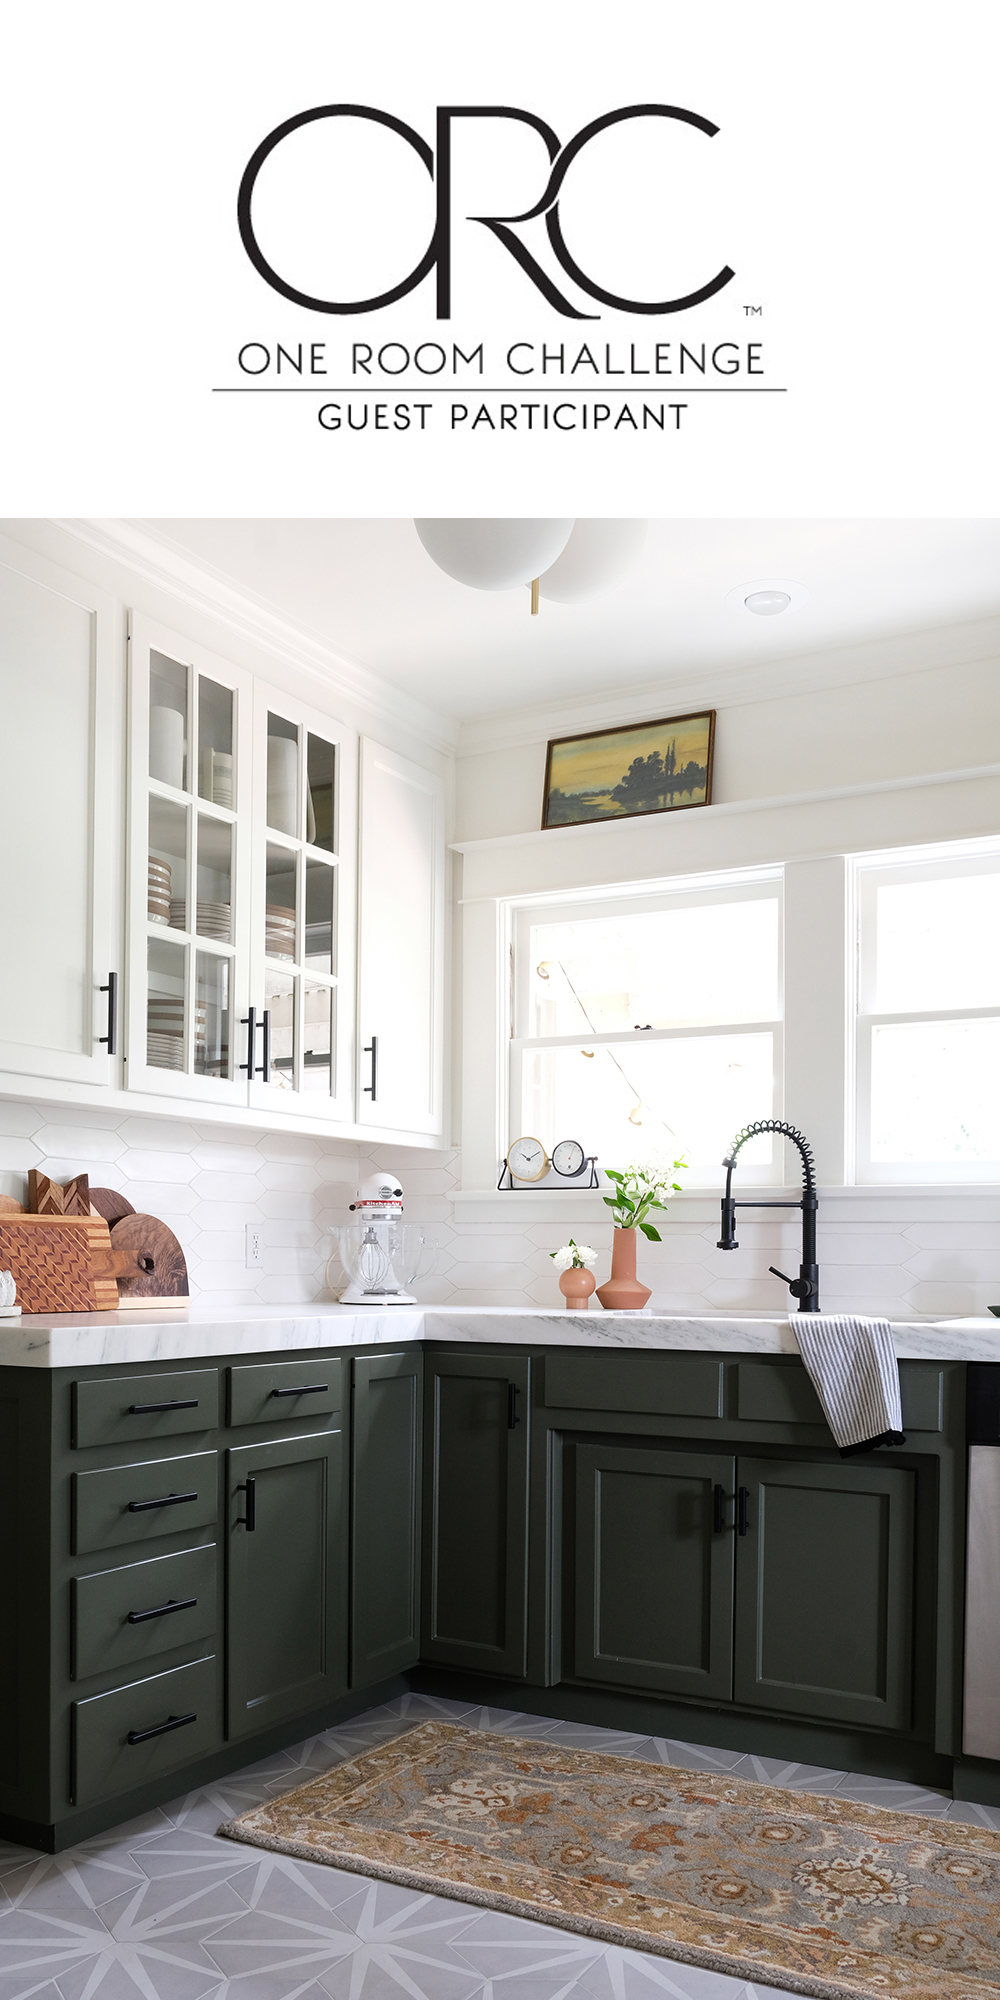
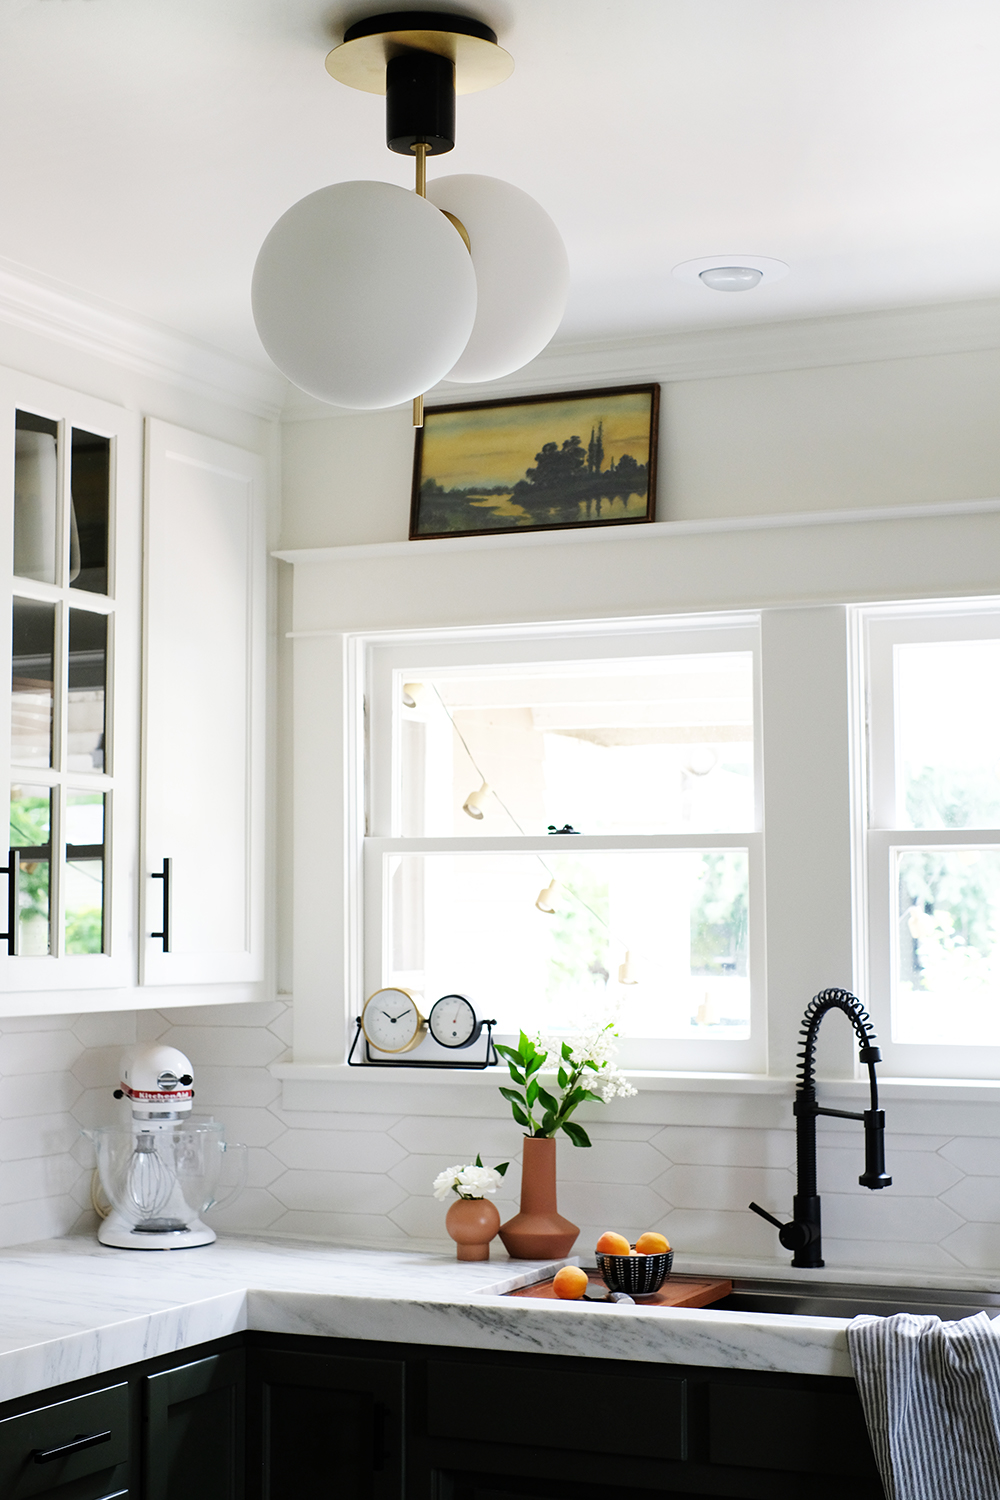
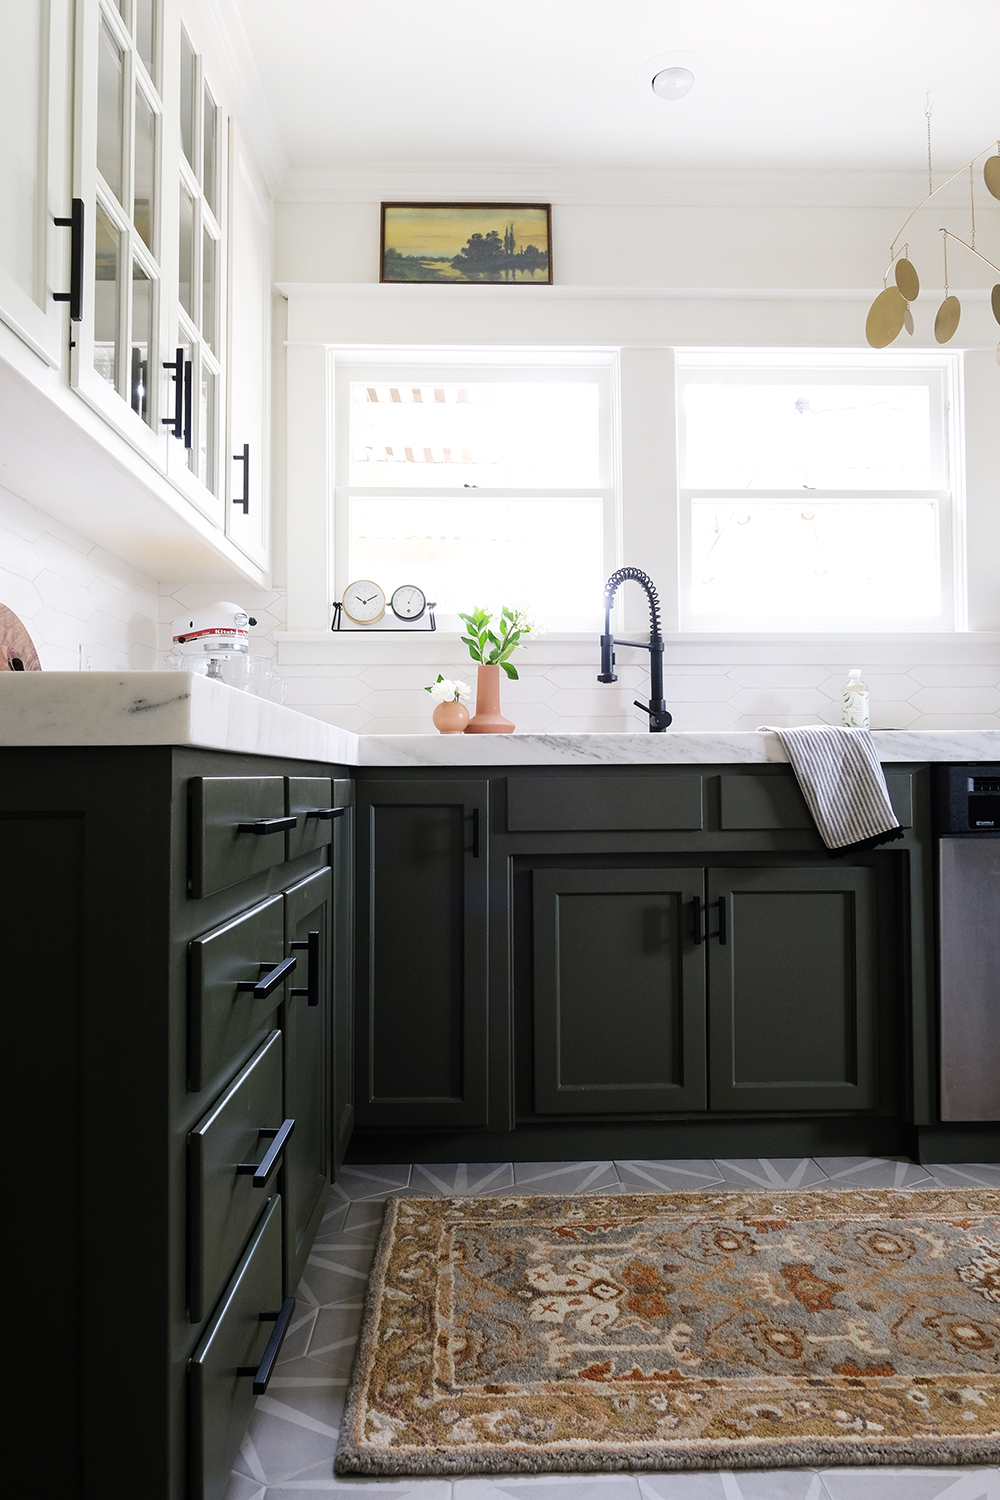
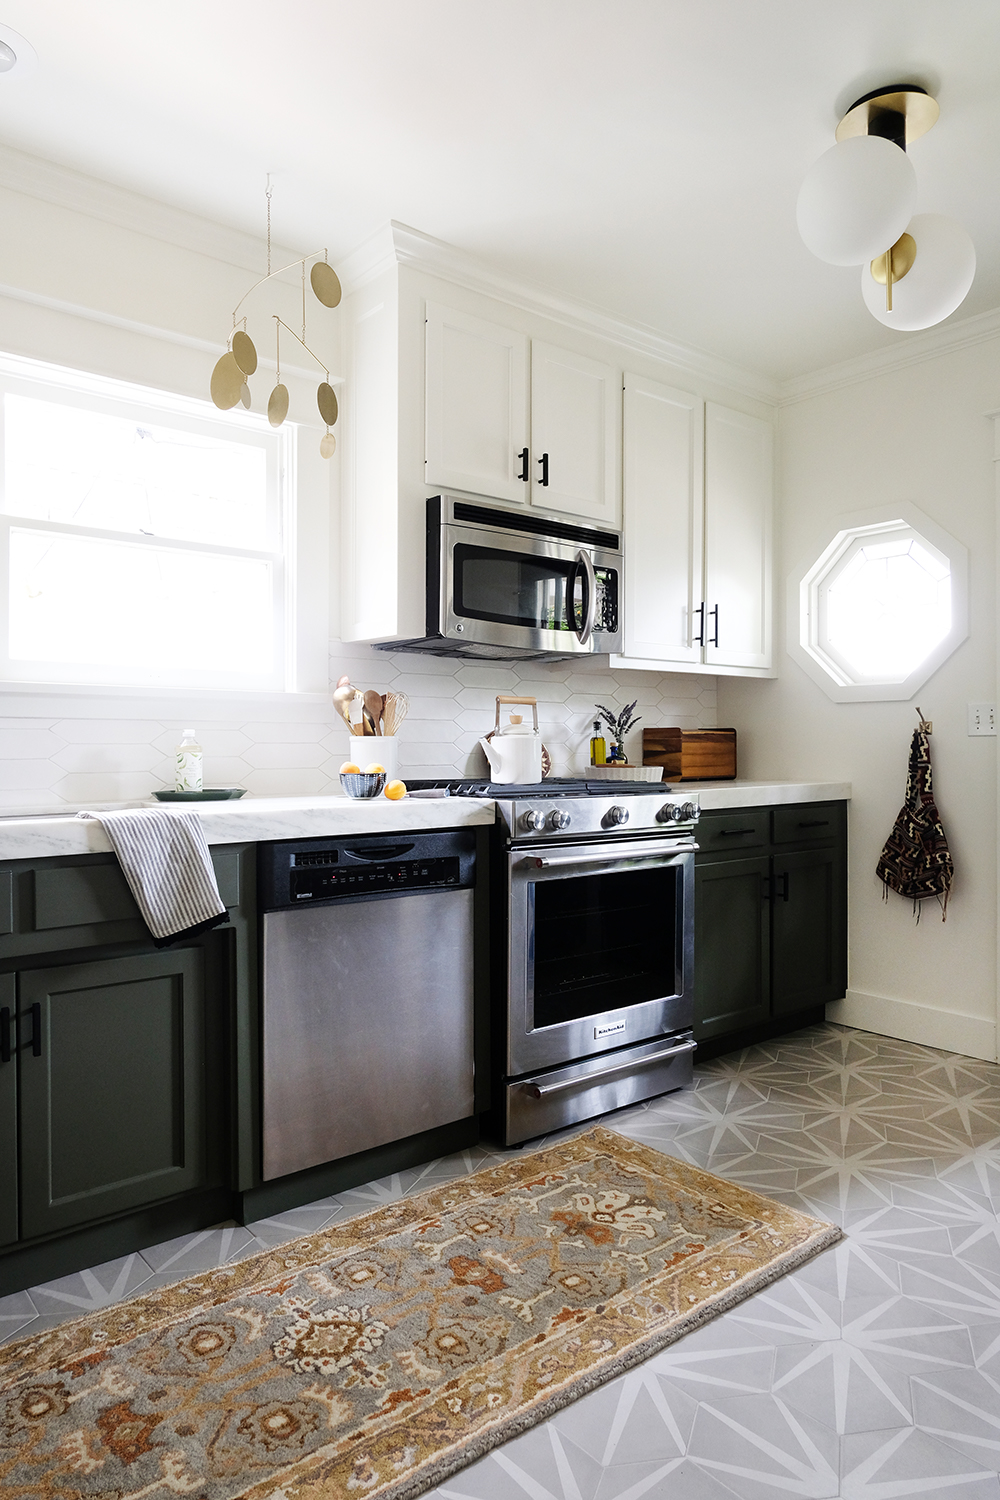
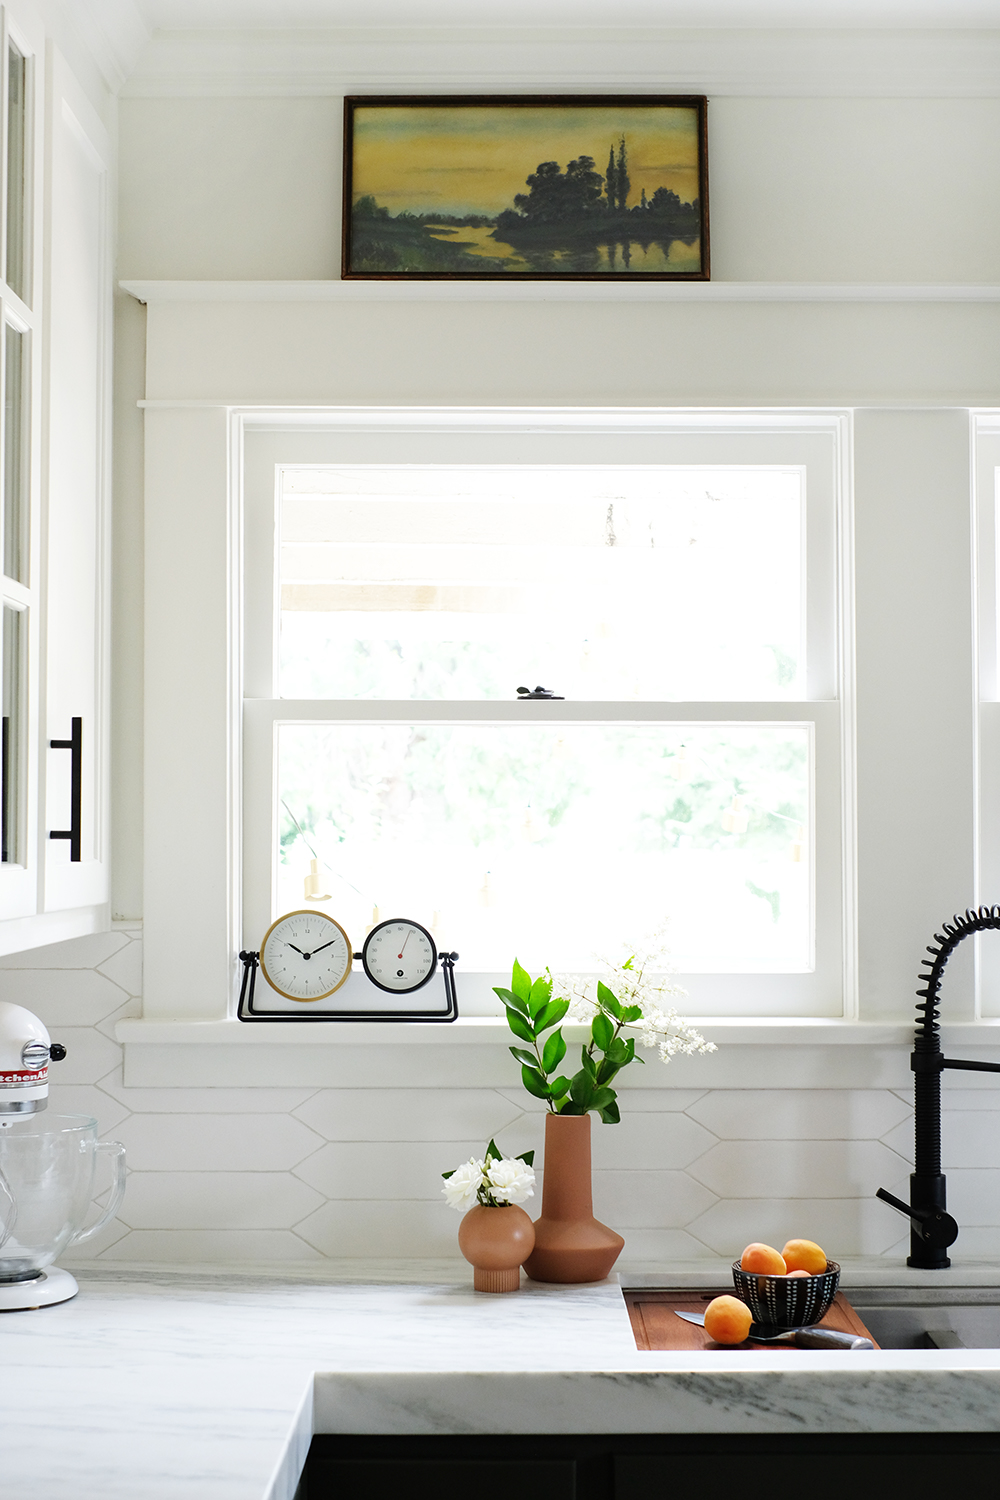
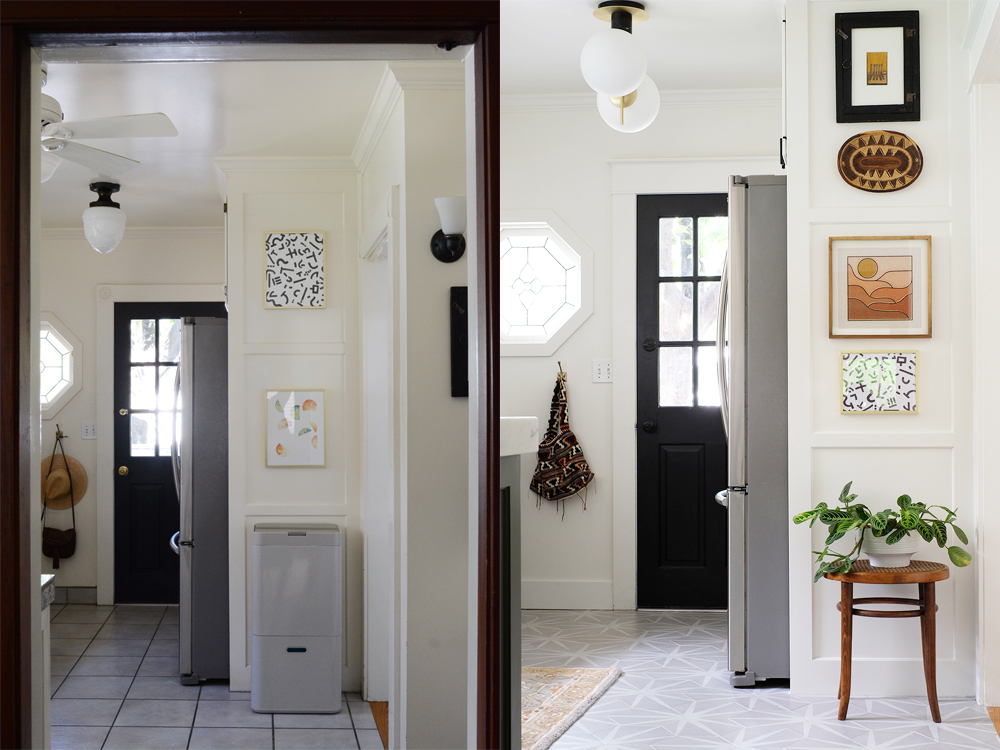
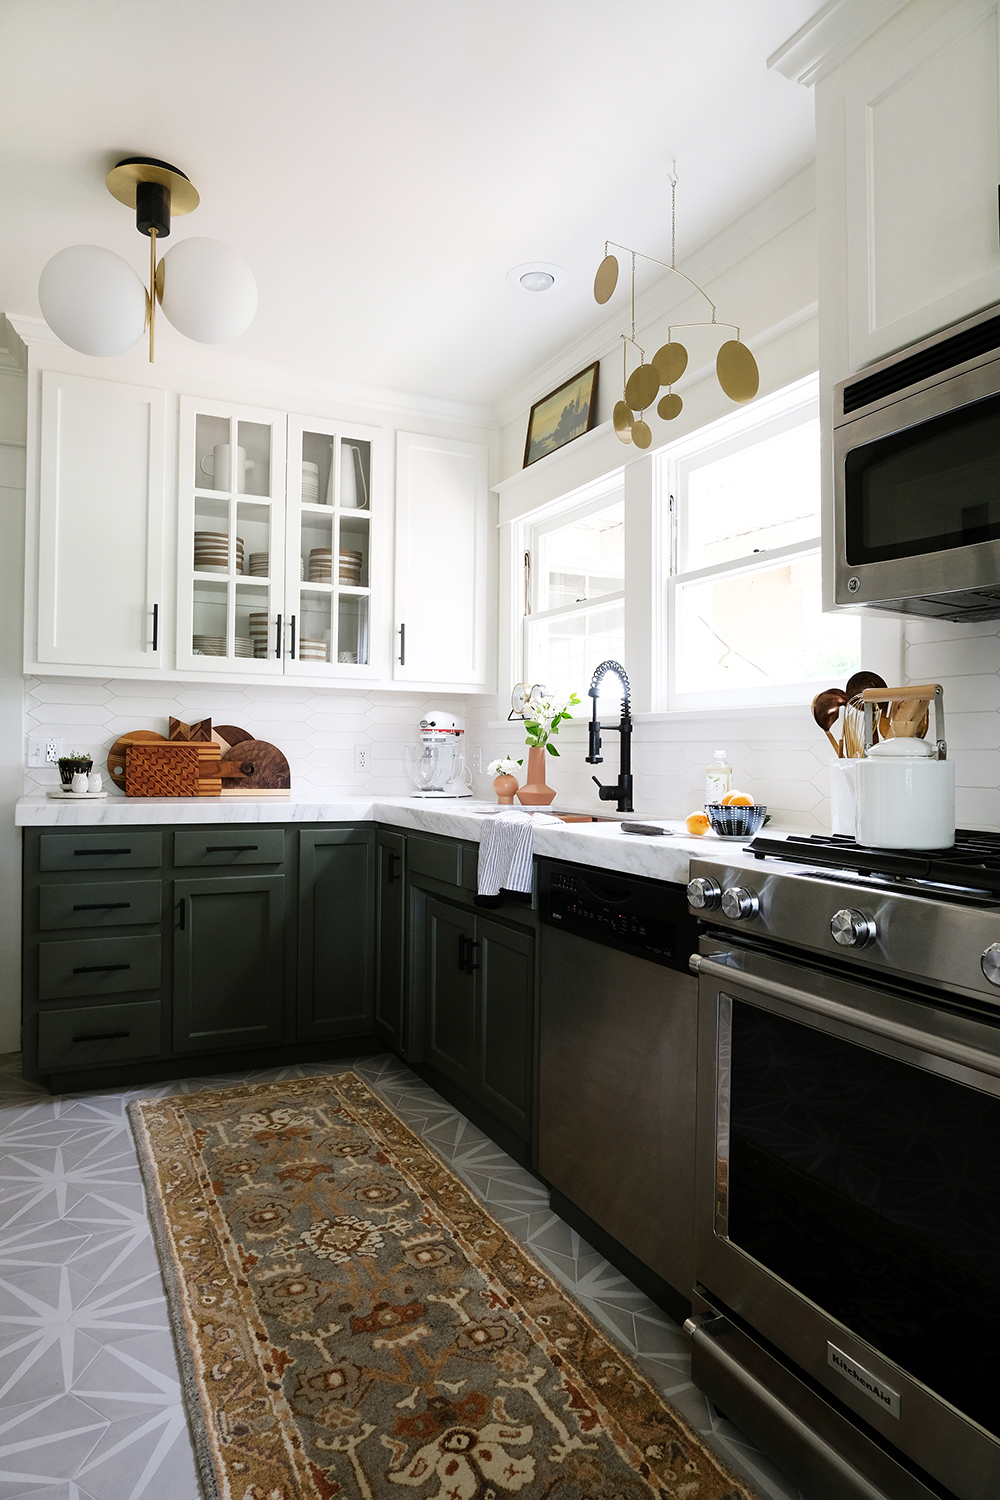
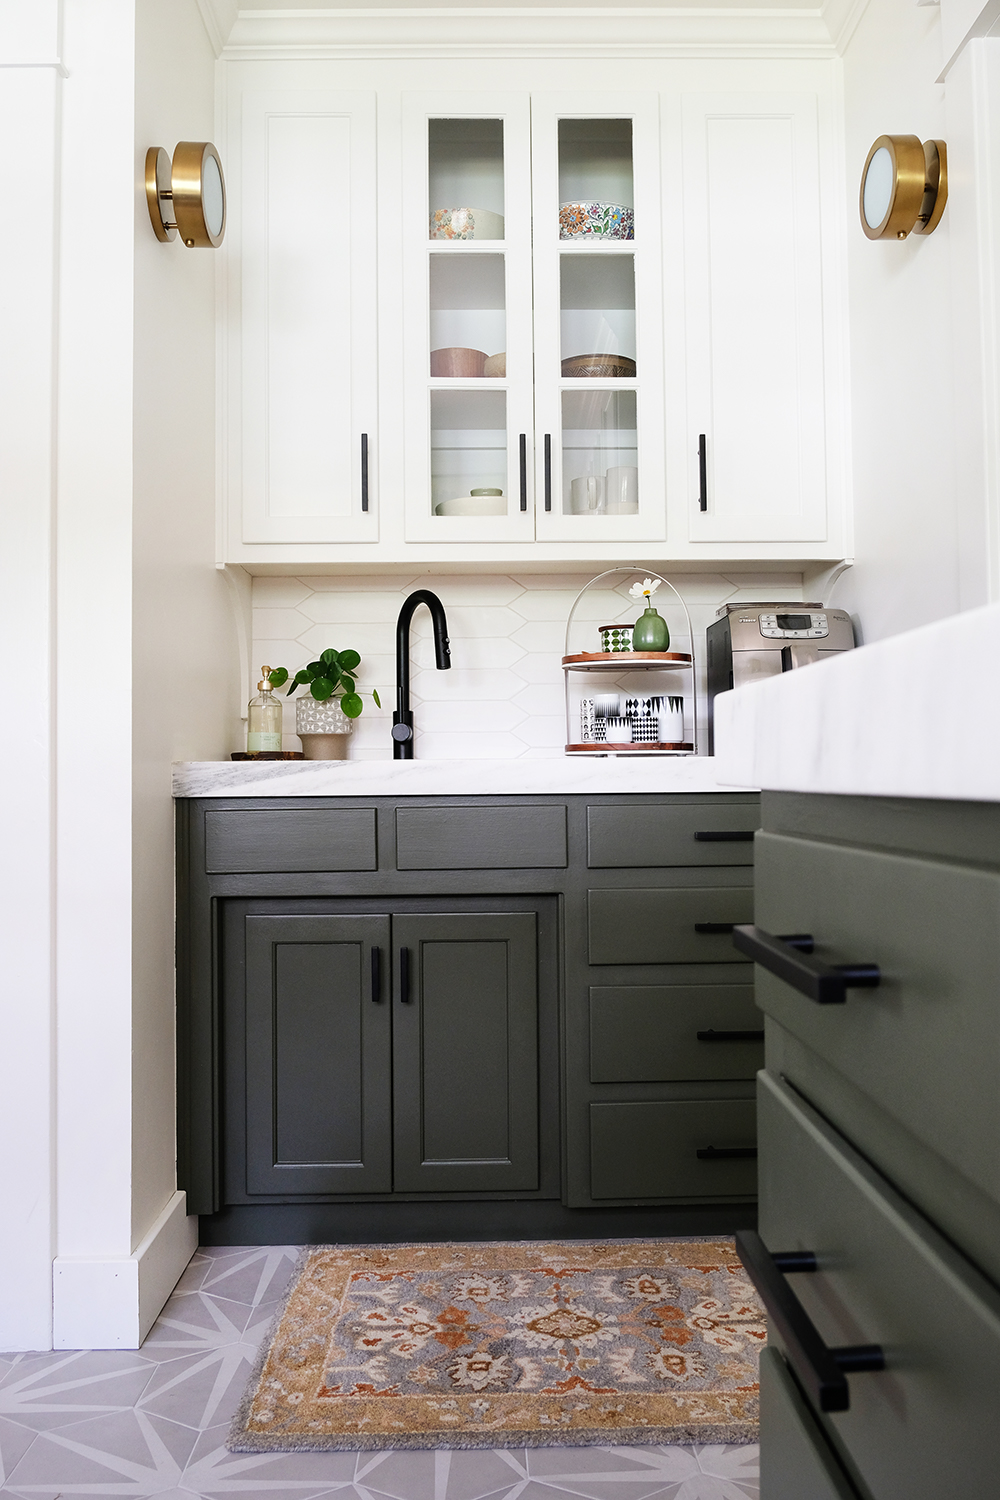
And now for the “afters”. I will try to link everything, but this post also has a lot of the sources too. This room really is exactly what I wanted. It feels modern and fresh, but still fits into my 100 year old house. When we started with week 1, I was positive that the lower cabinets had to be black. But, now I can’t imagine anything but this gorgeous green in this space. The room is so much brighter. I think it’s the combination of the fresh white paint, the lighter marble countertops and the white backsplash. I just can’t wait to shoot some recipes in here. No more hauling everything to the sunroom and shooting on a large marble cutting board. I now have over 12 feet of marble to shoot on.

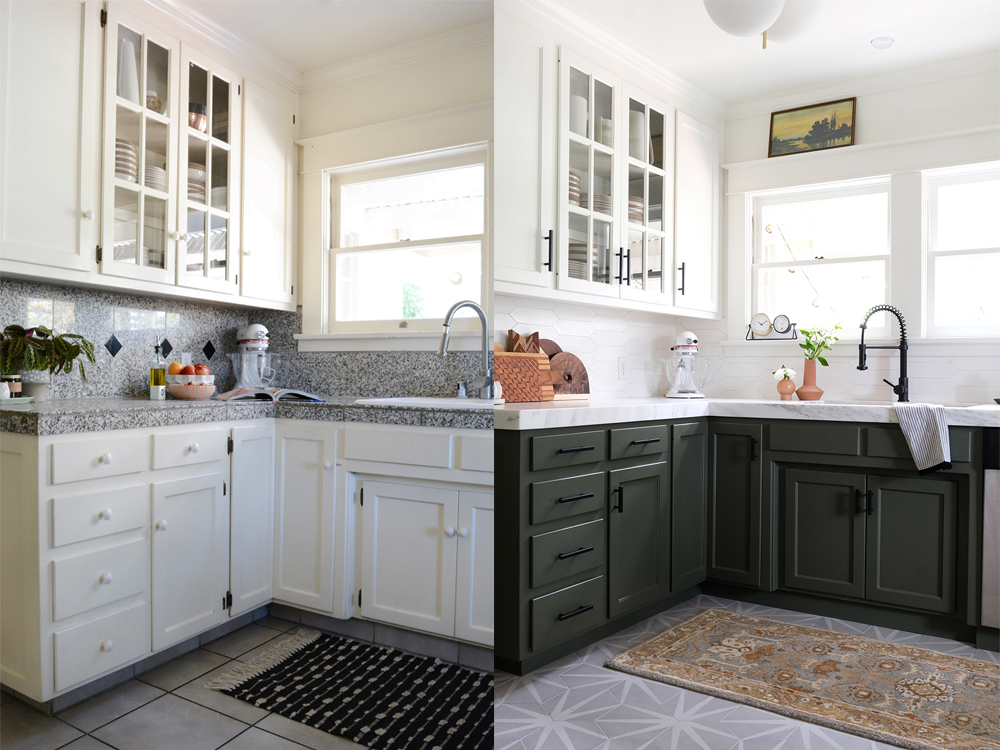
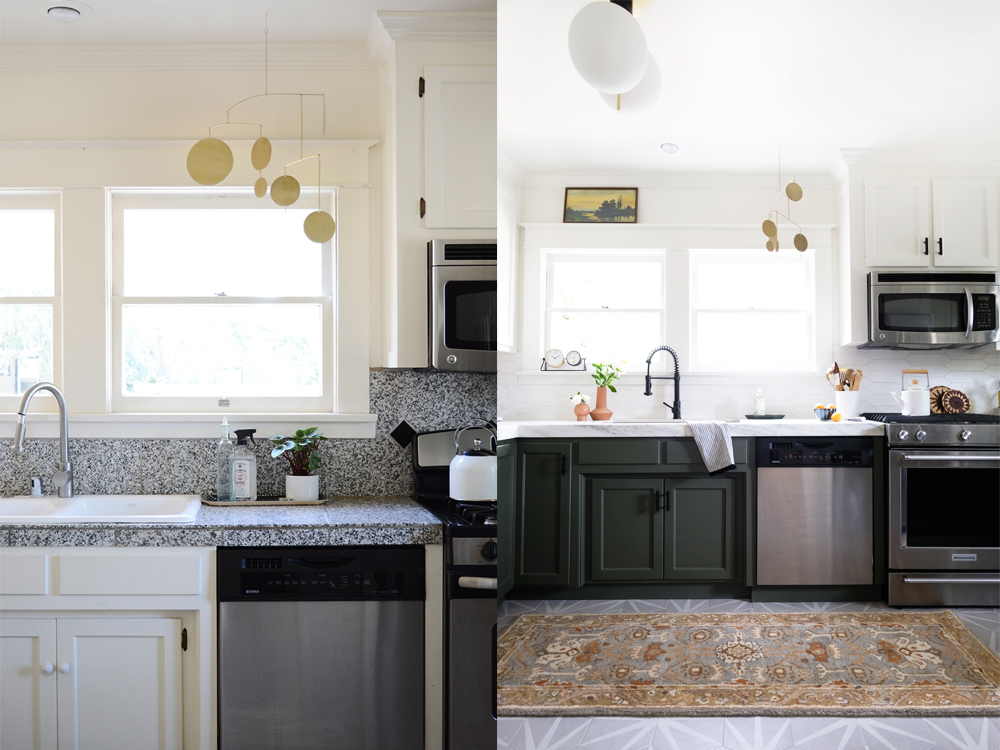
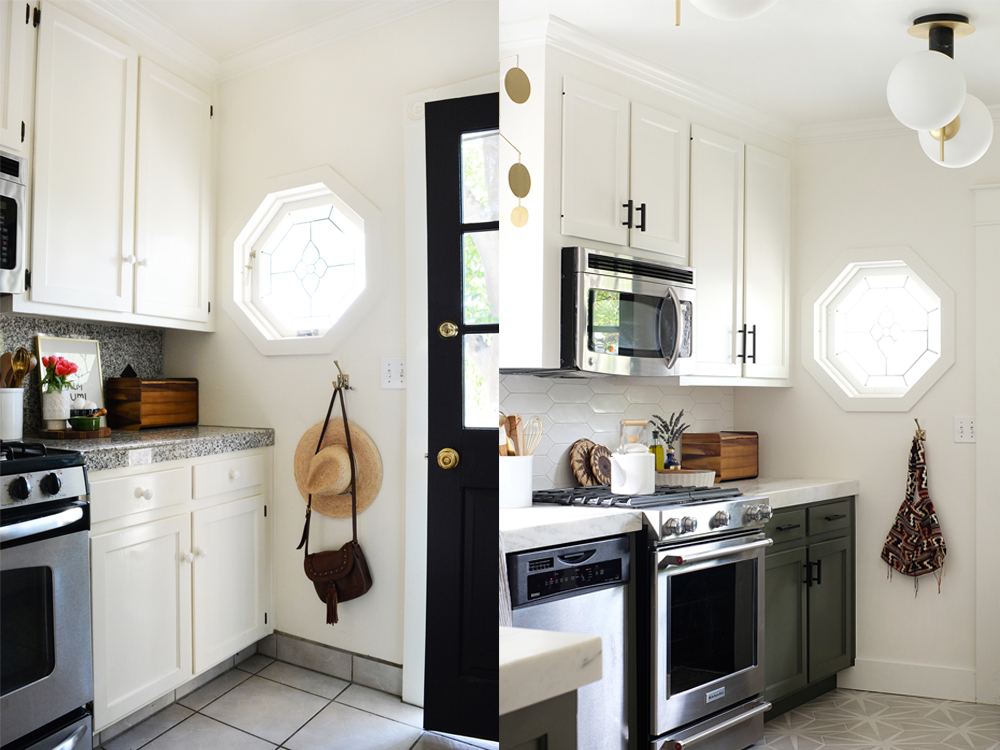
Ok, before I go into all the details, let’s look at some side by sides of “befores” and “afters”. Just in case you forgot what our kitchen looked like just 5 weeks ago.

As you can see, we did not change the floor plan, foot print or cabinets at all. This was really a cosmetic makeover. But, finishes can bring a lot of style to a space.

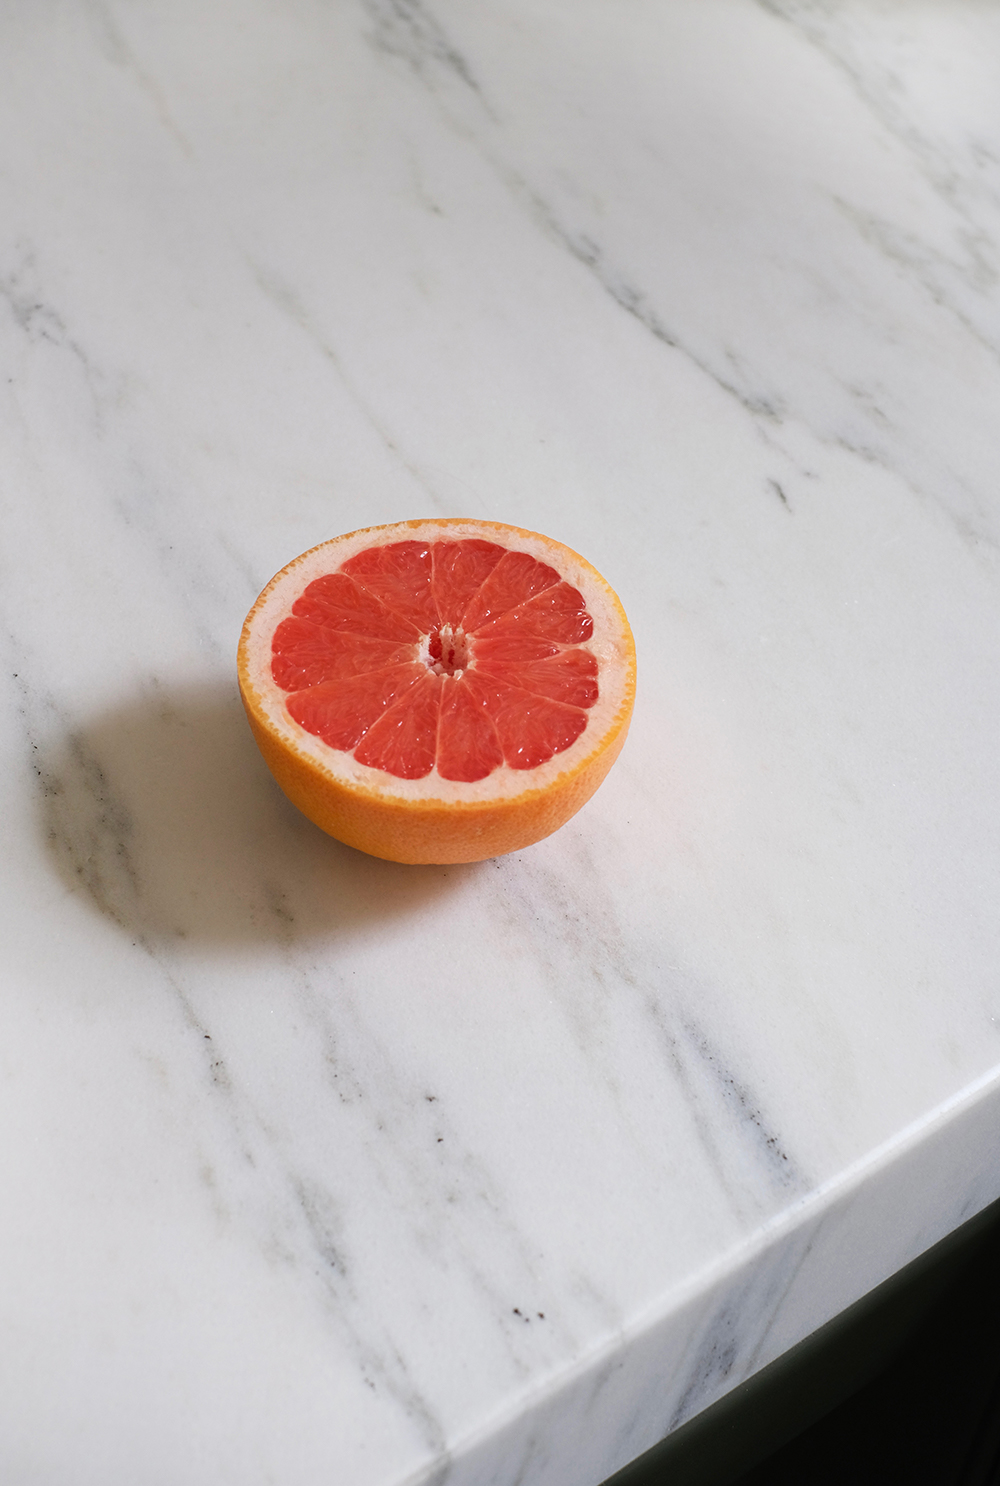
I teamed up with Bedrosians Tile and Stone on this room makeover and they have been a dream to work with. The team here in Bakersfield are the best! I couldn’t have found better floors, countertops and backsplash anywhere. They have so many options, but I think I went with the best! This honed marble is pretty much the prettiest thing I’ve ever owned. I’ve been wiping it down and polishing it over and over.

We hired Pat Callahan to fabricate our marble counters and install the tile. These guys are the best of the best and we are so happy with the work they did.

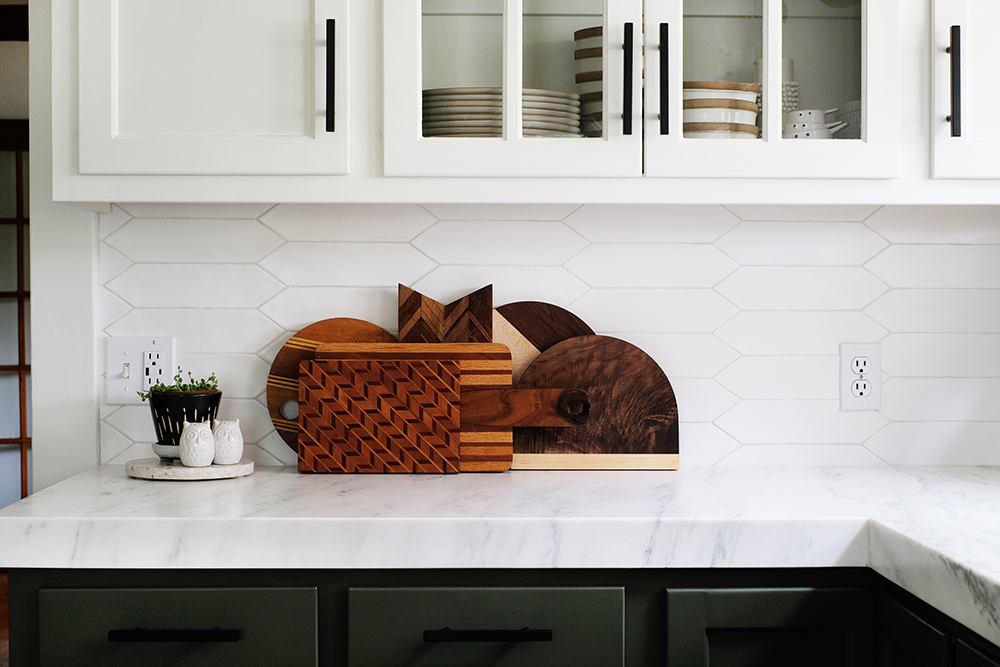
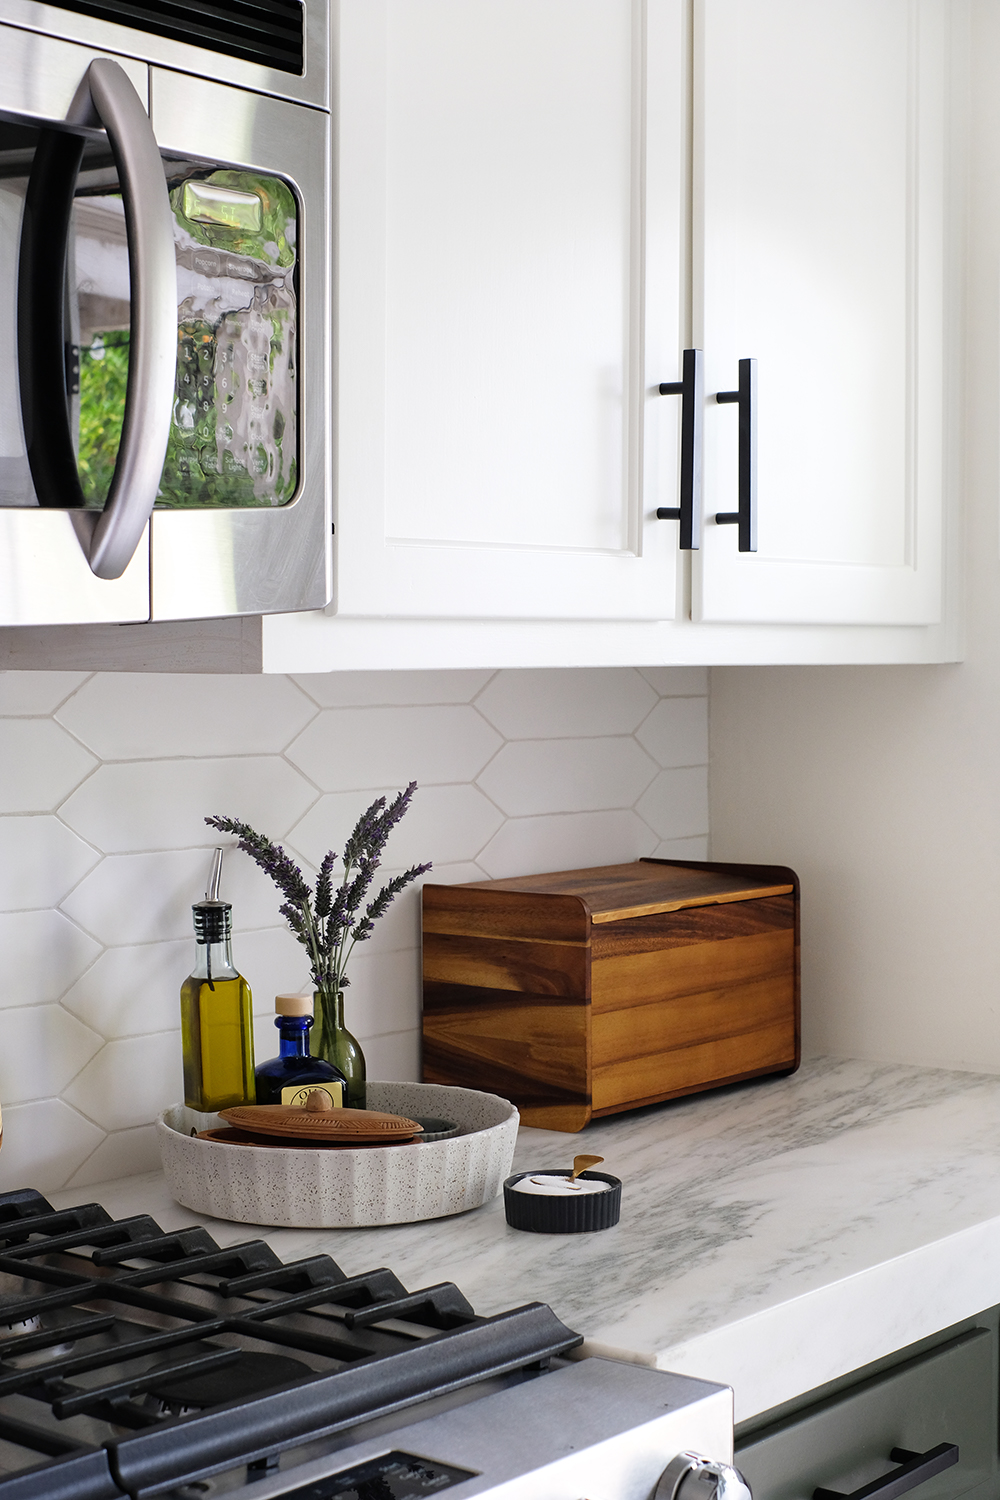
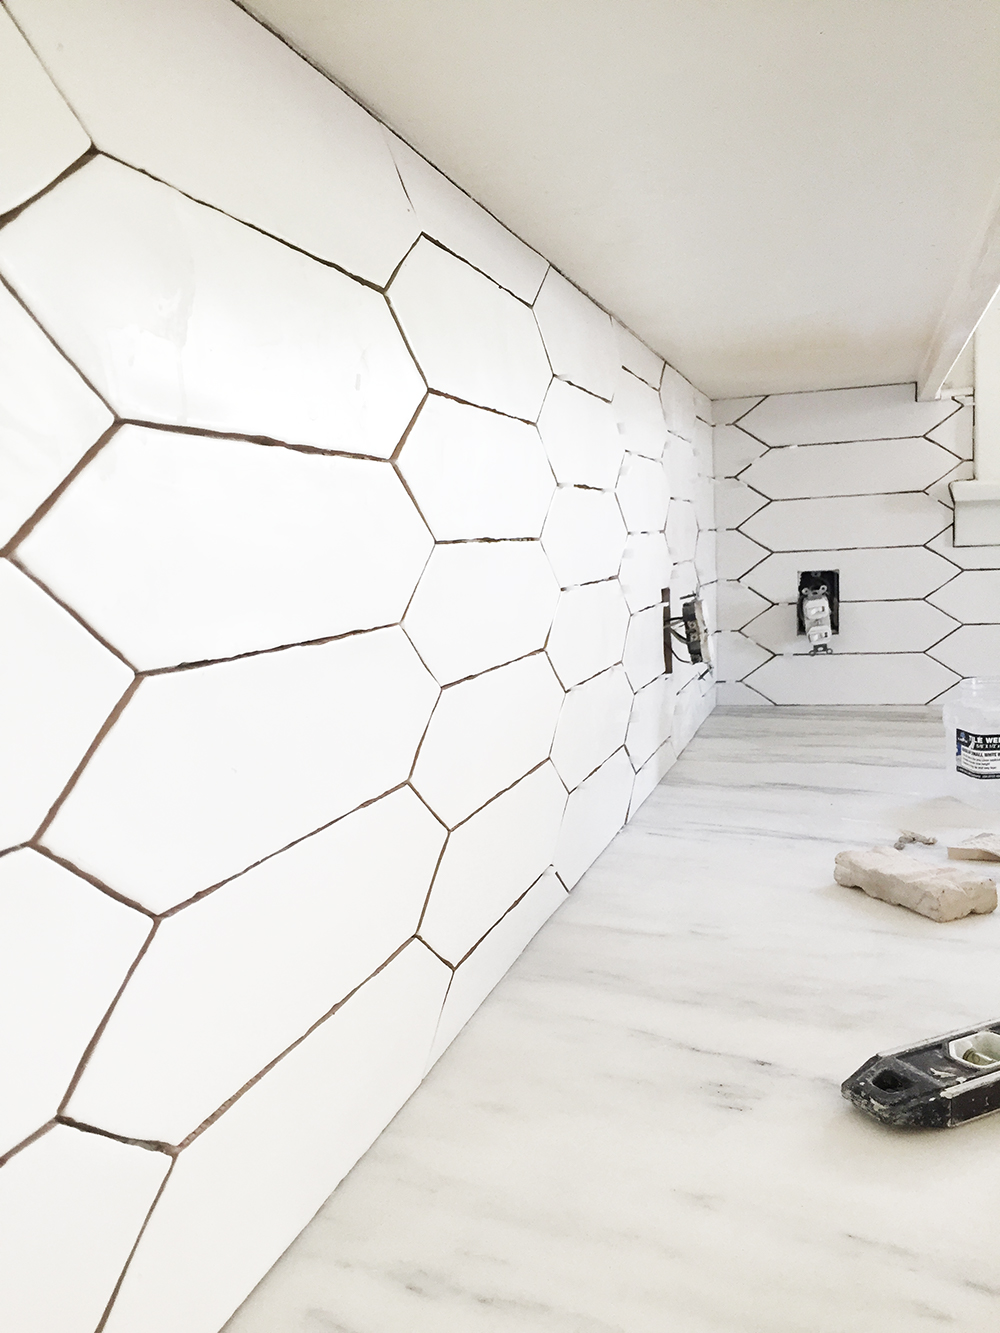
In our first house, I went with a very bold backsplash, it was avocado green glass. I LOVED it, but I’m excited to have a neutral, clean back drop. And while subway tile is a classic, I wanted to play with something with a little more pattern. So, this Reine 3″ x 12″ Wall Tile feels like a nice updated version of subway tile.

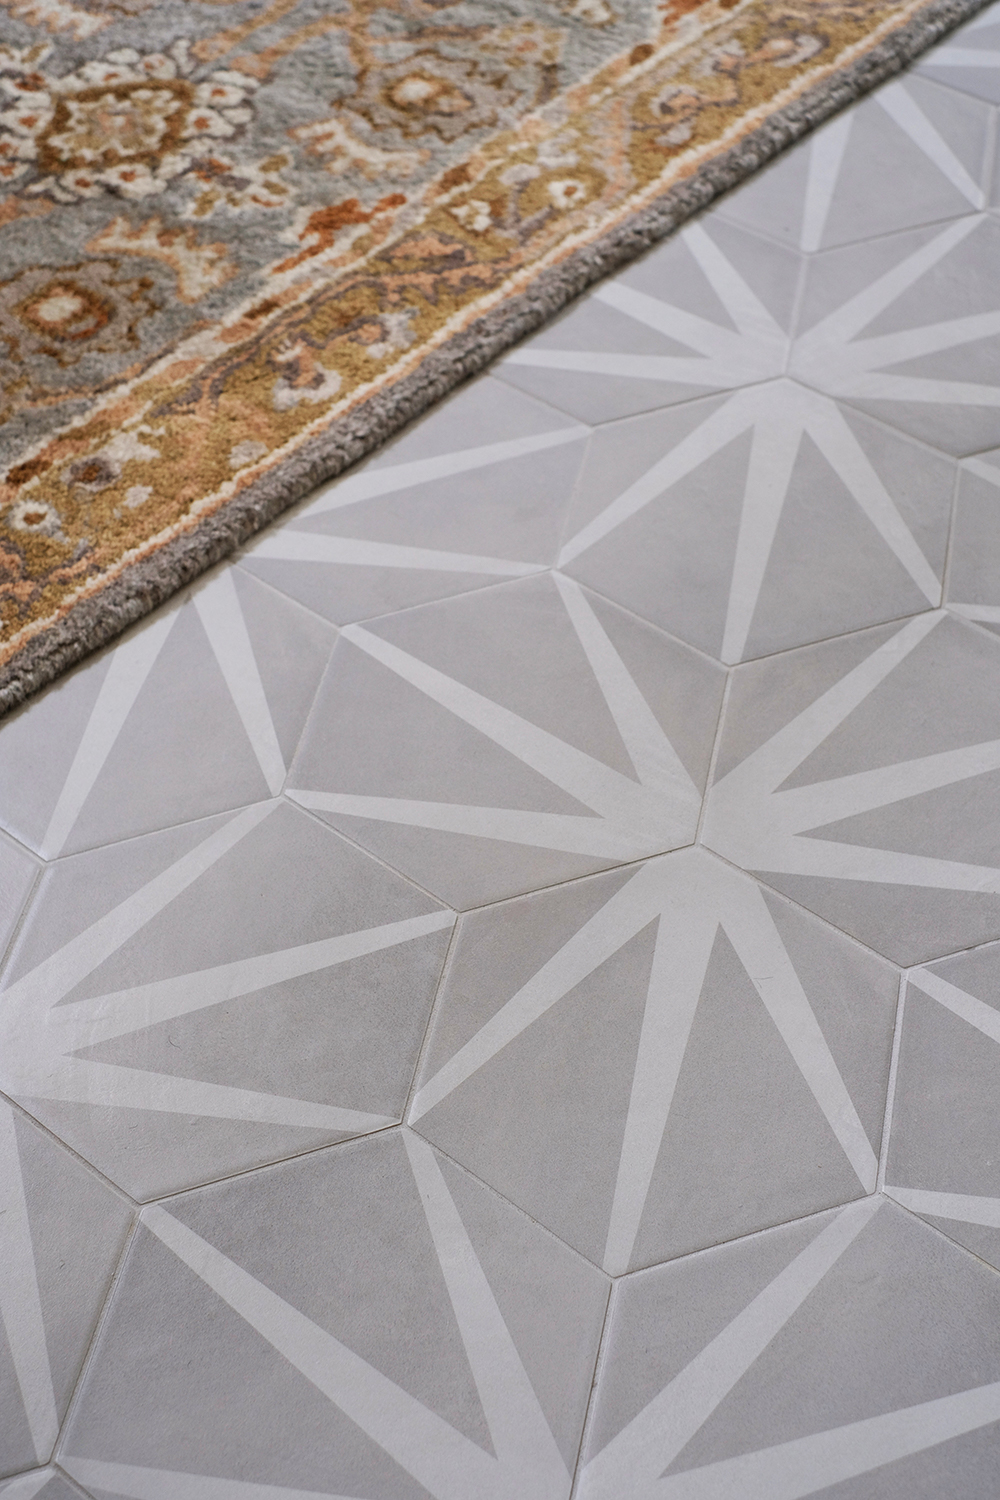
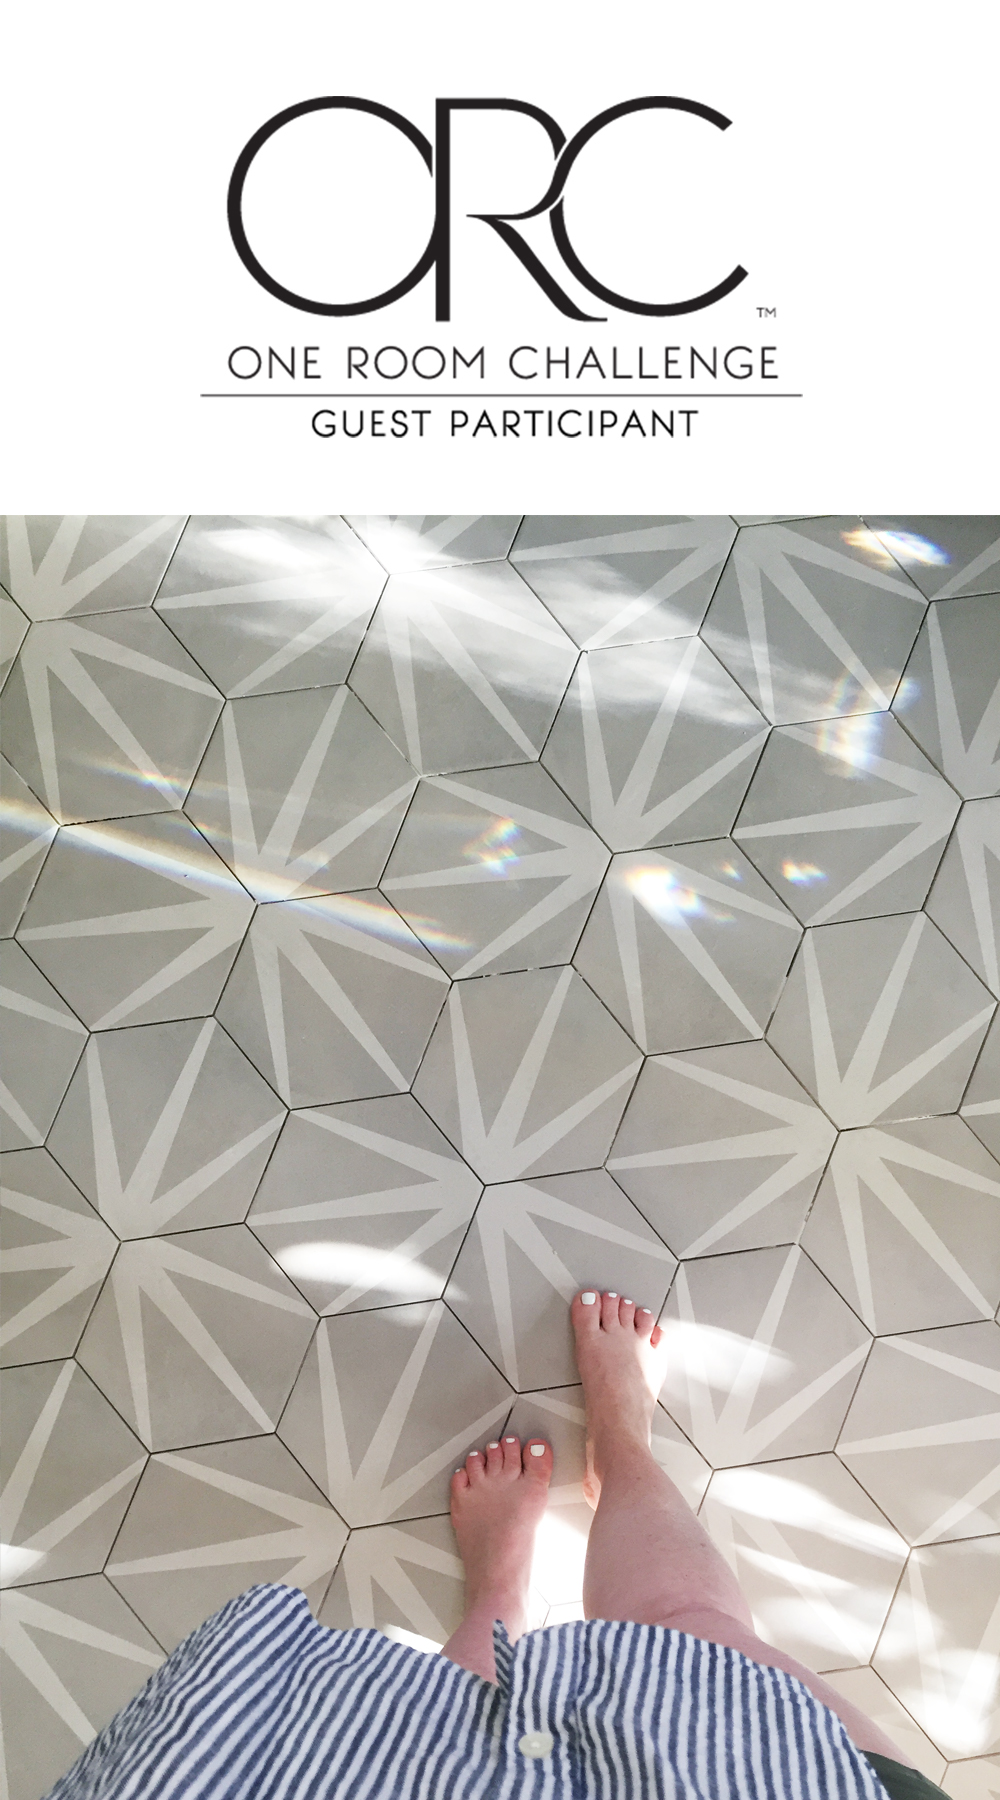
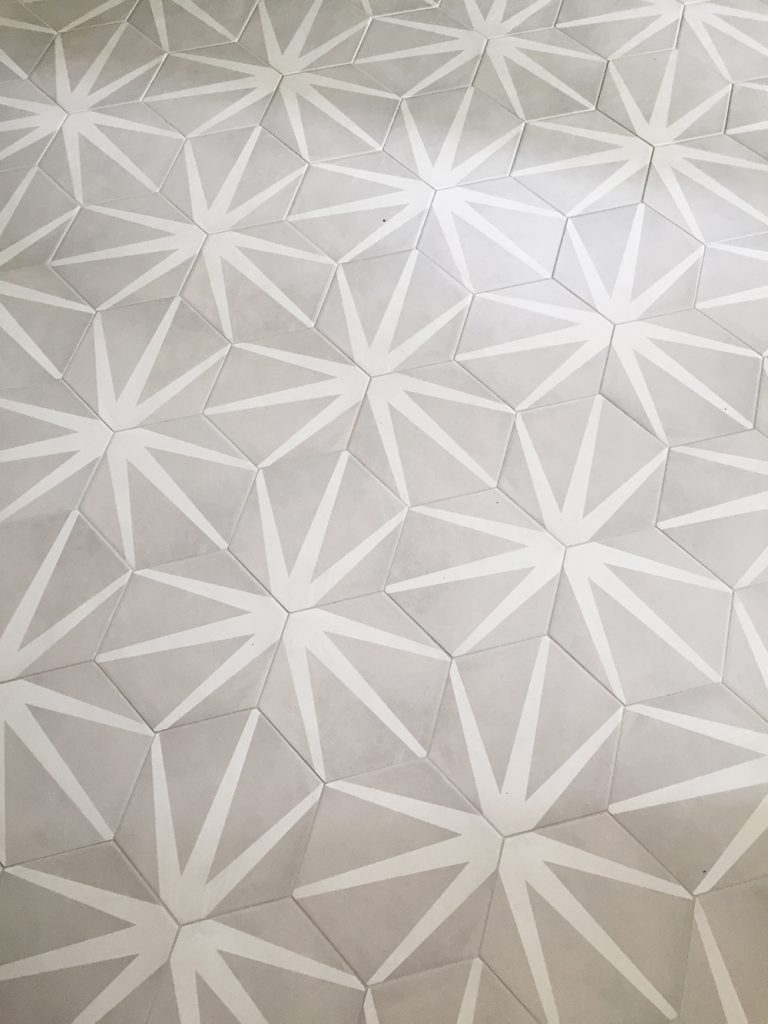
I think the floors make this space. And early on in the process I wasn’t sure if we would replace the floors or not. Oh gosh, I’m so glad we pulled the trigger and added the floors. I paired this modern starburst tile floors with a very traditional style rug and I think it works. I would have loved to have found a vintage rug, but I’ll be on the hunt. And until I do I actually really love this runner I found. It’s comfy under foot and it’s all the right colors. Often these Persian style rugs have a lot of reds and blues, which are colors I do not use very often. I love mixing old and new styles and I never wanted this kitchen to feel tooooo modern, so I think to rugs check all the right boxes.

Every inch of this room got a fresh coat of paint. I think we spend about 3 full weeks just sanding, filling, priming, painting and then sanding and painting some more. The walls and cabinets were a very yellow/cream color. We primed everything with UMA primer and then painted the walls, ceiling and upper cabinets Sherwin Williams Alabaster White and the lowers a Benjamin Moore color, Dark Olive. We used Sherwin Williams, Emerald Urethane Trim Enamel Trim Paint in Satin. I actually had a hard time deciding between a semi-gloss or satin finish, but I’m really glad I opted for something with very little sheen. The paint sprayer saved the day! We just wouldn’t have gotten this awesome, professional finish with a brush or roller.

A friend came over last week and thought we had replaced our windows. I was flattered, these 100 year old windows look fantastic because we sanded and filled and sanded some more. It’s really amazing the power of a fresh coat of paint.

You can see here that having a paint sprayer really paid off. Everything came out looking like brand new cabinetry.

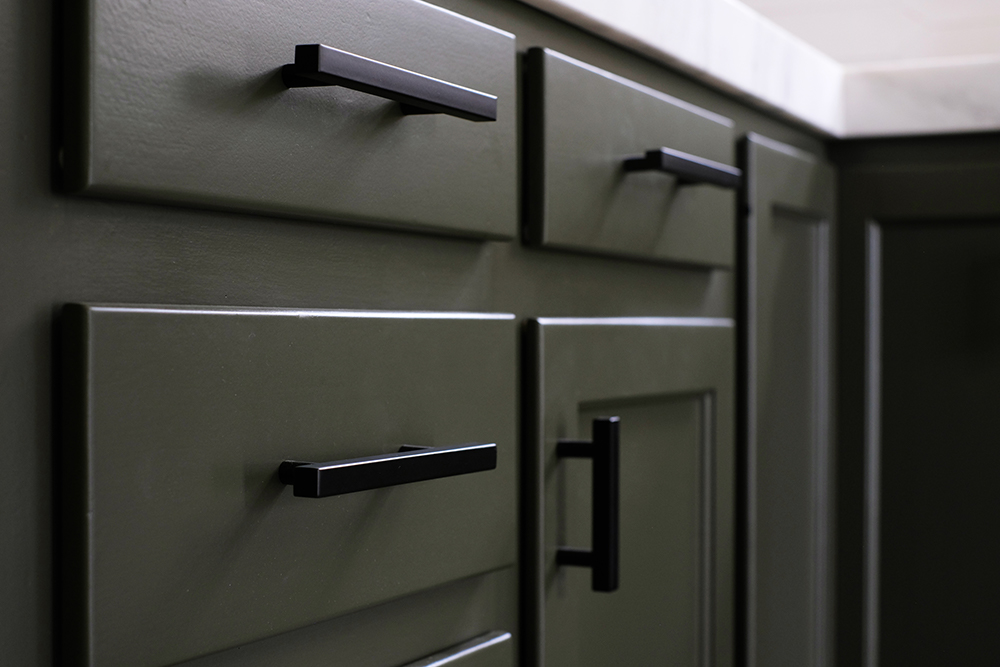
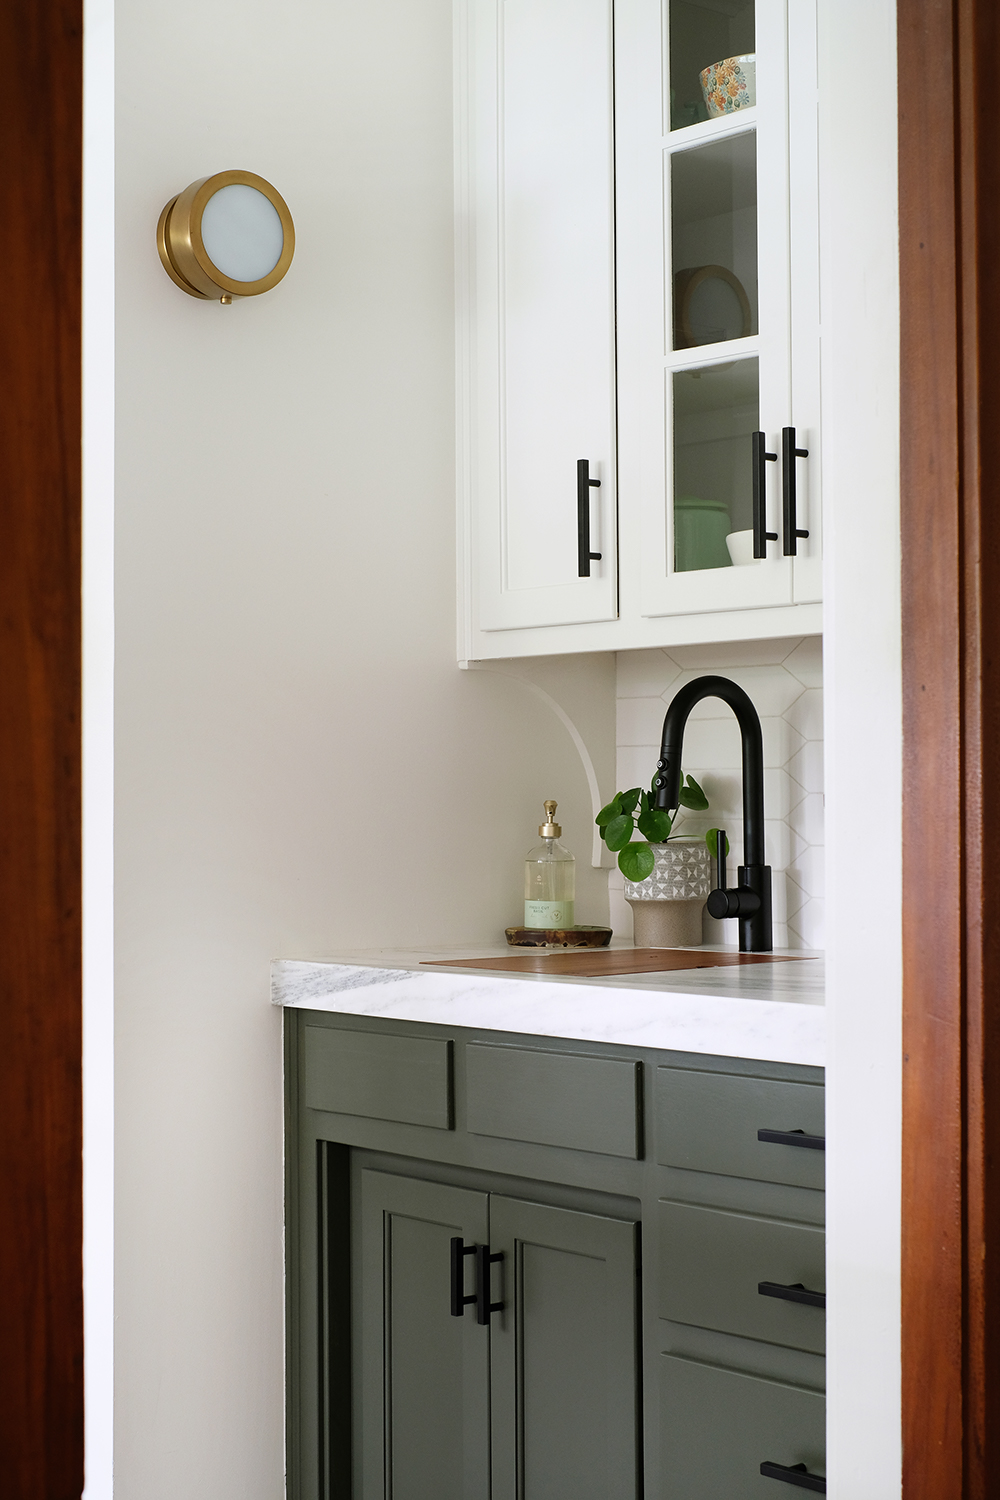
Changing the hardware on the cabinets had a really big impact as well. I actually think these matte black handles really add to the Craftsman feel of this space.

We also changed out all the hinges on the cabinets. If you look back at the befores, you can see that the hinges were exposed on the outside of the cabinet doors. It took some research to find the right hinges, but I think this was a really a great investment for our kitchen.

We kept all our old appliances. Just the stove is semi-new from what is in the “before” pics. We got this new stove last Fall. The old stove was very inefficient and actually heated up the entire house whenever I baked anything – hence no cookies in the Summer. The only appliance I would like to replace in the near future (but probably won’t happen until it dies) is the fridge. It’s a great fridge, it is just too big and sticks out too far from the cabinets. We brought it from out old house. Ideally, I’d probably like a counter depth fridge at some point. This isn’t a huge kitchen, so those couple extra inches might be nice to gain. But, until that day, I’m totally a-ok with my fridge sticking out a bit.

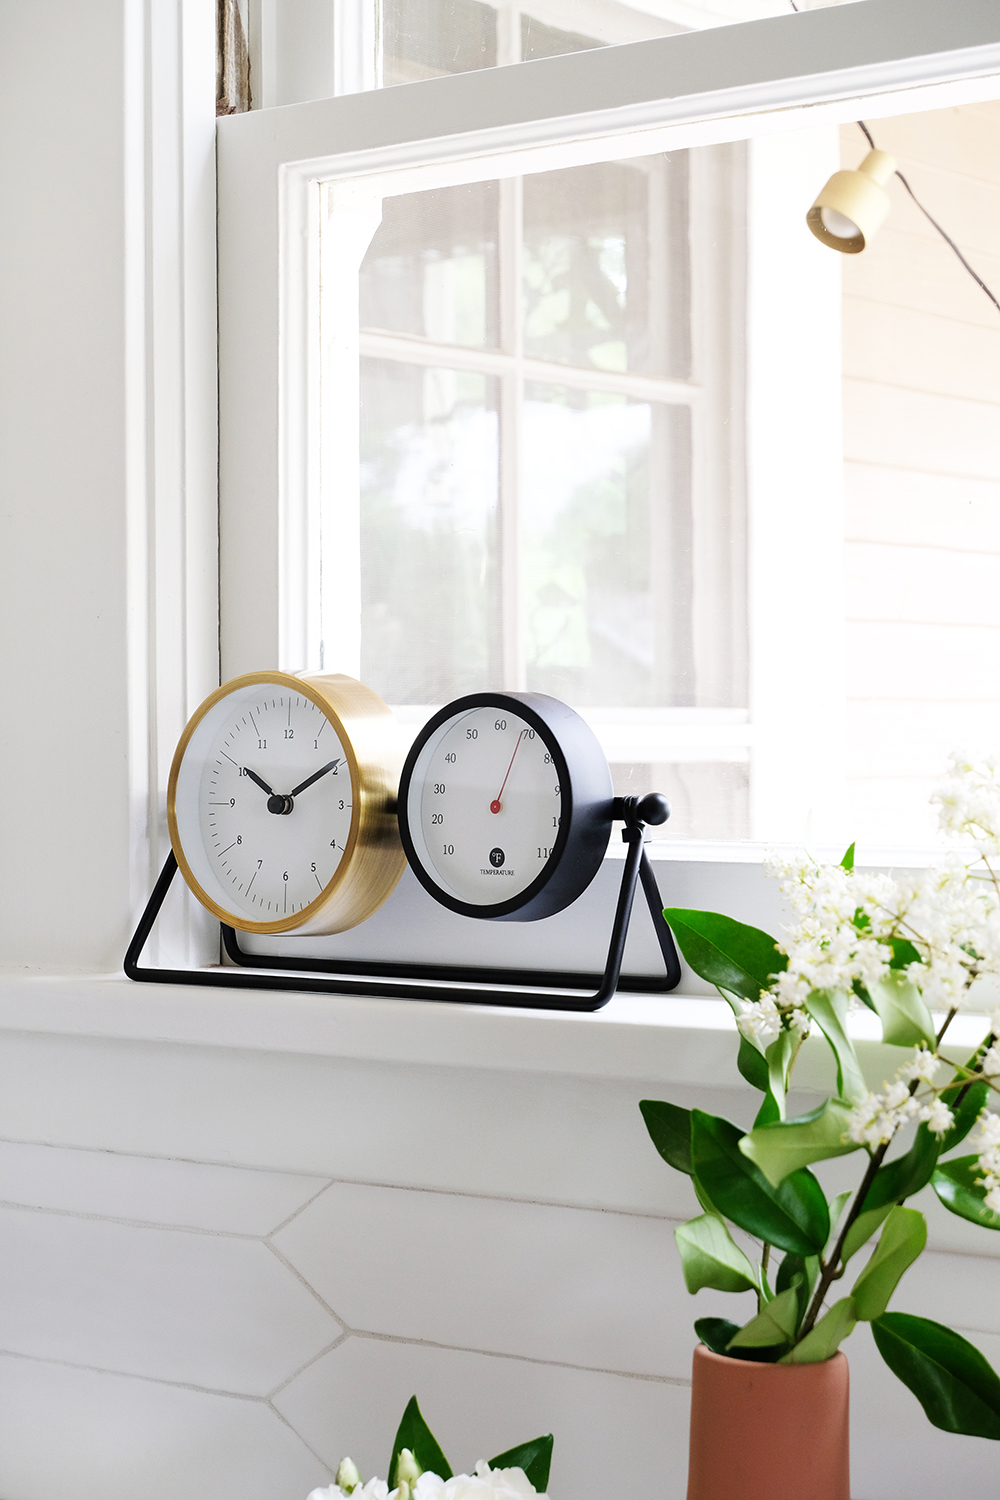
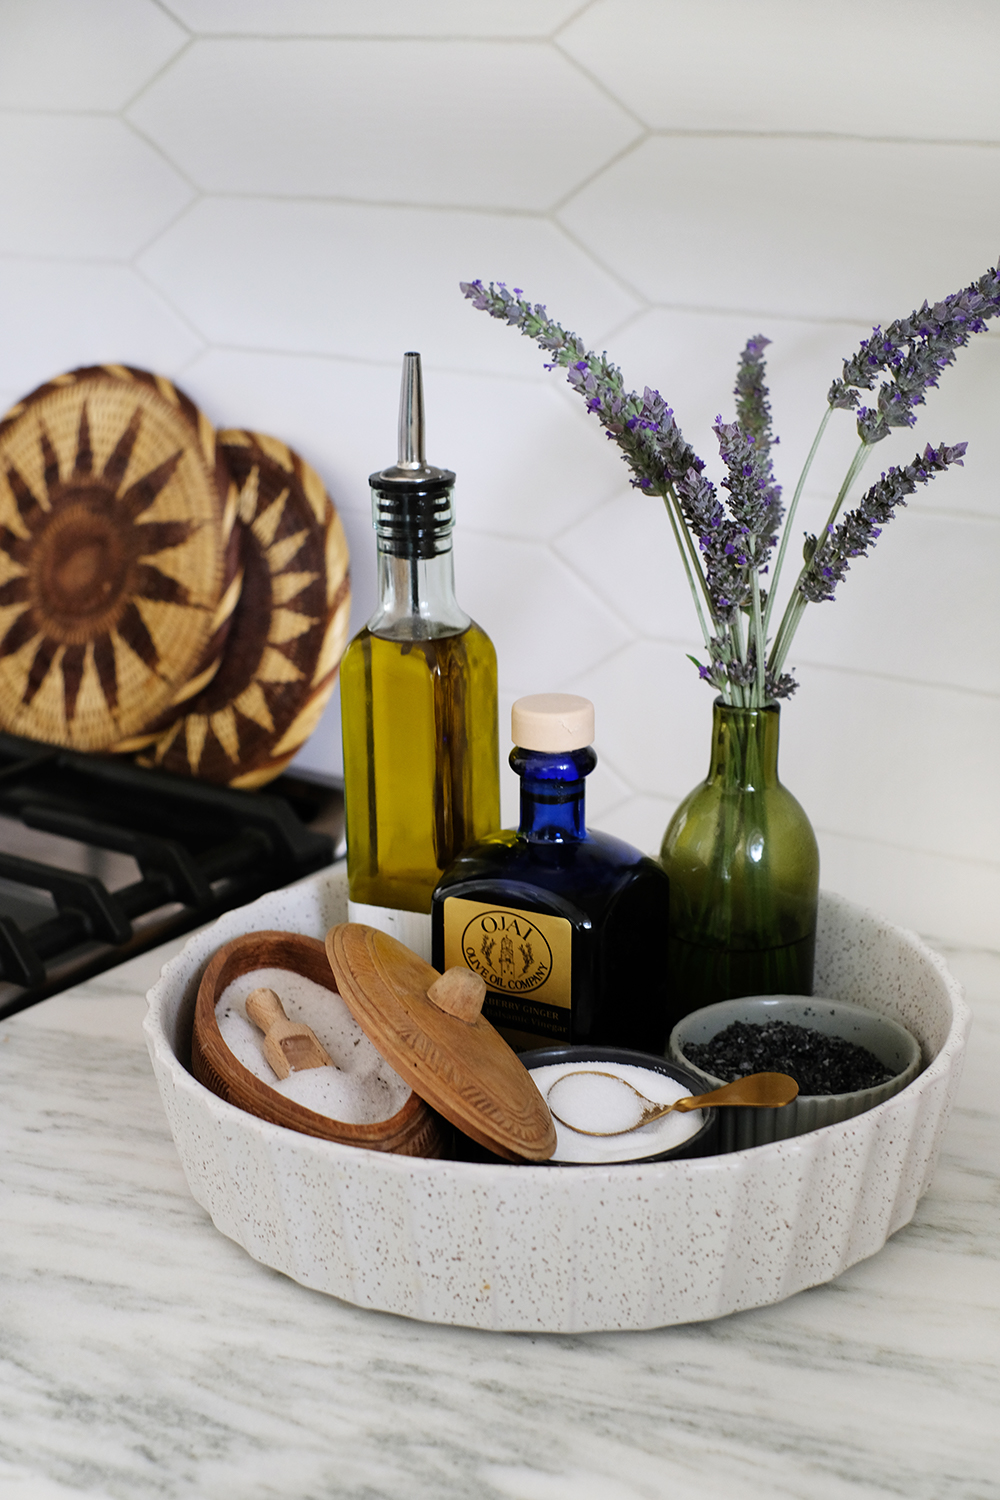
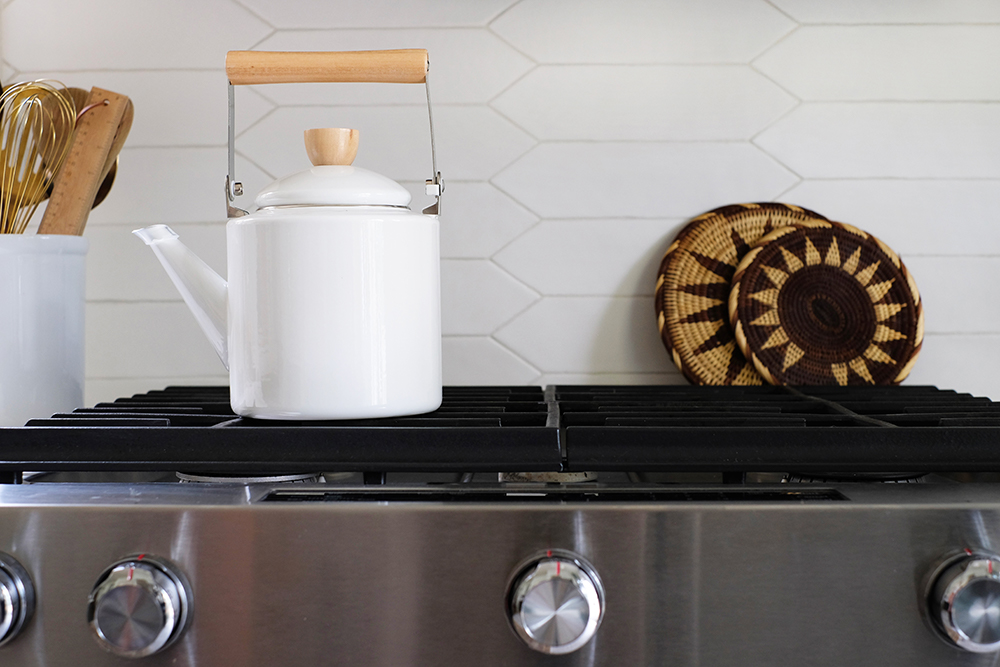
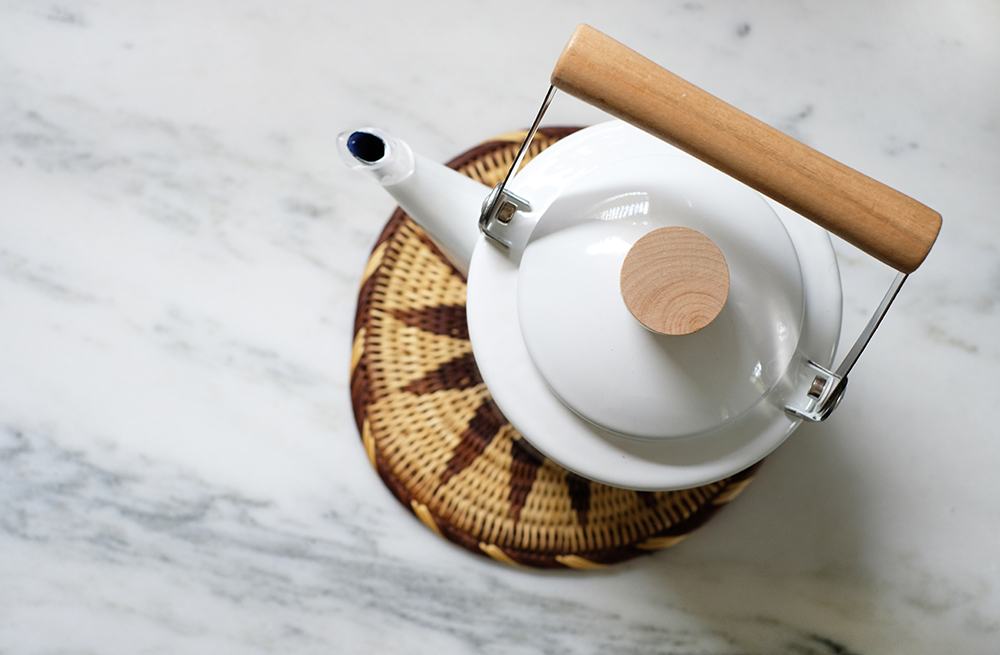
A new kitchen needs a new kettle. I love this simple Japanese one I found. I really didn’t buy any other new accessories for the space, all my old stuff just looks new in this space.

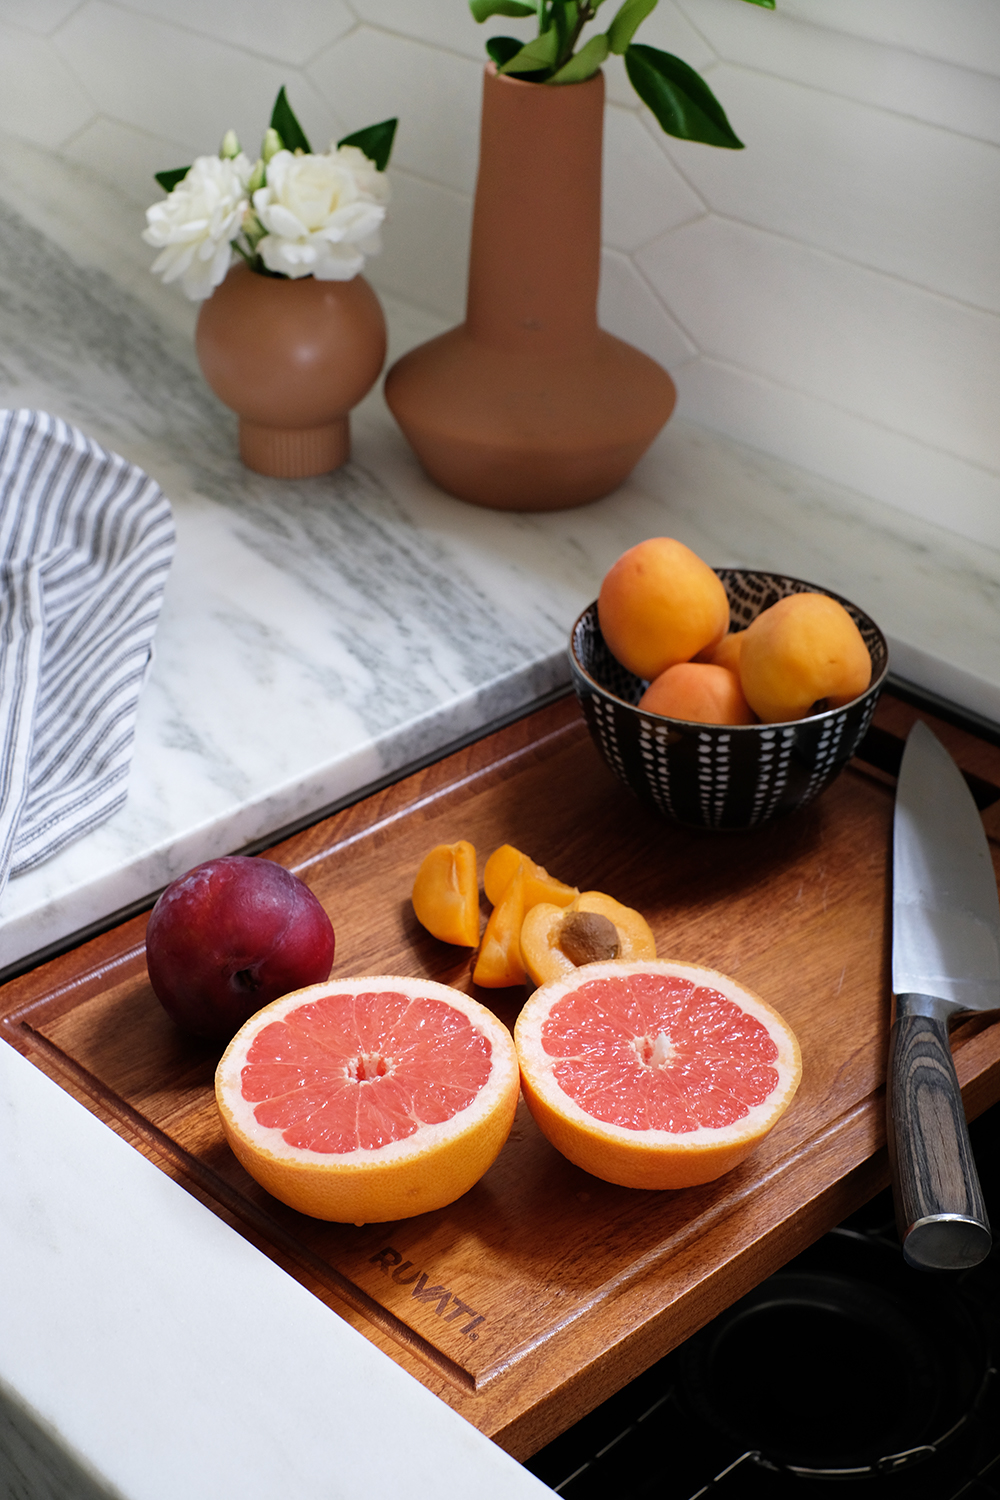
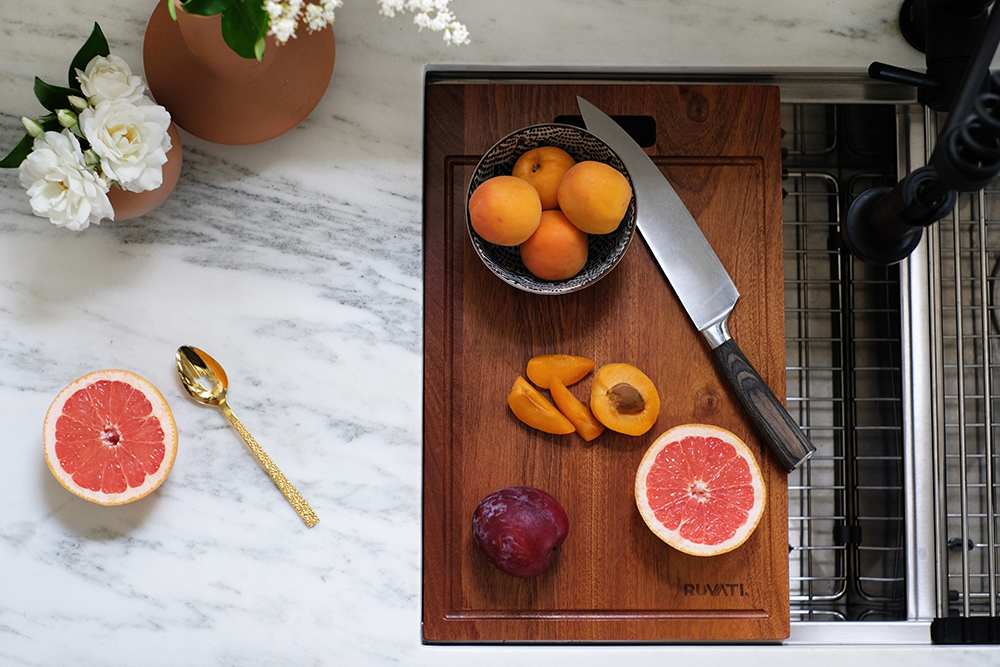
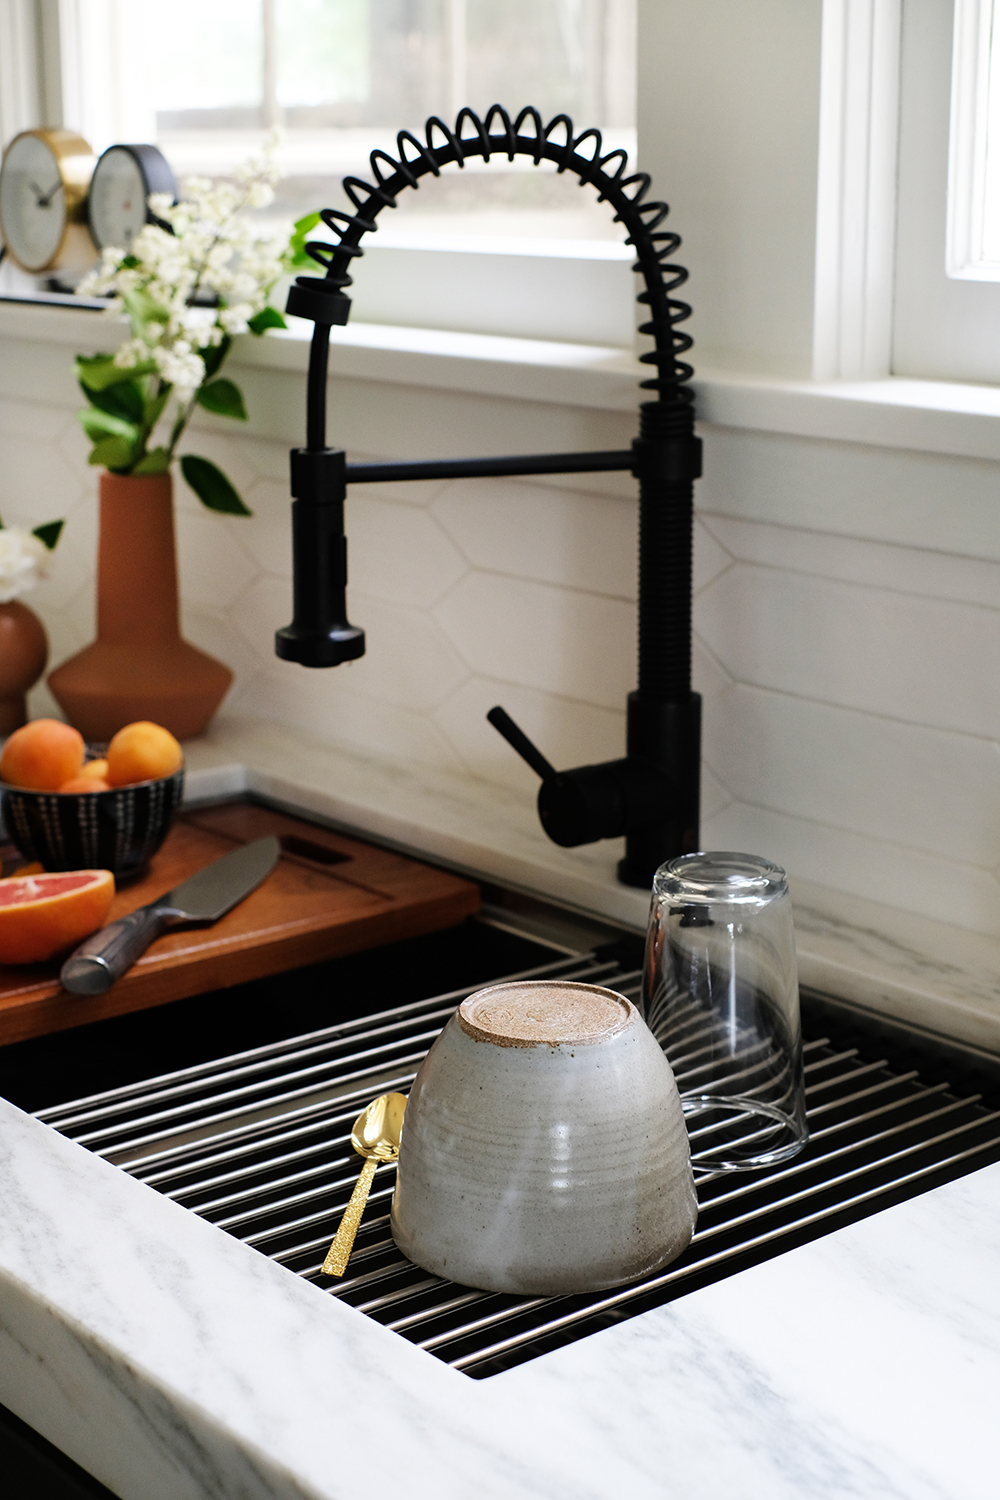
The sinks we installed are amazing, they are big and deep and have cool components like cutting boards, drying racks and colanders. The bar sink is huge and has a cutting board and the main double sink has a ton of cool accessories.

No more dish drainer taking up real estate on my counters, this drying rack is one of the coolest features.

The little wet bar, or as we refer to it as the coffee bar, looks fantastic with the new lighting and the two-toned cabinets.

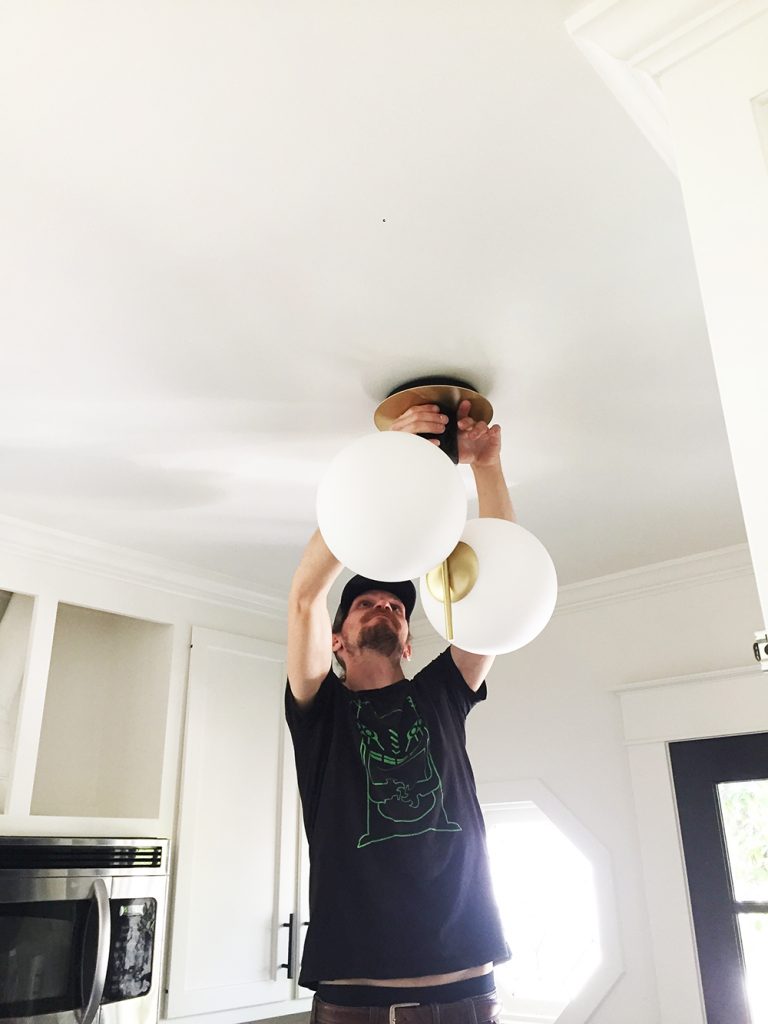
We also got rid of the random lighting combinations and the “boob” light fan and replaced then with two really cool globe pendants.

We hung them in different directions for a little interest. Nothing about this kitchen is very symmetrical, so we decided to play a bit.

I also changed up the art that was on the wall a bit and added a little more color and pattern.

This is one of my favorite before/after pairs.

Well, that’s our new kitchen! What do you think? I wanna know. And if you in the neighborhood, please stop by for a cup of coffee (I mean it).

DIY / etc.

Spring One Room Challenge Week 5

May 9, 2019

Well, I’m a little late with this week’s One Room Challenge post. We’ve been going full steam ahead. We are SOOO CLOSE to being done. And full disclosure, I am so completely exhausted. I think I’ve cried at least once everyday (maybe that’s more hormones too – who knows). But, this room has been no joke. It’s taken a toll on my body, but I think it’s really going to be worth it in the end. And if you follow me on IG stories, you know that my brother, Ash, is really doing most of the work. I can’t thank him enough.

I’ve also missed cooking. Sometimes I get sick of making meals everyday – but currently, recipes are on my mind all the time. Like, I can’t wait to bake some chocolate chip cookies and poach an egg for breakfast.
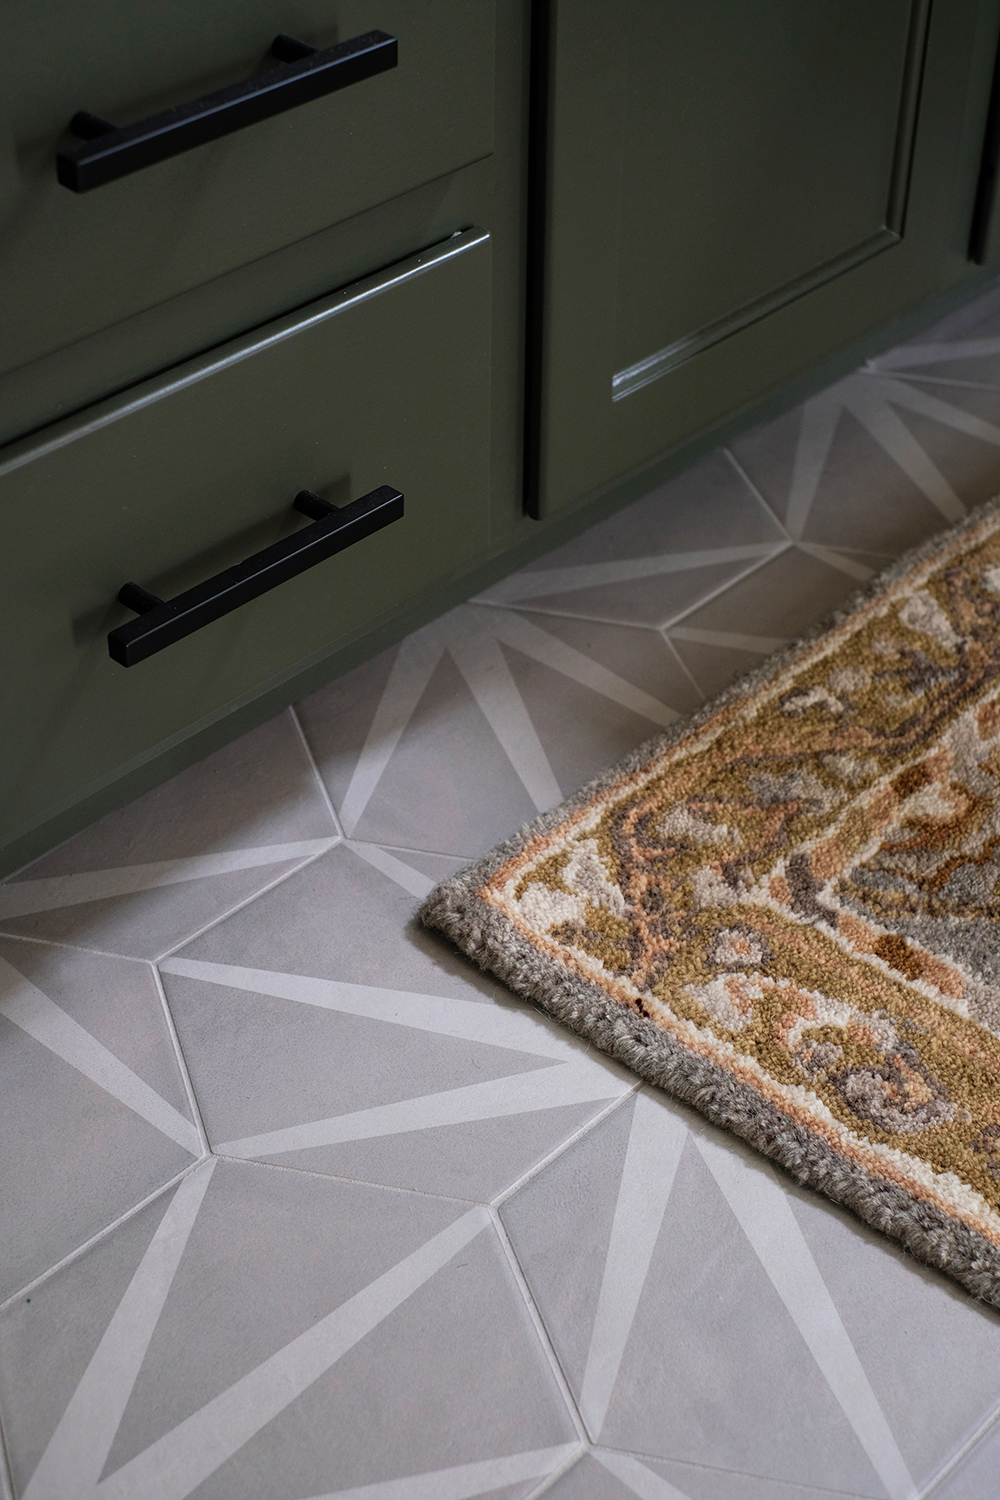
This week some big changes happened. The tile went in! The backsplash and floors were put in just before the weekend and then both were grouted on Monday. Oh man the tile is gorgeous you guys. And one point in this renovation I thought I might just save some money and just keep the floors as is. Oh gosh I’m glad I changed my mind. These hex tiles from Bedrosians make this room! The backsplash is even better then I thought it would be and I’m so happy that I went with the matte white finish. The room feels so much bigger and brighter with light countertops and light backsplash. It’s amazing the difference it makes.

And while tile was being put it, we were still PAINTING and working on touch up. I thought we’d never be done and as I was hanging the last couple of cabinets I realized that we had painted two of the uppers dark olive and two of the lowers white. Grrrrr. That meant sanding, priming and spraying TWO MORE TIMES! It’s not that the spraying is tough, it’s just all the set up and clean up.

While the grout dried, we couldn’t move the appliances back in, so we worked on plumbing. Plumbing is always a nightmare, as far as I’m concerned. The simplest jobs require so many parts, that you end up making 15 trips to the hardware store. Just finding a big enough basin wrench is tough, I had to go to 3 stores. Because our cabinets are older, and my sink is HUGE, there is very little space between the wall and the sink for the faucet. So, needless to say, it was not easy to get tools up in there to tighten down the fixtures.
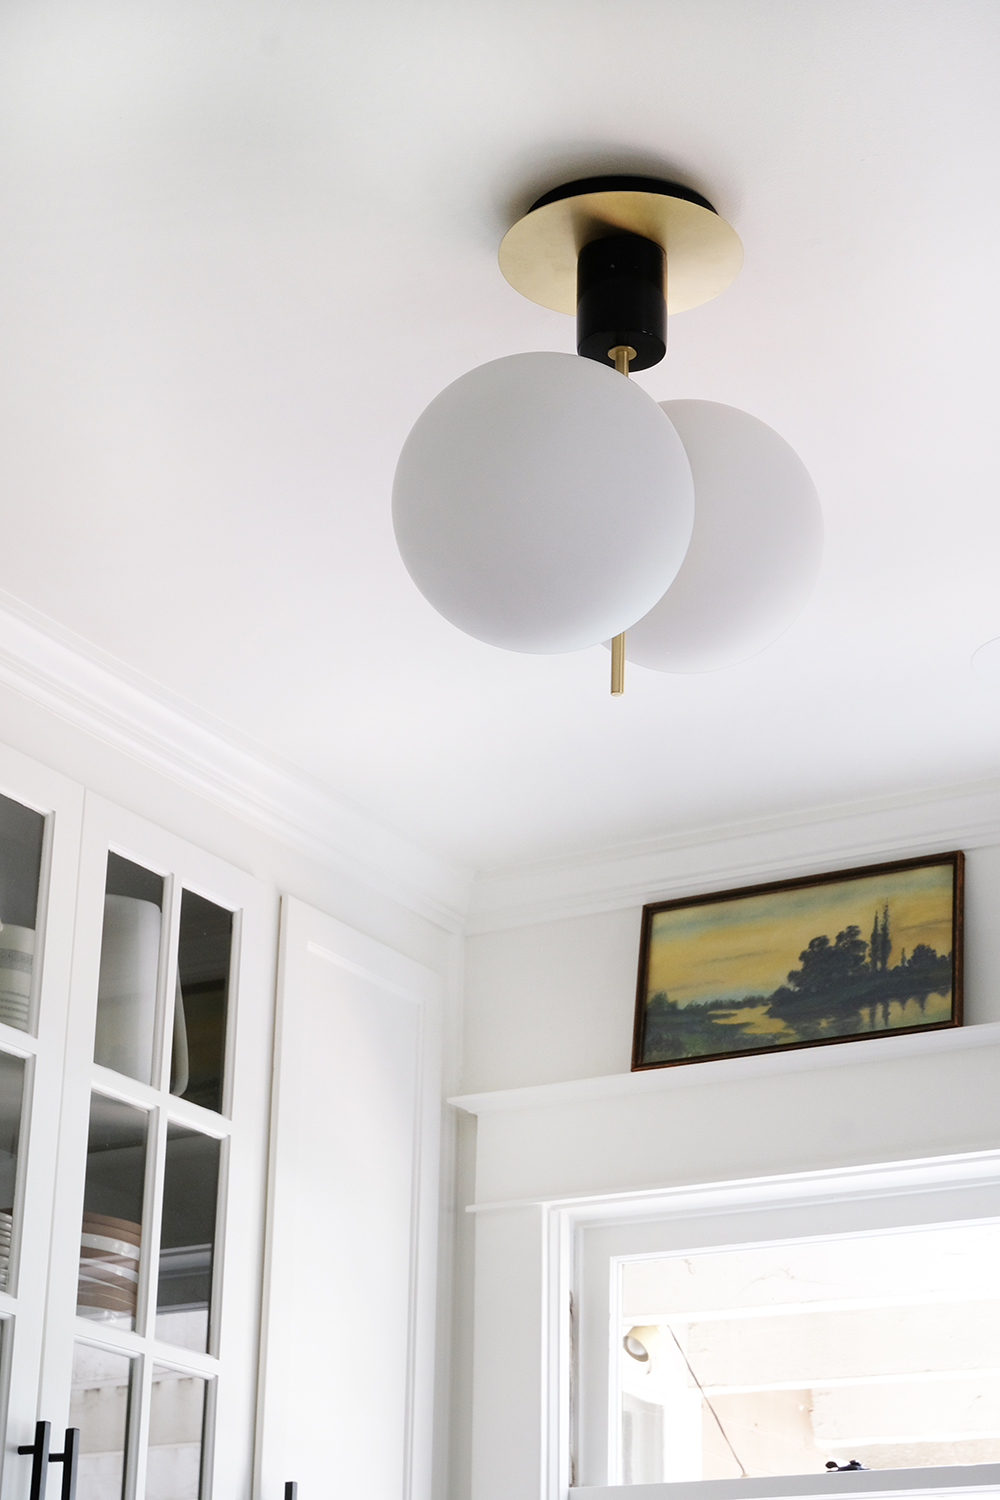
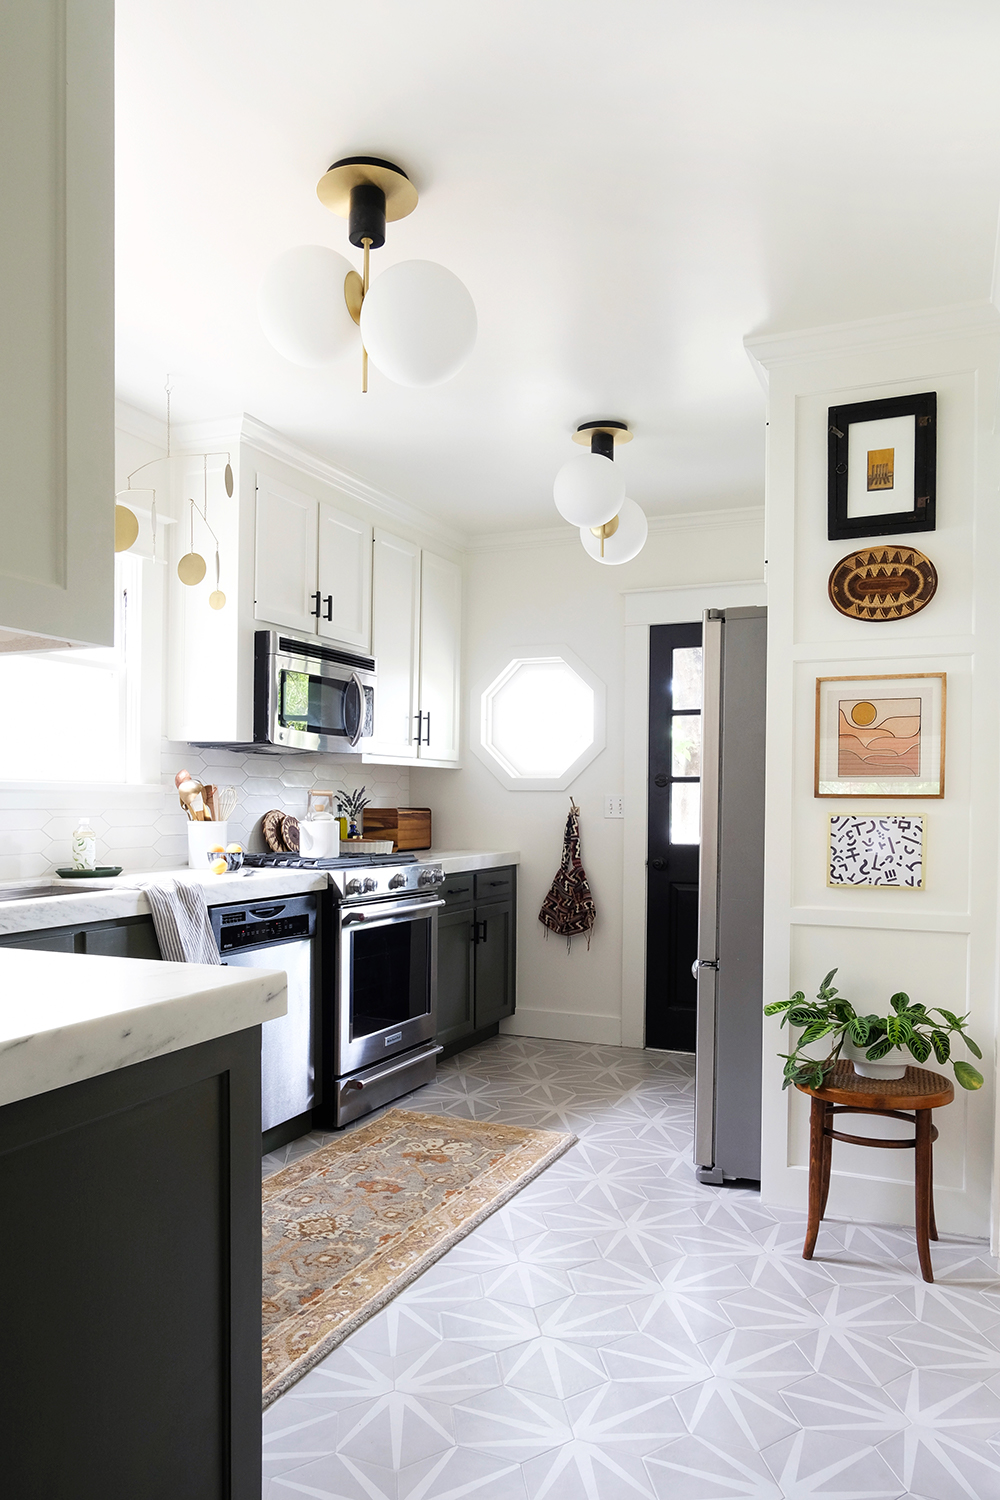
One of the last things we have left to do is hang the lighting fixtures. I hope I love them once they are in. I really wanted something unique and had a little funk to them. These lights are not exactly the look I was going for, but they are close and they were reasonably priced. So, I’m taking a risk and installing them. I have a feeling, I’m going to be really happy with my choice.

I really can’t wait to share this whole space with you. Tomorrow I get to style the space (my favorite part). And then, PICTURES! The full reveal is coming soon friends. Thank you so much for following along.

DIY

DIY Mother’s Day Coupons and Gift Basket

May 1, 2019

Let’s be honest, moms deserve ALL THE TREATS! With Mother’s Day right around the corner, I think it’s time to chat about what moms really want and some fun gift ideas. Oh and keep reading, because there is a fun giveaway this week as well.

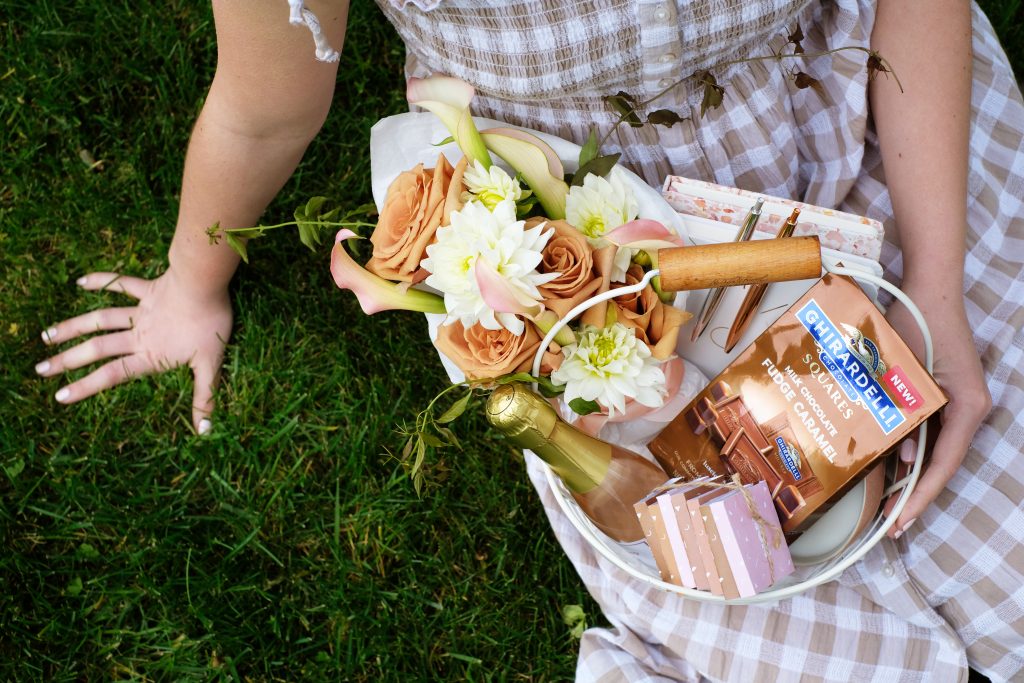
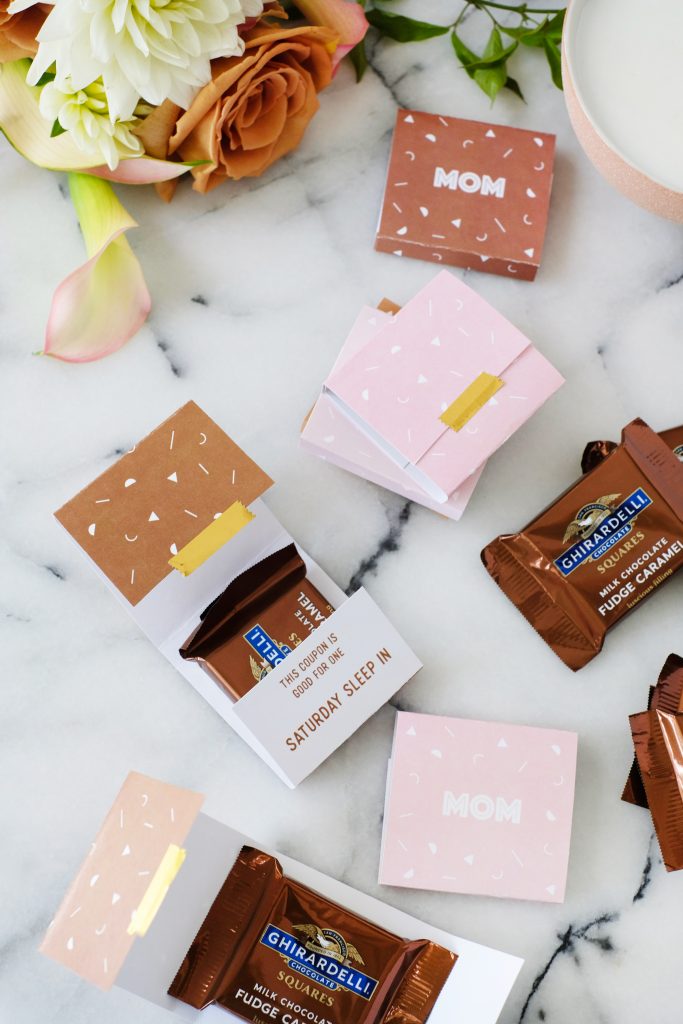
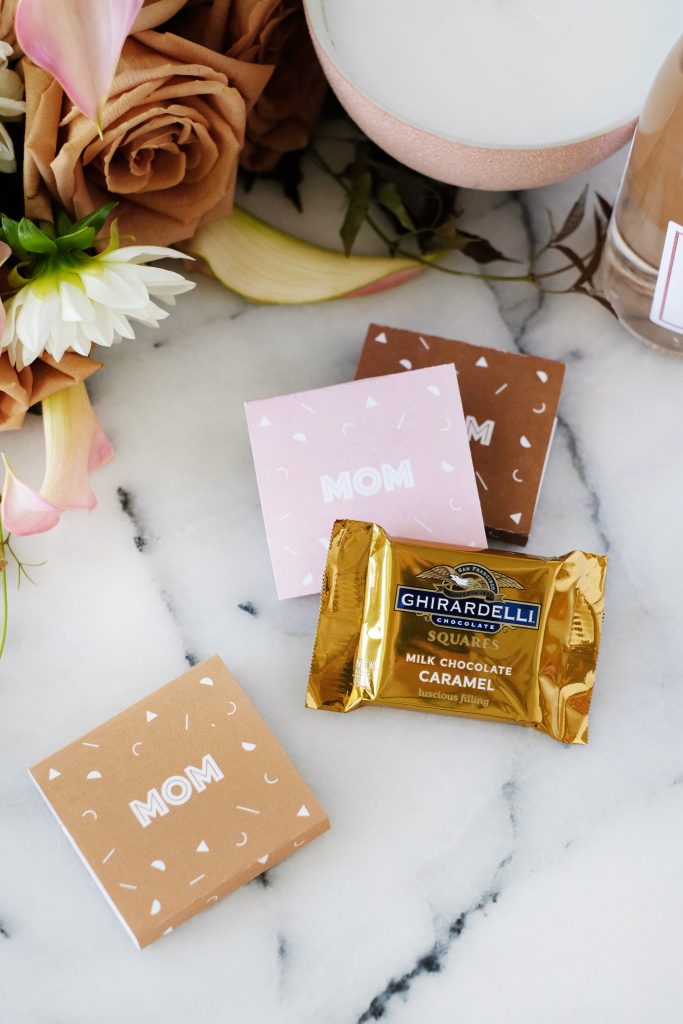
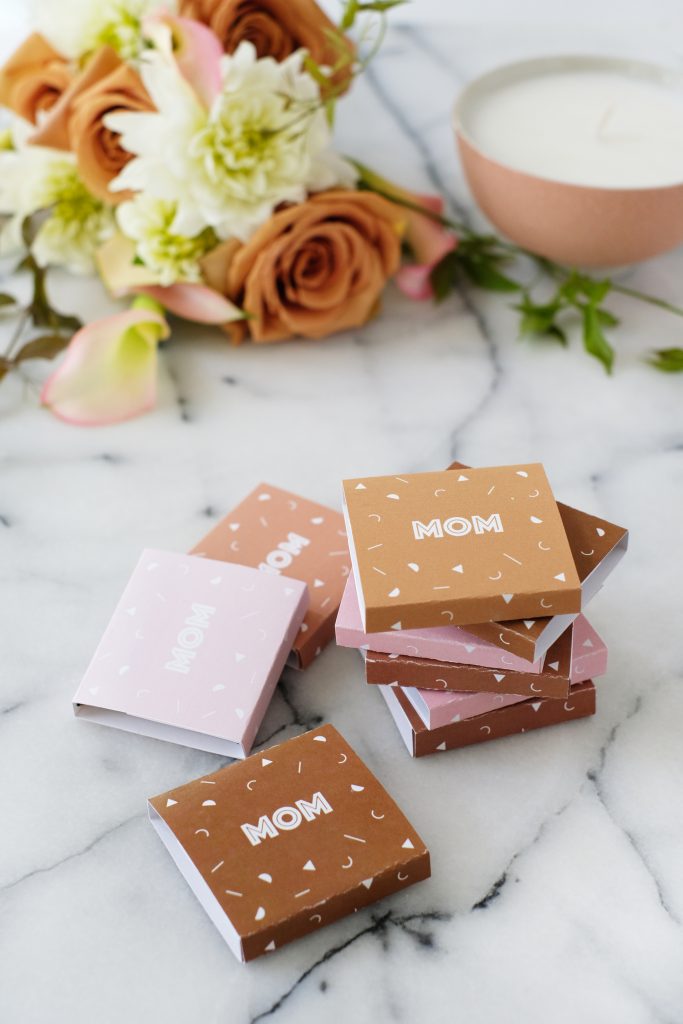
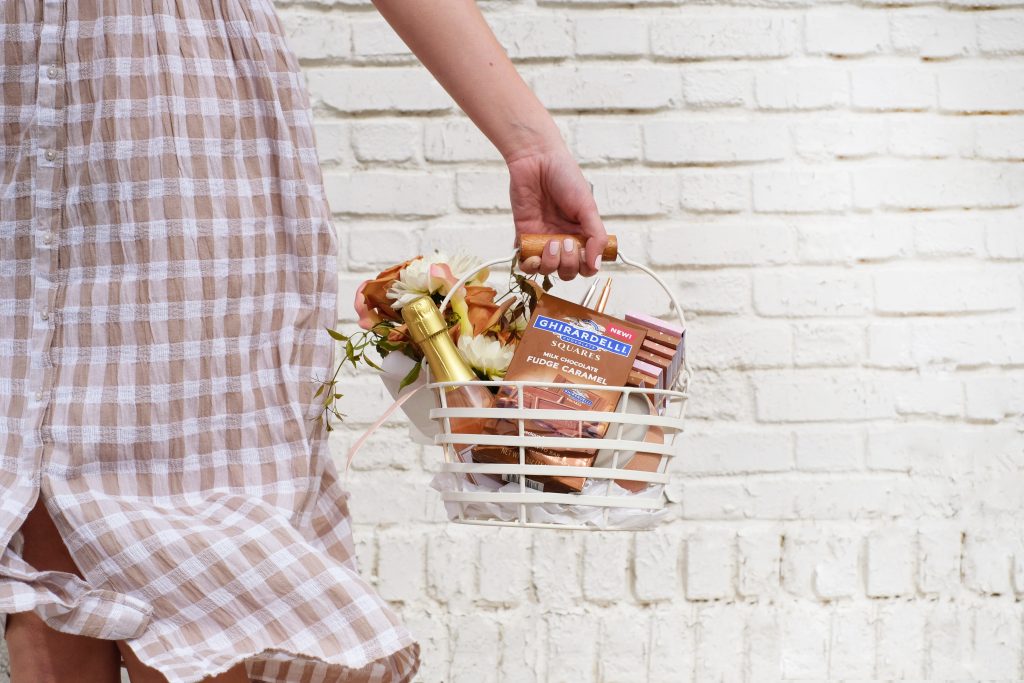
Being a mom is the hardest, but most rewarding job there is. I don’t know very many moms that couldn’t use just a little time to themselves and maybe a little self care time. So, I teamed up with Ghirardelli to put together a Mother’s Day basket to help make that happen, because “Ghirardelli Makes Life a Bite Better”. I filled this basket with all the things to create a little oasis at home – a yummy candle, a mini bouquet of fresh flowers, a couple journals, some pretty pens, a bottle of bubbly and cute little printable Mom Coupons filled with Ghirardelli Milk Chocolate Caramel Squares and Chocolate Fudge Caramel Squares. What more could a mom want?

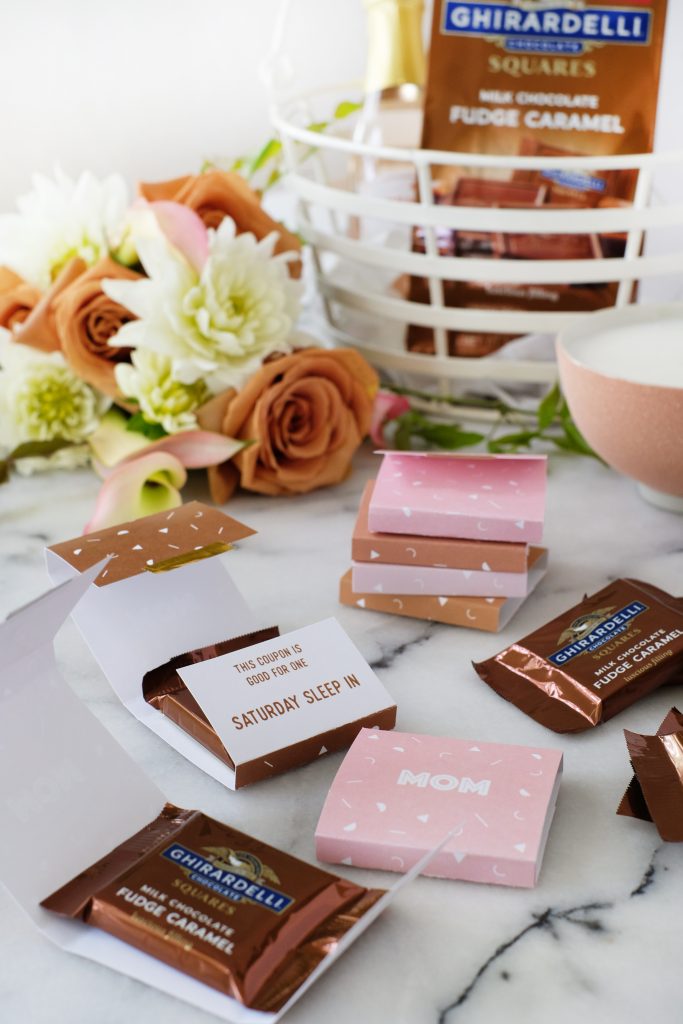
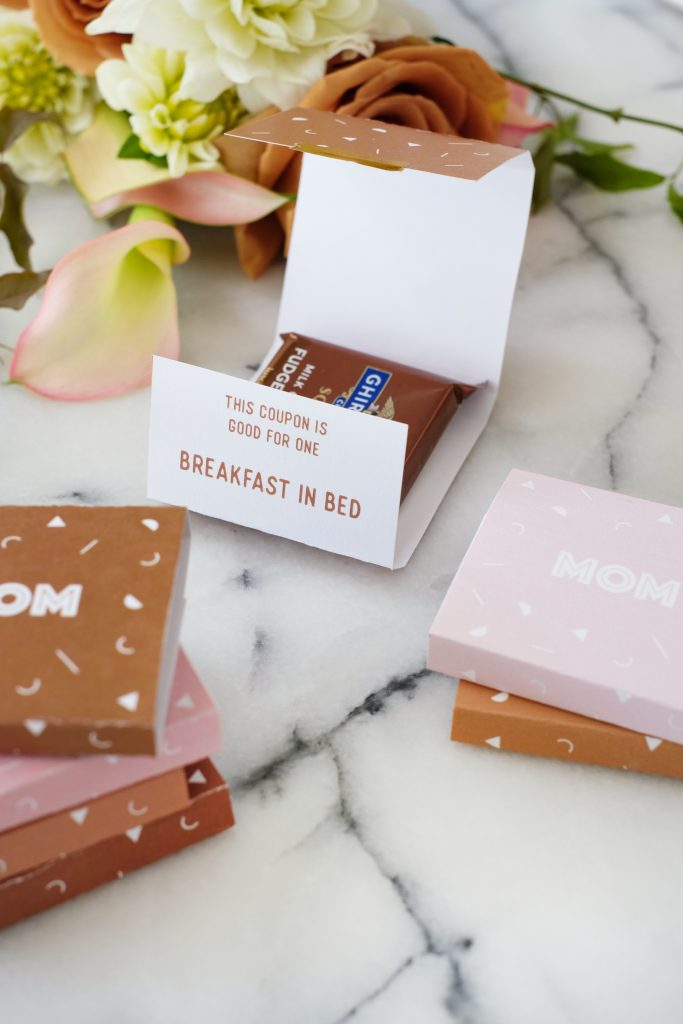
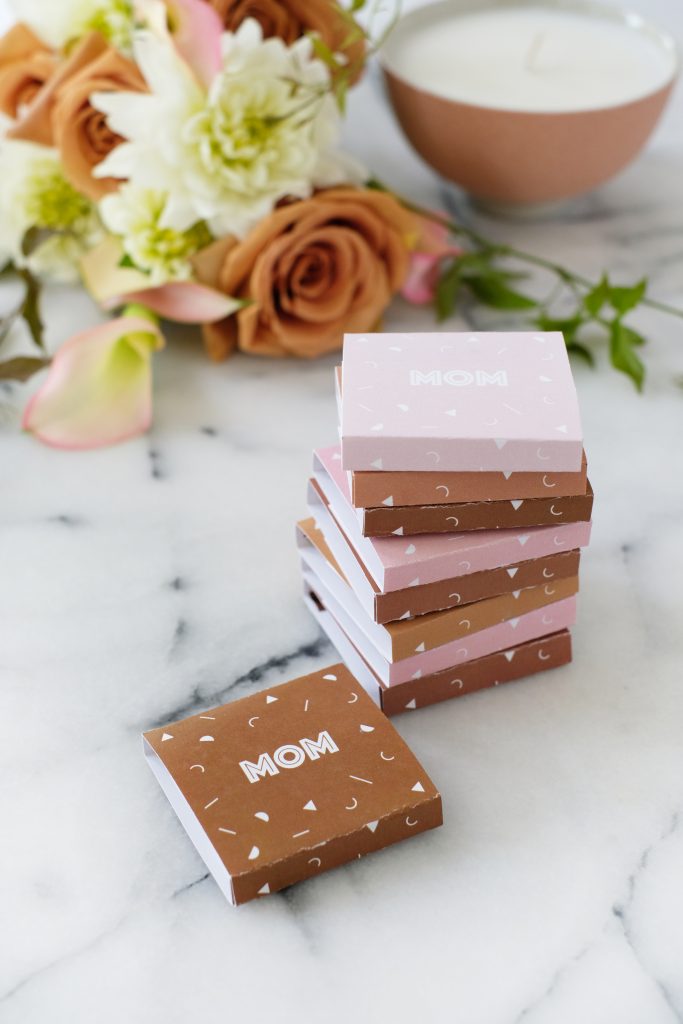
I created a little printable template for these fun coupons. All you need to do is simply print, cut and then fold. And a Ghirardelli square fits perfectly inside. There are two templates, the first is filled in with coupons like “Breakfast in Bed” and the second template has fill in the blanks so that you can make custom coupons specifically for your mom.

Ghirardelli Milk Chocolate Caramel Squares have long been a favorite treat of mine, but I might have a new favorite with the new Milk Chocolate Fudge Caramel Squares. Oh my, the best chocolate filled with gooey, decadent caramel!

Wouldn’t this be a fun gift to give to a special mom in your life, or even better, have it gifted to you?

And now for the GIVEAWAY! Head over to Instagram, where I am hosting a fun giveaway for a special mom in your life. You can enter to win a mom pampering gift basket filled with Ghirardelli chocolate, a robe, slippers, a manicure/pedicure set, and a branded mug. How fun, right? Enter to win for yourself or give it to your favorite mom. The giveaway is open till May 5th, 2019.

This post is sponsored by Ghirardelli. Thank you for supporting the companies that help make this blog possible.

DIY

Printable Floral Chocolate Bar Wraps

February 12, 2019

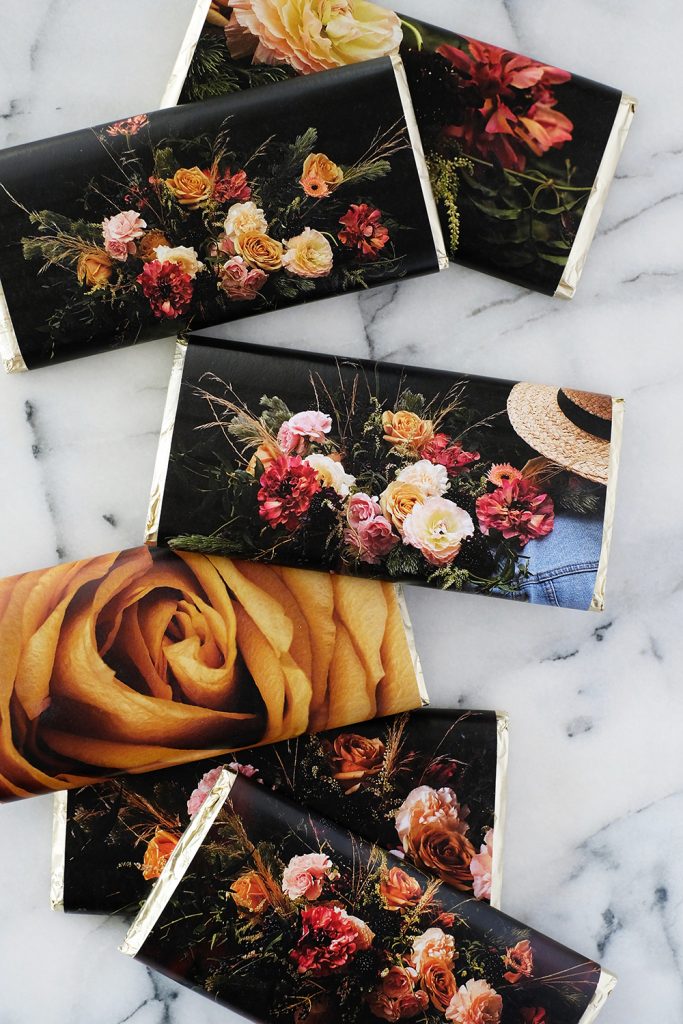
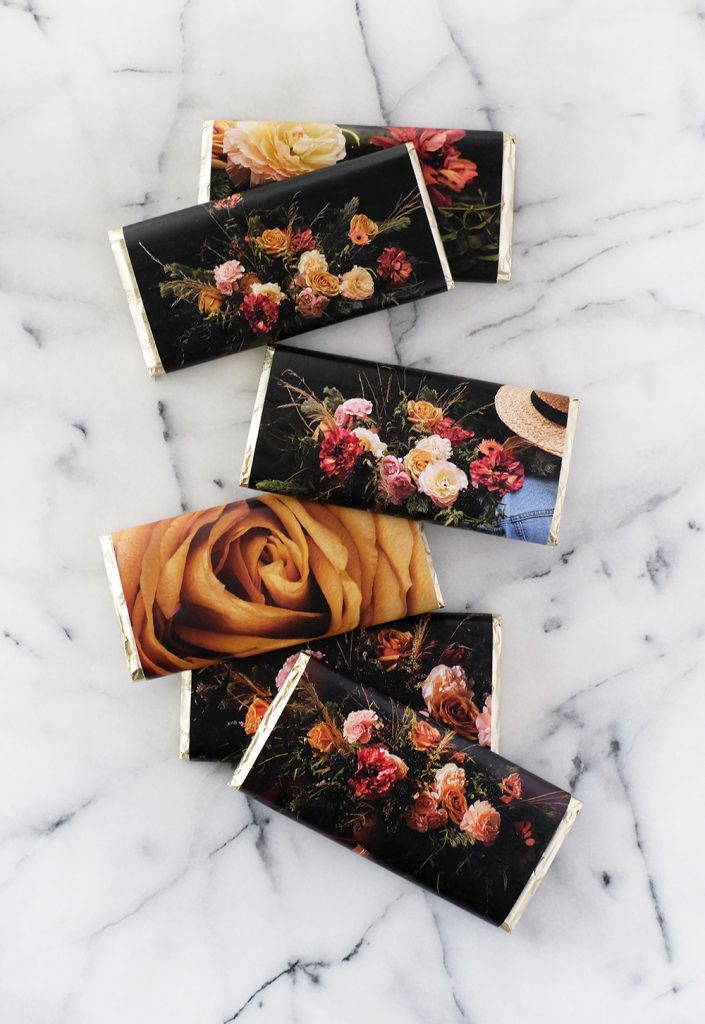
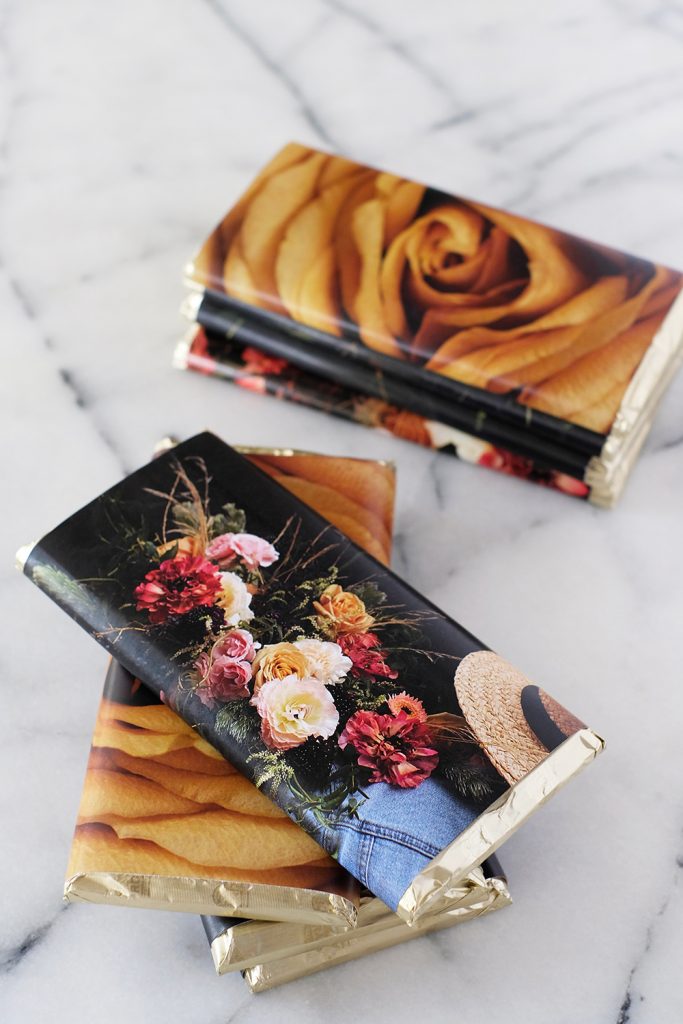
I’m squeezing this post in just before Valentine’s Day. Because I literally realized this morning that I didn’t have anything fun to send to my kid’s teachers for v-day. A couple years ago I made a set of these chocolate bar wrappers and they were a hit. All you have to do is print, cut and tape and you have a fun little personalized Valentine’s Day gift.

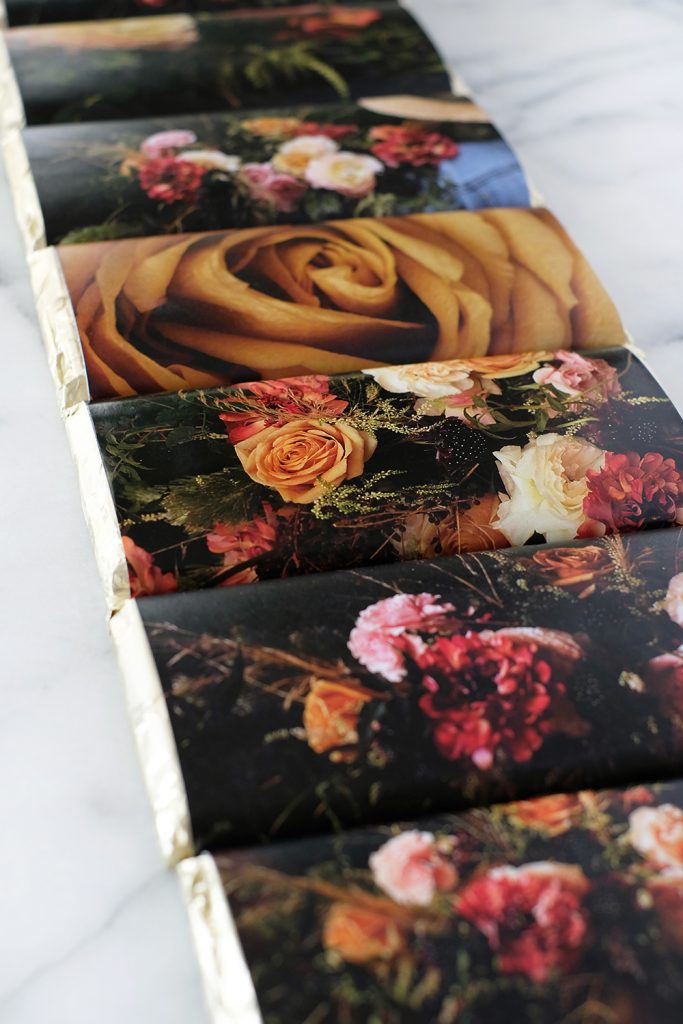
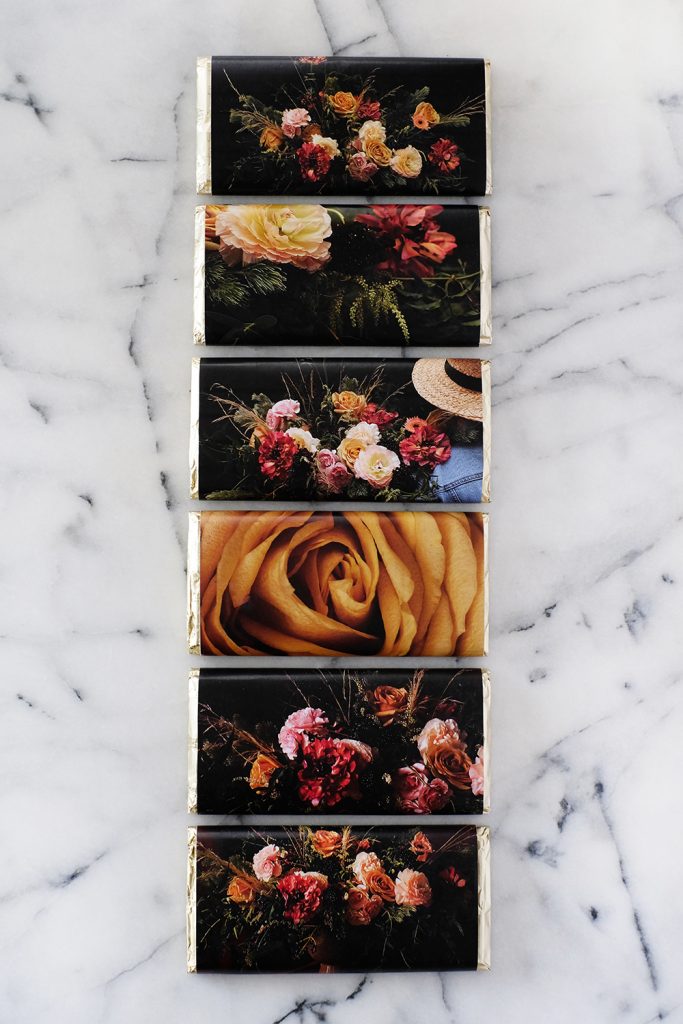
And because I had so much fun with the Moody Florals, I decided these would be really pretty wrapped around a chocolate bar as well. If you’ve been around for a while, you know that if I get one idea, I run with it for a while.

I simply printed these out of regular white printer paper, cut them out and used double-sided tape to attach them to the chocolate bars.

I recommend removing the original wrapper on the chocolate bar (but make sure there is a foil wrapping underneath). You can wrap these around any candy bar, but I highly suggest Ghirardelli’s Milk Chocolate Caramel Bar or their Dark Chocolate Sea Salt Caramel Bar. They are the perfect size and shape and they might be one of the yummiest treats out there.

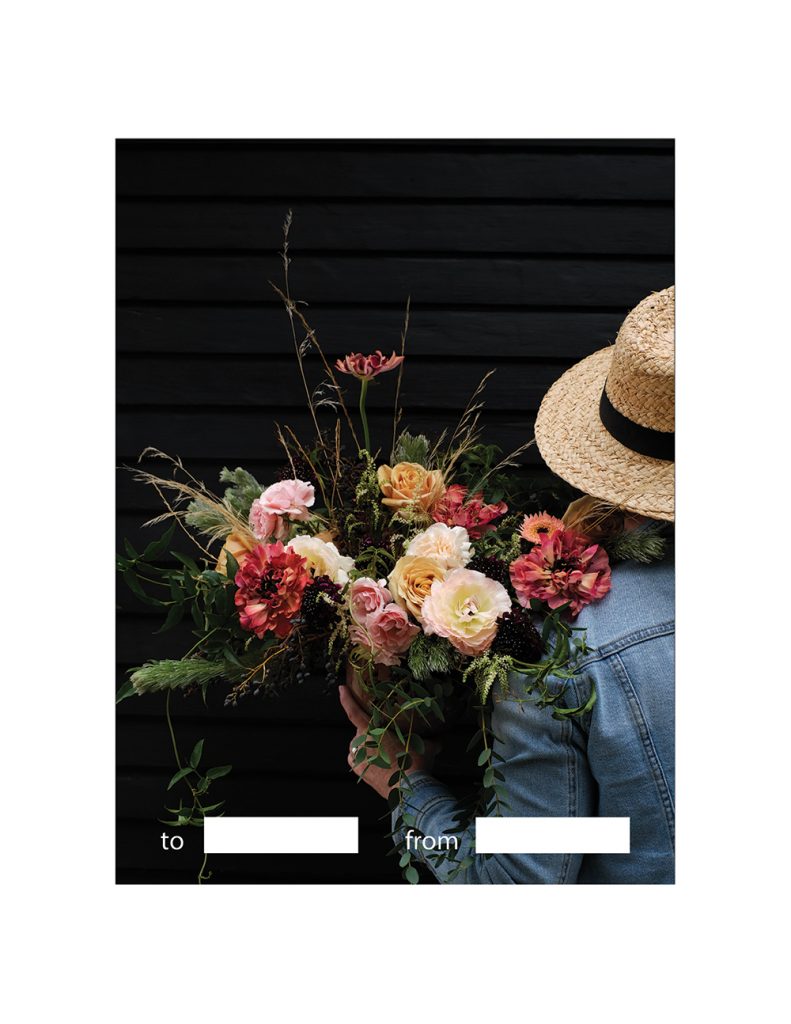
Download the wraps HERE! I’ve even left a spot for you to add to + from.

Happy Valentine’s Day friends!

DIY

Medicine Cabinet Makeover

February 1, 2019

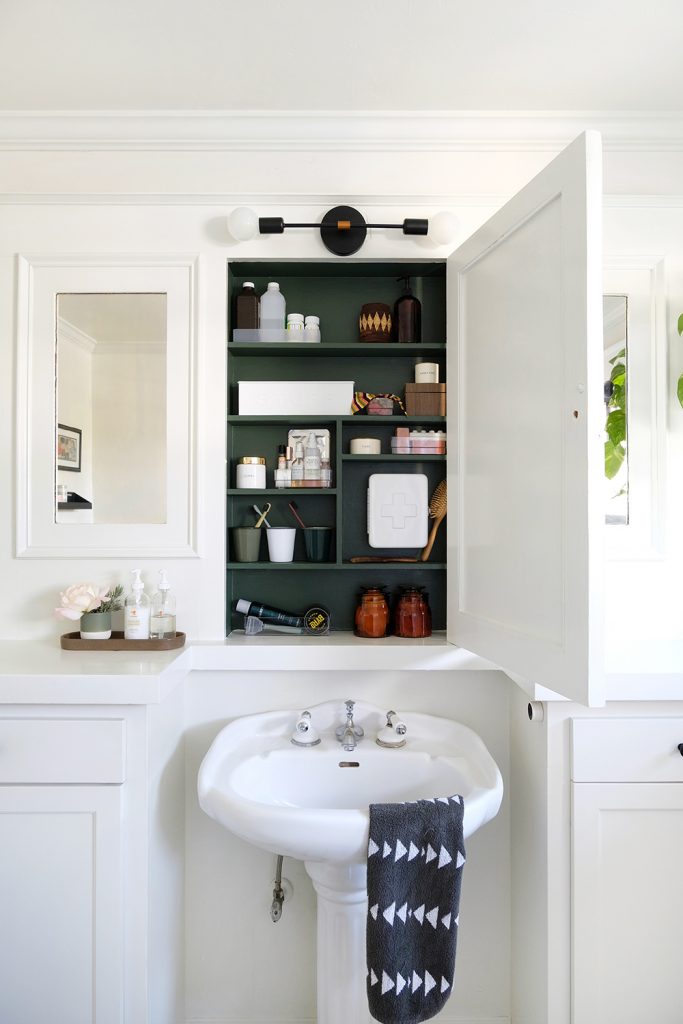
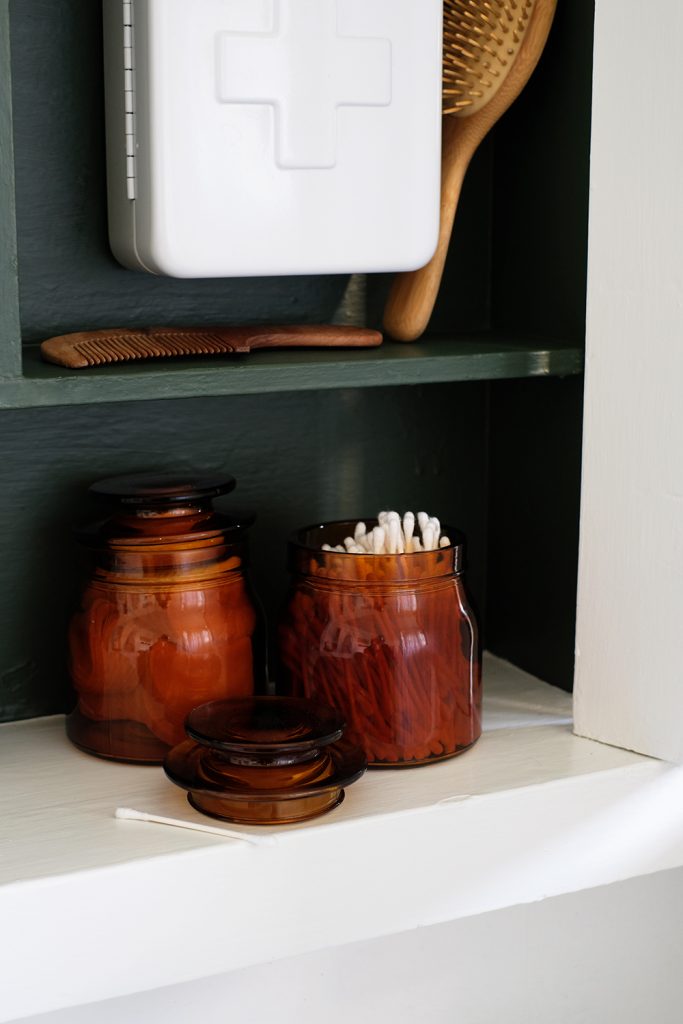
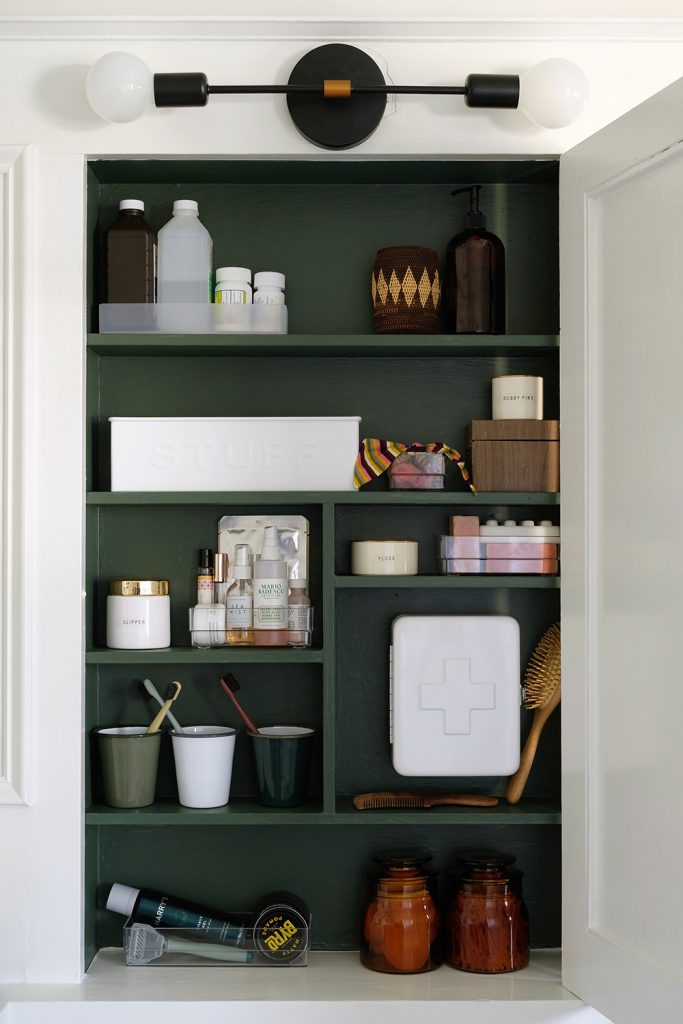
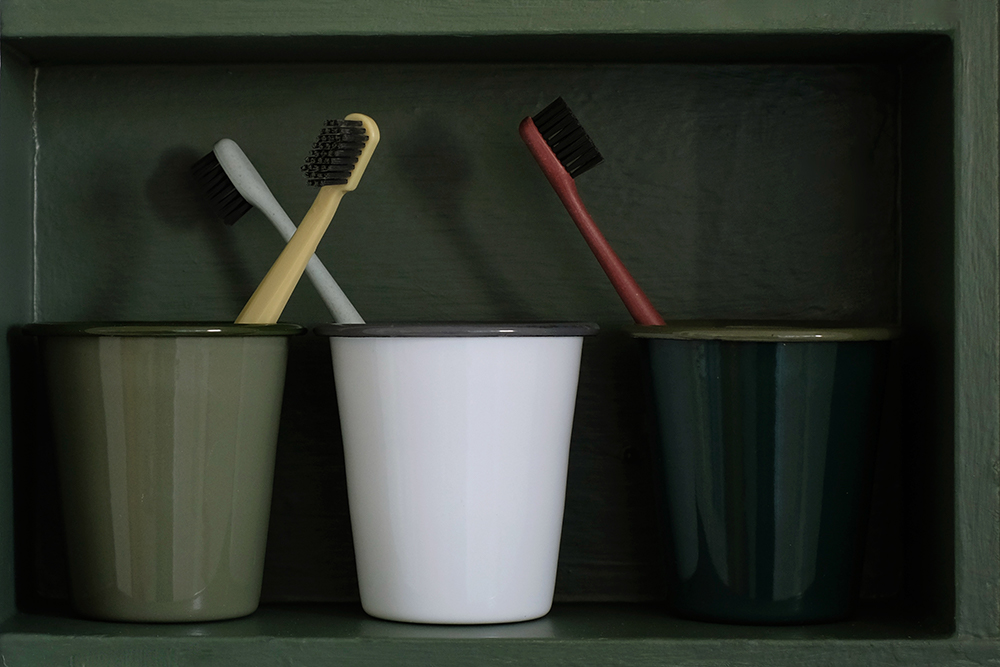
If you’ve been following along, we just wrapped up a MONTH OF MINIMIING! And I feel soooo good about all the organizing and decluttering I’ve done. Today’s post is one of the tasks I tackled last week. The kid’s bathroom is one of my favorite rooms in our house. When we first moved in, I stripped all the wallpaper and painted EVERYTHING. It was a big job. But, I never touched the inside on the medicine cabinet. I just ran out of steam and figured it’s a spot no one would notice. But, it turns out, KIDS ARE THE WORST and the left the cabinet open all the time and all it’s hideousness was exposed. Now, I’m so excited about this little space and I’m happy to show it off.

You can find the full DIY over on Hunker today. I’m sharing befores and afters, all the sources and how I to organize a shallow space like this.

DIY

A Month of Minimizing

January 8, 2019

If you haven’t been following on instagram, then you might not know that we just made through the first week of a #MonthofMinimizing. The new year is always a great time to clear out the clutter and find a little order and organization.

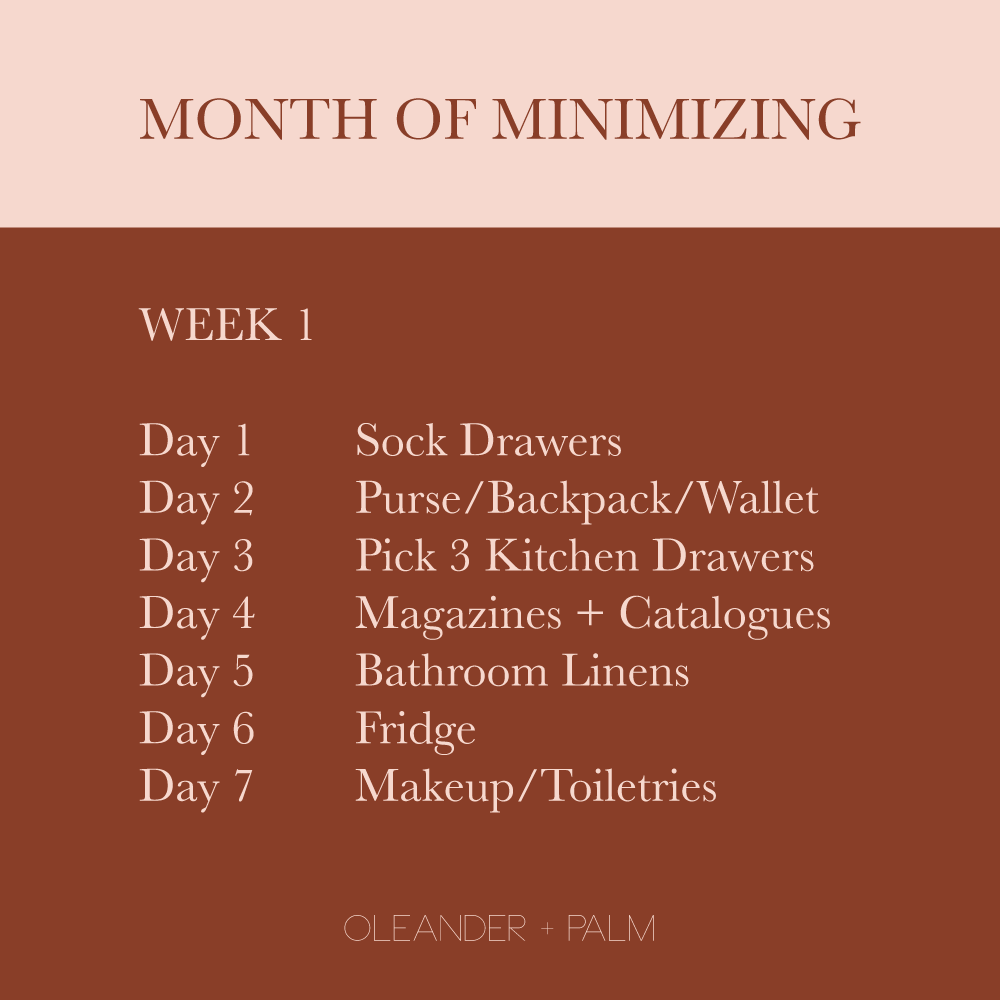
Everyday this month, I am assigning a cleaning task and then walking you through my process of purging, sorting and then organizing. It’s all happening on IG stories. I picked small, totally doable tasks for each day. I also tried to pick areas that are actual problem areas in my home.

We are #MakingRoomforStyle in our homes. Before any cute pillows are bought, walls are painted or furniture is purchased – you need to declutter and then store what you already have properly. A clean and tidy home is where a stylish home begins. And I think a lot of us want to have stylish homes. So before you go shopping, let’s donate a load to your local thrift store and make a little room.

Here are the tasks for the first week. There is no right or wrong way to do this. If you schedule is too busy, maybe you just try to take on a couple problem areas on the weekend. Even if you just clean out one area, you are winning. Team up with your family or find a friend for accountability and let’s start 2019 organized.

Oh, and I’ve started a little shopping resource page here on O+P. I’m linking some of the items that I’m using to bring a little order to our home there. My plan is to add items to this page that I love and use and maybe that will be helpful to some of you.

DIY

DIY Terrazzo Coasters

December 11, 2018

I have partnered with the Martha Stewart team and Plaid Crafts for this post. Thank you for supporting the companies that help make this blog possible. 

You know life is too busy when it’s been months since you’ve had time to tackle a DIY. This week, I really didn’t think I had time to squeeze in one more thing and then I sat down and started painting and I was so grateful I was in the middle of a DIY. I’m sure a lot of you can relate, there is something so therapeutic about making. It calms and relaxes me. I definitely will be allowing a lot more time this month to bake and make with and for my family. 

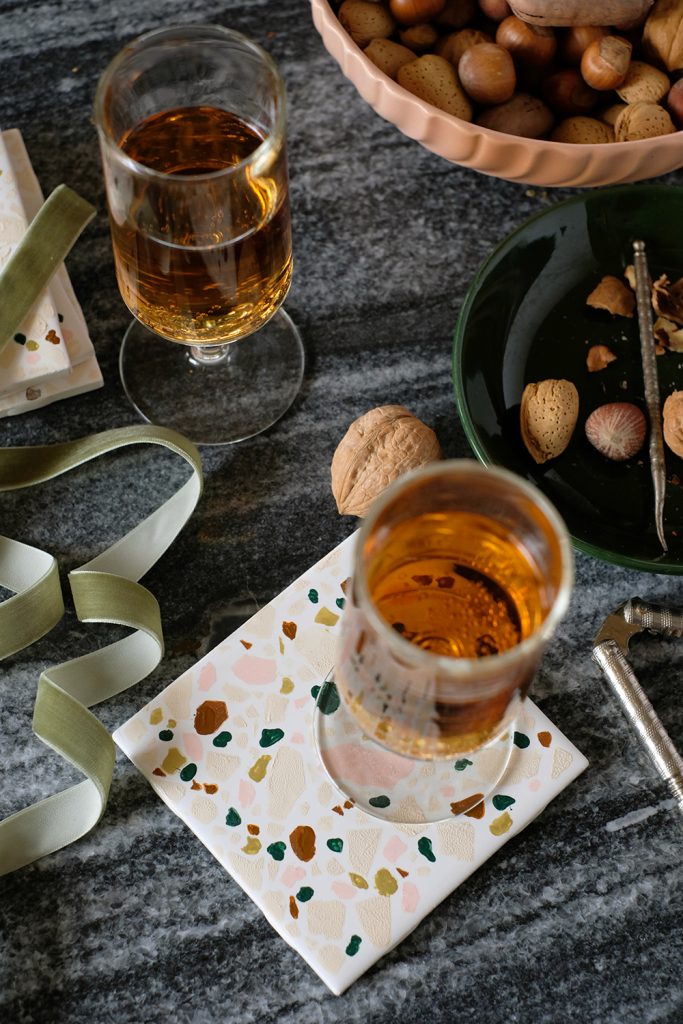
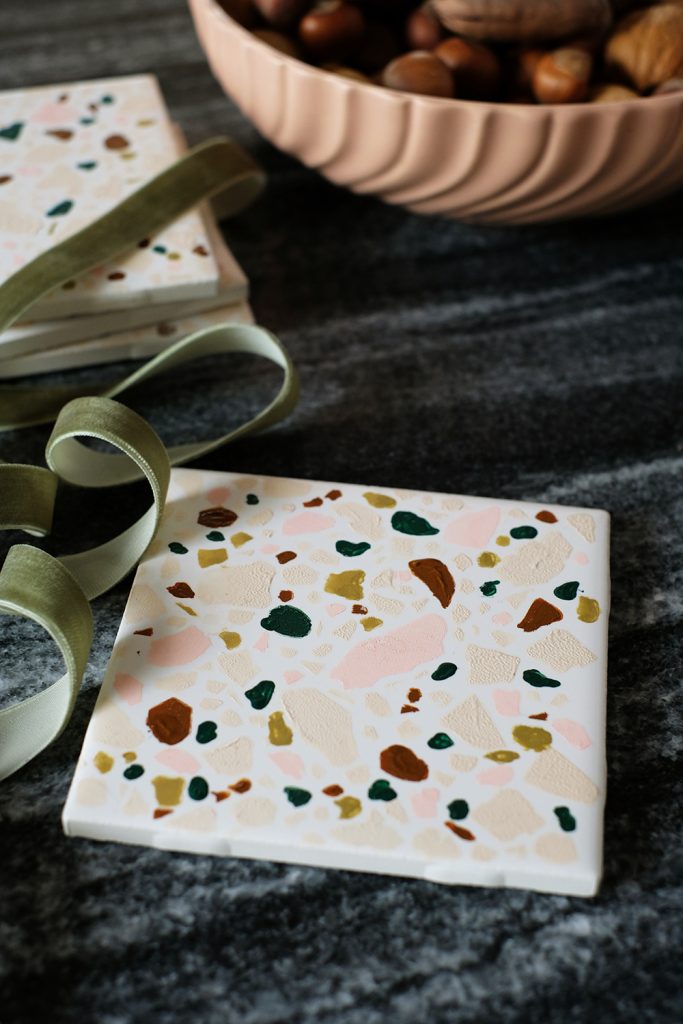
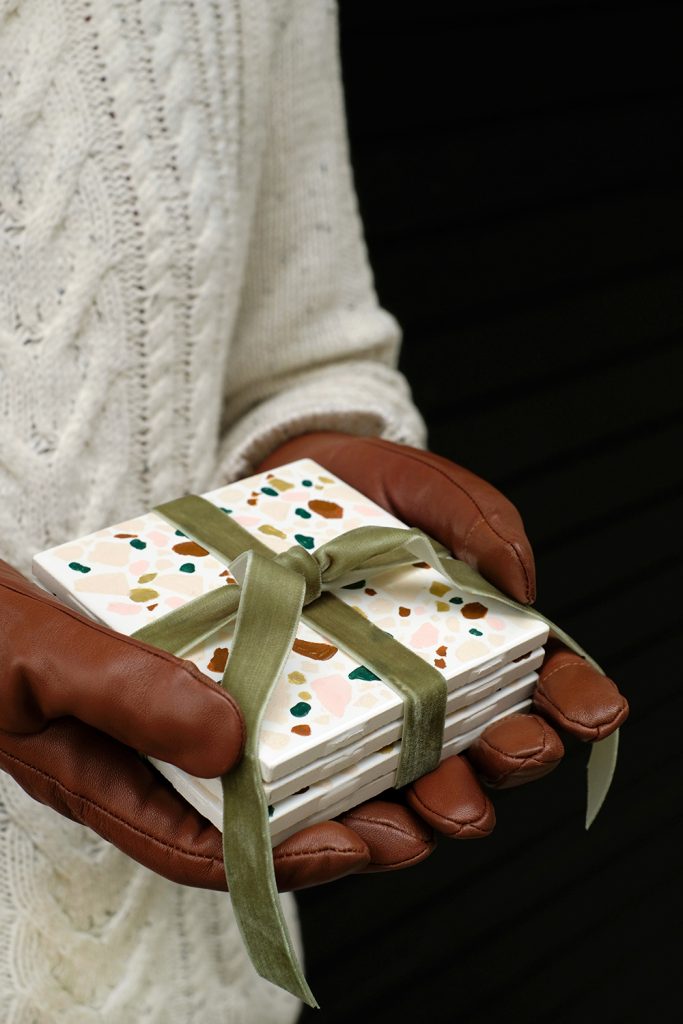
Holiday Party season is here, and I know we have a few that we are attending in the next week of so. Therefore, I’m on the hunt for some good host/hostess gifts and this year I think a few friends will be getting a set of these DIY Terrazzo Coasters. 

I’ve been itching to try something terrazzo inspired. When I was in Sweden last year, there were so many fun terrazzo accessories for the home. And since my house is not built for terrazzo floors, these little coaster will have to do. So, a trip to Michaels and a little shopping in the Martha isle, and I came home with all the supplies I needed. 

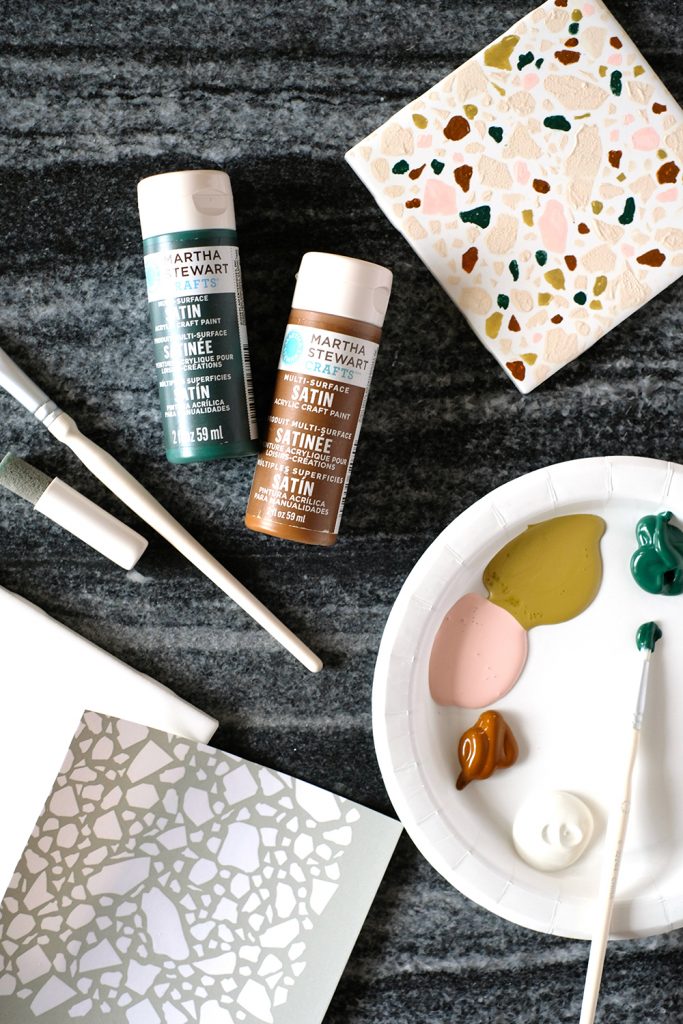
Here’s what you will need:

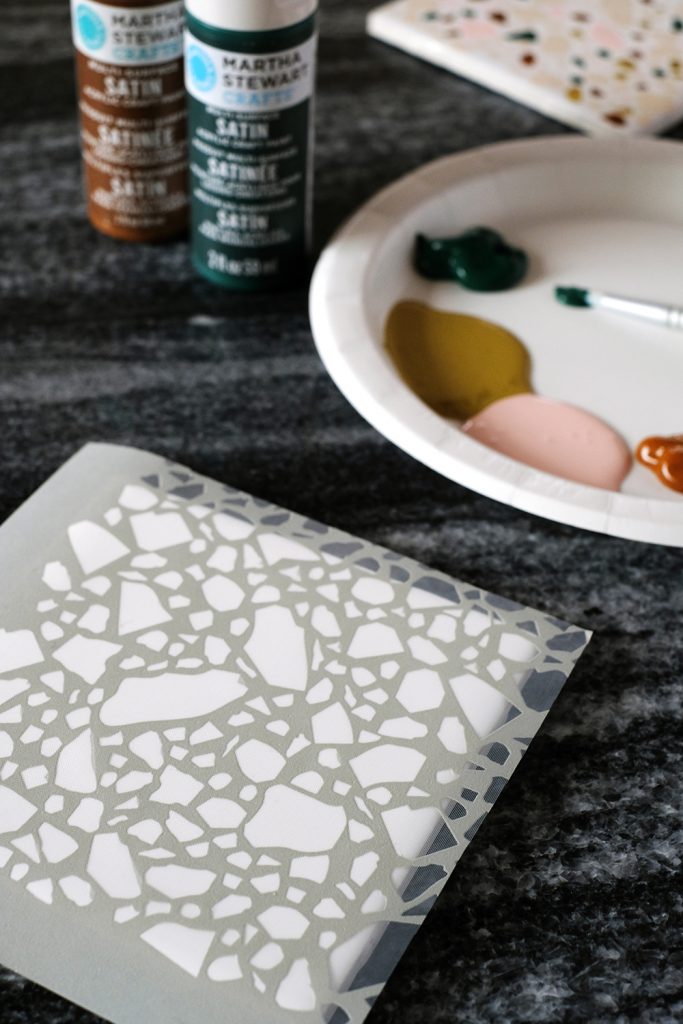
Start by making sure the surface of the tile is clean. A little glass cleaner will do the trick. Then cut the stencil to a 4×4 inch square, remove the backing and adhere the stencil to the tile. 

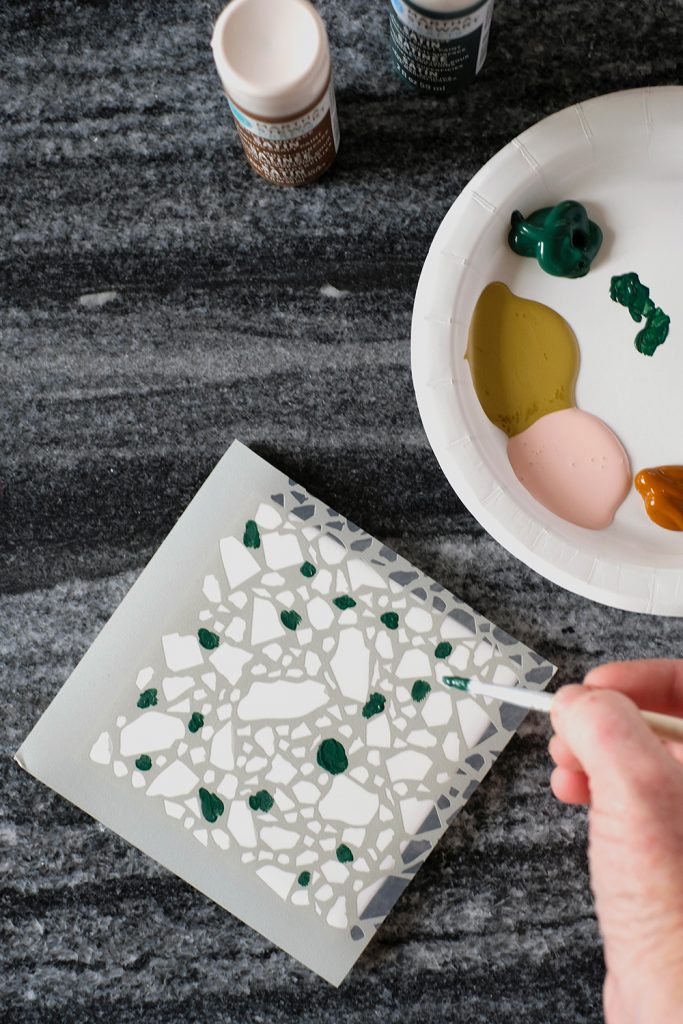
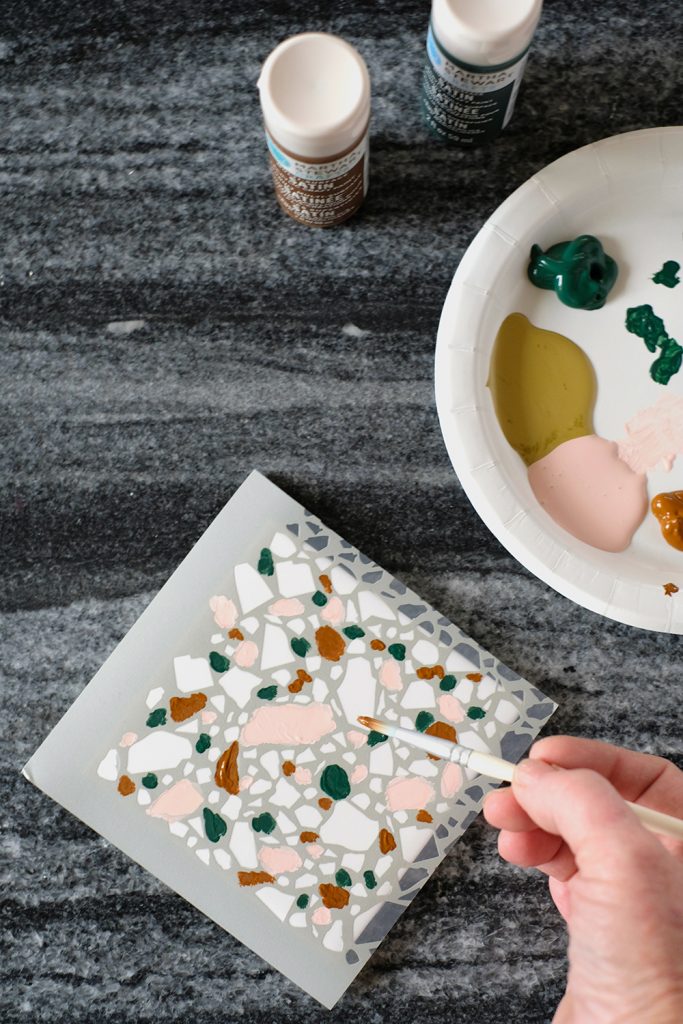
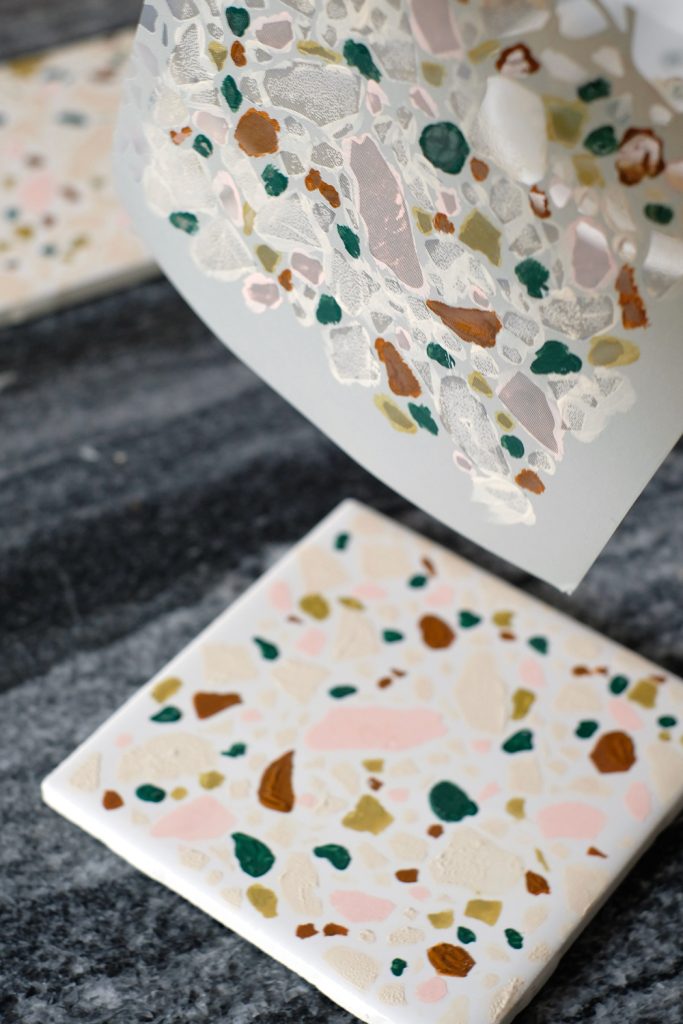
Begin by painting the darker colors first. I tried a few different methods and found that this gave me the best terrazzo-like affect. I chose a few stronger colors and painted them first and then filled in the remaining shapes with a pale cream color. 

Often when I use stencils, I like to use a stencil pouncer, but with this being so highly detailed, a small fine-tipped paint brush worked so much better. 

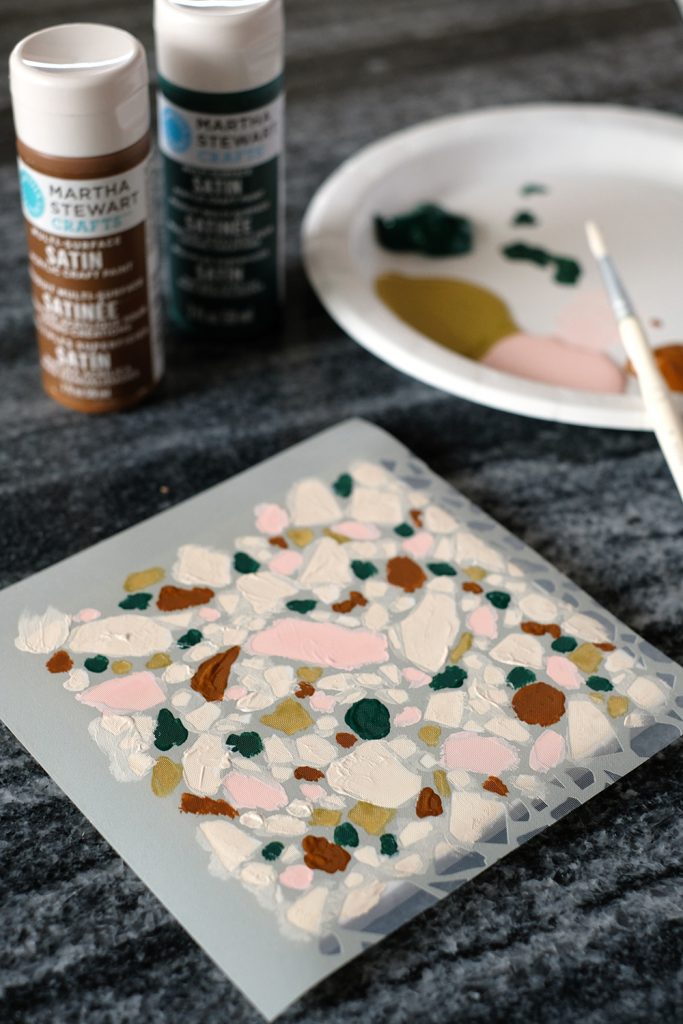
Once I had filled in the green, brown, pink and gold, I painted the remaining spaces with the lighter color.

Then, while the paint is still wet, remove the stencil and rinse it immediately under warm water. These stencils can be used a couple of times. Just place the clean stencil back on the paper backing it came with. 

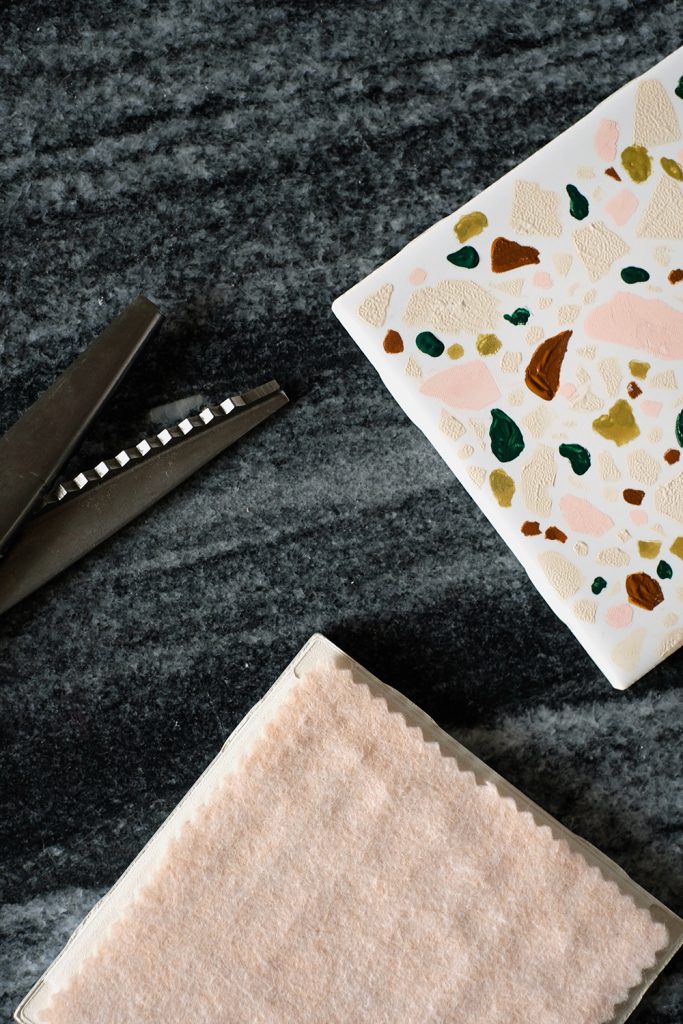
Once the paint is completely dry, I cut a square of felt, just slightly smaller then the tile and adhered it to the back of the tile with a little hot glue. 

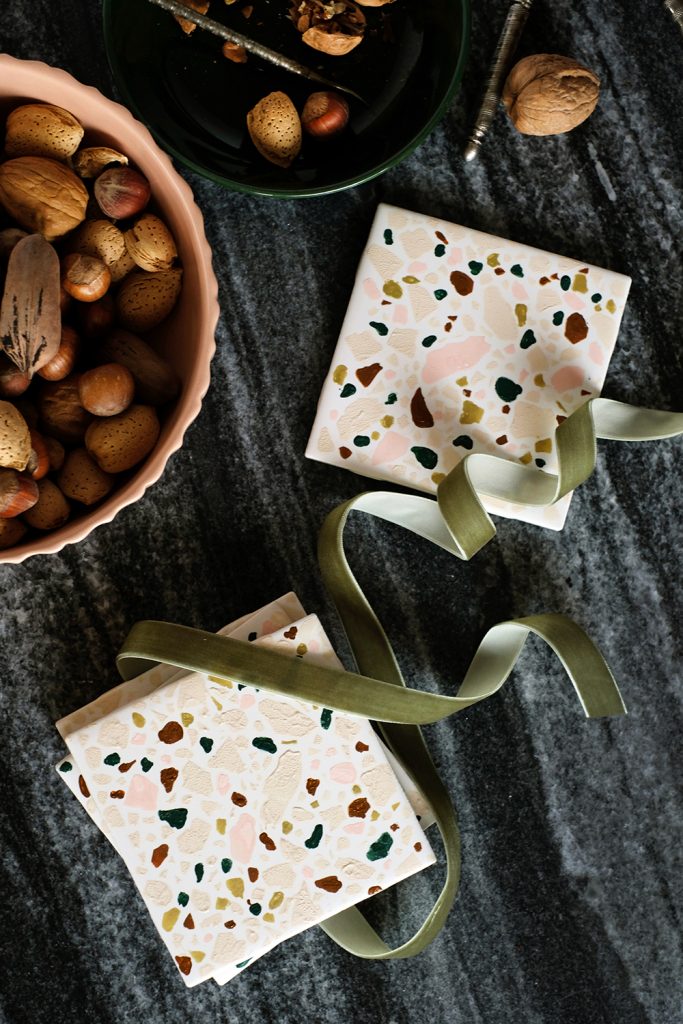
I decided 4 was a nice sized set to receive, so I stacked them and tied them with a little velvet ribbon. 

They are far from perfect, but I kind of love the little imperfections of something handmade. But, if you like a more polished look, you could definitely go back and fill in some of the shapes that maybe didn’t get as much paint as the others. 

You can find Martha Stewart products exclusively at Michaels.

Now, what’s the best hostess gift you’ve given or received? Was is something homemade?

DIY

Napoleon Dynamite Halloween Costumes

November 1, 2018

Napoleon Dynamite Costumes

Well, another Halloween has come and gone. And we definitely had a great time. This is Denali’s last Halloween with us, because she is a senior is high school. In the last 17 years, I’ve made a lot of costumes. I’ve been that crazy mom that has dressed my kids in costumes that go together. But, gosh it’s been fun. And I know I will be so happy that I have all of these memories and photographs for years and years to come. Sorry to get sentimental, but sometimes you just gotta be a sappy mom.

This year we decided to dress up as some of favorite characters from Napoleon Dynamite, one of our all time faves movies. And, I think it’s obvious that we had some fun.

Napoleon Dynamite Costumes

Olivia played the role of Tine, aka “The Fat Lard”. I followed Mer Mag Blog’s Llama turtorial to make this adorable llama. I decided to take it a step further and cover her completely in fuzzy fleece. Olivia is totally in love with this llama, she’s not ready for Halloween to be over anytime soon.
Napoleon Dynamite Costumes Napoleon Dynamite Costumes Napoleon Dynamite Costumes

Denali’s Deb costume was the by far the easiest. Just some scrunchies, a pair of thrifted mom jeans, a pink polo from amazon and running with your hands by your side is all that is needed.

Napoleon Dynamite CostumesNapoleon Dynamite Costumes Napoleon Dynamite Costumes

Dylan’s Napoleon costume is kind of a thrifting dream come true. I found this amazing cord 3 piece suit at Salvation army for just $12. It fits him so well. I also picked up a wig and some nerdy glasses at the party store.

Napoleon Dynamite Costumes Napoleon Dynamite Costumes Napoleon Dynamite Costumes

If you’d like to see more of our costumes over the years, just search “halloween” in the search bar and I’m sure a bunch will pop up.

Napoleon Dynamite Costumes