etc.

The Week’s End

November 13, 2015

I hope you’ve had a great week.  We spend last weekend in LA helping out at a mission on skid row. It was a good time for our family and definitely a departure from the usual, but it left me needing a weekend all week long. Can I just say I’m so thankful for Veteran’s Day.  What I nice little bonus in the middle of the week. We watched Dylan’s marching band in the parade and I cried when I saw the faces of the little old Grandpa’s who fought in the wars.  Then Lonnie helped me start painting Dylan’s bedroom. Of course, we ran out of paint, so I had to finish it yesterday.  But, it’s bright white and feels fresh and clean.  I’m working on a little makeover for his room, so stay tuned.

Image

I sure appreciate you guys for sticking with me as my posts have been so sporadic. I’m juggling a bunch of life right now, which I’m sure you are as well.

Do you need some weekend inspiration?  Be sure to check out these fun ideas:

These poppy colored pillows in the cutest prints are sure to brighten any space.

Learn a little about yourself here.

Refresh your entryway with some fun, unexpected art pieces for the holidays.

Make a fun footed serving bowl.

And I’m always a fan of homemade biscuits, so I’m going to try these Cheddar Scallion Biscuits this weekend.

Oh, and there is still time to save on a framing project with Framebridge.  Be sure to grab Oleander + Palm’s special discount code here.

DIY

DIY “Let’s Snuggle” Pillow

November 11, 2015

It finally cooled off this week and I’m so pleased with the weather. Now it’s time to make my home warm and cozy. No longer do we have to pump the AC and sit near a fan – YAY!

I’m giving my couch a little love with a new “Let’s Snuggle” pillow made from the softest flannel. Head overt to Curbly today to see the full how-to.

I used my trusty Cricut Explore machine to cut out these letters, but there is also a printable template ready for you to download. 

Design

Cafe Design

November 9, 2015

I thought I’d share with you a little sneak peek into a design job I’ve been working on for the last month or so.  My favorite little bakery in town is opening a little eat-in cafe/bistro and I’ve been helping design the space. I can’t wait for it to open. I’ve got some fun DIY projects happening in there and lots a modern copper touches.  
Here’s a look at the mood board to give you an idea of where we are headed with the space.  The color palette is quite feminine, but there’s lots of fun geometric pattern and shapes for contrast.
Stay tuned, it will be opening very soon!
Teal Planter (CB2 sold out) // Blush Vase (Similar) // Rose Gold Tea Light Holder

Design / DIY / etc.

Nature Photography Framed

November 6, 2015

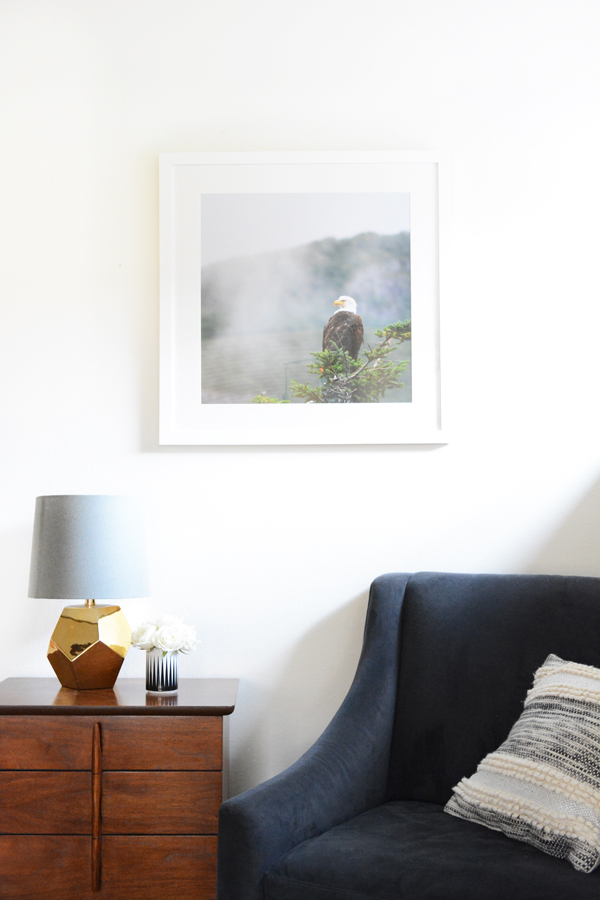
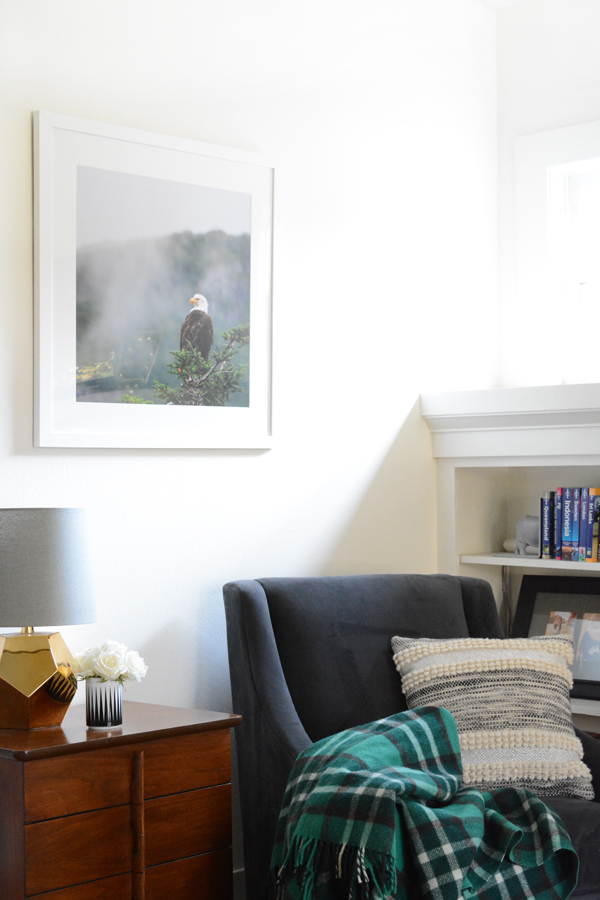
As we hit November, I feel the need to start thinking about all the Christmas gifts I need to buy. In our family, that is my job. And honestly, I don’t think anyone wants my biology nerd hubby picking out their gift. There’s always at least one person in the family that is hard to buy for and that person is the biology nerd. I really hate giving gift cards and there is no way I’m going to be able to pick out some scientific journal or ecologist biography that he’s been dying to read. So this year, I’m super excited about the presents I have for him.  I had a few of my nature photographs, from our trip this Summer, framed at Framebridge.  They turned out so good, and now I’m feeling like they are a present to me as well, I can’t wait to get them up on the walls. Well, to be totally honest, I already hung the eagle in the fog photograph in our living room. I made sure to say Merry Christmas to Lonnie when he saw it.

I took down all the smaller pieces on this wall and replaced them with this one big fabulous piece.  I love the simplicity and clean lines of having just one frame on this little wall. As I Canadian, I was a little worried that this eagle image felt a little too patriotic, tee hee. Lonnie insists that we’re making nature photography cool again. What do you think?

Keep reading all the way to end of the post because I have a special offer for Oleander + Palm readers only.

So, in case you are new O + P, this Summer we took an epic road trip as a family. We drove all the way from Southern California to Alaska and back with our vintage trailer, Riley.  It took us about 5 weeks, with some stops along the way of course.  But, we put over 9000 miles on our truck. We are so glad we did this as a family. Lonnie grew up in Alaska, so we’ve been as a family a few times, but we’ve never driven the Alcan together. Yes, it’s a lot of car time, but the scenery and the wildlife is absolutely amazing.  And nothing brings you closer to your kids then camping and road tripping together. One day in Northern British Columbia we saw caribou, buffalo, elk and a grizzly bear. That beats going to the zoo any day.

There’s nothing I like more then filling my home with memories from our travels.  I have very few generic art prints in my home, I want my the pieces I hang on my walls to have meaning and significance to our family.  Plus, I feel like I’m doing my kids a service, and when I’m long gone, they can inherit these framed pieces from our adventures together as a family. 
Framebridge had so many great choice for frames in lots of colors, finishes and styles.  I went with clean, modern frames called Carson and Irvine.  I squealed when I unwrapped the Jasper National Park reflection image in it’s gorgeous gold frame.  Green and gold are also so pretty together.  

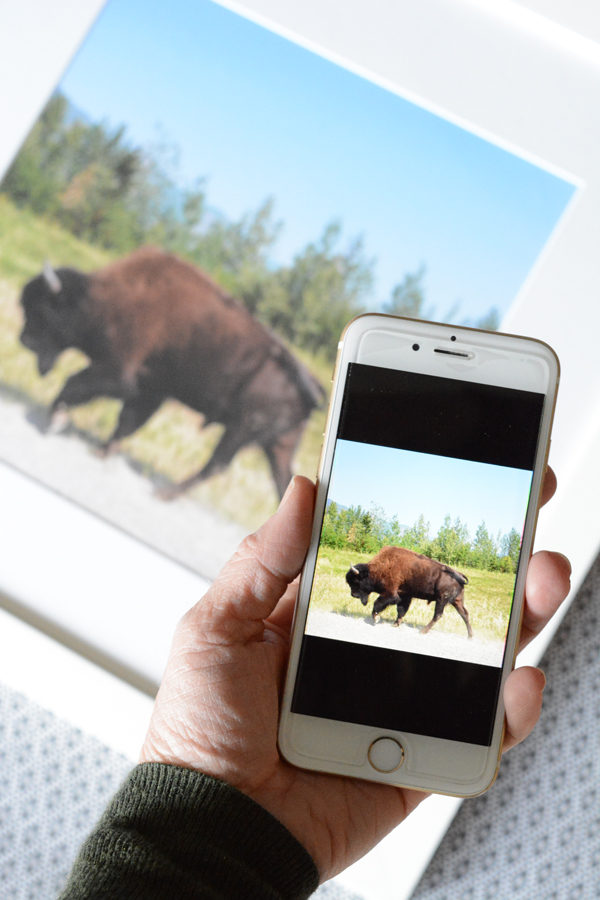
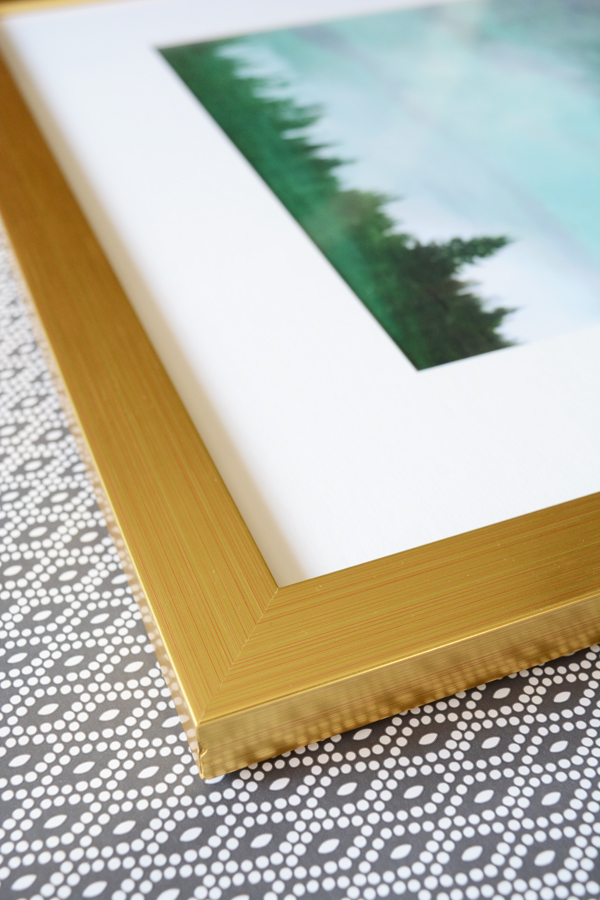
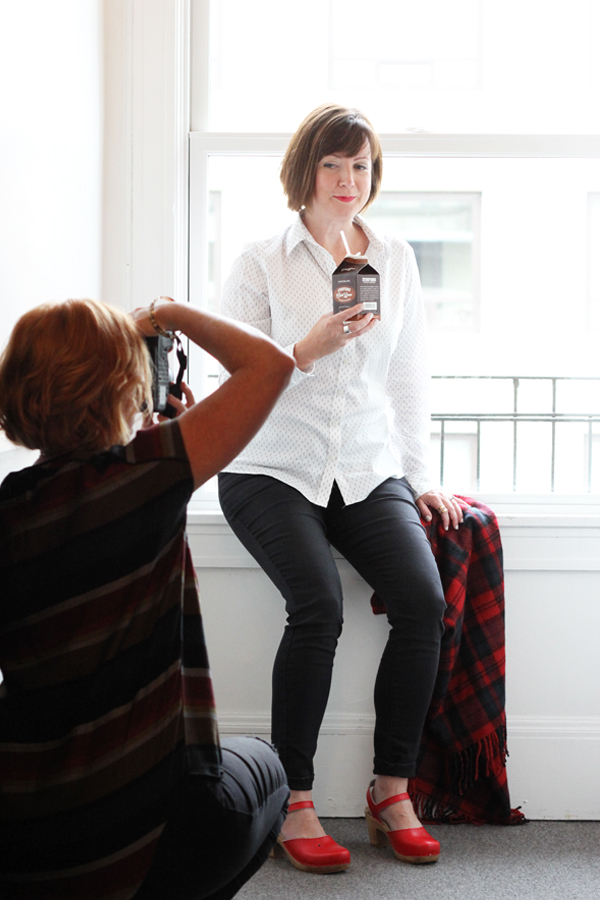
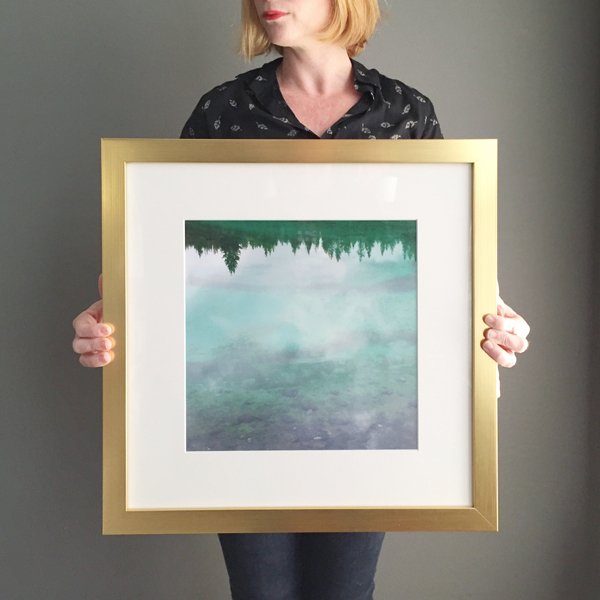
There’s a couple options for getting your artwork framed with Framebridge.  You can simply send them a digital file, like even an Instagram image like my 
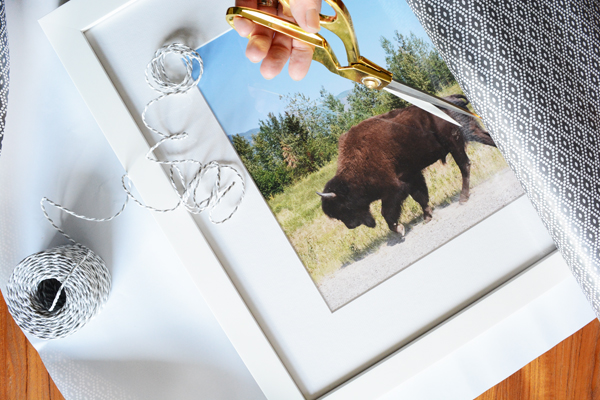
buffalo print, or you can mail in a special art piece or photograph and they will custom frame it for you. I opted for both options. I had already printed the reflection image at a local printer, so Framebridge sent me a specific box for the print and I simply packaged it up and sent it on it’s way with my postman.  So simple and easy.  
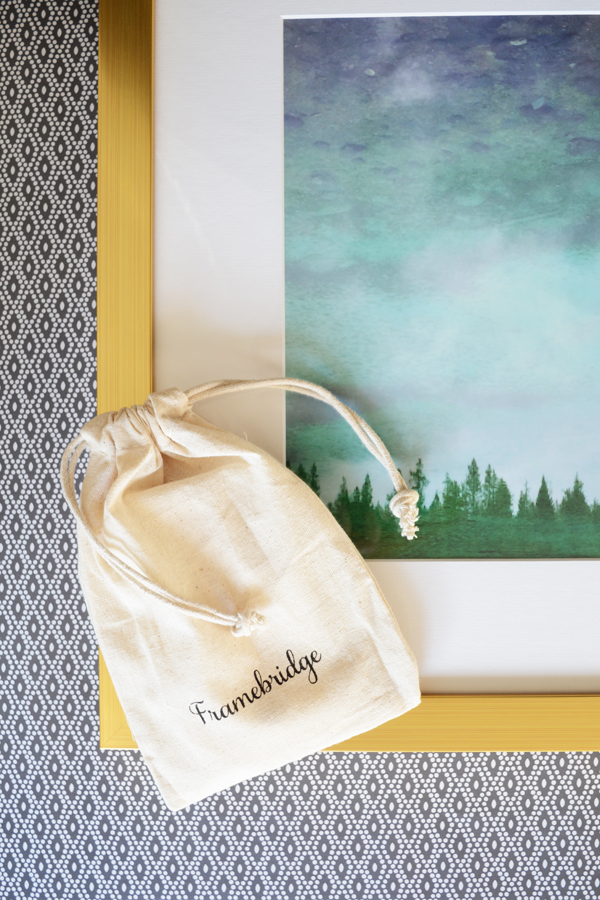
Framebridge also sends you instructions and a picture hangers so you can hang your framed pieces right away.

I’m pretty excited to check one person off my Christmas shopping list.  Lonnie’s gifts are done!!! And he’s going to love them.

Ok, I promised I had a little something special for you too.  How about a discount code just for Oleander + Palm readers. Don’t wait to frame those special pictures locked on your phone or the art work you’ve been wanting to hang on your walls. Head over to Framebridge right now and check out all the amazing options. 
Enter the code OLEANDER20 to save 20% on your first order! (expires 1/31/16)

This post is sponsored by Framebridge.  Thank you for supporting the amazing companies that help make this blog possible. 

DIY

Alice in Wonderland Halloween Costumes for Siblings

November 3, 2015

I know Halloween in long over now, but I really wanted you to see this year’s costumes. My kids are really really great sports and go along with my crazy themed costumes. I’ve always dressed them in costumes that go together in some way.  As Denali gets older, I’m always sure it will be the last year. This year the Alice, Queen of Hearts, and White Rabbit costumes were a hit with each of them.

Olivia has the perfect blond hair to be Alice in Wonderland.  I actually found the dress at Old Navy and the tulle skirt at Target and then my mom made the adorable little apron for her.  I added a felt red heart to tie all the costumes together.

Denali has the Queen of Hearts look down.  She never cracked a smile and kept that stern look most of the evening.  For her costume, I added black and white felt hearts to a red lace dress I found on clearance for $4.99 at Forever 21.  I made her fun collar with a pack of playing cards and some bias tape.  I simply fanned them out and then sewed them together.  It worked out perfectly and stood up stiff and straight, just as I had hoped.

Dylan is our cool White Rabbit. Instead of a fancy ruffled collar, we opted to make him a little more distinguished with a bow tie and vest.  I made felt ears for Dylan and attached them to a head band, he cut out and painted his out clock, and I bend some wire and painted it gold to make him some spectacles.

I love the pop of red to tie all the costumes together.

I bet started thinking about an idea for next year’s costumes.  It’s going to be hard to top this look.  I’m open to suggestions, if you have great ideas for costumes that go together, I’m all ears.

etc.

Friendsgiving Table Setting

November 2, 2015

Can you believe Halloween has come and past? Before you know it, Thanksgiving is going to be here. We are headed to my parent’s for Thanksgiving week, but before we travel we are celebrating Friendsgiving here at home.  It’s going to be great!  I love this casual, no fuss version of this holiday. We are going to deep fry a turkey, and make the meal super simple by having everyone bring their favorite side dish. And to keep it kid friendly and fun, there will be a root beer and cream soda bar, with all different kinds to choose from.
I’m excited to host, I love setting a table. I’m decorating with a little wheat, black and white pumpkins, some simple candle sticks and some awesome paper goods from Makr.  They have some really cute kits for setting a fabulous Thanksgiving table. I’m using the Friendsgiving set.  And how much fun is the Kids Table set

This kit includes:

  • 1 Howdy Pilgrim Poster
  • 12 ad-lib cards
  • 8 can coolers
  • 25 temporary tattoos
  • 12 favor boxes
  • 12 placemats
  • 20 dinner napkins
  • 12 tent cards
  • 12 coasters

The illustrations and clever sayings add a fun vibe to table. I love thoughtful details and this Makr kit does all the work for me.

Hey, you don’t even have to plan a game or activity, these ad-lib cards will have folks in stitches in between dinner and dessert.

Who doesn’t love a fun temporary tattoo?  “I like legs” and “Dish Duty” are just a couple of the clever ones available.

Everyone can go home with a piece of pie for breakfast the next day in these adorable boxes.

I’ve got a special deal for Oleander + Palm readers, enter the code PALM to receive 20% off of any kit order via makr.co (code is valid through 11/11/15)
This post is sponsored by Makr, thank you for supporting the companies that make this blog possible. 

etc.

The Week’s End

October 30, 2015

Yay, last night a finally finished my kid’s costumes for Halloween.  I’m headed to LA today with Olivia and a friend.  We just need a change of scenery and I need a few things at IKEA (always).  I’m hoping their Christmas decor is out – gotta get me some of that fun Swedish stuff.

This week has been a little strange.  I’m extremely exhausted, and kind of feel like I’m just about to get sick.  I just want to curl up on the couch and nap, but there isn’t any time to.  I think I’ve just had too many things on my plate lately. I’m hoping this week I can slow down a bit.  So, I apologize for the lack of posts this week.  I had big plans, but just not enough hours in the day. Part of my problem right now is dealing with a High Schooler, Jr. Higher and Preschooler. Their schedules are all over the place and I can’t keep on top of their activities and the places they have to be. Right now, my mom role is taking all my daylight hours. Can you relate?

I hope you have a great Halloween! And if you are going to through a little Halloween get to together, you might want to check out these ideas from some of my favorite bloggers:

This clever Halloween Candy Bark is sure to be a hit.

This Creepy Cocktail sure looks fun.

Need a festive photo backdrop, this Pumpkin Balloon Backdrop is absolutely adorable.

These little printable treat bags are a fun way to package up all that cute Halloween candy.

And what’s a party without a garland, this jack o lantern balloon garland will make any space feel like an instant party!

DIY / etc.

DIY Sassy Trick or Treat Bags

October 27, 2015

If you haven’t figured out your kid’s Halloween costumes yet, don’t feel bad, I still need to make my kid’s costumes this week. But, if you have planned ahead and have costumes already made or bought for your kids, you might like to make these super easy, somewhat sassy trick or treat bags.

These bags can be made in just a couple minutes, with just a few supplies.  And you can add your on custom saying, like “Smell My Feet”, “Just Treats”, “Gimme Gimme”, or “Treat Yo Self”. Halloween is the perfect occasion to be a little sassy pants and rude in a fun way.

Here’s what you’ll need:

Design Master’s Colortool Spray Paint in Flat White
Black canvas bags
2″ letter stickers
white craft paint
a small plastic cup and plastic fork

Start by adhering your letter stickers on the front of the bag.  Be sure to press firmly on the edges of all the letters, so that paint can’t get under the edges.

Place newsprint or cardboard inside the bag to insure that the paint doesn’t run through to the other side of the bag.
Start at the bottom of the bag and layer the paint moving towards the top of the bag. Allow the paint to dry between coats. I love Design Master Colortool paint for this reason, it layers in nice even thin coats and dries very quickly.  To achieve the dusty white effect of these bags, I sprayed the bags with 3 coats of spray paint.

I wanted these trick or treat bags to have an erie night sky effect, so I added a little speckling of white splattered paint. I mixed 2 part white craft paint with 1 part water and then splattered it with a fork.

When the paint is dry, you can remove the letter stickers.  And now you are ready for trick or treating in style.

I had fun hunting down black and white candy that wasn’t black licorice!


I buy my Design Master paints and my local Michaels. Design Master paints can paint the most delicate of surfaces, such as silk and fresh flowers, fabric, ribbon, tulle, lace, paper, foam board and Stryrofoam TO the sturdy hard surfaces such as wood, metal, masonry, terra cotta, ceramics and plaster. Design Master is a great resource for products and ideas.  Be sure to check out all the craft and project ideas on their blog.  
This post is sponsored by Design Master. All opinions are my own. Thank you for supporting the brands that make this blog possible. 

etc.

Weekend Happenings

October 23, 2015

Yay, it’s Friday! And Halloween is just around the corner, so I better get me kiddo’s costumes made. I think we finally have an idea. I’m the dorky mom that makes my kids wear costumes that go together. Last year they were famous paintings, he year before, they were a BLT and here’s a whole bunch of costumes I’ve made over the years.

I’ve got a couple fun things going on this weekend.

1.  If you are local, I’m organizing an Instagram Meet Up downtown Bakersfield tomorrow morning. We are meeting at Dagney’s Coffee at 10 am.  Come meet your instagram friends in person.  Learn some phone photography tips and tricks and just help us make Bakersfield look COOL!

2.  I’ve got a Sven Clog GIVEAWAY going on right now!!!! Head over to Instagram to enter!

Here’s a few great posts you might want to check out this weekend:

These printable straw flags, adorbs.

I already have all the supplies for these color blocked candles, totally making some.

Ooh, I love me a FIMO craft.

And this Halloween floral arrangement is gorgeous.

If you are anything like me, taking care of yourself is your last priority.  I’m printing this and sticking it on the fridge.

If you are a blogger and creative entrepreneur and are thinking about attending a creative conference, this post is a must-read.

Style

Sven Clogs for Fall

October 22, 2015

To start this post, I have to say that being behind that camera is so much easier then being in front of it. This is very much out of my comfort zone. But, I often preach about taking risks, so here’s me practicing what I preach.  I’m showing full body shots of myself – eek.  Not just the perfectly cropped headshot, that doesn’t show my lumpy, bumpy parts. 
But, I know how much you guys love a good Sven Clog GIVEAWAY. So, these pictures of myself were for a good cause – new shoes for one of you.  I’ve teamed up with a couple of my favorite bloggers and real life friends, MJ of Pars Caeli and PJ of A Girl Name PJ, to bring you 3 chances to win a pair of Sven Clogs for your Fall wardrobe.  While we were in Portland a couple weeks ago, we put together our own little photoshoot in the Ace Hotel, where we were staying.  Please know that there was a lot of giggling and fun poses, even some clog dancing. We don’t take our selves too seriously.
This fun giveaway is all happening over on Instagram.  So, head over there as soon as you’ve read this post.  

As a redhead, Fall is my season to shine. All the colors and tones are perfect for my hair and fair skin color. I look forward to the warm earthy tones that make their appearance this time of year. So, this was a fun look to put together.

And here’s a little of the behind the scenes look at bloggers taking pictures of bloggers. We really did have fun shooting these posts. There was a lot of laughing and silly poses.  And while I still think I’m a better photographer then model, there’s a little confidence gained when you take a risk and follow through with it.

MJ’s splash of red works perfectly with her playful personality and kid-friendly brand.  This lady is beautiful inside and out.

PJ’s city refined but comfortable style sensibility is always about well thought out details and she oozes that cool mom vibe through both her blog and her wardrobe. 
Now go check us all out on Instagram and enter to win a pair of clogs on each one of our accounts.