This post is sponsored by Article. Thank you for supporting the brands that help make this blog possible.
It’s been a while since we’ve made any major changes to our home. But, now that our son has been in college for a few years, we decided that we needed a more official guest room. Of course it’s still Dylan’s room when he comes home. But, since we have a lot of out of town family and want our guests to be as comfortable as possible, we made a few upgrades.
I few years ago, actually in the heart of the pandemic, we gave Dylan’s room a makeover. It was time for the bunk beds to go, so we partnered with Article and added the beautiful Lenia Walnut Queen Bed. You can check out the full post HERE. Now, fast forward a few years, I always knew I wanted a sofa in this room. It’s a very long, spacious room and we wanted to be able to use the room for watching a game, reading in a quiet spot, or just giving one extra spot to folks to sleep. With friends and family visiting, the sofa bed turns this room into a little suite, room for parents and kiddos.
With this in mind, Article was the only choice I had in mind to help makeover this room. Their furniture is thoughtfully designed – they feel classic, but modern and stylish. I can also shop from them with confidence knowing I’m not only getting a great value but that I’ll have and love their quality pieces for a long time. Everything truly feels built to last.
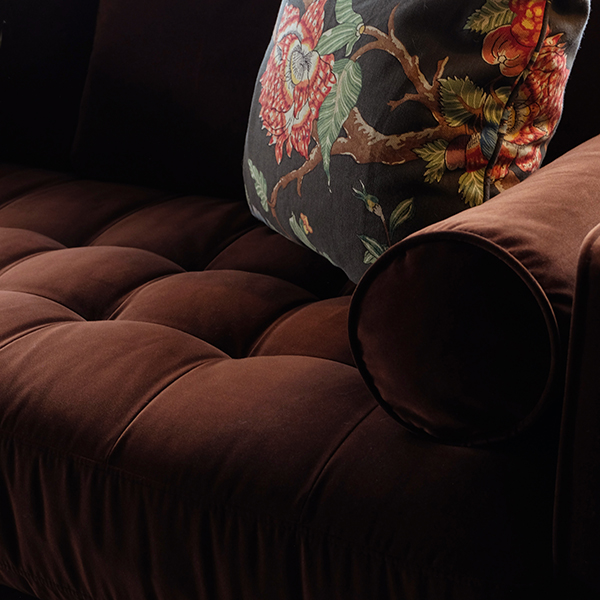
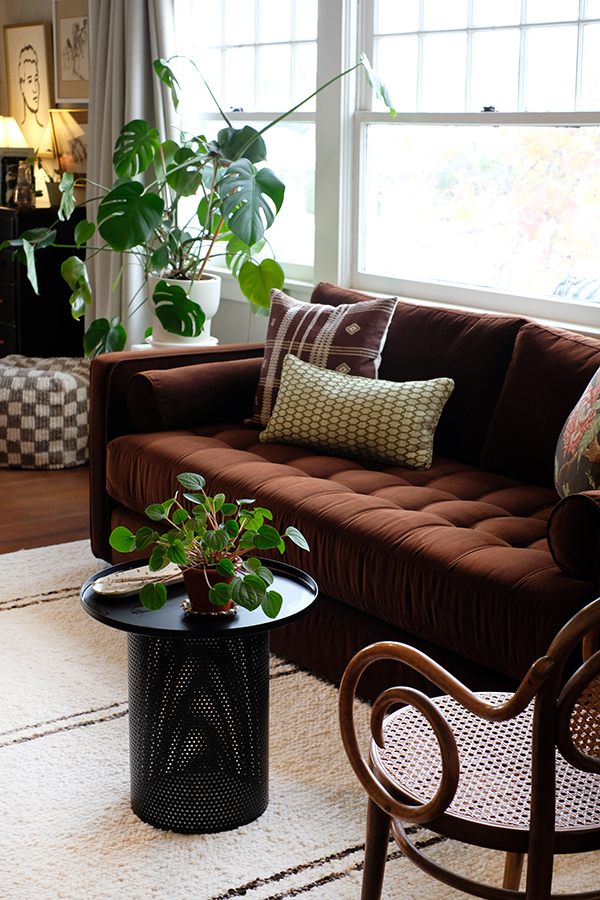
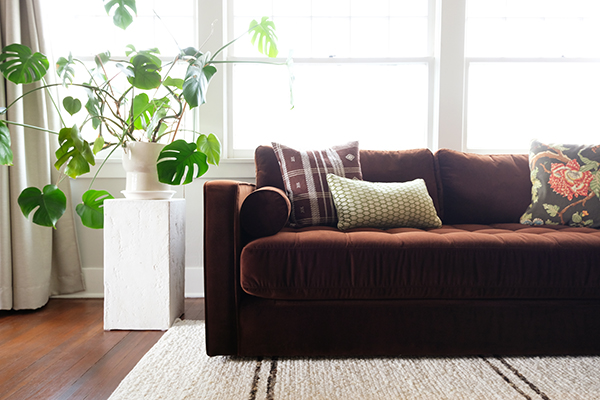
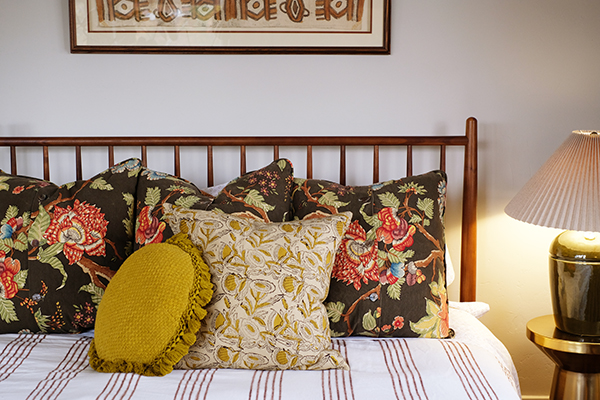
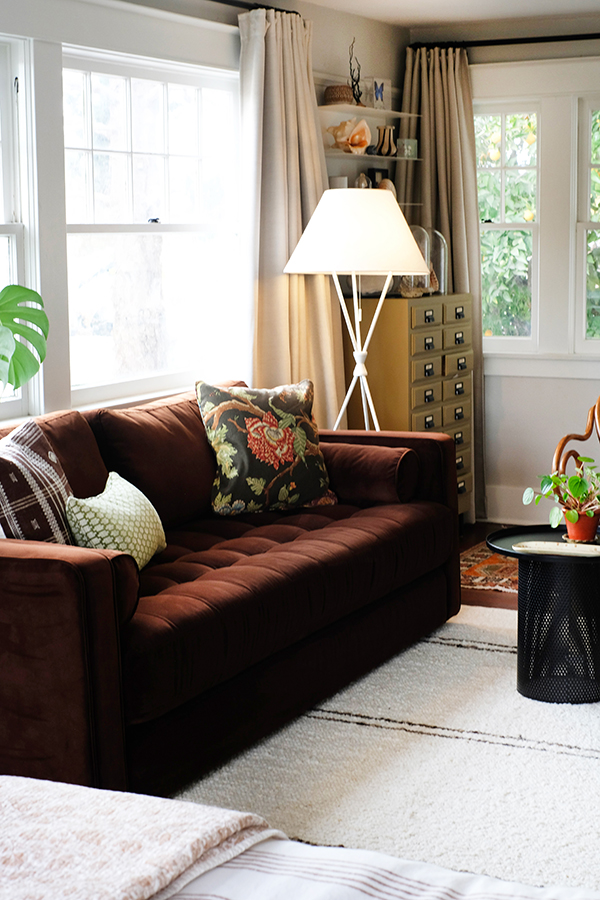
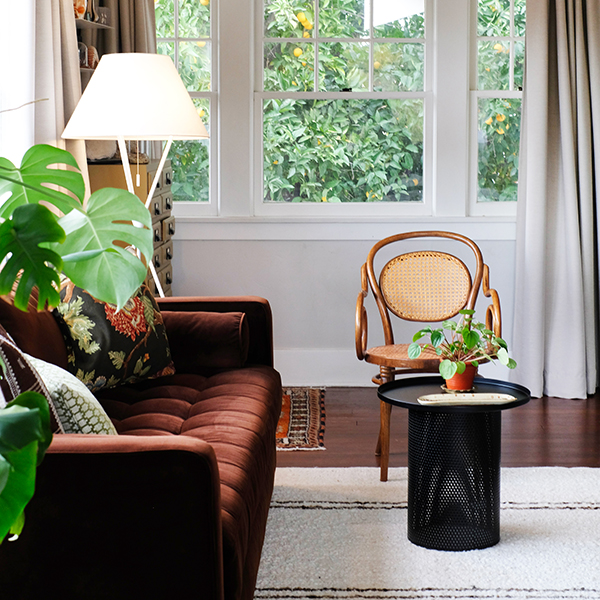
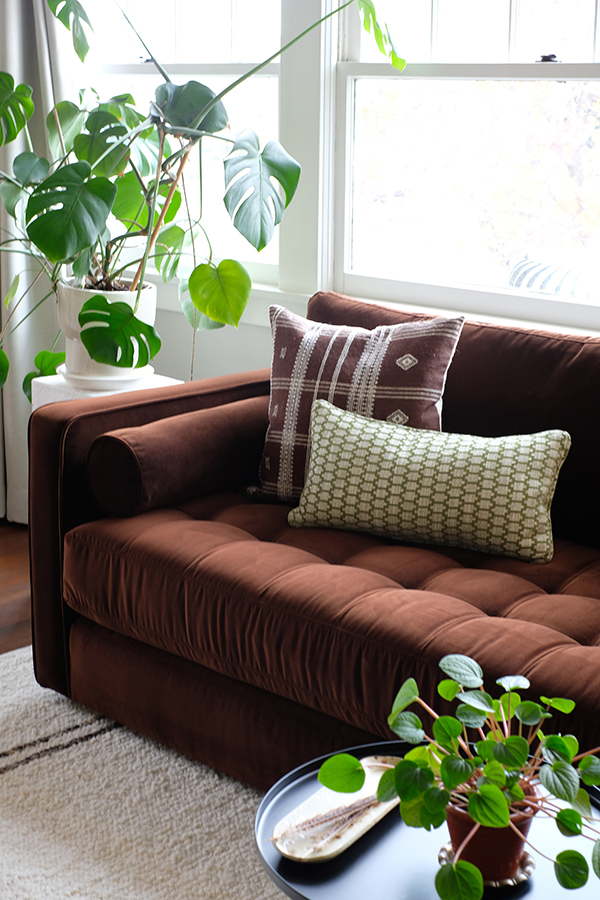
I knew I wanted to add more chocolate brown to this space. I love earth tones, and lately I can’t get enough of warm browns. This room is very light and bright with 3 full walls of windows and light colored walls. So, a grounding color like brown was just what this space really needed. I’m so glad that this trending colour seems like it’s here to stay. It’s classic but still special and so rich, especially in velvet. The Sven Sofa Bed in Plush Pacific Brown checked all the boxes. The fabric on the Sven Sofa is not only super soft, it’s very durable – which I love. And honestly it’s the easiest sofa to turn into a bed. You just remove the seat back cushions and then pull two tabs on the seat to lay out the bed. This is not like your grandma’s sleeper sofa with an uncomfortable thin spring mattress with the inevitable bar in your back all night. It’s truly one of the most comfortable beds in our house.
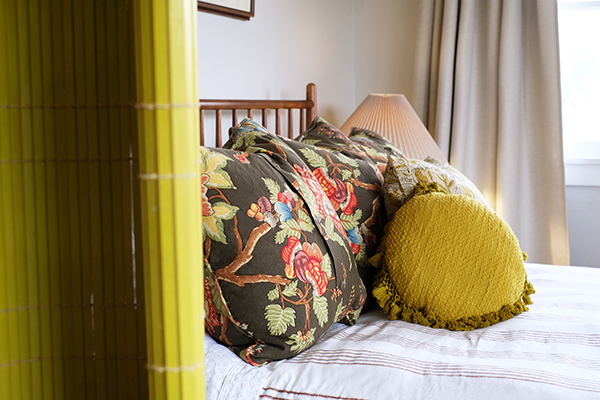
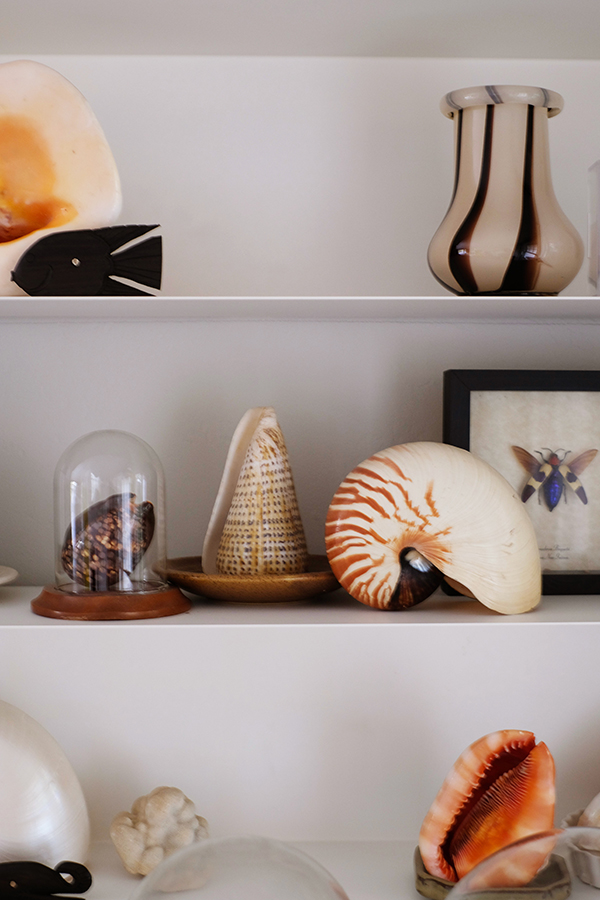
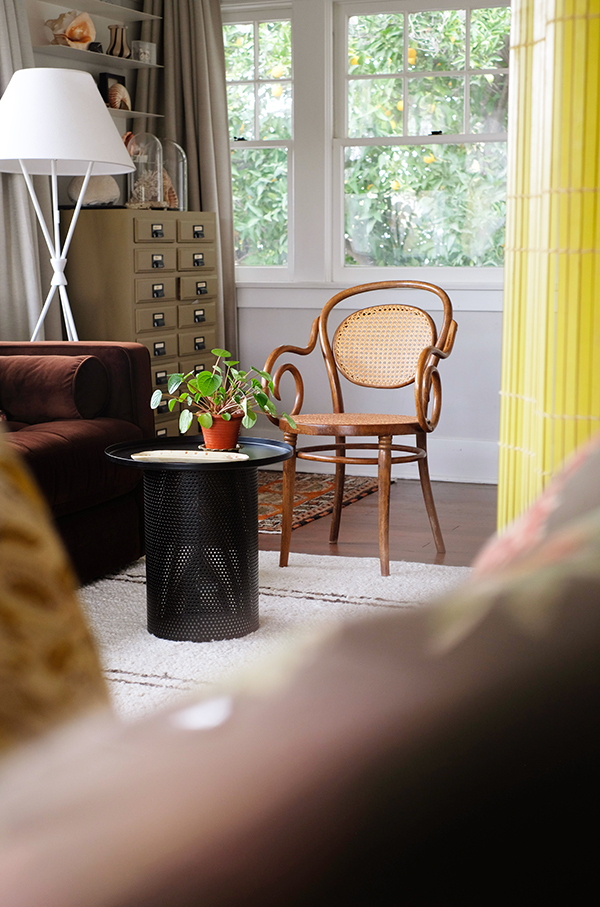
With the Sven Sofa as the new foundation piece for the room, I sourced some fun new vintage pieces, pillows, art and a bright colored bamboo screen. Since it’s a big open space with two beds, I thought guests might like to have a little privacy. I’d love to add a little more pattern to this space, maybe even wallpaper someday. But for now, I really couldn’t be happier and I hope my guests feel the same way.
This post is sponsored by Ghirardelli. Thank you for supporting the brands that help make this blog possible.
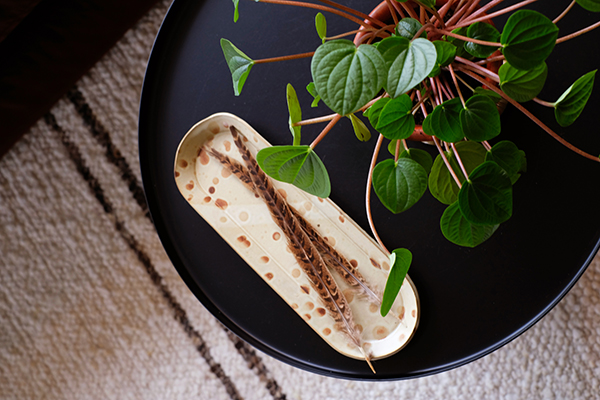
Life has been particularly busy lately. I’m sure opening a shop is part of that. But, Lonnie and I just want to have some chill time and home together. So, a coffee table date is exactly what we need and Ghirardelli Duet Hearts are the star of the event. Dark chocolate for Lonnie and milk chocolate for me.
Even though I love to cook and bake, I need a night off and creating a pretty fruit, nut and chocolate board is a perfect low effort dessert.
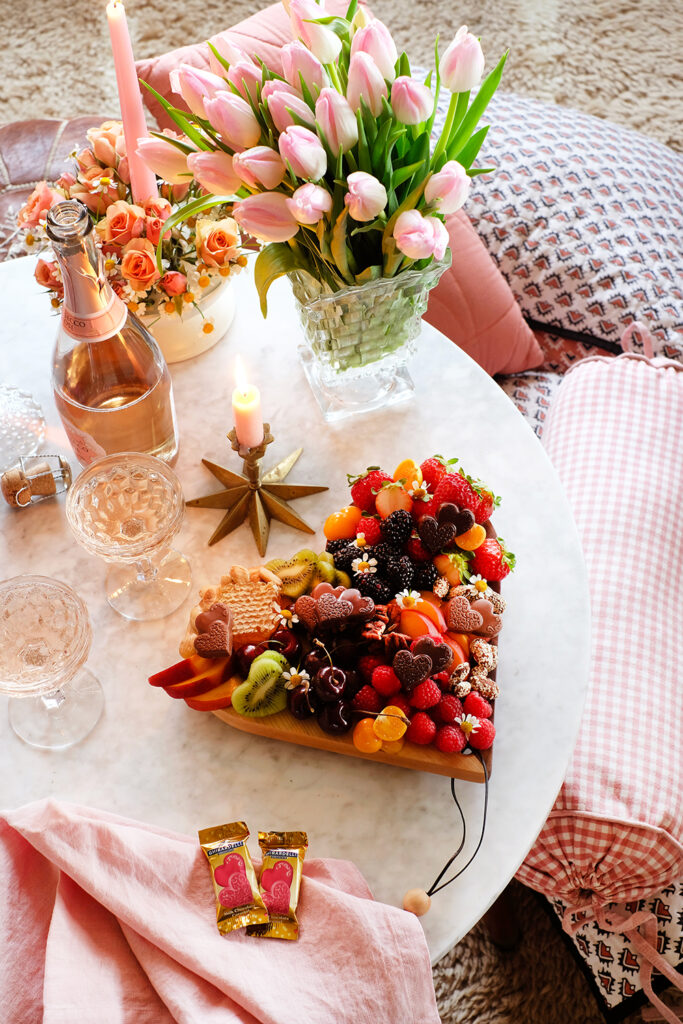
I set the scene with some pretty grocery store flowers, some pink taper candles, and some bubbly. And then I filled a cute heart shaped board with fresh fruit and berries, a few sweet and salty nuts, a little honey comb, Ghirardelli Duet Hearts and some cut camomile flowers.
Grazing boards are perfect for a slow, intimate evening. You don’t have to be in a rush, and picking at sweet treats while we visit is about as good as it gets.
Happy Valentine’s Day friends. I hope you feel loved and seen today.
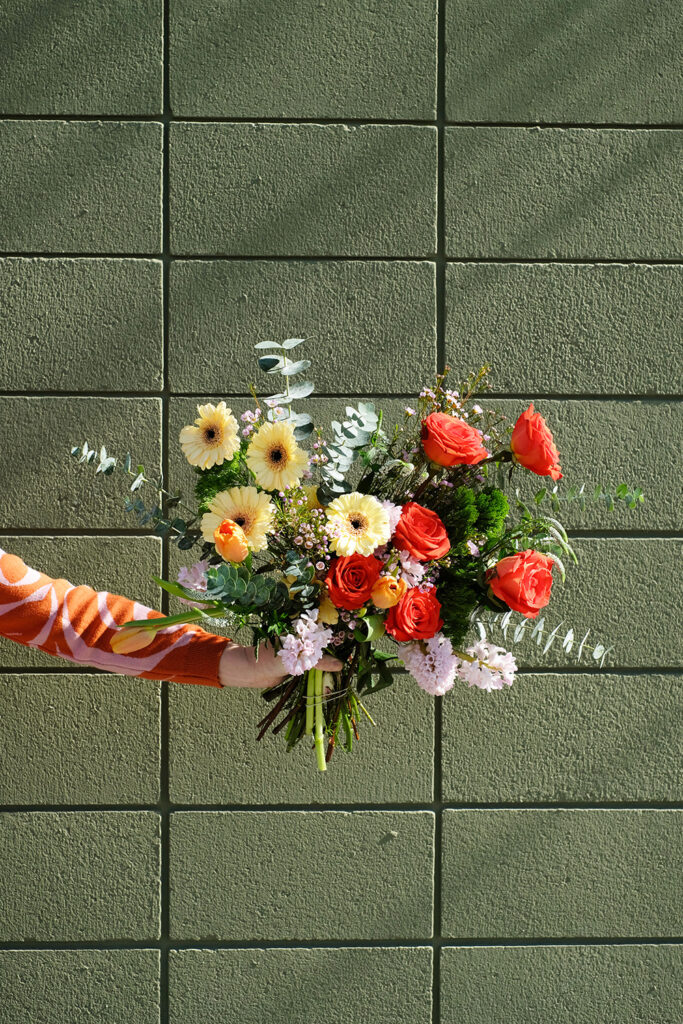
Valentine’s Day is just around the corner and the shop is stocked with great gifts, both old and new. And I’m so excited to be hosting Brittney of Knot and Fern here at the shop on February 13th and 14th. Brittney is bringing her gorgeous custom floral bouquets here for easy Valentine’s Day pick up.
Simply pre-order your bouquet before Sunday, February 12th and then you can just stop by the shop and pick up your bouquet. We are making it easy-peasy for you. You’ll have the option to add a vintage vase and we have lots of adorable cards, gourmet chocolate, French soaps and candies, handmade candles, incense and lots more.
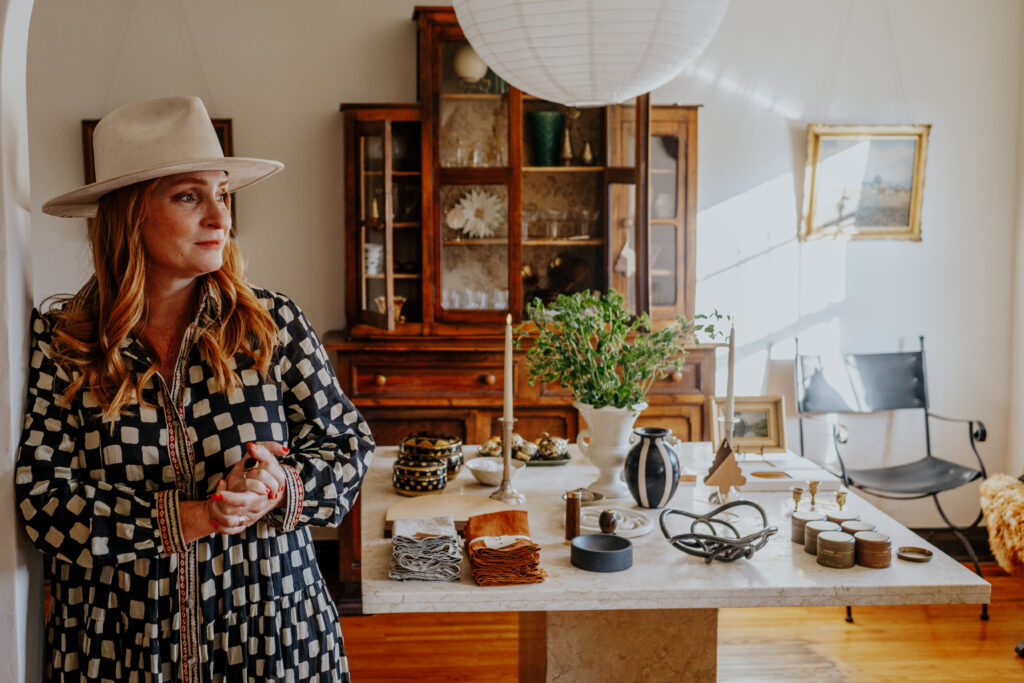
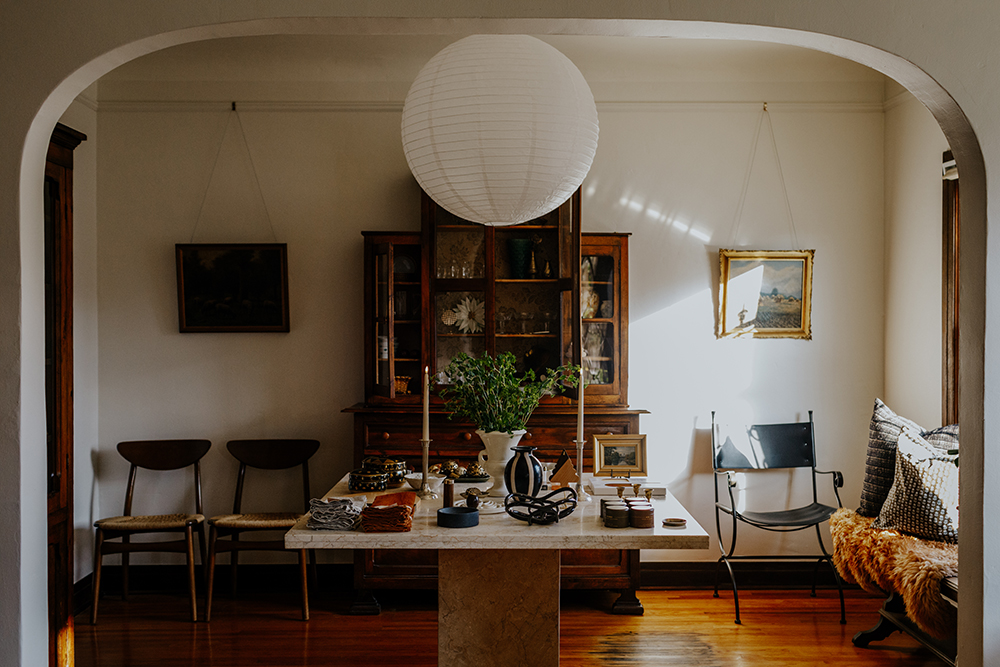
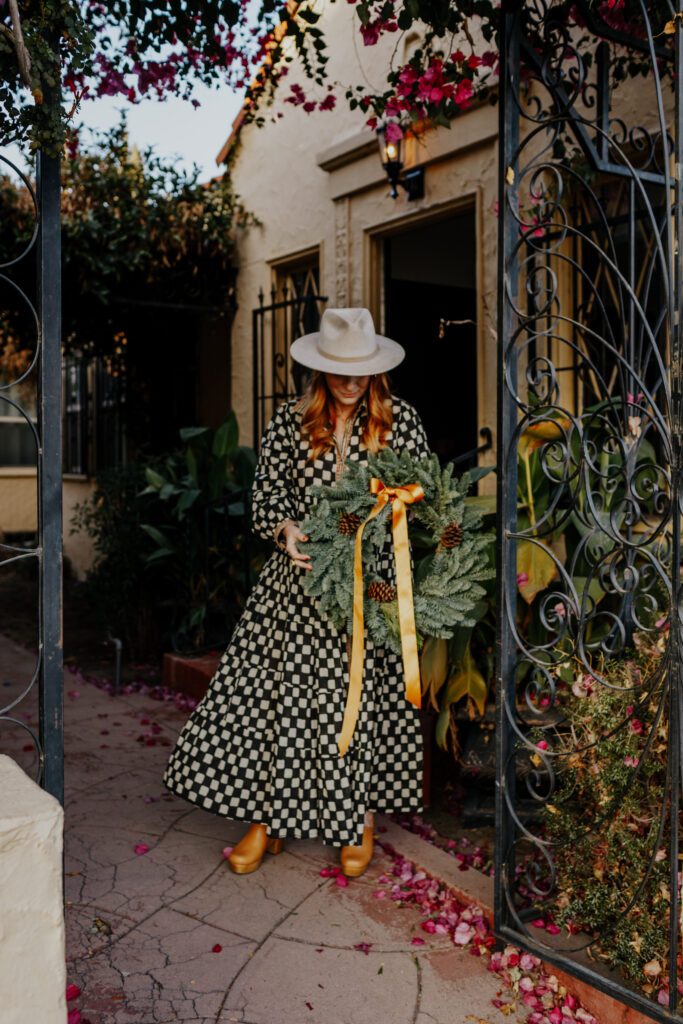
Hi friends, you probably already know this, but I OPENED A SHOP! It’s been a long time dream and in true Jeran fashion, I decided very spontaneously to lease a building and open.
I want to document more of this decision and process here on the blog. But to be completely honest, right now I don’t have the time or energy to share more then this announcement and some images my friend @allyswenphotography took for me just before I opened. I’ll be back and share more, but for now here’s where we are located and when we are open.
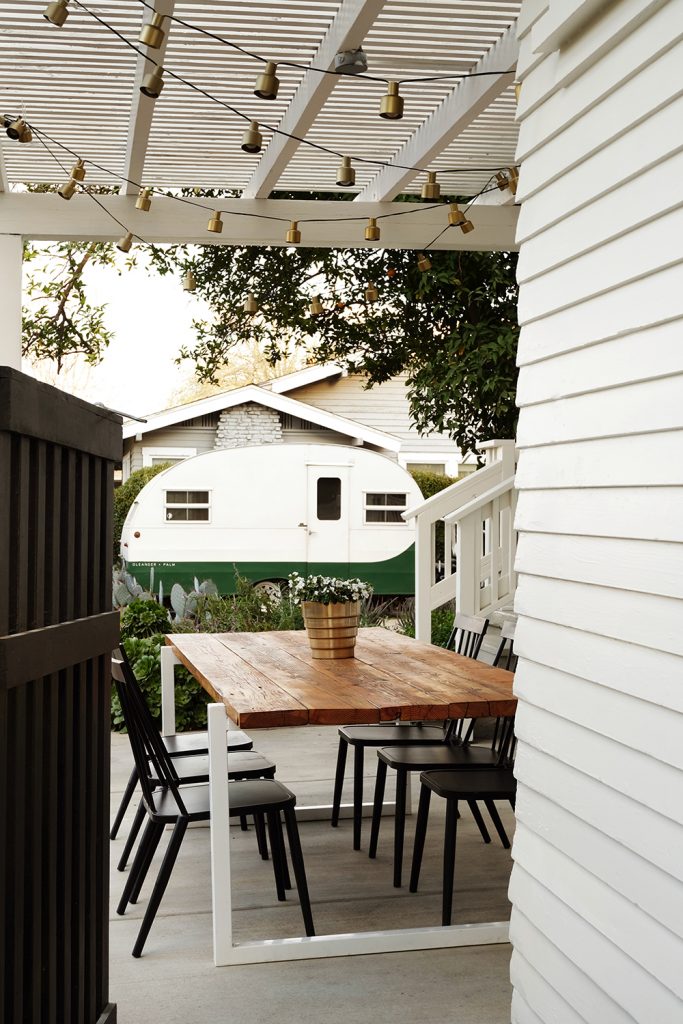
Oleander + Palm
1022 Truxtun Ave, Bakersfield CA 93301
Tuesday – Saturday 10 am – 5 pm
I hope you can come a visit me, but if that is not possible my online shop is still there and I’m adding new items to it all the time. Thanks for all the support friends.
This post is sponsored by Artifact Uprising. Thank you for supporting the brands that help make this blog possible.
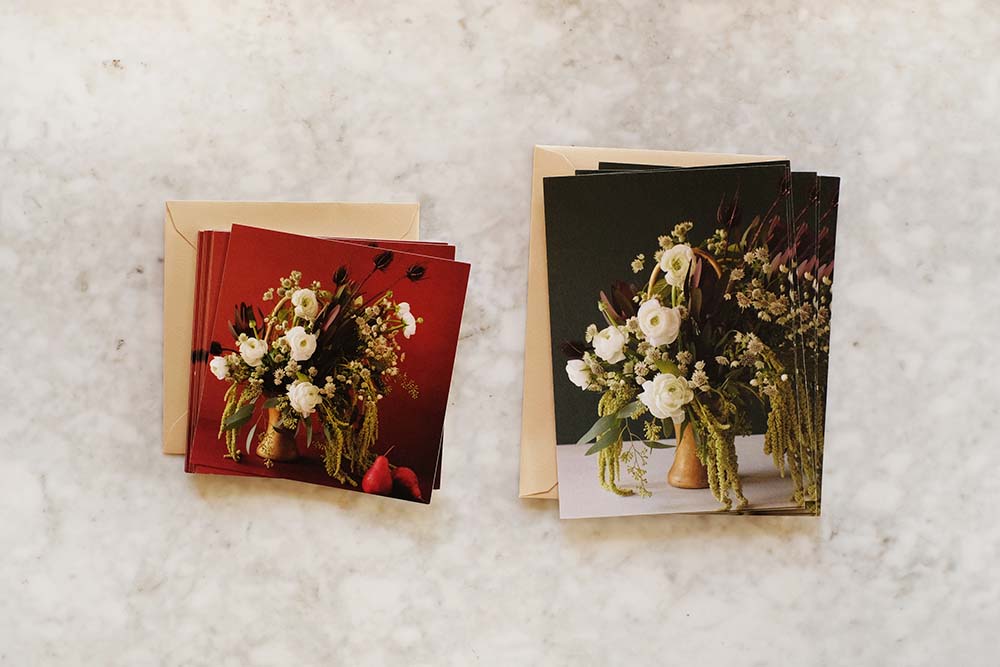
A couple weeks ago I asked you to vote on a RED or GREEN floral still life that I was going to add to my Artifact Uprising Holiday Card this year. Green won! I mean, it is my favorite color, but so many of you liked the red as well, so I printed BOTH! They came out really beautiful. Artifact Uprising‘s gorgeous mat ink and paper makes these look like mini oil paintings.
As a small shop owner, I’m always looking for ways to give my customers a unique and memorable experience when they purchase from my shop. It’s hard to be the little guy competing against the big brands. But, even when my customers order online, I want them to be pleasantly surprised when they open their package. That’s why I always include a handwritten thank you note. I make sure to included something pretty on the card so that it’s something my customers will hang onto and hopefully remember to come back and shop again.
Artifact Uprising makes it so easy to create professionally designed cards and prints. There are so many amazing layouts and designs available. I opted for the simplest card that allowed me to fill the entire surface with my florals. But, if you want to pack in a couple cute pictures of your kids or pets, they have so many great options for that as well. Their Holiday cards are fully customizable with 5 foil color options, varying image placements, interchangeable color choices and so many festive designs. You can even customize the envelopes!
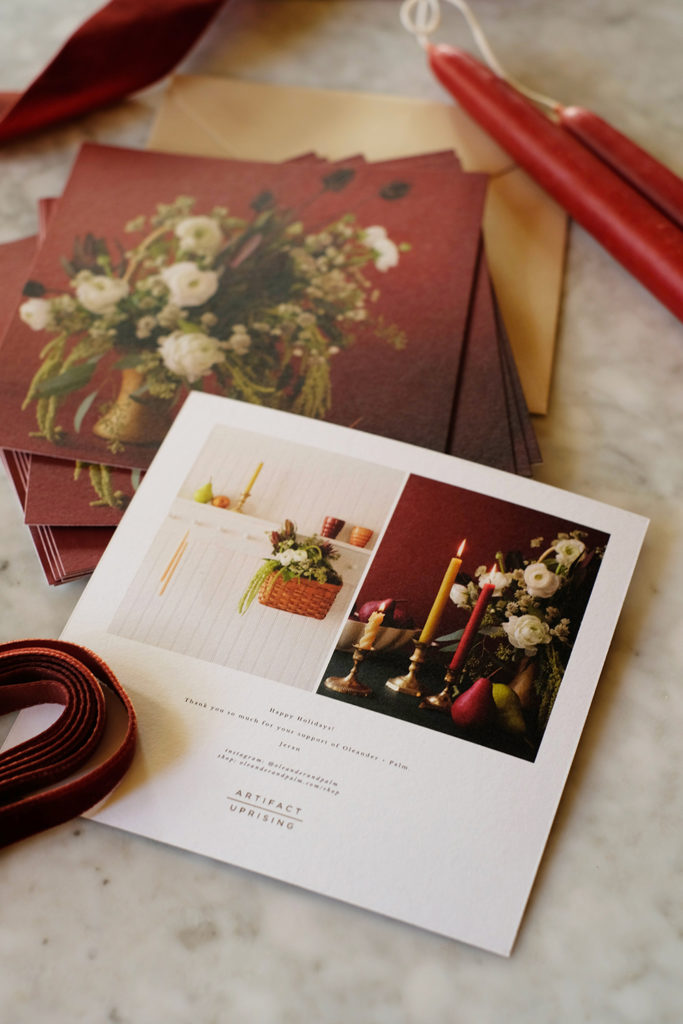
I added a couple more images to the back of the cards and wrote a Happy Holidays greeting. I can’t wait to add these to orders from my shop in the weeks to come.
I’ve printed our family holiday cards with Artifact Uprising for a few years now. I also regularly create photo albums and calendars with family pictures. Everything made by Artifact Uprising is the BEST and that why they are my go-to when I want to create premium-quality customizable photo goods with my digital photos. I LOVE that they always print on 100% recycled paper.
Take my advice, there really is nothing Grandparents like more than photo gifts. Just speaking from experience. And if you decide to make some beautiful holiday cards or a gorgeous photo book, be sure to save 15% with my code: JERAN15 (which is good till 12/31/2021).
This post is sponsored by Ghirardelli, thank you for supporting the companies that help make this blog possible.
It’s here! SPOOKY SEASON.
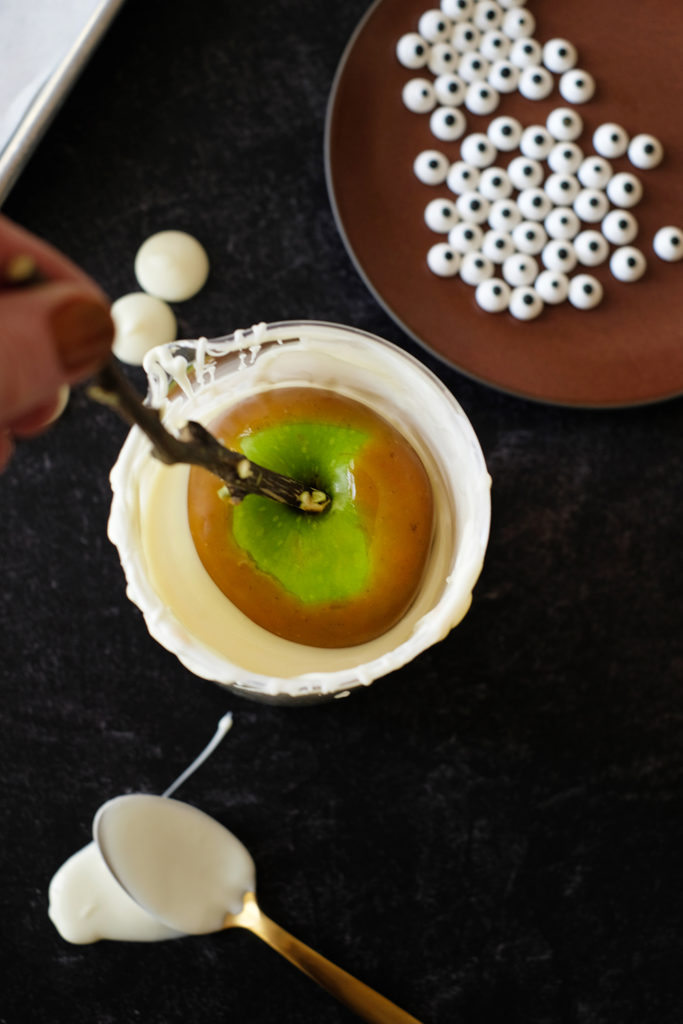
I’m sad that we won’t be hosting our annual Halloween party AGAIN, but don’t fret, there will still be treats. We might just have to deliver them to friends and neighbors instead. I don’t think there is anything more quintessentially Fall than a caramel apple. I really had so much fun creating these cute and creepy White Caramel Apples. They are just the right amount of spook, but not overly scary.
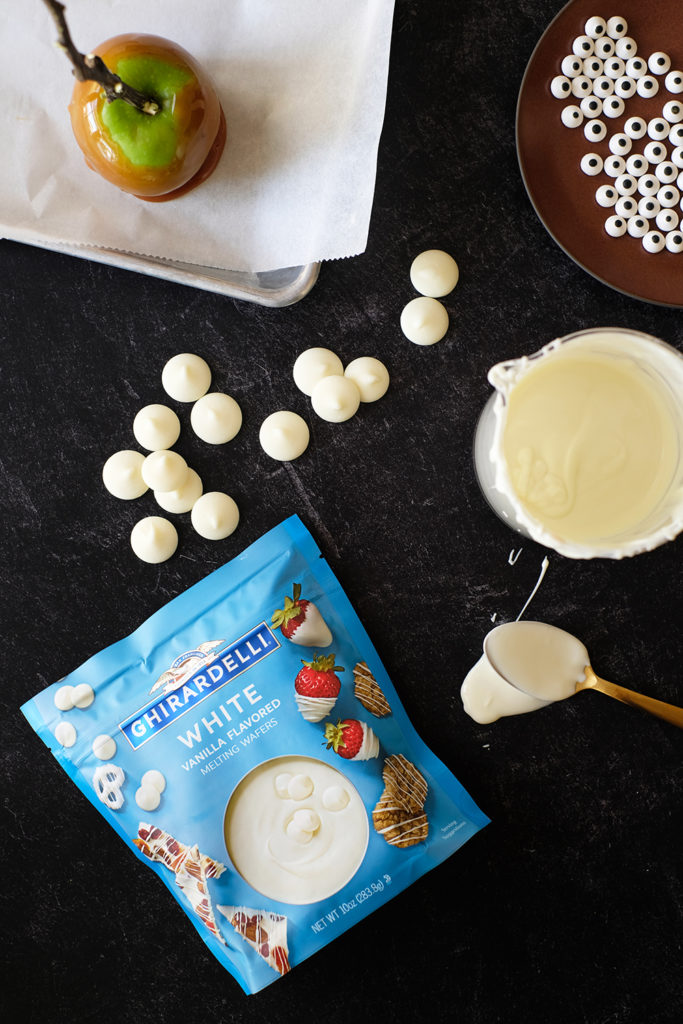
You don’t have to be intimidated by making these, they really were so easy to make. And Ghirardelli’s White Vanilla Flavored Melting Wafers make it a breeze. Simply melt, dip, chill and enjoy! Tempering is a very exact science, and with Ghirardelli’s melts you don’t have to fuss with that at all. And the best part – these melts tastes amazing. You’ll never use another melt again, I promise.
Ok, let’s get started. Here’s what you will need:
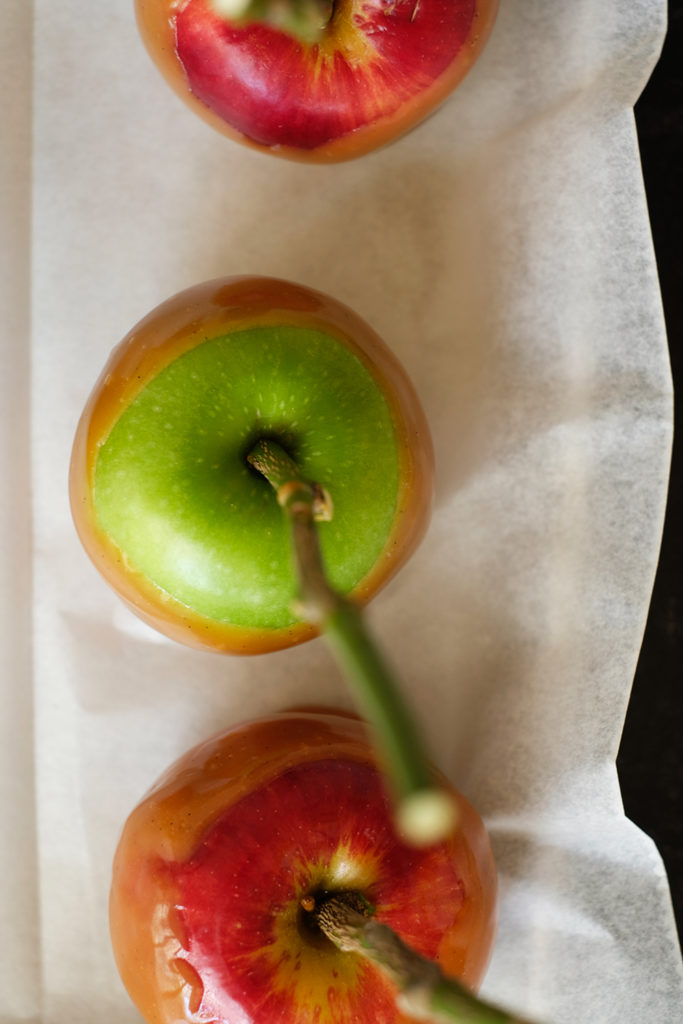
apples (I used a mix of granny smiths and honey crisps)
The first thing you need to do is really clean your apples. A lot of apples a waxed before hitting the grocery store shelves. If you don’t get rid of this waxy coating, your caramel will slide right off.
I soaked my apples in some cold water and an organic fruit and veggie wash. Then I made sure to dry the apples thoroughly with a towel.
You can use a popsicle stick, but I love how the natural twigs look in this apples. You will want sticks that are at least 6 inches long so that you can insert the stick quite a ways into the apple. Using a pocket knife or utility knife, sharpen one end and remove the bark. This will make spearing the apples a little easier.
And now you are ready to prepare your caramel and dip your apples. You can definitely be a super star and make your own caramel from scratch (I like this recipe best). But, you can also just buy a bag of caramels from the grocery store and melt them over the stove with a tablespoon of water. I mean….. I’m not going to tell anyone if you don’t. And whether you make your caramel from scratch or not, I do suggest scraping one vanilla bean into the warm caramel. It adds just a little extra and looks really pretty too.
Let the extra caramel run off the apples and scrape the bottom on the apple off completely. Don’t worry there will still be a pretty puddle of caramel at the bottom of the apple.
Place the freshly dipped apples on a parchment lined cookie sheet and place the apples into the fridge right away. Once the caramel cools it will solidify and you will be ready for the white layer.
Now we are ready to dip in the melting wafers! Ghirardelli Melting Wafers can be melted on the stove top in a double boiler or in the microwave at half power. I went old school and melted mine on the stove. I poured the melted wafers into a slim cylindric container so that it would be deep enough to dip the apple in.
Just like with the caramel, let the excess run off and then scrape the bottom on the apple off as well. I chose to dip my apples about halfway because I wanted to show off all the layers. You can dip as much or as little as you’d like. Place back on the parchment paper lines cookie sheet and chill in the fridge again.
Once set, you can add the eyes. I simply dabbed the back of the eye in some melted vanilla wafers and then adhered the eyes to the apples. I tried adding the eyes right after dipping the apples, but this just slid right off.
And because I was having so much fun, I decided to try some dark melting wafers and black salt caramel apples as well.
Aren’t these so pretty? This combo of the caramel, the dark melts and the salt was perfection.
I hope you try out this recipe. And let me know if you have any questions in the comments below.
This post is sponsored by The Company Store. Thank you for supporting the brands that help make this blog possible.
Happy Monday!
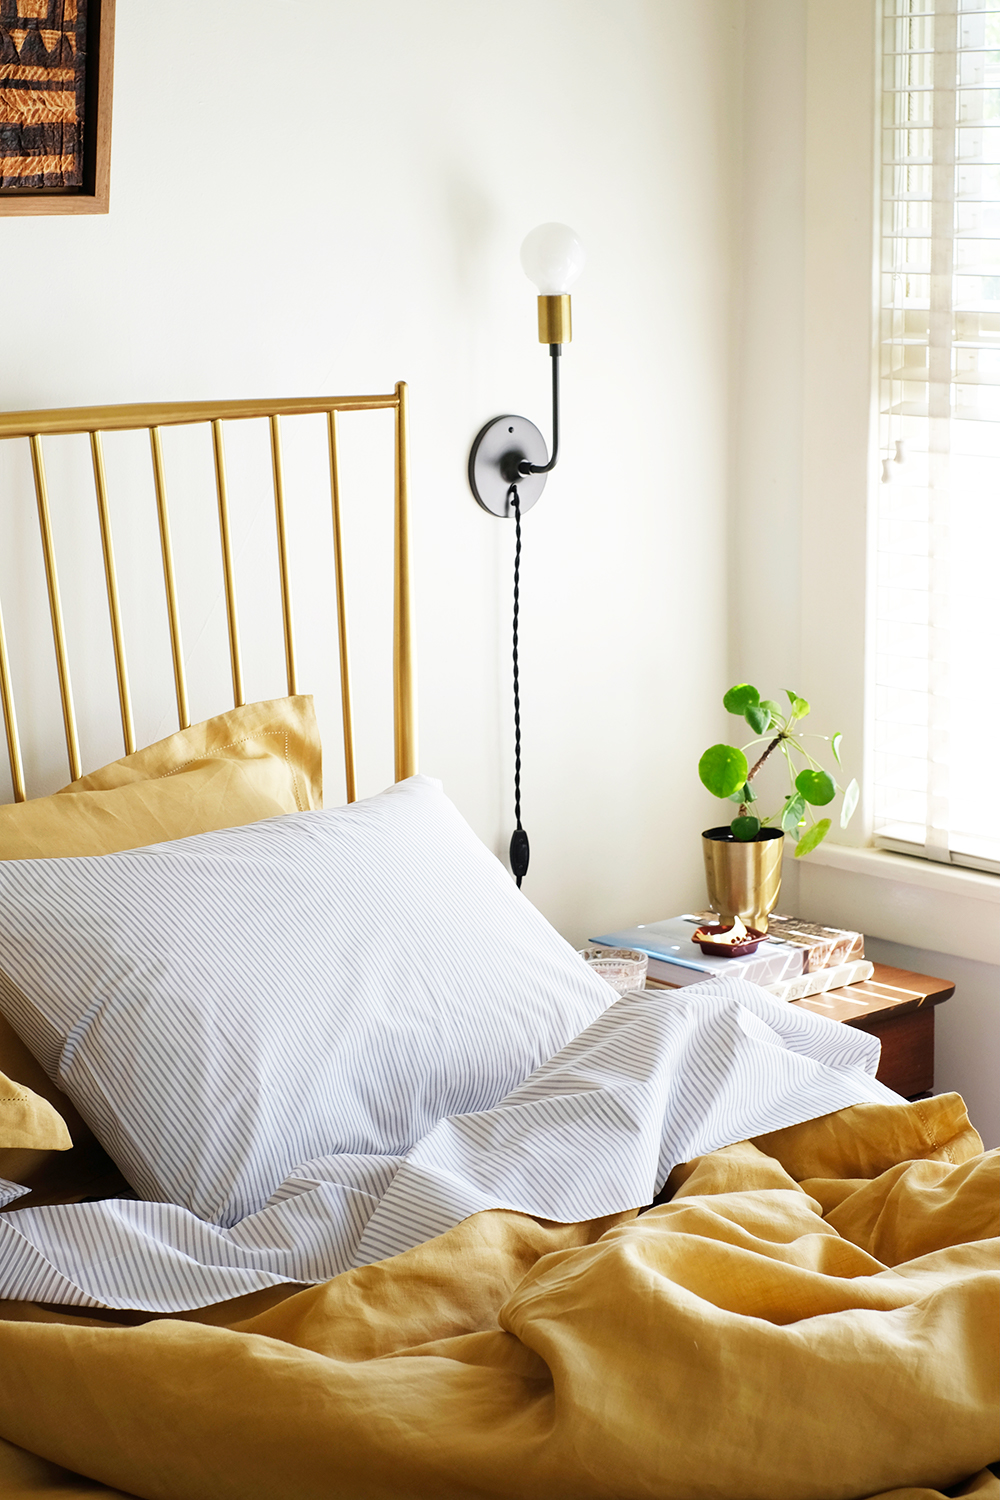
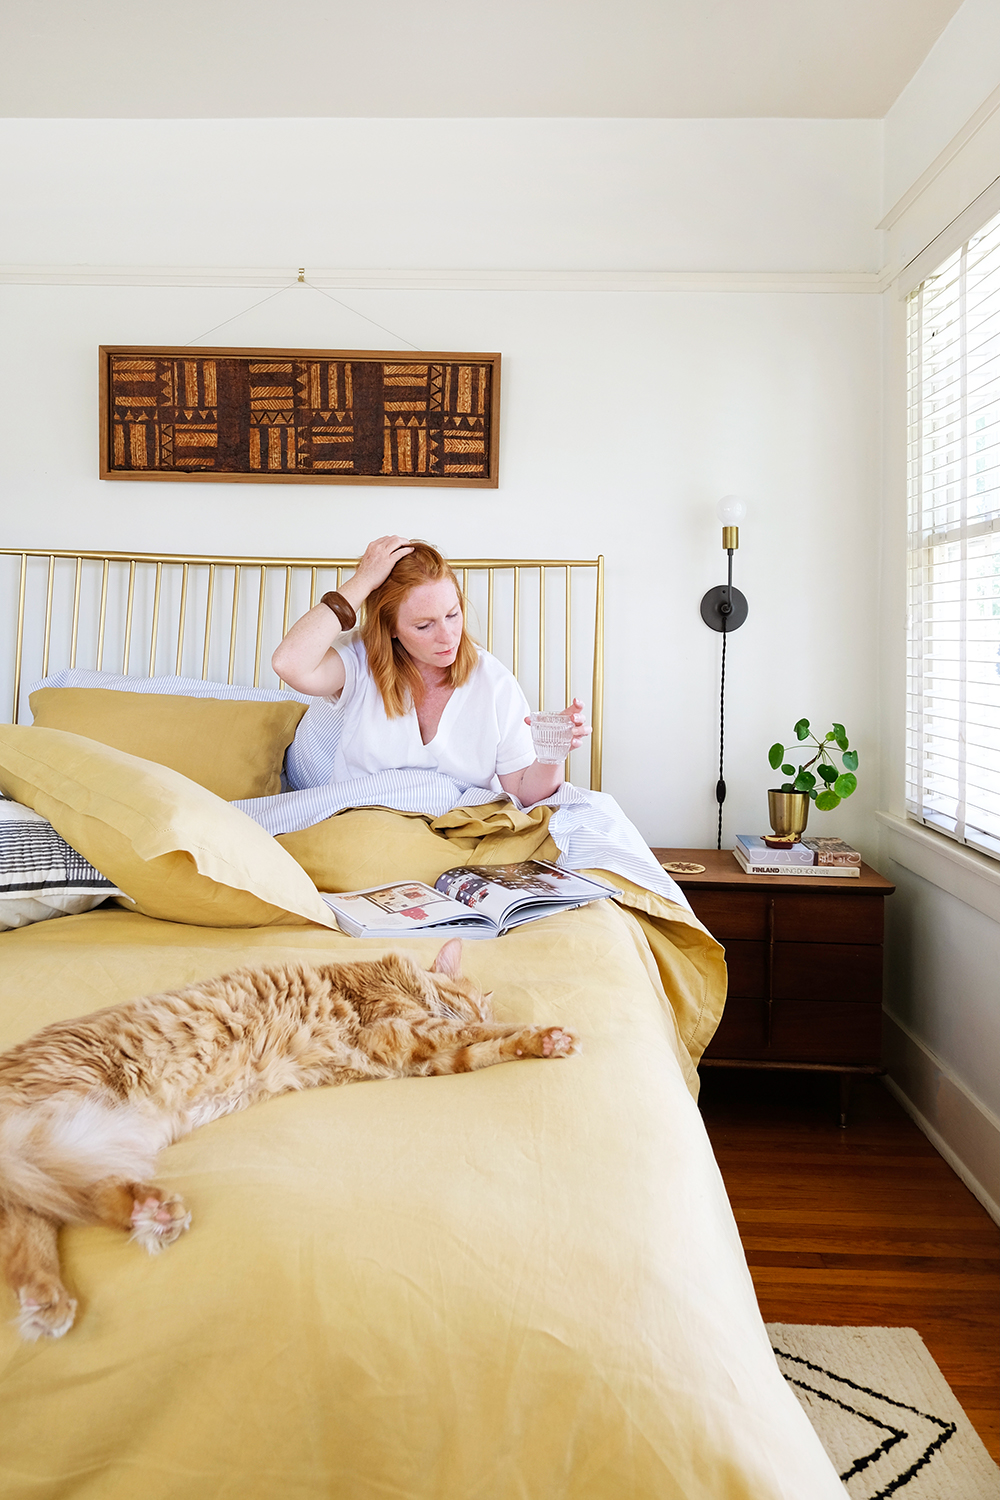
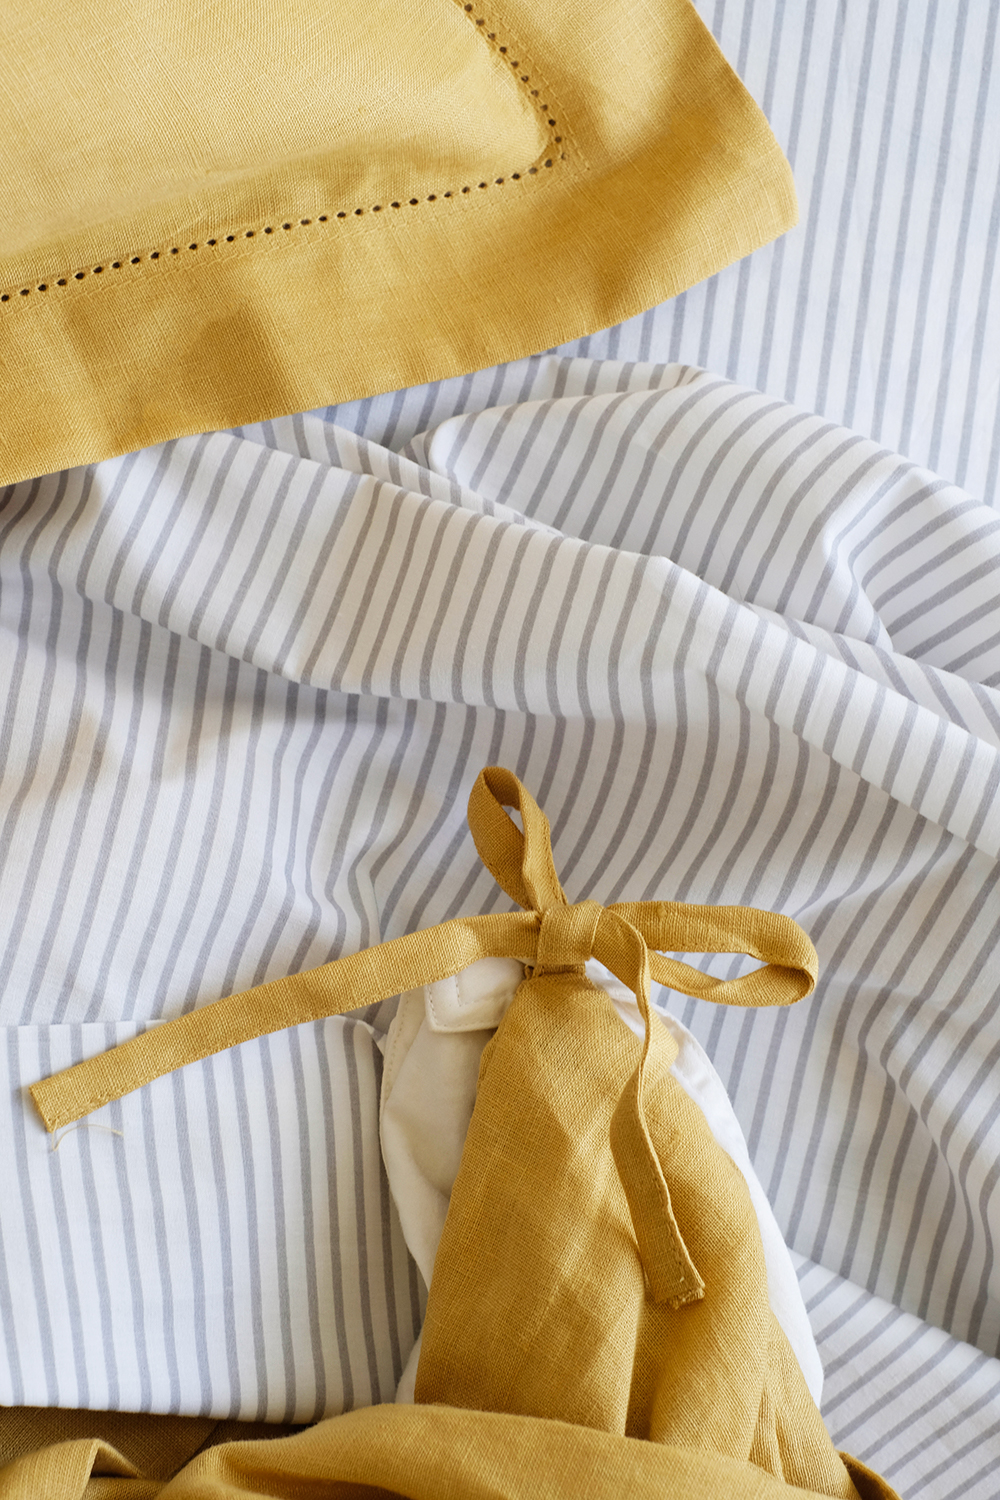
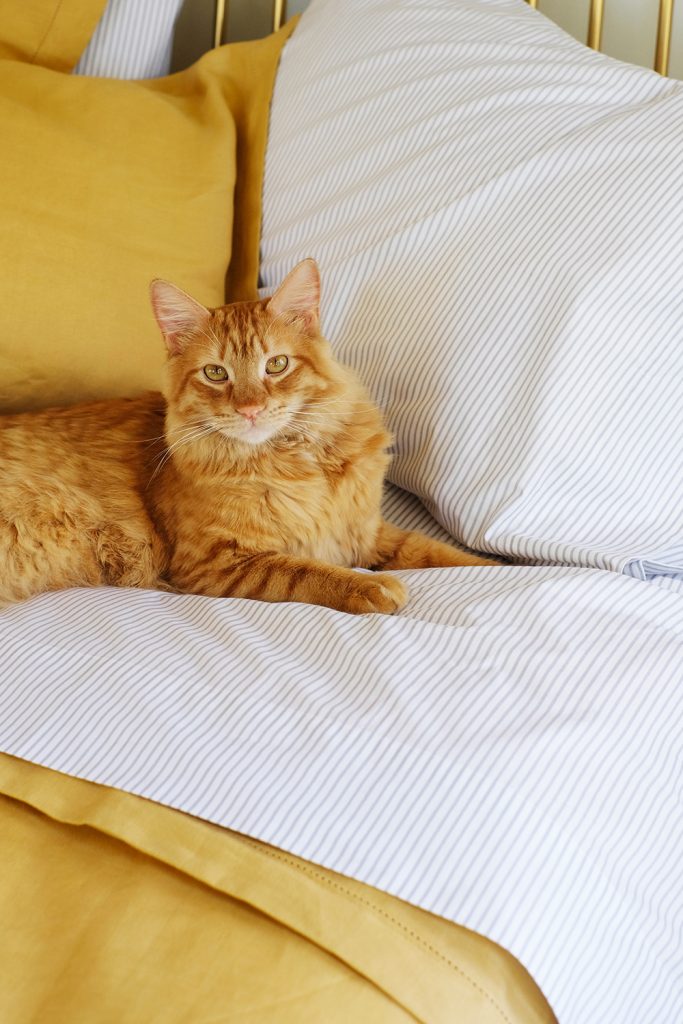
There is no time like Spring for wanting to spruce up and give rooms a refresh. I’ve been itching to change things up a little. And while I’ve been on an “all white bedding” kick for quite a few years, I’m craving a lot more color these days. My husband, Lonnie, is always happy when a stray from neutrals and add a burst of color. Since I’m ready for the sun and warmer days, we decided to bring in a little sunshine with a beautiful warm mustard colored Legends Hotel™ Relaxed Linen Duvet Cover and Shams from The Company Store.
I’m very impressed with the details like the pretty linen hem stitch around the duvet and the shams. This grey and yellow might be a combo we’ve all played with before, but it still feels current to me with this subtle pattern and just enough texture.
And the duvet cover has four interior corner ties to secure the duvet insert in place – because there is nothing worse than a duvet scooting all the way down to one end.
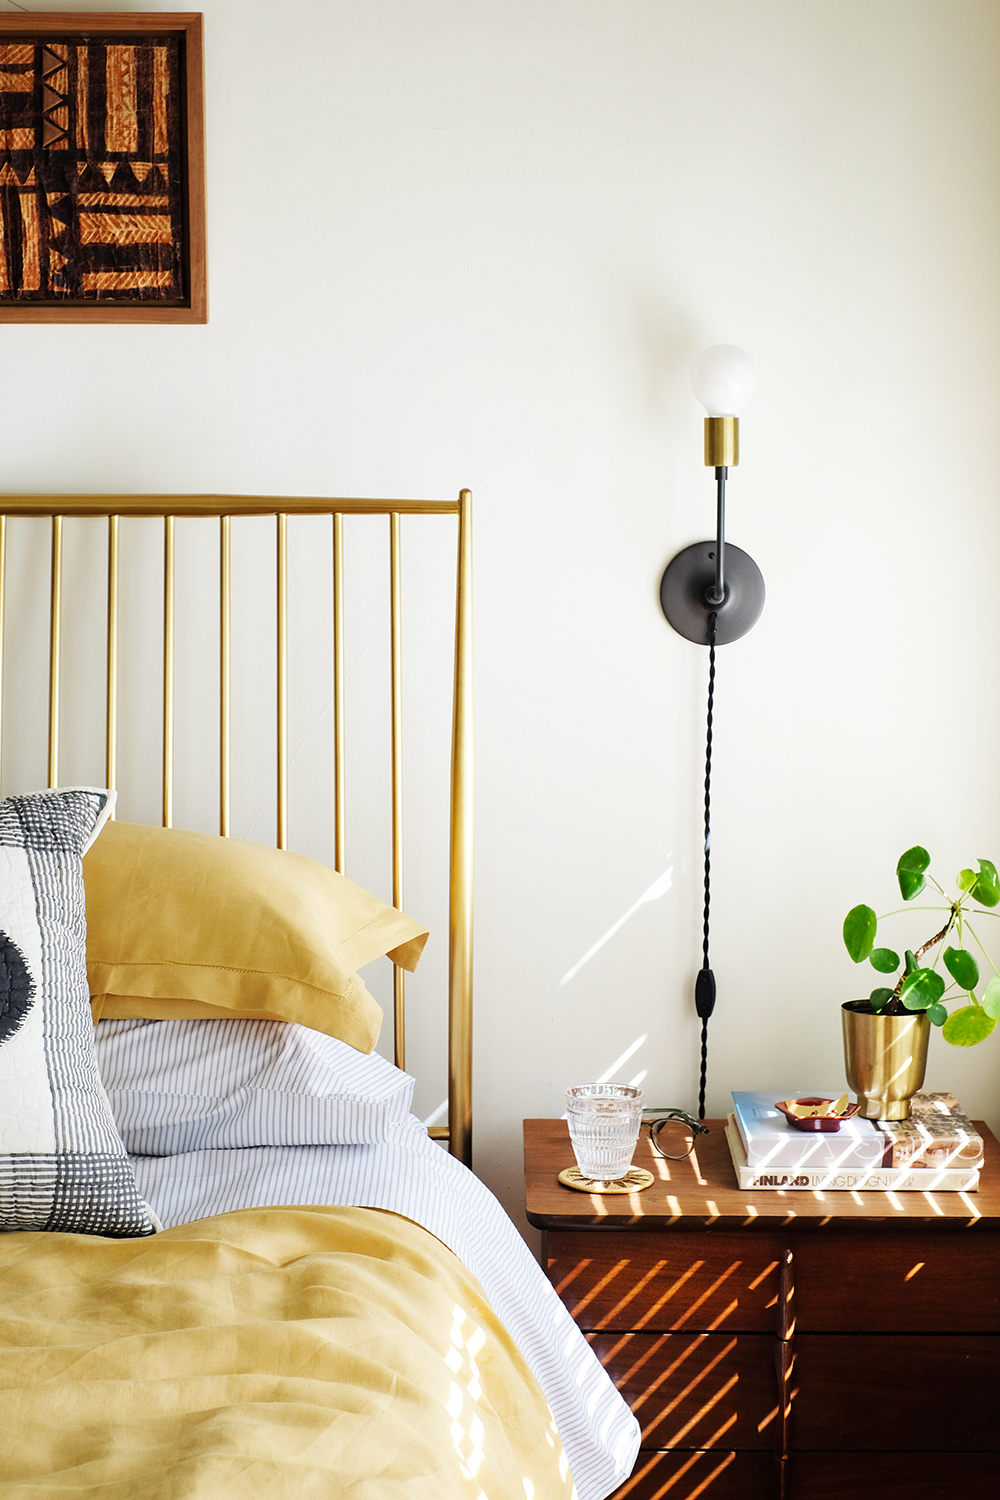
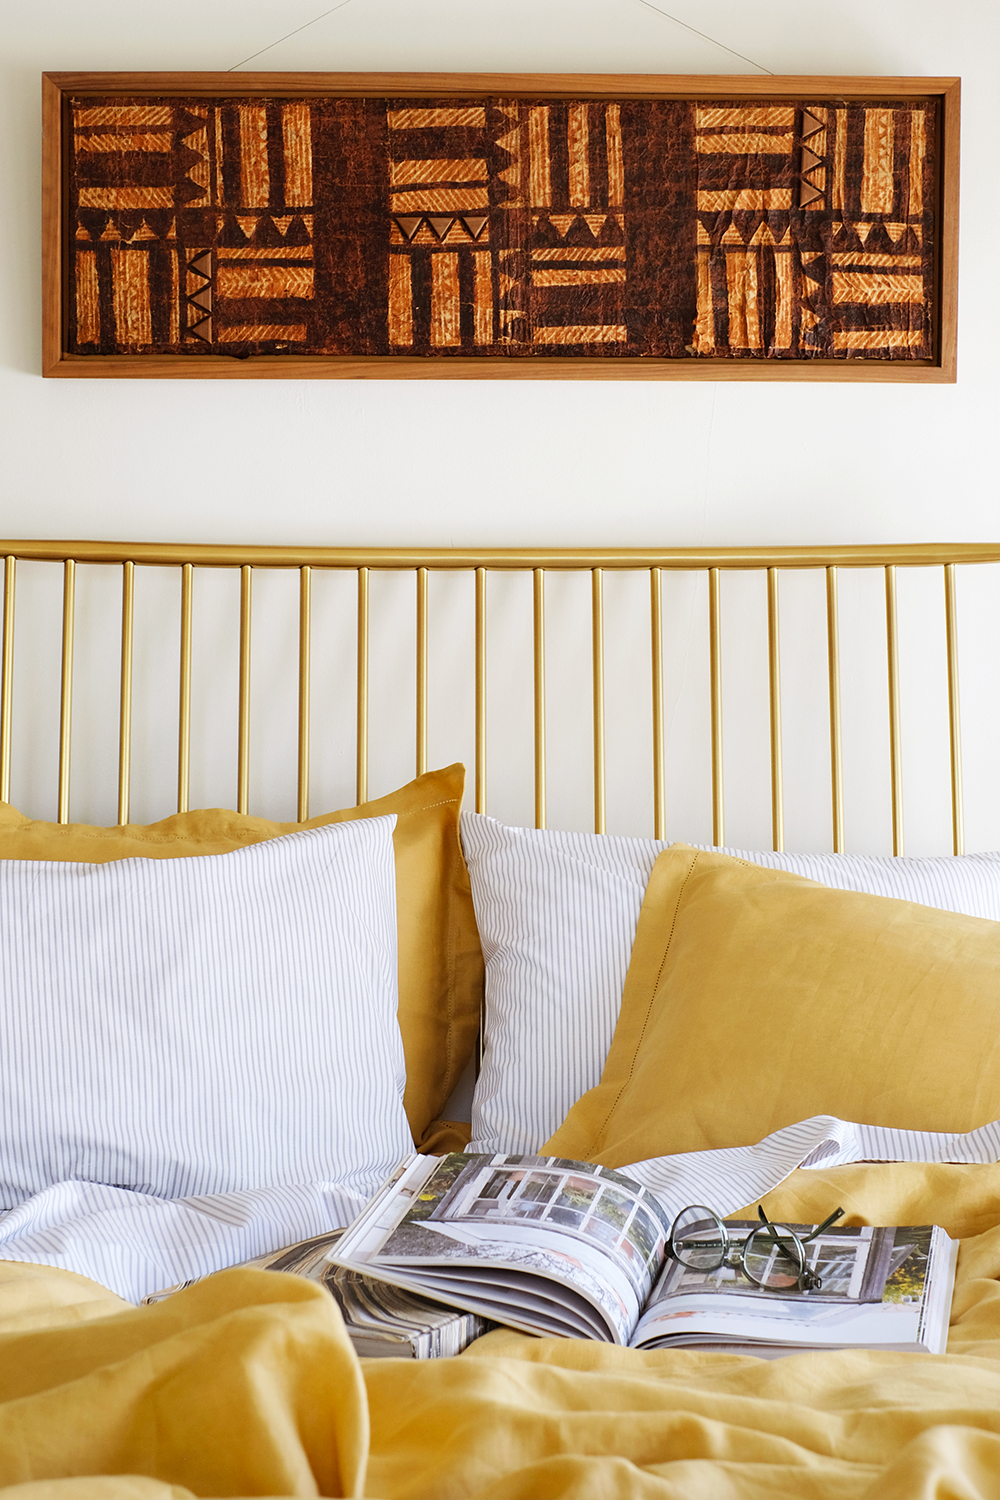
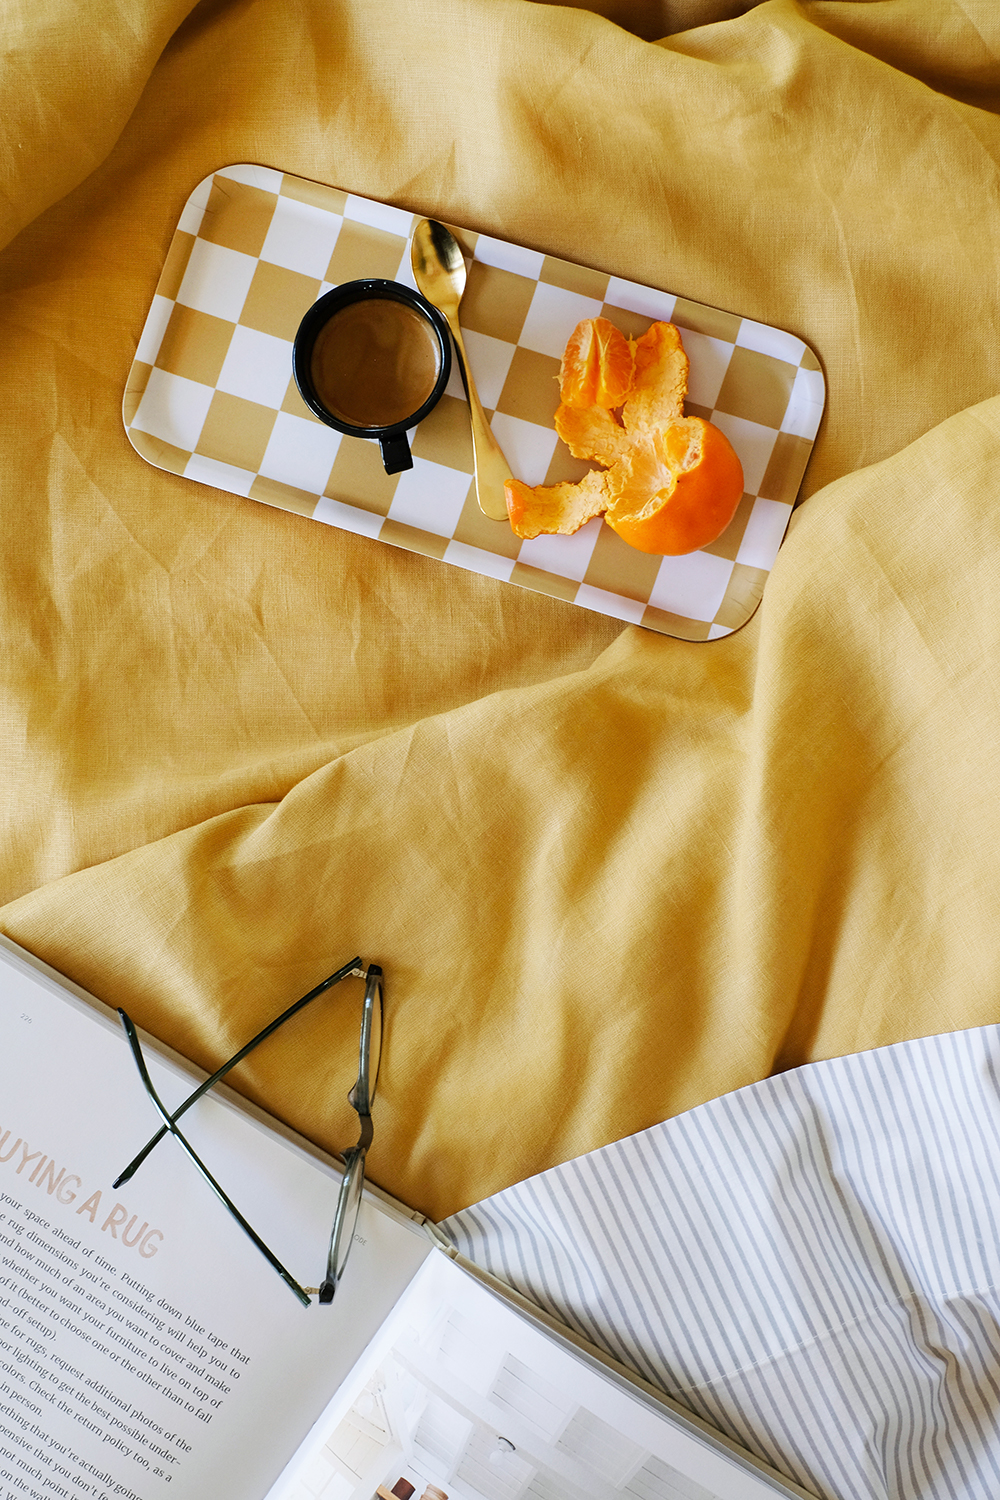
I love wearing linen, especially when the weather gets warmer. It’s great breathable natural fiber. It’s relaxed and the opposite of anything fussy or fancy. And, for all the same reasons, I’ve been wanting to try linen bedding. This is the softest linen and this gorgeous Legends Hotel™ Relaxed Linen Duvet Cover comes in 10 beautiful colors. I had a hard time choosing. There’s a gorgeous Green and a rusty red/orange called Russet that were both very tempting. But, I’ve been wanting to push myself a bit with colors lately, so this golden hue felt like the brave and bold choice. I think I made the right choice, It matched the brass of my bed frame spot on, which is kind of fun.
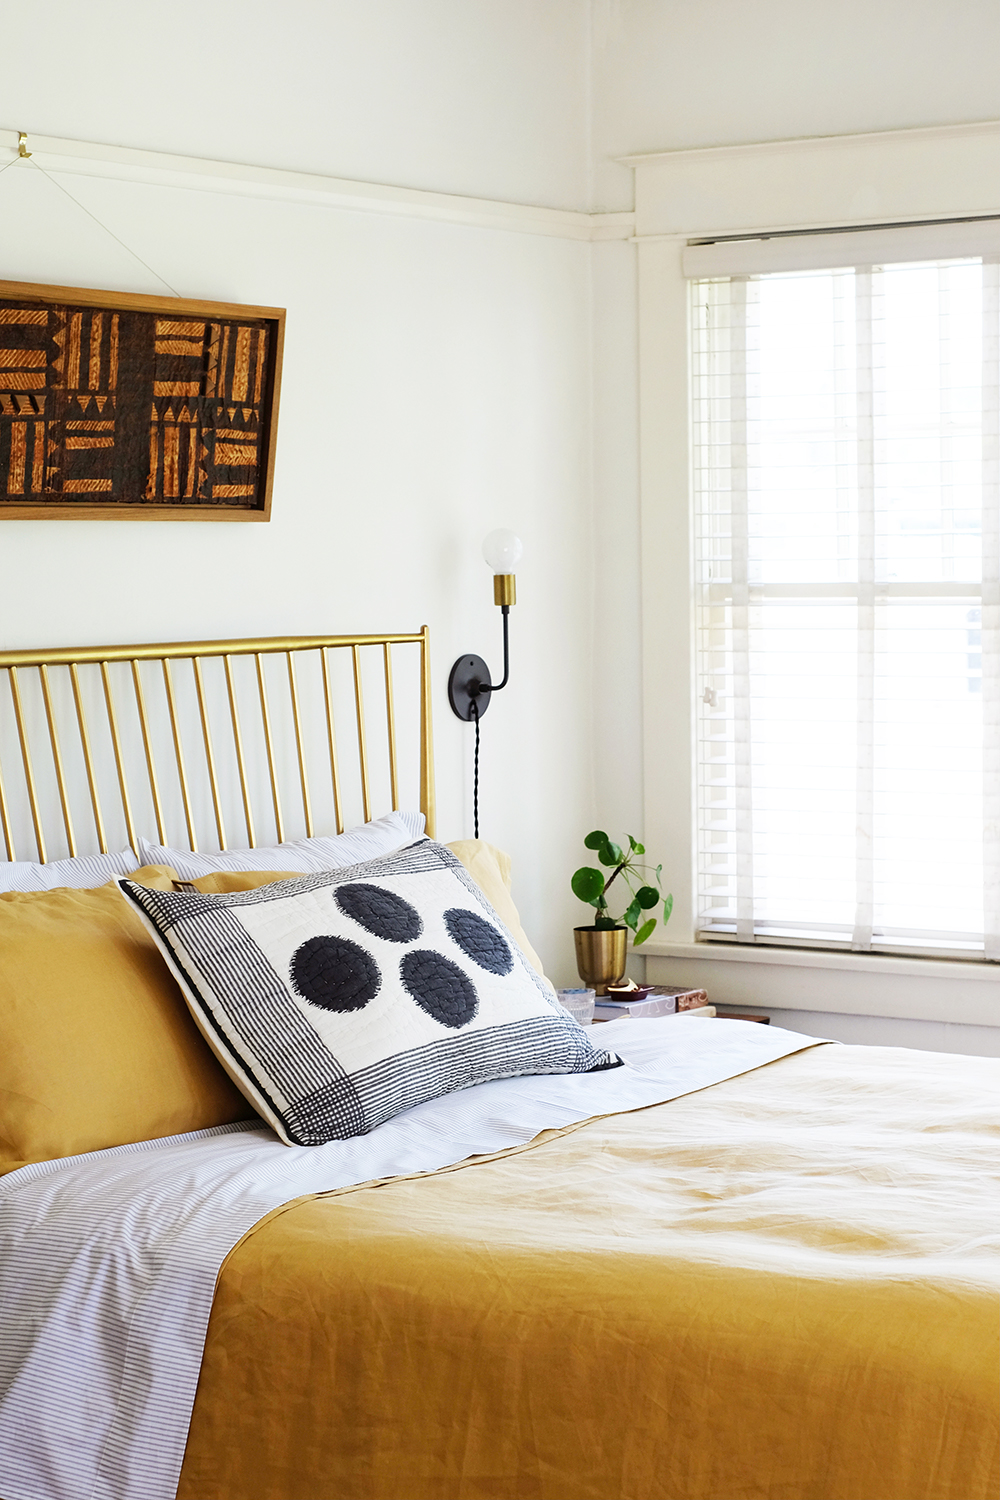
I also added a fun Ink Spot Cotton Voile QuiltedSham to the center of the bed to add a little visual interest and pattern. You know I’m a fan of black and white and this sure does look sharp with the mustard yellow.
I’m such a fan of working with what you have and just making a few simple tweaks here and there. Fresh bedding is all this room needed to feel like a new space.
This post is sponsored by Carpet One Floor & Home. Thank you for supporting the brands that help make this blog possible.
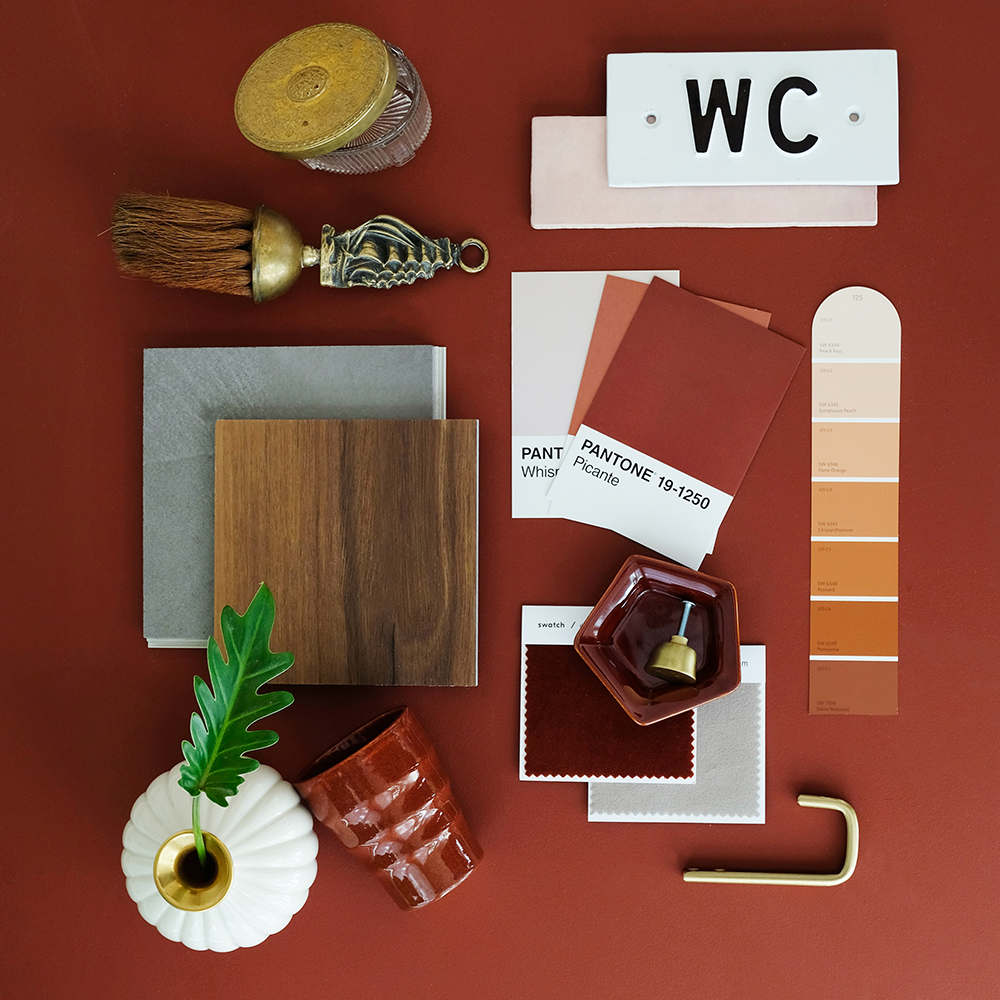
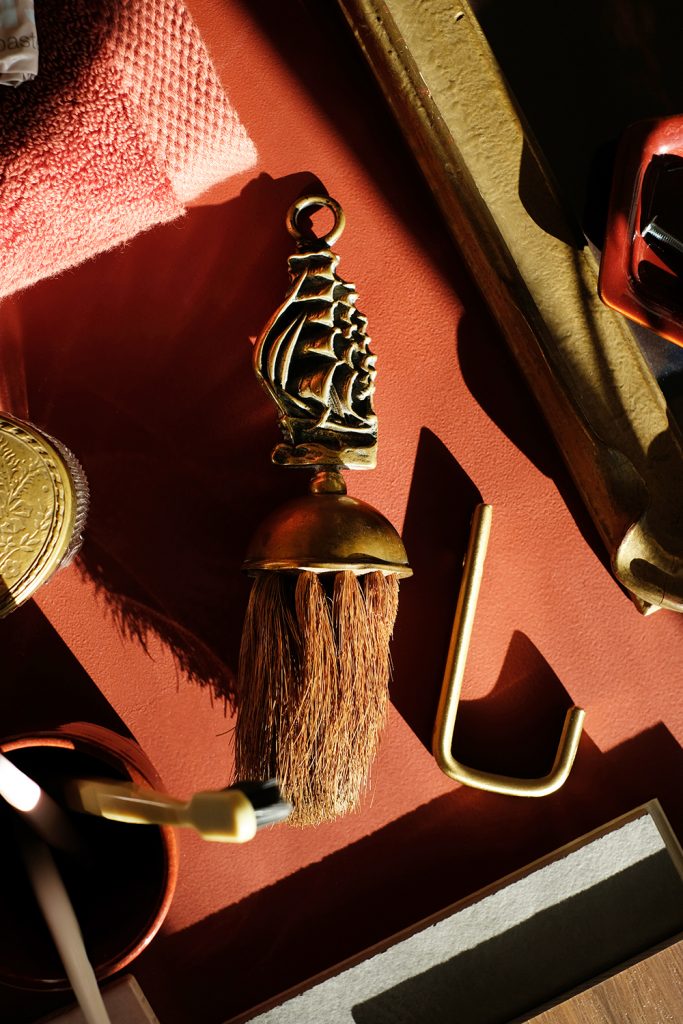
There’s one room in our home that gets very little screen time, our primary bathroom off of our bedroom. It’s a lot of “90’s remodel” vibes. Peachy/Pink walls, so many mirrors, shiny cheap brass fixtures, broken metal mini blinds and rust colored stone are just a few of the extra special features. I’m honestly just not ready for a full gut reno of this bathroom and really I don’t think it’s necessary. There actually is some great storage in this bathroom. So, I think I’m going to keep the updates to just upgrading the floor, painting EVERYTHING and then adding some art, accessories and new hardware. As much as I’d like to replace the dated (and not the date of our house dated) bathtub and retile the shower, it’s really the floor that needs some attention.
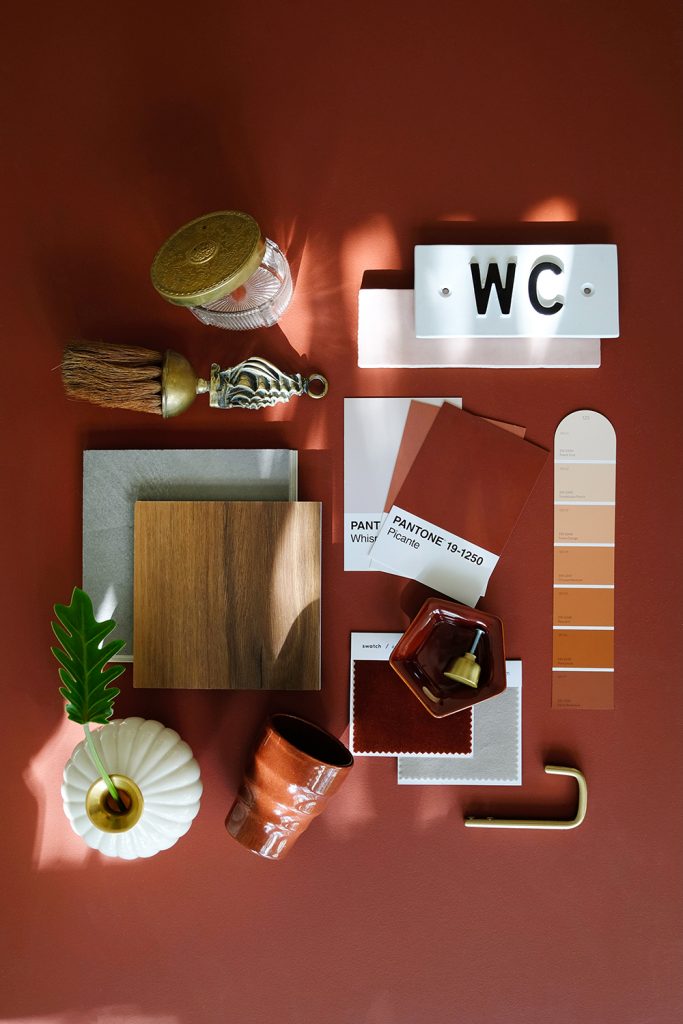
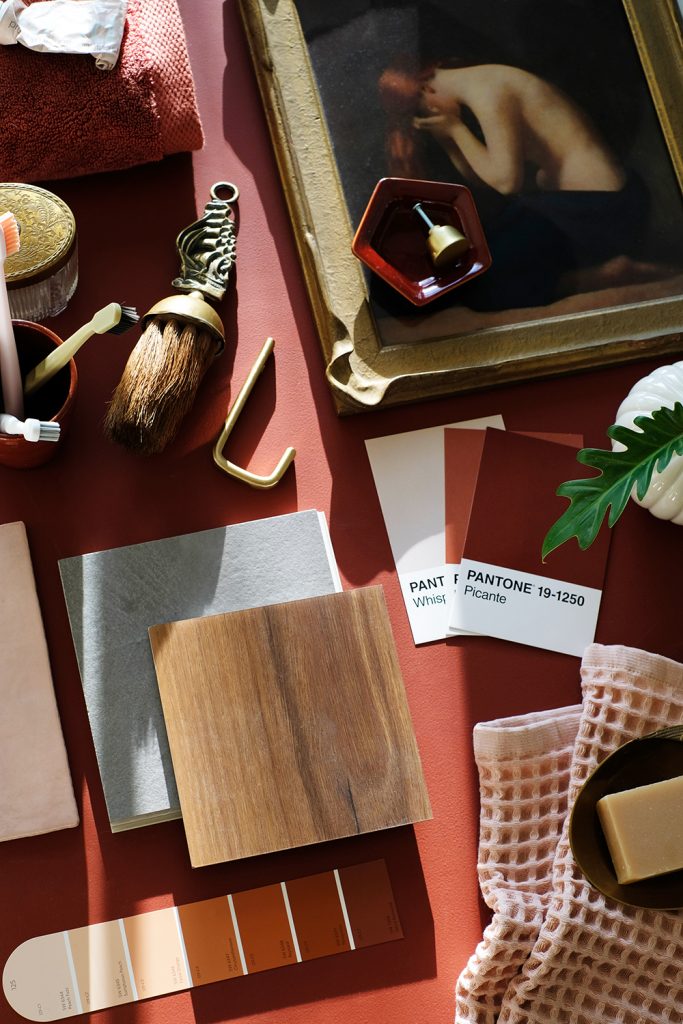
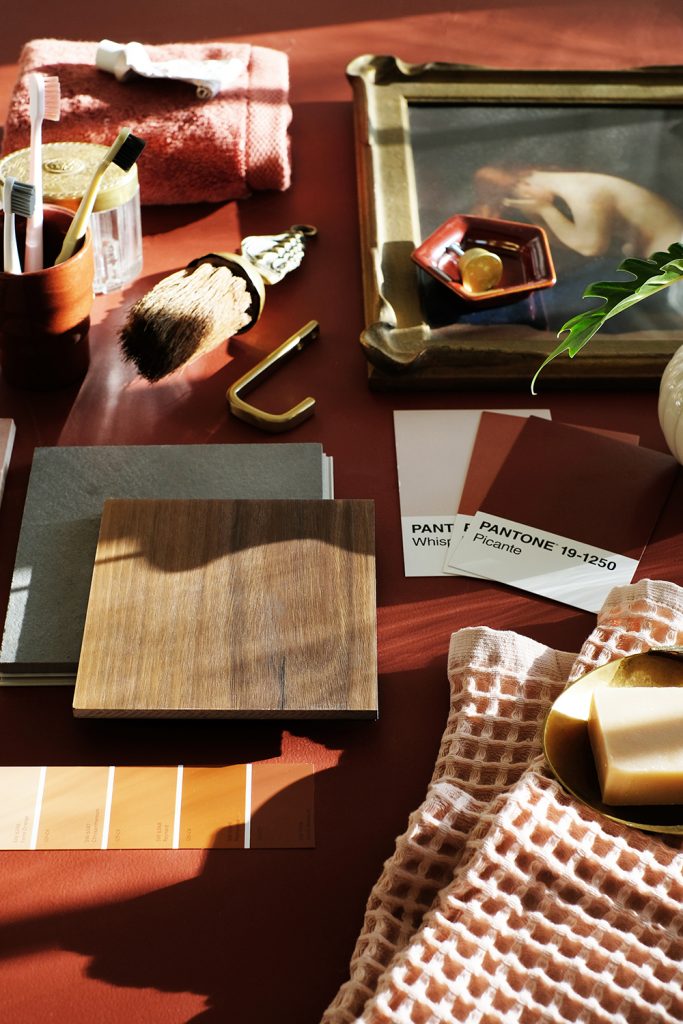
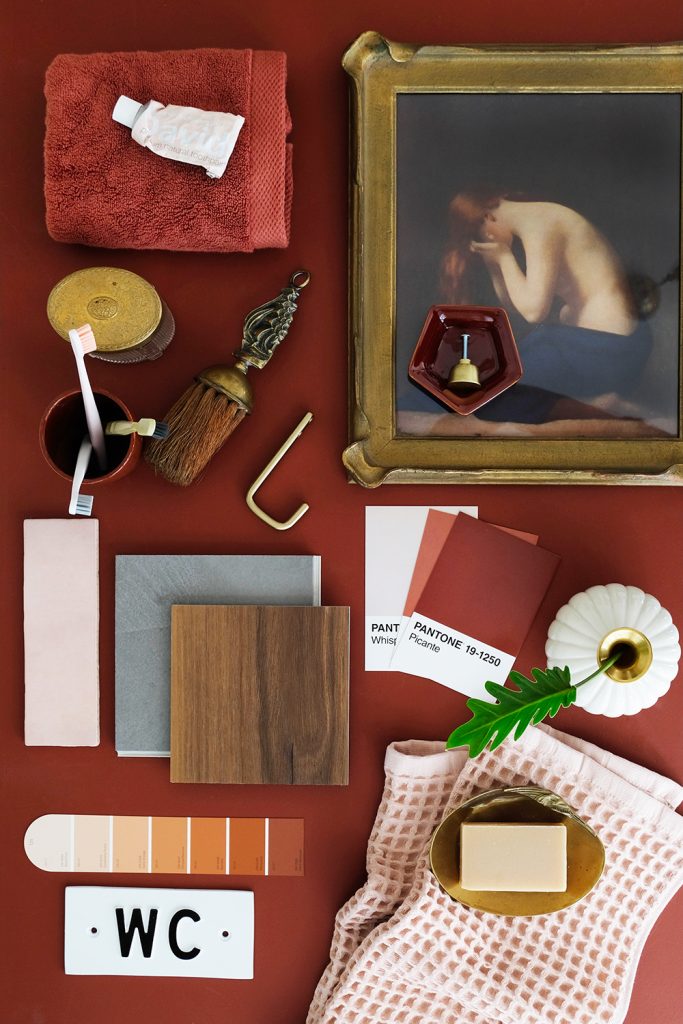
Carpet One Floor & Home has analyzed products in every flooring category to introduce their Trending Ten products of 2021. Carpet One Floor & Home is a trusted advisor when is comes to flooring trends, products and the latest flooring features. They sent me a sample box with the Trending Ten and I was immediately drawn to 2 of their flooring selections for our bathroom – Concrete Look in Power Grey by Bel Terra Tile and Ralston Creek in Charleston by Invincible XT(seen in the mood boards).
I decided to lay out a mood board of my vision to get a better feel for the space. Some of you might be really surprised by all the saturated color I’m infusing into this space. This is a little bit of a departure from my norm. But, I’m wanting to take some risks and have a little fun outside of my comfort zone when it comes to design. I’ve been all for keeping a space somewhat neutral so that you don’t end up with a design decision you don’t love in a couple years. But, there is something to be said about diving all in on a look that you REALLY love in the moment. Who knows what you’ll like in a few years. You can kind like it for quite a while or really LOVE it right now. I guess I’m liking the idea of living in the moment instead of playing it safe for some future time. So, let’s paint the cabinets a bold color and play with a brand new color palette!
I decided that just embracing the rust colored stone counter tops was the best way to go. So, I believe the plan will be to paint all the cabinets a rich rusty red color and maybe even keep the walls a pink tone. The Carpet One samples I was drawn to the most are quite different, but they both work so well with this palette. The wood grain feels warm and more like all the hardwood that is already in the home and the grey concrete look feels like a nice juxtaposition to all the warm reds. Because we live in a old house and I want to honor it’s age, without living in a museum. So, I’m always designing with a mix of vintage and modern. I think finding that balance with a little old and some new is what keeps our home feeling fresh.
A modern material on the floor, but lots of vintage touches when it comes to art and accessories – that’s my game plan.
If you had to pick, which would you go with, the grey cement look or the warm wood grain?
This post is sponsored by Sherwin Williams. A big thank you to Sherwin Williams for helping provide paint for this project. And a thank you for supporting the brands that help make this blog possible.
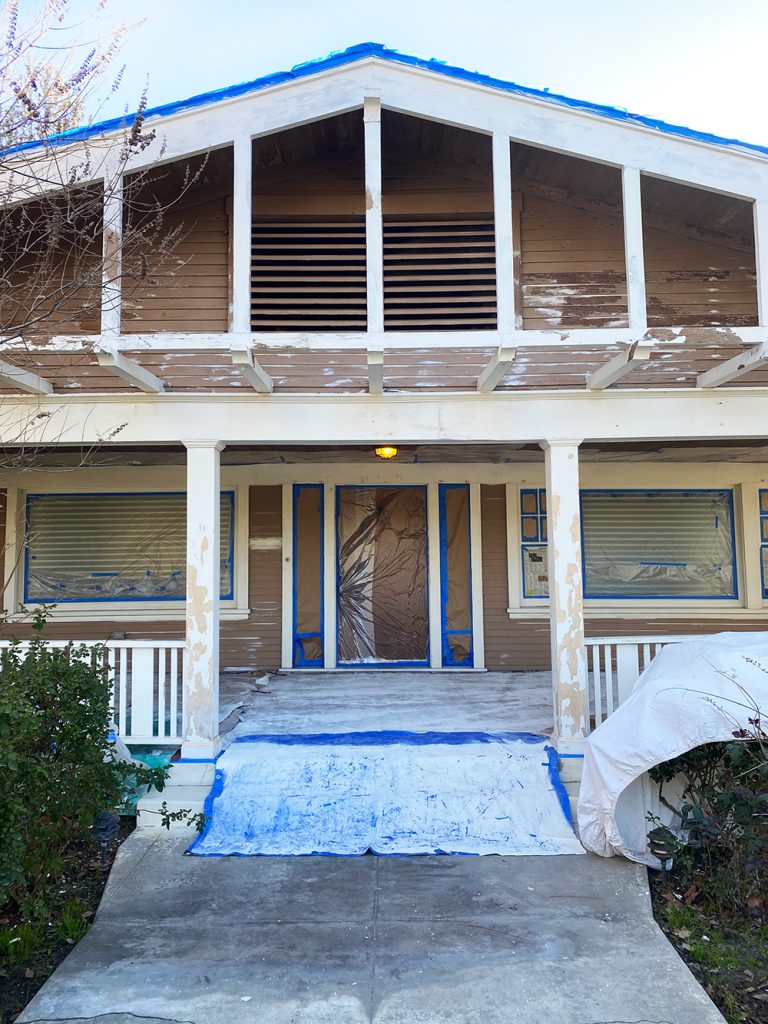
Yes, we painted our house. You can see all the angles HERE! Ok, humor me while we look at a couple more befores and afters before we get started whitee all the how-to information and the process of getting this BIG job done.
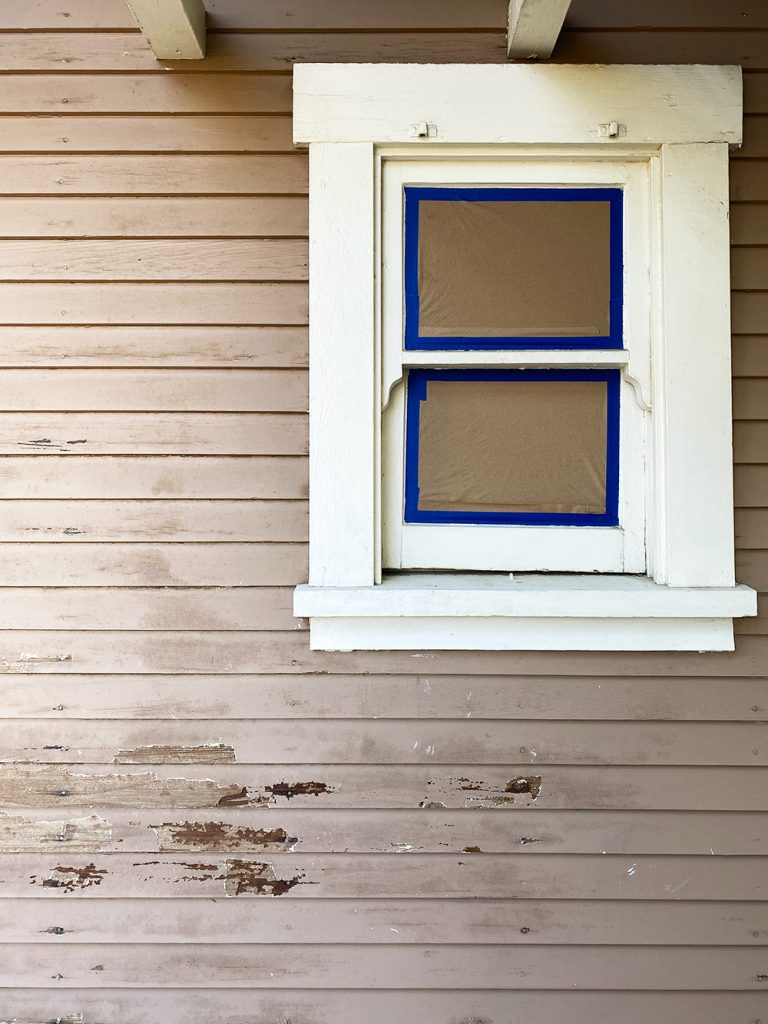
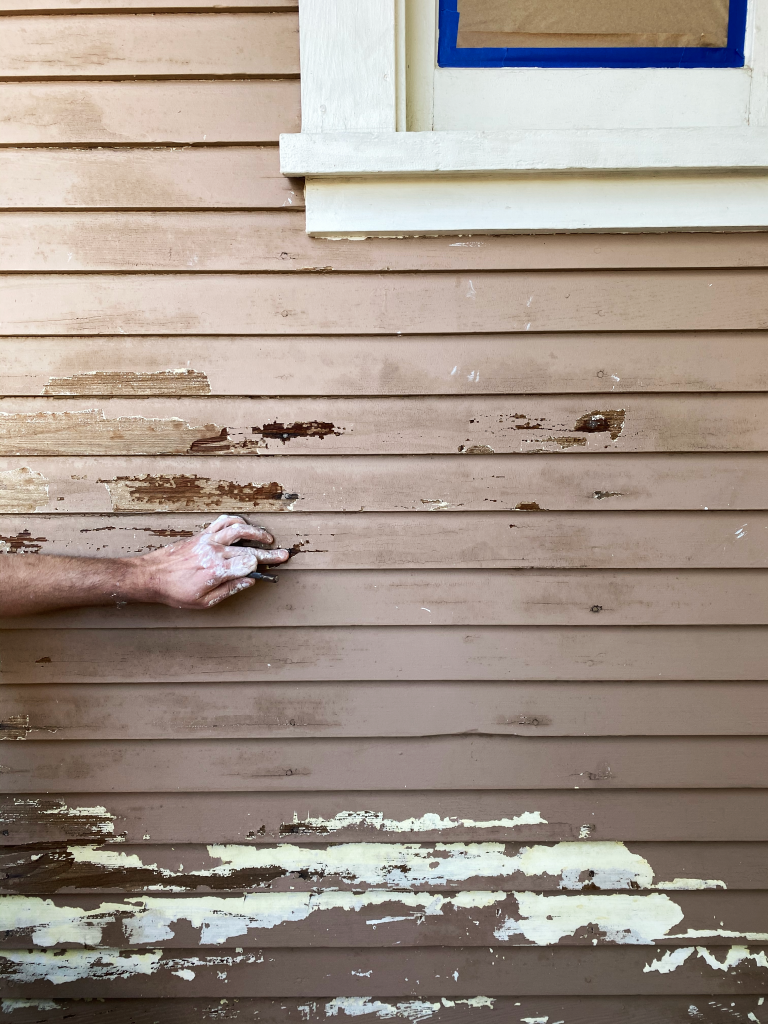
I still can’t get over how different our house looks.The siding was in desperate need of some care. You can see some peeling and the exposed nails.
Now, let’s get into the nitty gritty of all the supplies you’ll need and how we went about painting our house. I’m going to link products as much as possible and explain in detail the steps. If I miss anything, please leave a question in the comments. Ok, here we go.
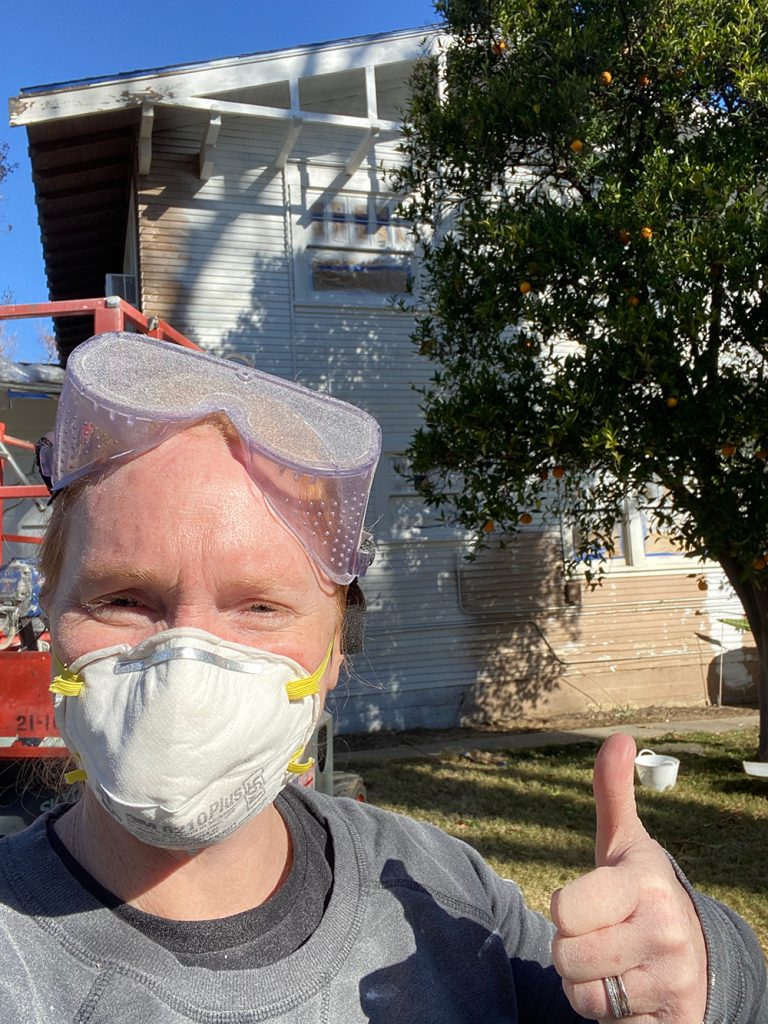
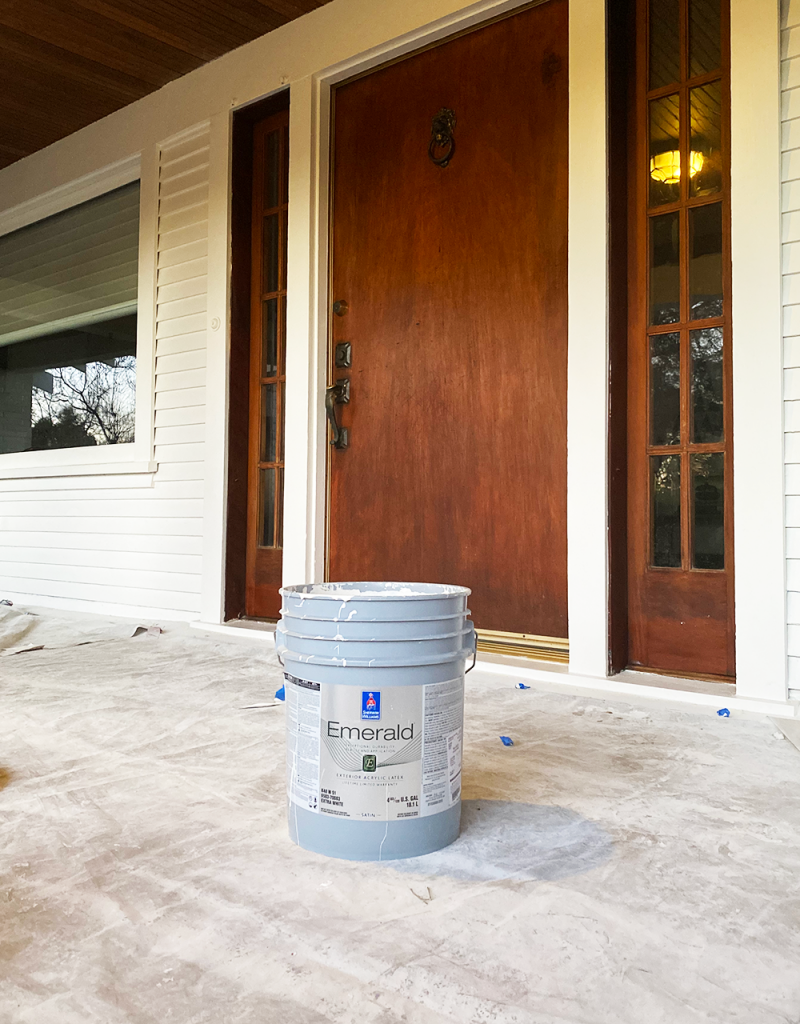
I have only 2 pieces of advice for painting. Number 1. PREP PREP PREP and PREP. and Number 2. USE THE BEST PAINT THERE IS. Once you start reading my instructions, you will see that painting a house is really mostly a bunch of prep and then just a little painting. I firmly believe that the quality of your painting is only as good as the prep you do. The more prep you do, the better your results will be. And if you are going to go to all this work, you should definitely use the best paint there is. Weeks and weeks of work, and then you use a cheap, thin paint that can’t stand up to the weather, that doesn’t make sense. That’s why I always use Sherwin Williams product. They are the BEST!
Setting all the nails and filling the holes.Here you can see how much filling and scraping we did before priming.
Method and Order of Operations:
We worked in sections for these steps. Once one side of the house was done, we would remove all the tape and drop clothes and then start from scratch on the next side.
Scrape – the first step is to get the big, flakey chunks off. Depending on the type of peeling or lifting of the paint either a chisel scraper or a wire brush may work.
Power Wash – after scraping, this is a good time to power wash. It will knock down a lot of the dust and probably take off a little more loose paint. Allow the siding to dry completely
Wood Fill – There maybe boards or edges that have more damage then just pealing paint. Wood fill can fill in those gaps and holes. Apply a thin coat and allow it to dry completely.
Sand – now it’s time to take a sander to every inch on the house. It will give any remaining paint a good surface to accept the primer and where the paint is lifting, you can soften those edges. You really just want to sand till paint chips aren’t coming off any longer. And you will be sanding down all the areas that you applied wood fill to. You will want to sand those down till the wood fill is flush with the original board.
Power Wash – AGAIN, if you have created a lot of dust with the sanding it’s good to take a power washer to the siding again. Allow the siding to dry again.
Tape and Cover – while everything is clean and dust free, tape all the panes of glass and any areas that you do not want to be covered with paint.
Set Nails – with all siding, you may notice that nails are lifting and the heads of the nail stick out from the boards. Using a nail set and hammer, hammer the nails so that they sit in the wood siding.
Caulk – this is when you will fill in all the nails that have been set and also fill in any gaps between the siding boards and details on the windows. If there is gap – fill it. Simply apply a small bead of caulk with a caulking gun and then wipe down the caulking with a wet rag to smooth out the caulk and remove any excess caulk.
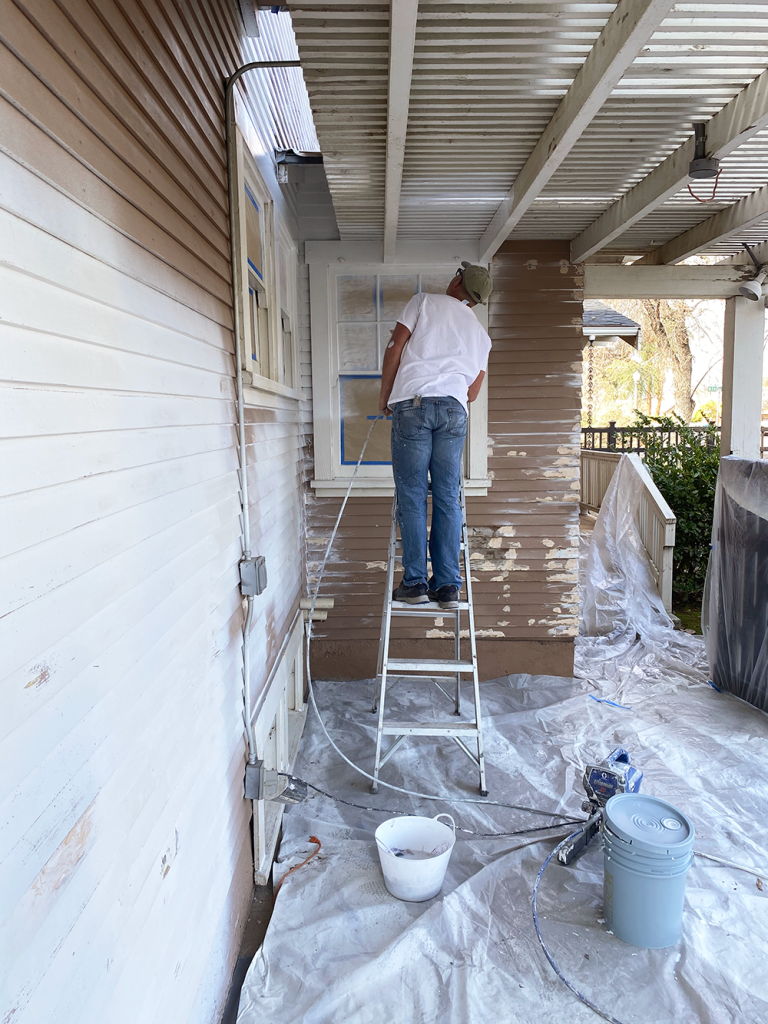
Prime – we bought the primer in 5 gallon buckets, so we prepped out sprayer and put the hose in it. We primed everything and we primed it well. No thin, sparse coats, we made sure everything had a good, strong layer of primer.
Caulk More – after you have a nice even coat of primer on and it’s dried, you may notice some imperfections or areas that need a little more sanding and filling. Sand and apply caulk to those spots.
Paint – are you tired yet? NOW, you can finally paint your house. We used a satin finish for everything. I really didn’t want a lot of sheen, but I also want too make sure that all the dust in this area wouldn’t immediately stick to the house. Working in sections we painted everything and then before we put away the sprayer, we made sure to go back and do touch ups and get second coats where the paint looked too thin.
Touch Up – there will be places that need a little more attention. I found spots we missed or ever over sprayed where we shouldn’t have. I also discovered that our window sills all got a little dusting of over spray. So, I sanded them down and then brushed on a couple of smooth coats. I knew these surfaces would attract dust, so I wanted them to be well coated with paint for easy clean up.
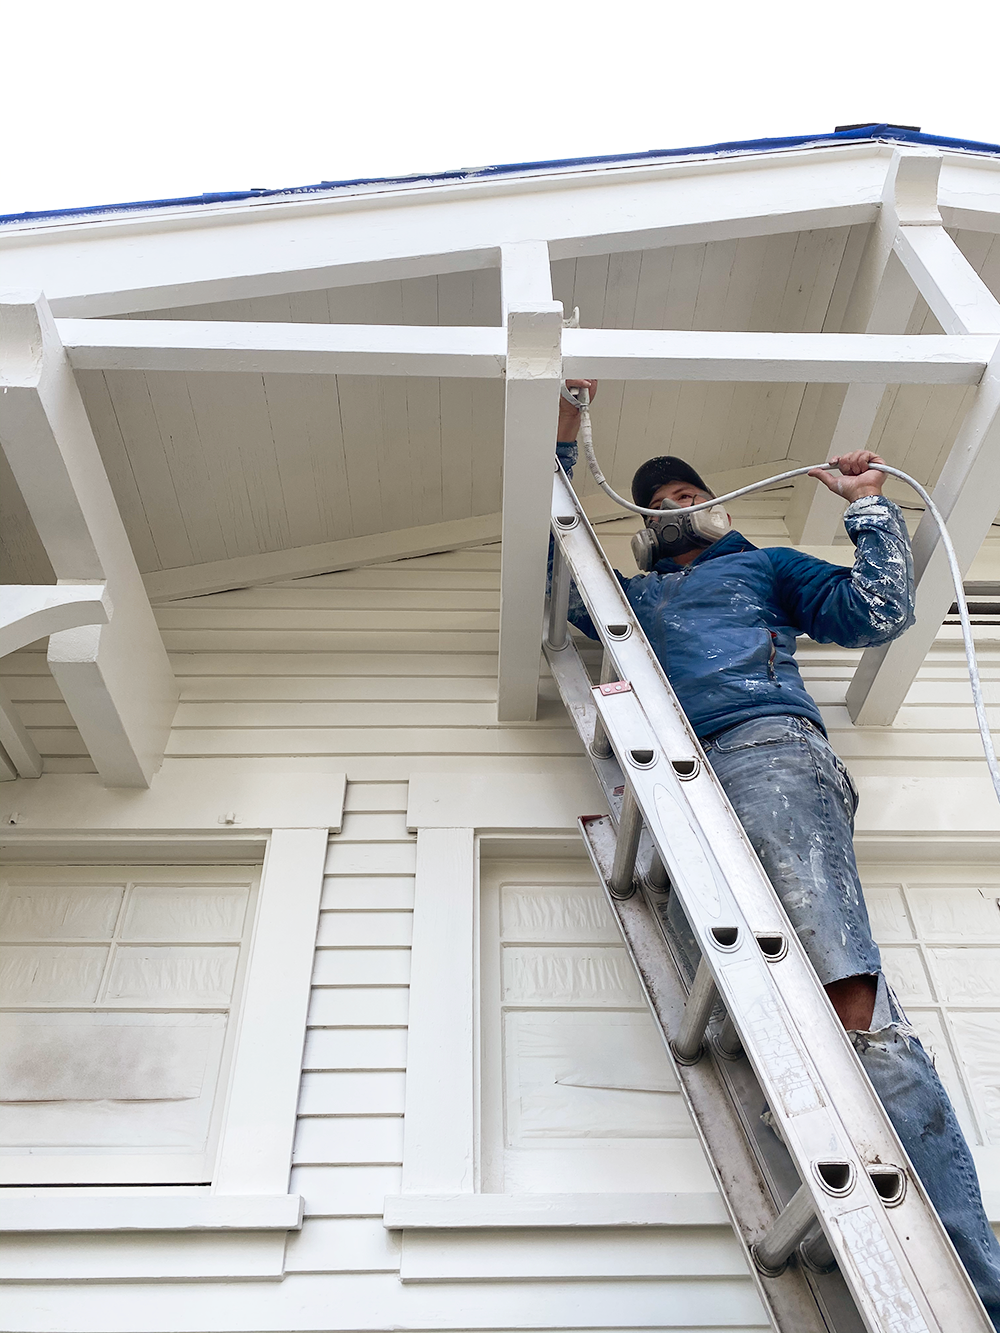
So much taping and drop clothing. We rented a lift to reach the top of South side of the house.
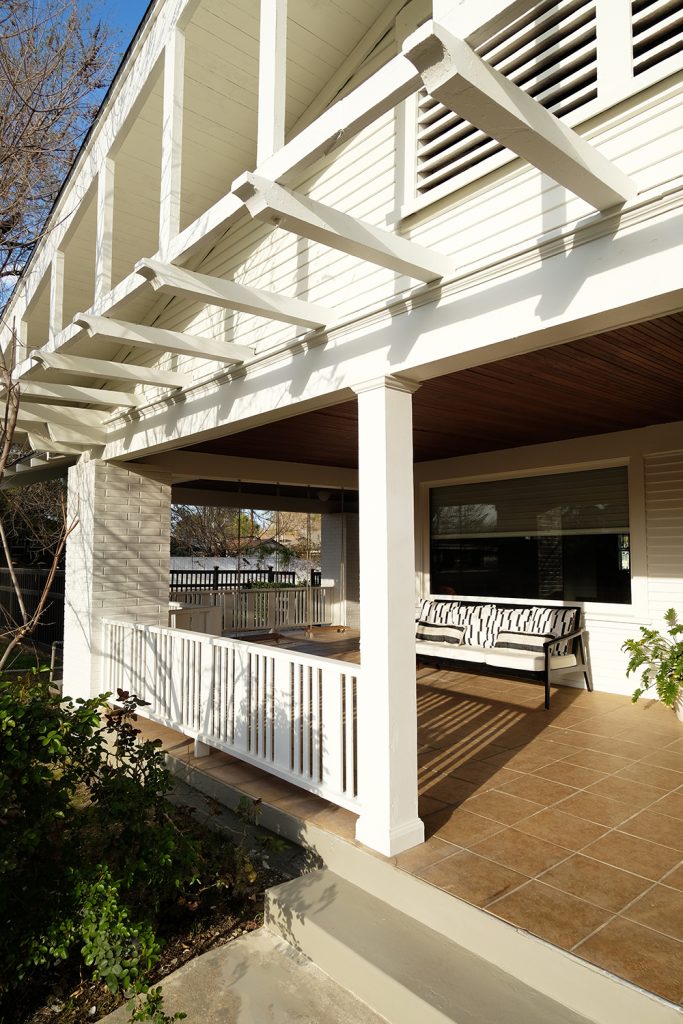
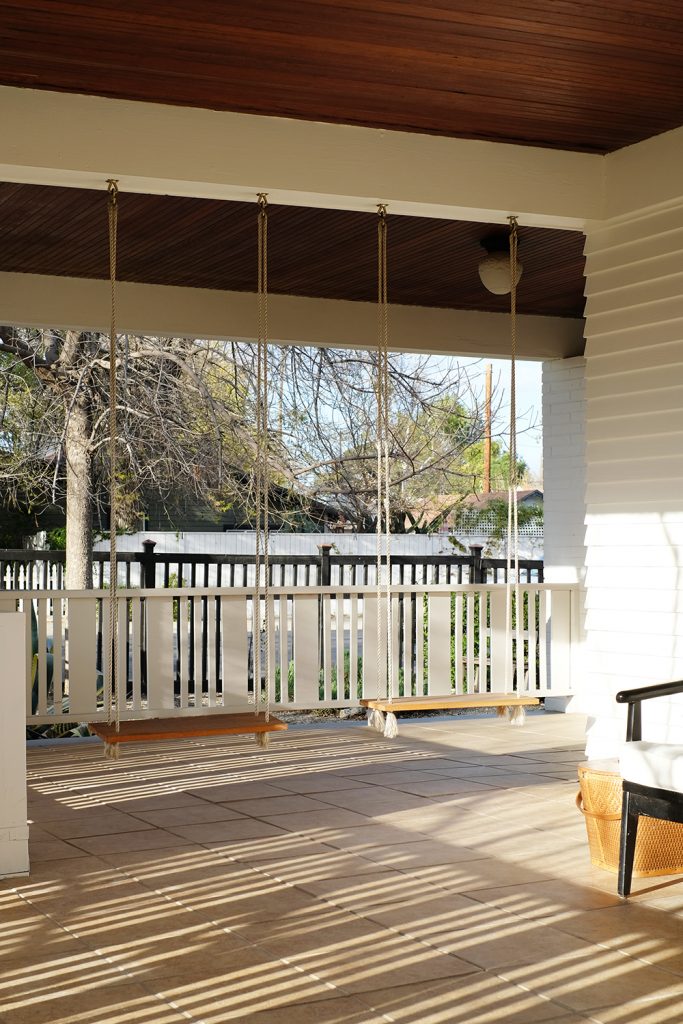
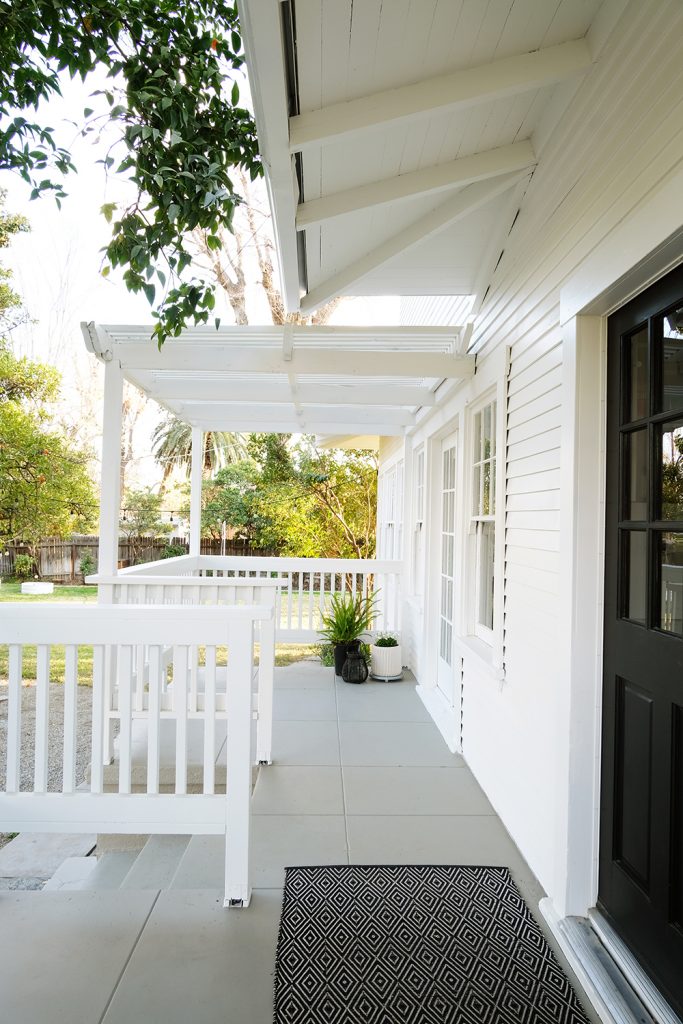
And last but not least, we (my dad) painted all the foundations around the house Sherwin Williams Studio Clay. I think it really wrapped up the look so nicely. I think a white foundation would have looked off. And the darker grey of studio clay was very grounding and really just made the foundation blend in. I used that same color to paint the outside porches and stairs as well. They had been stained and painted over the years, so a fresh coat really cleaned up the back porch especially.
Here’s what the foundation and porches looked like before we painted it Studio Clay.Isn’t that soooo much better?
I’m sure I’ve missed some details along the way, but I’ve saved all the painting stories from the last 7 weeks to my Instagram Highlights (it’s called Exterior Paint).
We really felt so accomplished during and after this process. It was exhausting but such a good process to go through as a homeowner.
Ok, and are ready to hear how much paint we used? It’s a lot!!! 31 gallons – 11 gallons of primer, 16 gallons of paint and 4 gallons for the foundations and porches. Yikes.
This post is sponsored by Sherwin Williams. A big thank you to Sherwin Williams for helping provide paint for this project. And a thank you for supporting the brands that help make this blog possible.
AND…. a very big shout out to my brother, Ash (who helped us run the lift and kicked off our first week of painting), my dad (who helped us problem solve the sprayer on more than one occasion and rebuilt new railings on my porch to match the rest of the house), my mom (who helped keep us fed and full), and last but definitely not least, Lonnie, my husband (who worked more hours then we can count prepping and painting this giant house).
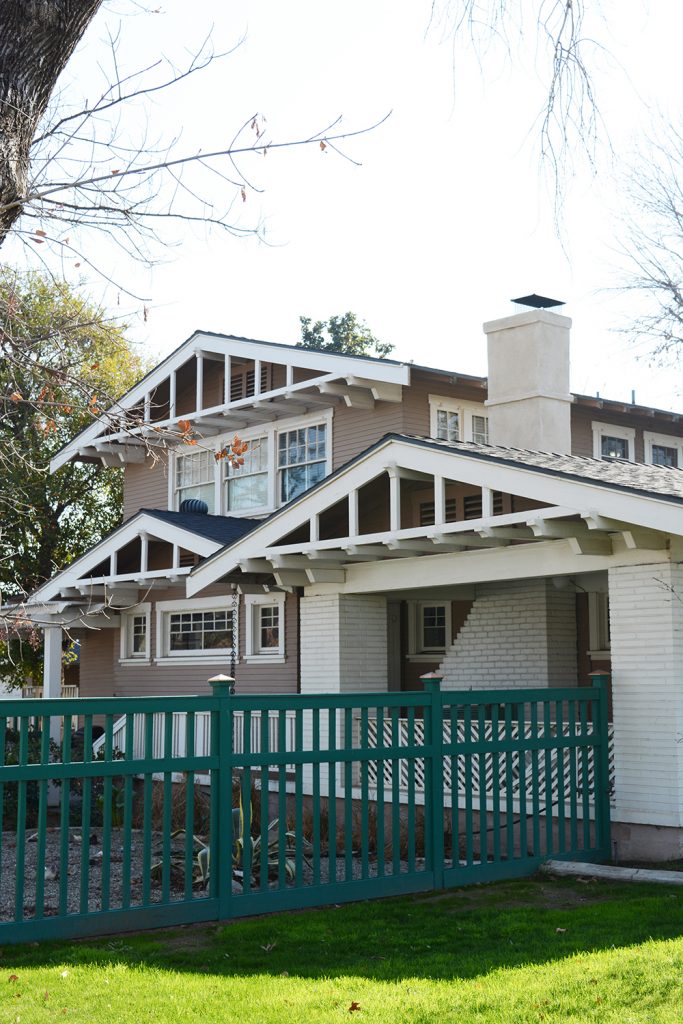
Before
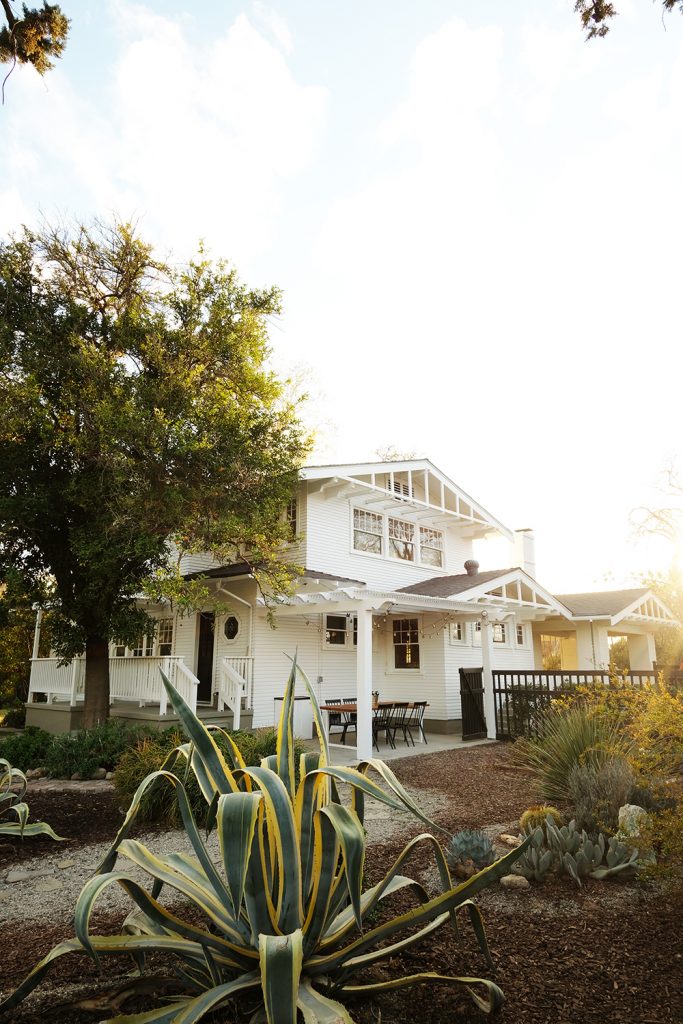
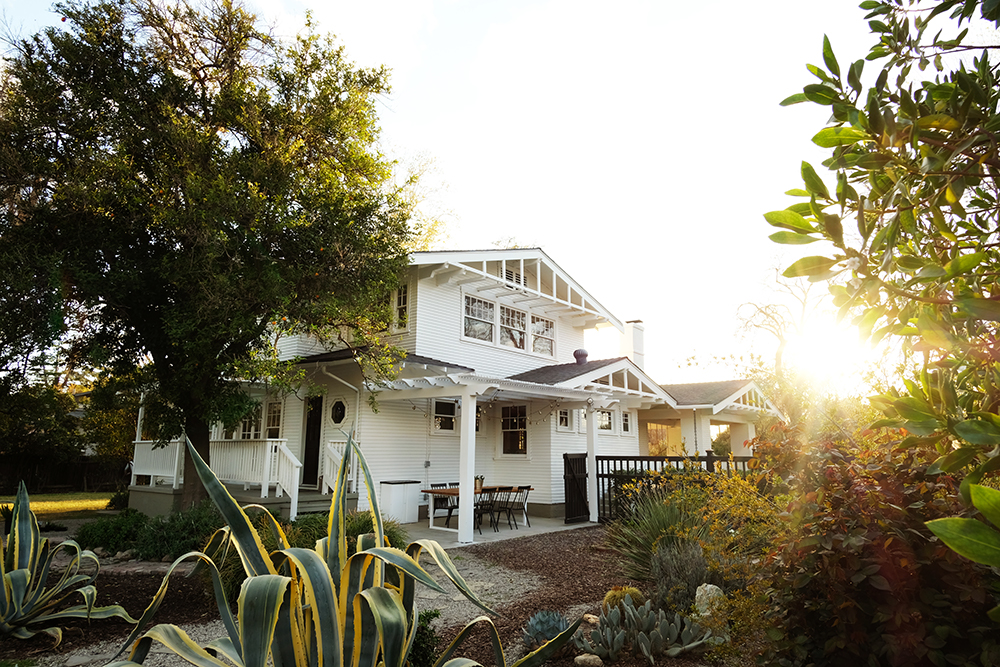
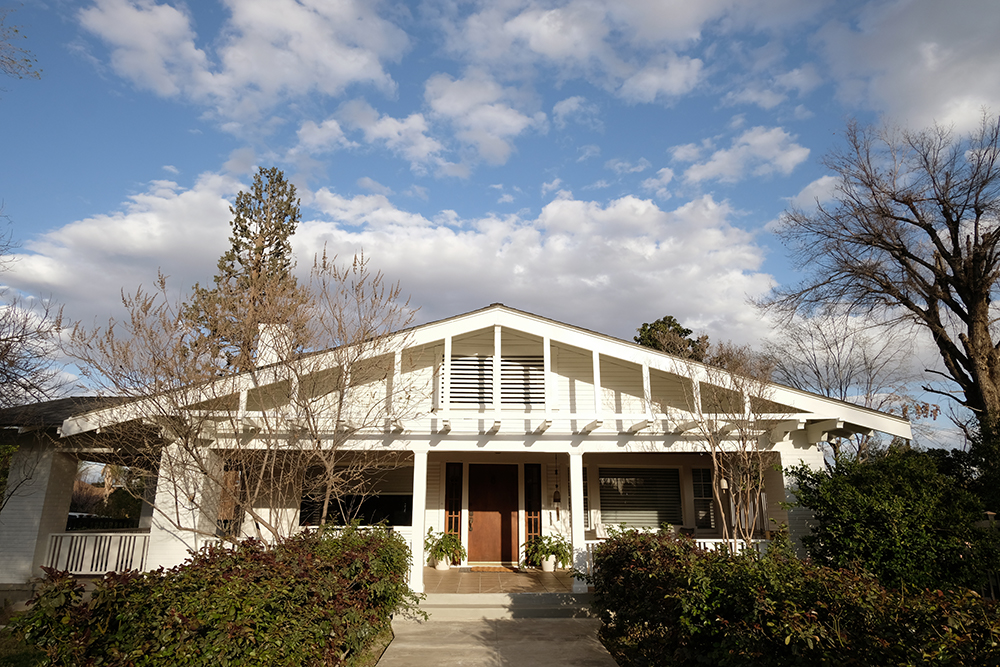
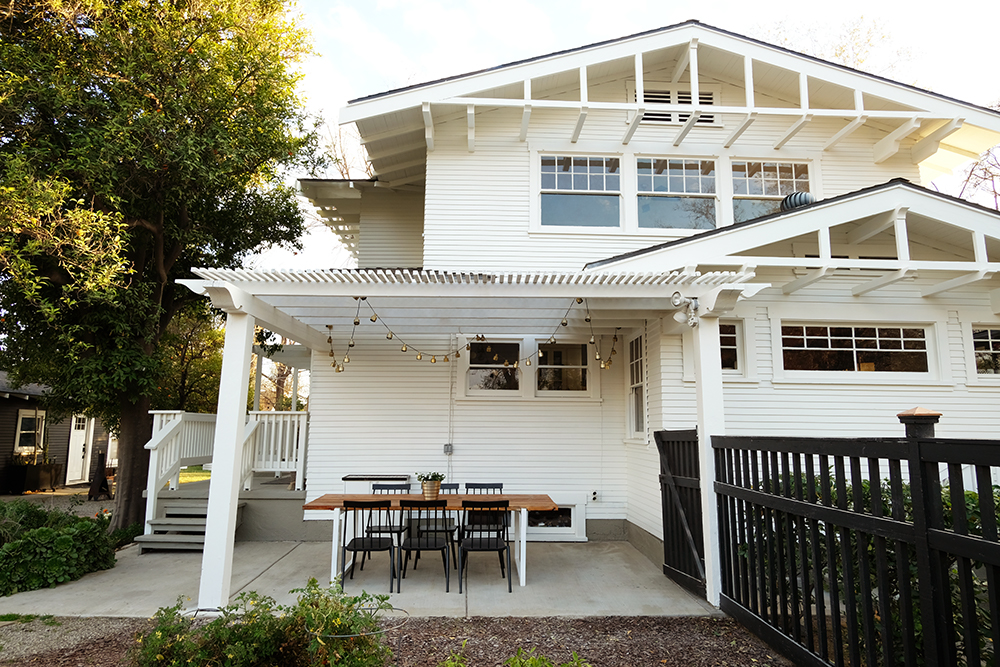
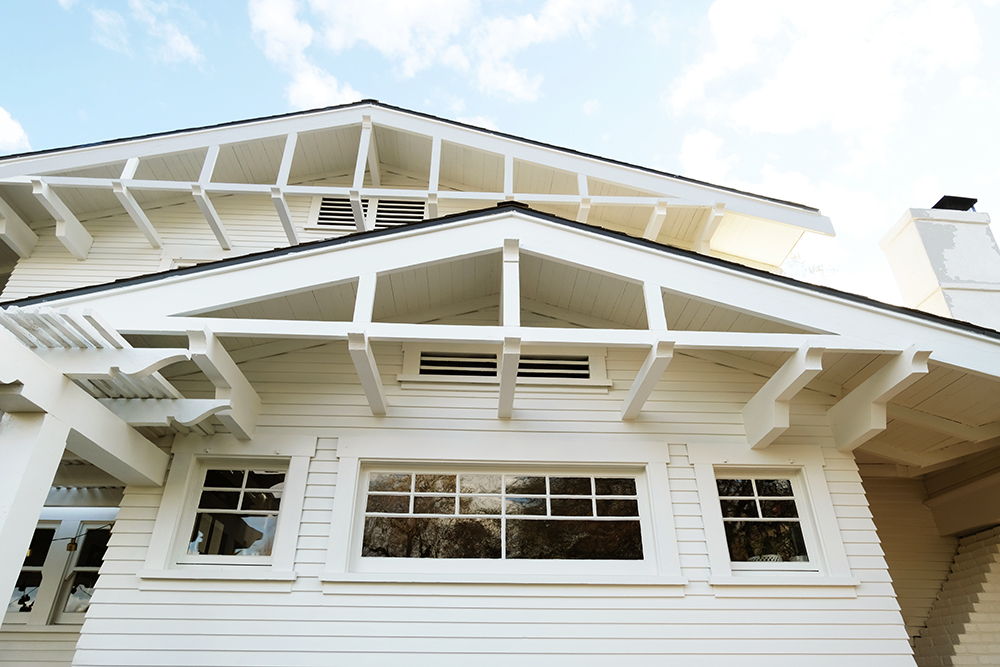
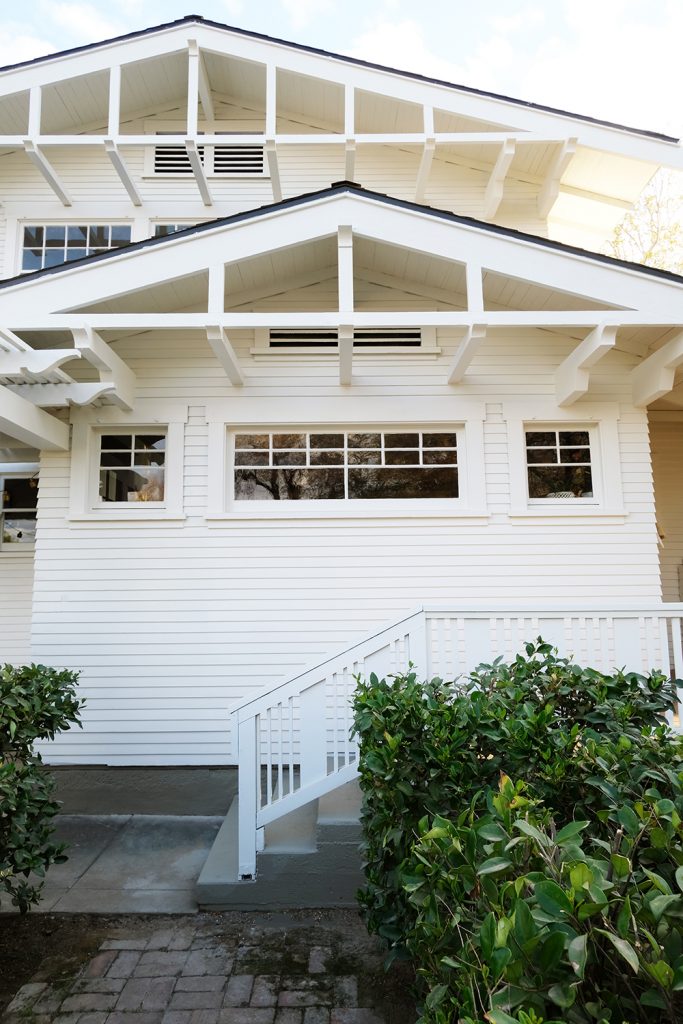
It’s a big day for the McConnel house, WE PAINTED THE EXTERIOR OF OUR HOUSE! This is going to be a doozy of a post, so buckle up. Painting an old house is a BIG deal. Oh man, this feels like it was a long time coming. If you are new here, we own a 1918 two-story craftsman. I LOVE our house! We have only lived in Oleander neighborhood in Bakersfield, California. It’s our hood! I always knew that this is the house I wanted to own eventually. So, when it came on the market we listed our house the very next day.
Before
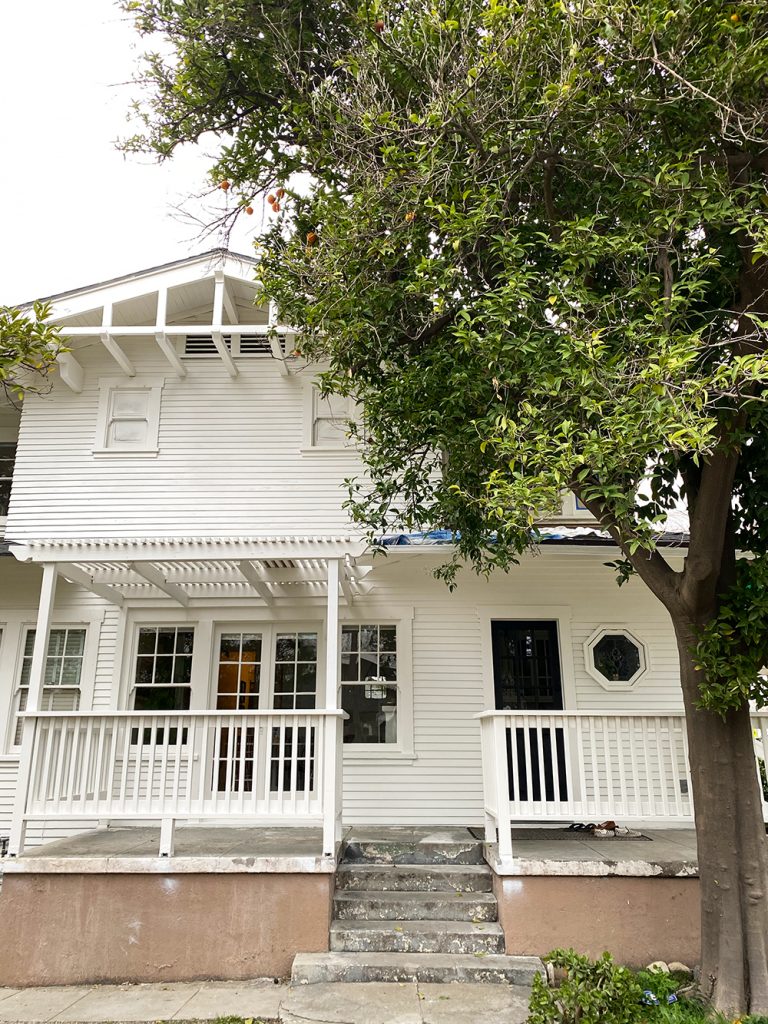
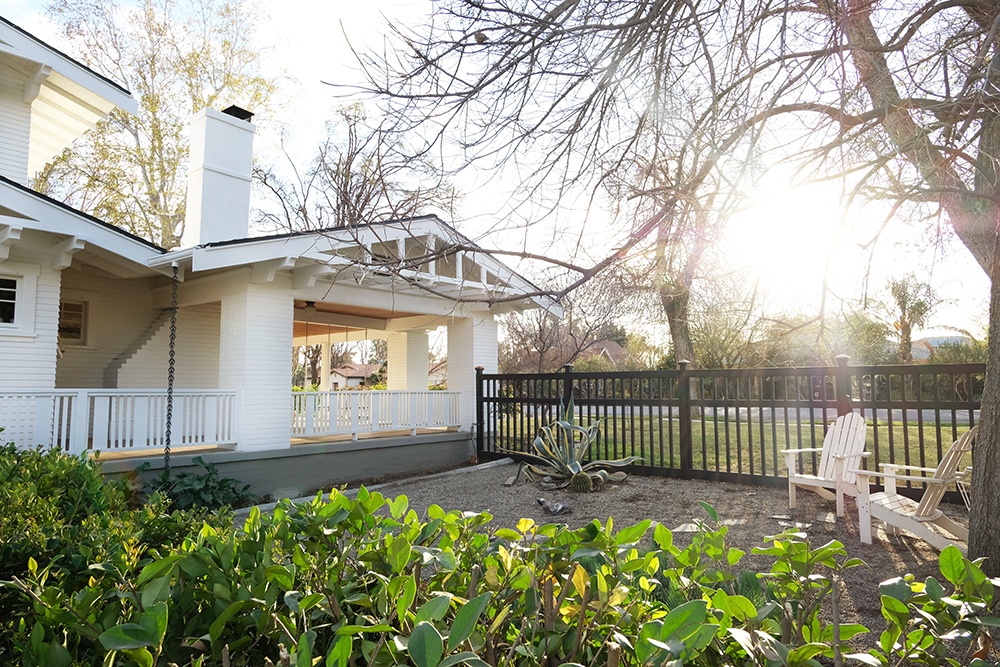
When we bought this house, 4 1/2 years ago, it needed a fresh coat of paint. On the South side of the house, a lot of the siding was down to the bare boards. Even with peeling paint, I loved this house. But, now that it is freshly painted, I’ve fallen in love with this place all over again. It really looks like a totally different house, it’s crisp and fresh, but still feels like a classic old house.
Early on, we figured out how much it would cost to hire someone to paint our house (way too much), so we knew it would have to be a DIY job. And to be honest, my husband started scraping and sanding the exterior of our house over a year ago. He would put in at least 10 hours a week in the evenings and weekends. But when it came time to do the actual painting, we knew it was a job that would need to be done all at once and it would probably time a few weeks to complete. My husband is a high school teacher, so we do have a couple months in the Summer available. But, Summer’s here are 100+F, so that would be a very painfully hot job. So, year after year, we just put it off because we were busy with full time jobs, an airbnb to run and 3 kiddos. And then…. the pandemic hit. And we were here ALL THE TIME! Lonnie, my husband scraped and sanded more and more through the pandemic and right after the New Year, he said, “Let’s do this!”. And he rented a lift and ordered some primer. We probably could have prepped and sanded for the next decade, but once we had an actual date set we knew we had to go strong until it was done.
Our house is BIG and complicated with lots of different roof pitches and so, so many windows. And these are original windows, so it’s all wood and they all needed to be painted. We counted, there are over 300 panes of glass!!! (I will get an exact count for you soon).
BeforeBefore
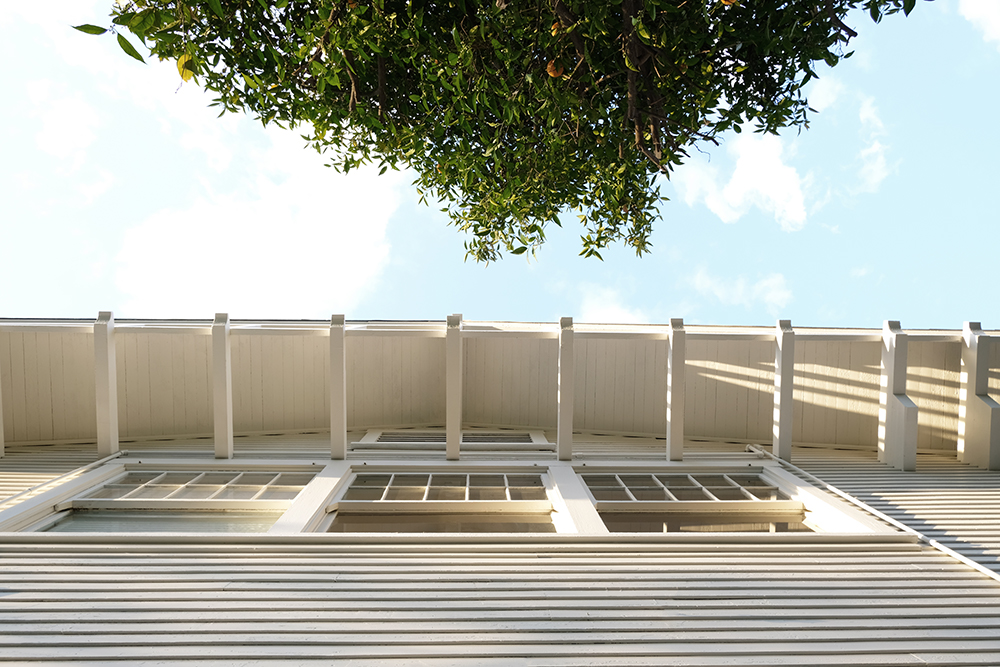
3 years ago I wrote a blog post about painting our house all white. I made my mind up a long time ago that I wanted a white house. Originally, I thought I’d have some black details, maybe on the trim, windows or the airplane wings. I should explain, our house is an Airplane Craftsman. The second story is really only 1/2 a story and it comes up out of the middle of the house, with windows on all sides, making it feel like a cockpit. And then all the oversized eaves and exposed rafters resemble the wings.
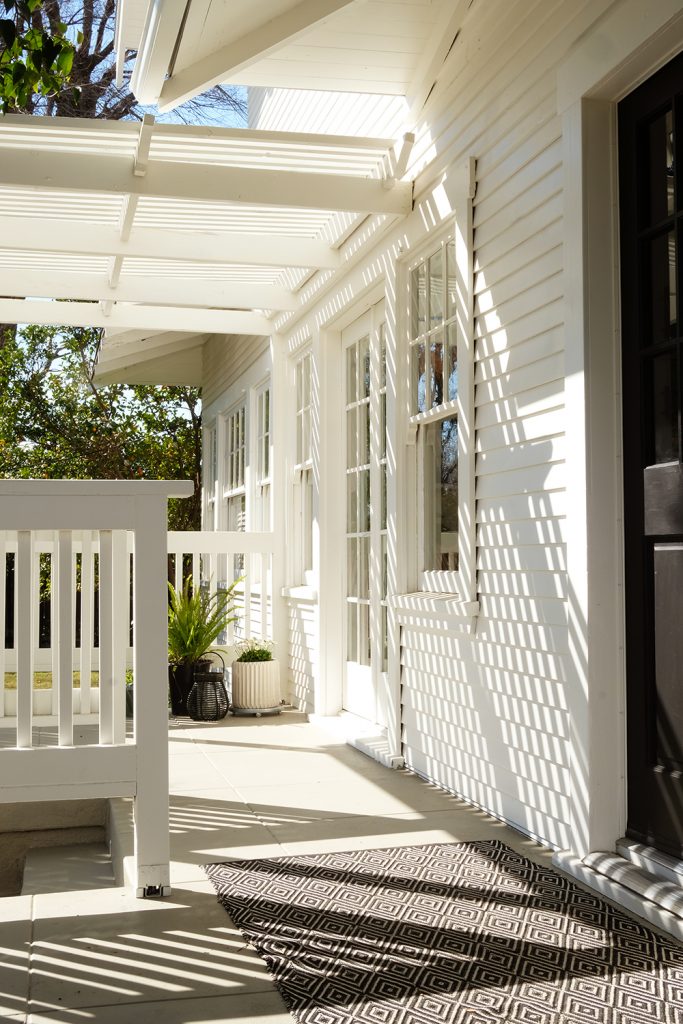
Anyways, the more I looked at our house once the primer was on, I decided that the black was just not needed. My biggest worry was that the rafters in the eaves (which are a really unique detail to our house) would not be as visible as they were before. With the house being a darker color and the rafters being white, they really stood out. So I thought the rafters needed to be a contrasting color. But, when I saw them all white, it just made sense. It really is all about the light and all the shadows that are cast at different times of the day. The details were not lost when everything went all white.
Before I give you all the DIY steps and details, let’s talk color. While we went with no color, picking the right white really is important. If you have been around here for a while, you know that Sherwin Williams Alabaster White is my GO-TO white. I’ve painted all the trim and many walls in my last two houses this same warm white. I chose it 17 years ago for our built-ins in our first house, and I’ve been using it ever since. It’s warm without being yellow, and crisp without being cool and flat. It really is a perfect white for an older home (in my opinion). So, we HAD to go Alabaster with the exterior.
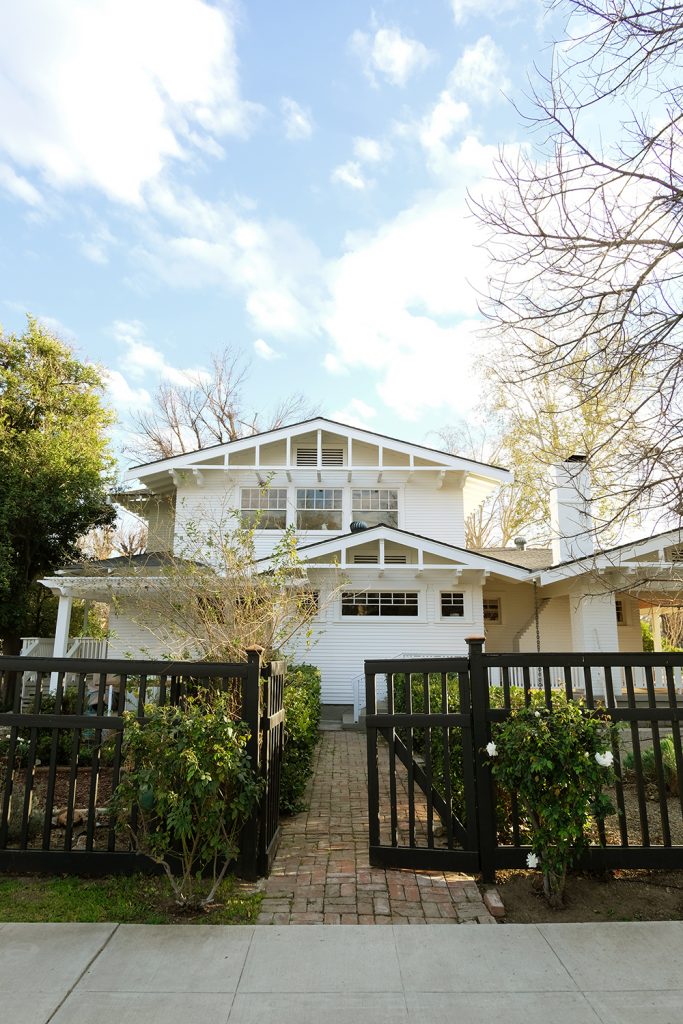
At the beginning of the pandemic, we had the kids paint the fence. Yep, we were those parents. But honestly, it got them out in the fresh air and doing something when there was absolutely nothing to do. The fence was a bright emerald green. and while I love the color green, it felt too bright and brought way more attention to the fence then the house. We went with Sherwin Williams Black Magic and it is absolutely perfect with our all white house.
Ok, from start to finish, it took us just over 6 weeks. That was every afternoon, evening, weekend and even some days we both took off work to paint. Yep, it was a lot of work, but I honestly think we did a better job than any painter we could have hired. We were perfectionists and took care of every inch of this exterior.
Do I think you should paint your house? YES! If we can do it, you totally can! But, you’ve got to really want it. Because you are going to be frustrated and tired and covered in paint at times. And you aren’t going to have any down time for quite a few weeks. But, SO SO WORTH IT! I feel so much pride and accomplishment with finishing this project.
Well it turns out I had a lot to say and a lot of pictures of our house to share, so please come back tomorrow for the full how-to. I have all the supplies and details on how we did this job start to finish.