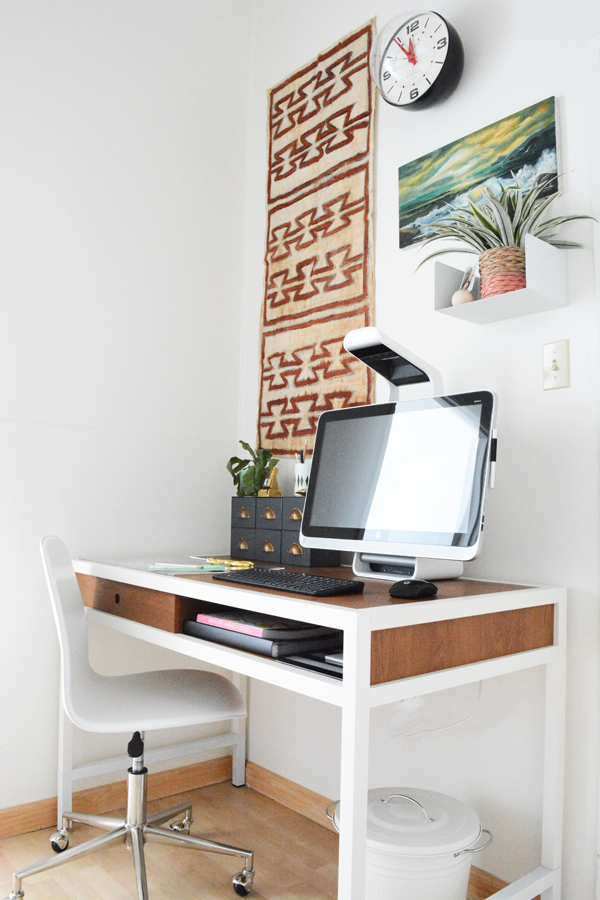
I’ve been in my new studio space for a couple of months now. I’ve shared that this space is actually two small rooms. When you walk in the door, I’ve set up the first space as my office and storage space. And then it opens into a larger space with a wall of windows (you can see more of that room here and here). I keep this second space almost empty so that I can have space for photographing, making and hosting craft events. But, I’ve finally got the office space together and I LOVE it!!!! I can’t wait to you to see the space.
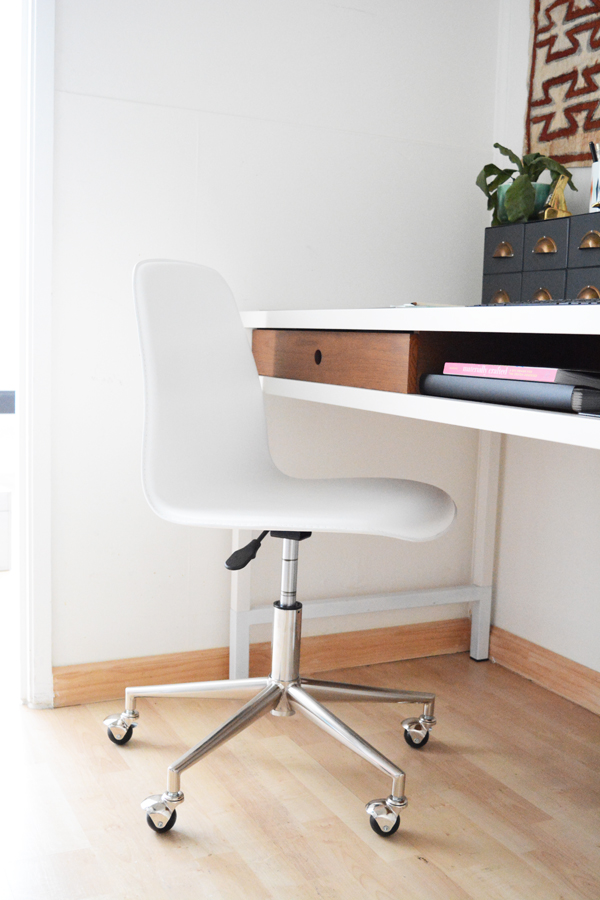
I measured and planned every last inch of this office space, so that I could get the most out of it. I wanted to keep it organized and neat, but also allow it to be a place for my creativity to be sparked. I found the perfect desk at The Land of Nod, and so I built the room design around it.
Here’s a quick look at the space, but to see the whole room, head over to Honest to Nod today!
So, what do you think? I’m a using every square inch the best way possible. I’d love to hear your thoughts and opinions.
I’ve got a fun DIY for you today. I’ve been itching to play with bleach pens for a while now. I love tie dye and dip dye looks, but wanted a project that was a little less messy. These were easy to make and I love how they turned out.
Hi there friends, long time no post. I’ve had big plans of getting this post up for weeks, but traveling and Summer adventures have gotten in the way. But, here I am finally. We are on route to Alaska with our vintage trailer, Riley (follow along on instagram if you’d like to see more).
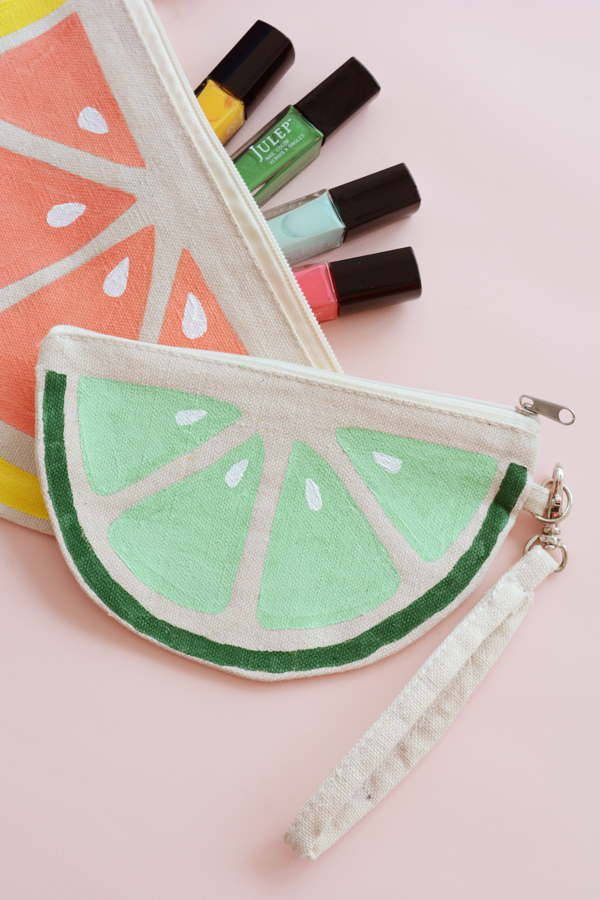
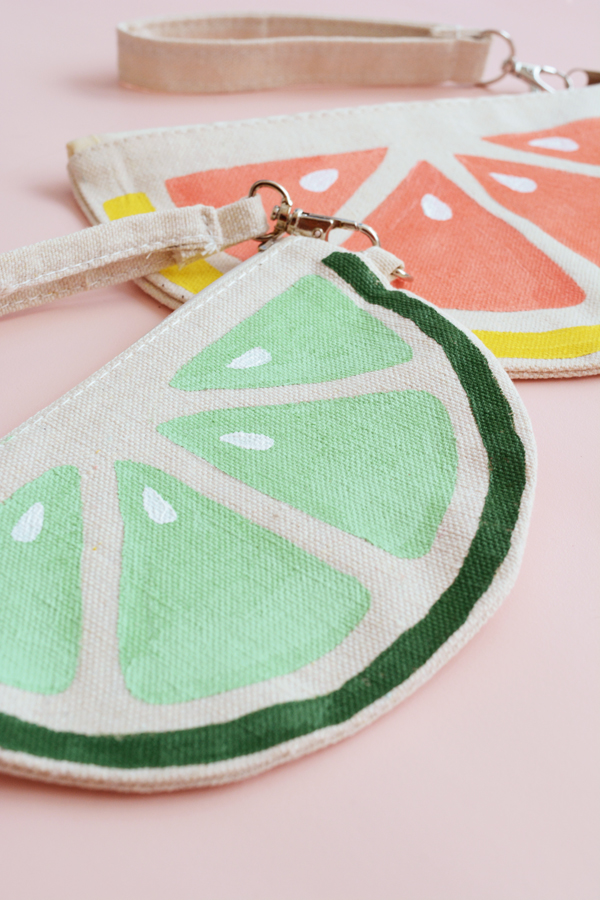
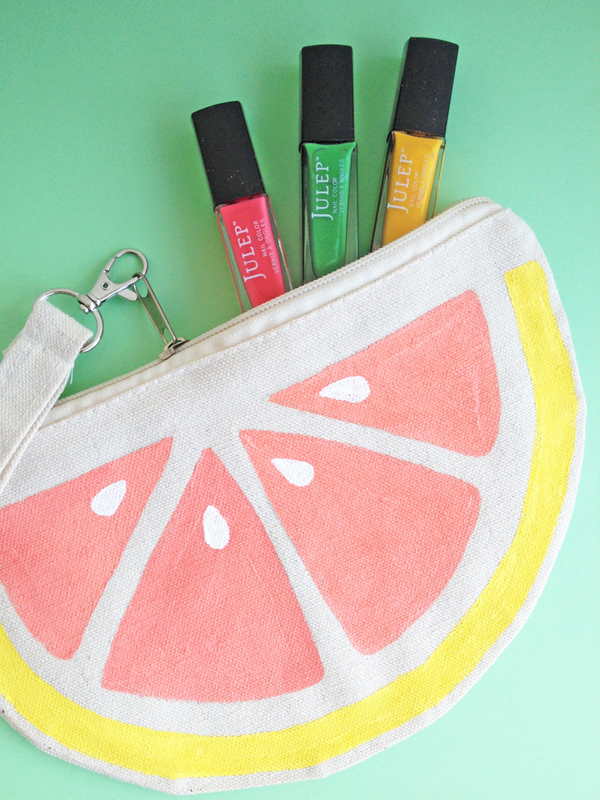
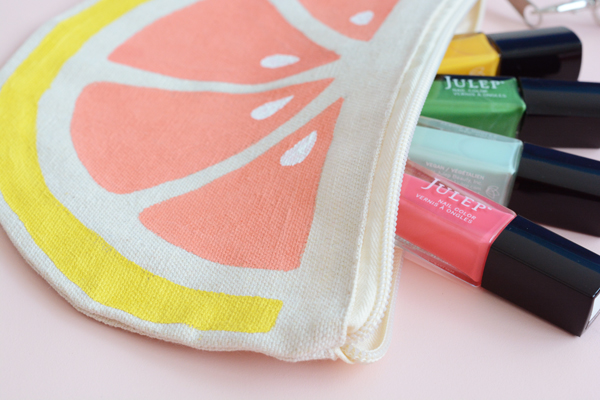
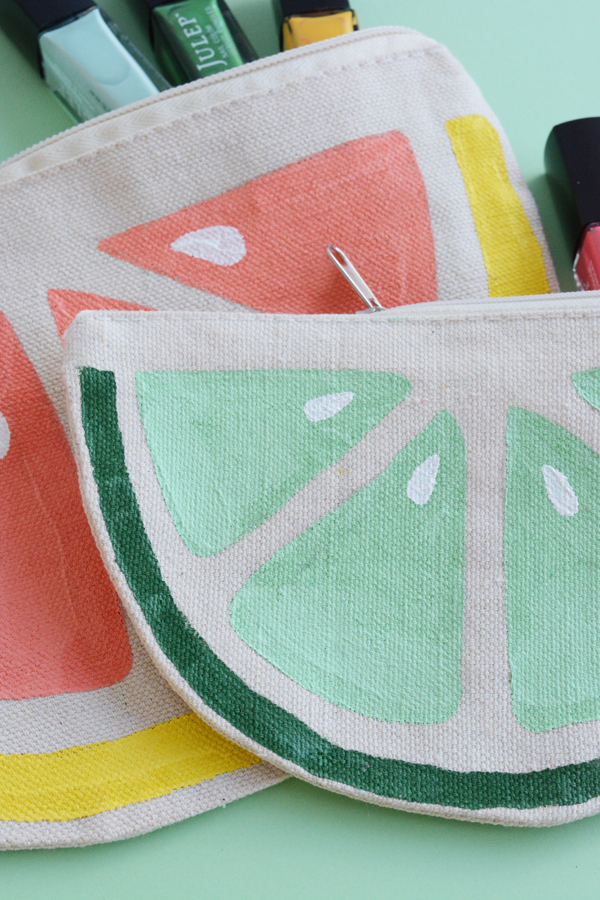
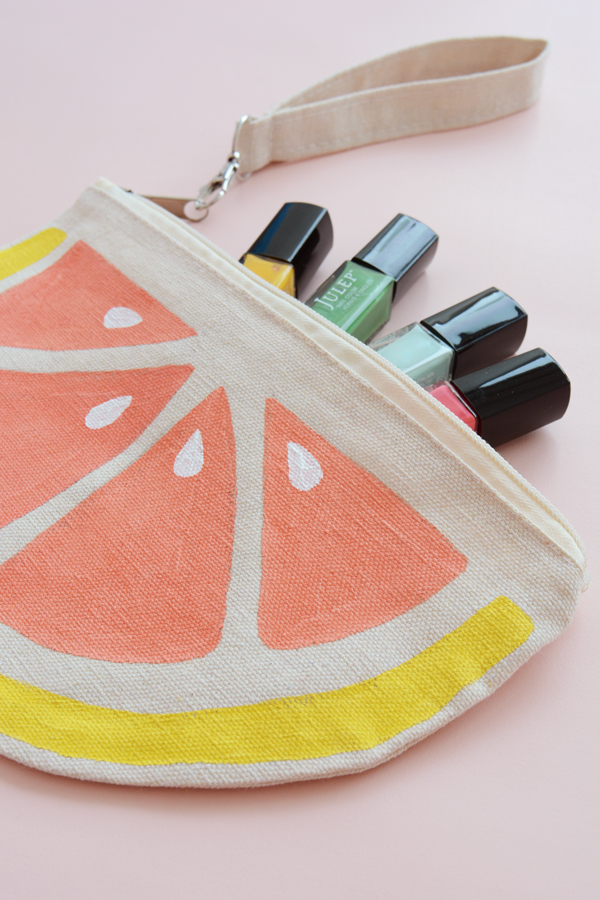
I really like these little citrus slice bags that I made. They’ve been going with me on all my trips and helping me stay organized.
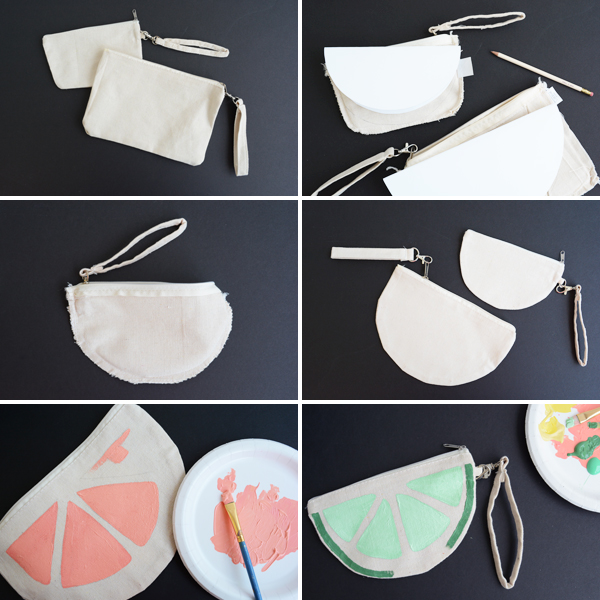
I do like to sew, but putting in a zipper is not my favorite. So, I found a couple simple canvas bags at Hobby Lobby and just changed the shape of them.
Start by turning the bags inside out. Make a circle pattern on card stock, I used a couple different bowls from my kitchen that where the same width as the bags. Fold the circles in half and trace the shape on the bags.
Using a sewing machine, stitch along the curved line. I also zig zag stitched along the raw edges. Then turn the bag back the right way and iron flat.
lightly sketch 4 triangle segments on the front of the bag with a pencil. Using craft paint (I like Martha Stewart’s) fill in the segments and paint the edge of the bag for the rind. When it was completely dry, paint on a seed in each section with white paint.
And that’s it, super simple, but super summery cute.
Right now I’m obsessed with Julep nail polishes. These pretty colors go on beautifully with one coat. I can’t get enough of these unique bright colors.
Happy Friday. This week was a doozy. Lonnie was gone all week, it was 100+ F everyday, I had a million things to accomplish and just as many things went wrong. But, I survived. I hope your week was less eventful then mine.
So, if you saw Monday’s post, DIY Modern Stitched Pillow, then you’ll know I teamed up with 4 awesome bloggers to show you 5 Ways to DIY a pillow. I love how everyone’s personal style and taste came out in this project. These talented ladies brought some great DIY inspiration! If you are looking for a weekend project, look no further, I bet you’ll want to make at least one of these pillows.
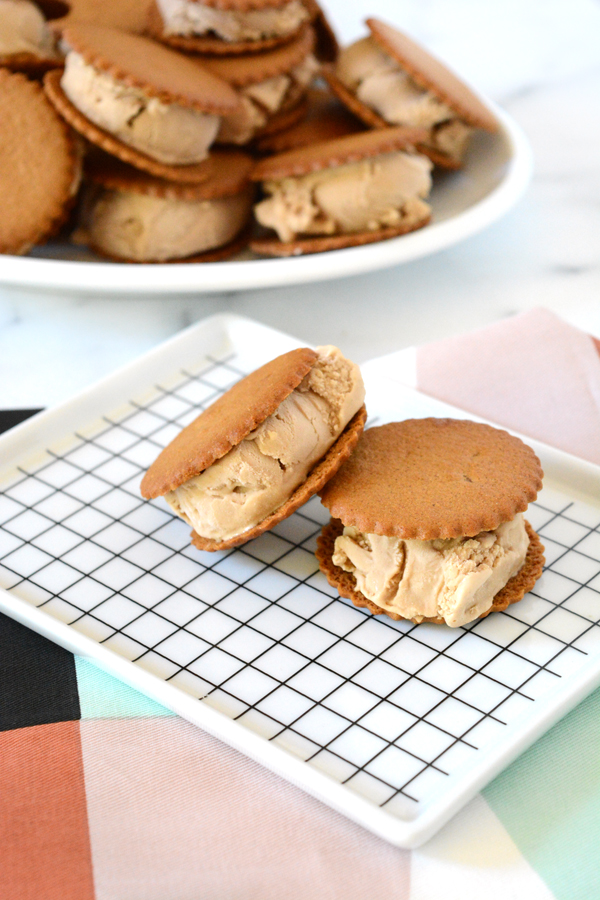
We are smack in the middle of HOT Southern Cali Summer. It’s been 100+ all week and we only want to eat frozen foods. These spiced chai ice cream sandwiches definitely hit the spot. Made with store bought ginger thin cookies, the oven didn’t even have to be turned on.
There’s no messing around with low fat or light options here. Ice cream is best when is made with real whipping cream and eggs. This, easy to make, ice cream is some of the smoothest, creamiest ice cream you’ll ever make.
Spiced Chai Ice Cream Sandwiches
2 cups whipping cream (chilled)
1 egg
1 tsp. vanilla
pinch of salt
6 tablespoons Trader Joe’s Chai Mix (2 scoops or 6 teaspoons)
1/4 tsp. ginger
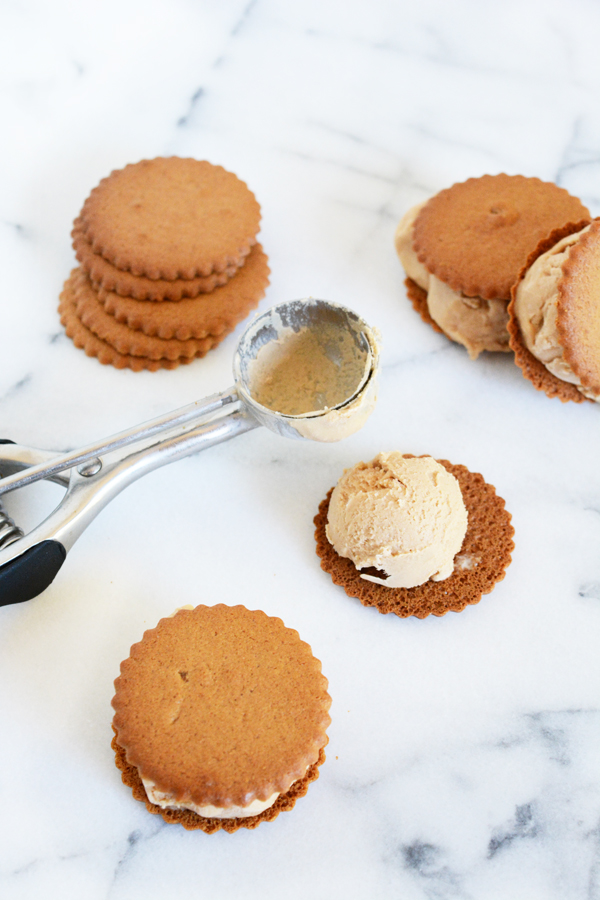
1 package of store bought ginger snaps (I love the thin Trader Joe’s ones)
Combine the first 6 ingredients in a large bowl and whisk to mix well. Pour into the bowl of an ice cream freezer and prepare according to your specific machine. When the ice cream is done, place in an air tight container and freeze for at least 1 hour. Using a small scoop (mine is a cookie scoop), place a scoop in the center a cookie and the flatten with the second cookie on top. Place them back in an airtight container and freeze until solid. Makes about 20 ice cream sandwiches.
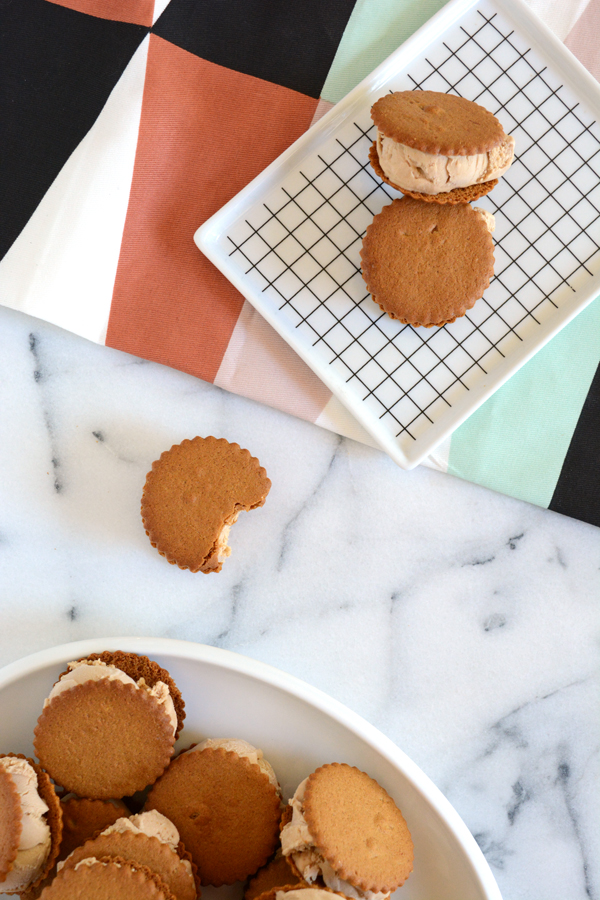
Ice cream is our go-to when it’s hot. I have to confess that sometimes ice cream and popcorn is our dinner in the Summer. What’s you go-to cool treat when the temperatures rise?
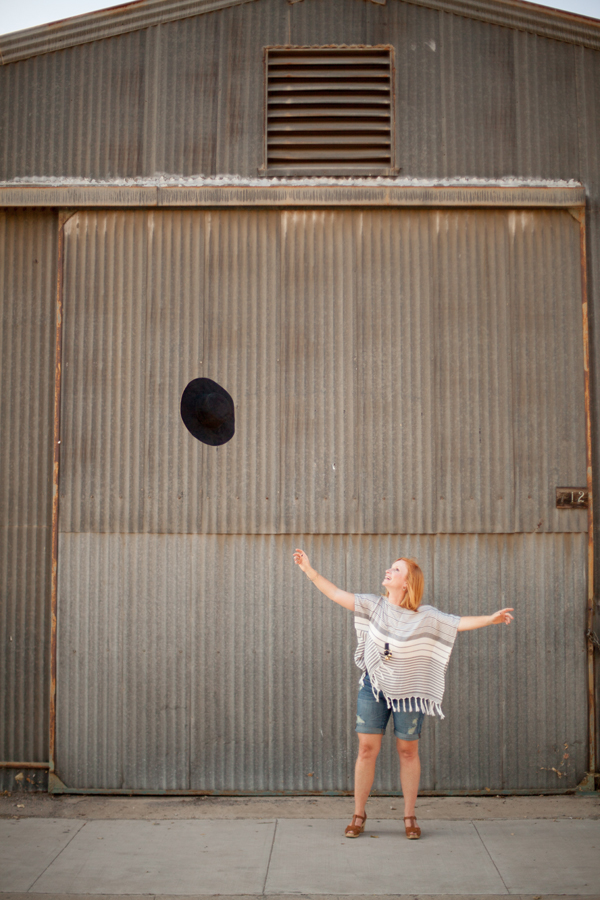
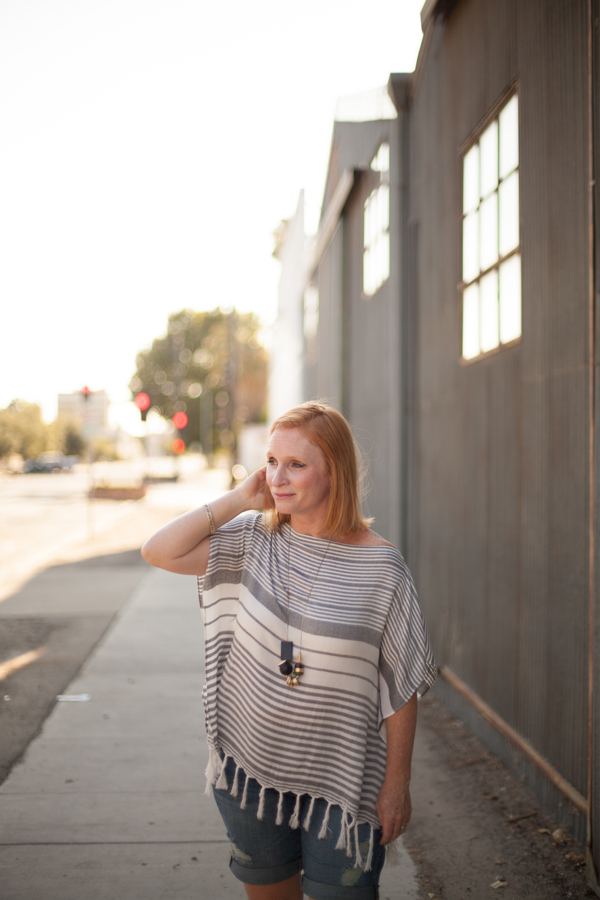
I love to take risks and try new things. It’s what keeps me feeling young and alive. Whether it’s a success or fail, at least I know I tried. For this post, I was challenged to Switch It Up!You know O + P as a place for design, DIY, travel and recipes. So, to go where I don’t usually go, I’m sharing a fashion post with you. Ya, this is a stretch for me, I am definitely not a fashion blogger.
Switch It Up,a new reality series brought to you by Ford, is challenging experts in their given fields to try something difficult that they’ve never tried before. So, here I am, a DIY blogger trying out the roll of fashion blogger. When I put together my reader survey earlier this year, I was surprised to hear from so many of my readers that they wanted fashion and style posts. The thought of those posts gave me a lot of anxiety. So instead of avoiding this topic, let’s try something new and Switch It Up friends!
photos by the super sweet and talented Katie Bernal
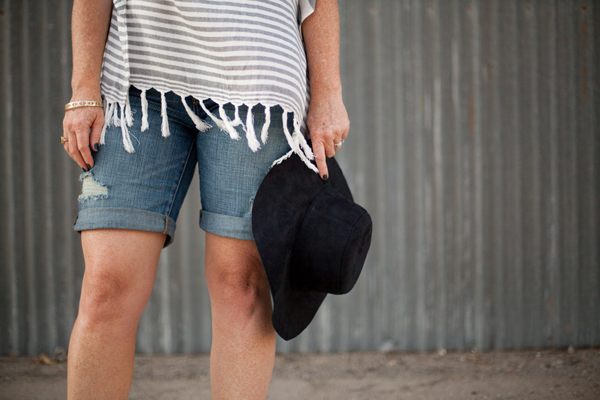
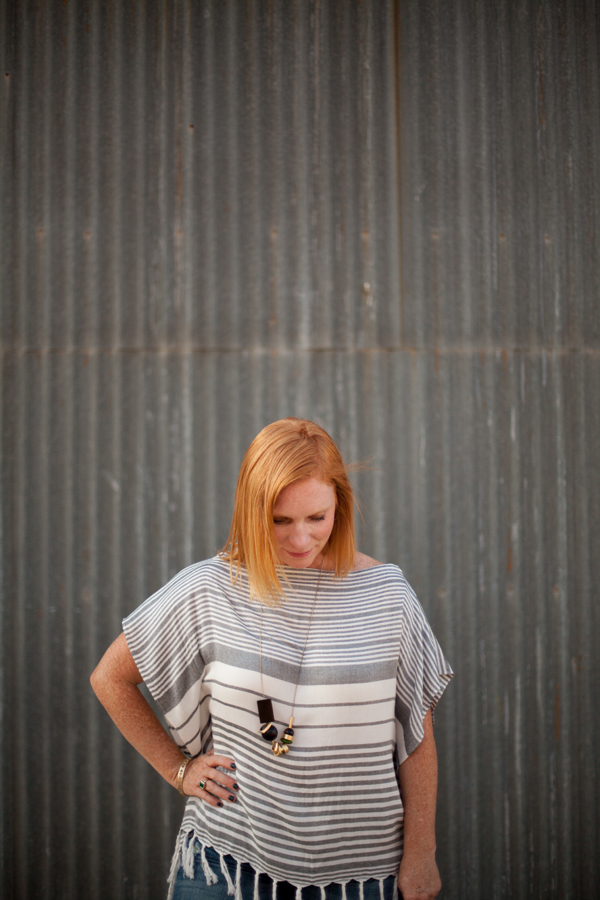
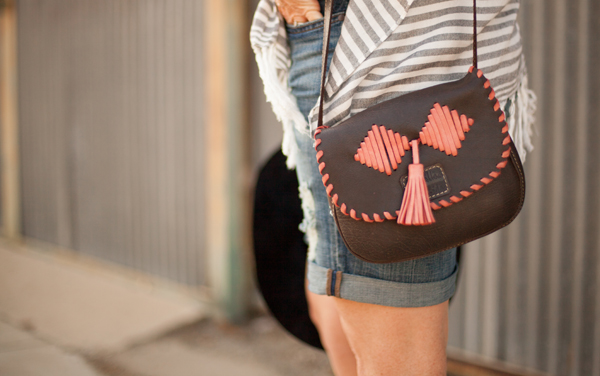
I usually like to be the one behind the camera, not in front of it. In my younger years, clothing and personal style was fun. But, with 3 kids and trying to run my own business, life is busy and how I look everyday usually isn’t a priority. But, this week, I finally donated all the clothes that I’ve been hoping to fit into since having Olivia (which is actually most of my closet). I’ve got about 15 lbs. that just wants to stay put, and therefore every morning I’m faced with a closet full of frustration. So, instead of feeling sorry for myself and picking out all the negatives, I’m trying to enjoy this body that has brought me 3 beautiful kiddos and gets me through each hectic day. And while yoga pants and pjs are comfy, I need to wear real clothes more often.So here’s what I’ll be wearing most days this Summer. First of all, I’ve found the perfect, almost, 40 year old, mom cut-offs. They are so comfy, and I don’t have to worry about my butt cheeks showing. I also made a fun DIY shirt out of a scarf (check out the tutorial below). It’s a little boho and I the breeziest top ever for hot California days. Having fair skin and red hair, hats are my friend. This faux-suede flopping black hat is going to a staple. I’m also wearing all my favorite jewelry and, of course, my clogs.
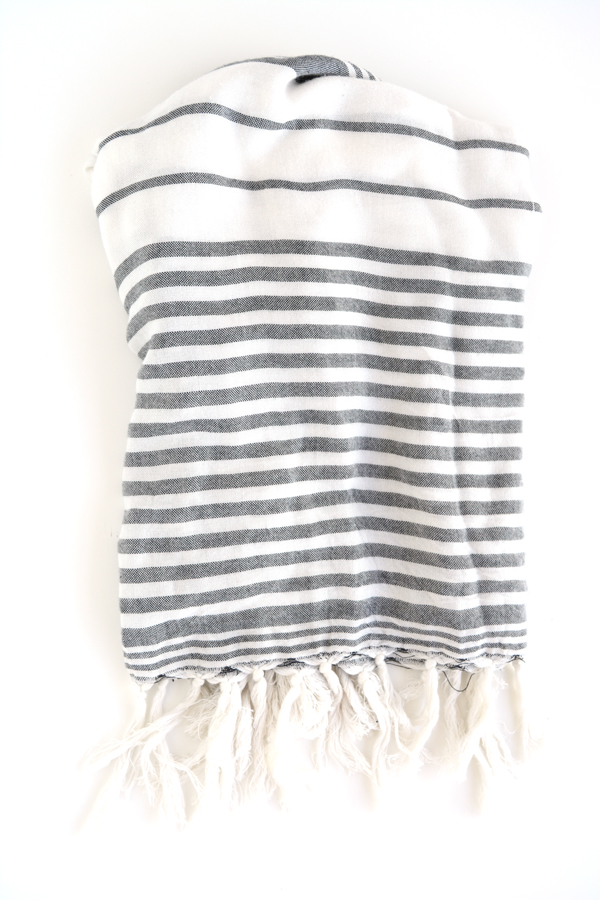
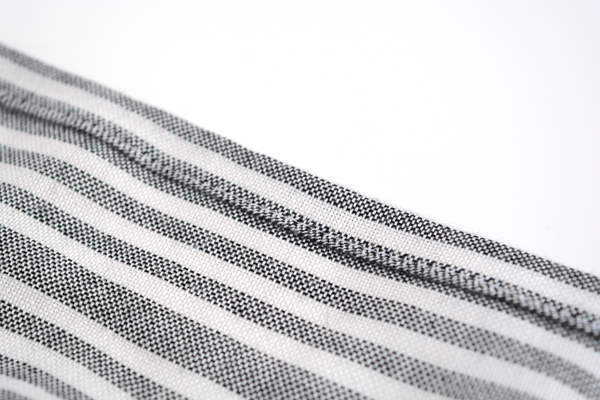
Here’s how you make this simple shirt out of a scarf. You’ll need to start with a scarf that is at least 2 1/2 ft. wide. It can be wider, but anything narrower might not work. I chose one with tassels on the bottom to make it more interesting.
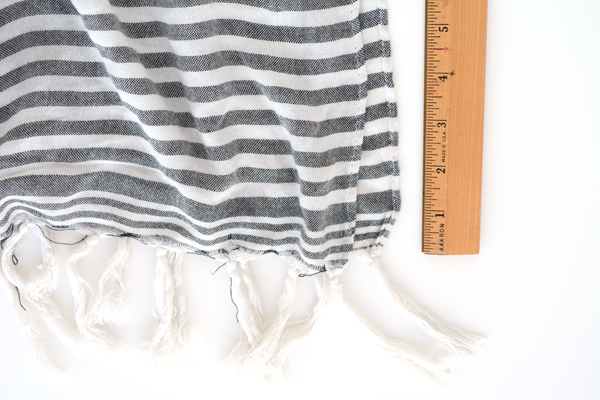
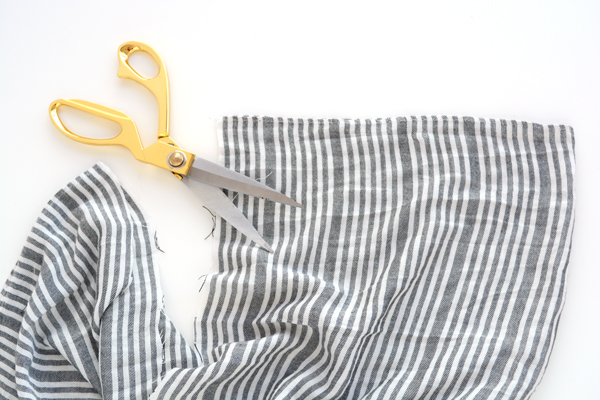
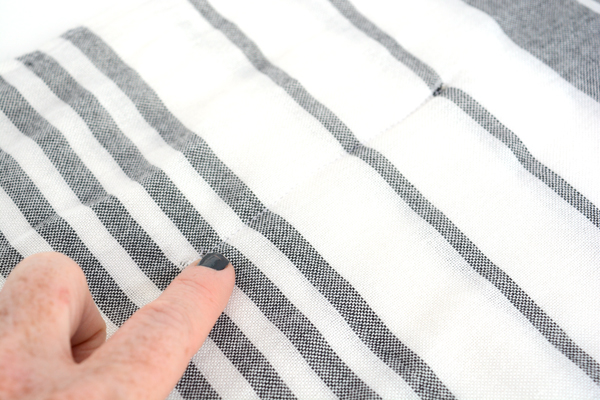
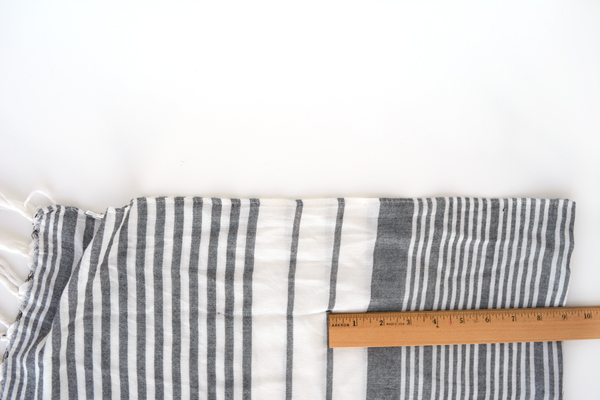
Fold the scarf in half so that the tassel ends meet. Start at the end of the scarf, measure 25 inches. This is where you will cut the scarf. Cut through both layers of fabric.
Fold over the raw edges twice and hem them at 1/4″ seam allowance.
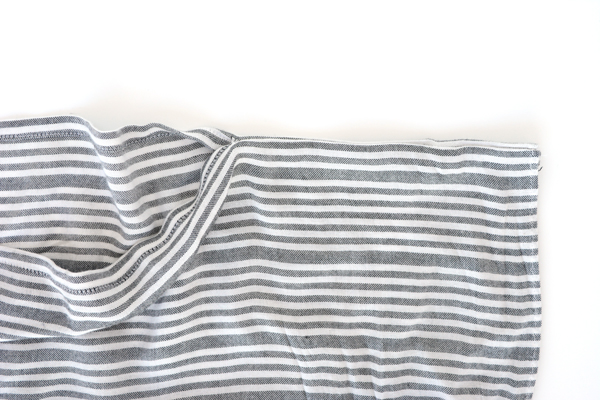
Put the good sides together and sew the shoulders of the shirt. Measure a 12 inch opening in the middle of the shirt and start from the ends and sew towards the middle. Be sure to back stitch on either end to reinforce the seam.
Finally, you will sew the two short seams under the arms. This forms the sides of the shirt.
Mearsure 9 inches from the shoulder and stitch a 5 inch long seam, 5 inches from the side of the shirt. Do this to both sides of the shirt. If you would like the shirt to be closed more, you can sew all the way to the bottom of the shirt. Just make sure that it fits easily over your hips and butt.
And that’s it! How simple is that? This scarf only cost me $10. I think that’s a pretty reasonable price for a unique top.
Switch It Up is a YouTube series dedicated to challenging “experts” to try something new. Ford is challenging folks to get out of their comfort zone in the spirit of Switch It Up. Be sure to check out this fun video and the others in the series.
This post is sponsored by Ford and the Switch It Up YouTube series. Thanks for supporting the companies that help make this blog possible.
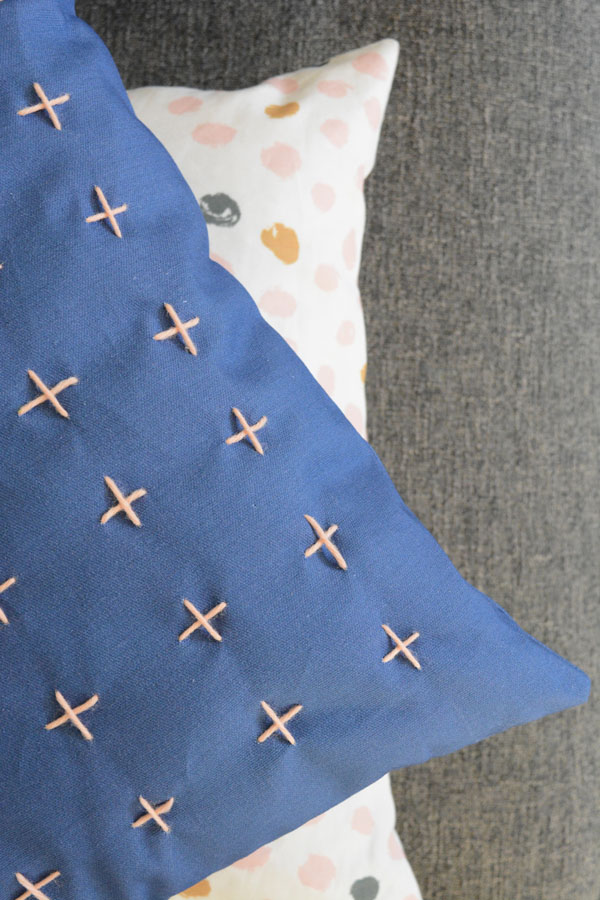
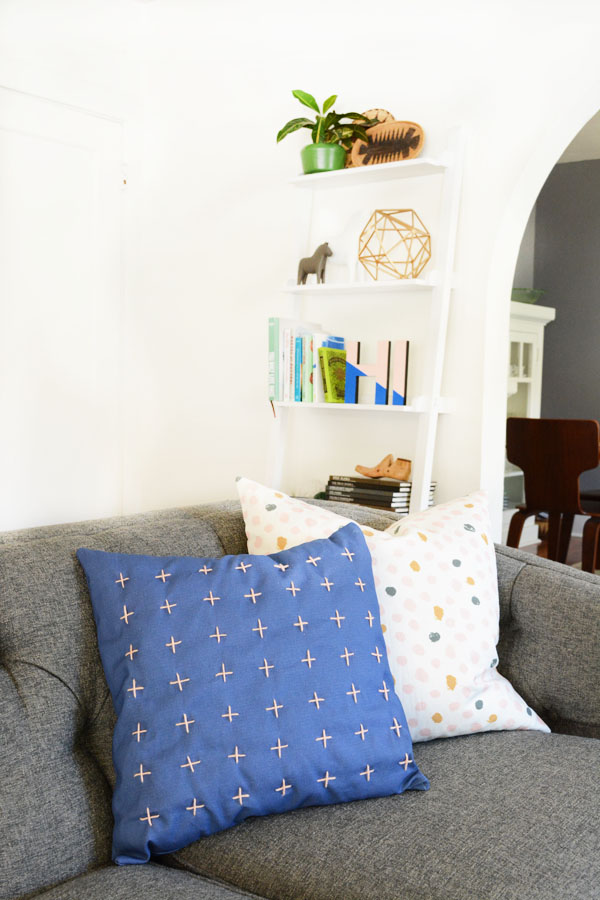
We’re back with another addition of 5 Ways to DIY! A couple of months ago I teamed up with some of my favorite bloggers to bring you 5 Ways to DIY Wooden Trays, you might remember my DIY Triangle Patterned Tray. This time we are each taking a solid colored pillow and giving it a little DIY makeover to add personality to match each of our styles.
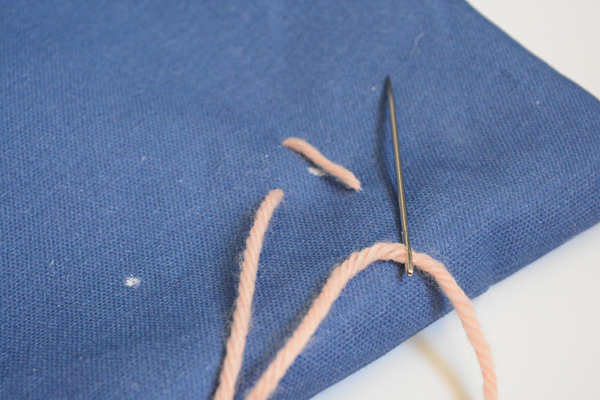
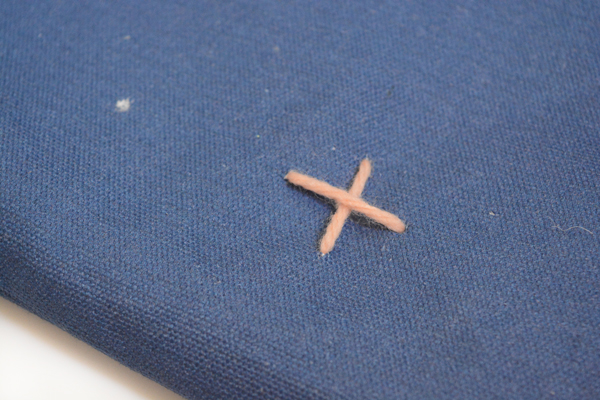
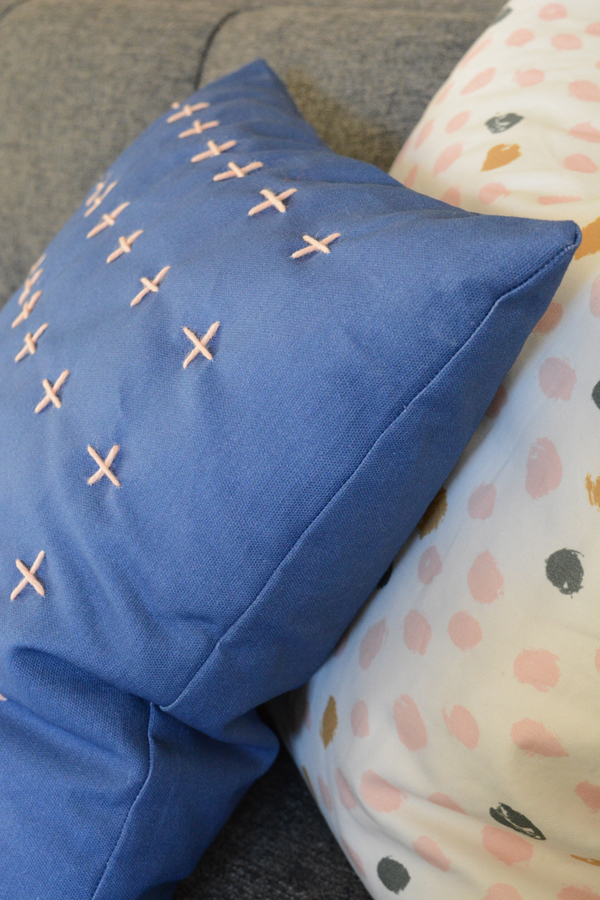
I’m still playing with the color cobalt blue and I love it with pale pink, so I decided to do some simple cross stitching in a all over pattern. I think it has a sweet homemade look, but still feels modern and clean.
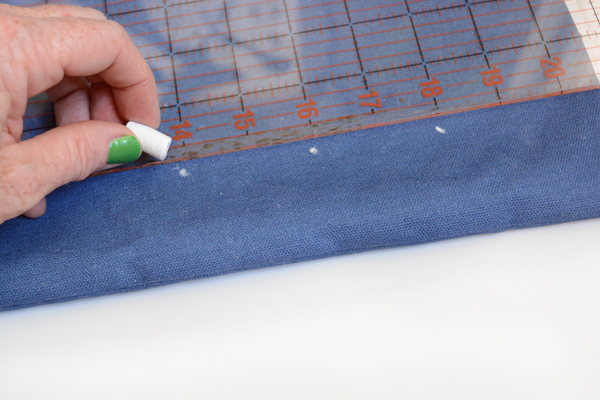
Start by removing the pillow insert and then mark out a grid, spacing the dots 2 inches apart. I used a piece of chalk so that it could be brushed off once the pillow was finished.
Then using a large darning needle and some yarn, begin stitching the crosses on the pillow. I simple used the chalk dot as a guide for the center of each cross. They are not all exactly the same size, but I wanted it to look handmade and have some variation. Each cross is about 1 inch by 1 inch.
Now how simple was that? Be sure to check out all 5 Ways to DIY. Do you have a favorite? Oh, and don’t forget to enter to win the $250 gift card to AllModern!!!! Then you can buy enough pillows to try all 5 of the DIYs! Enter in the rafflecopter below.
This post is sponsored by AllModern. Thank you for supporting the companies that help make this blog possible.
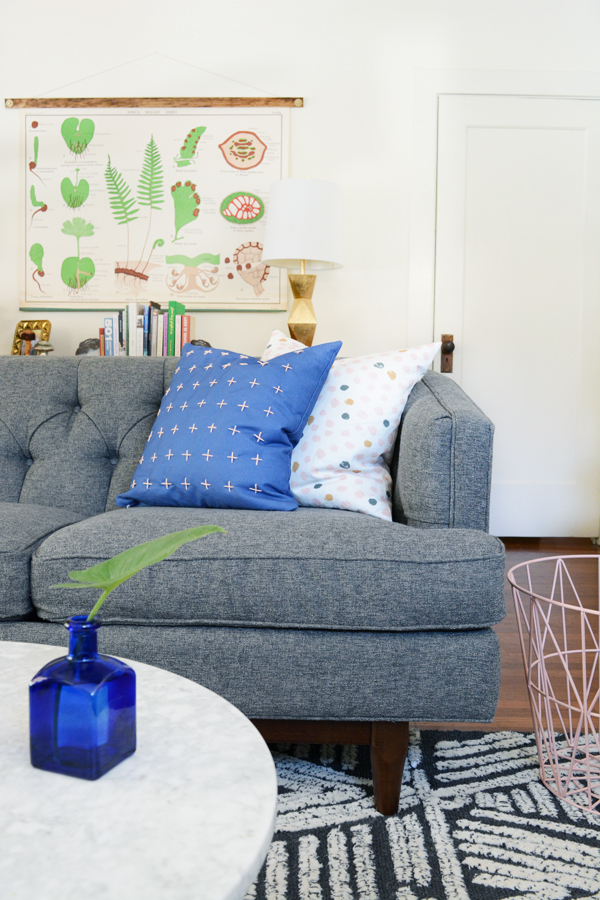
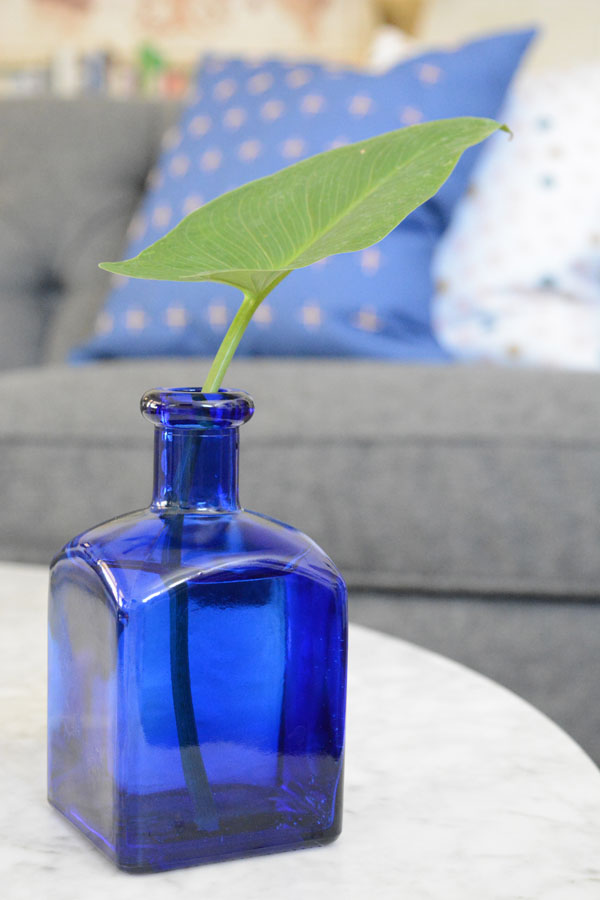
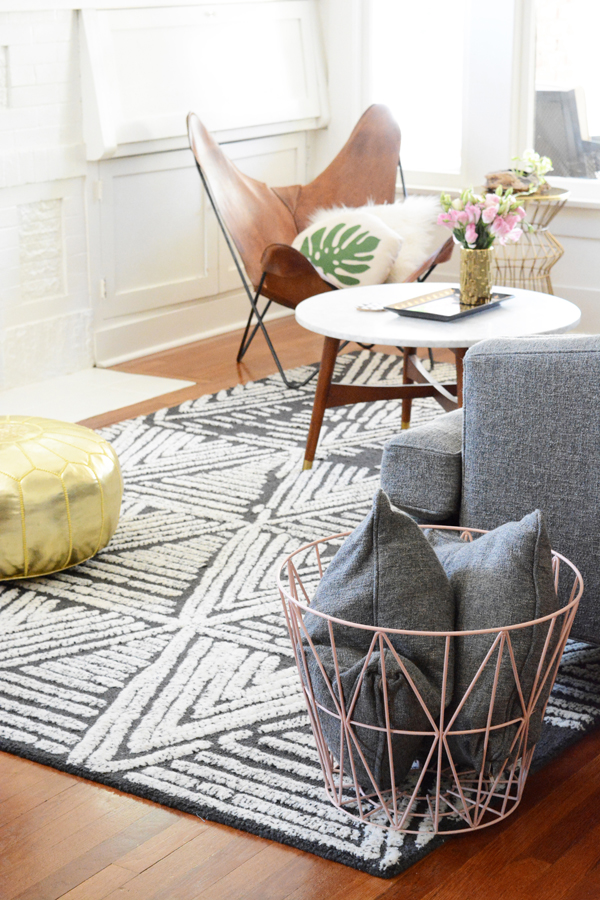
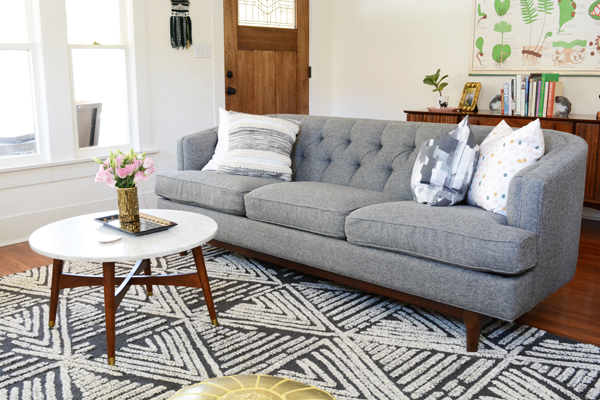
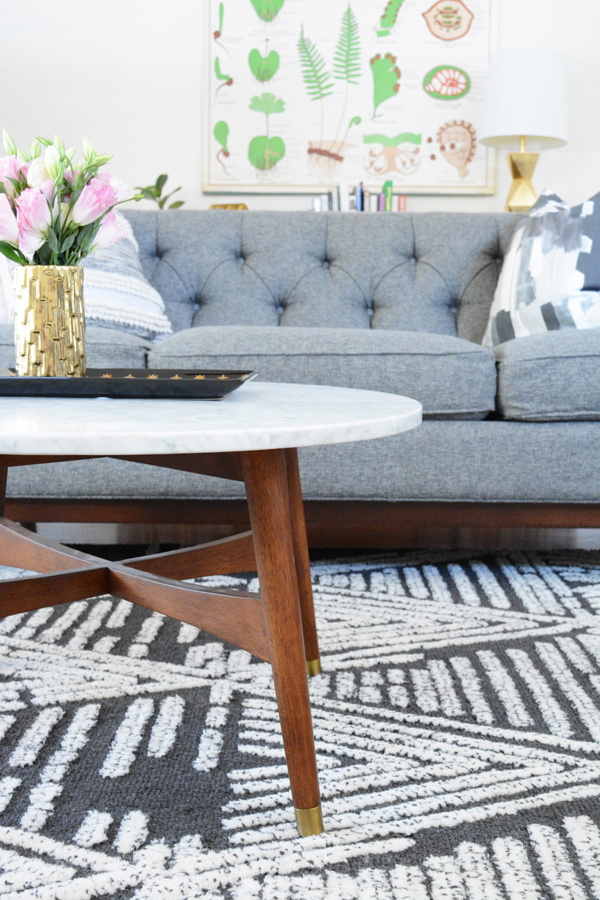
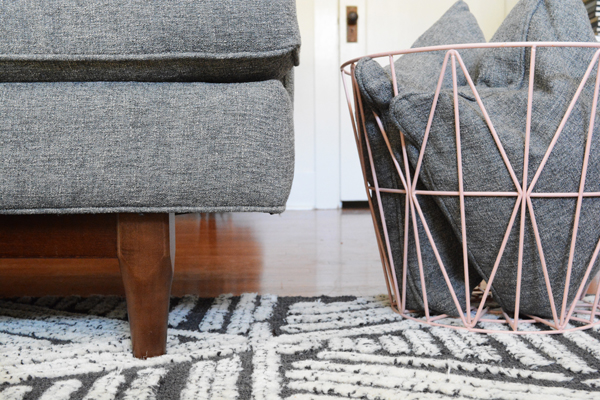
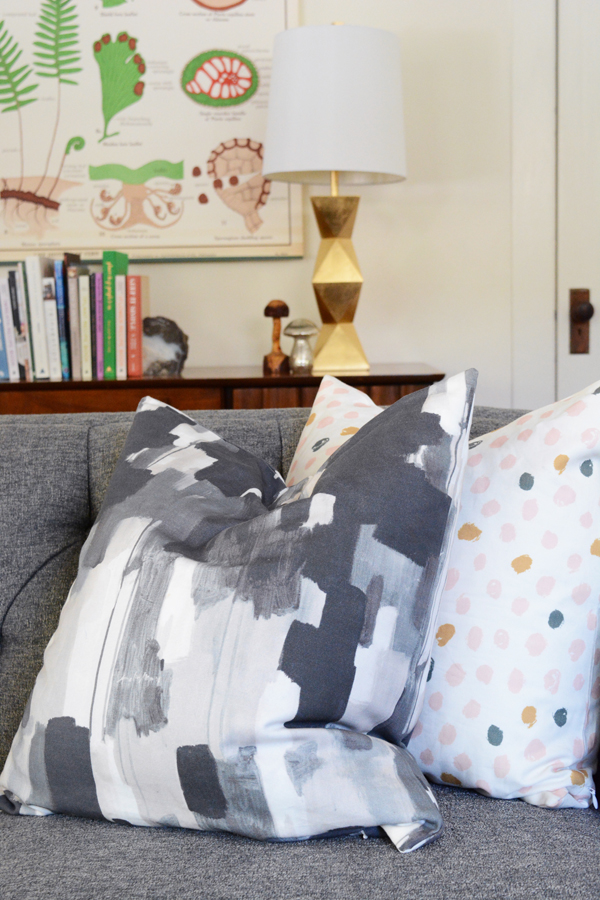
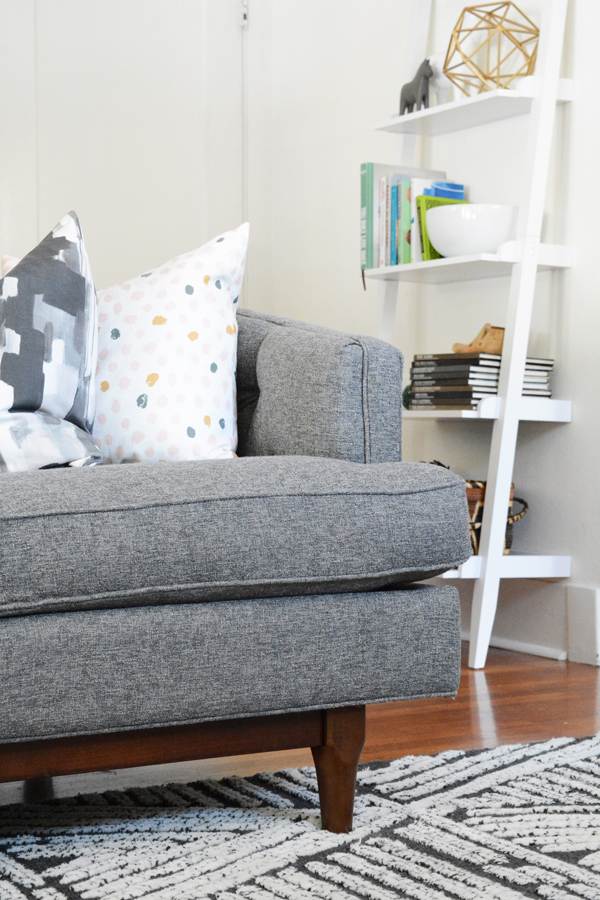
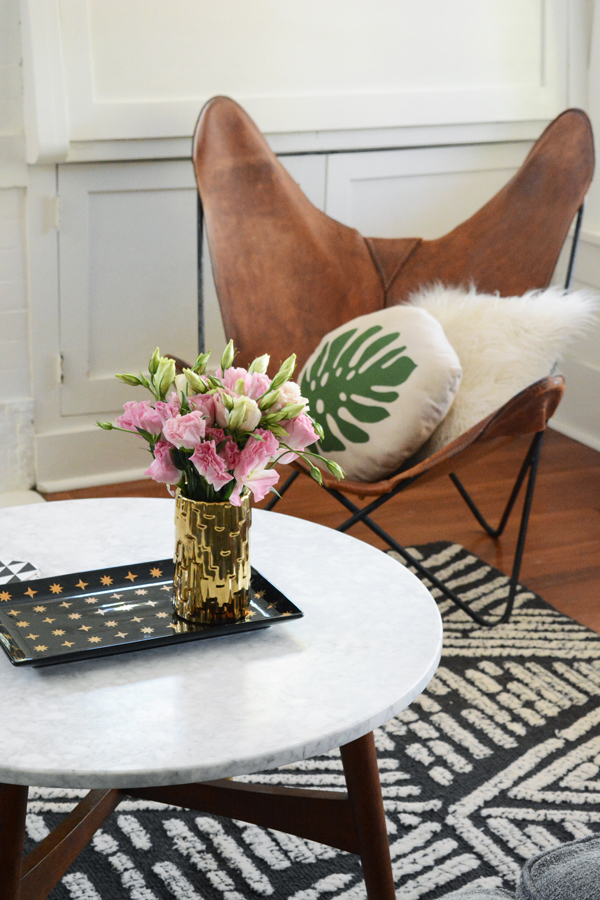
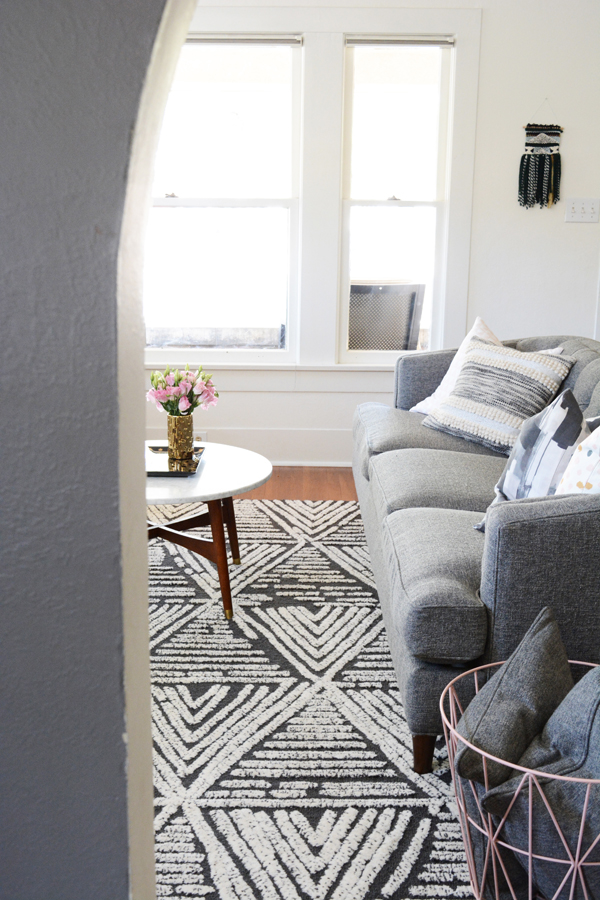
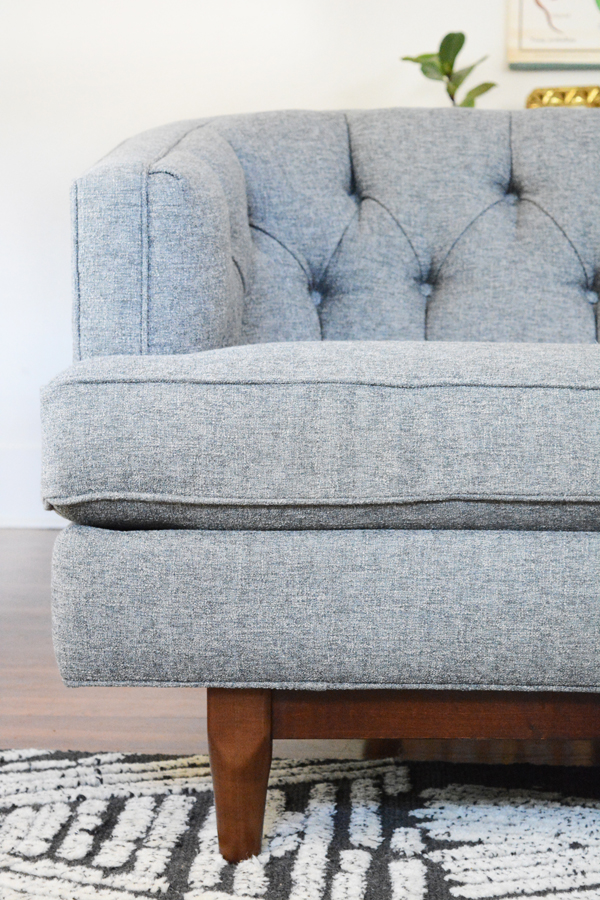
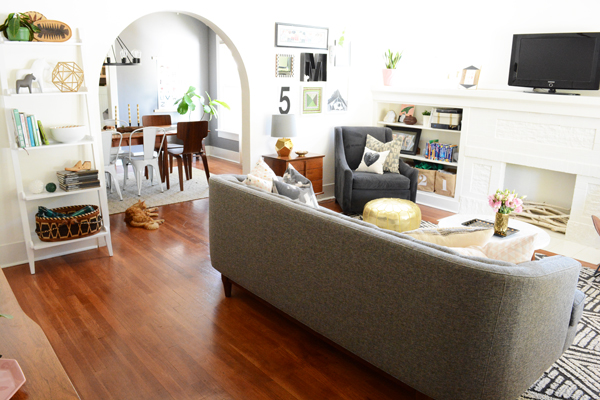
If you’ve been following O + P long enough, you will remember my living room before and also before the before. Well, it was time for another update. Our sofa had seen better days. So, with a new sofa, a new rug and an old chair (that finally got fixed), we have a brand new space.
When you open the front door to our tiny 1920’s home, you walk directly into the living room. This is the room where first impressions are made. I think the room feels grown up and sophisticated, but still playful and hopefully young. We really do most of our living in this room, so the pieces need to be comfy, yet durable with 3 kiddos and a kitty.
We did a lot of online shopping looking for the right one. Bakersfield can be a bit of a small town when it comes to furniture shopping, so I decided I needed to use the convenience of the web and save myself a trip to LA. I’m a huge fan of AllModern, so it’s the first place I looked. When you shop AllModern, your don’t have to weed through the 100s of overstuffed and floral sofas out there, they only sell the good stuff. Now, some of you a probably think “modern” is not your look, too cold and stark. But, it doesn’t have to be. I love mixing modern pieces with vintage finds for a comfortable look and feel. So, when we found this Dwell Studio Sofa, I knew it’s classic tufted shape would compliment my mix matched thrifted treasures, like my credenza and butterfly chair.
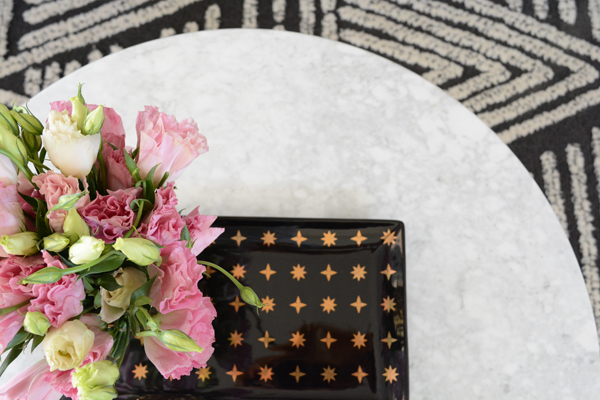
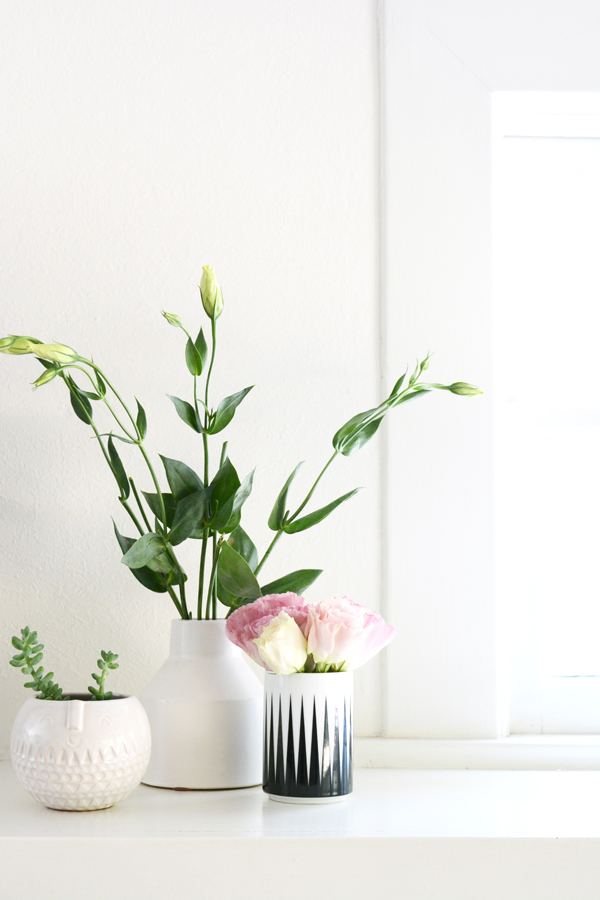
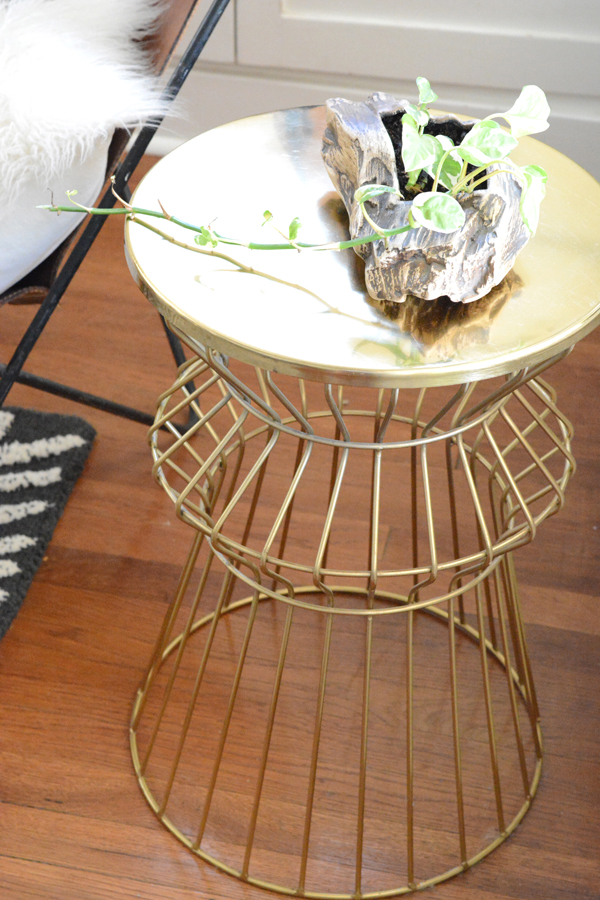
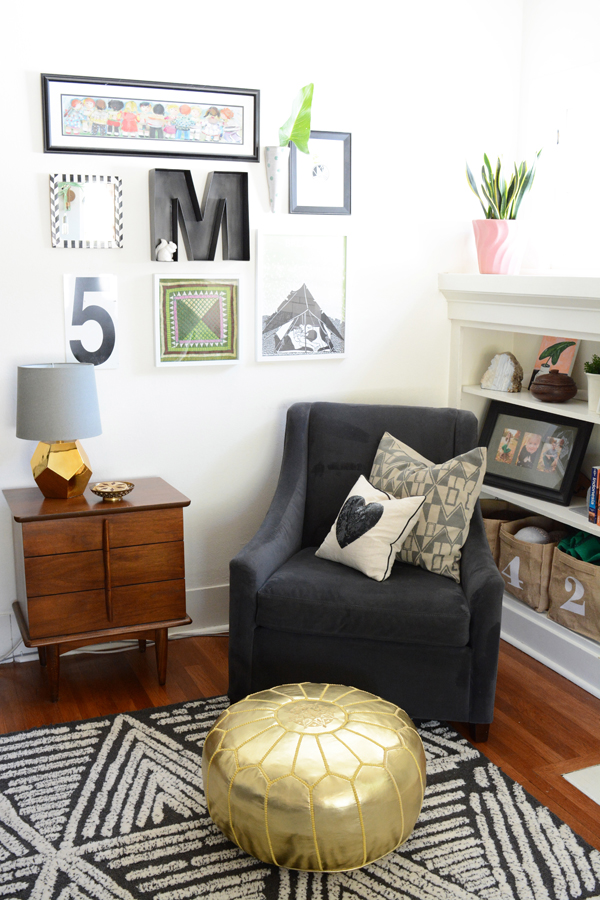
Sticking with my favorite neutral, grey, I decided to add a little color with pillows, a gold pouf and this gorgeous pink wire basket.
Green is my usual go-to accent color, but I’m trying out pink for a change.
So, what do you think of the updates? The space really feels like it fits my style more then it every has before. Would you be brave enough to order a sofa online? I have no regrets, our new sofa is even better then we imagined.
This post is sponsored by AllModern, but all my thoughts and opinions are my own. Thanks for supporting the companies that help make this blog possible.
Well, we just got home today and I’m feeling super unprepared for Father’s Day. So, I did a little online shopping and found some fun stuff for dads. And the best part is that these are all 2 day shipping, so I can order then in time. So, if you have left father’s day to the last minute like I have, hopefully this will help you out as well.
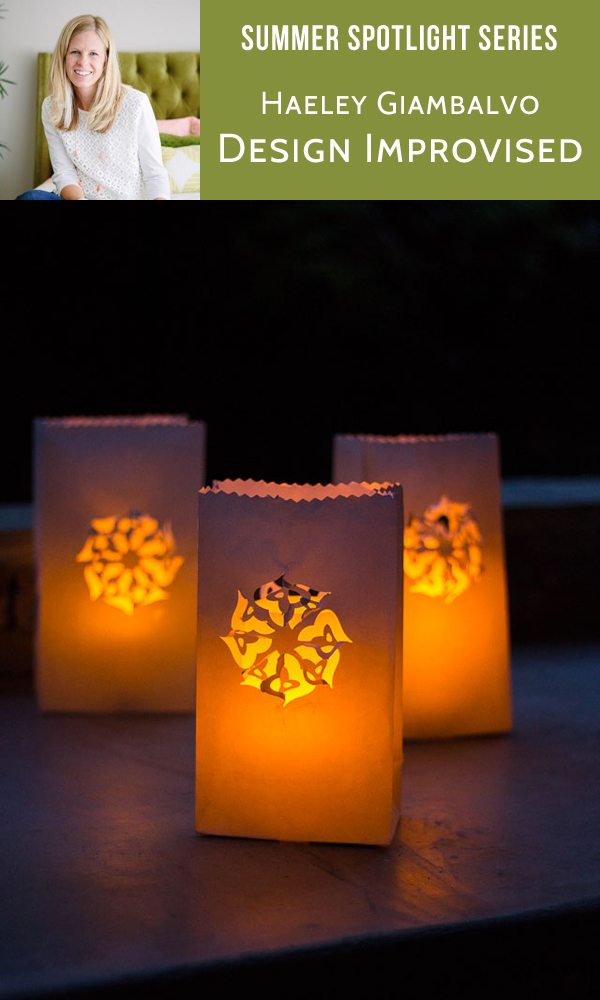
I’m back with another blogger you need to know. Haeley Giambalvo of Design Improvised is a talented mom to 2 adorable girls and is a crafter extraordinaire. Haeley’s style is bright and colorful and her DIYs are totally doable. They are always inexpensive and easy to make, but add color and pattern to your home or party.
I met Haeley at Alt a couple years ago and we were roomies at Alt the second year I attended. She is sweet and genuinely kind. I’m lucky to call her my friend.
What does a perfect Summer day look like to you?
Having breakfast outside with my girls and playing a little bit before the sun gets too hot. A quiet afternoon of crafting and relaxing indoors (and hopefully naps!), followed by a late afternoon trip to the pool and something yummy on the grill for dinner.
How do you stay cool?
Daily trips to our neighborhood pool. Here in San Antonio, TX it is the only way to survive during the heat of the summer!
What is your essential Summer item?
This summer it is a floppy straw hat, a good magazine, and a bottle of white wine chilling in the fridge.
Pool, Lake or Ocean?
Pool
Tan, Burn, or Freckle?
Tan
Flip Flops, Slip-ons, or Bare Feet?
TOMS – I wear them year round.
What’s on your Summer reading list?
Lots of magazines – I love any home related magazine. I also love checking out home design and crafting books from the library during the summer. They are easier to flip through and enjoy in bits and pieces without having to commit to reading an entire novel. I love reading but I’m usually too tired before bed at night to get in more than a few pages before I crash!
What is one Summer activity you are looking forward to?
Spending lazy days with my two girls – it is our last summer before my oldest daughter starts Kindergarten in the fall!
Do you have a goal or project for this Summer?
Last summer I took the month of July off from blogging, and it was one of the best choices I made. It gave me time to spend with my girls and explore new craft ideas without the pressure of having to post something. I ended up coming up with some of my most creative ideas during that break. I hope to take a month (or two?) off this summer too!