Design / etc.

Moroccan Style Rugs

July 29, 2014

Having a house with all hardwood floors, great area rugs are a must.  I love the ease of cleaning hardwood floors, but especially with kids, you need a few soft places to land.  Rugs also give you a great opportunity to add a little pattern and color to a space.  Good area rugs can be an investment, so I like to keep the colors neutral and play more with the pattern.  I fabulous rug can really make a room. Moroccan rugs are everywhere.  Every good blogger owns one.  I thought I do a little hunting for some great, reasonably priced options.  And I hit the jack pot on Wayfair.  I’d happily put any and all of these in my home.  
1 // 2 // 3
4
5 // 6 // 7

A great Sisal rug is always a great option as well, but I think number 4 is calling my name.  It could be pretty fabulous in my bedroom. Do you have a favorite from these?

Do you need a great rug for a room in your home?  I’ve got a special deal for O+P readers.  Wayfair is offering my readers 15% area rugs !!!!! Just enter the code RUGLUV20 at checkout. The code is only good from 7/31 to 8/4.  Wayfair hardly ever does promo codes, so this is a pretty great deal.  Happy rug shopping.

This post is brought to you by Wayfair.

etc. / Food & Drink

Blackberry Basil Buttermilk Ice Cream

July 28, 2014

Well, what a week.  We are finally headed home.  We (mostly my brother Joash) worked for 6 straight days on Riley.  It really was my dad, Lonnie, Joash and I on it for a good solid week. He’s not even cute yet, but he’s super strong and safe.  As soon as it cools down in Bakersfield, I’ll start working on painting him.

We managed to do a little blackberry picking around my parent’s place in Eureka, CA.  We made three batches of jam – classic blackberry, blackberry basil and blackberry mojito jam.  We also made a big batch of blackberry curd and my mom made the BEST ice cream, Blackberry Basil Buttermilk.  So, as promised, here’s the recipe for this creamy, fresh frozen treat.

Blackberry Basil Buttermilk Ice Cream

3 cups of heavy whipping cream
1 cup buttermilk
3/4 cup sugar
4 eggs
3/4 cup blackberries pureed (plus a couple extra berries)
6 basil leaves

In a blender or food processor blend the berries and basil together to make a puree.  In a sauce pan over medium, heat cream, milk and sugar until sugar dissolves.  Whisk the egg yolks in another bowl.  Take 1 cup of the hot cream mixtures and whisk it into the eggs.  Then pour the eggs into the cream mixture and whisk well.  Cook over medium heat for 8 mins, stirring constantly.  Do not let it boil.  Remove from heat and whisk in the blackberry and basil puree.  Mash up a handful of whole blackberries with the back of a spoon.  Stir the berries into the prepared ice cream mixture.  It’s nice to have just a few chunks of the berries throughout.  Chill the mixture completely and then freeze according to your ice cream maker instructions.

etc.

Friday’s Fabulous Five – Pretty Pastels, Patterns, and Pineapples

July 25, 2014

Happy Friday!  It’s been a busy week of Riley repairs.  It’s so good to see him strong and sturdy again.  He’s 66 years old, so he’s a senior citizen, and his age is definitely showing. 
This little round up was actually meant for last week, but in the hustle and bustle of prepping for my mom’s 60th birthday party, I didn’t get a chance to post.  But, these are some Summery DIYs you don’t want to miss.  There’s pretty pastels, patterns and pineapples (of course).  Enjoy and I hope you all have a great weekend!  

etc.

Riley Repairs – it’s not pretty

July 24, 2014

It’s been a busy month. I’m sorry posts have been sporadic around here. I’m out of my usual routine, with lots of traveling and I’m still going to school and getting my required courses to keep my teaching credential. Stay tuned all my faithful readers, I’ll be back soon with lots of fun ideas on a regular bases very soon.
This is what’s been keeping me busy this week.  Riley is in need of some repairs. On our way back from our Spring Break trip to the Napa Valley, we had a bad tire blow out on the I5. It was late at night, pitch black and the tire that needed to be changed was on the road side of the trailer.  It was nerve wracking watching Lonnie dodge semi-trucks while I kept the kids in the ditch listening to a coyote yip and howl at us very near by.  The blow out ruined not only the tire and wheel, but it ripped out a lot of the wheel well and all the electrical to the trailer.  It was a mess.  
My brother Joash and my Dad offered to help us tackle this huge job. Yesterday we began taking off the side panels to get a better look at the damage. I turns out that Riley, who was built in 1948, has had some water damage. A lot of the base of the frame was rotten and chunks were missing. We definitely have  a lot more work cut out for us then we expected. Today is day two of Riley repairs and we have 3 sides of the trailer off. I wanted to share the not so glamorous side of owning a Vintage Trailer. We found awful papery insulation, hornet’s nests and a lot of rotten wood that has to be replace. I’m lucky to have a great DIY family. They are eager and knowledgable – the perfect combo.  We are trying to fix just what’s necessary. I don’t want to gut Riley. He’s old and I really want to keep him as original as possible. But, it’s going to be so nice knowing he is road ready.
Flying Creatures Once Called This Home
Yucky Insulation
The Torn Up Wheel Well
Brand New Solid Boards Going In
I’ve known since we bought Riley, that I’d need to paint him sooner then later. But, now that the side panels are off and we are making all these changes, paint is totally the next step. I think I want to keep the green, but I’m considering different patterns and designs for the paint job.  Here’s a few that have caught my eye.

What do you think?  Do any of these or a combination of a couple scream Riley?  I also found another 1948 Kit Companion on Craigslist and it says that it has the original paint job, so it would be fun to return Riley to his original glory.  Here’s the twin and the original paint job.  Don’t you like the angular lines?  Doesn’t it seem right to go with the original look?  I’d love to know what you think.

The Paint Job Riley Would Have Originally Had

etc.

Great Air Plant (Tillandsia) Sources

July 16, 2014

I few weeks ago I posted my DIY Beaded Glass Bubbles to hold my air plants in.  I got a lot of comments asking what an air plant (Tillandsia) is and were can you find them.  The few air plants that I started with, I got at West Elm.  They are gorgeous and healthy, but I honestly paid too much for them.  I think one was $6 and the other was $4.

I haven’t been able to find any locally yet, here in Bakersfield.  But, I’m really not all that surprised.  Bakersfield is a pretty big city that thinks it’s a tiny cow town.  For example, our GAP in the mall recently had to close, because it wasn’t making it.  Yes, LA is only 2 hours away, but I really don’t want to drive there all the time.

So, I did a little Amazon shopping and tried out a few vendors for air plants and glass bubbles.  I ordered quite a few and I wanted to share what sources I found to be the best.  By the way, this is not an ad.  I just wanted to help you find some great online sources for air plants.

This set, seen in the images, was the best purchase.  It send I would get 5 different plants and I actually got 6.  They came in less then a week, were nicely packed and are healthy and strong.  With shipping I paid less the $11 for this set.

The round glass bubbles and the tear dropped shaped bubbles were smaller then I expected, but I actually think they are pretty dang cute.  Both came in sets of 6 and I think these look fabulous in a little grouping.

I filled my bubbles with a little colored sand and just sat my little plants in them.  The colored sand (bought at Hobby Lobby in the wedding section for $2.99)  adds a great pop of color.

etc. / Food & Drink

Ginger Mint Watermelon Sorbet

July 15, 2014

I’m finely back home for a couple of days.  I’m so sorry that I’ve been so sporadic with posts lately. Traveling to Canada, single parenting, and doing homework left me little time to get the posts out that I wanted to.  But, I’m home and it’s HOT here!

Are you needing a cool Summer treat?  I’ve got a really refreshing dessert to beat the heat.  Nothing taste more like Summer then watermelon.  This frozen treat has a little kick with a hint of fresh ginger and mint.  And it’s so easy to make.

Ginger Mint Watermelon Sorbet
1 small seedless watermelon (about 4 cups of watermelon pureed)
1/2 cup sugar
1/2 cup water
2 tbsp. fresh ginger grated
2 tbsp. finely chopped mintpinch of salt

Start by making a simple syrup.  Place the sugar, water, ginger, mint and salt in a small sauce pan.  Bring to a boil and boil for one minute.  Pour into a glass jar and refrigerate till it is cold.  

Remove all the watermelon from rind, place in a blender and blend until smooth.  Refrigerate for a couple hours.

Drain the ginger and mint out of the simple syrup. Combine the syrup and watermelon puree, place in the bowl of an ice cream maker.  Freeze according to the directions of your machine.  Store in an airtight container in the freezer.  

What’s your go-to Summer flavor?  
P.S. Got these cute little milk glass glasses at the little Idaho vintage market I went to with my sis-in-law and mother-in-law.  There were only 5 (perfect number for our family) but, I’ll be on the hunt for more. 

Design / DIY / etc.

Coral and Kelly Green Home Office – Furniture Fixes

July 9, 2014

Ok, here’s more of the Coral and Kelly Green Home Office.  These two pieces of furniture are what anchored my color scheme.  Both were well loved pieces that needed some TLC.  And yes, I spray painted both the chair and the desk to get this great look.  Although both of the desk and the chair were wood, I used my How to Paint Laminate Furniture technique to refinish both of these.  

Let’s start with the desk.  I found this beauty on Craigslist, but about a 2 hour drive away.  That didn’t stop me, Olivia and I hoped in the car and make the trek.  Some of you might be wondering we I would paint such beautiful wood desk.  Well, it was a struggle for me to make the decision.  I even considered just painting part of it and leaving the rest it’s natural wood.  But, the truth is, it was in pretty rough condition and I would have had to refinish it, so I decided to take the risk and paint it coral.  I’m so glad I did.  I love this desk.  It is sooo heavy and well made and has an amazing shape.  It is perfect for the space.

Before
After

This is me trying to decide if the drawers could just be painted.  I decided that there wasn’t enough color contrast between the coral and the wood color for it to work.
I kept all the original hardware.  I love the little brass trim piece around the bottom of the dresser.

And I found the perfect chair at Homegoods for this little desk.  

The side chair I found in an antique mall.  I paid only $20 for this sturdy little school chair.  My client is a teacher and so I felt that this chair would be so appropriate.  It had a great shape, but is was rough.  I think everyone that had ever sat in it had carved their name into it.  But, with some good sanding, primer and a few coats of paint, this is one of my favorite things in the whole office.

After
Before
See what I mean about the shape?  It’s such a good looking chair. 

I really enjoy giving furniture a whole new look.  And with spray paint, you can have results in just a day.  You’ve probably seen this color scheme appear on my blog a lot lately.  I can’t get enough of it.  

etc. / Style

Denali Style

July 6, 2014

I am obviously not a fashion blogger. But, fashion is definitely something I loved more in my younger, thinner years, but also something I want to explore and play with more.
Now, fashion for my kids, that’s easy.  Denali, my 12 year old, looks amazing in everything.  I’m sure you know a bit about this great kid, but let me tell you more.  This smart, easy going, beautiful inside and out kid is the best 1st born you could ask for.  She’s responsible and a great big sis to Dylan and Olivia.  She’s a tough cookie and has been since the day she was born.  I had Denali when we where living in Papua New Guinea.  It’s a really long story, but she almost died after she was born.  She ended up having to be medi-vacced to Australia when she was just 3 days old. She’s seen more of the world then most adults I know.  She has a calm spirit and is kind to everyone.
This is a story, I’ve wanted to share with you, but just haven’t known how to. It’s definitely been a big part of our lives the last 6 months. There is this fine line between sharing and over sharing in the blog world. So, here’s the REAL Oleander and Palm, not just the easy DIYs and crafty crap.  Just this last year, Denali was diagnosed with scoliosis.  It ended up, that her “S” curve was worsening too rapidly and so just a couple months ago, she had to get a back brace.  It’s really not fun. It goes from under her arm pits to past her hips.  It’s an extremely tight, solid plastic brace and she has to wear it pretty much 24/7 for the next 2-3 years.  We are still so bummed for her.  But, she has such a great attitude.  She hardly ever complains about it.  
Turns out, none of her old clothes would work with the brace and so we’ve been on the hunt for clothes that will fit over the brace comfortably and also cover it well.  And then once we found things that would work, the brace would tear holes in them.  
So, when Aeropostale asked if I’d like to partner with them, I thought that this could  be a fun project for Denali and I.  We could try to find cute, comfortable clothes for her and then photograph her in them.  I wanted this to be a way for her to feel beautiful and comfortable in her “new” body.  If you don’t remember being 12, it’s not an easy age. Then add a back brace, it can be hard, to say the least. 
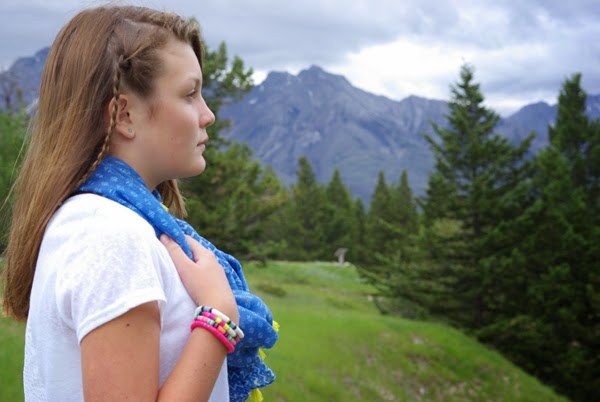
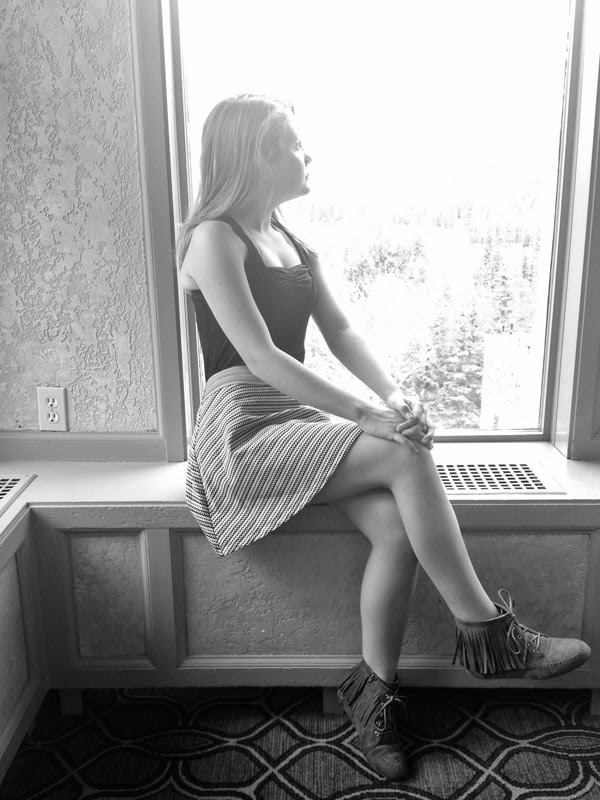
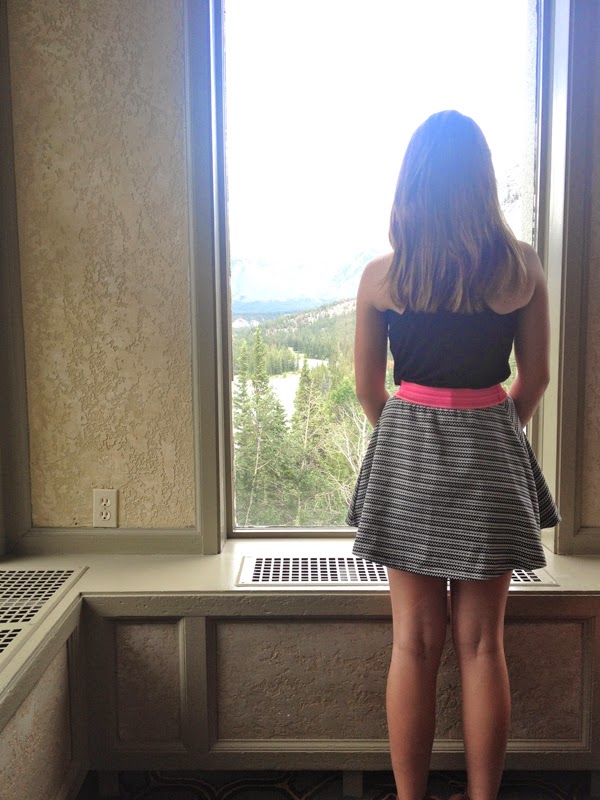
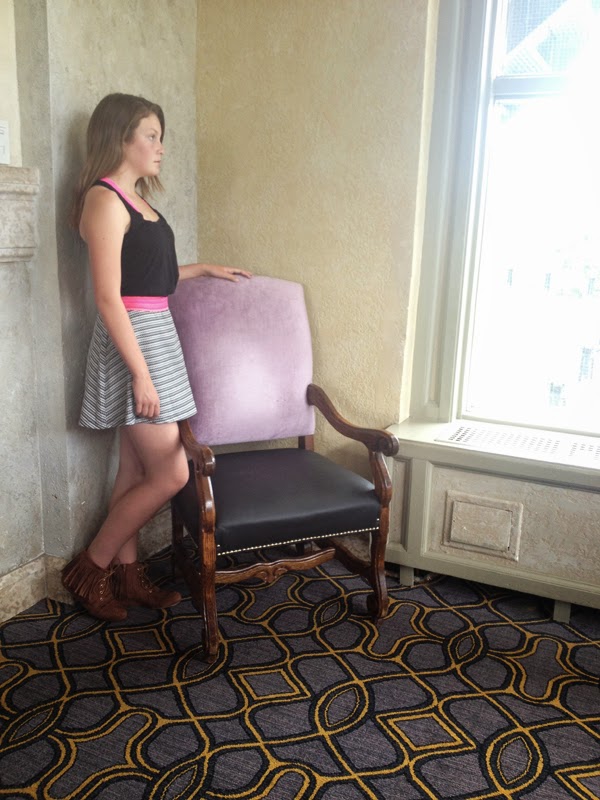
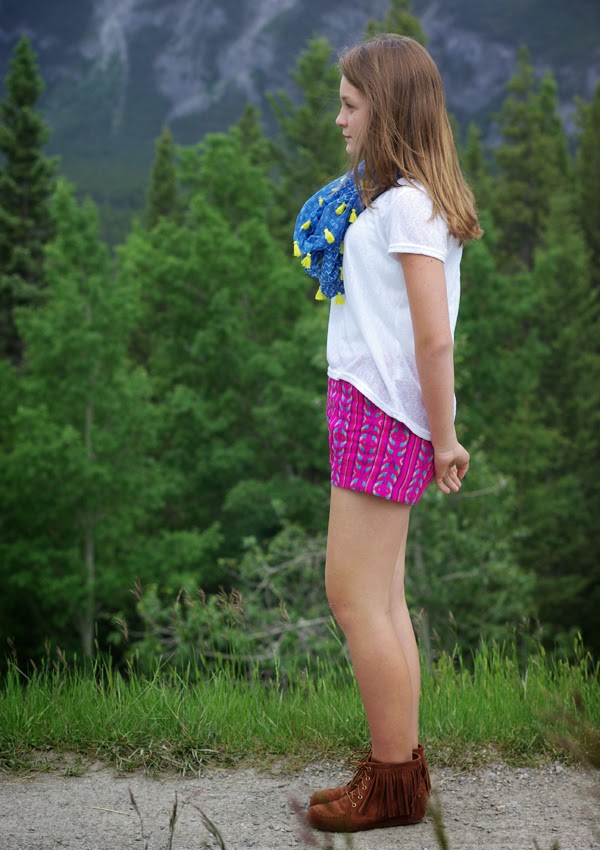
We were so pleasantly surprised when we walked into Aeropostale.  We found piece after piece that were age appropriate and incredibly fashionable.  And my favorite part, the prices!  You guys, this thrifty mom was pleased.  Denali walked away with so many unique, cute items.  Just take a look at my cute daughter.  We shot three outfits while in Banff, Alberta.  She’s a pretty great model.  

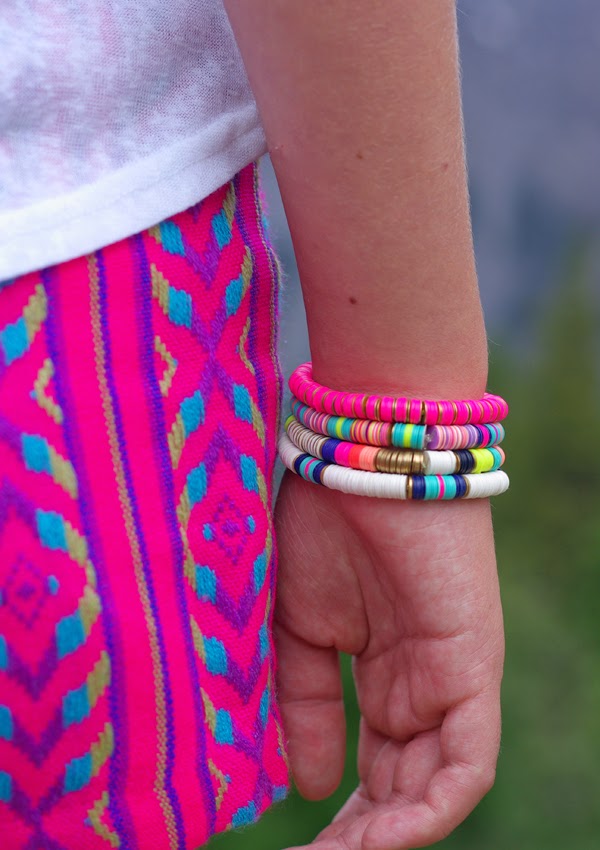
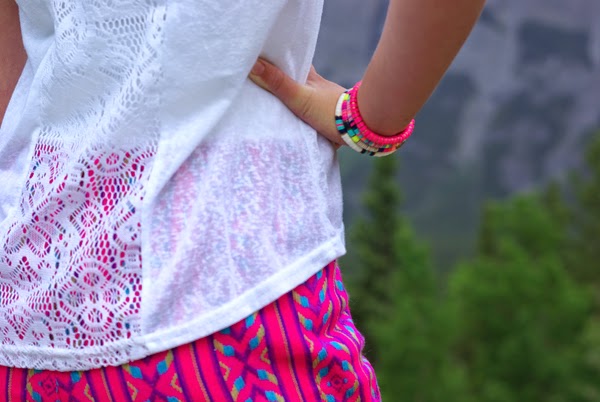
This first look was taken at Tunnel Mountain Campground in Banff with Mount Rundle in the background.  I want these shorts, if not on my legs, definitely as a pillow. 

The second look was shot in the amazing Banff Springs Hotel.  We celebrated my parent’s 39th anniversary with high tea, it was a good excuse to get dressed up.

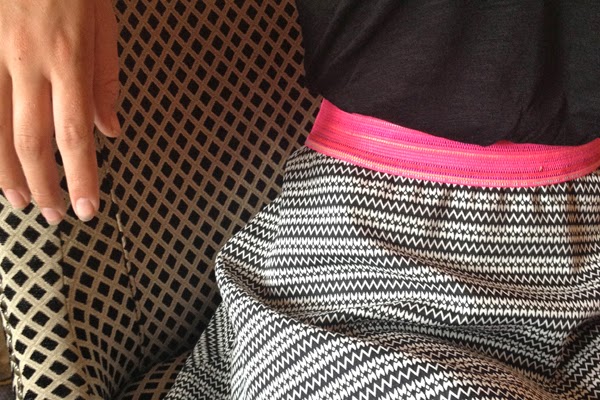
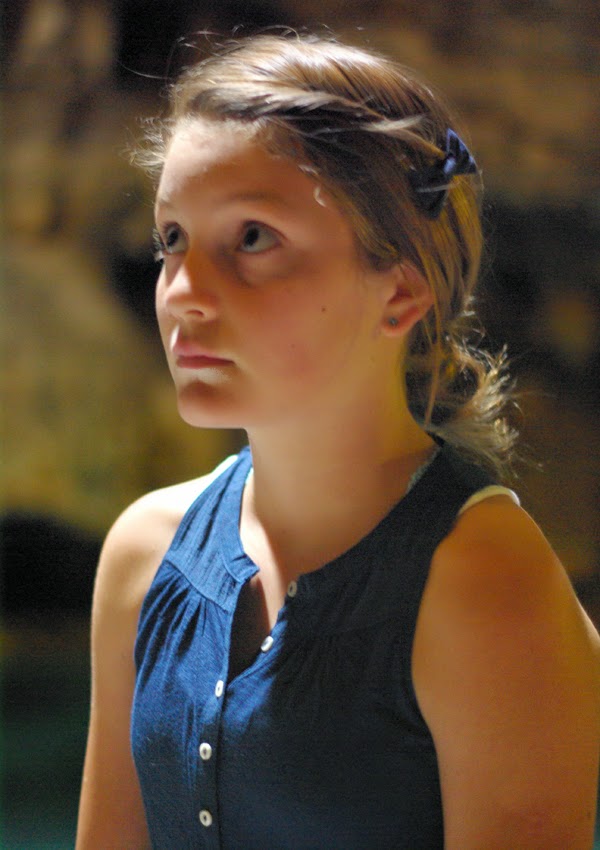
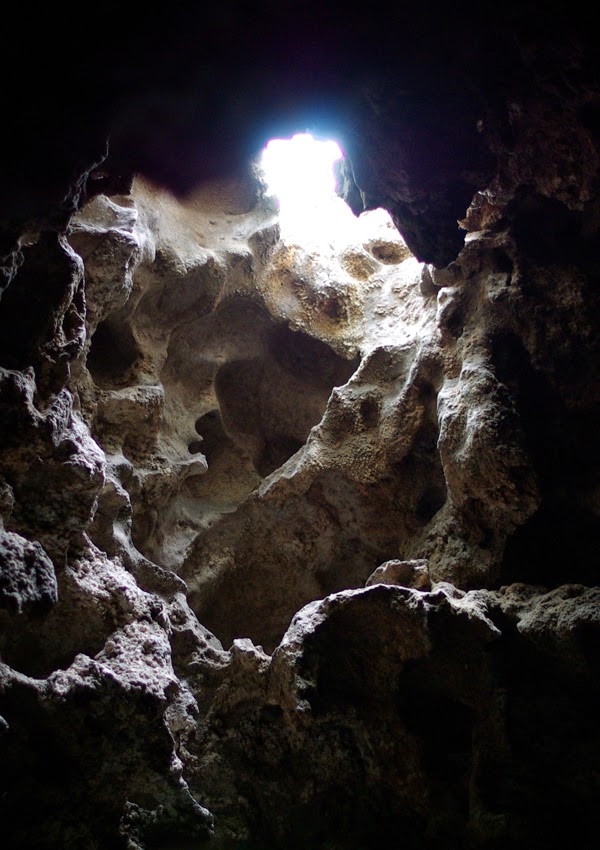
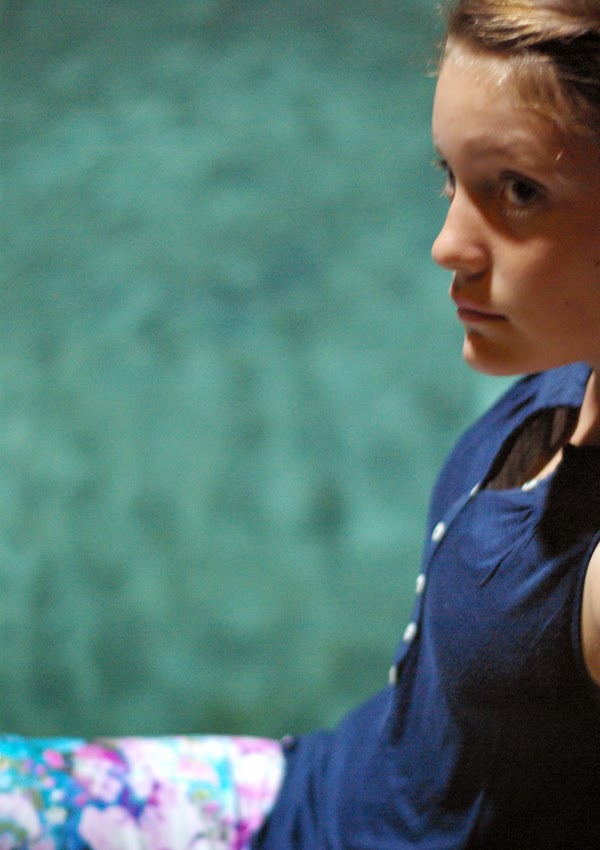
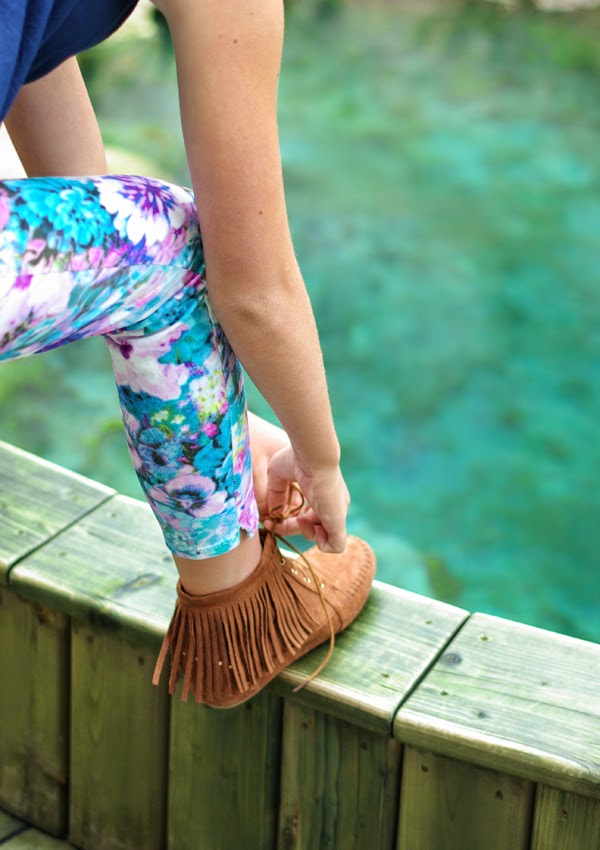
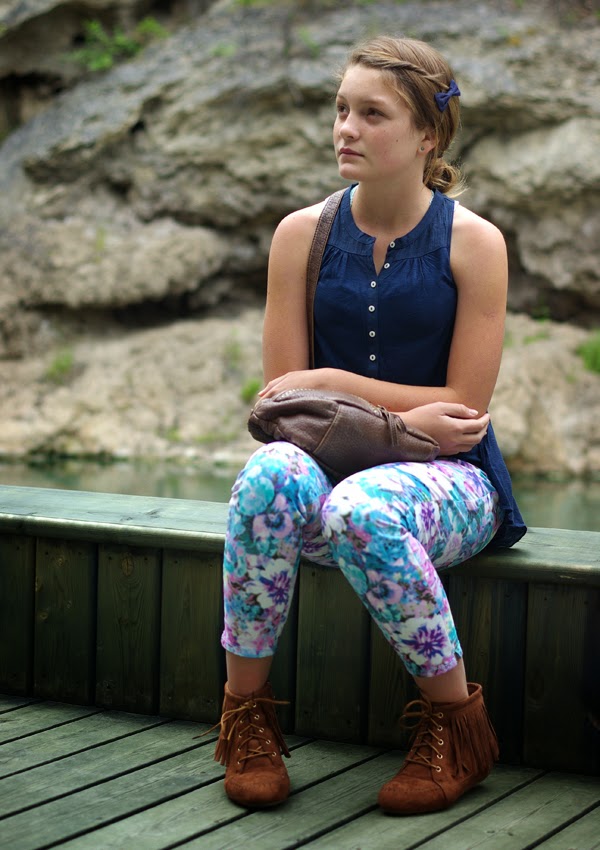
And the third look we shot at Cave and Basin Hot Springs in Banff.  These jeggings are perfect for fitting over a bulky brace.  Button up jeans don’t work for her anymore.  And lots of cute layering pieces make covering brace lumps and bumps a breeze.

All these items are available in Aeropostale stores now (and yes, even the cute fringy moccs).

Design / etc.

Coral and Kelly Green Home Office – Expedit Bookcase Makeover and the BEFORE pics.

July 4, 2014

I’m sure you’d like to see the before pictures of The Coral and Kelly Green Home Office.  I made sure to take the befores on my iphone so that there would be an even more dramatic transformation in the after pics.

But, before the befores, I want to share with you an easy update I made to my client’s existing IKEA Expedit bookcase.  I’m sure you’ve owned this shelf at sometime or know someone who has, I had one in dark brown.  It’s a great piece that offers a tone of great storage and display space.  This is the one of the pieces in the room that I decided to keep.  It has such great function and really it’s design is simple and clean.  I don’t love the Expedit on the ground as is though.  So, I decided it needed some sort of legs to give it a little breathing room underneath and make it look more like a real piece of furniture.  I thought about heavy duty casters, which still would be cool, but decided it’s boxy shape needed a little feminine touch.  Curvy legs to the rescue.

I purchased all the supplies for this project at The Home Depot.  It cost me only about $25 to add style to this very plain bookcase.  I bought four leg brackets and 4 wooden furniture legs (see image below).  There are a few options of leg styles, but I really liked these curvy angular ones.  

To pull in the kelly green of the side chair and to draw your eye down to the legs, I decided to spray paint the legs the same color.  I started by painting the legs kelly green.  I used Rust-oleum Painter’s Choice in Gloss, Meadow Green.

Then, using the screws provided in the packaging, attach the leg plate to the four corners of the bookcase.  And then, this is the easiest part of all, screw on the legs to the plates – no really, it’s that easy!  I’m sure you can think of a couple pieces of furniture that could use a set of these legs.  I just helped my sister in law add some cute taped gold legs to a little thrifted shelf for my nieces bedroom, it made a huge difference.

And now the befores!!!

The original wall color was a yellowish beige (that’s my best description).  We painted the walls a nice crisp white.  I know white it pretty hot right now, but I think folks are still afraid that white might feel like a hospital or school.  But, as you can see, a space can still be warm and inviting with all white walls.  It gives you a clean blank space to let colorful accessories play.  I still love my all white living room, and it’s doesn’t feel cold or sterile at all. 
As you can see, we repositioned the Expedit shelf on the wall beside the door (opposite the window).  I  had a lot of fun filling the shelves with my client’s favorite pieces (especially her mom’s amazing book collection) and some fun pieces I bought, made and thrifted.
To check out the whole room and all the detailed pictures of the finished space, click here.

etc.

Coral and Kelly Green Home Office Reveal

July 2, 2014

All photographs taken by the talented NY Fotography

The Coral and Kelly Green Home Office project is done! I’ve been dying to share this finished room with you. I had the privilege of getting to design and put together this total room makeover. I’m really happy with the finished product and so is my client.  I think it’s a fun, fresh and feminine space. I want this room in my home, I think it would really help my creativity and productivity.  
Over the next couple of days, I’ll share more of the details and DIYs with you.  This is a room jam packed with thrifted finds, refinished pieces, and lots of DIYs. I’m not going to say a lot in the post, I’m just going to share a bunch of pics. 

Come back for more, I’ll share all the sources and the before pictures.  So, what do you think? I’d love your feed back on my design/makeover skills.  This was so much fun to do.