Food & Drink

Shamrock Floats

March 5, 2013

St. Patrick’s Day will be here before you know it. I’ve started to decorate and I’m hunting down cute party supplies.  I have a yummy minty green drink for you to serve. This frosty treat is so simple, it only has two ingredients (a carton of Lime Sherbet, and a 2 liter bottle of Sprite).  Scoop the sherbet into a pitcher, punch bowl or individual glasses and then top with Sprite. I served my minty green drinks with some yummy minty green Pistachio Wedding Cookies.  The recipe is from the gorgeous food blog Mother Thyme.

I dressed up my milk bottles with little gold shamrocks.  These were so easy to make.  I used gold heart stickers from We Love Citrus and a tiny strip of gold washi tape (I use Minted’s).  I also dressed up my paper straws with a little more gold washi tape. If you are looking to host a party, visit We Love Citrus. This San Diego based shop, has unique party supplies to make your party treats extra special.

And I have a fun treat for O + P readers, how does 20% of your purchase at We Love Citrus sound?  Go check out We Love Citrus and leave a comment telling me what caught your eye.  Then the first 20 folks to email me your email address will get a 20% off code.

I’m also reusing the Pom Pom bunting I made for Olivia’s first birthday party.

Design / DIY

Giant Geometric Wall Shamrock

March 4, 2013


Well, I had to do it.  Here’s the St. Patrick’s Day version of my Giant Geometric Wall Heart that I made for Valentine’s Day.  Green is my favorite color, so I think this guy is going to stay on my dining room wall for quite a while.  Plus, it should bring me some good luck to have a giant shamrock in my home, right?
For this shamrock, you’ll need 10 pieces of scrapbook paper.  I used mint, forest green and metallic gold.  You simply cut each piece of paper into 6″ squares and then cut those squares diagonally to make triangles.  Each piece of 12″ scrapbook paper will give you 8 triangles.  To make the shamrock shape, you will be making 3 hearts (like my giant geometric heart) and then adding a stem that is 3″ wide.  I attached the triangle to the wall using glue dots.  I tried double stick tape, but with the texture of my walls, it didn’t want to hold well.  
  

It goes perfectly with my Green and Gold Geometric Pillow.  I am really loving this mint and gold combo for St. Patrick’s Day.

What do you think about my “go big or go home” holiday decorations?  I’m having fun with it, would you put up something this big on your wall?  If you do decorate for St. Patrick’s day, what does it look like?

Entertain

Let’s have a St. Patrick’s Day Party

March 1, 2013

I’m having fun searching out some fun St. Patrick’s Day party finds.  I love the color green, in every shade, but this minty hue is particularly pretty.  Last year, I played with this gold and mint combo for St. Patrick’s Day.  And for this St. Patrick’s Day, I think I’ll stick with this beautiful, soft pairing.
Do you enjoy my “let’s have a party” series that I started this year? I’ve shared a New Years, Valentines, and Football themed round ups. I certainly have fun putting them together. I try to pick items that are affordable and unique. And as an etsy seller myself, I also try to include some handmade etsy finds and some DIYs.
Oh and for more St. Patty’s Day fun, check out my Pinterest Board.

etc.

Green and Gold Geometric Pillow

February 27, 2013

To keep with my love of triangles and geometric patterns, I decided I would make a fun green and gold pillow. I had so much fun with my giant geometric heart, that I’m working on lots of fun green geometric ideas for St. Patrick’s Day and Spring.  While my love of the color pink is new, green has been my favorite color for as long as I can remember.  
I chose 3 green cotton fabric and a metallic gold for the triangles. I knew I wanted to add a splash of metallic gold, but this fun, fabulous, shiny, slick gold fabric is very synthetic and very difficult to work with. For the design, I wanted it to be very random so I just cut out a lot of triangle and played with their placement for quite a while.  I cut 5″ squares and then cut those squares in half diagonally. To piece this mini quilt pattern, I sewed the triangles together to make squares first, then I sewed the squares together in rows, and finally sewed the rows together to make a 20″ square for the pillow.  I backed the pillow in the darkest green fabric and put in an invisible zipper in the bottom seam of the pillow.
I am going to be totally honest with you though. This pillow just about kicked my butt. I started this pillow Sunday evening thinking it would a fun little project that would take an hour or two of my time. But, after fighting this fantastic gold fabric for hours, I managed to accidentally touch a hot iron to one of the middle triangles and it instantly melted it. So, I had to unpick way too many squares and then replace the melted piece and sew it back together again.  So, IF I attempt this again, I will be on the hunt for better gold fabric to work with.  

Do you ever get yourself into a sewing project that you think will be a breeze and then hours later your unpicking your mess and wanting to cuss?  If you have, I feel your pain. But if your stubborn like me, you won’t let that project beat you.

etc.

Toddler and Tween Shared Bedroom

February 23, 2013

Yesterday I shared with you the dilemma with my girl’s shared bedroom.  After photographing it today, I am seeing more of the problems that I want to address. You can see that it isn’t a huge space by any means, but we’ve got a lot packed in this room.   
Here’s what furniture we have in the room:
full sized antique metal bed
white Jenny Lind crib
desk and stool
2 dressers (one a flea market fix and the other a Target find)
bedside table
The walls are looking especially bare over the bed and desk.  I love the two horse and little girl prints that are over Denali’s bed.  They are sentimental to me.  These sweet prints hung in the room of my Grandparent’s house that I used to sleep in as a child.  A few years ago, my mom gave them to me and I reframed them in simple white frames.  But, I think that their scale is a little off for the size of this long wall.  I think when they are grouped with the 3 prints from The Land of Nod I picked out, they’ll all come together as one larger piece.  Or maybe they would look better together over Denali’s larger dresser.  I’ll be playing around with this.   
Over Olivia’s crib I have a fun metal bicycle that goes with her quilt.  I want to keep that there, but I think I’ll make something new for the bike basket, I might be tired of the tissue paper flowers.  And the vintage needle point and print over Olivia’s dresser with also stay. 
Overall, I want the room to grow up a bit.  It’s looking a little nurseryish through the camera lens.  I think a few modern pieces of art, a sleek modern chair for Denali’s desk, some metallic gold touches here and there (especially on Denali’s bed) and maybe a change in lamps should help.  

What do you think? Am I on the right track?  Can you see how difficult it is for me to make the space fun and age appropriate for both a toddler and a tween?

Design / Find

Window Shopping – Toddler and Tween Shared Bedroom

February 21, 2013

Most of the time, I love my little 1920’s California bungalow. But, recently I’ve realized our tiny home is not ideal. The problem is that my daughters, Denali and Olivia, have to share a room.  This doesn’t seem like it would be a big issue, but there is a big age gap between them. Denali is 11 (going on 16) and Olivia is just a year old. I want them to have a space that is appealing and organized for both of them. I don’t want the room to look like a nursery, or on the other extreme, like a mature teenage space either. The room does have furniture, but really no defined style. The bedding, rug and walls are grey and light pink and I do love that color combo.  But, beyond color, there isn’t much else. I’m struggling to give my toddler and tween the space and design that they each need. I want their room to be a place that they both love. We need function and funk folks. 
I put together an inspiration board of fun pieces that I think could help bridge this age gap in design. I think The Land of Nod has beautiful pieces that will provide my toddler and tween with the unique and quirky style that I’m looking for.
  
They both have vintage beds. Denali’s is a full sized metal frame from Lonnie’s Grandparent’s farm and Olivia’s crib was my Jenny Lind crib from when I was a baby. Obviously our house is also old, but I think the space needs a splash of modern and playful. Denali helped me pick out the prints, she particularly loved the Flamingo and Cat prints. And I LOVE the gold dot sheets. There is something both classic and fun about polka dots. I think they’ll look great with Denali’s grey bedding. I also would love to get Denali the beautiful leather desk chair. It’s sleek and modern and she just has an old stool for a chair at her desk now. The Land of Nod has a well curated catalogue. It’s such a treat to flip through the pages, there is a sense of nostalgia and the creative touch of artists.  
Over the next couple of weeks I’m going to attempt to makeover my Toddler and Tween’s Shared Bedroom. I’ll be sharing what I find along the way and what works in this space.  So, stay tuned for more. Do you have a space in your home that has to serve two functions or accommodate multiple people? 

Food & Drink

Chocolate Coconut Camp Cookies

February 20, 2013

Well, I’m back with another campsite recipe today, yesterday I shared my Campfire Nachos that we made this weekend.  This is the first time I’ve made these cookies while camping, and I’m kicking myself that I’ve never done this before.  Denali and Dylan helped me make these on the little stove in our trailer. I’m training them, so that by the time they are in High School, I’ll only have to cook a couple times a week.

I’m not one of those mom’s that “plays” well with my kids.  Like, I don’t really sit on the floor and play with toys with them for very long.  But, I am good at involving them in tasks around the house, like cooking and cleaning.  All three of my kids have spent a lot of time sitting on the counter helping and watching me cook.  Kids love feeling grown up and doing grown up things, I know I did.  These cookies are ones that I made when I was a kid, probably the first start to finish recipe I made on my own.

I’ve added coconut to these classic no-bake cookies. And now I don’t think we’ll camp without these simple ingredients again. They made an excellent after-hike snack.

Chocolate Coconut Camp Cookies
1 stick butter (1/2 cup)
1/2 cup milk
2 cups sugar
1/2 cup cocoa

2 1/2 cups rolled oats
1/2 cup coconut
wax paper

At home, measure out the sugar and cocoa in one ziploc bag and the oats and coconut in another.  This simple step will make life a lot easier at the campsite.

In a small sauce pan, stir and bring to a boil the butter, milk, sugar and cocoa.  Boil for exactly 5 mins., stirring often.  Remove from the heat, moving quickly, stir in the oats and coconut and then place a teaspoon amount in mounds on wax paper.  Let the cool for about 10 mins and then enjoy!

Recipe adapted from Company’s Coming Cookies by Jean Pare. 

Food & Drink / Travel

Campfire Nachos

February 19, 2013

We really needed to get away this weekend. Our family needed some quality time together. And really in my opinion, there is no better time with your family then when you are camping. There are very few distractions (no phones, TVs, or computers) and you all sleep in tight quarters which allows for great bedtime conversations. 
We took 
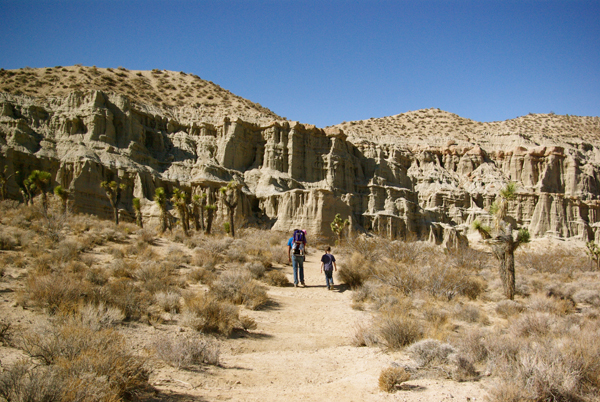
Riley out to Red Rock Canyon, we’ve camped there before, it’s only an hour from our house. This time of year it warms up to the high 60’s during the day and it’s a nice chilly 40 F during the night. The kids love climbing in the bluffs and going for hikes. I really do love desert camping, especially with kids. It’s really the cleanest camping there is, you just dust off the sand and you’re good to go without a shower for quite a few days.   
I really enjoy cooking while we are out camping. Yes, we do love a good hot dog over the fire, but it’s fun to mix it up with some other meals. I’ve shared a few of my other camping recipes here before (like Sweet and Sour Meatball Hobo Meals, 
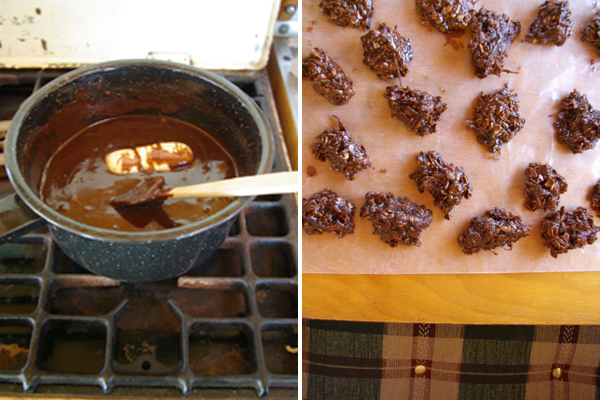
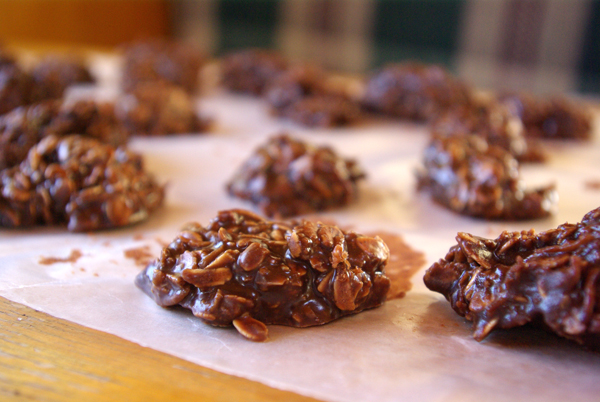
Homemade Chocolate Graham Crackers, and 
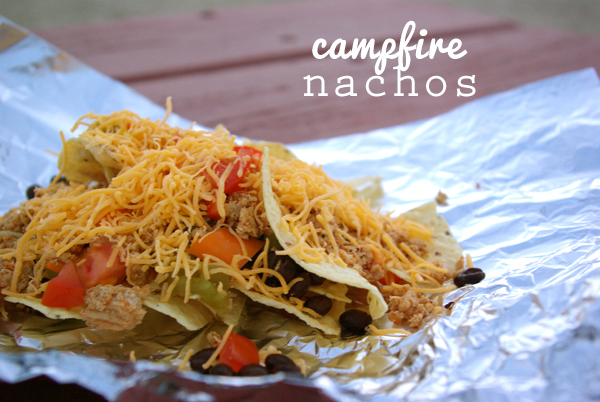
Campfire Orange Cinnamon Rolls). This weekend I made a few new ones. The first one I’m sharing is really simple and uses absolutely no dishes. These campfire nachos were loaded with yummy, hearty toppings to keep campers happy and full.

Campfire Nachos
1 lb ground turkey
1 packet taco seasoning
1 can of chopped green chilies
1 can black beans
1 tomato
1 bell pepper
2 cups grated cheese
1 bag of corn chips
foil

Cook and season the ground beef at home.  When it’s cool, place in a large ziploc bag and freeze the meat.  Doing this ahead of time will make things so much easier for you at the camp site.  And freezing the meat will allow you to keep it cold in your cooler for a couple days.

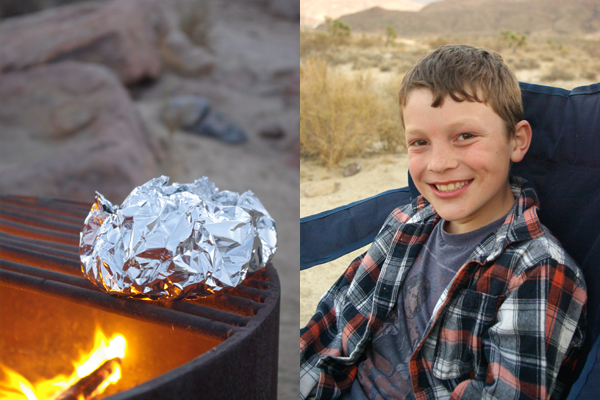
When you are ready to assemble your nachos, cut up the tomato and bell pepper and drain the cans of beans and green chilies.  On large pieces of foil, let everyone load up their nachos, ending with the cheese.  Wrap up the foil tight, because you want the steam to get trapped in the foil and help melt the cheese.  Place the foil bundles on a grate over a good hot fire that has lots of coals.  Everything should heat up and melt in about 10 mins.  You can serve with sour cream and salsa of course, but I like to keep the ingredients simple.  The less I have to keep cool in the ice box, the better, when I’m camping. Enjoy them while they are hot!

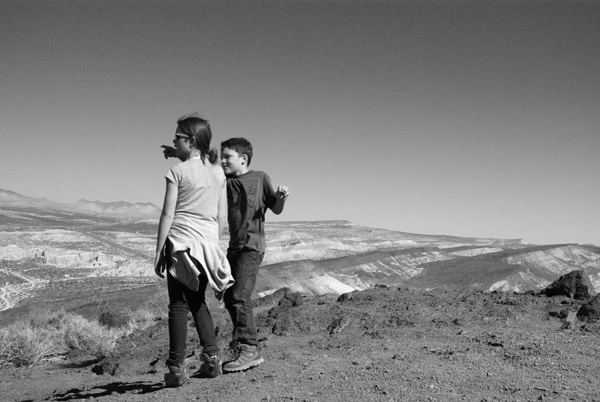
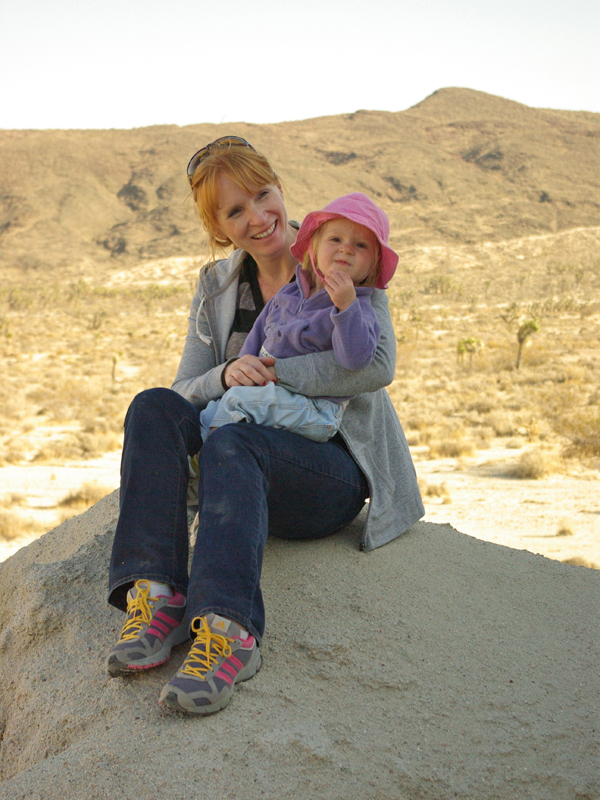
And here’s a look at our weekend. I don’t think I share a lot of family pictures here on O+P. So, here we are, without showers and makeup.
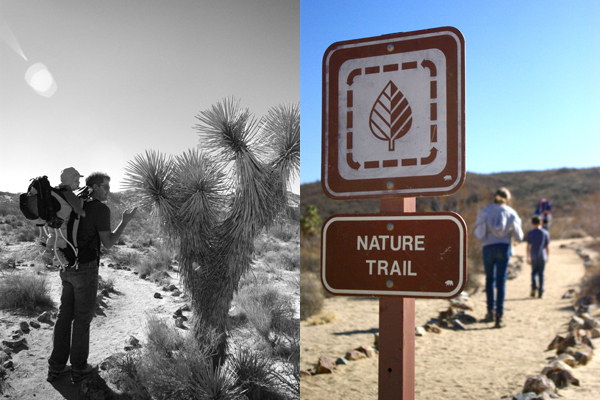
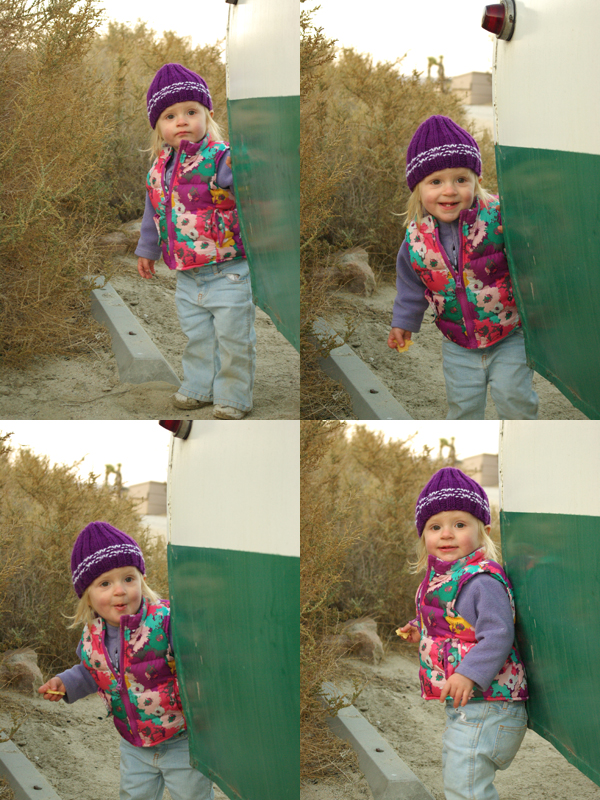
Olivia had a blast.  She is naturally a very curious and busy child, so she has a fantastic time exploring and wondering around the desert.  She also loved hiding around the back of Riley and playing peek-a-boo with us.  
I hope you had a great weekend. Where do you find that QUALITY family time? Is is outdoors in nature or do you have another favorite place where you connect? I’d love to know, so please share.  

etc.

this week

February 16, 2013

This week…… Well, it was definitely been a full one.  Here’s a few of my instagrams from the week.  This week was jam packed with activities and a whole lot of LOVE. Somewhere in the middle of the week’s craziness, I began questioning my sanity.  But, I made it through. 
I made a lot of heart shaped meals and treats and had a little Valentine’s party with close friends.  We had lots of cousin love and Olivia couldn’t be happier.  She can’t get enough of her cousins, well no of us can. They are the sweetest.  And I was a super lucky girl and got showered with lovely Valentine’s Day gifts from my hubby and had a wonderful night out with him last night.  
I hope you all had a great week and that you felt loved.  I’ve been getting Riley ready today, we’re going camping tomorrow!  I can’t wait.  We need some peace and quite that only time outdoors can bring.  With Lonnie working so much, our family needs a good old camping trip.  I’ll take pictures and share our adventures with you next week.
Enjoy your weekend with the ones you love.

DIY

Geometric Heart Printables

February 14, 2013

Need some last minute decorations for Valentine’s treats or a little Valentine’s dinner?  I’ve got some FREE printables for you today.  Because my Giant Geometric Wall Heart has been so well liked, I decided I’d make some printable geometric hearts for my lovely, faithful readers to download.  
I’ve made a sheet of small 1 1/2″ decals, larger 3″ ones and a printable bunting.  The decals can be printed on sticker paper and then applied to goody bags, milk bottles, or cupcake toppers.  Print off as many as you like.

I had plans of getting these to you much earlier in the week.  But, life has been hectic.  Yesterday was especially crappy.  I fought my printer for most of the day and just really felt like I got absolutely nothing done. So sorry friends.

For the PDF downloads click here.  Let me know if you download these and how you use them.

Glitter image used in illustrations generously provided by Girly Bits Cosmetics