DIY

Framed Geometric Heart

January 30, 2013

Last week I shared some of the touches of pink I’ve added to our home just in time for Valentine’s Day. And I like my Giant Geometric Wall Heart so much, I made a smaller framed version for our mantel. 

If you don’t have space for a large scale heart like the one in our dining room, here’s a more practical size.  I started by cutting ten 1 1/2″ squares of pink, light pink, and glittered gold card stock.  Then I cut the squares in half to make 20 triangles.  Using double-stick tape, I adhered the triangles to a pale grey piece of card stock.  Then I just trimmed the finished piece to fit a 8×10″ frame.  My angular ceramic fox (from Target) sits beside it.

I purposefully didn’t  line up the triangle totally straight, I wanted it to look like it had been pieced together layered. 
I love when something so simple comes together to make something beautiful and unique.  I’ll be putting this out for many Valentine’s Days to come, or maybe it will find a place in the girls grey and pink bedroom.

DIY / etc.

Lavender Sachet Business Cards

January 28, 2013

Well, I’m back from Alt.  I had great intentions of posting while I was there, but I really didn’t have a moment to spare.  I’ll share more about my experience when I’ve had a couple days to process all that a did and saw.  But, I will tell you, it was a fantastic experience and I’m exhausted mentally and physically.

In the months leading up to Alt, I kept reading about the fantastic business cards that people made and shared at Alt.  I wanted to come up with something memorable and unique.  So, I made these Lavender Sachet Business Cards.  I knew I wanted something with fabric and something that would leave a lasting impression.  These cards grabbed the attention of a few senses, not just sight, but also touch and smell.

So, here’s how I made these personalized lavender sachets.  To start, I printed my business card on fabric at Spoonflower.  In Illustrator, I drew out my business cards to fit on a fat quarter of fabric.  I made my cards 4 1/8 by 2 5/8″, so that I would have a seem allowance to make them almost exactly business card size when they were done.  I was able to fit 35 cards on the piece of fabric.  Spoonflower is a fantastic company, with excellent customer service.  I’ve printed fabric with them before.  For mother’s day, I printed one of my Grandma’s hand written recipe cards onto linen and made it into a tea towel for my mom.

Then I found a really great grey and white ikat cotton to back them with.  So that the lavender would not show through the front of the card, I lined it with white cotton.  I cut all 3 pieces to exactly 4 1/8 by 2 5/8″.  
I placed the white piece on top of the printed piece and them put right sides together and sewed the card  all the way around leaving a 1/2″ opening on one end.  I trimmed the corners and then turned the card right side out.  I ironed it flat and crisp and then filled each one with about 1/4 cup of good quality lavender.  

To close the opening, I first tried just machine top stitching them, but I really didn’t like seeing the seam. I knew I didn’t have time to hand stitch them all, so I tried something I have never used before.  I’m kind of embarrassed to say it, but I used fabric glue (Fabri-Tac permanent adhesive).  It kind of feels like cheating, but really is worked amazingly and gave me the clean seamless finish I was wanting.  But, standing in line at the fabric store with this glue in my hands was a little embarrassing.  I kind of wanted to explain myself to everyone else in line.  Like “I DO know how to sew, really!!”

They smell fantastic and it was nice having one in my suitcase while I travelled.  I have plans to make more of these for favors for a future event.  The possibilities are endless when you can print ANYTHING on fabric with Spoonflower.  Wouldn’t these be perfect for a spa themed shower favor?

DIY / etc.

Valentines Window Art

January 23, 2013

I just couldn’t help myself, if you follow me on instagram (@jeranmcconnel), you’ve probably noticed that I painted my front window again!  I just had so much fun with it this Thanksgiving and Christmas.

I warned you that I would be repeating my geometric heart design over and over.  So here it is again.

I’m on my way to Salt Lake City for the Alt Conference.  So wish me luck friends.

DIY / etc.

A touch of pink

January 22, 2013

Here’s a little peek at some of the pink that is showing up in my house just in time for Valentine’s Day.  My decorations are simple and nothing really fancy at all, but that’s kind of the way I like it.  I have my big Geometric Heart on the wall and then a touch of pink here and there.

My pink Ombre Owl made his way to the mantel beside my Breathe print.

I filled little votives with Valentine’s Day candy corn and placed a tea light in the middle of each one.

And I brought out my family hearts that I made last year.

This little framed geometric heart is a scaled down version of my Giant Geometric Wall Heart.  I have how-to instructions for this framed version coming soon.

And I also strung up last years Vintage Book Page Bunting.

Do you decorate for Valentine’s Day? If so, what do you put out?  
I leave tomorrow morning for Salt Lake City, for the Alt Conference.  I am hectically trying to get everything done around around here, it’s going to be a jam packed day.  

etc. / Find

Window Shopping – Ikea 2013

January 21, 2013

A couple weeks ago, on our way back from my parent’s place, we stopped in San Francisco and I got to walk around Ikea.  I hadn’t been in a few months, so I was in need of an Ikea fix.  There were lots of “new to me” items that caught my eye.  Here’s a round up of of some of my favorites.  

I did bring home a couple of the green velvet pillows for our couch.  The Pantone color of the year is Emerald, so I couldn’t resist.  It may look like grey is my favorite color, but it’s really green. Every good redhead should love the color green, right?  Grey is just my favorite neutral.  It plays together so nicely with all the colors.

I also bought this fun log tray, it was only $2.99.  I’m starting to think I might have a tray problem, I really love using them and displaying things on them.  Well, maybe it’s not really that big of a problem, now that I count them, I really only own six or maybe seven.

And if you follow my instagram (@jeranmcconnel) you might also have seen the bookshelf/picture ledges that I put up in Dylan’s room.  Those were of course an Ikea purchase, the Ribba ledges.  I’ll post more about those soon, because they were a great solution for storage in a small space.

I really love Ikea.  To prove it, I’ve been to Ikea in SIX different countries (Canada, US, England, Turkey, United Arab Emirates, and Australia).  That’s pretty good, right?  Are you a fan?  How can you not be when there’s meatballs and furniture all in one place?

DIY / Entertain / etc.

Giant Geometric Wall Heart

January 17, 2013

I’m lovin pink for Valentine’s Day this year.  Last year I went with a vintage look with classic red and gold. But this year, pink feels soft, light, and fresh. And it looks so great with grey and a little splash of gold.  

Oh yes, I’m still on my triangles kick. I am loving this triangle patchwork heart.  The idea came from a quilt square.  Please be warned, you’re going to see it a lot in this year’s Valentine’s treats.  I decided to go BIG with my decorations this year, so I covered a whole wall of my dining room with this giant, geometric heart.  Why not, right? 
It was simple and inexpensive (that’s really all that I do).  You will need 10 sheets of scrapbook paper (to make 20 triangles).  I used 4 light pink, 3 dark pink and 3 metallic gold ones.  You’ll also need scissor or paper cutter and glue dots (I tried double stick tape, but it didn’t hold well).   Simply cut your scrapbook paper in half diagonally, then play around with a design and pattern that you like.  Then stick them to your wall.  I started by marking one straight line with a level and chalk.  It gave me a guide to start with and kept everything straight.    
And if you don’t have space for something this big, I have a mini framed version here

Just for fun, I made a little video of me putting up the heart.  I was in the mood to try something new.  
And this catchy little jingle is Blew My Mind by Dresses.

I know Valentine’s Day is still about a month away, but I’ve got a busy week ahead of me and I thought I’d get a head start.  Plus, with all these football posts I’ve been putting together lately, I needed a girlie fix.  I think this giant pink heart might have done the trick.  

Entertain / etc.

Let’s Have a Football Party

January 16, 2013

Well, it’s been long enough since Christmas and New Years, I guess I’m ready for a another excuse to have a party.  I’m not even a football fan, but I am a fan of the snacks and get togethers football brings. I’ve done a little round up of some cute party finds that are out there.  Happy playoff season! 

DIY / Food & Drink

Football Straws and Lemon Lime Bitters

January 15, 2013

Yesterday when I shared my recipes for football food (Coconut Lime Wings and Mango Salsa), I promised I would share my drink recipe as well.  Lemon Lime Bitters is a drink from my childhood.  I grew up in Papua New Guinea.  Often on a Saturday, we would go to the local hotel to swim.  If you purchased a drink or meal, you were free to use the pool.  A Lemon Lime Bitters was my drink of choice.  It’s the most refreshing drink and the bitters gives it a unique and unforgettable flavor.

I know it’s Winter and this seems like a Summer drink, but our citrus is all ripe and I want to enjoy it as much as possible.  The limes I used for this drink are very unusual.  They are Bearrs Limes, the skin and flesh is yellow and they have a milder lime flavor.  I think they’re flavor is somewhere in between and lemon and a lime.

Lemon Lime Bitters
ice
Lime wedges (mine is a Bearrs Lime from our garden)
lemon lime soda (Sprite or 7 up)
Angostura Aromatic Bitters
lime cordial (I love Rose’s Sweetened Lime Juice)

1. Fill a glass with ice
2. Squeeze a 1/4 of a lime into the glass and then throw it it.
3. Pour 2-3 tbsp. of lime cordial into the glass (depending on how sweet you like your drinks)
4. Fill the glass with soda.
5. Finish with a couple dashes of bitters.
6. Mix and enjoy!

I also made these football topped straws for our drinks.  They are very simple to make.  I found this great football leather print paper at the craft store.  I simply cut out a small football shapes, punched two holes in them on a diagonal, and then inserted a striped paper straw.  I like the black and white straws, because they look like referee uniforms.

Entertain / Food & Drink

Coconut Lime Wings and Mango Salsa

January 14, 2013

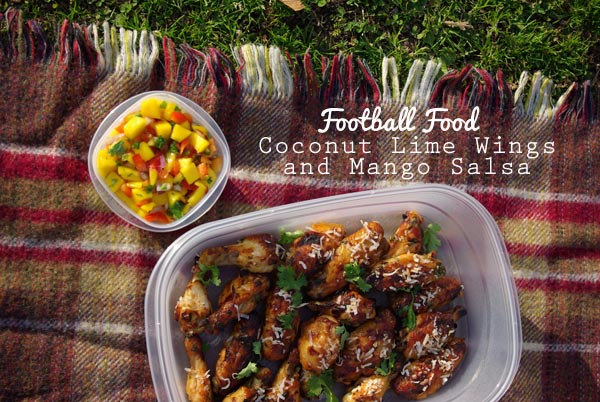
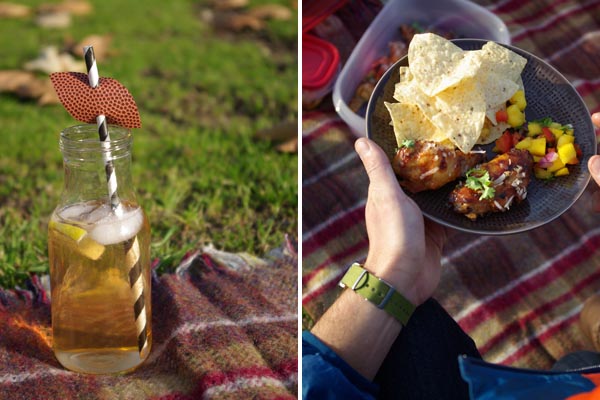
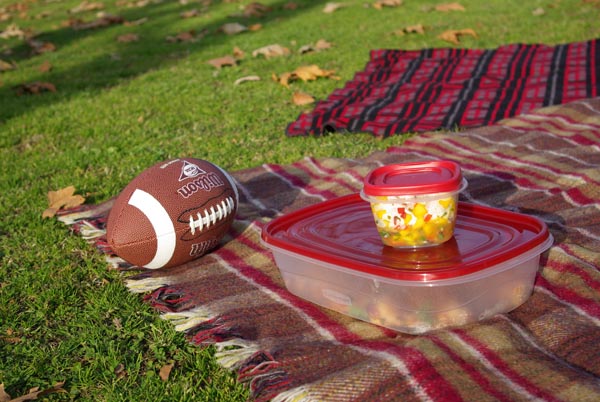
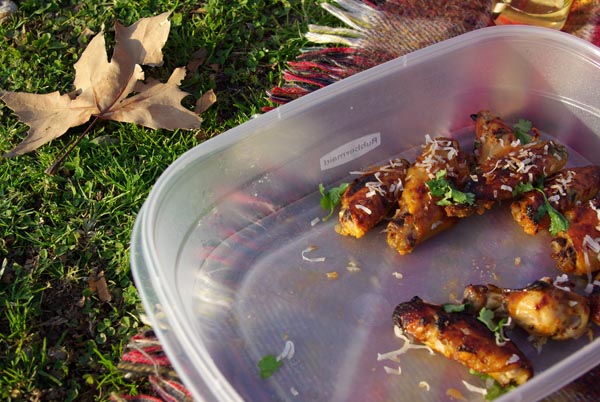
It’s football season and that means it’s time for football finger foods. I have to admit, the one reason I watch football, is for the snacks.  So what’s more classic game food then wings and chips and salsa?This year I put a little tropical twist on these classics. For playoff games I made Coconut Lime Wings and Mango Salsa. Here in California the pleasant afternoon weather allows us to take our football party outside.  This Sunday, between games, we packed up our snacks and headed to the park to enjoy the sunshine and throw the old pig skin around.  

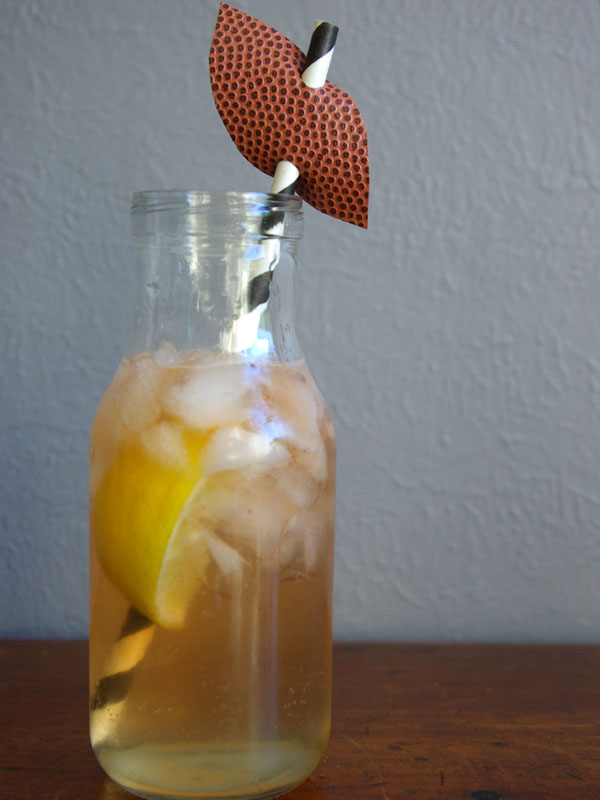
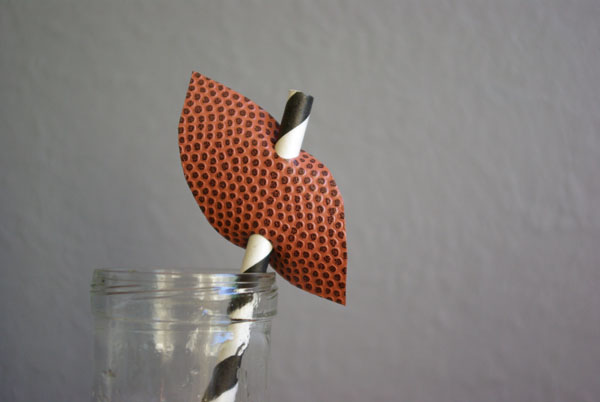
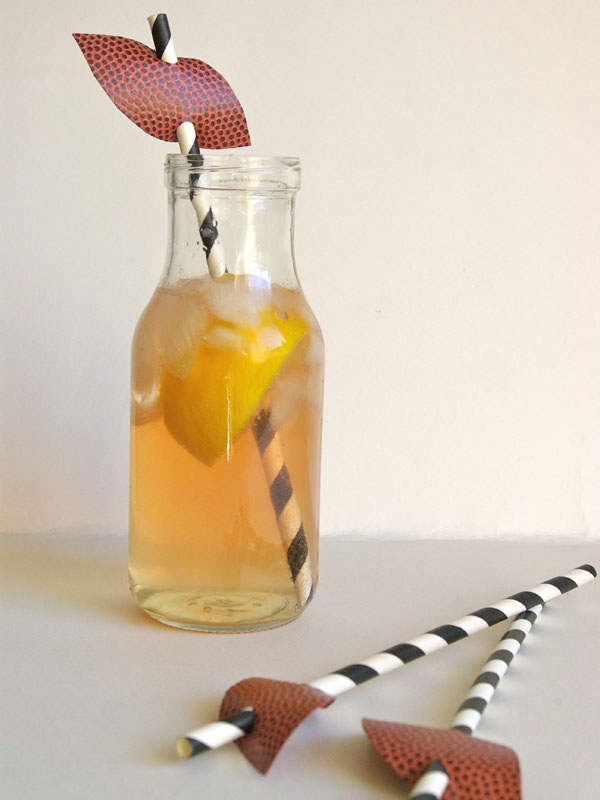
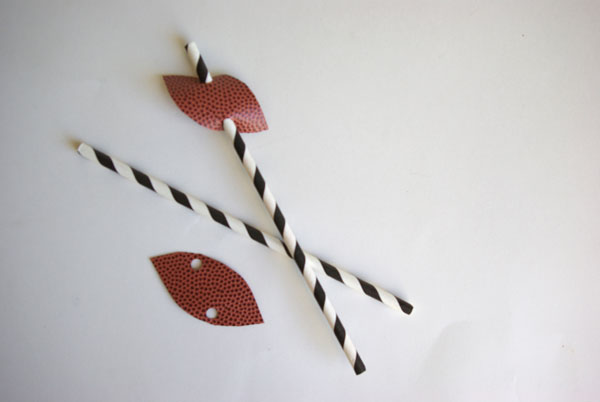
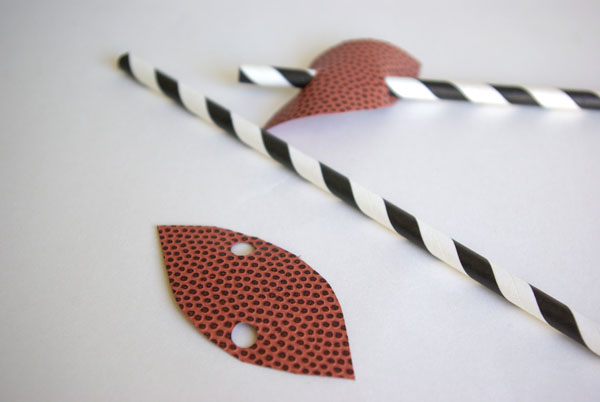
Come back for the drink recipe and the football straws tomorrow.  It’s a refreshing favorite from my childhood.
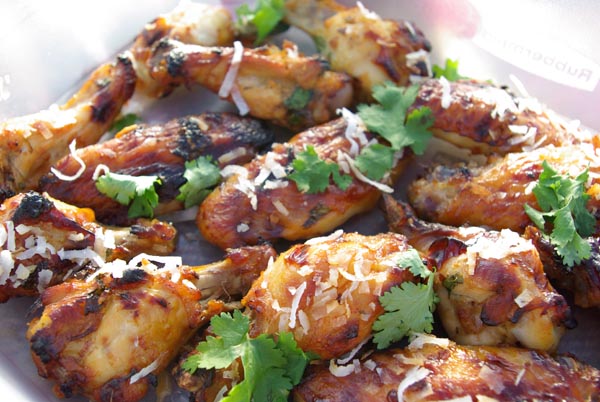
Coconut Lime Wings
3 lb. chicken wings (about 2 dozen)
1 can of coconut milk (I used light)
1 tbsp. Thai red curry paste
juice of 2 limes
zest of 1 lime
2 tbsp. grated fresh ginger
3 garlic cloves crushed
1 tsp. salt
2 tbsp. honey
4 tbsp. chopped cilantro, plus 2 tbsp. for garnish
1/4 cup flake coconut

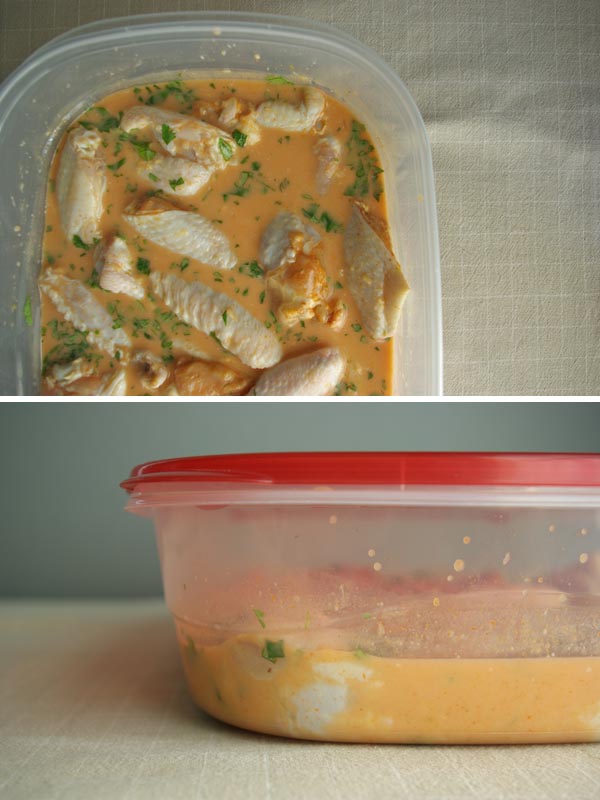
Combine all the ingredients above, except the flake coconut in a bowl.  Mix well.  Place the chicken wings in a large shallow container (I used Rubbermaid’s 1 Gal large rectangle TakeAlong container), pour the marinade over the wings, cover and refrigerate.  Allow the wings to marinade for at least 5 hours, over night if possible.  

Preheat the oven to 400 F.  Line a large baking sheet with foil.  Place the wings on the tray and pour about 1 cup of the marinade over the wings (discard the rest of the marinade).  Bake the wings for 35 mins.  

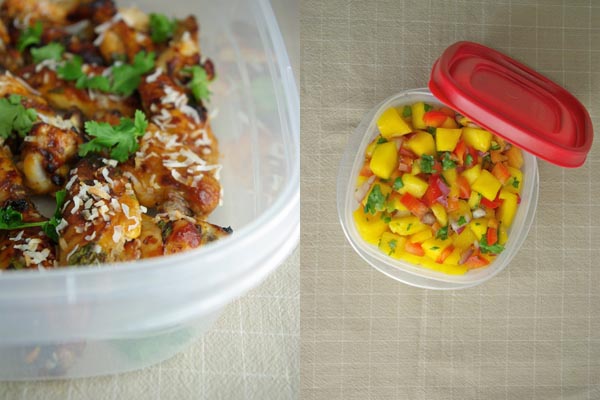
While they are cooking, toast the coconut in pan, tossing and turning it until it is just golden.  When the wings are done, remove them from pan and then brush the tops of them with the drippings left in the pan.  Then sprinkle the coconut and cilantro on the wings.  Serve warm or at room temperature.  

This recipe is adapted from here

Mango Salsa
2 ripe mangoes chopped
1-3 tbsp. of jalapenos finely chopped (depending how spicy you like things)
1/2 cup red bell pepper chopped
1/4 cup red onion chopped
juice of one lime
1/2 tsp. salt
a couple dashes of hot sauce

Mix all the ingredients in bowl and store in an airtight container in the fridge.  It’s best if it has time to marinade for a couple hours.  Serve with white corn chips.  

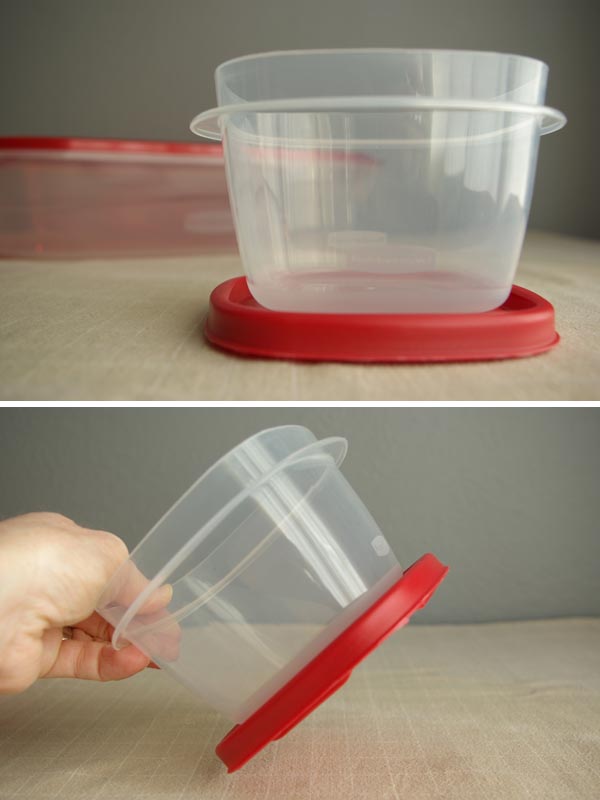
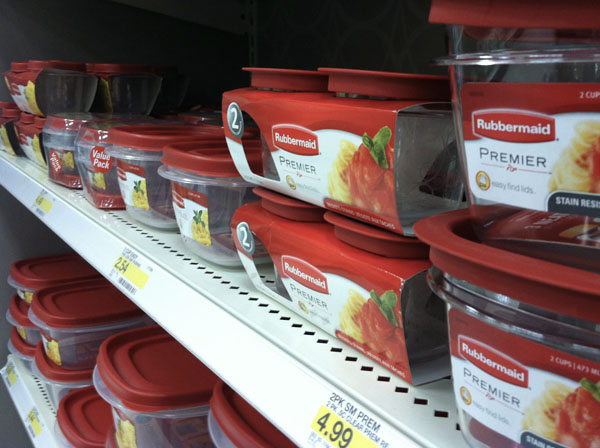
To make prep, serving and then storage of leftovers easy, I headed to Target for a great deal on Rubbermaid containers. Just visit Target Online and print out this coupon.

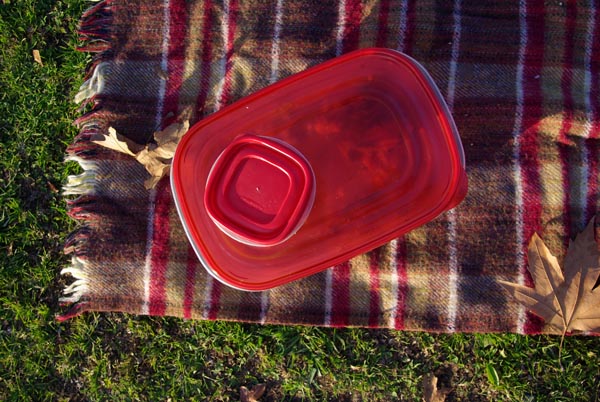
Rubbermaid’s Easy Find Lids Containers are the perfect way to take food to the big game party. The lids snap to the bottom of the containers, so you’ll never lose a lid or leave one behind at the party again. And the TakeAlongs are a great value and great quality – perfect for giving food in as a gift, and leaving behind. All Rubbermaid’s containers have leak-proof seals to prevent messes and spills on the way to the party. And they come in a huge range of sizes. Large sizes for wings, chips and salads and even tiny ones for dips and sauces.

I also wanted to let you know that Rubbermaid is hosting a Game Day Party Sweepstakes.  They are offering the chance to win an Easy Find Lids Party Pack, a 48Qt Cooler and $100 VISA gift card! To enter the sweepstakes click here. Entries are limited to one entry per person / per email address / per day. Sweepstakes starts December 19, 2012 and ends January 21, 2013.

And if you’d like to know more about Rubbermaid and their great offers, you can visit them on twitter, facebook, and pinterest.


“This shop is part of a social shopper marketing insight campaign with Pollinate Media Group™, but all my opinions are my own. http://cmp.ly/3/8vNxcO

DIY

Gilded Leather Heart Clip

January 12, 2013

I’m going to Alt!!! I know I’ve said it before, but I’m just so pleased.  I’ve heard that one of the best parts of Alt is the fashion.  I’m both excited and intimidated by this.  I love fashion and used to consider myself somewhat fashionable.  But now, this mom’s wardrobe is pretty much down to just the essentials.  Actually, I’m not sure if you can call it a wardrobe. Really, I just own a bunch of random clothes, many of which do not fit me or go with anything else in my closet. Most days, looking cute is the last thing on my mind or budget. It’s really not how I want it to be, but I’m also ok with it.  Life is full of Seasons (that’s what my mom says), and this is my Season for being the mom of a messy baby. Someday my kiddos will all be big and I’ll have a job that pays money, and maybe then I’ll be able to dress how I really want to.

So, back to attending Alt Summit in just two week, I’ve been trying to put together some outfits and accessories for this event. I’ve gotten a couple really great dresses, a couple pairs of shoes and a new bright red lipstick.  But I’ve also been making a few accessories. This gilded gold leather heart clip was really easy to make, and I’ll definitely be sporting it at Alt.  I was going to make these gold leather clips by painting the leather with metallic paint (like when I made my Leather Cuffs), but I came across this DIY Gilded Business Card Holder on Lovely Indeed.  I’ve never tried using gold leaf, so thanks Chelsea for the inspiration to try out a new art medium.  And now my mind is racing trying to figure out what other things a could gold leaf.

I love the texture of the leather and how nicely the gold leaf cracks and folds on it. I think this turned out to be a playful hair accessory that I’ll get a lot of use out of.

So here’s the how-to:

1. Make a heart template out of cardboard or paper.  Mine is about 3 inches across.
2. Trace around the heart using a sharpie, on the back of the leather.
3. Cut out the heart using good, sharp scissors.
4. Paint on an even coat of Modge Podge.
5. Let it dry for only a minute, just so it’s a little tacky versus drippy.
6. Gentle lay a piece of gold leaf on the heart.
7. Press the gold leaf down and gentle smooth in out.  There should be creases, this adds to the gilded look.
8. Then let the Modge Podge dry for about 10-15 mins, and then with another dry paint brush (I liked this foam one) gently rub away the excess gold leaf. The leather will show through in spots, this is what I love about the gold leaf on leather.
9. Then paint on another thin, even coat of the Modge Podge on top of the gold leaf.  I found that this prevented the gold leaf from flaking or rubbing off further.
10. Using a hot glue gun, attach a hair clip (I like the big, long bobby pins for the beauty supply store) or broach pin to the back.  I like to use a small square of felt as well.  Not only does it give it a nice finished look, but it also holds the clip firmly in place and makes it comfortable in your hair.

Can you relate to my loss of style issue? Are fashion and trends the last thing you have time to worry about? Or are you the mom that always looks good? If so, how do you do it? I need you advice and help.

Oh, and I’d love your opinion on one more thing. What do you think about the size and detail of my how-to pictures (the step by step instructional photos). Are they too small? Are they clear in what I’m trying to show? I want this part of my DIYs to be clear and easy to follow.  I’d appreciate your feedback.