DIY

Deer Pillow

December 28, 2012

I hope you’ve had a wonderful Christmas.  We definitely have.  Lot’s of great time with family and definitely lots of eating – way too much eating.  I can’t seem to stop eating actually.  Do I really need to eat a piece of pie for breakfast and a two pieces of fudge at 2 pm just because?  I’ve been eating pretty guilt free this week.  How about you?  

I’m not ready for this season to be over.  I’m glad that I can keep the decorations up till New Years.  And really many of my decorations are “wintery” not just for “Christmas”.  So, I’ll leave lots of them up through January.

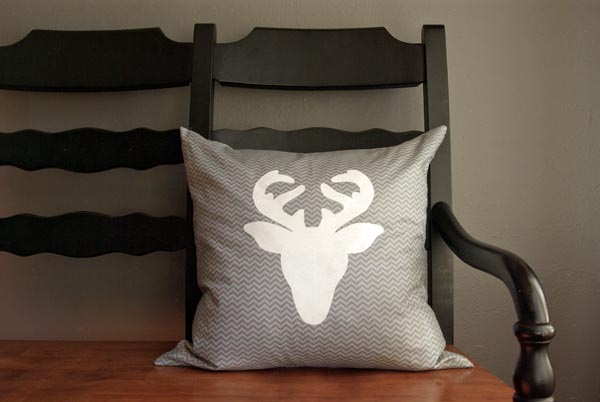
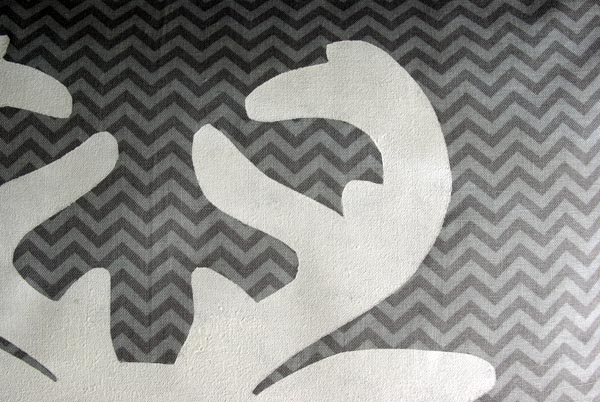
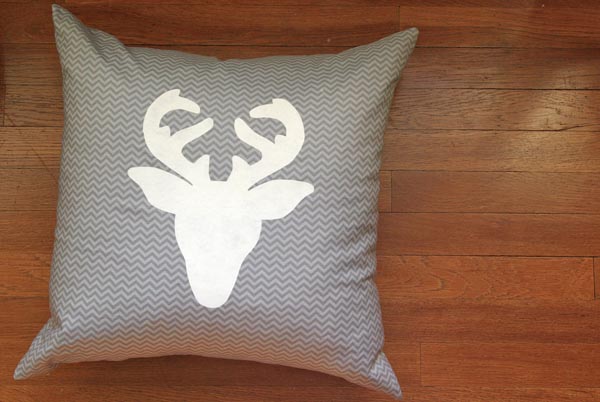
I made this reindeer pillow this year to add to my wintery decor.  I used this freezer paper stencil method to paint on my little reindeer head.  I like the crisp white on this grey chevron fabric.
 

You really can’t have too many pillows, can you?  I love changing them up with the seasons too.  

DIY / etc.

Winter Window Painting

December 24, 2012

This week I painted a winter scene on the front windows of my house.  I had so much fun painting on them for Thanksgiving.  And I was excited to try my hand at a little more window painting.  

I kind of went a little crazy and should have probably kept it simple like I did with the “Give Thanks”.  But, my kids were really excited about it.  The winter village is definitely my favorite part.

I hope you are enjoying working on the last minute preparations for Christmas.  I hope you aren’t having to brave the malls and that all your gift buying is done.  I’m done!  And it’s a relief to have that part of Christmas finished.  I’m enjoying time with my family, as crazy as it is with 7 kiddos, 5 of which are under the age of 3.    

DIY

Modern Glitter Dipped Trees

December 21, 2012

I will admit it.  Sometimes I leave things to the very last moment possible.  It’s not really that I am intentionally procrastinating, it’s just I’m really busy and the fun stuff has to be pushed aside to make room for all the have to things of life.  So, even though this is just days before Christmas, I’m sharing a little DIY that I made this week.  The truth is, I bought these cardboard cones last year with the intention to make them into trees for Christmas decor and it never happened.  So that I didn’t store them unfinished for another year, I made the time to transform them into Modern Glitter Dipped Trees.  I know there are just a couple days left to enjoy them, but next year when I unpack my Christmas stuff, I’ll be so pleased that I made these.

I know I sound like a broken record, but I’m loving clean, modern design so much right now.  These trees really appeal to me.

Here’s how I made them.  I simply bought two cardboard cone forms at Michaels.  They were just a couple dollars each. I painted them each white all over for a base coat.  Then using blue painters tape, I taped off the top half of each cone on a diagonal.  Then I brushed on white glue and sprinkle glitter generously (I used Martha’s glitter in Smoky Quartz and Hematite)  Let them dry completely and then tap them a couple times to remove any extra glitter.  These are sitting up on my buffet in my dining room. They are a great last minute addition to my holiday decor.

What do you think?  Can you really have too much Christmas decor?  Do you put out EVERYTHING, every year or do you pick a chose for year to year what you display.

Oh, and I came across these lovely Color Block Trees Nicole from Making it Lovely made this week. You should check out her cute pastel and metallic trees. Our trees are quite similar, so all I can say is “Great Minds Think Alike!”

DIY / etc.

Potted Succulent Gifts

It’s that time of year – time to give the wonderful teachers in your child’s life something special.  As a teacher myself, (well, I’m not teaching now but have in the past and will again someday) I want to give something that they can actually use and enjoy.  Really, I didn’t need another apple themed calendar, #1 Teacher Mug or desk plaque.  Even though, plants are temporary, they bring a lot of enjoyment.  That’s why I’m giving the teachers in our lives, succulents this year.  Succulents are so popular right now, and really I see why.  They require very little effort to maintain.  I water mine once every 2 weeks (that’s what my local nursery suggested) and it seems to work well.

I decided since it was the holidays, I would add a little sparkle to the terra cotta pots.  I kept it simple and easy with polka dots, because they’re always happy and playful.

Here’s what you’ll need:
Mini terra cotta pots (I got mine at Michaels for 99 cents each)
Glitter (I used Martha’s in Florentine Gold, Smoky Quartz, and Yellow Barite)
White craft glue
A sponge stencil brush
A small succulent

Simply apply the glue in polka dots using the stencil brush.  Then sprinkle glitter on the glue dots (do this over a paper plate or container so you can collect and reuse the extra glitter).  Tap the pot a couple times to remove any excess glitter.  Let the glue dry completely.  Then transplant the succulent into your glittered polka dot pot.

I’m a fan of flowers for teachers as well.  Remember my Back to School Bouquets that I gave to the teachers at of beginning of the year?  What are you giving to teachers this year?  I’d love to hear you great ideas.

Oh, and I wanted you to check out another really great way to give succulents.  A Golden Afternoon, potted her succulents in tea cups and saucers – how darling?

DIY / Entertain

Wrapping Paper Placemats

December 20, 2012

I recently helped my mom decorate 3 themed tables for a Christmas banquet.   My favorite one was the wintery woodland themed table.   In order to add some depth and interest to this table, I decided placemats were needed.  But, on a small budget, I needed to find something reasonably priced.  So, wrapping paper did the trick.  I found this great woodgrain wrapping paper at Target.

I simply cut 12″ x 18″ rectangles of the paper (this was easy because the back of this paper has been marked off in 1″ squares).  Then to make them look a little more finished, I rounded the corners.  I have this nifty Martha Stewart corner cutter, but this could easily be done with scissors as well.

With so many fantastic choices of wrapping paper, these placemats could be made for any party.  Can’t you see this being fun for a themed birthday party or just a family dinner that you want to feel festive or special?  To make placemats for a table of 8, I used a yard and a half of wrapping paper.  I’m sure that cost less then a dollar.

If you like what you see, BE A FRIEND!  Leave a comment, follow Oleander and Palm by email, PinterestFacebook, or Twitter.

DIY / etc.

Poinsettia Napkin Rings

December 14, 2012

Poinsettias are a classic for Christmas.  When I was a kid, my mom had some felt poinsettia napkin rings that we always used for Christmas dinner.  They were made up of a few pieces of felt, but there was no sewing involved in putting them together.  When I was up at my parent’s place a couple weeks ago, I asked her if she still had them.  No, she had thrown them away a few years ago.  So, she sat down and tried to remember how they were made and what they looked like.  We searched the internet high and low and just couldn’t find a good pattern.  So, with my moms help, I’ve put together a pattern for you to follow. All you need is a good pair of scissors, a few pieces of felt and the printable pattern I’ve made.

I decided to make mine in tonal greys and tans for a more modern look.  They look really quite great with my birch candle holders, owl collection and antlers.

Here’s how to make them:

1. Print out the Pattern. Follow the pattern and cut out 4 pieces total.  3 in the flower color and 1 in the leaf color.
2. Cut an X in the center of all the petal and leaf pieces.
3. Place the leaf colored felt on the bottom on the petals.
4. Fold the center petals and ring piece of felt in half.
5. From the top down, push the folded end of the ring through the center of the petals.
6. Fluff and wiggle the poinsettia into the shape you could like it to be.

These poinsettias look pretty great in any color combo.  The red and green are definitely a classic.

I hope you find this helpful and fun low-stress craft.  

etc. / Find

Photo Christmas Cards

It’s that time of year.  Time to order Christmas cards.  Really, weren’t cards totally boring before the invention of photo cards.  I love sending and receiving them.  This year I’m ordering from Minted.  They have fantastic holiday cards to suite any taste and the quality of the paper and options are amazing.  You can even have rounded corners and patterned edges to your cards.

Here’s a few of my favorites.  I haven’t decided which one I’m going with, but how can I go wrong with these options?

Minted has this really great option that makes choosing the right card for you photo really easy.  The Find it Fast feature allows you to upload an image and then it displays your image in ALL the cards.  Isn’t that awesome?  You don’t have to select each card one by one and add the image and then decide if it will work.  This feature saved me lots of time.

Are you sending out photo Christmas cards this year?  How many do you send out? This weekend I was discussing with a friend who are the people that really should get a Christmas card.  I really only send cards to close family and friends.  I keep my list pretty short.  How long is your list?  I’m curious.

DIY / etc.

Milk Bottle Scarves

December 12, 2012

I love serving drinks in my milk bottles (aka old Starbucks frappacinno bottles) at parties.  I like to wrap twine and string around the necks and put custom stickers on them.  I think great parties are made in all the details.
When I got the first Christmas Pottery Barn Kids catalogue of the season, I noticed red scarves on milk bottles as one of the props in the photograph.  I’ve been wanting to make my own version.  And how simple and cute did these turn out.
All you need to do is cut a 1″ width strip of felt down the long side of a felt square (they are 12″ long).  Cut fringe on either end of the scarf and the cut a 1 inch slit in the middle of the scarf about 2 1/2″ inches in.  Wrap the scarf around the bottle neck and put the other end of the scarf through the slit, pull snug.  Attach the buttons using glue dots (they wash of easily).  And you of course need cute paper straws.  I got these adorable Birch Bark Straws at Paper Source. 

I’m itching to have a party of some sort.  I’m considering a good old cookie exchange.  I really need an excuse to serve eggnog in these fun cozyfied bottles.

And don’t forget to enter to win the Winter Wreath.

DIY / etc.

Vintage Sign Letters Garland

December 11, 2012

So, this weekend I lucked out and got to go to the Pasadena Flea Market.  Late Saturday afternoon, my friend and I made plans for an early rise the next morning.  We had an awesome day.  No kids, no husbands, no real agenda, just a fun day of wondering around.  But, it was one of those Flea Market days where I just couldn’t catch a break.  Everything I wanted was already sold or being purchased at the very moment I happened upon it.  But, they are just things and I did come away with a fixer-upper metal filing cabinet (that I’ll share soon) and these fun vintage metal sign letters.

I bought JOY hoping to display them in some way for Christmas.  I decided to use this festive silver tinsel to hang it on.  The letters already are conveniently bent on the back for hanging on their signs.  So, I just bent them a little further and then just simply hung them on the tinsel.  It’s the easiest garland I’ve ever made.  I love the black and white with the sparkle, it’s graphic and glitzy all at the same time.  

etc.

Wreath Giveaway!

December 10, 2012

It’s about time O + P had a giveaway.  So I’m going to give away one of my Winter Yarn Wrapped Wreathes away (a $30 value).  This one, with the little bottle brush trees, is one of my faves.  I am so thankful for all my faithful readers.  I’m not bragging, just excited about I few milestones my little blog has made recently.  And it’s all thanks to you guys, the ones who visit regularly, leave comments for me, and pin and share my ideas.  I’m really grateful.

Not that anyone really cares except me, but here’s O + P’s latest accomplishments:
1000+ pinterest followers
300+ facebook likes
79,000 visits to the blog last month

Here’s how to enter, you have the opportunity to enter multiple times:

1. LIKE Oleander and Palm on Facebook
2. Follow Oleander and Palm on Pinterest
3. Follow Oleander and Palm on Twitter
4. Follow me on Instagram (@jeranmcconnel)

or if you have already done those things, here’s some other options for an entry

5. Share this giveaway on your Facebook page
6. Tweet this giveaway
7. Pin something from O + P to pinterest.

Leave a comment for each entry you make.  A winner will be chosen randomly on Sunday December 16th, so that I can mail this wreath in time for Christmas.

*I am shipping only to the US and Canada.  I am sorry I can’t include all my other overseas readers in this giveaway.

Thanks again for reading.  I have some fun Christmas DIY’s, crafts and ideas coming up this week.  So be sure to come back.