DIY Marble Shamrock Print
March 14, 2015

March 14, 2015
March 4, 2015
This is probably my favorite feature in this Global Eclectic Bedroom, the hand drawn Gold Grid Wall. I knew from the beginning that this room needed some white paint to brighten up the small space that is was. But, I also wanted to added some sort of graphic element that wasn’t super heavy.
This simple gold grid was just what the room needed.
I’ve always love Mandi’s (of Vintage Revivals) gold sharpie wall in her living room. So, I decided to attempt my own version. Using just 2 waterbased gold sharpie paint pens I was able to cover the whole wall. I didn’t want super straight lines, I wanted the grid to look hand drawn (but not like a 5 year old did it). So, I measured and taped off every line, but ran the sharpie pen just above the tape line so that the line would not be perfectly straight. I spaced my grid 6″ apart. Using a level and tape measure, I taped one line at a time, drew my sharpie line and then moved the tape ( I used the same piece of tape for almost the entire wall). I’m not going to say that this was quick job, but it was easy. I think I completed the whole wall in about 5 or 6 hours. Not bad for a $7 wall.
March 3, 2015
Phew, that was a lot of pictures for one post. I’d love to know what you think? And if you have any questions about the details from this space, please ask.
March 2, 2015
I found a package of 4 wooden knobs at Hobby Lobby for less then $3. They are flat on the bottom, so they sit nicely on a table top. Using a hack saw, very carefully saw a 1/2″ deep slit just off to the side of the center on a slight angle.
Tape off sections of the wooden knobs. I taped mine all in different directions and angles. Then using 3 fun colors of craft paint, paint each of them.
When they are dry, remove the tape and insert your pictures.
timeshel is only available for iOs in the Apple Store. For more about timeshel, be sure to check them out on Pinterest, Facebook, Instagram, and Twitter.
February 27, 2015
I’ve been working on a fun makeover for a college kid this last week. It’s a really playful, quirky space – my favorite kind. The reveal is coming soon, but I’m giving you a little sneak peek today and sharing one of my favorite DIY’s from the room – this little DIY Wire Basket Side Table. It adds pattern to the space without being heavy and weighing it down.
I used this same wire basket in Dylan’s closet makeover. I love the shape and design of this Target basket, I like to think it’s an inexpensive version of this Ferm Living basket that I’ve been eyeing for over a year now. So, for about $30, I DIYed this little side table, and it took me just a few minutes to put together.
Here’s what you’ll need:
Wire Basket
Solid Pine 18″ Round
Wood Stain (I used Old Master’s Wiping stain in Walnut)
8 3/4″ wood screws
8 1/4″ nylon cable clamp (1/4″ not available online, but this is what they look like)
Power drill or just a screw driver
Start by staining the 18″ pine piece. I love a wiping stain, it’s totally fool proof. Simply wipe on the stain with a rag and then wipe off the excess and let it dry. A little dark walnut stain can make even the palest pine look rich. Stain is your friend, I find myself using it more and more these days.
The next step is even easier. Simply flip the basket over and center it in the middle of the wood top. Using a power drill or screw driver, attach the clamps spacing them evenly around the table top. Now how easy was that? DONE! You have a unique table, that is modern and clean. Now accessorize that bad boy.
Stay tuned to see more of the DIYs and thrifted treasures from this room makeover.
February 20, 2015
 |
| AFTER |
 |
| BEFORE |
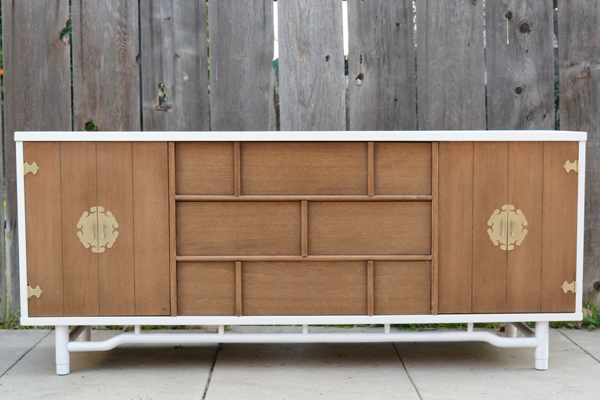
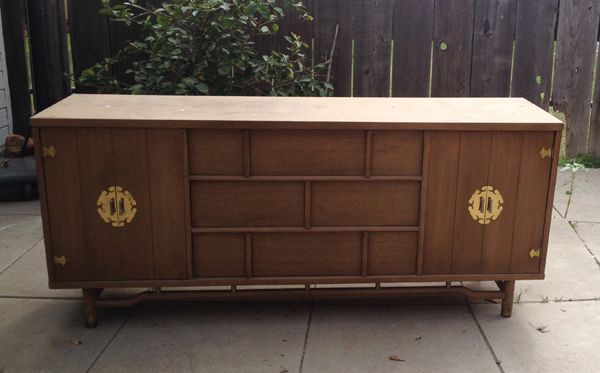
This piece had some fun hardware, but it was a bit to brassy and cheap looking. So, I decided to take it all off and give it a quick coat of metallic gold spray paint. I also replaced all the hinges, they had seen better days and were all bent out of shape.
This is such a great piece for holding so much stuff. It has 9 drawers to keep everything organized.
Have you found any great finds while thrifting lately? Does your city’s craigslist have great stuff? Should I be heading your way?
February 13, 2015
I big thanks to Joann Fabric and Craft Stores for sponsoring this event. They provided the black and white felt and fabric glue for all the crafters at the event.
February 12, 2015
Guest were given white or black pendants as a base. I provided a couple patterns for them and lots of colored felt. I was so impressed with the creativity and uniqueness of everyone pendants. Some serious talent showed up Sunday morning. Oh, and I will also share to how-to with you and the printable patterns very soon.
My daughter, Denali, took a lot of these shots. I’m super impressed with her skills and eye for detail. I’ll be hiring her to take more pics for me again soon.
February 11, 2015
Need a quick Valentine’s gift idea for your kiddos or sweetheart? You can print off these chocolate bar wraps and customize a candy bar for someone you love in no time at all.
Last year I made a set of printable Valentine’s Day cards and I liked the designs so much, I decided to use them again. I’ve created free printable PDFs for you, you can download all 4 of these designs HERE!
And on the back, I added a spot to write who the gift is to and from. This is what I’ll be sending to my kid’s teachers this year for Valentine’s Day.
February 5, 2015
This is such an easy DIY. All you need is Crayola’s Air Dry Clay, a couple large paper clips and some paint. Simply, shape the clay into the desired shapes, insert a paper clip into both of them and allow them to dry for 3-4 days. Then tape off the paper clips and spray painted both of them metallic gold.