Category Archives: etc.

DIY / etc.

Mailbox Facelift

January 11, 2013

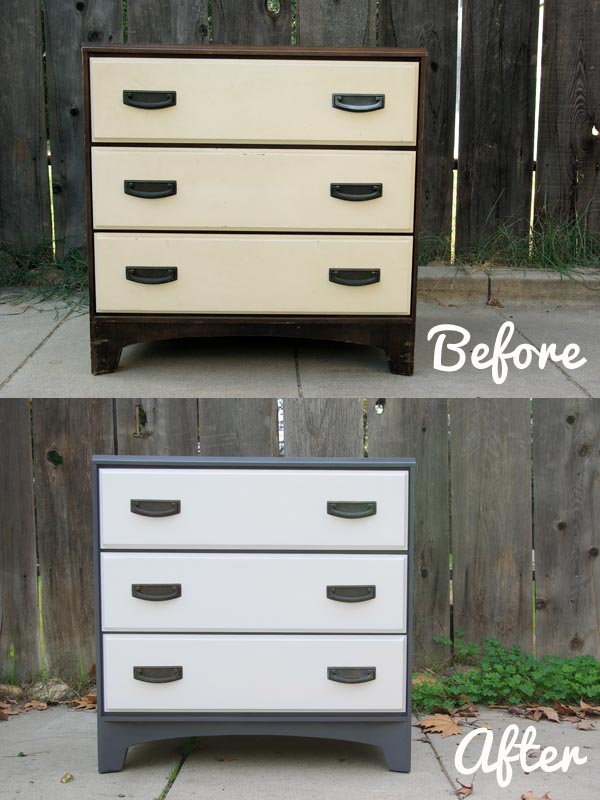
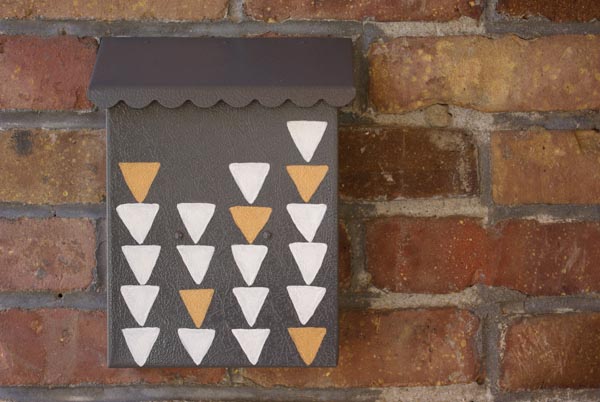
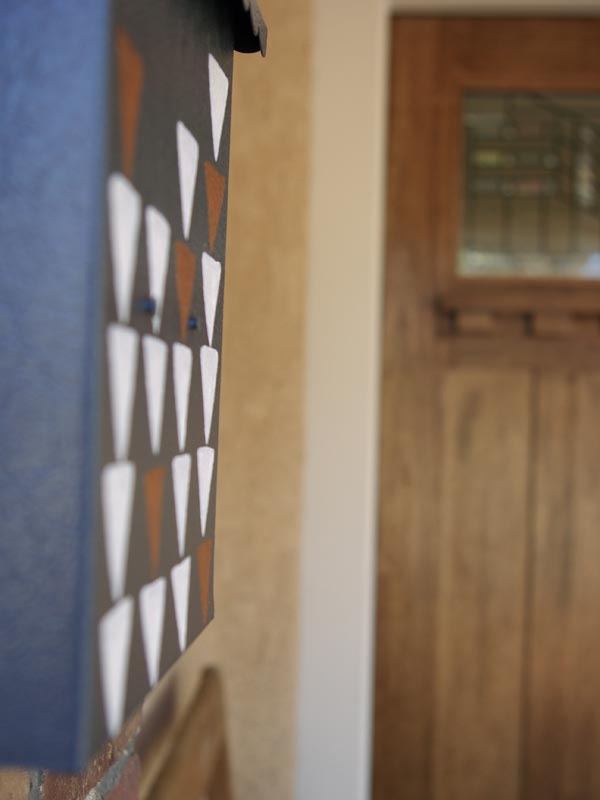
Now that we have a new front door, I thought it was time our mailbox got a facelift.  I couple years ago I decided to paint it red with a little bird on it.  I’ve enjoyed having it that way, but I was in the mood for something new.  So, I went with triangles.  I’ve been liking triangles and geometric patterns more and more lately.  If you remember, last year I painted metallic triangles on the desk I found on the side of the road.

This was a simple project, quite relaxing and just plain old good for the spirit.  There’s something about painting that puts me in a good mood.

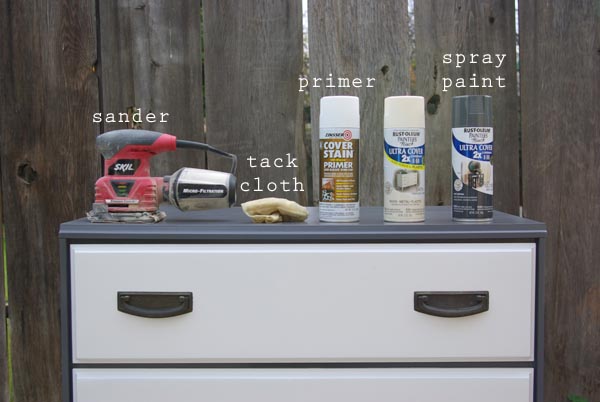
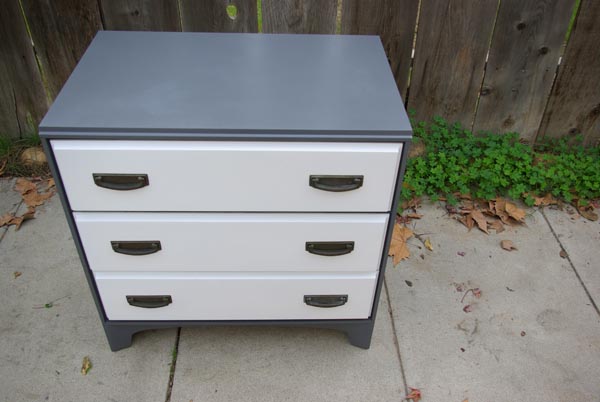
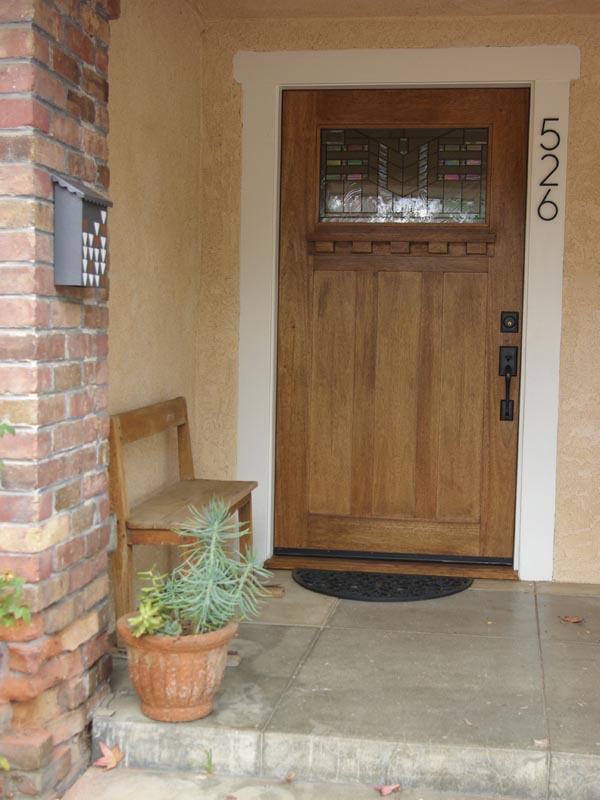
I simply sanded down the whole thing, and then painted the entire mailbox a dark charcoal grey.  Then I used a little blue painters tape to map out where I wanted the triangle.  I made columns that were 1 1/4″ wide and then, with sharpie, I marked every 1 1/4″ up the tape.  This gave me 1 1/4″ squares to work in.  I didn’t want the triangles to all be perfectly the same, I wanted a hand painted look to them.  But, having the tape helped me keep them straight and even.

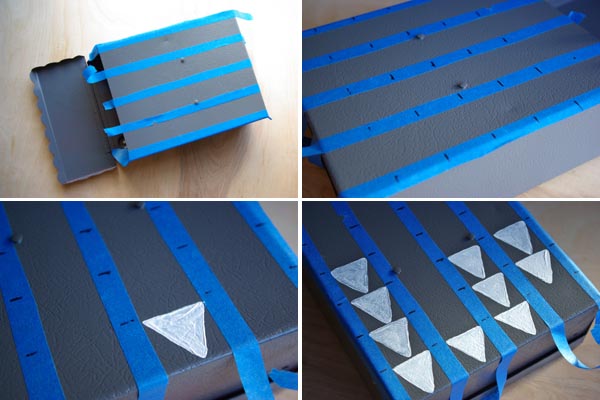
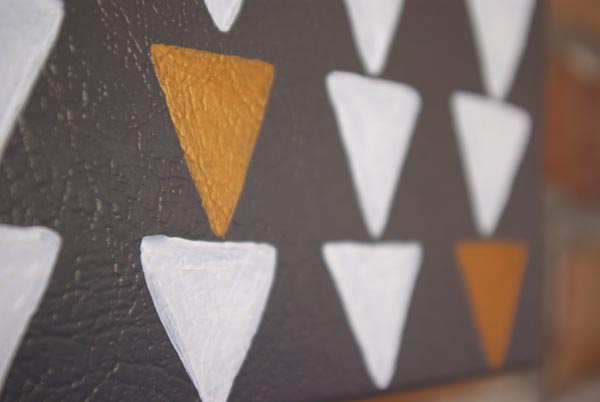
I painted my triangles white with just a random few metallic copper ones.  I had to do 3 coats of paint on each triangle to get enough coverage.

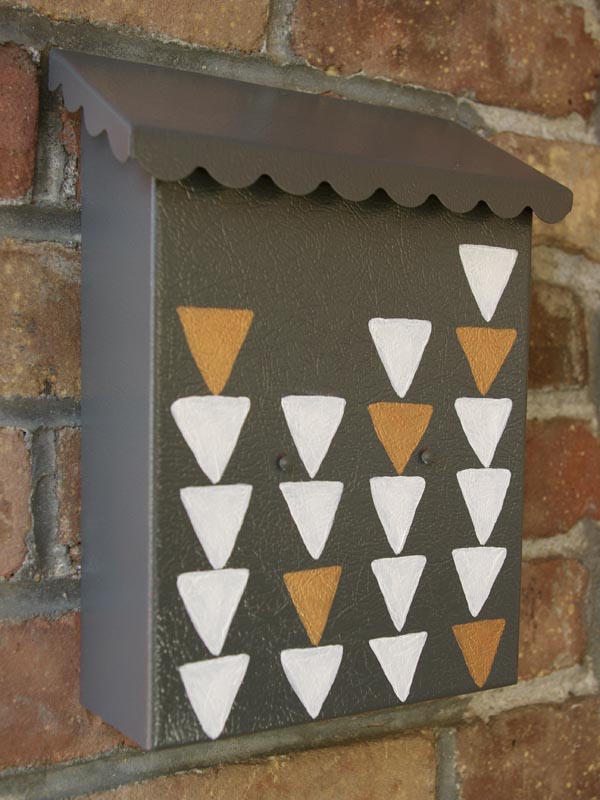
Isn’t making a house a home all about the details?  I might not have the nicest, biggest house, but it does reflect me and my family.  I know a fun mailbox isn’t an essential, but it makes me happy and it shares a little of my personal style with the rest of the world.  What details in your home tell about your uniqueness?

etc.

It’s Citrus Season

January 10, 2013

I love living in California.  I’m sure you’ve heard me say it many times.  While other’s are having a snow day, I’m in our back yard picking lemons, oranges and grapefruit.  The trees are loaded right now and it’s really such a beautiful thing.  It’s so fun to have all this fruit, because these are trees we planted after we bought the house.  There’s some pride and ownership there.  Ya the tree did all the work, but we loved it into producing fruit.  The grapefruit tree is actually quite a small little guy, and his branches are bowing and bending from the weight of these giant fruits.  Nothing compares to the taste of an orange picked that very day.

We are definitely getting out vitamin C intake these days.  I’m also baking with citrus quite a bit. Yesterday I made Lemon Coconut Scones, the day before, California Sunshine Shortbread (orange and poppyseed) and the day before that, Orange Rosemary Salt Scrub.

For those of you still feeling Winter’s chill, I’m sharing these images to send a little Cali sunshine your way.

And, I just wanted to let you know, that it has just been one of those weeks.  I feel like I’m working my tail off, but I’m just not accomplishing all that I want to.  I have lots of fun crafty things in the works, I’m just a little scatter brained and haven’t gotten everything photographed yet.  Please hang in there with me.  I’m heading to SLC in 2 weeks for the Alt Summit Conference.  I am beyond excited, but feel slightly intimidated and overwhelmed by all that I need and want to do before I get there.  I am sure that I will come back refreshed, inspired and refueled to make this blog what I want it to be.

DIY / etc.

Orange Rosemary Salt Scrub

January 9, 2013

I’m hearing a lot of talk of snow, it’s definitely not here though.  We are having a very mild Winter, whom am I kidding, it’s always a mild winter here.  It might not be very cold but we definitely have dry Winter air. I’m feeling and seeing the effects of the dry air on my skin.  I often look at my hands and am embarrassed by how old they look. I’ve got my Grandma’s hands, like her hands when she was in her 80’s.  A couple years ago I made a Pumpkin Spice Sugar Scrub.  I kept a jar of it by my kitchen sink and when I’d remember, I’d scrub my hands with it.  It worked really well to exfoliate and moisturize my skin.  So, I thought I’m try a salt scrub. I am loving this combination of crisp citrus with woodsy rosemary.  It’s refreshing and energizing and after using it just twice, my hands and looking and feeling so much better.

I searched the web looking for salt and sugar scrub recipes, and most require essential oils.  I really didn’t want to have to buy a $5 bottle of orange essential oil.  The whole point of making my own scrub is to save a little money.  Yes, I could easily go out and buy a $12 or even $20 jar of scrub.  But, my little recipe fills a whole jar and it cost me less then $1. And I love that it came from my garden and pantry and it has nothing artificial or fake in it.

Orange Rosemary Salt Scrub
1 cup salt
zest of one orange
1tsp. rosemary leaves taken off the stem
1/3 cup olive oil

In a food processor, place the orange zest, rosemary and salt.  Pulse a couple times until the rosemary is copped finely.  Pour in the olive oil and pulse a couple times more.  Store in a jar or airtight container.  To use the scrub, wet your hands or entire body with warm water, then in gentle circular motions rub the salt scrub.  Rinse completely with warm water.  Pat skin dry.

I’m storing my scrub in my new Weck jar.  My kids got me a set of 6 canning jars for Christmas (with their dad’s help of course).  They’ll be great for jam making in the summer.

So, are you enjoying Winter or are you already longing for warmer weather?

DIY / etc.

How-to Paint Laminate Furniture

January 8, 2013

I couple months ago I posted this little dresser I found at my local Salvation Army.  I finally refinished it earlier this month and now it’s my nightstand.  It has really turned out to be one of my favorite thrift store finds now that it got a facelift.  I had promised I would share more about the refinishing process.  So, here’s the how-to.

This is the second piece of laminate furniture that I’ve painted.  This summer I painted a little cabinet in our bathroom yellow.  I was so pleased with how it turned out, and it’s really held up well (even with it being in a bathroom with moisture), I decided that I’d try again.  This little dresser had a laminate top and the rest of the piece was wood. But, it seemed like a lot of work to remove the laminate and glue from the top, so I decided to paint the whole thing. 

 I’ll try to make this as simple and easy to follow as possible.

1. SAND –  Remove all hardware and take apart the piece as much as possible.  There is no substitute for sanding.  Take a power sanding and run it over all the surfaces to smooth out any imperfections.  You do not need to remove all the finish, just rough up the surface a bit so the primer has something to stick to.

2. DUST – remove all dust with a tack cloth.  The paint won’t lay down and adhere well if their are particles on the surface.

3. PRIME – paint one coat of primer on, I use Zinsser Cover Stain Oil-Base Primer Primer (purchased at Home Depot).  It’s the best! It is oil based and bonds fantastically and dries super fast.

4. SAND – sand super lightly with a piece of sand paper when the primer is good and dry (overnight is best).

5. DUST – tack cloth the entire piece again.

6. PAINT – I like Rustoleum’s Painter’s Touch (for this dresser I used Dark Grey and Heirloom White).  It took two coats of to get good coverage.  I learned from my dad to put on a light coat and then go back and do another coat.  Putting it on thick to start with does not work as well, you can get yucky drips and bubbles.  

So there it is, my fool proof method.  I’ve done lot’s of research and trial and error, and this really is the easiest and cheapest way to turn a tacky piece of laminate furniture into something sleek and fabulous.  I hope you find this helpful.  Do you have a piece of laminate furniture, possibly bought while you were in college, that could use a facelift?    

DIY / etc.

Large Black and White Print for less

January 5, 2013

For months I’ve been seeing on pinterest how you can enlarge a black and white photograph for just a couple bucks at Staples.  Well, we don’t have Staples here, so I tried Kinkos.  And I’m so pleased to tell you that I had this photo of my three cute kiddos enlarged to 20 x 30 for just $4.50.  How great is that? For a photo enlargement anywhere else, you’re looking at paying anywhere from $23-$45.
Olivia is 15 months ago, and embarrassingly enough, I’ve had a picture of our family up in our entryway without her that whole time.  I really like the family silhouette, but I just haven’t gotten the right picture of us to make a new one for our family of five.  But, for $4.50, I can change the picture whenever I want!  
Do you have a favorite photo of your loved ones and a special place that you’d love to see enlarge to poster size?  Oh, and I need your opinion.  I’m kind of getting tired of the Khaki walls in our living room.  They’ve been this color for a LONG time (like 8 years).  You probably can guess I’m thinking a grey color, probably a very light, almost white grey.  What do you think?  

etc.

A look back at 2012’s posts

January 4, 2013

I’ve spent the last couple of days looking back at the last year and what I’ve put on my blog. I’m trying to set some goals and get some direction for where I want to take my blog this year.  I’ve looked over my post statistics and tried to see where my readers interests are.  These are the most popular posts from 2012.  Some of them kind of surprise me, they aren’t necessarily my favorite posts.  I feel like I’ve made some good improvements to this little blog. I’m not there yet, but I’m learning, growing and having a pretty great time doing it.  
I love having your input.  Do you have favorite posts?  What would you like to see more of on Oleander and Palm?  

etc.

Lucky 2013

January 2, 2013

Well, I looked back at my resolutions for 2012 and was a little disappointed with myself.  I wish I had done better with some of them, especially #1.  I have to be honest, reading my bible didn’t happen everday! So, instead of just giving up, I’m putting it at the top of my list for 2013 again.  I’m calling this year LUCKY ’13. I’m not superstitious so number 13 is going to be my lucky year.

1. Read my bible everyday! (Let’s try again)
2. Celebrate my 15th Wedding Anniversary in some BIG way. (Hopefully a trip somewhere fun without kids)
3. Date my husband more! (Let’s try this one again, 2012 was so busy)
4. Complete some house projects (paint the outside of the garage, complete the laundry room, paint the hallway, and put in some kind of semi-custom storage in all our tiny closets).
5. Take Riley on a long road trip this summer, hopefully all the way to my homeland, Canada.
6. Talk to my kids more about God, life, struggles and decisions they have to make.
7. Grow my hair out!
8. Find time to watercolor paint. Maybe a family art night of some sort each week.
9. Cook my way through the French Laundry Cookbook. 
10. Get a REAL family portrait taken (not one I take with a tripod or a cheesy Mall Studio portrait).   
11. Enjoy, really ENJOY anytime I have home with Olivia this year (because maybe I’ll have to get a teaching job again this Fall).

What are your plans, hopes, dreams, or resolutions for this year?  I’m curious what you all have in the works for 2013. 

DIY / etc.

Winter Window Painting

December 24, 2012

This week I painted a winter scene on the front windows of my house.  I had so much fun painting on them for Thanksgiving.  And I was excited to try my hand at a little more window painting.  

I kind of went a little crazy and should have probably kept it simple like I did with the “Give Thanks”.  But, my kids were really excited about it.  The winter village is definitely my favorite part.

I hope you are enjoying working on the last minute preparations for Christmas.  I hope you aren’t having to brave the malls and that all your gift buying is done.  I’m done!  And it’s a relief to have that part of Christmas finished.  I’m enjoying time with my family, as crazy as it is with 7 kiddos, 5 of which are under the age of 3.    

DIY / etc.

Potted Succulent Gifts

December 21, 2012

It’s that time of year – time to give the wonderful teachers in your child’s life something special.  As a teacher myself, (well, I’m not teaching now but have in the past and will again someday) I want to give something that they can actually use and enjoy.  Really, I didn’t need another apple themed calendar, #1 Teacher Mug or desk plaque.  Even though, plants are temporary, they bring a lot of enjoyment.  That’s why I’m giving the teachers in our lives, succulents this year.  Succulents are so popular right now, and really I see why.  They require very little effort to maintain.  I water mine once every 2 weeks (that’s what my local nursery suggested) and it seems to work well.

I decided since it was the holidays, I would add a little sparkle to the terra cotta pots.  I kept it simple and easy with polka dots, because they’re always happy and playful.

Here’s what you’ll need:
Mini terra cotta pots (I got mine at Michaels for 99 cents each)
Glitter (I used Martha’s in Florentine Gold, Smoky Quartz, and Yellow Barite)
White craft glue
A sponge stencil brush
A small succulent

Simply apply the glue in polka dots using the stencil brush.  Then sprinkle glitter on the glue dots (do this over a paper plate or container so you can collect and reuse the extra glitter).  Tap the pot a couple times to remove any excess glitter.  Let the glue dry completely.  Then transplant the succulent into your glittered polka dot pot.

I’m a fan of flowers for teachers as well.  Remember my Back to School Bouquets that I gave to the teachers at of beginning of the year?  What are you giving to teachers this year?  I’d love to hear you great ideas.

Oh, and I wanted you to check out another really great way to give succulents.  A Golden Afternoon, potted her succulents in tea cups and saucers – how darling?

DIY / etc.

Poinsettia Napkin Rings

December 14, 2012

Poinsettias are a classic for Christmas.  When I was a kid, my mom had some felt poinsettia napkin rings that we always used for Christmas dinner.  They were made up of a few pieces of felt, but there was no sewing involved in putting them together.  When I was up at my parent’s place a couple weeks ago, I asked her if she still had them.  No, she had thrown them away a few years ago.  So, she sat down and tried to remember how they were made and what they looked like.  We searched the internet high and low and just couldn’t find a good pattern.  So, with my moms help, I’ve put together a pattern for you to follow. All you need is a good pair of scissors, a few pieces of felt and the printable pattern I’ve made.

I decided to make mine in tonal greys and tans for a more modern look.  They look really quite great with my birch candle holders, owl collection and antlers.

Here’s how to make them:

1. Print out the Pattern. Follow the pattern and cut out 4 pieces total.  3 in the flower color and 1 in the leaf color.
2. Cut an X in the center of all the petal and leaf pieces.
3. Place the leaf colored felt on the bottom on the petals.
4. Fold the center petals and ring piece of felt in half.
5. From the top down, push the folded end of the ring through the center of the petals.
6. Fluff and wiggle the poinsettia into the shape you could like it to be.

These poinsettias look pretty great in any color combo.  The red and green are definitely a classic.

I hope you find this helpful and fun low-stress craft.