Category Archives: etc.

etc.

Painted Wooden Spoons

May 14, 2012

I had to do it.  I’m sure you’ve seen these cute painted wooden spoon.  They called my name and it was an enjoyable hour spent with craft paint (I used Martha’s), a little painters tape, and my favorite brush.

I made two sets.  The first is white with different metallic ends on each (silver, copper, and gold) and the second in pastels with gold ends.   

I taped off the section of the handle that I wanted painted, and I painted the white and pastels first.  When those were completely dry, I taped off about an inch on the end of the spoon and put a couple coats of the metallic paint on.  So simple and so satisfying.  I love these kinds of crafts.

So, my local friends (Bakersfield, CA).  Let’s have another DIY get together!  I really enjoyed the Spring Wreath Workshop, so let’s paint spoons together this time.  And of course we will eat treats, have coffee, and do what woman do best – chat!  Leave me a comment if you are interested in joining in this time round.  And I’d love to know if you prefer a week night or weekend.  So, tell your friends and “Like” my facebook page to find out the time and day.    

I’m not sure even where to start when crediting someone for this idea.  I feel very strongly about making sure that the creator or inventor of an idea is given props, but this is one of those crafts that I’ve been seeing all over blogs and pinterest and I don’t know where it all began.  I’ll try to credit as many sources as I can.  But, if you know the true origin of this idea, please let me know.

Check out these, and these, and these, and how about these.

etc.

Monthly Memory Verse – May

May 11, 2012

This verse seemed so appropriate this month.  I know a lot of people that are hurting, especially from the loss of their child.  Some have lost an unborn child, some a baby, some their adult children.  I can’t understand their pain, but I’m sure they are struggling to go on with life.  But there is hope, we don’t have to rely on our own strength.  He gives us the strength!  
Here’s May’s memory verse.  I got a little behind last month, I’m sorry.  Hopefully I am back on track and I can have June’s verse ready be the 1st of the month.  How about two trends in the design of this verse: ombre and navy blue.  I try to come up with interesting designs and then I ultimately just go back to clean and simple.  It just appeals more to me.  What are your thoughts?
If you want to know more about my Monthly Memory Verse, read here.

etc.

Camping Food: Hobo Meals

May 9, 2012

As summer is approaching, I’m getting excited about all the camping opportunities we have.  One of the best parts of camping is the food!  For some reason, when you are in the wilderness, you give yourself permission to eat things you would normally stay away from (like s’mores with homemade graham crackers).  And I think every thing just tastes better when your camping.  Hobo meals are something my mom made when we camped.  I guess they are named this, because Hobos ate these?  Or they would have been a good meal for a hobo, no pots or pans or stove necessary.  Just tin foil and a fire with good coals.  
Hobo meals usual consist of meat and lots of veggies.  Then they are wrapped up and cooked in the coals.  The steam that gets locked in the foil cooks the food, and it stay moist and flavorful.  This is my new twist on the traditional Hobo Meal – Sweet and Sour Meatball Hobo Meals.  This meal is now our  new family favorite camping meal.
Sweet and Sour Meatball Hobo Meals
2 lbs of ground beef
1 egg
a couple dashes of maggie sauce
1 garlic clove
1/4 rolled oats
salt and pepper
1 can of pineapple pieces (don’t you love the cute Trador Joe’s can of pineapple)
red, yellow, orange, or green pepper cut into pieces
1 red onion cut into wedges
Teriyaki Sauce (I used Lawry’s)

Make the meat balls ahead of time and freeze them.  Mix together the first 6 ingredients.  Then roll the meat into 1″ meat balls.  Freeze in a ziploc bag until you are ready to go camping.
When you are ready to cook the meals, cut two 12″ pieces of foil for each hobo meal (I made 4).  Divide the meal balls and veggies onto the pieces of foil.  Pour at least 4 tbsp. of teriyaki sauce on each meal.  Roll up the ends and seal the foil well, then just to be safe, seal each meal with a second piece of foil.  Place the meals in the hot coals of the fire.  These meals cook in 15-20 mins depending on the heat of the fire.  

Serve with rice.  I used instant brown rice, because it’s fast to make.  Eat them right out of the foil, no dishes necessary. 
I actually had made my own sweet and sour sauce before we left, but it got left in the fridge.  So, on the way to our campsite, I stopped at a little shop and found this teriyaki sauce.  It worked well and tasted great, so I think this is what we’ll use from now on.  And it saved me some work.  

Here’s some of the fun we had.

etc.

Riley, my vintage trailer

May 8, 2012

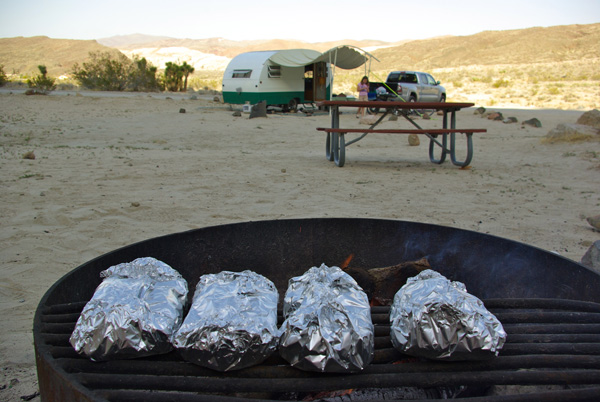
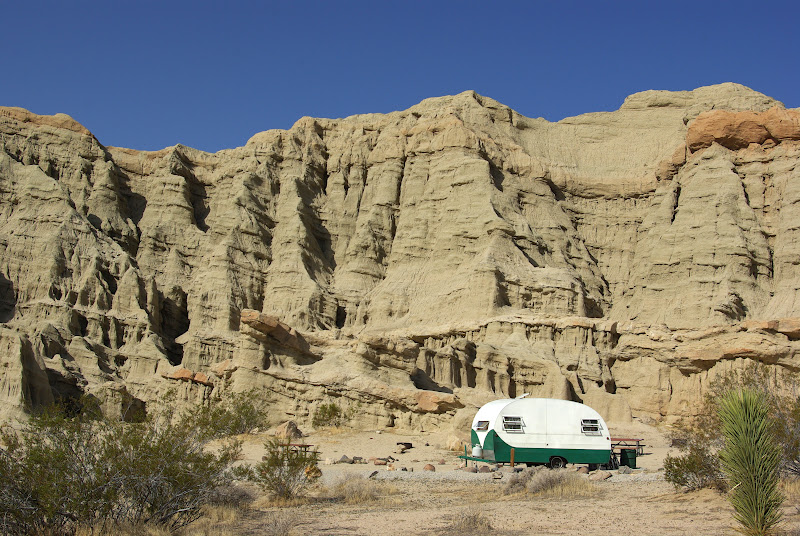
Last weekend we took Riley out to Red Rock Canyon.  It’s just over a hour from our front door.  It’s our new favorite spot for Spring and Fall camping (it would be 110+ F in the Summer).  Why didn’t we try out this spot earlier.  We love to hit the beach, LA and the Sequoias because they are only 2 hours away, but now we’ve got desert camping just on hour away too.  We do really live in a great spot.  We are close to everything.

We took the awning this time, which was a smart move with the sun.  The awning is not original to the trailer, but the former owner had it made with materials that would have been used in 1948 (the year Riley was made).  The polls are wooden and the rope is hemp.  

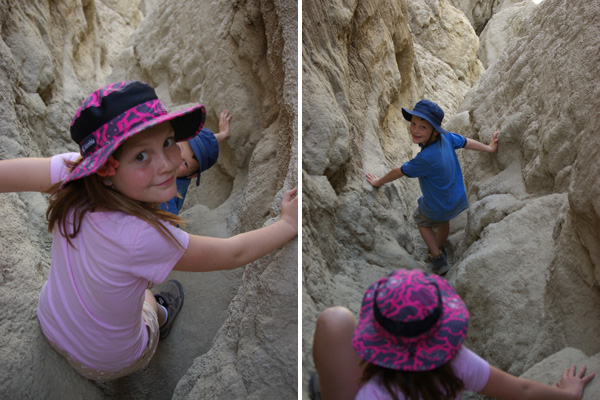
The kids had a blast climbing all over the bluffs right behind our camping spot.  (Actually I did too).  I love desert camping, you just dust off the dirt and you’re good to go without a shower for quite a few days.

I wanted to give you a peek into the inside of Riley.  He’s quite charming and cozy.  We really haven’t done much to the interior yet.  Don’t worry, I have lots of ideas and plans for him though.  I did make new curtains for him last Summer.  They are just white canvas with black out material on the back to help with insulation. The curtains that came with Riley were forest green, ruffly, faded, and very dusty.  I really wanted to brighten up the space and just give it a clean look with these simple curtains.

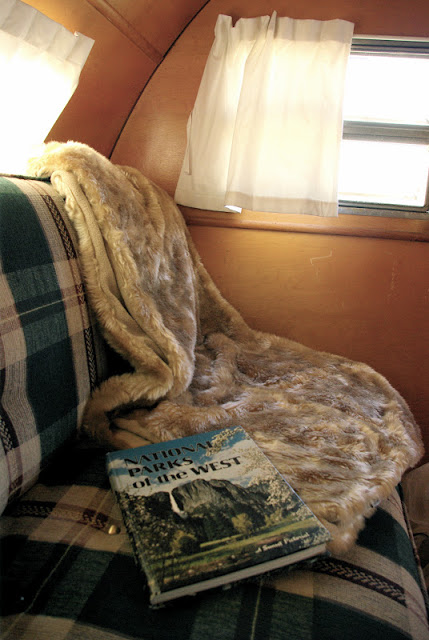
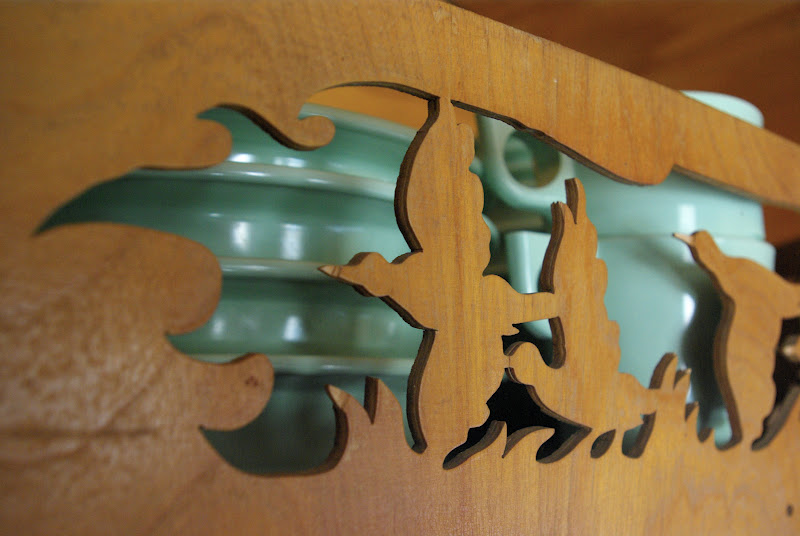
The upholstery is only about 10 years old and actually it is in very good condition.  It looks brand new.  It isn’t what I would choose but, I’m trying to figure out how to work with it.  The Kit Companion (that’s what Riley is) was made as a hunter’s travel trailer.  So, it features wood work with flying geese or I like to call them loons (for the Canadian in me).  So, really the upholstery goes well with this then.  Not that we are hunters, quite the opposite, remember the geek I’m married to is a biology teacher.

Olivia loved camping in Riley.  I recently added a sisal area rug, and she loved playing on it (no that is not a real rattle snake she is holding).  

Besides the seat cushions, everything else is original.  I love that all the windows still work well, and the hardware for the turn signals and lights still function.  
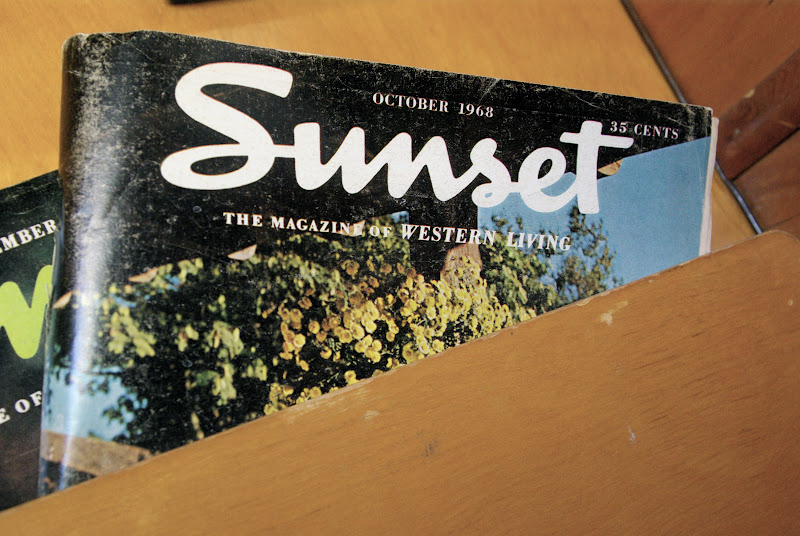
For Christmas, Lonnie put these two prints in my stocking.  I finally hung them in Riley.  Both prints have retro trailers in them and the Sequoias and General Grants Grove are special spots for us.  We also picked up a couple old copies of Sunset Magazine.  They issues from 1967 and 1968, we enjoy flipping through them in the trailer and imagining who was camping in Riley during that era.  
Riley has a stove, oven, sink, and ice box.  I love using this simple, little kitchen.  I feel like a kid and I’m playing house.   And don’t you love the black and white checkered floor?

I hope you enjoy seeing a little more of Riley.  I have a really fun Pinterest Board with all Vintage Trailers, be sure to check it out.  I have a look in my mind of how I want Riley to look once he’s styled and decorated.  It’s not the floral, feminine, retro look that a lot of the trailers are done in.  I love this look, but it’s not me, and definitely not my husbands.  So, when I can explain my style for Riley a bit better, I will share it with you.

etc.

Chevron Baby Quilt

May 7, 2012

Well, I finished it this week.  I shared my pattern for this quilt a while back.  But when
I found out my brother and sister in law’s baby shower was this weekend, I had to put my rear in gear and sew like there was no tomorrow.  And that’s what I did for 3 days straight (hence the lack of posts this last week).

I am so excited about how this quilt turned out.  I want one now too.

I had fun with the back of this quilt too, and decided to add a little pattern.

For this quilt I cut 5″ squares and then cut them in half to make triangles.  Each row is 12 triangles across and I made the quilt 10 rows in length.  Then I added a 2″ white border and a 4″ teal border.  I made my own binding and used this fantastic tutorial from See Kate Sew.

etc.

Irish Souvenirs

May 5, 2012

I thought I would share a few of my Irish souvenirs.  I love to bring back things for my home on my travels.  I feel like these are the kind of treasures that last a long time.  And they are also the things I can pass onto my kids.  

This sweet Eden strawberry bowl is my new favorite summer dish.  I kind of have a thing for bowls, I’ll share pictures of them sometime.  Each Eden piece is hand painted and they are made in the County of Down (which is where Lon’s family traces back to).  Eden has a lot of great patterns, I’m also loving their Lemon line.   Luckily I didn’t have an extra suitcase, because I probably would have brought home a lot more dishes.

My other big purchase was the Foxford lambswool throw.  It is so soft and I was drawn to the modern feel this grey and modern polka dot throw has.

It looks pretty good on my green leather chair in my bedroom.

What do you like to buy as souvenirs when you travel?  Is their something you always look for?

etc.

Homemade Chocolate Graham Crackers

May 2, 2012

Why did we ever eat store bought graham crackers?  These chocolate, homemade versions are so amazing.   I don’t know if we can ever go back.  This weekend we went camping in the Mojave Desert.  We have definitely found a new favorite spot.  We climbed on the cliffs, hiked and ate yummy things like s’mores and hobo meals on the fire.  It was nice to get away and just enjoy sometime with our family and the great outdoors.

I have to share my recipe for Chocolate Graham Crackers with you.  They made the best s’mores ever.


Homemade Chocolate Graham Crackers
1 cup each of whole wheat and white flour
1/4 cup ground flax seed
1/4 cup cocoa
1/4 tsp. cinnamon
1/2 tsp. salt
1 tsp. baking soda
1 cup butter
3/4 cup brown sugar

Cream butter and sugar together.  In a large bowl combine all the dry ingredients.  Mix well with a whisk.  Add the dry ingredients and mix until the dough comes together.  Place the dough between to floured pieces of parchment paper.  Roll out the dough to about 1/4 inch thick.  Cut into squares (mine were 3″x3″) with a pizza cutter.  Chill for 10-15 mins, then transfer the individual square to a parchment lined cookie sheet.  Prick them with a fork and bake for 15-18 mins in a 325 F oven.  Cool on a wire rack.

Here’s some images to help with the how to:

I used Martha’s recipe for my starting point and then changed a few ingredients here and there.

etc.

DIY Sophie Leash

May 1, 2012

We LOVE Sophie!  When I was preggo, I laughed at the thought of owning a $25 squeaky toy.  But my sister-in-law bought Sophie for Olivia.  Now I’ve decided that the French knew what they were doing when they made this toy, because Sophie is our favorite toy.  She goes everywhere with us!  Just this week we were in Target (our favorite shop), and Sophie went missing.  There was a 5 minute panic while we retraced our steps.  But luckily for us she was waiting on the floor, right where we had dropped her.  No more taking chances — Sophie’s got a leash now!  She’ll be safe from being dropped or worse, lost.
I really did make this leash in 5 minutes or less.  It could be used on any special toy that you don’t want to lose.  Here’s what you’ll need:
– about 2 feet of ribbon (1 inch wide grograin)
– 2 snap sets (I used dritz 5/8″ snaps and it comes with the tool – I bought mine at Joann’s Fabrics)
– a hammer

To start, you are going to fold the end of the ribbon over an inch, and then an inch again (this will encase the end of the ribbon).  Then you will attach the first snap (the male end) using the tool provided in the package and your hammer.

Next, measure Sophie’s or any other toy’s neck.  Mark where the other side (the female end) of the snap will go, and then attach it using the tool and hammer again.
Now you simply attach another set of snaps on the other end.  I made this loop a little larger so that I could attach it to the the side of the stroller, the car seat handle, or even the shopping cart.  You can make the leash as long or as short as you want.  Mine is about 18 inches long — just long enough to hold and play with, but not long enough to touch the ground when dropped.
Do you own a Sophie?  Have you lost a special toy?

If you like what you see, BE A FRIEND!  Leave a comment, follow Oleander and Palm by email, PinterestFacebook, or Twitter.

etc.

Monthly Memory Verse – April

April 26, 2012

Better late then never, right?  Sorry friends.  I had big plans of having this month’s verse ready before my trip to Ireland.  And, well, that didn’t happen.  And now April is almost over, and I just finished this free downloadable PDF tonight.  
I wanted an Easter themed verse, so I went with Jesus’ words for the great commission.  What could possibly be more comforting then these words.  I need this reminder.  Sometimes it’s easy to feel alone and lost, but he is with us, ALWAYS.  I hope this is encouraging and brings you hope today.
It’s free for you to download here.  If you want to know more about my Monthly Memory Verse, read here.

If you printed any of the Monthly Memory Verses or just think it’s a fun idea, please be a friend and “follow” my little blog.  If you already are a follower, please “like” my facebook page, follow my Pinterest or Twitter, sign up to follow by email, share this link with others, “Pin” it, or just leave me a comment.  

This is intended for personal use only.  

(Note: The text at the bottom of the image may print, but it is not within the 8 X10 measurement.  When you print, do not scale the image)

etc.

Vintage Needle Point

April 24, 2012

I found this sweet vintage needlepoint at an antique store a couple of months ago.  I fell in love with it and felt like it needed a home.  Someone had put a lot of time and effort into making it, and now it was just collecting dust at the antique mall.

The only thing I did to it was paint the yellowy oak frame a nice creamy white.  I think it’s pretty darn cute with my “Jesus Loves the Little Children” print.