
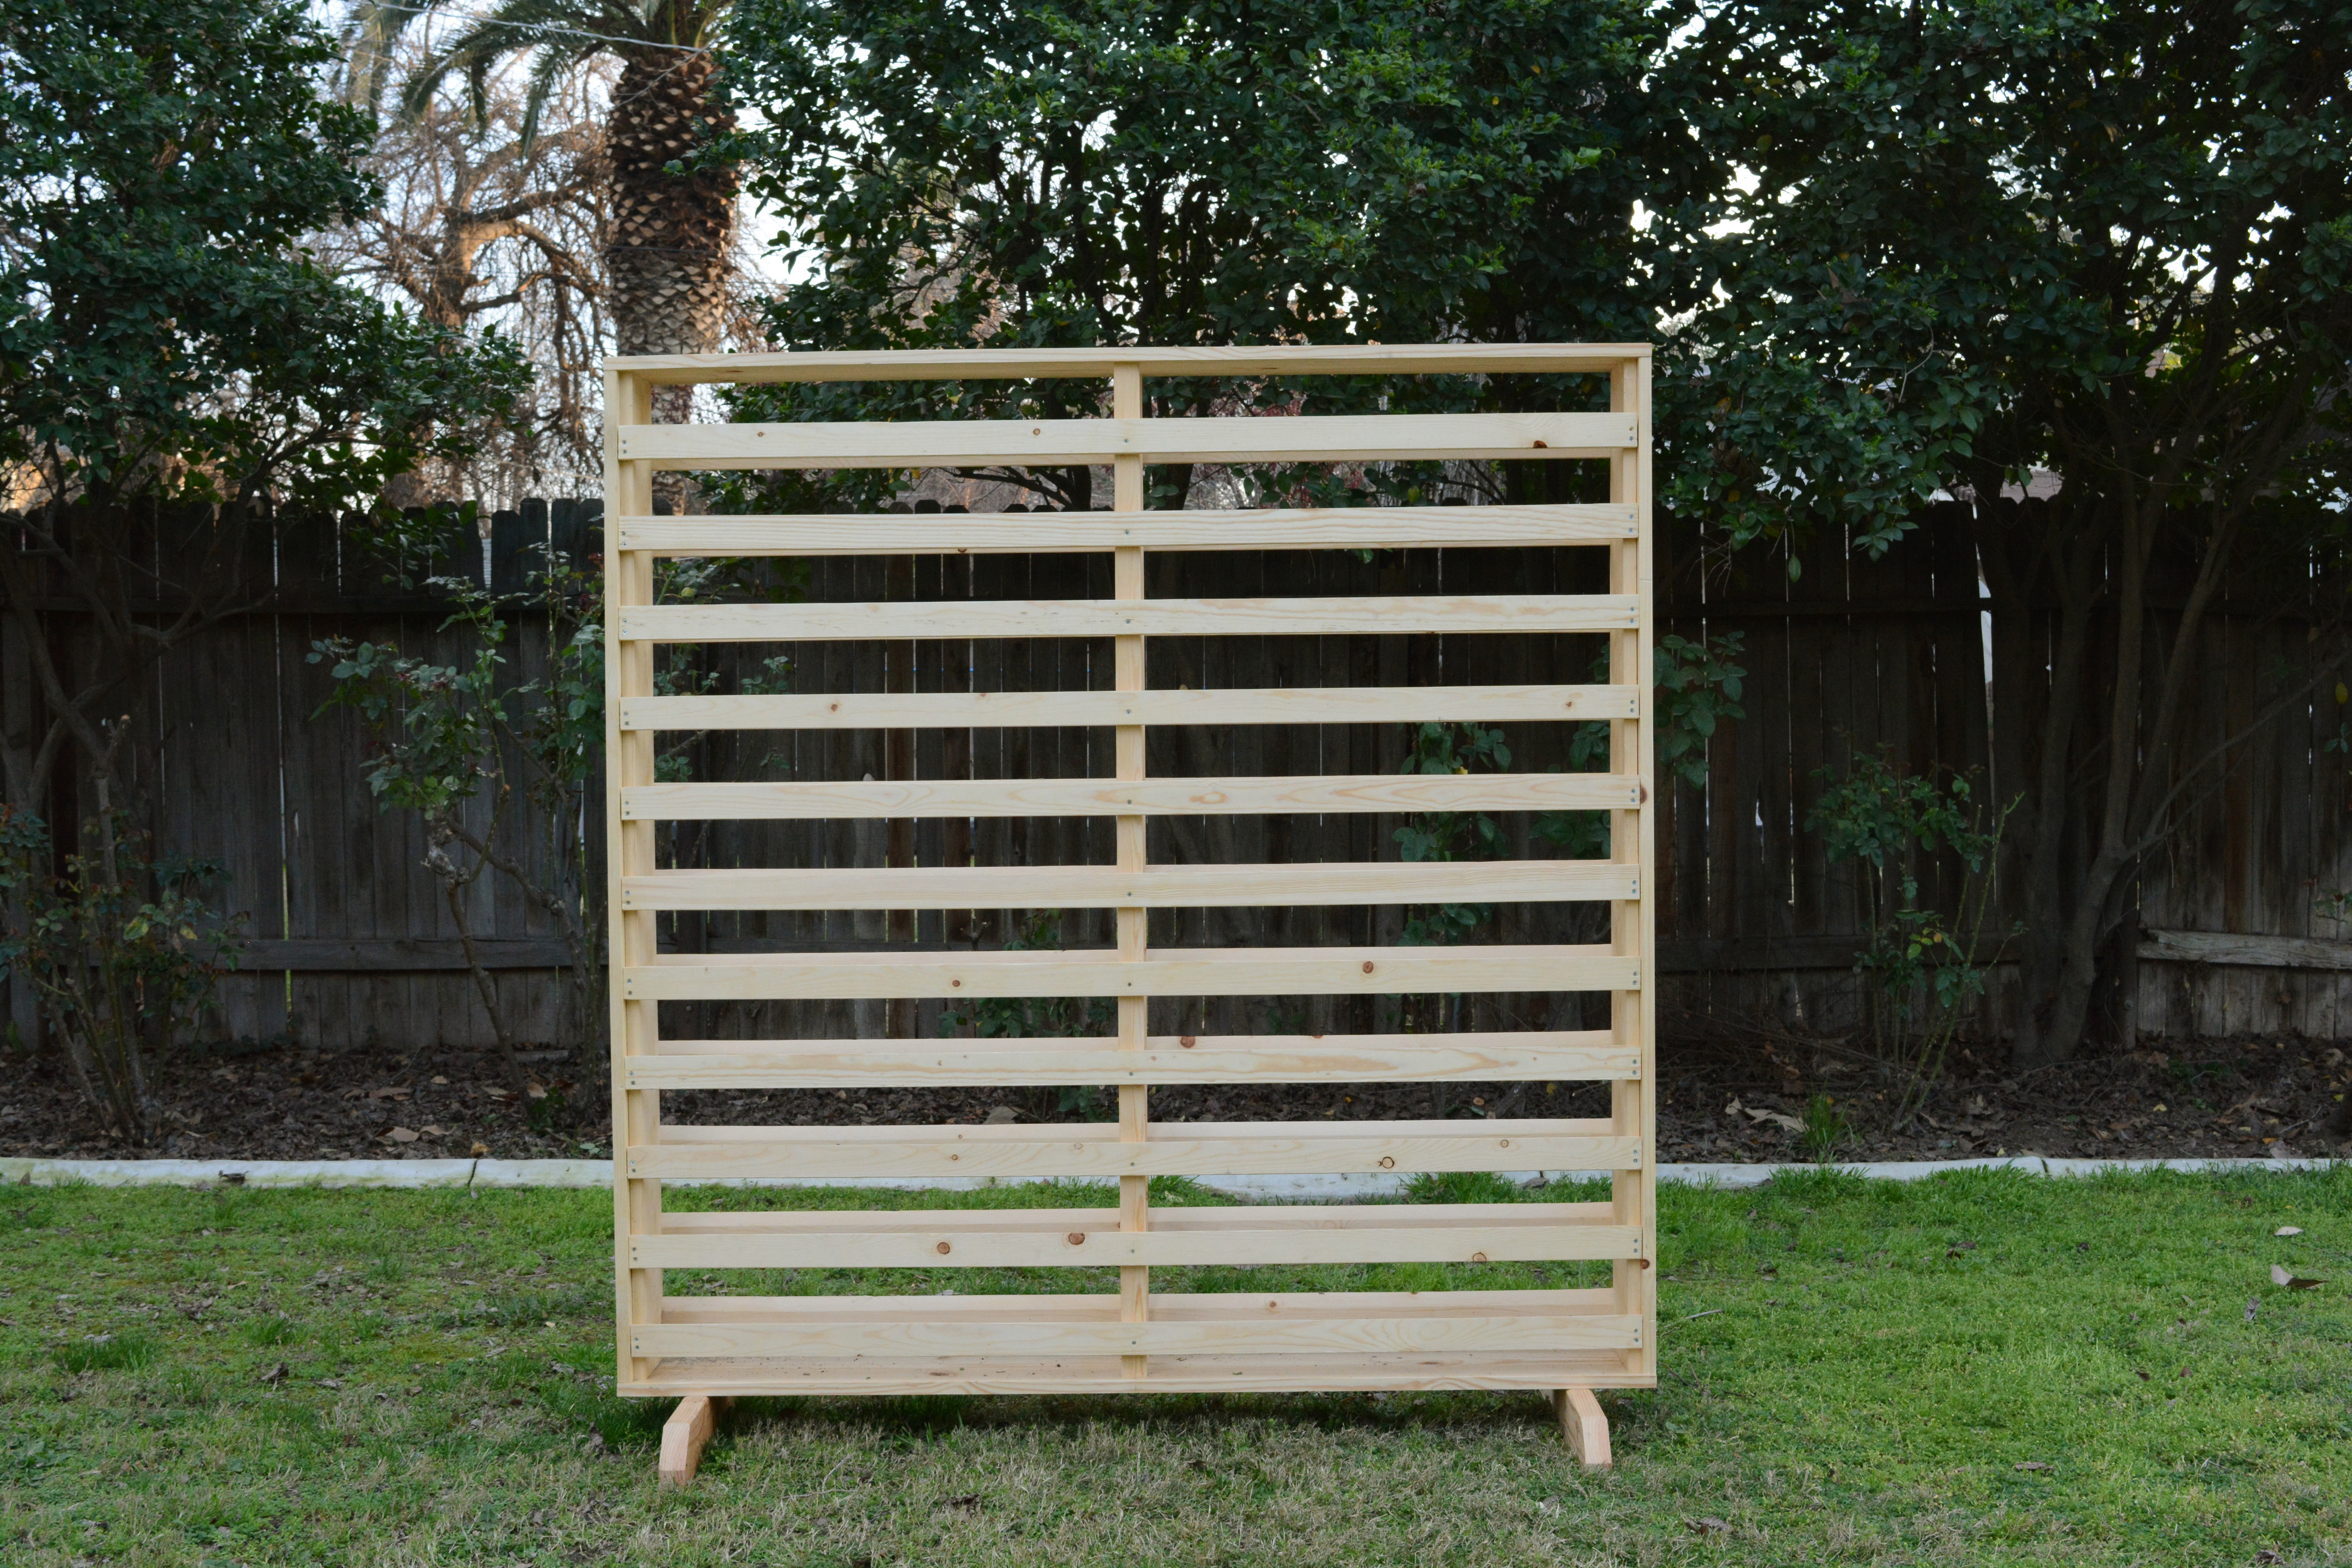
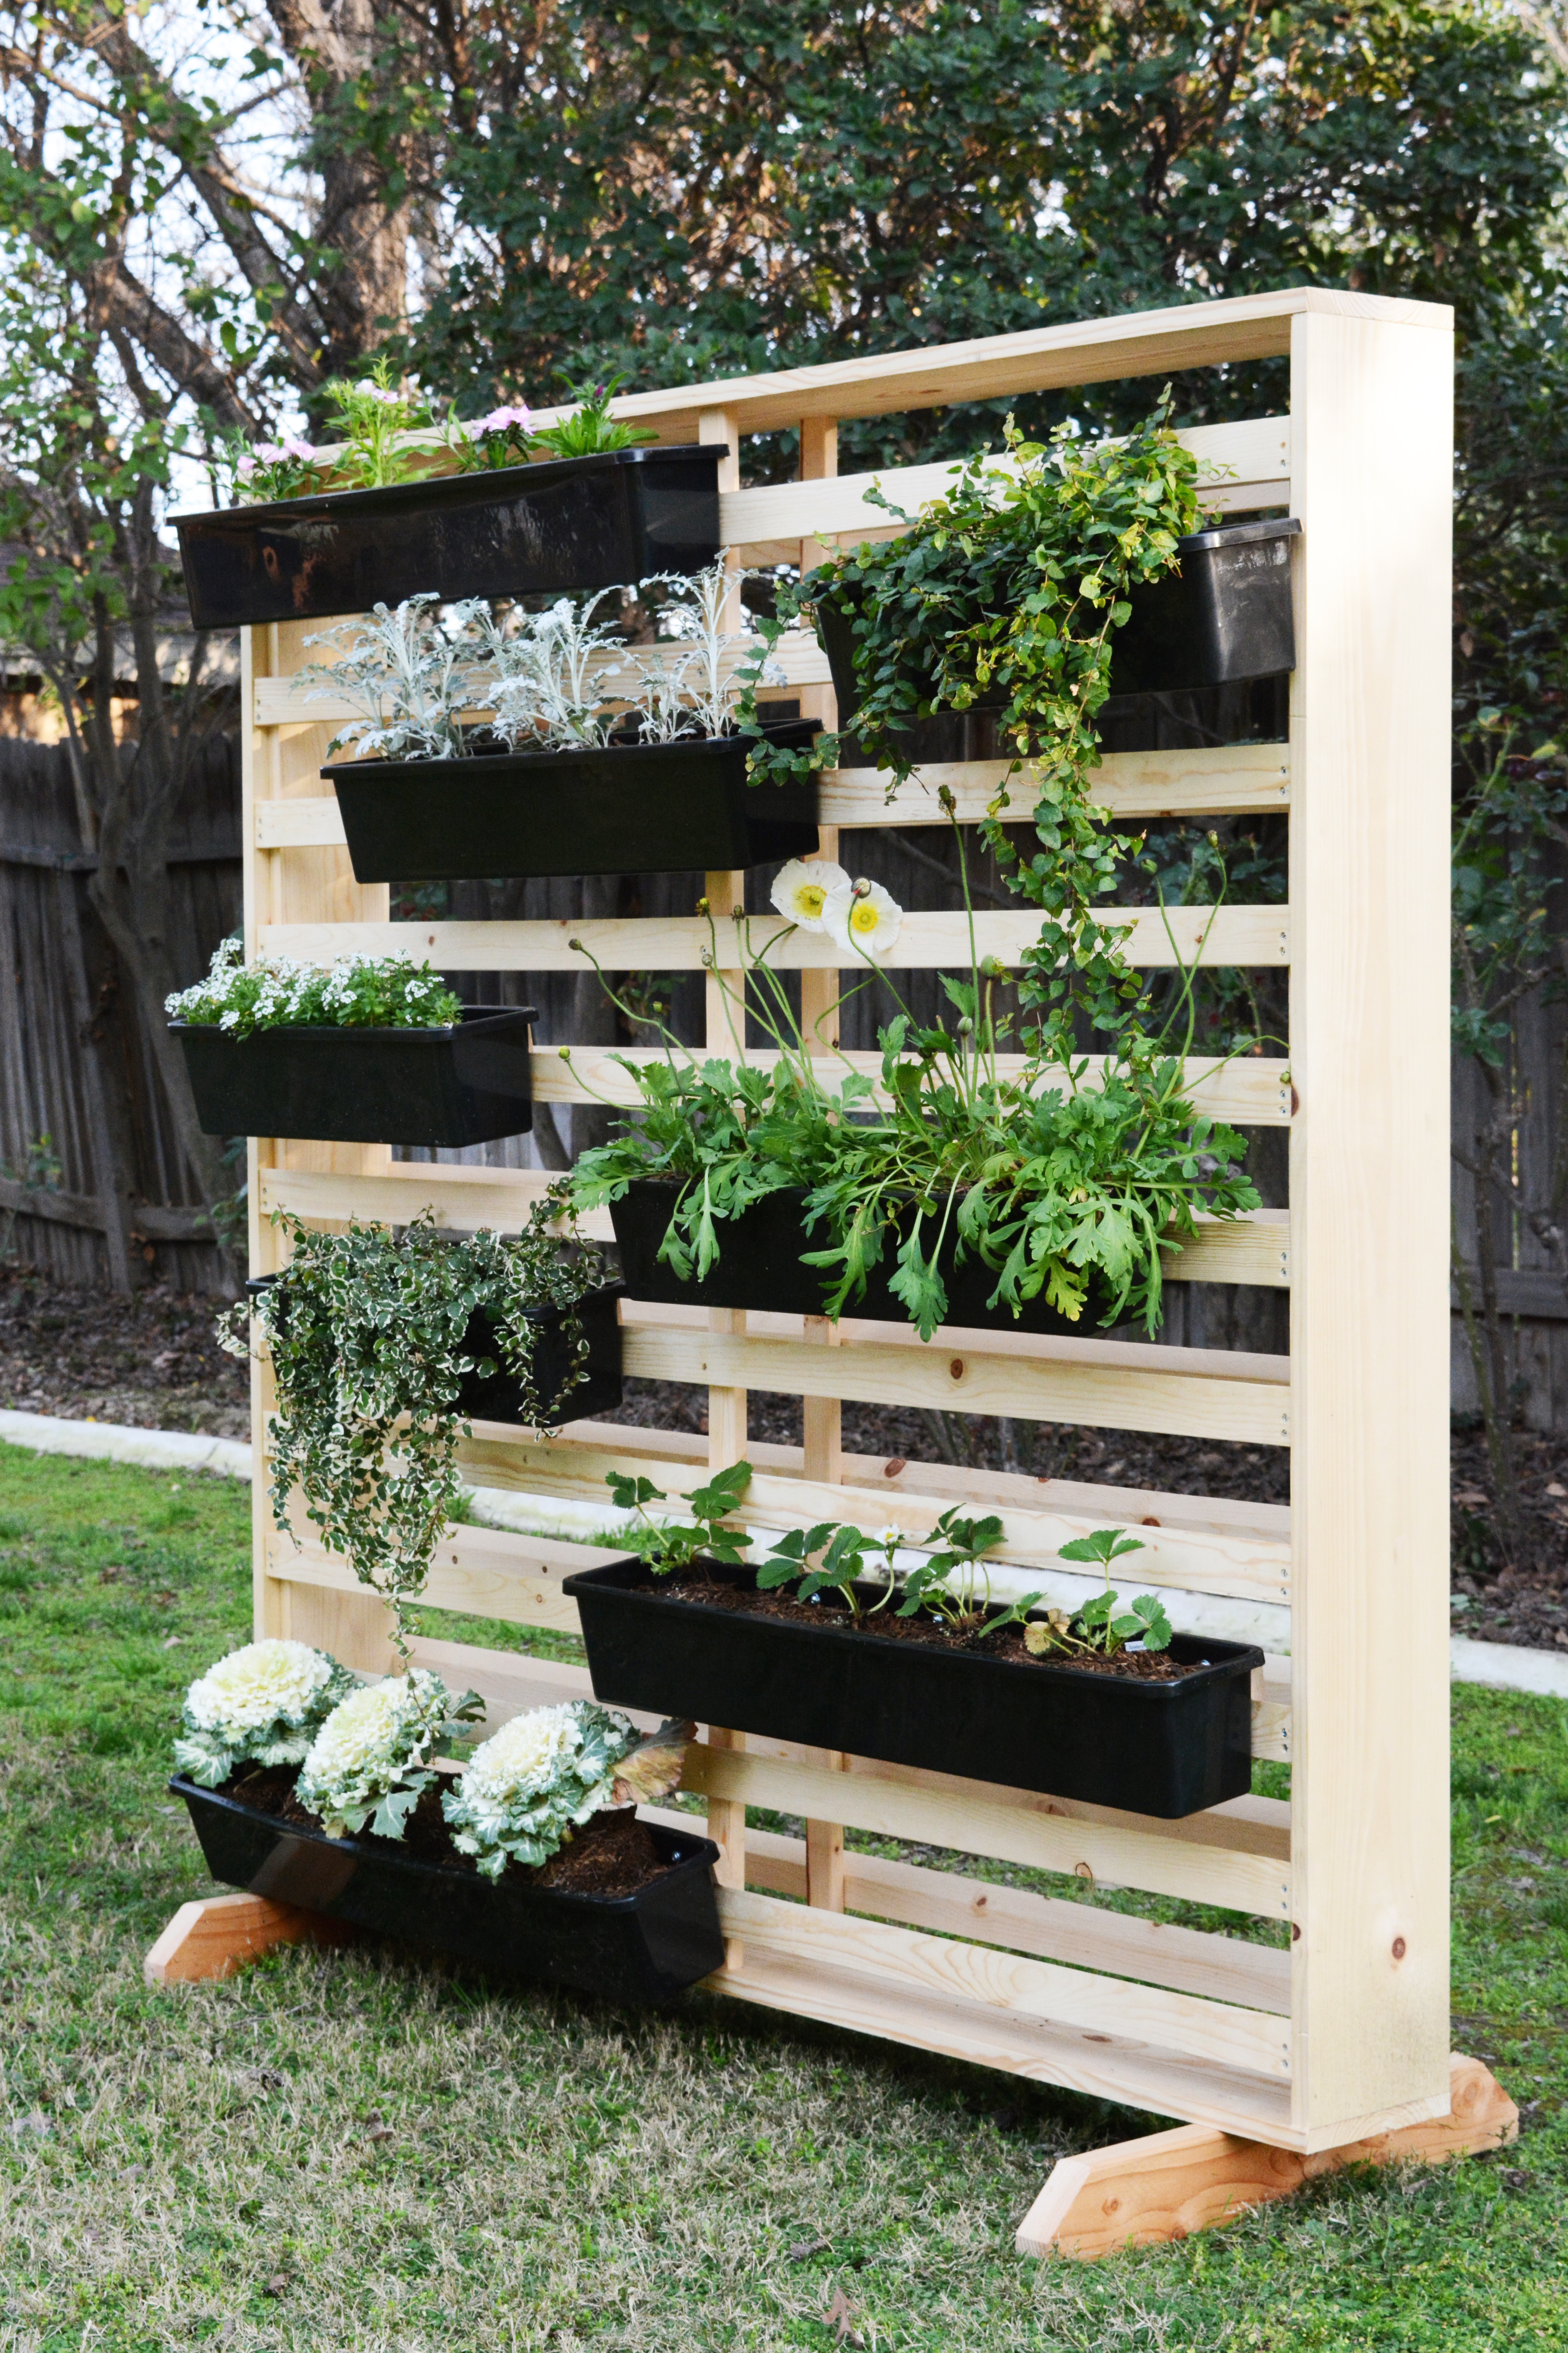
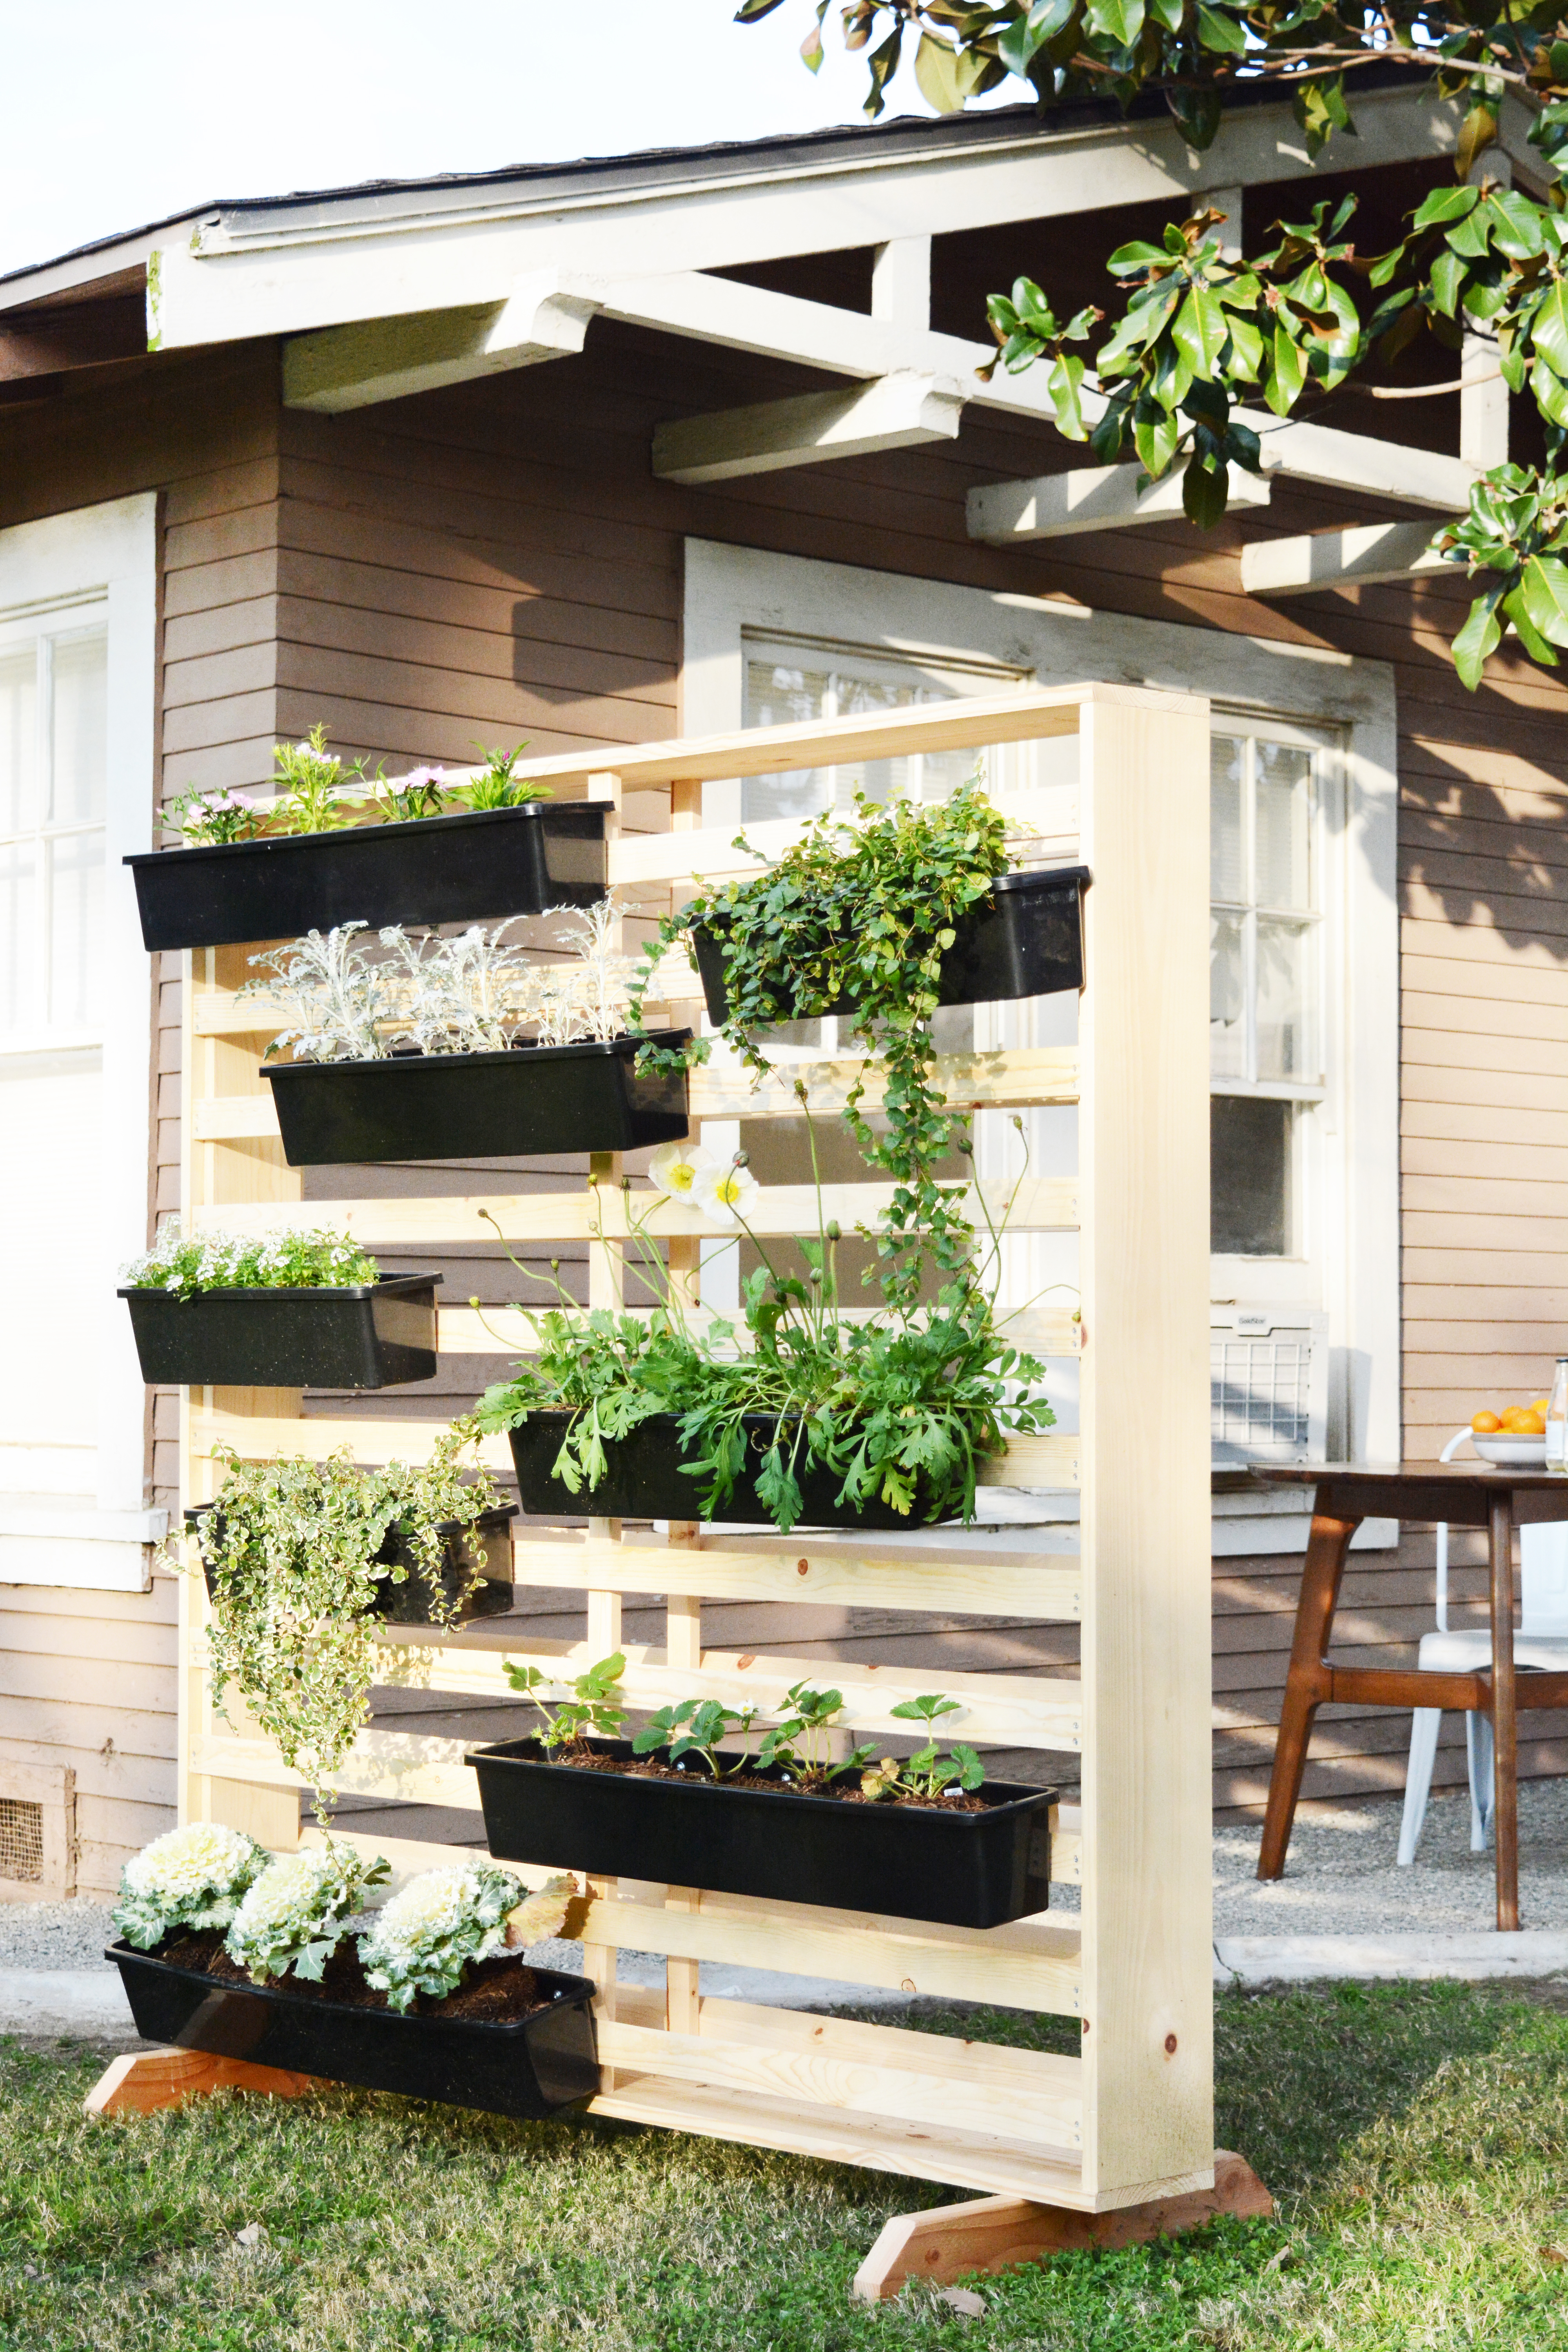
Sometimes you just need a little privacy in your outdoor areas. As you know we recently converted a small unit attached to our garage into a guesthouse that we are using as an Airbnb. We wanted to create a little outdoor seating area for guests that was a little more private and secluded. So, a DIY Living Wall with Moveable Planters seemed like that best idea. It’s a great way to add even more green to a space. And in a tight space, going vertical is the perfect solution.

I teamed up with my brother Joash (aka super handy, carpenter guy) and Fiskars (because they are the garden tool experts) to dream up an easy-to-build, yet totally stylish modern living wall. We designed it with simple, inexpensive materials, and simple cuts and assembly. No fancy hooks or hardware is needed. Using a simple cleat system, the planters can easily be moved around, repositioned and hung of either side of the wall.
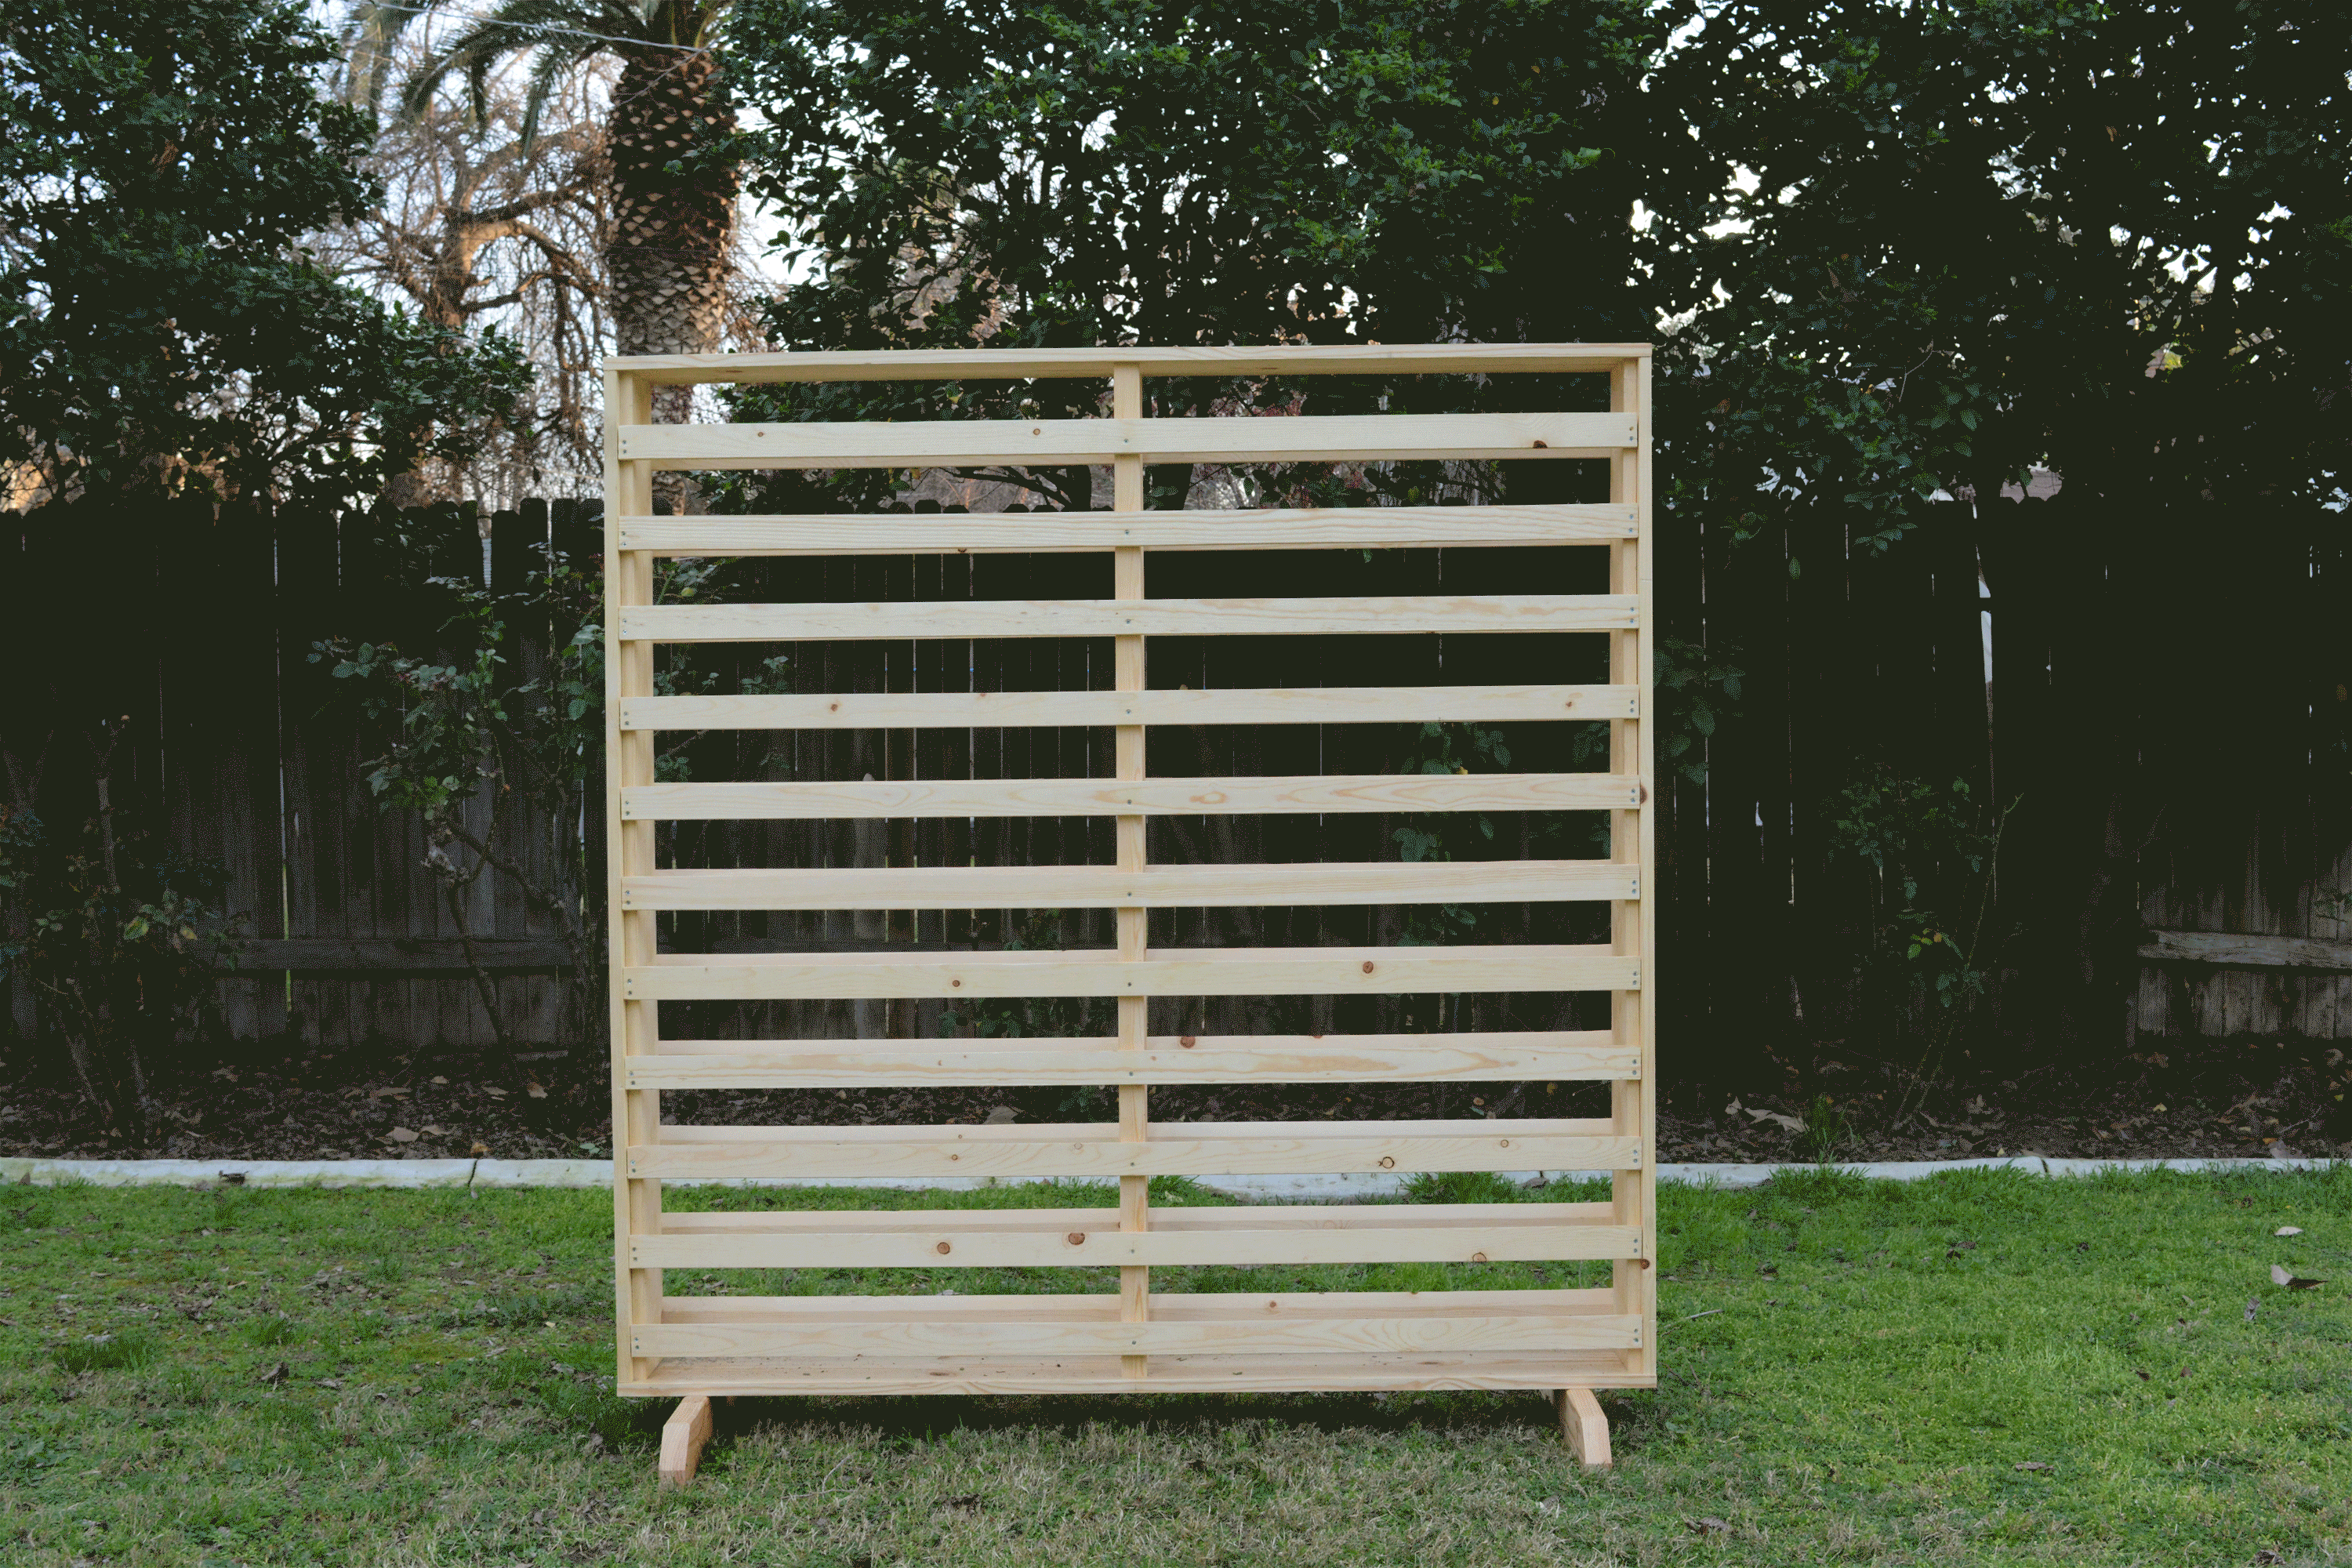
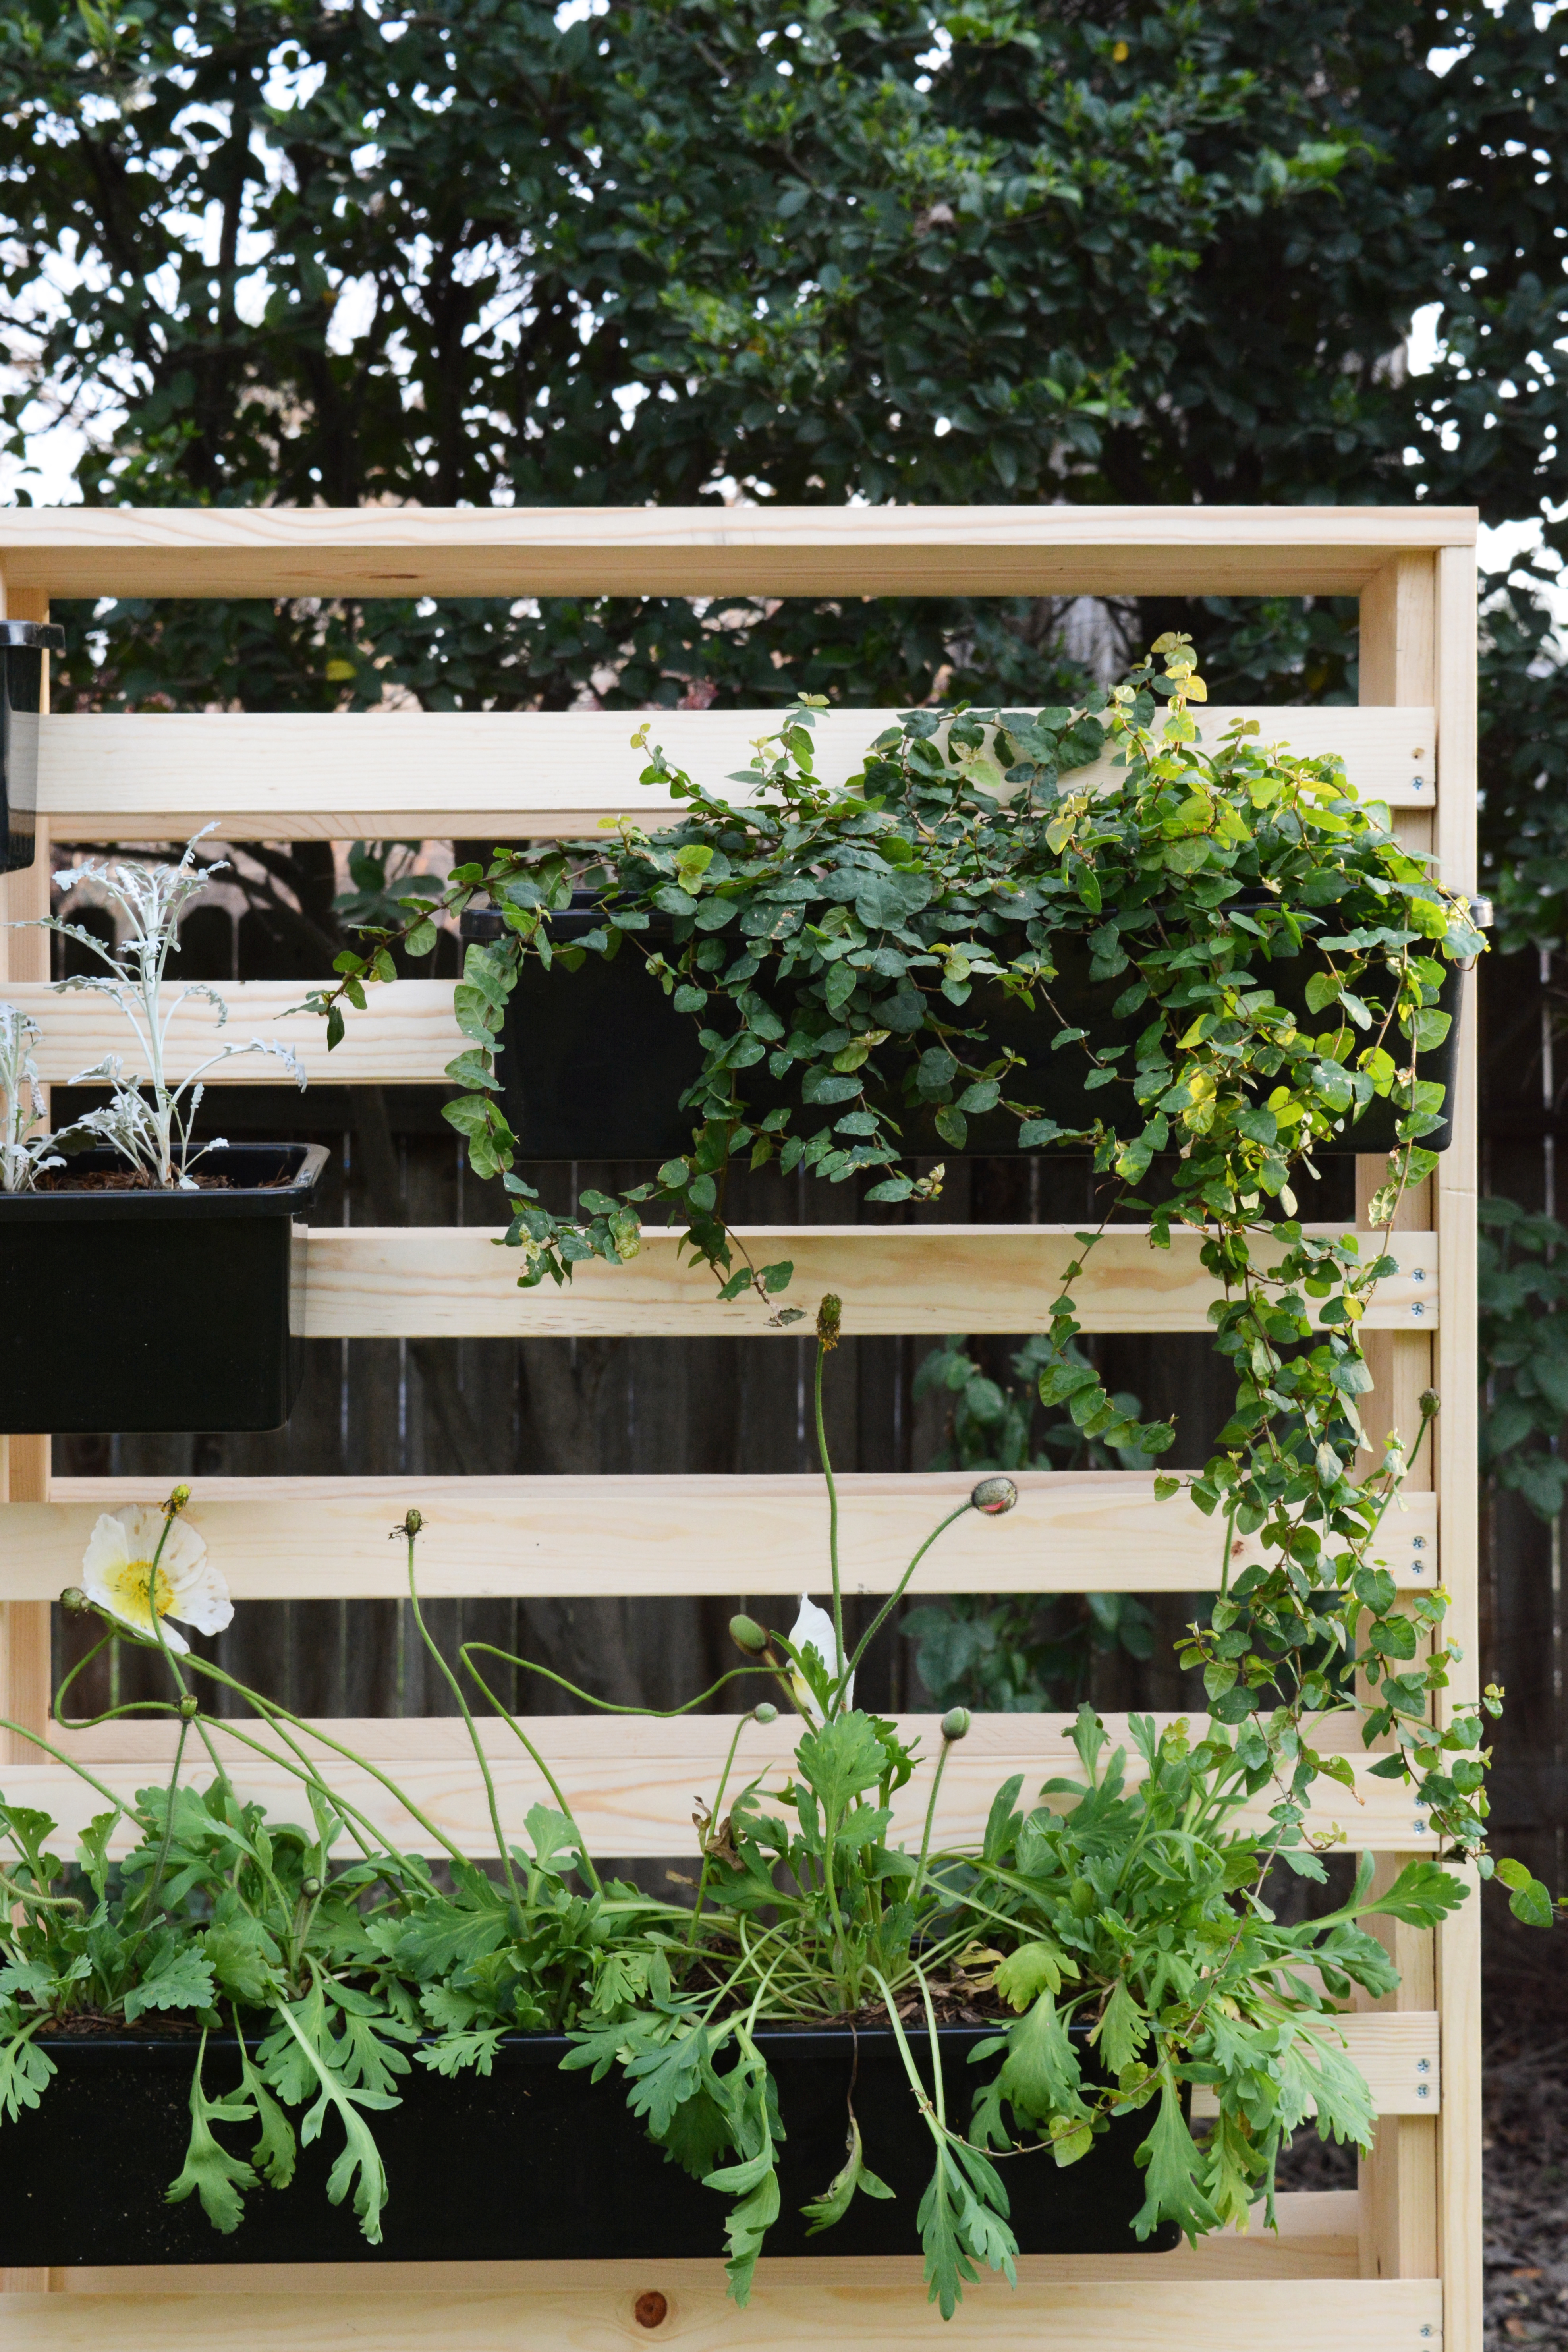
I am including a pattern with all the dimensions to help you visualize all the cuts and pieces for this project. We used inexpensive pine and just sealed it with an outdoor sealer to protect it from the elements. But this could be painted or stained, we just loved to Scandinavian feel of light wood. Bold black planters paired with the light wood created a nice contrast.
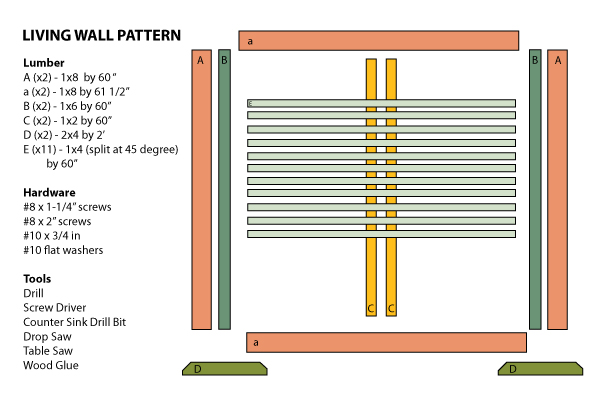
Start by glueing and screwing the frame of the wall together first. Pre-drill and attach ‘B’ to ‘A’ and then screw both pieces of ‘a’ to the top and bottom. Use the 2″ screws for assembling the frame.
Next attach ‘C’ in the center of both sides. Use the 1-1/4″ screws to attach these supports.
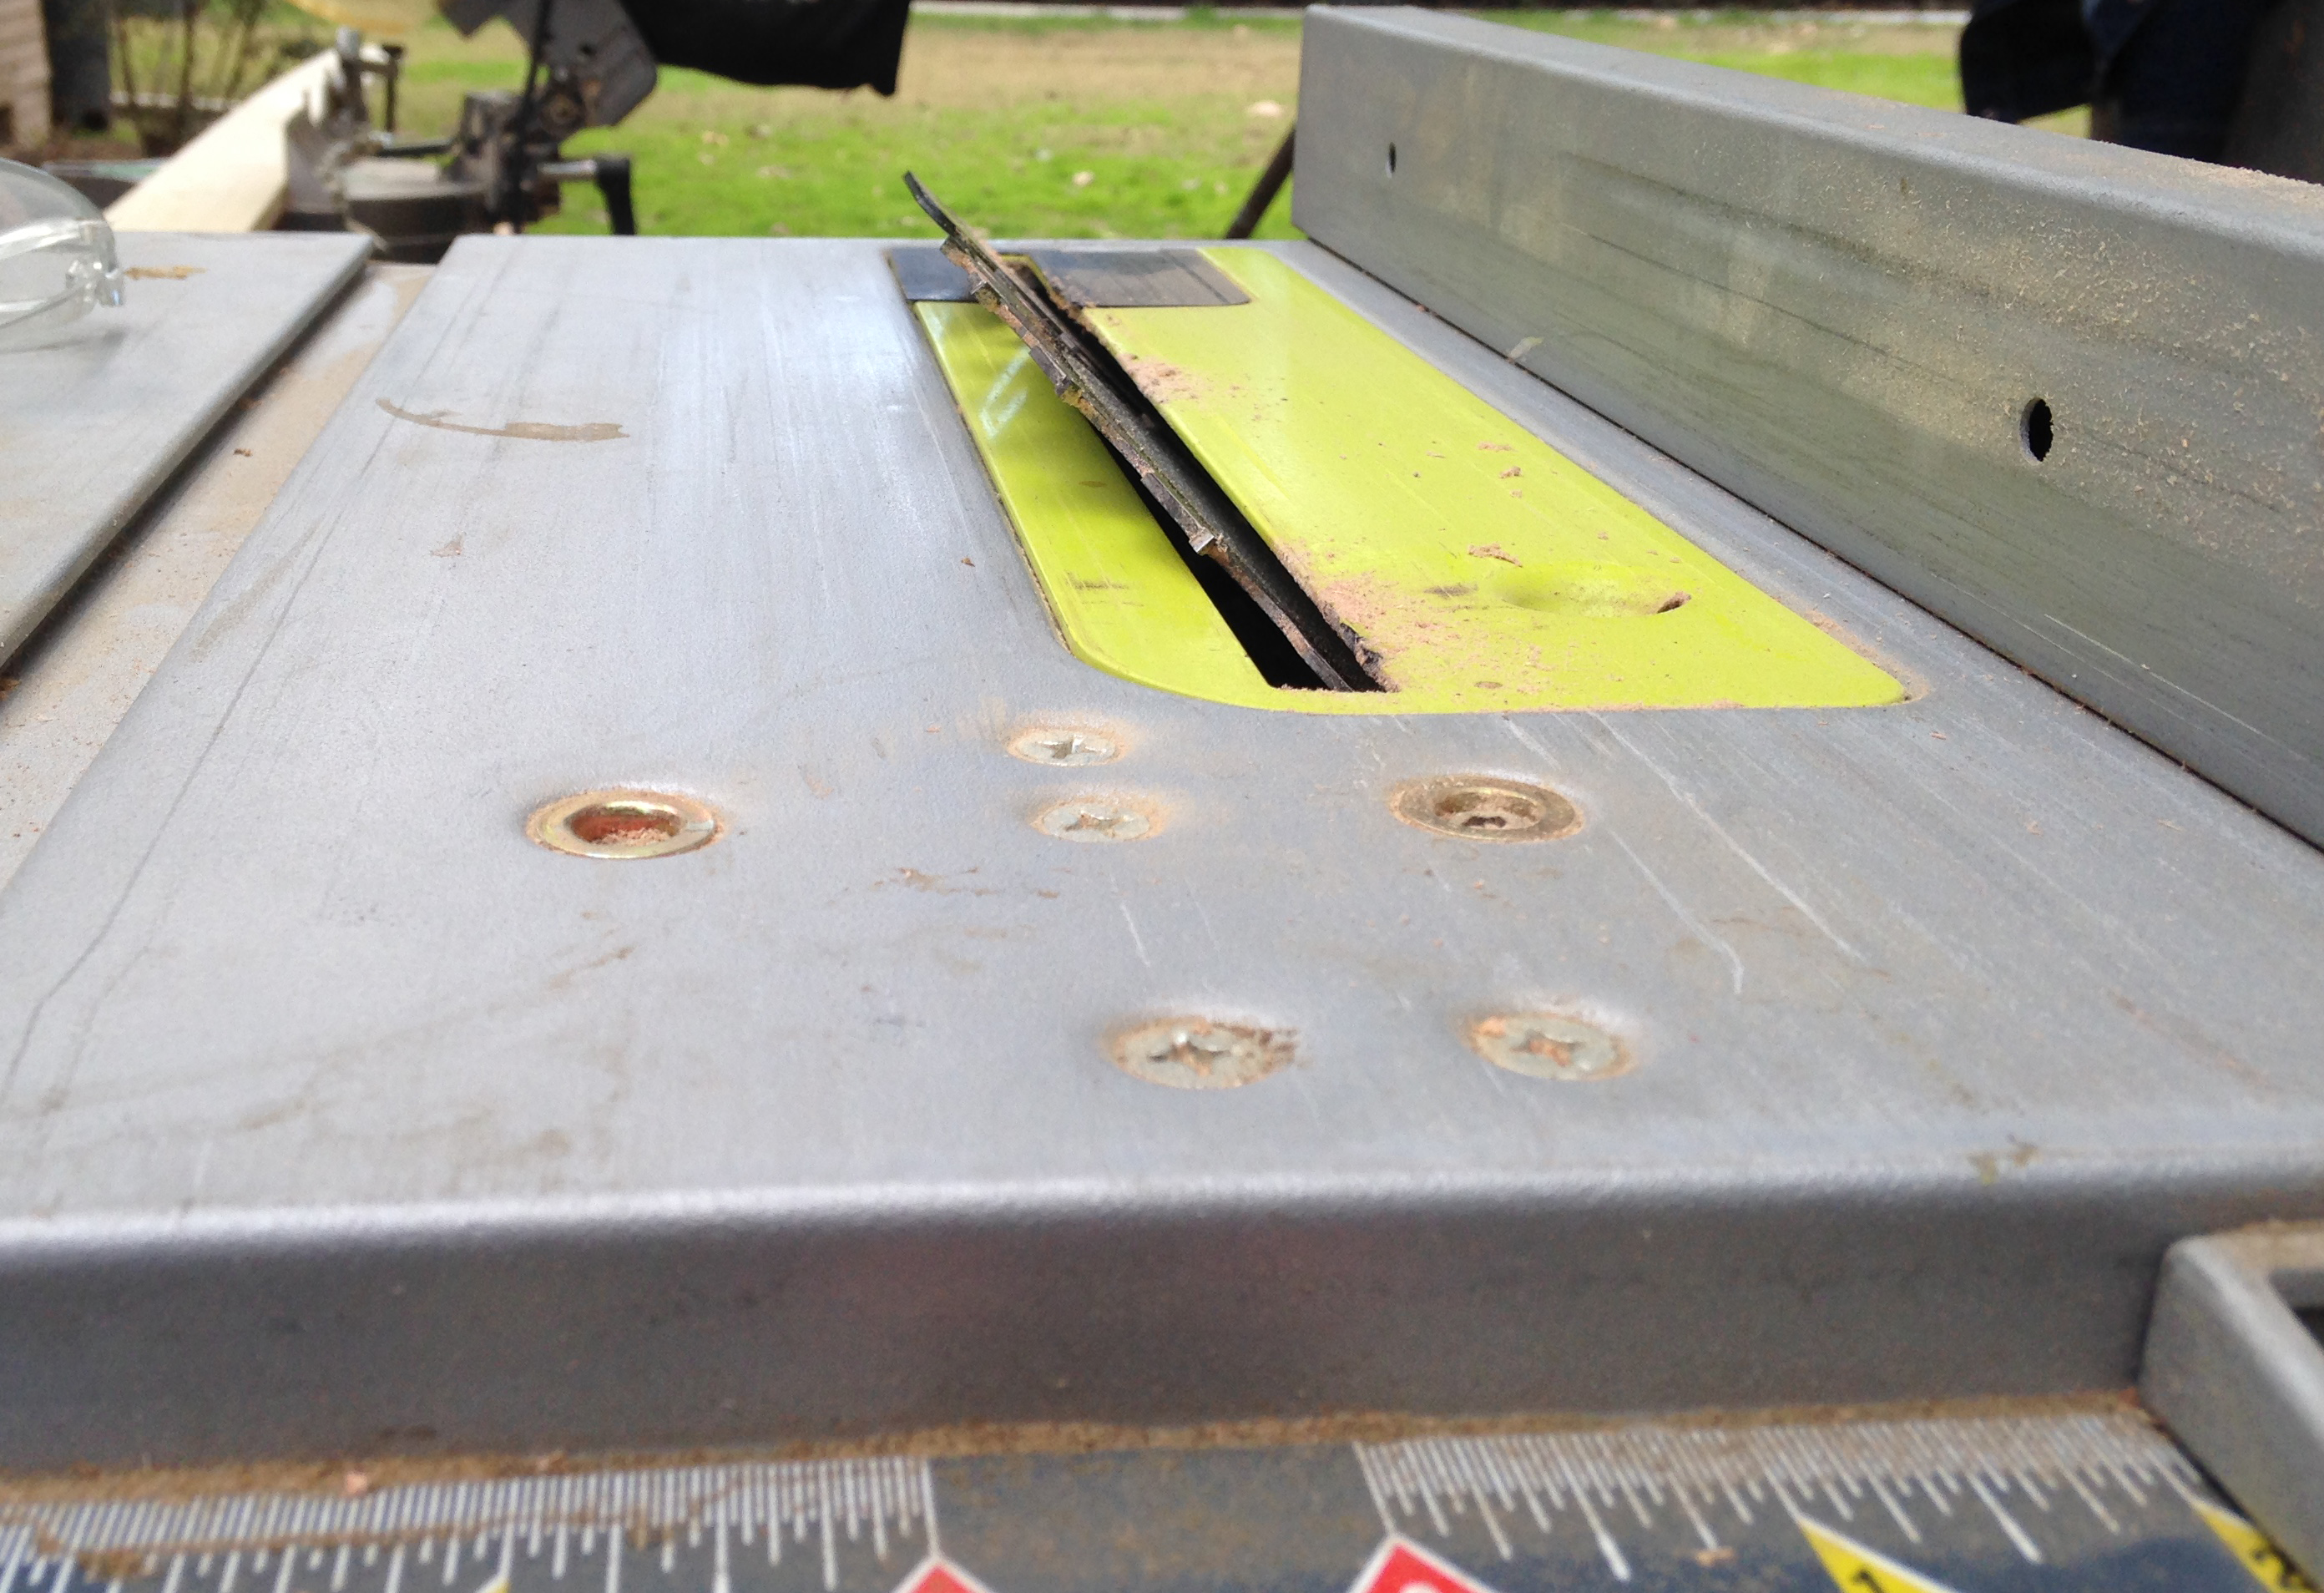
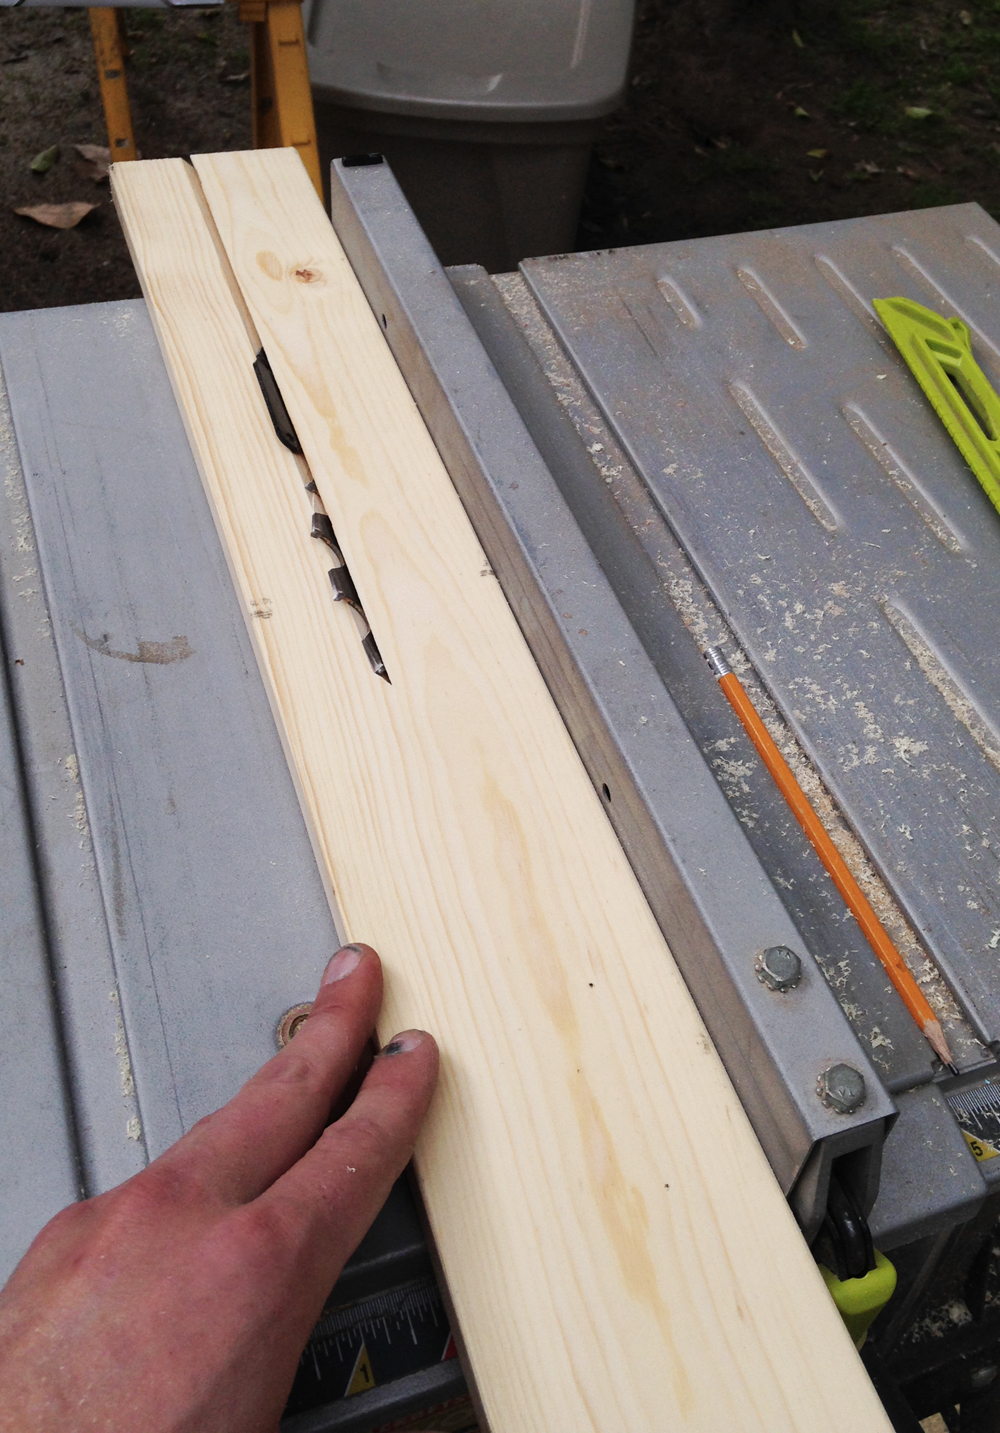
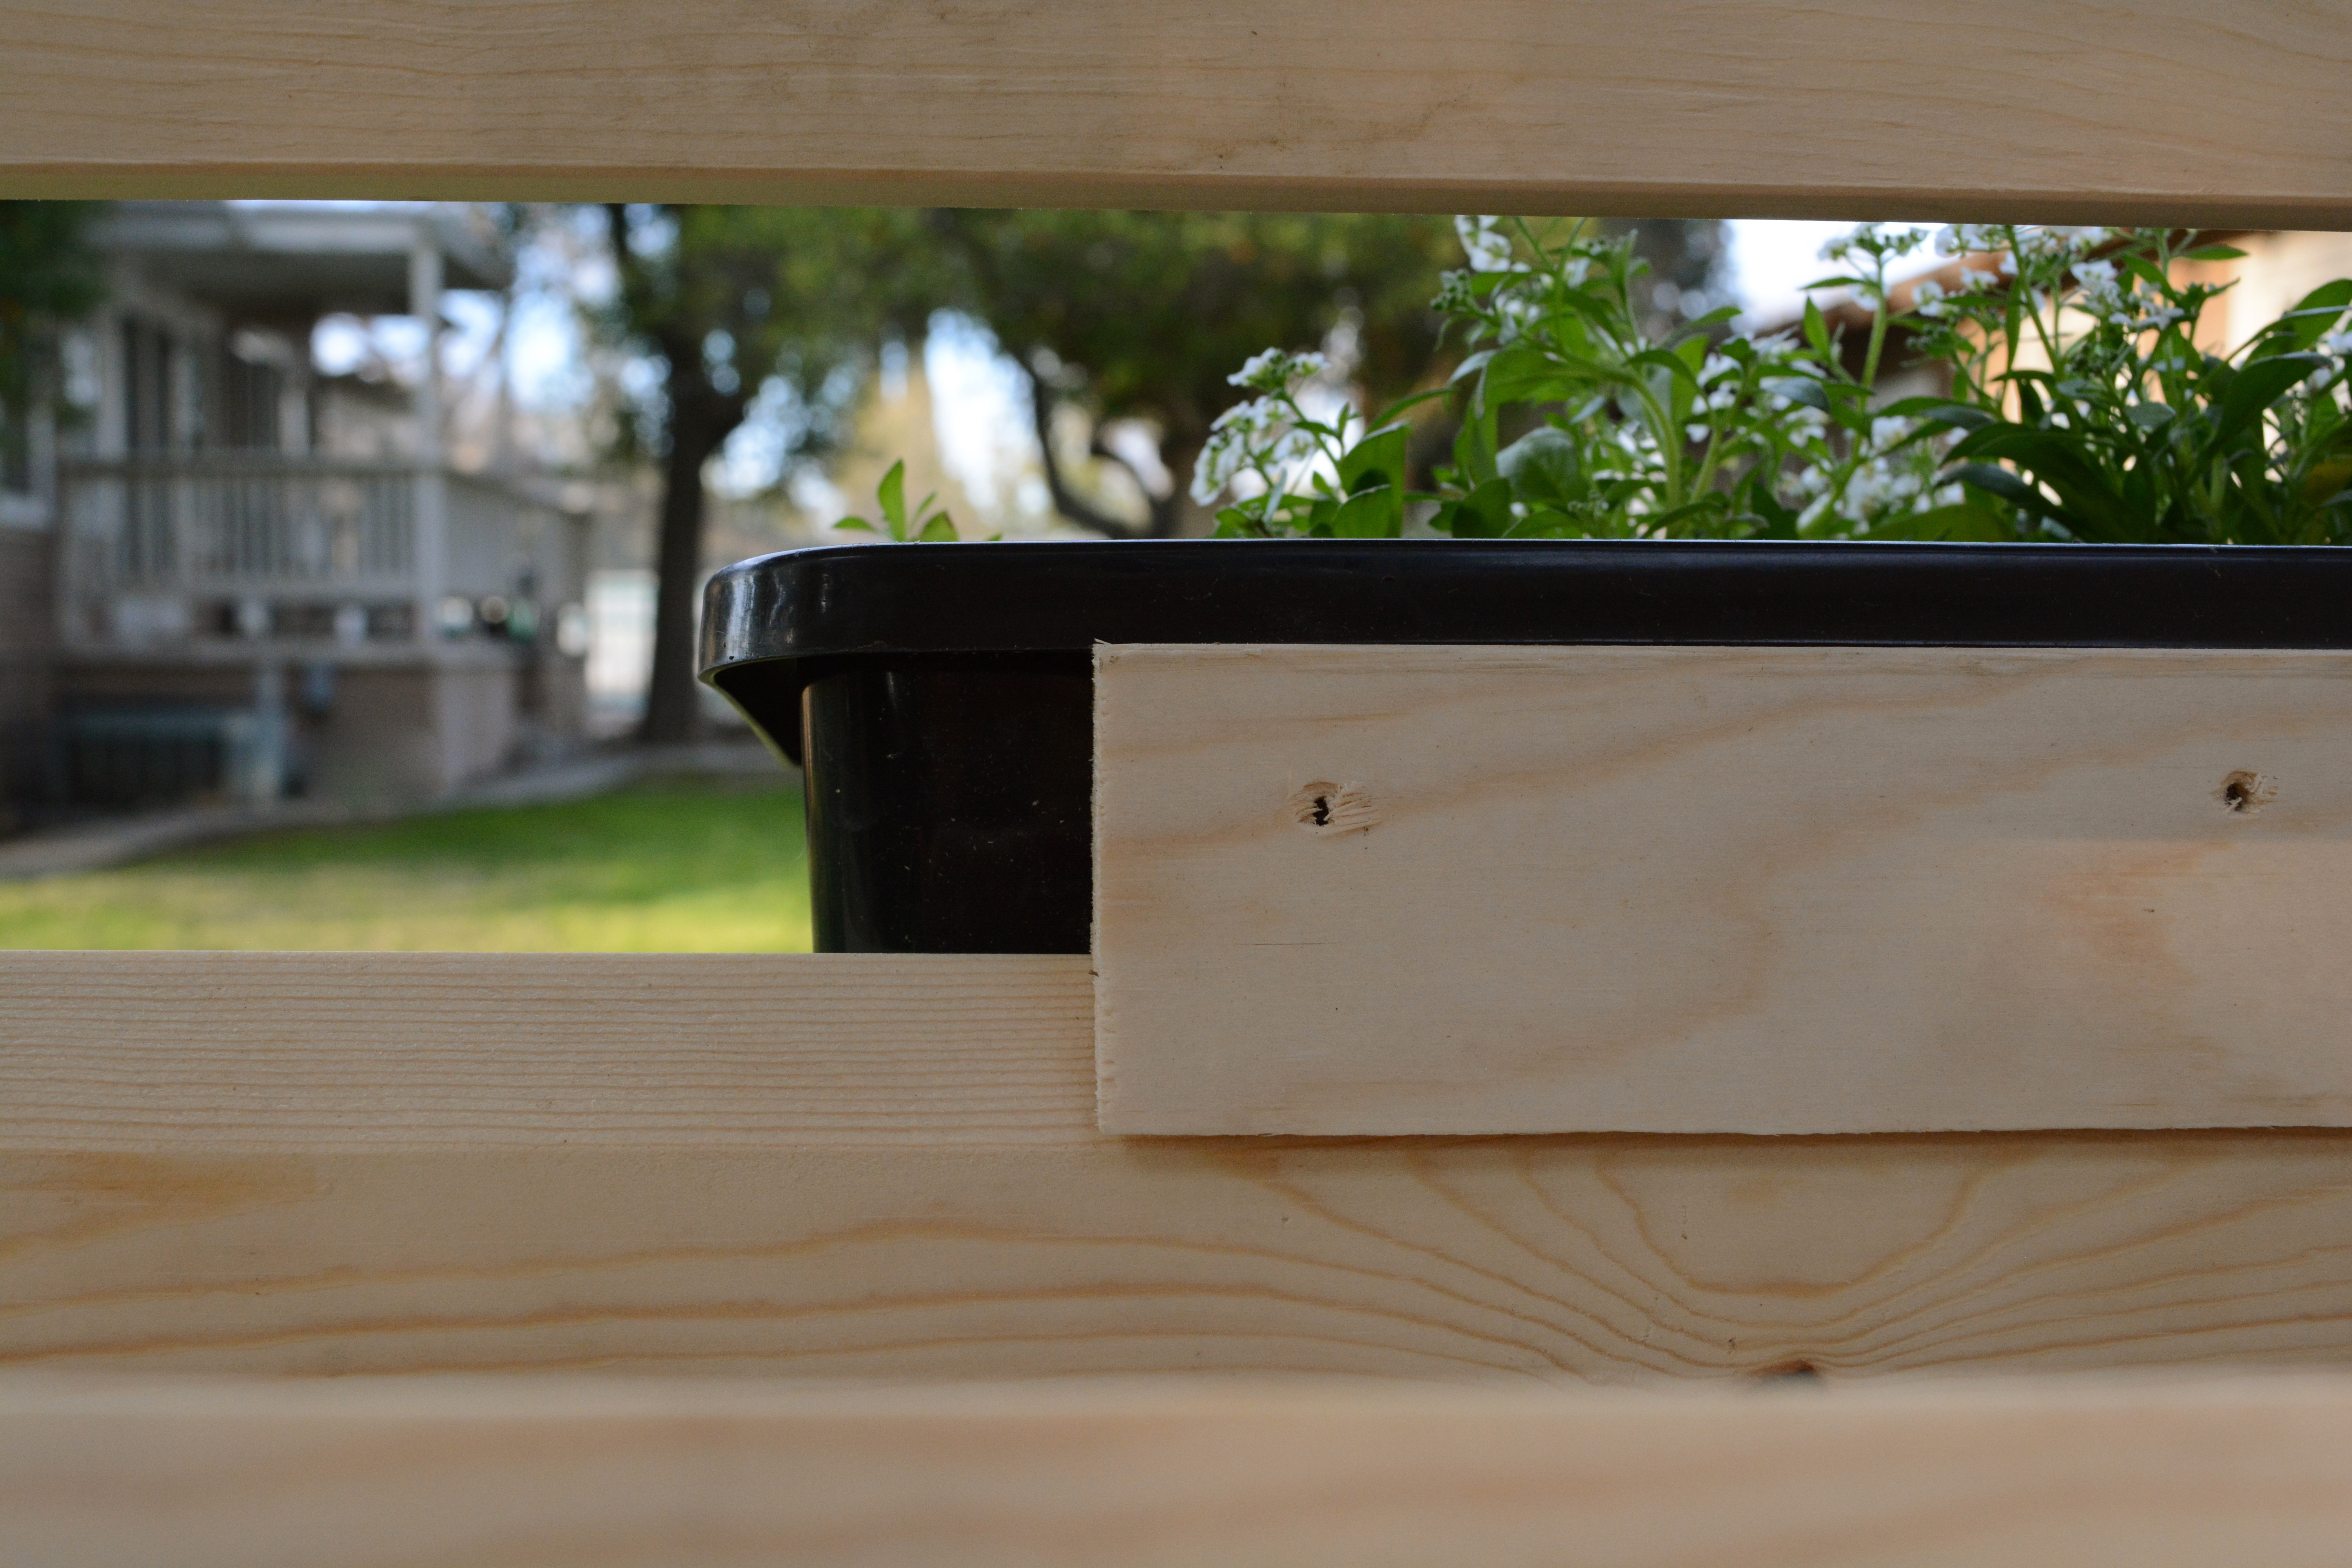
For the horizontal slats, you will need to cut the 1×4″ pieces cut down the center at a 45 degree angle using a table saw. You will need 22 total, each 5 ft. long. Space these slats 6 inches apart from each other. Pre-drill with a counter sink bit, and attach them to the frame with 1-1/4″ screws, 6 screws for each slat. Screw two in the center and two on each end of the slat.
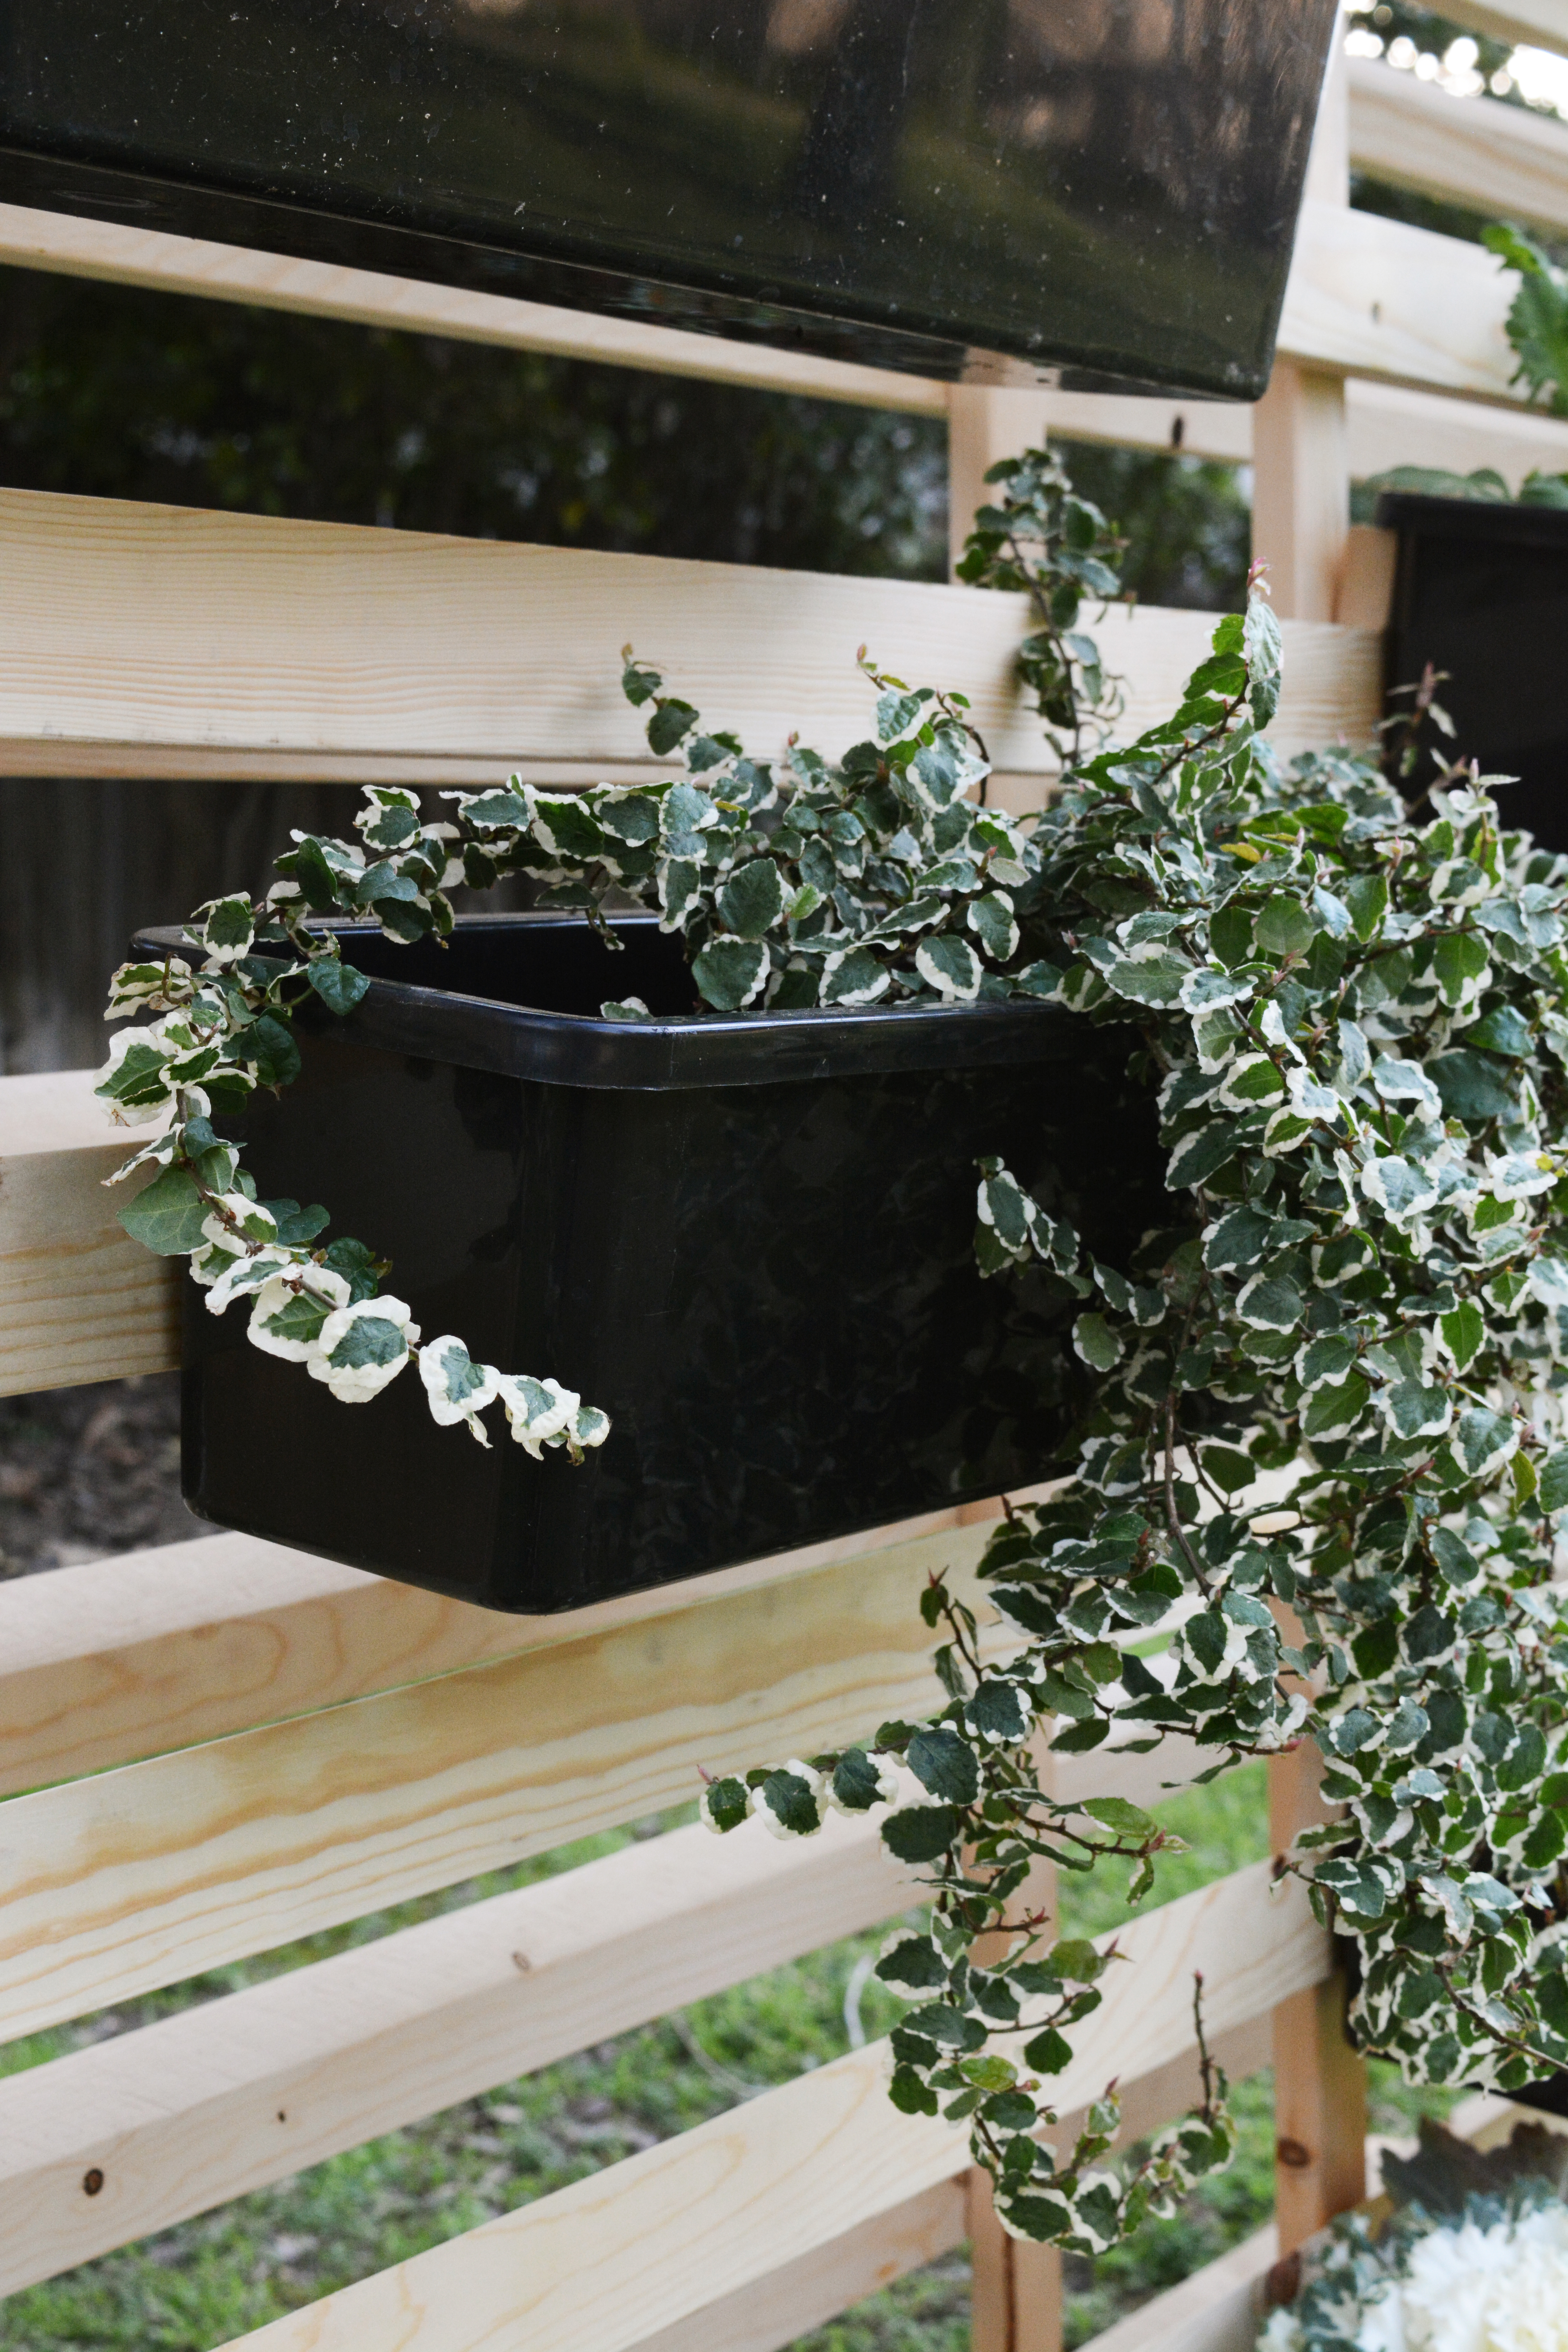
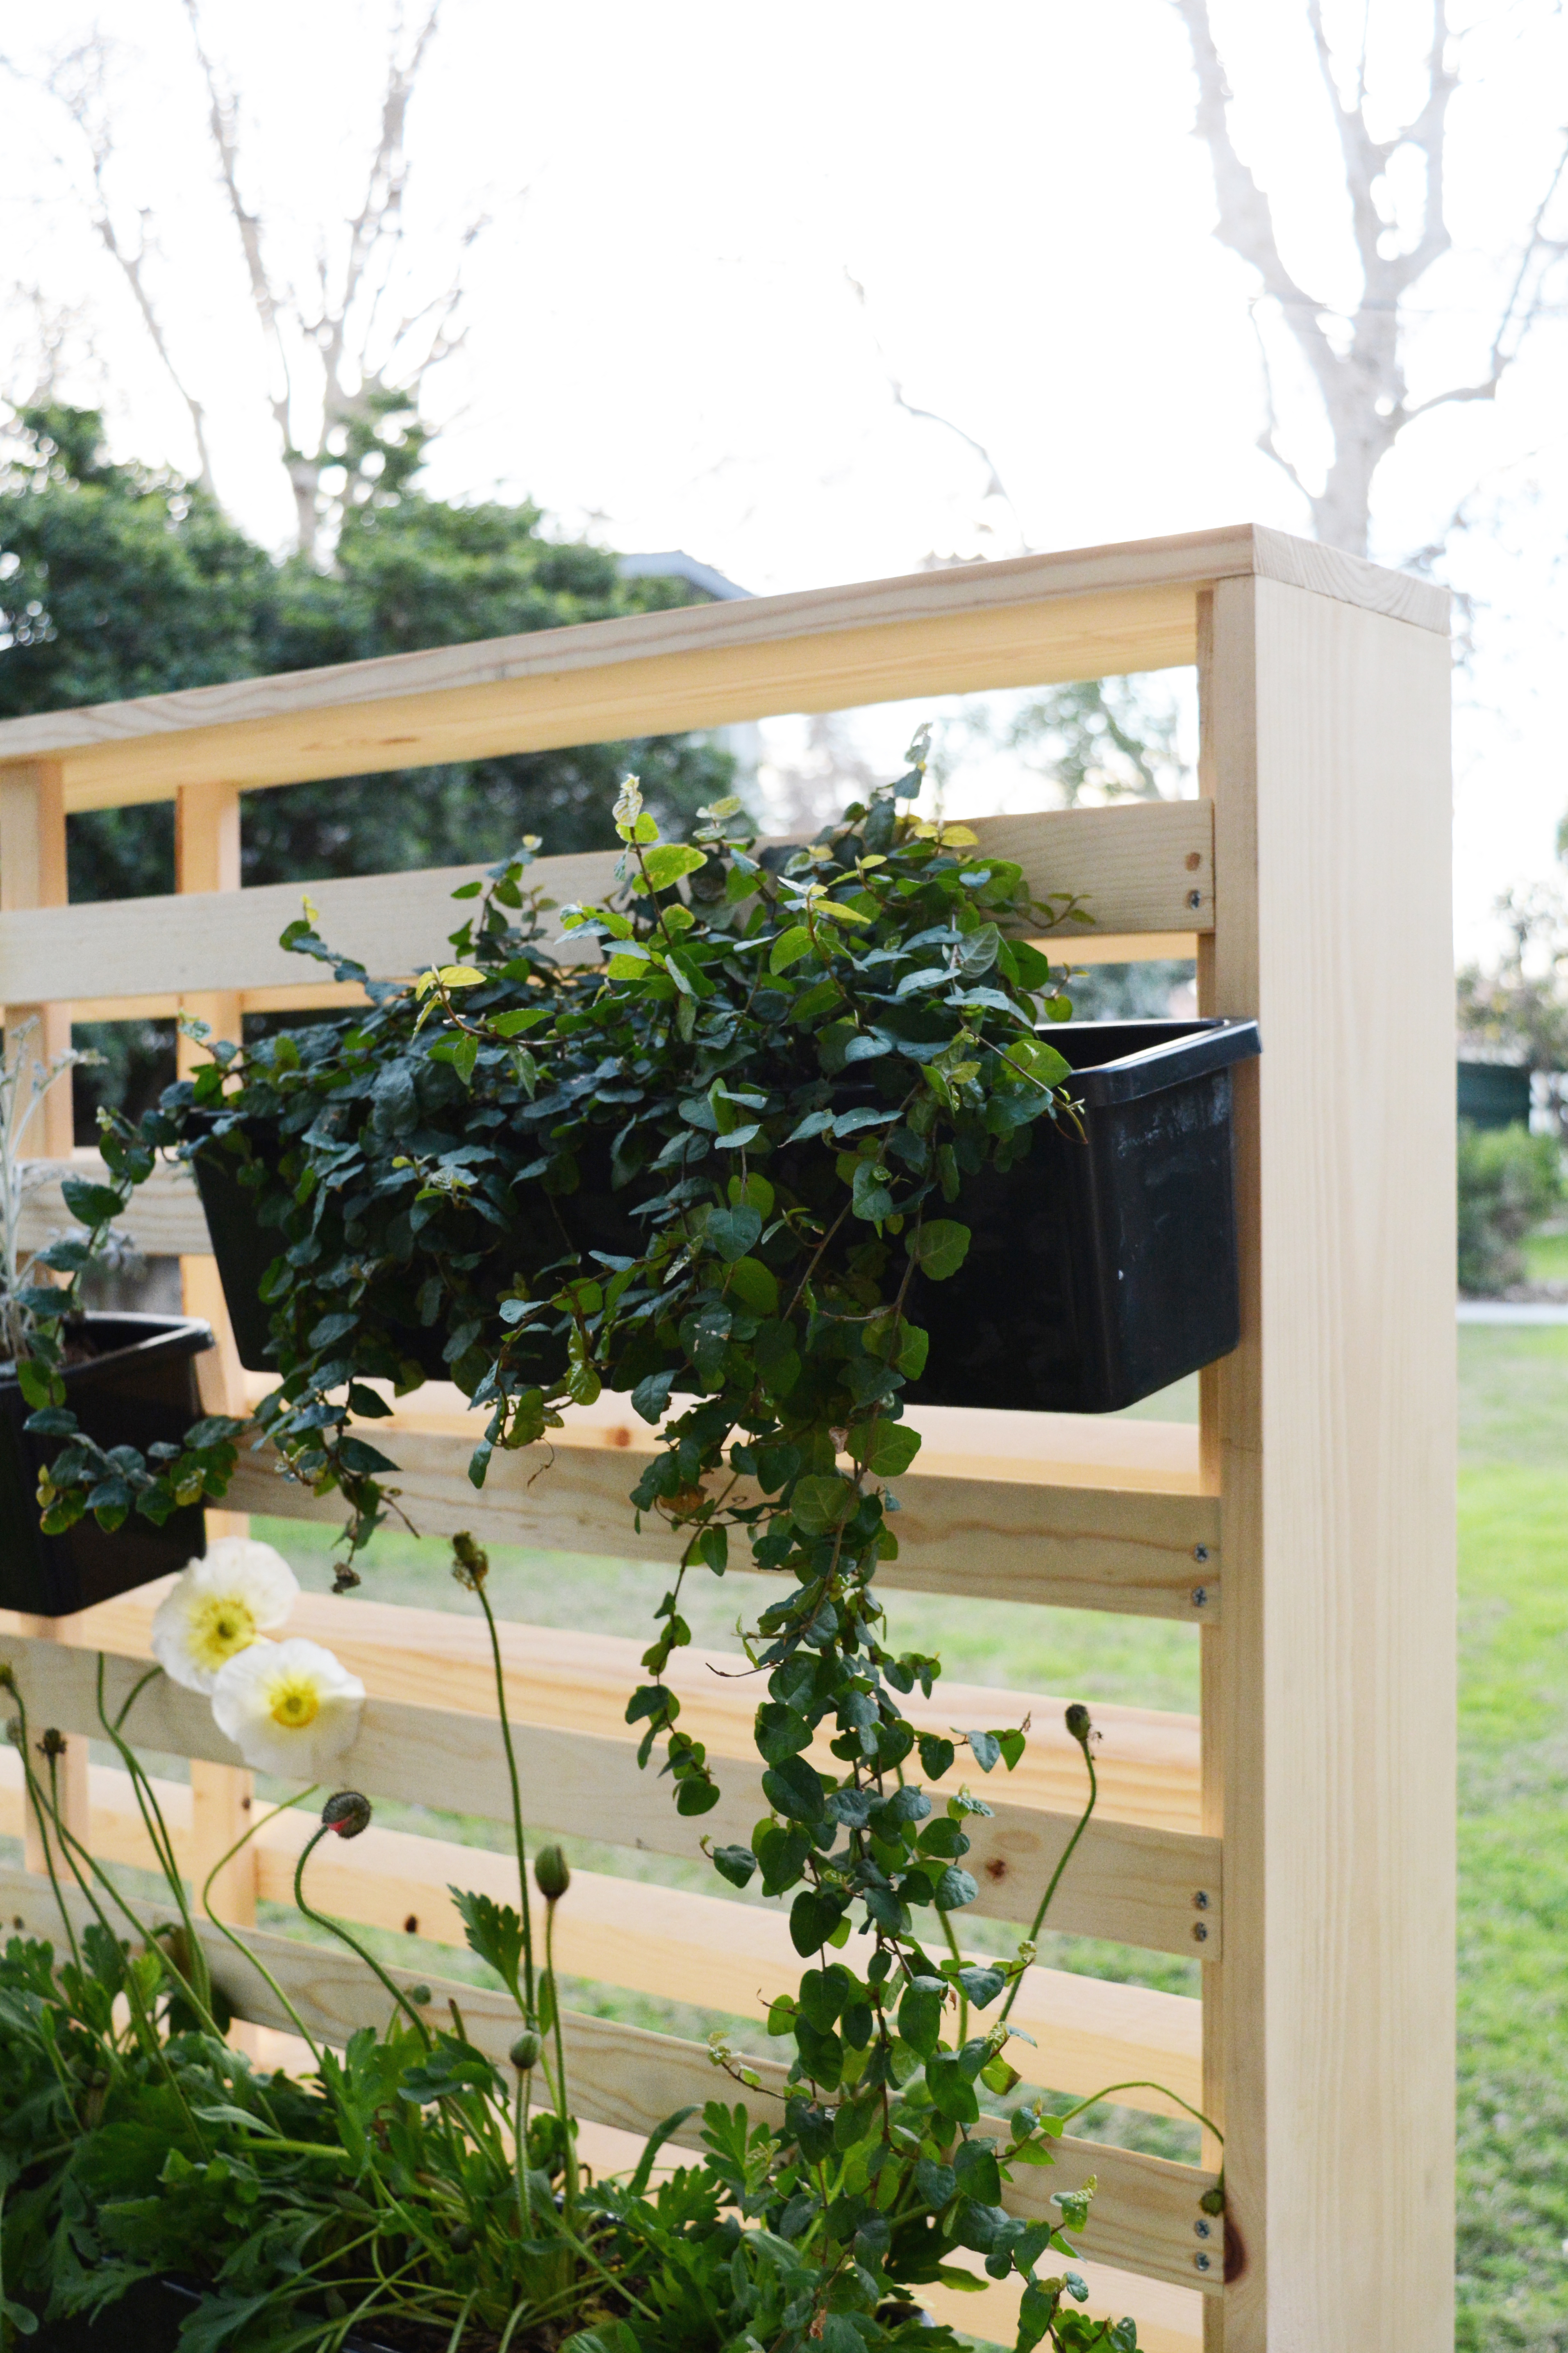
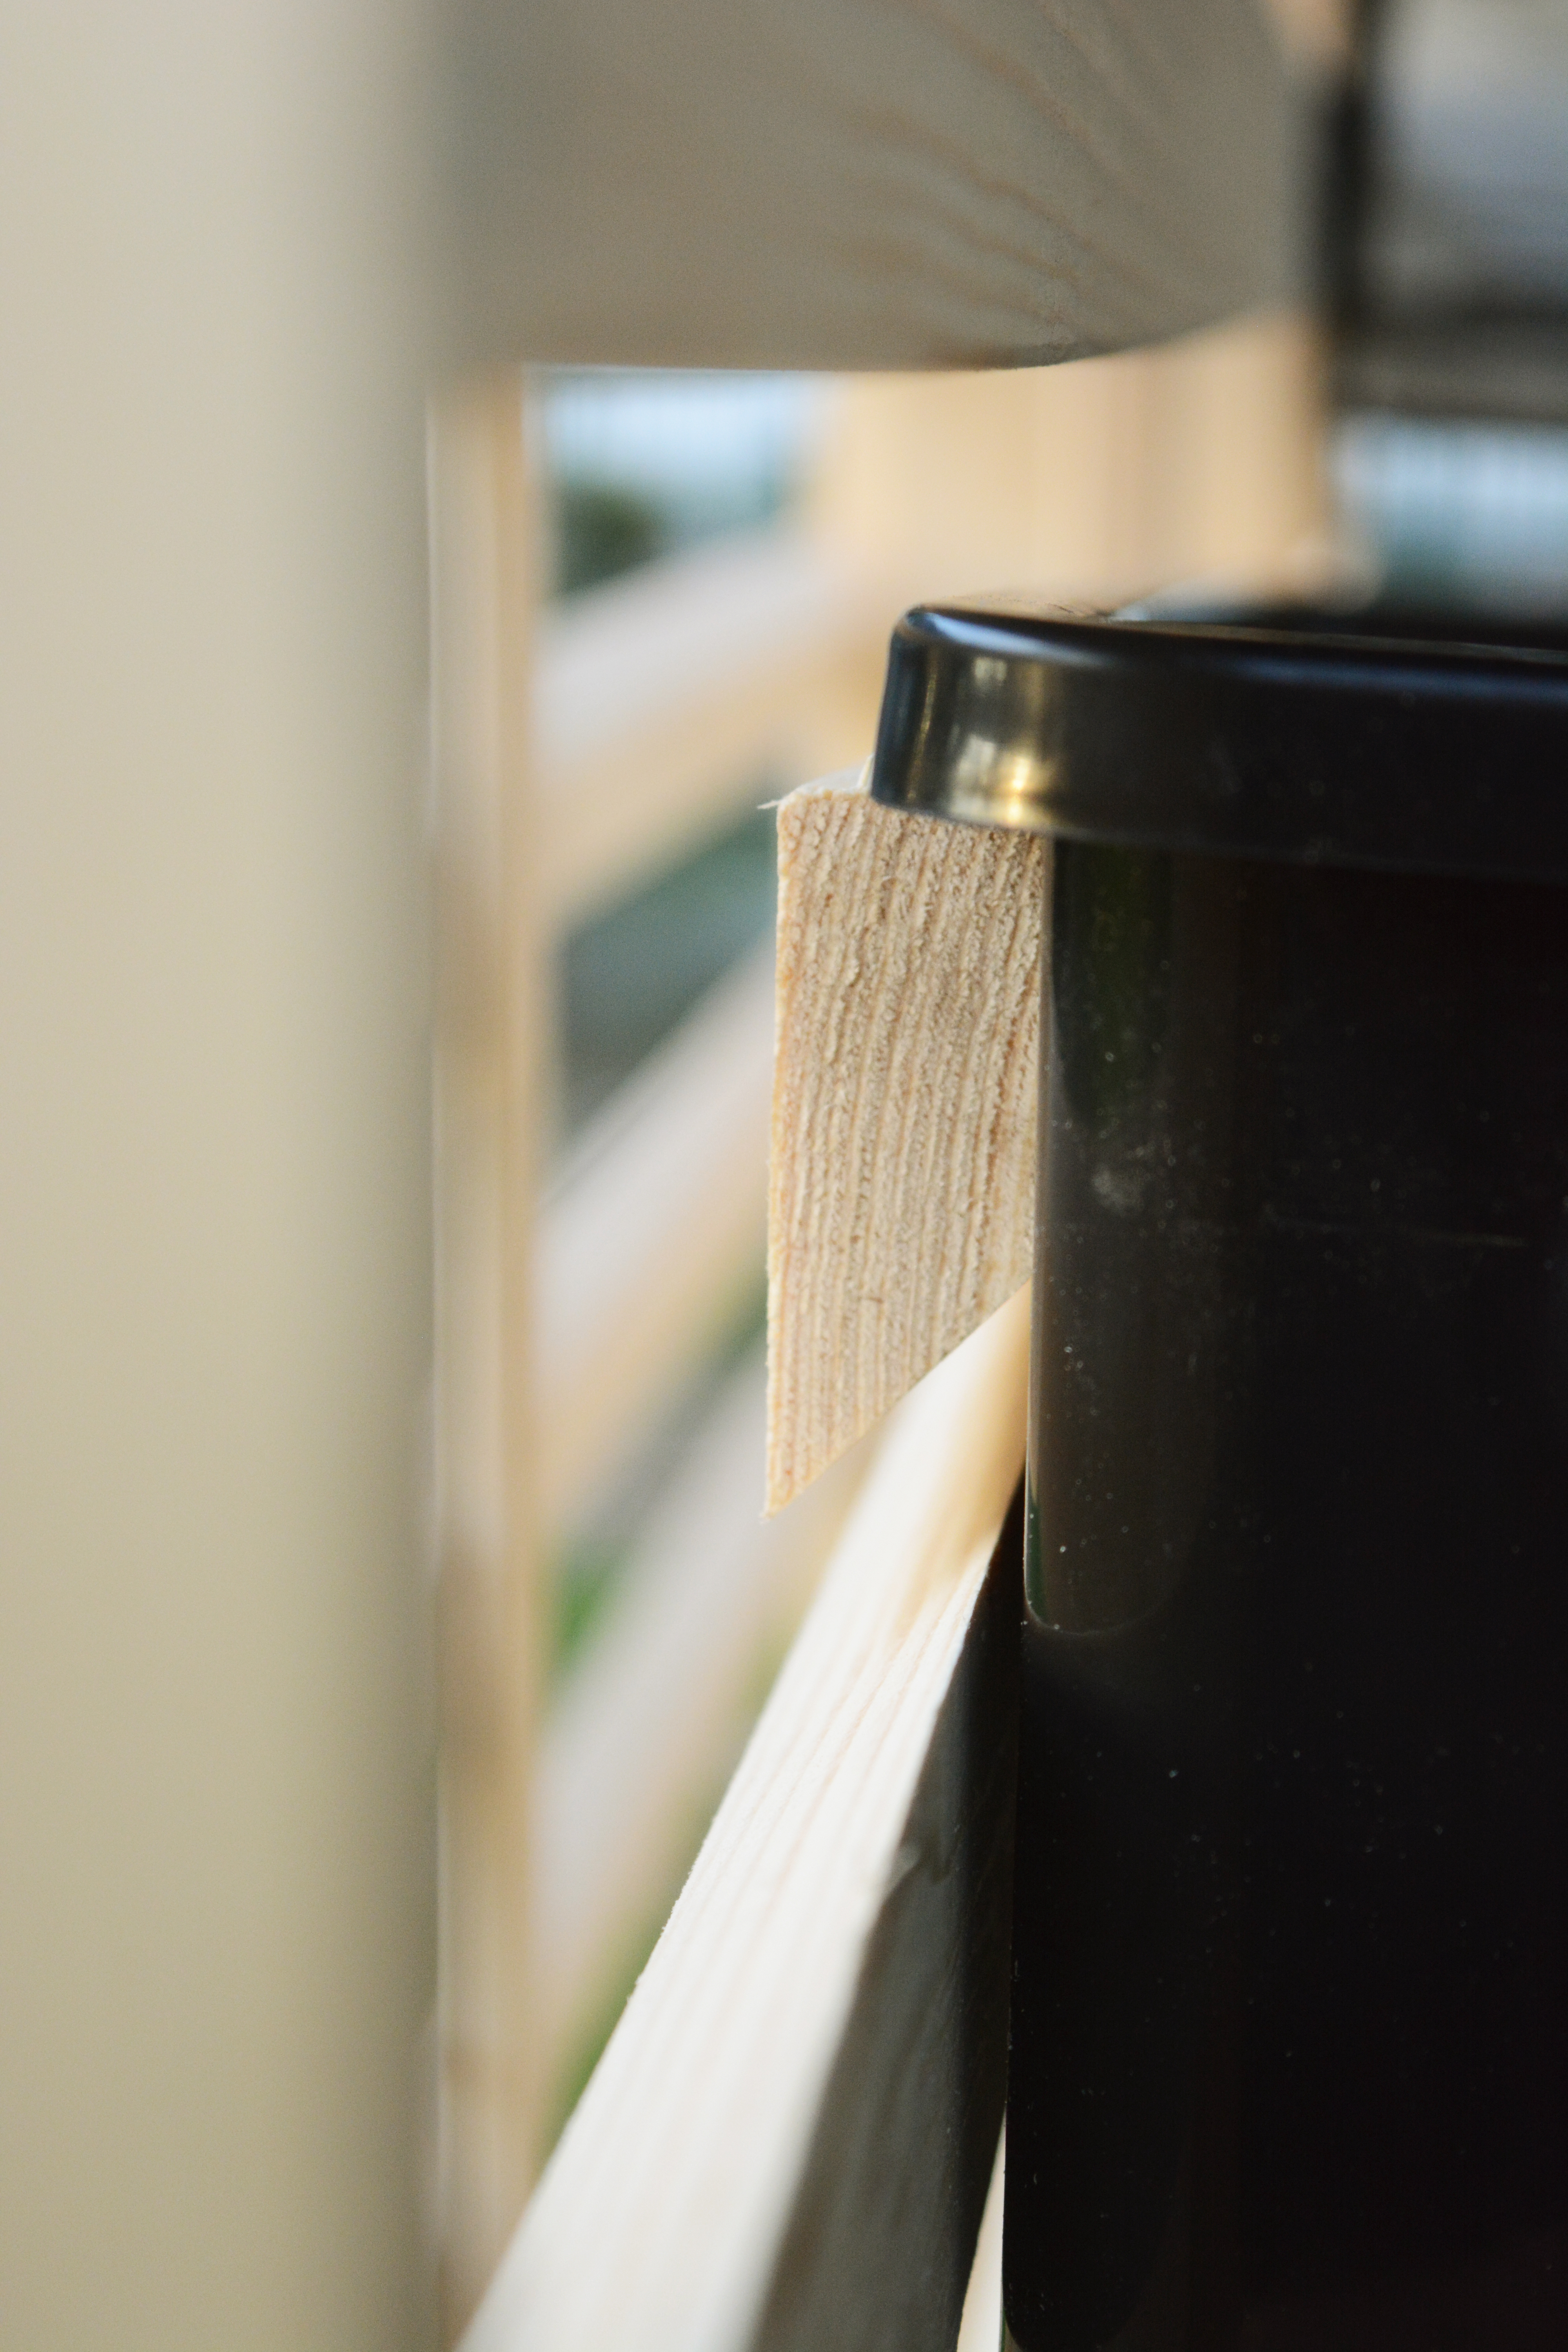
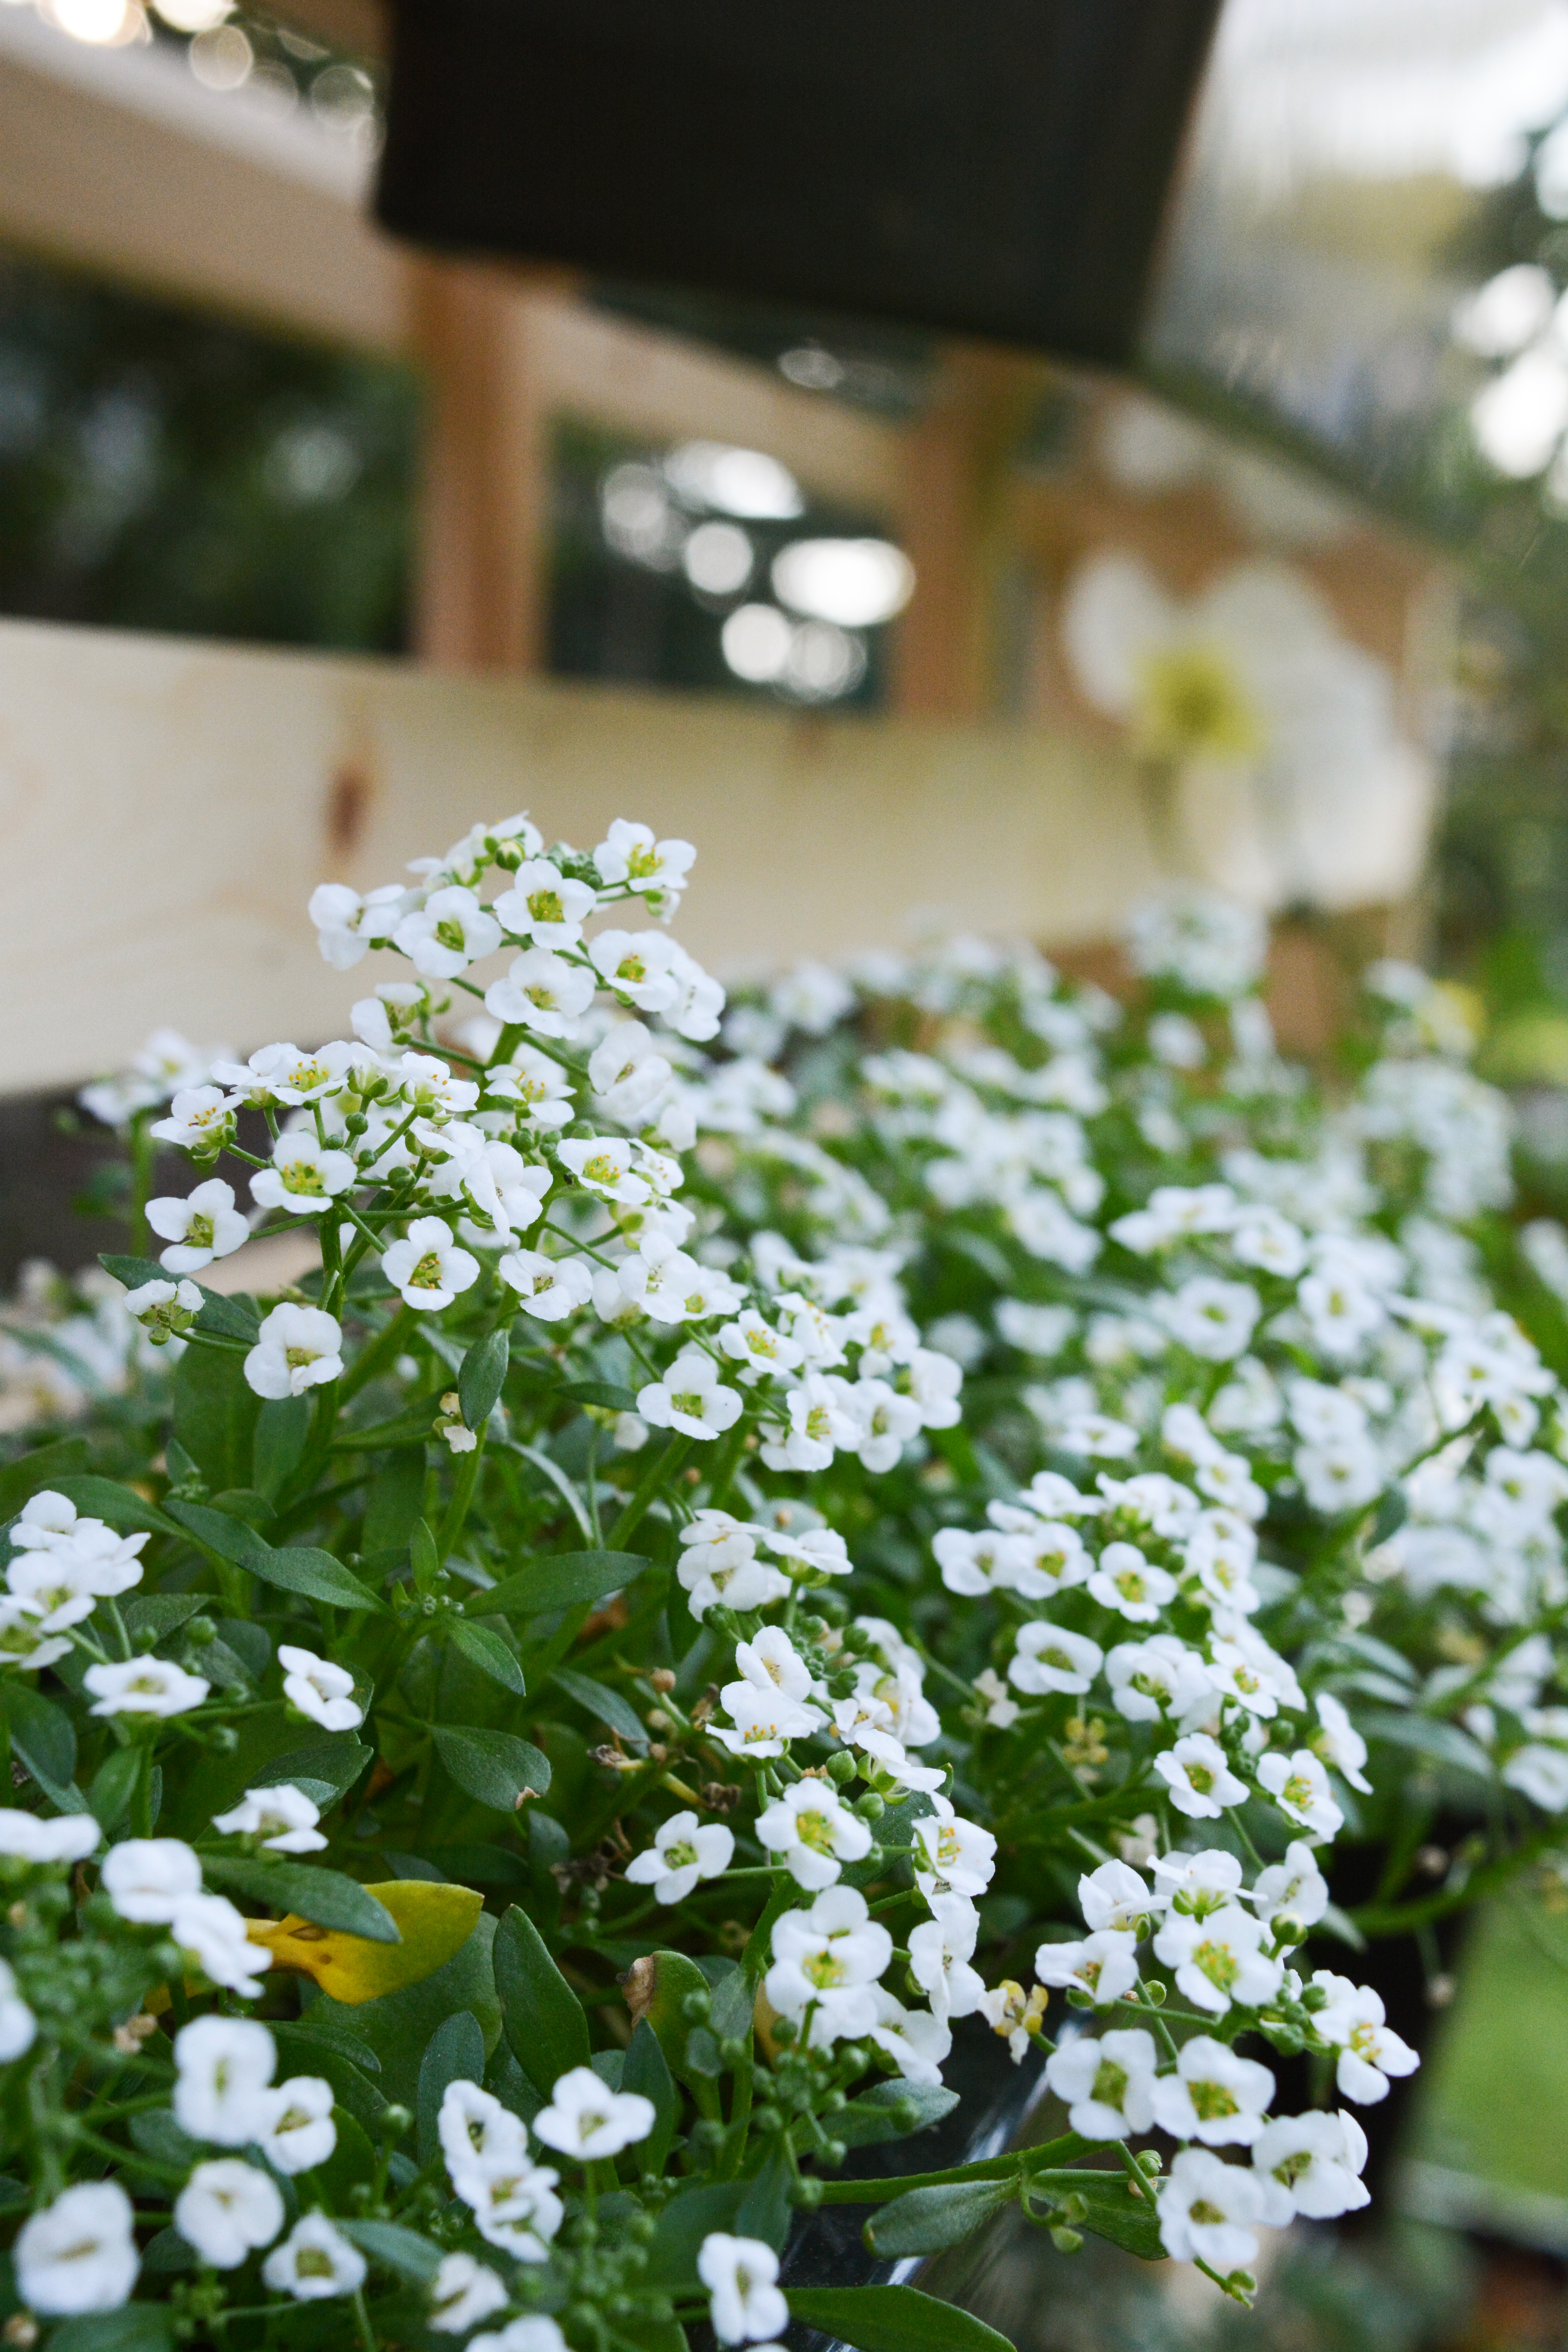
Now you will attach cleats to plastic planters. I chose to use inexpensive black plastic window box lines because I loved their simplicity and clean lines.
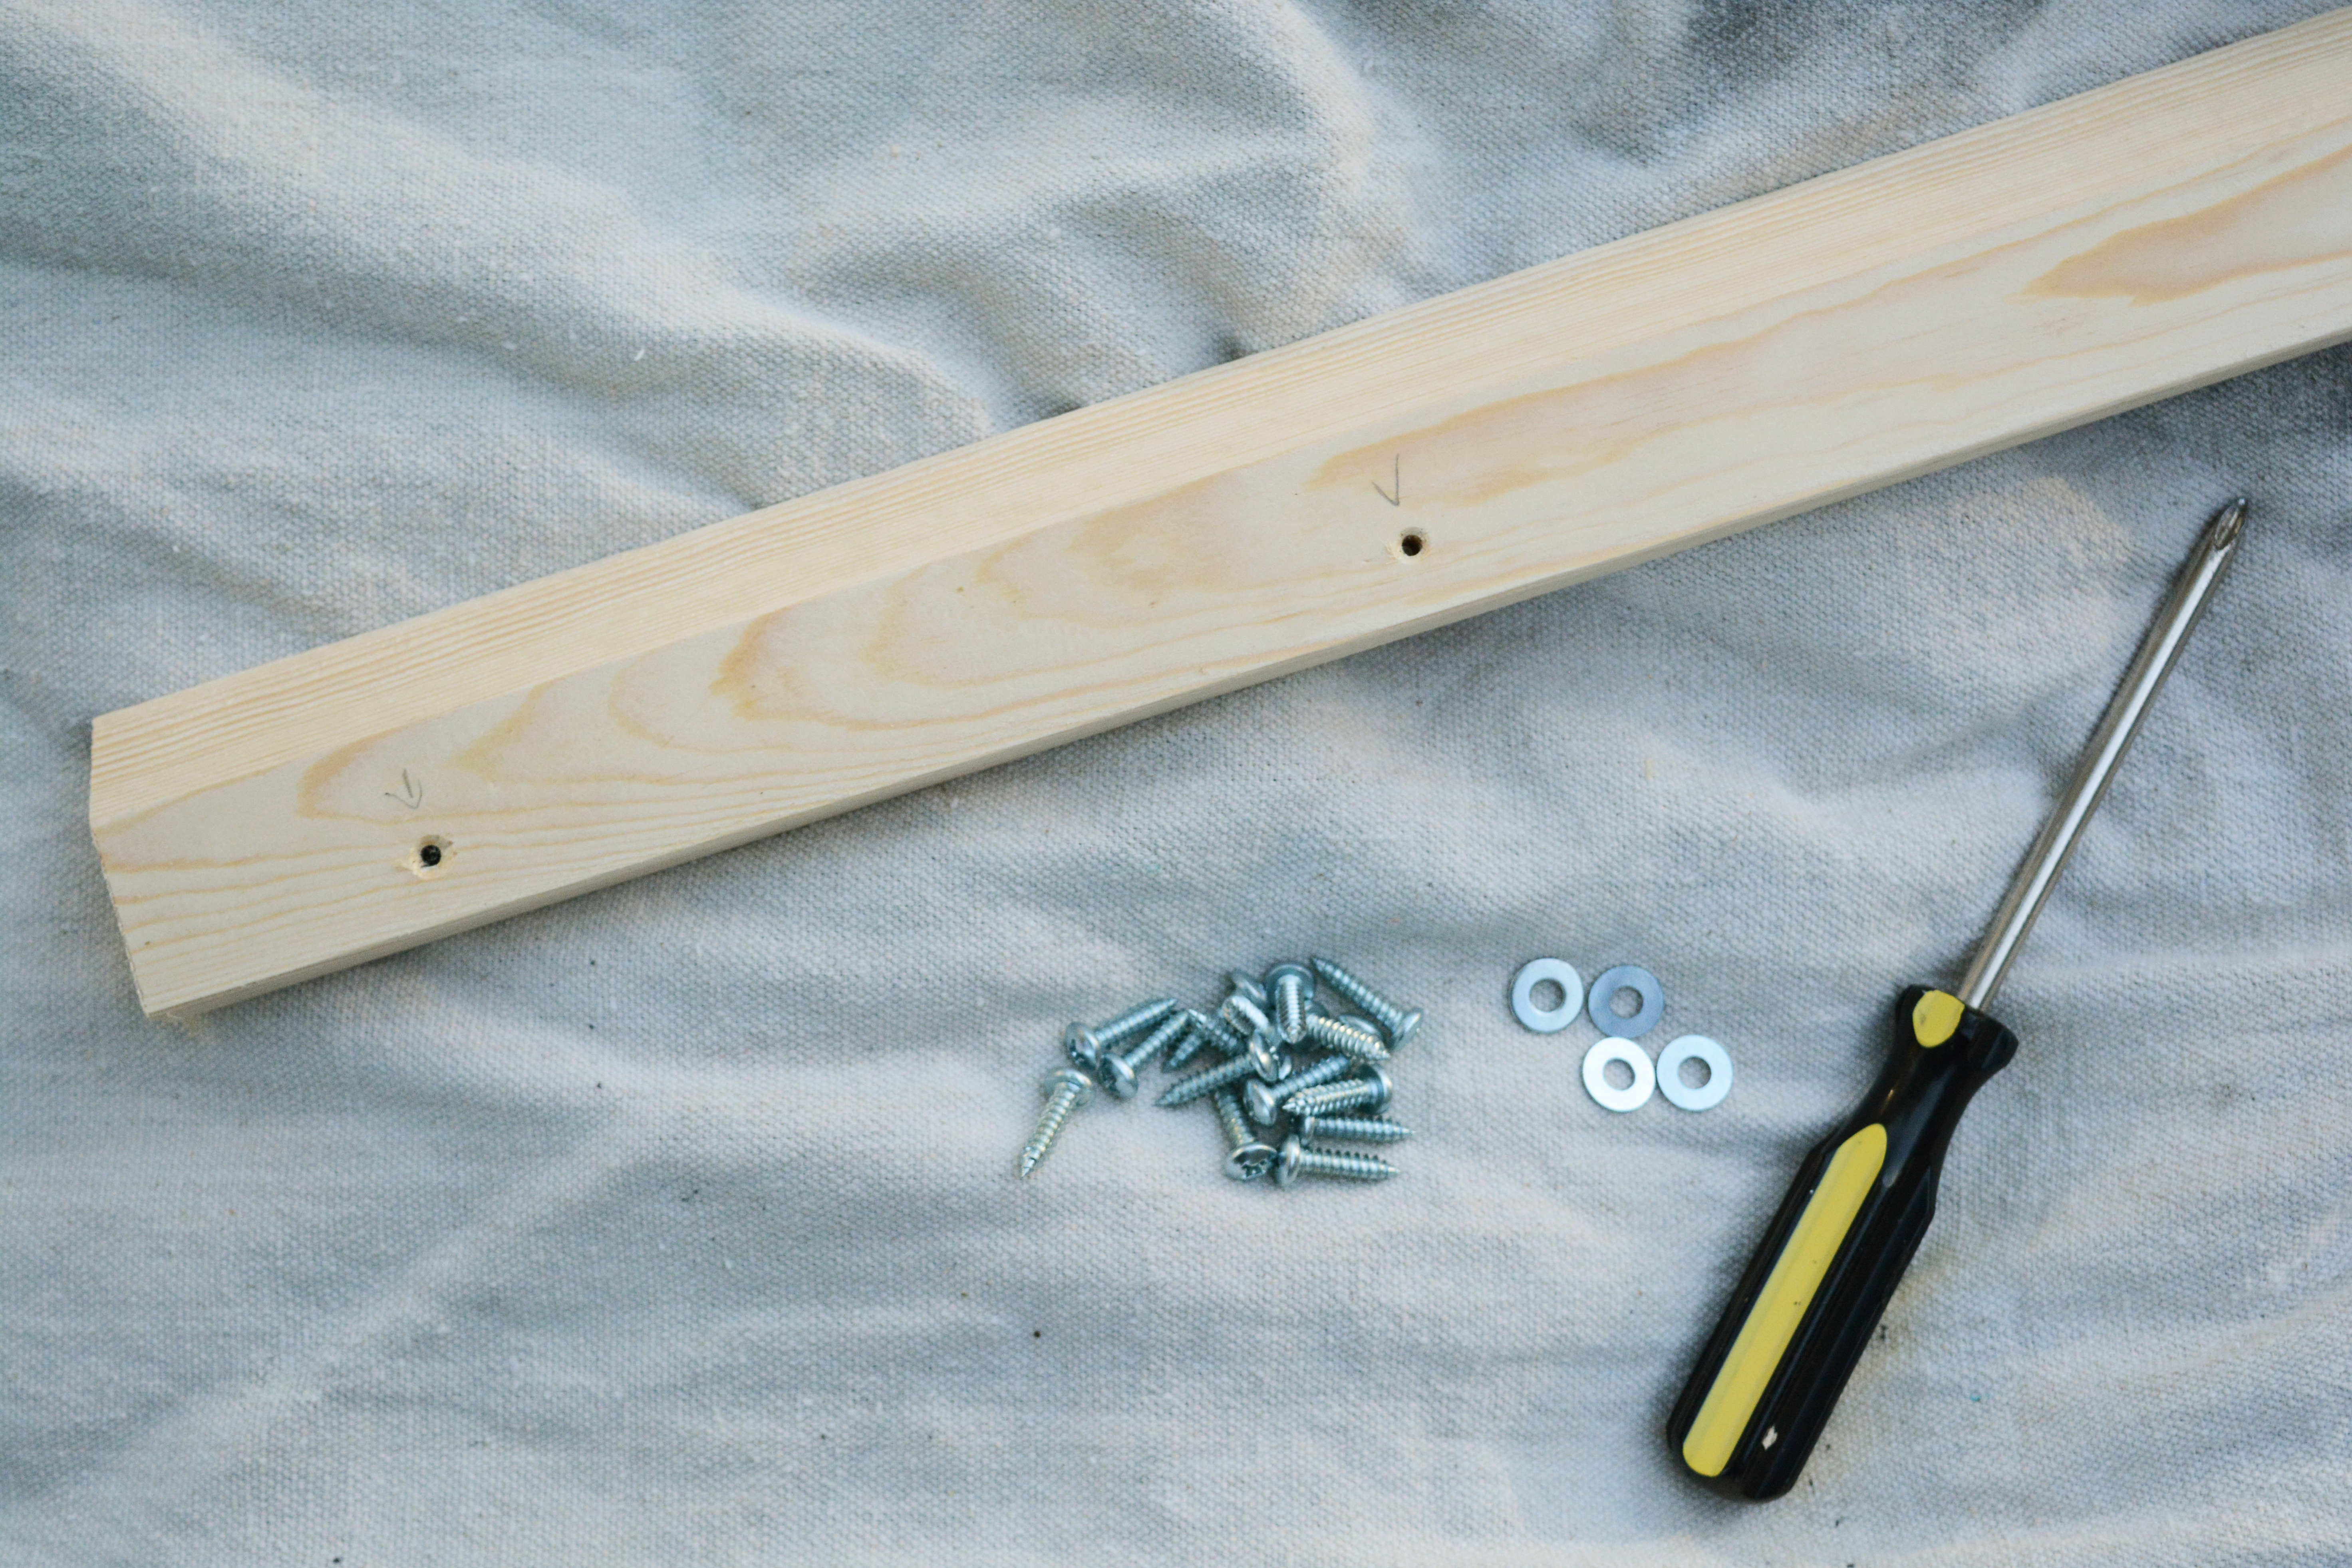
Cut extra lengths of the 45 degree angle slats. These will be cut the lengths of the plants that attached to backs in the opposite direction. Pre-drill the holes, starting 2 inches from the edge and spacing the screws no more then 6 inches apart.
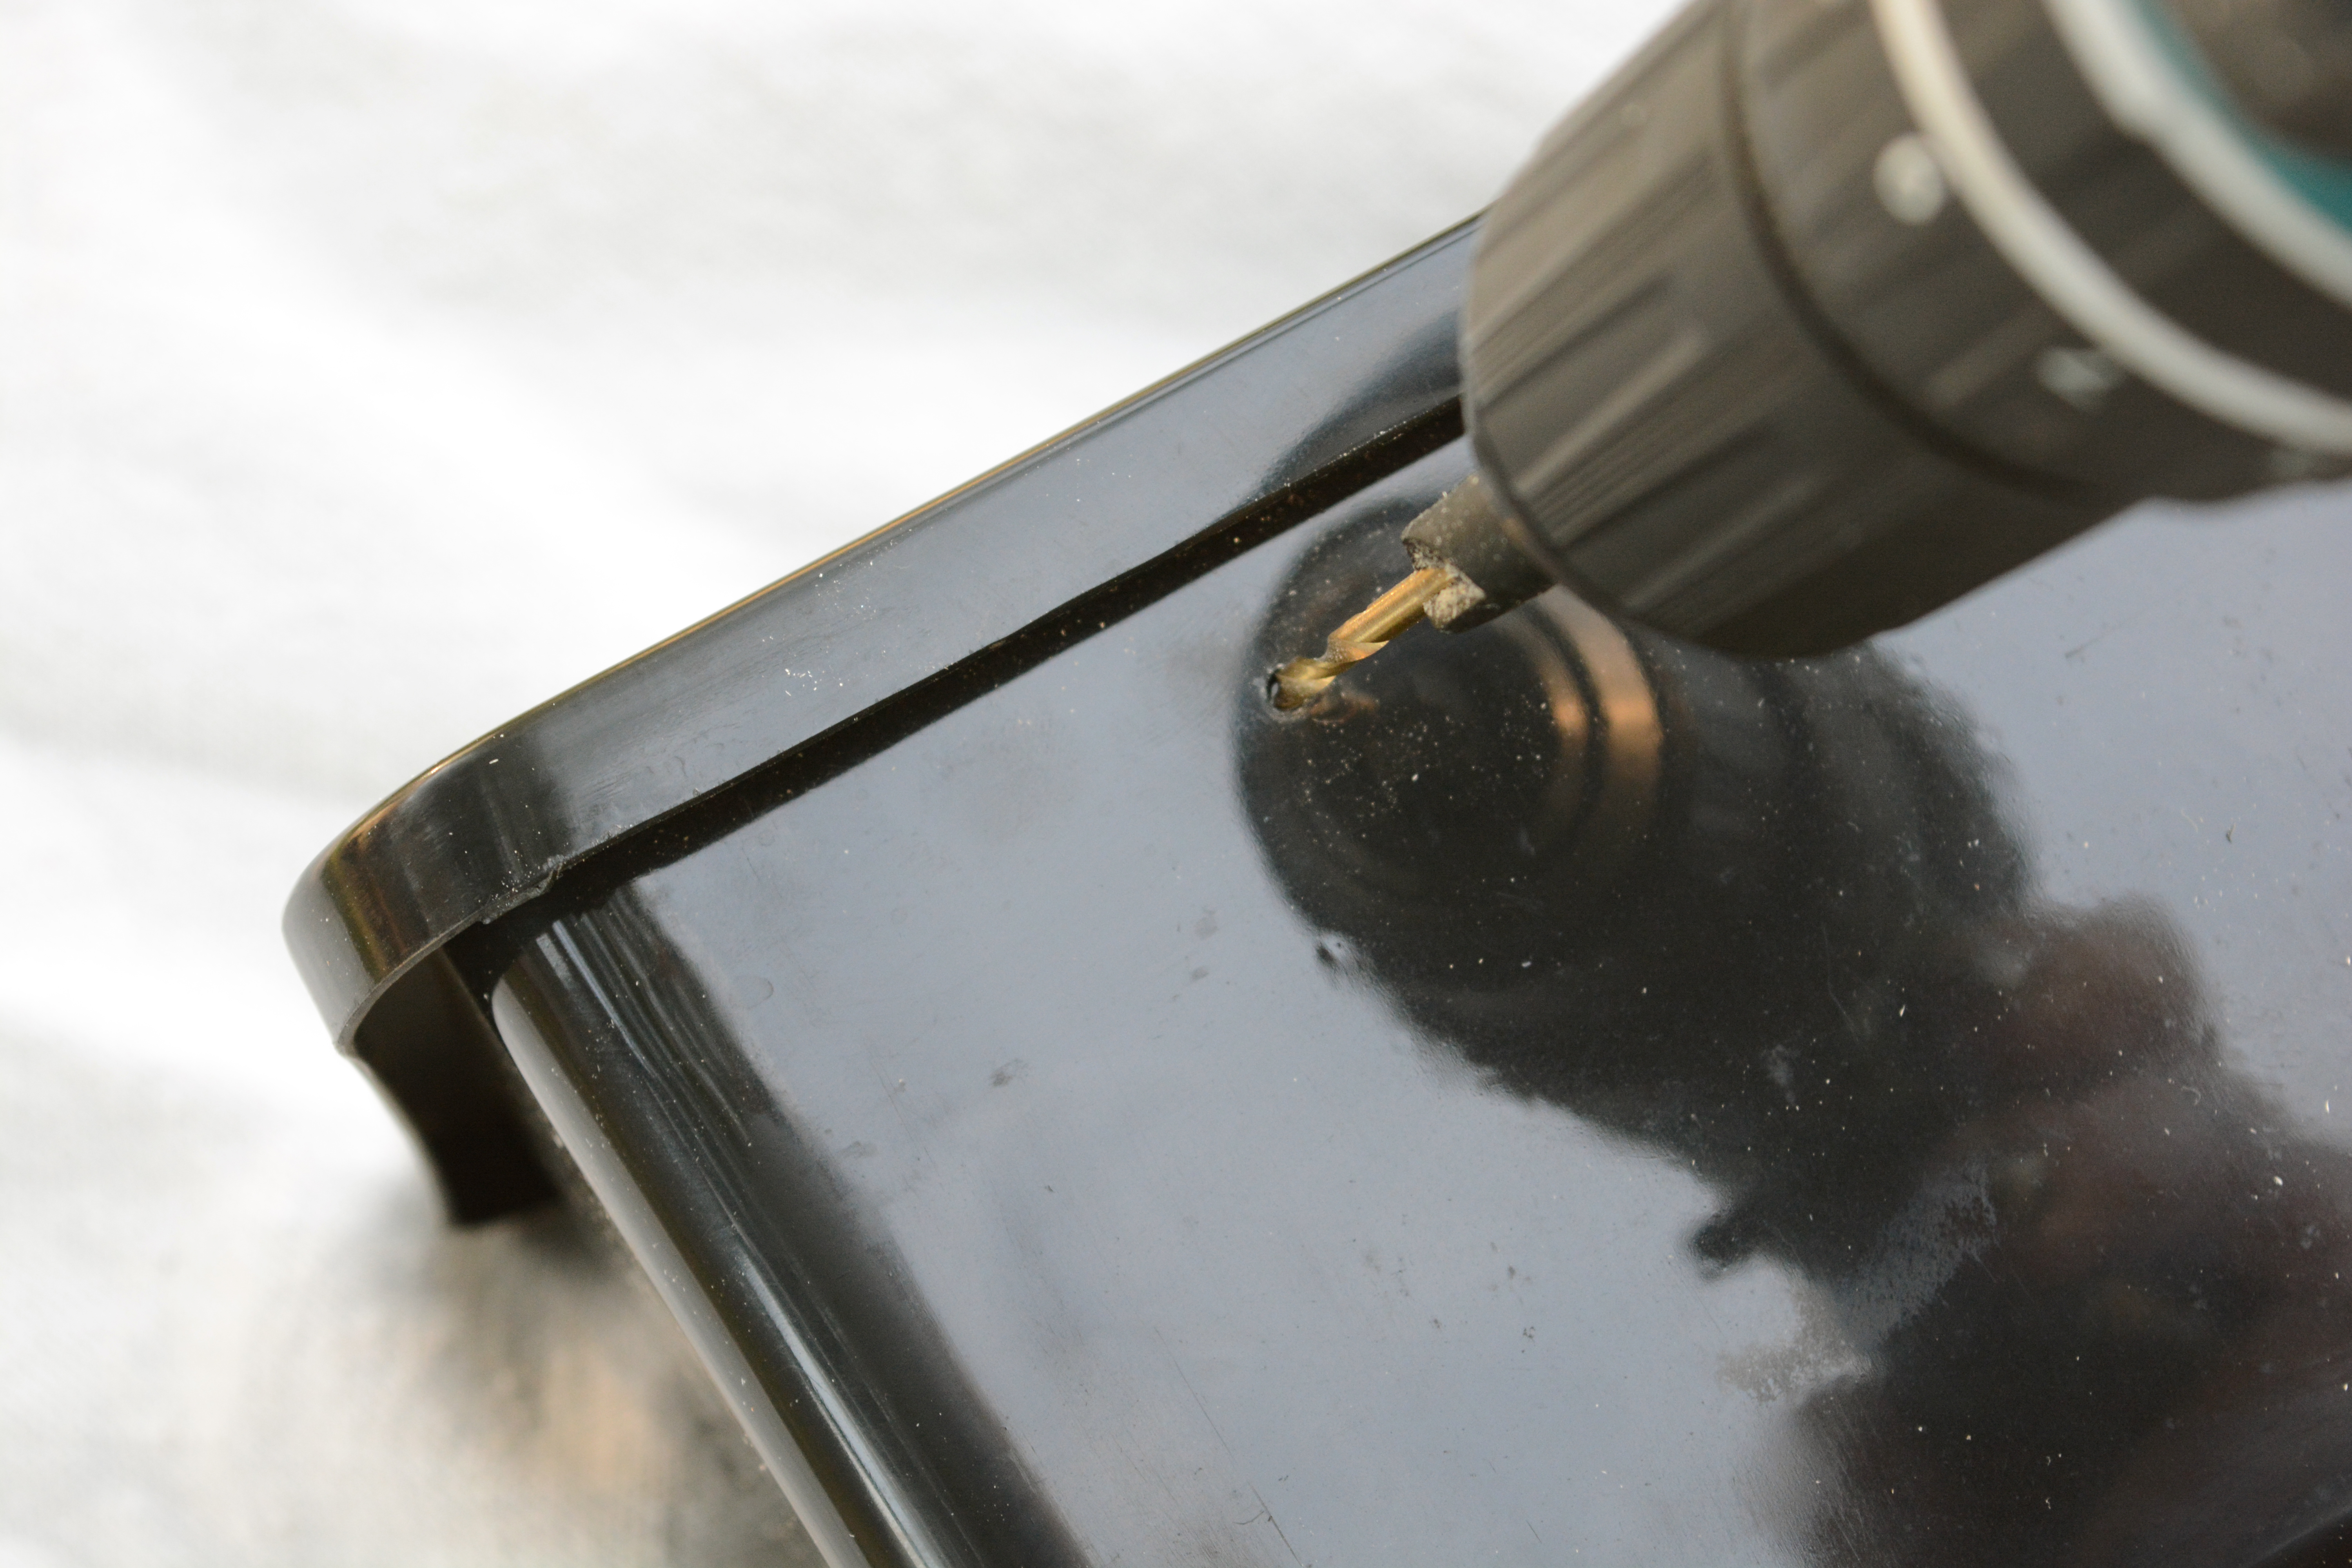
Pre-drill holes in the plastic planters as well. Then using a 1-1/4″ screw and a washer, attach a cleat to the back of every planter.

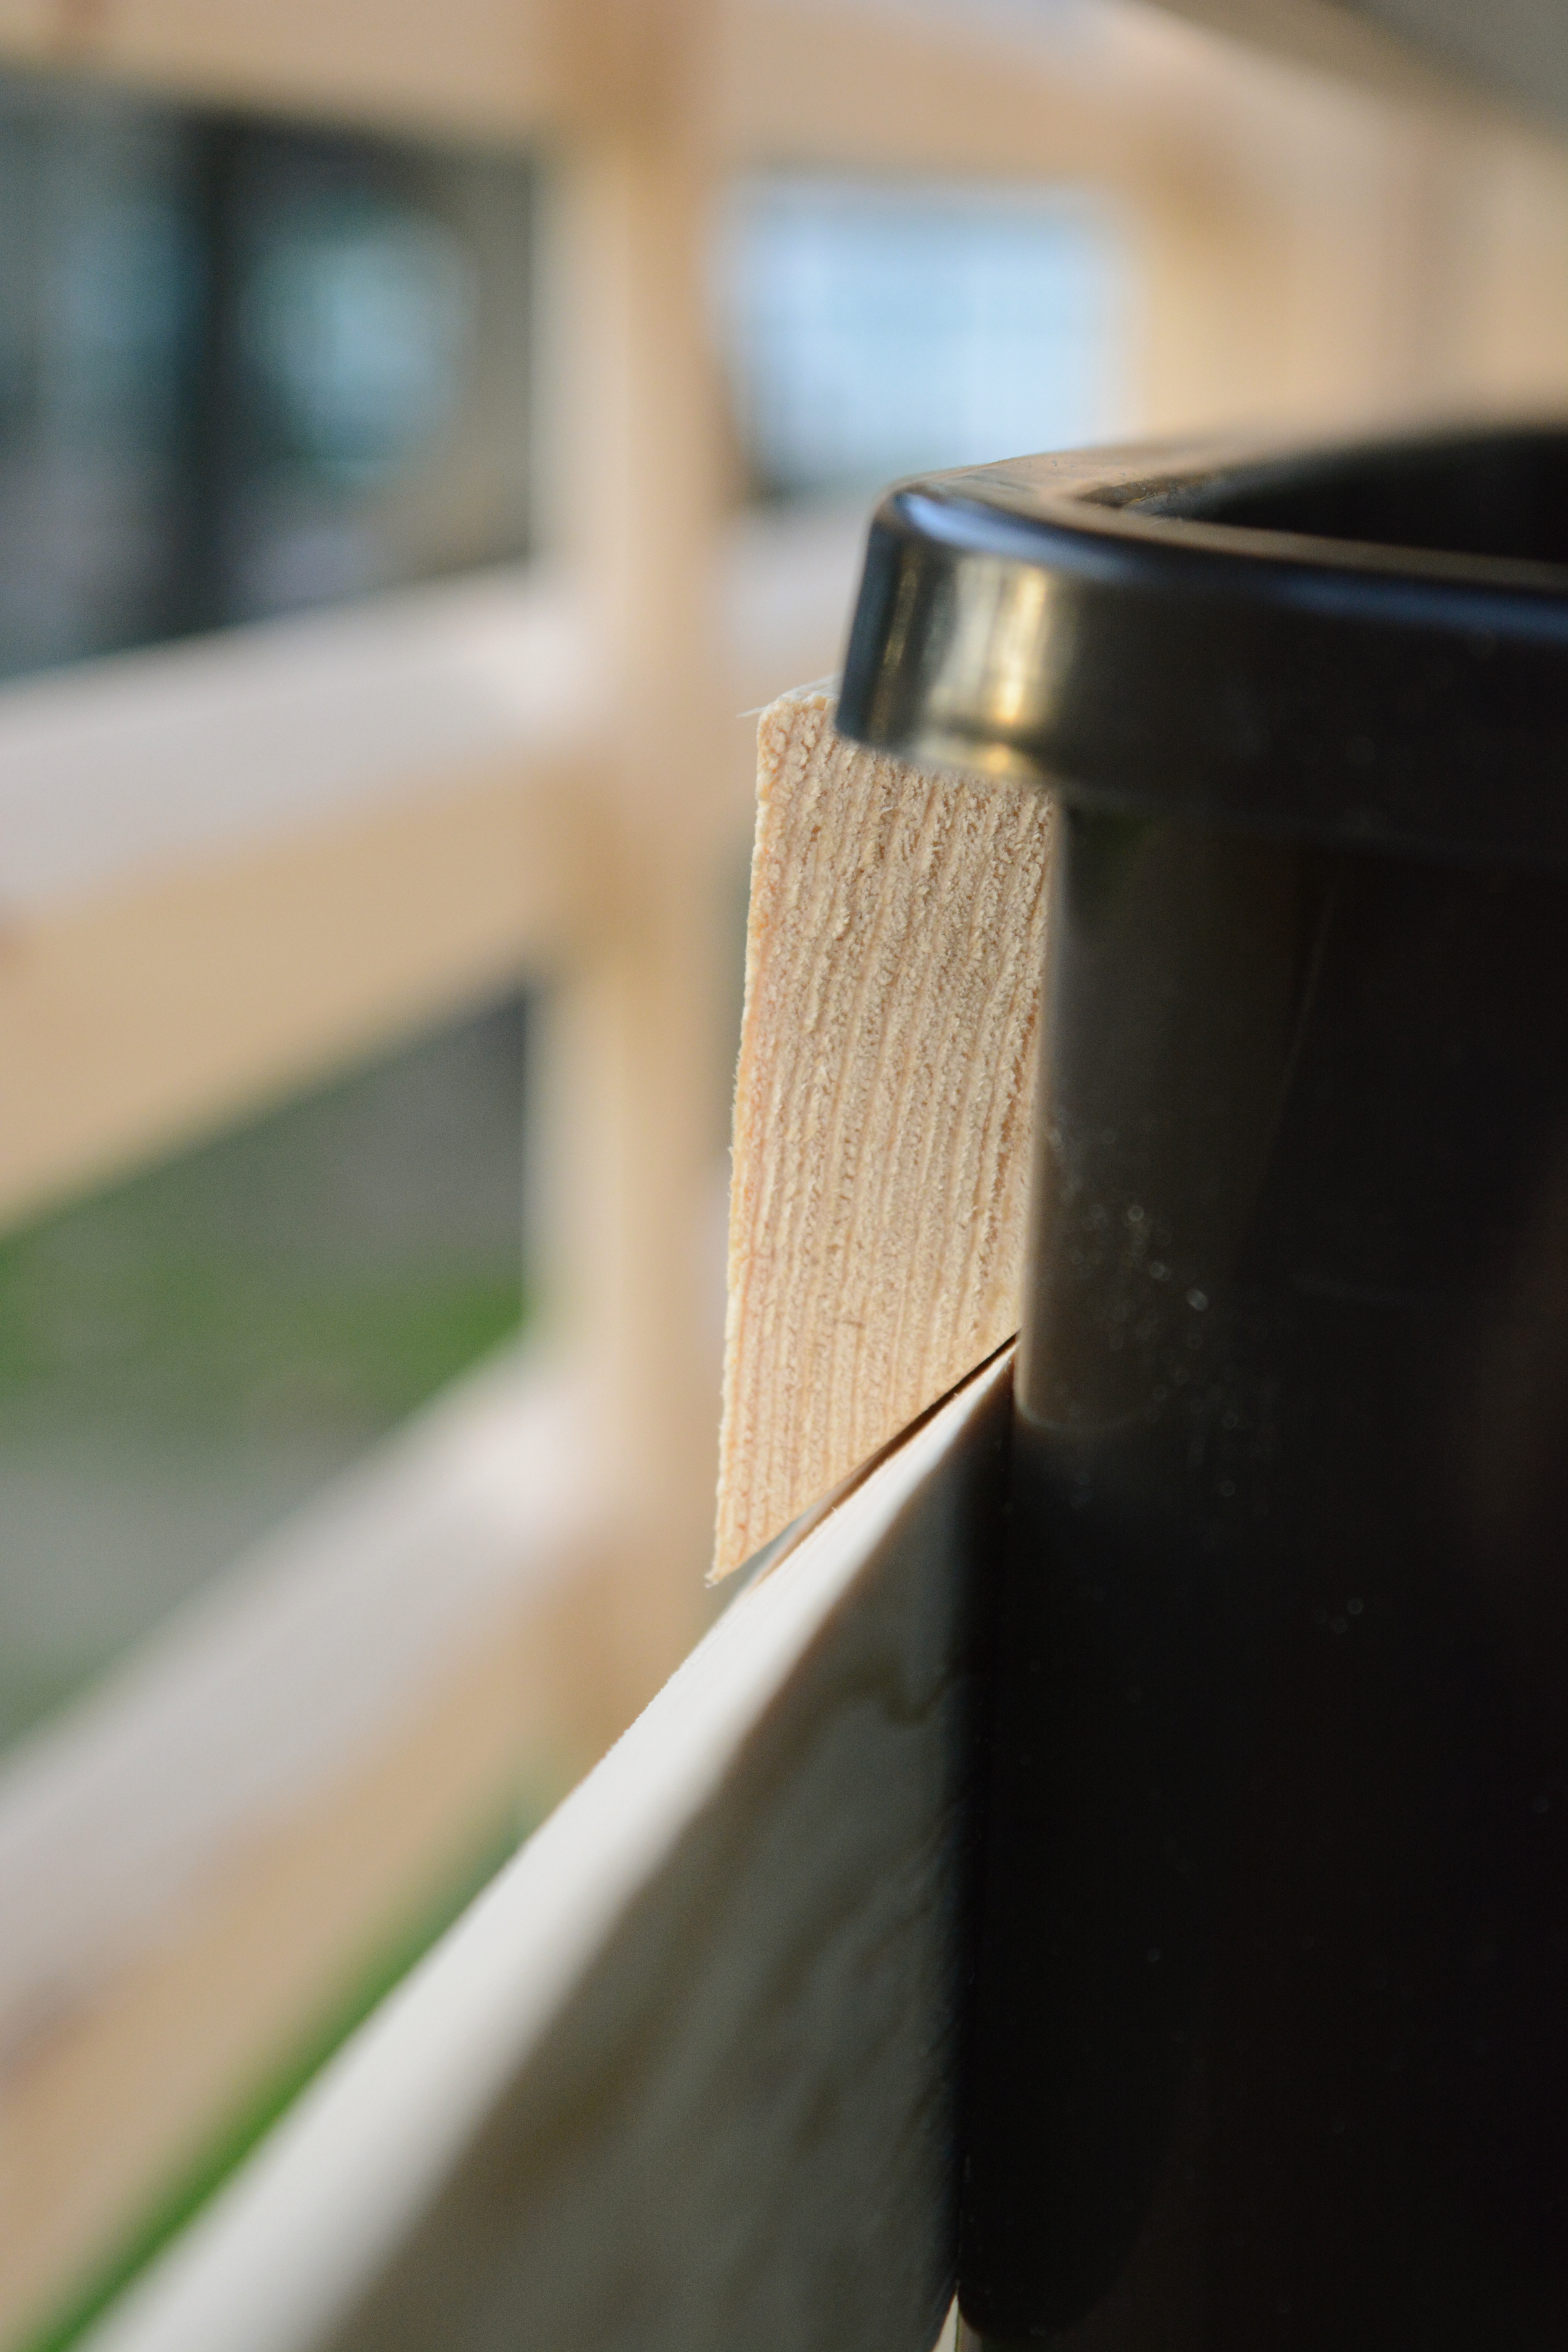
The cleats fit seamlessly on the wall. The weight of the planter holds them in place and there is no worry of them slipping off.
And there is no clunky hardware or hooks, the planters even look great from the back.
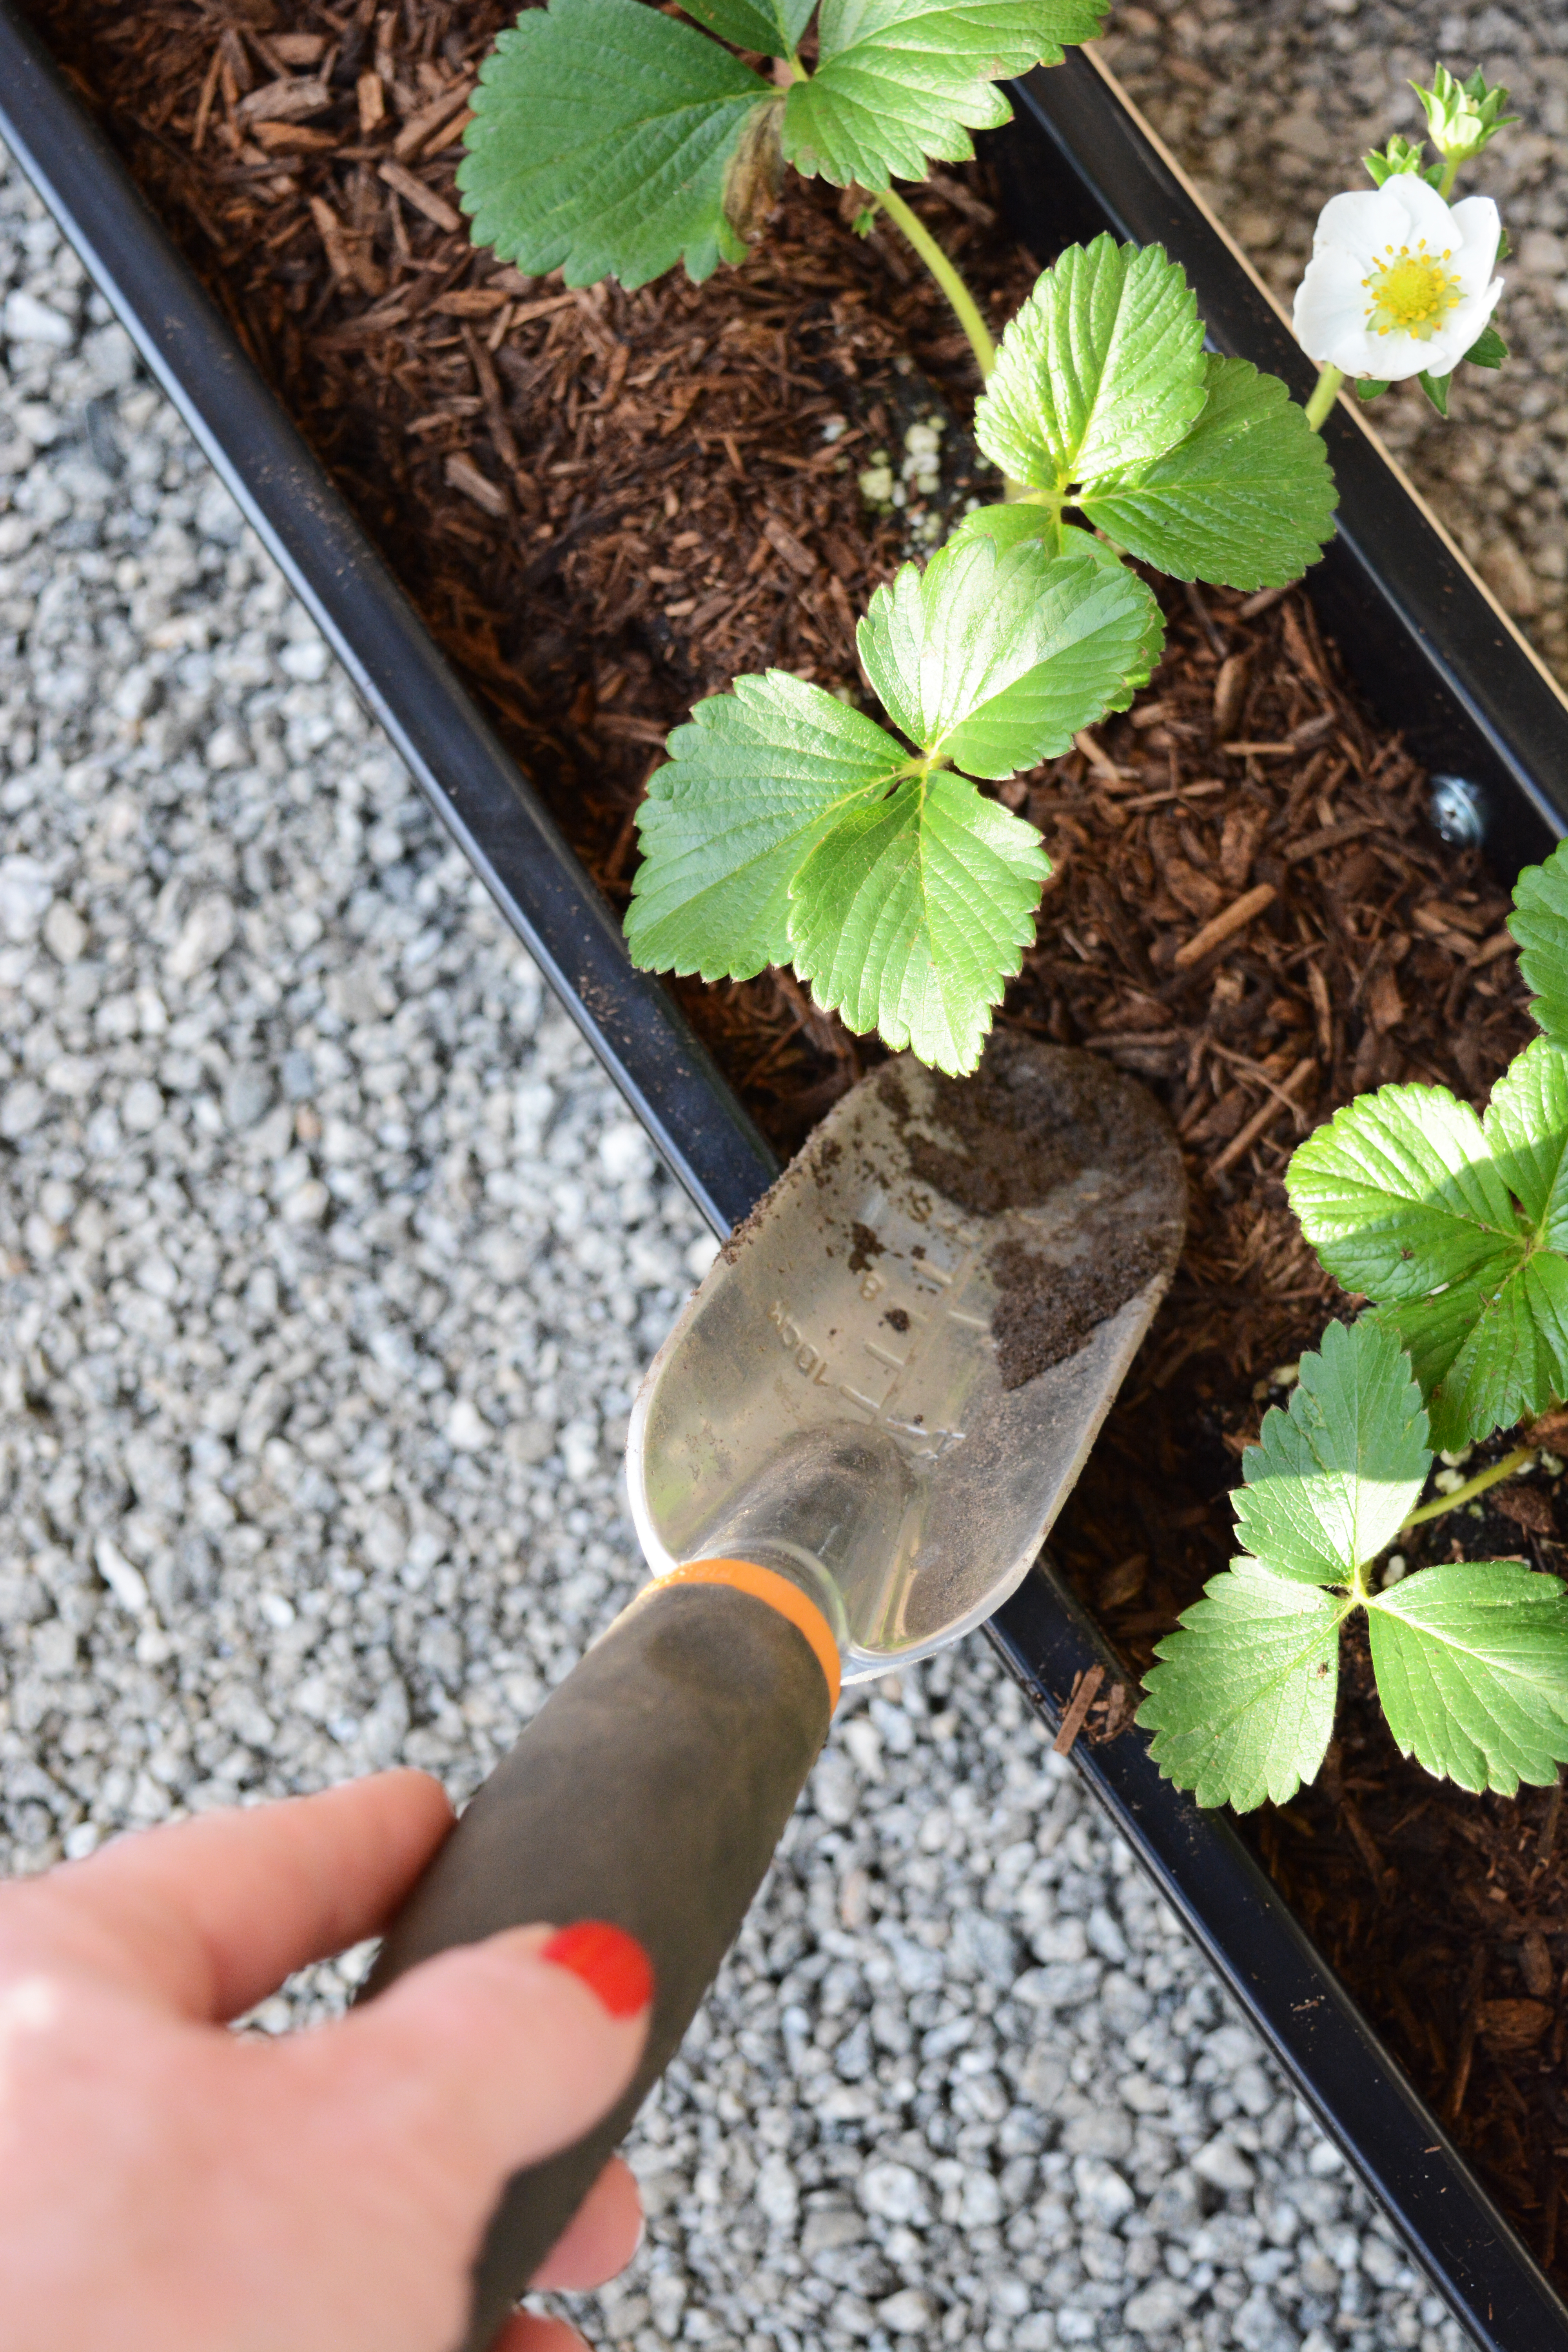
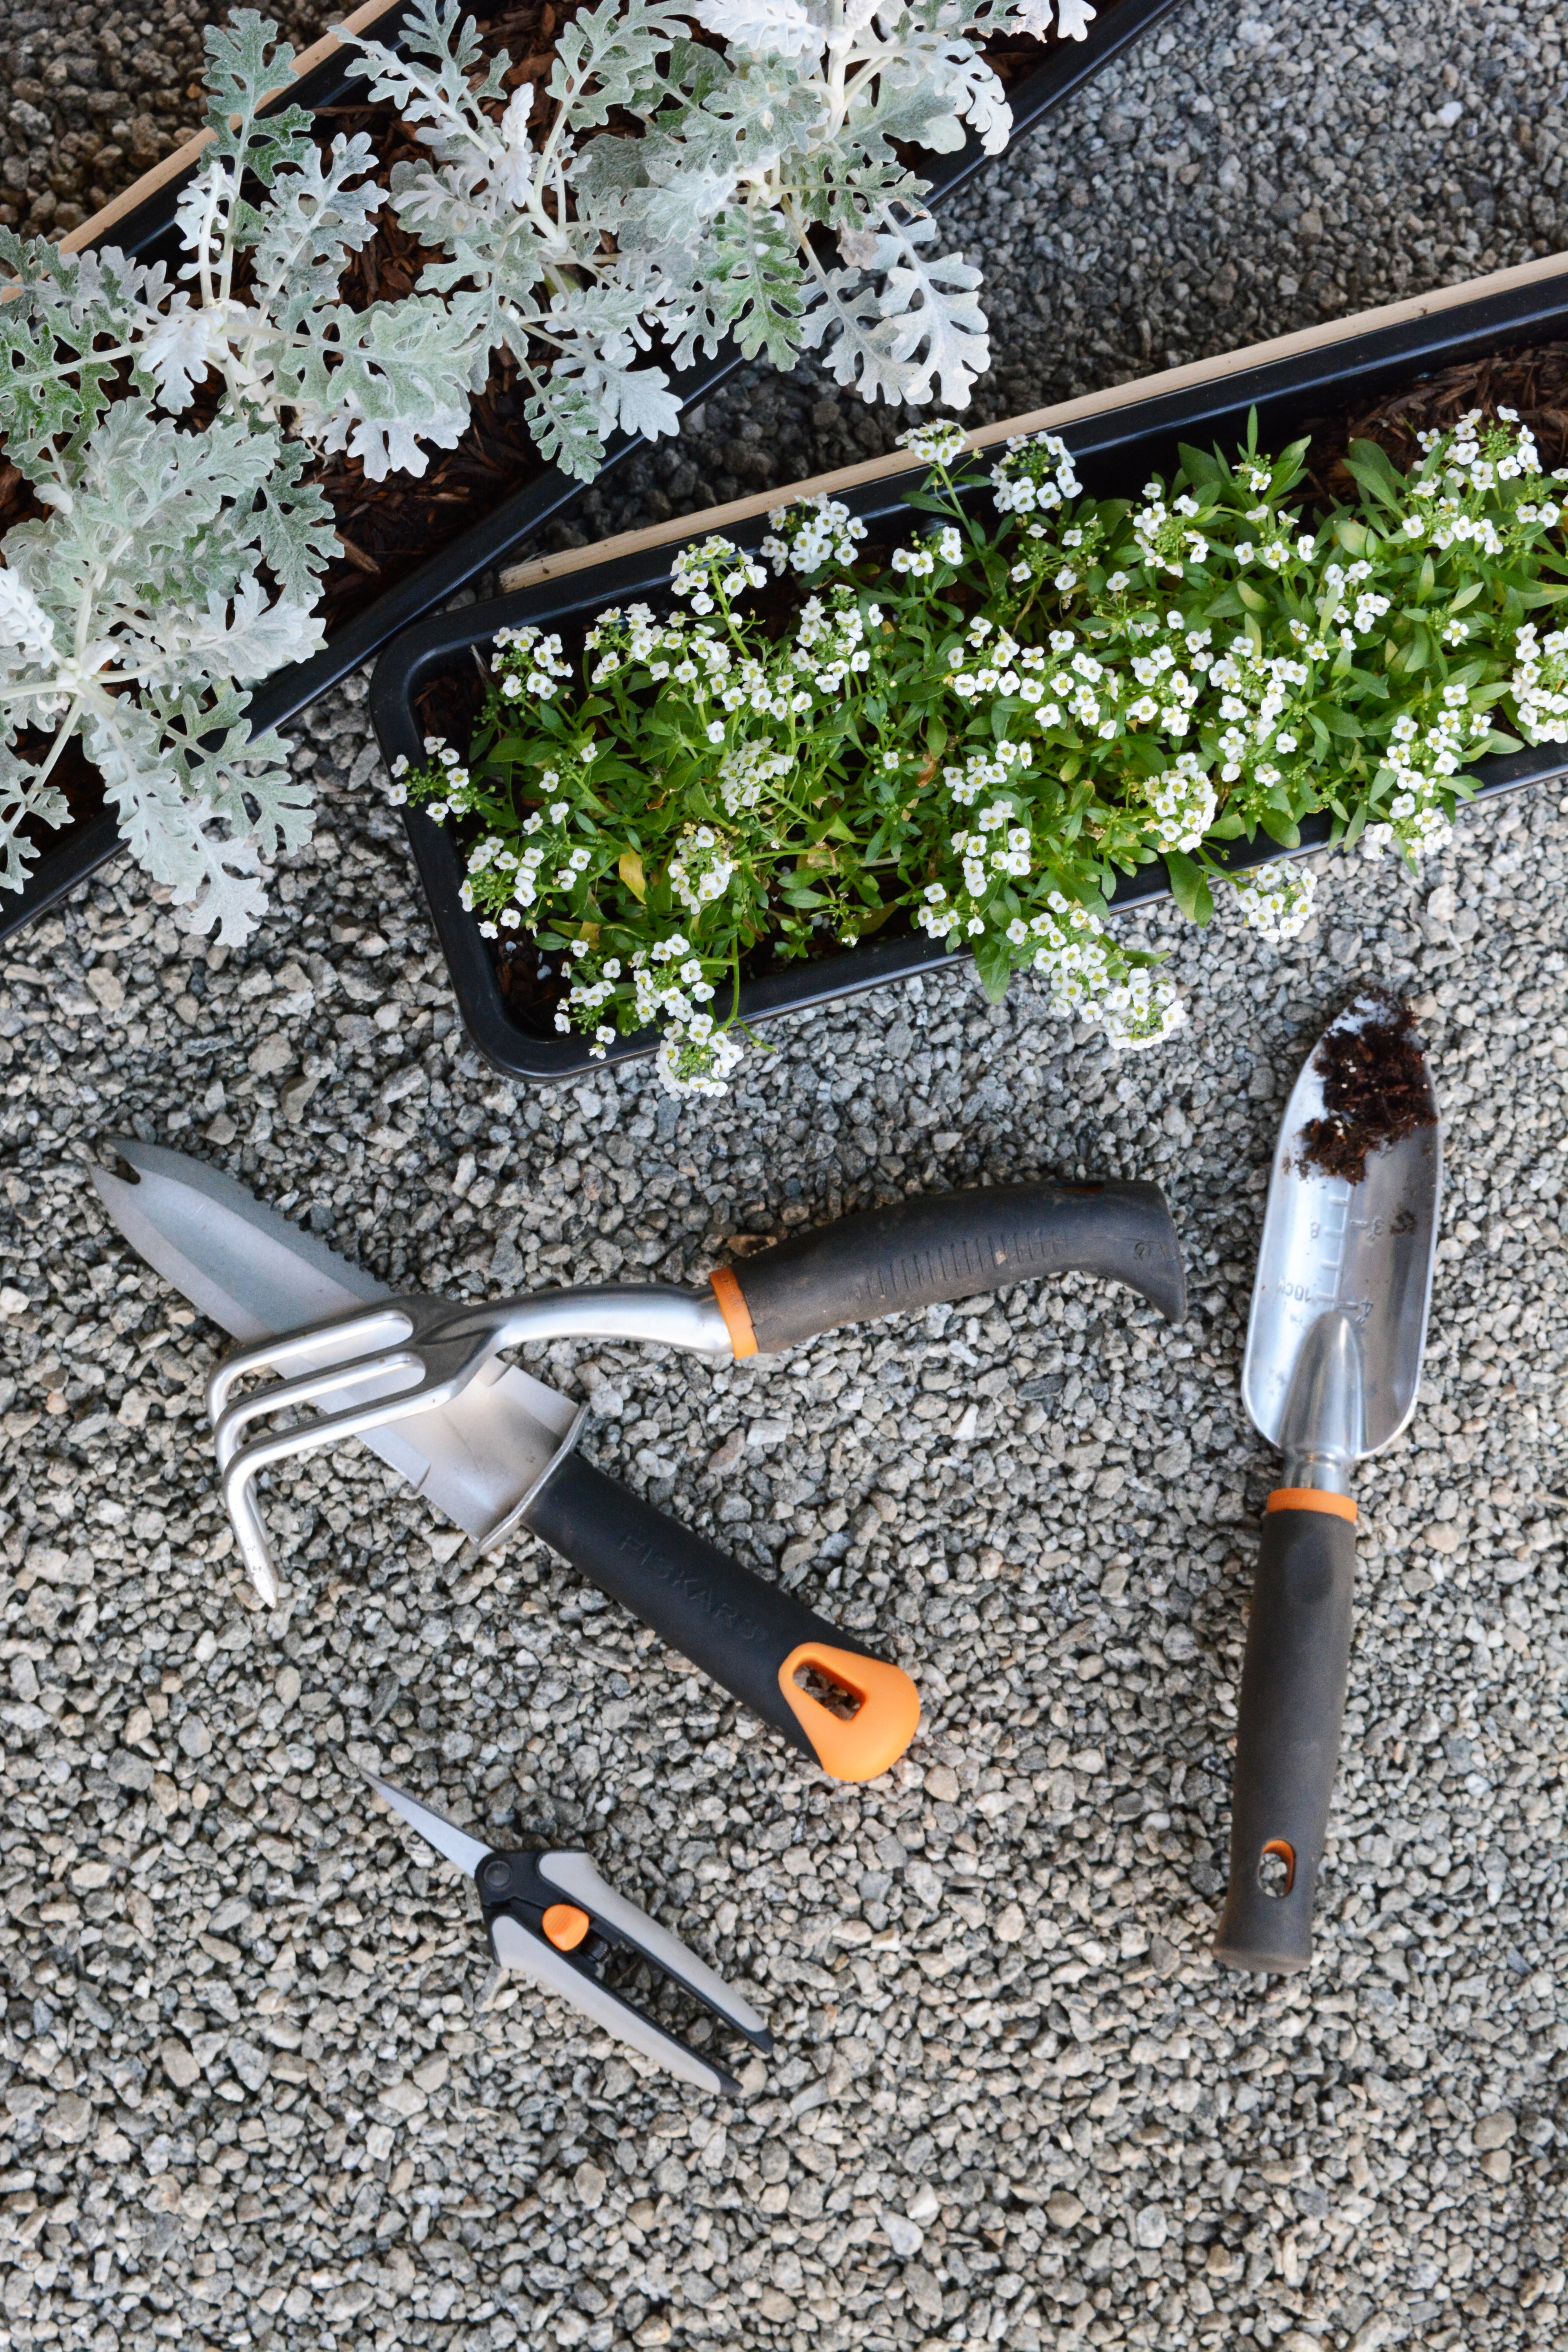
The planters can easily be take down to water, plant, prune or weed.
I think I’m going to have a lot of fun with this living wall. I’m excited to play with more plants and figure out what will grow best in the vertical garden. It’s also has created a great little outdoor getaway spot for my guests.
This is such a cute and very doable project. I am defiantly going to do this for my spring garden, I love the extra interest that the wood provides.
This looks so amazing! I am building one for where I rent since I do not have a garden space and may build one for my daughter as a surprise to use as a screen for some other plants even. You could put full sun loving plants on one side and shade happy on the other.
I have had these plans printed out for months and we are finally making one tomorrow. Do you have any tips or things that you would change now that it’s been a while since originally designing?
This is wonderful! Where did you purchase the black window boxes?