
It’s hard to believe that we have lived in this house for more than 4 years now. We’ve slowly made LOTS of improvements, one room at a time. The stairway and banisters were always put on the back burner, because it just felt like a space/room that just wasn’t very important. But, really it’s room we pass through the most. It’s kind of visible from every other room and actually, my “office” space is even in this room. We had stalled long enough, and it was time to tackle this big job. When Sherwin Williams reached out to me about using Urbane Bronze, the 2021 Color of the Year somewhere in our home, I knew it had to be this space!
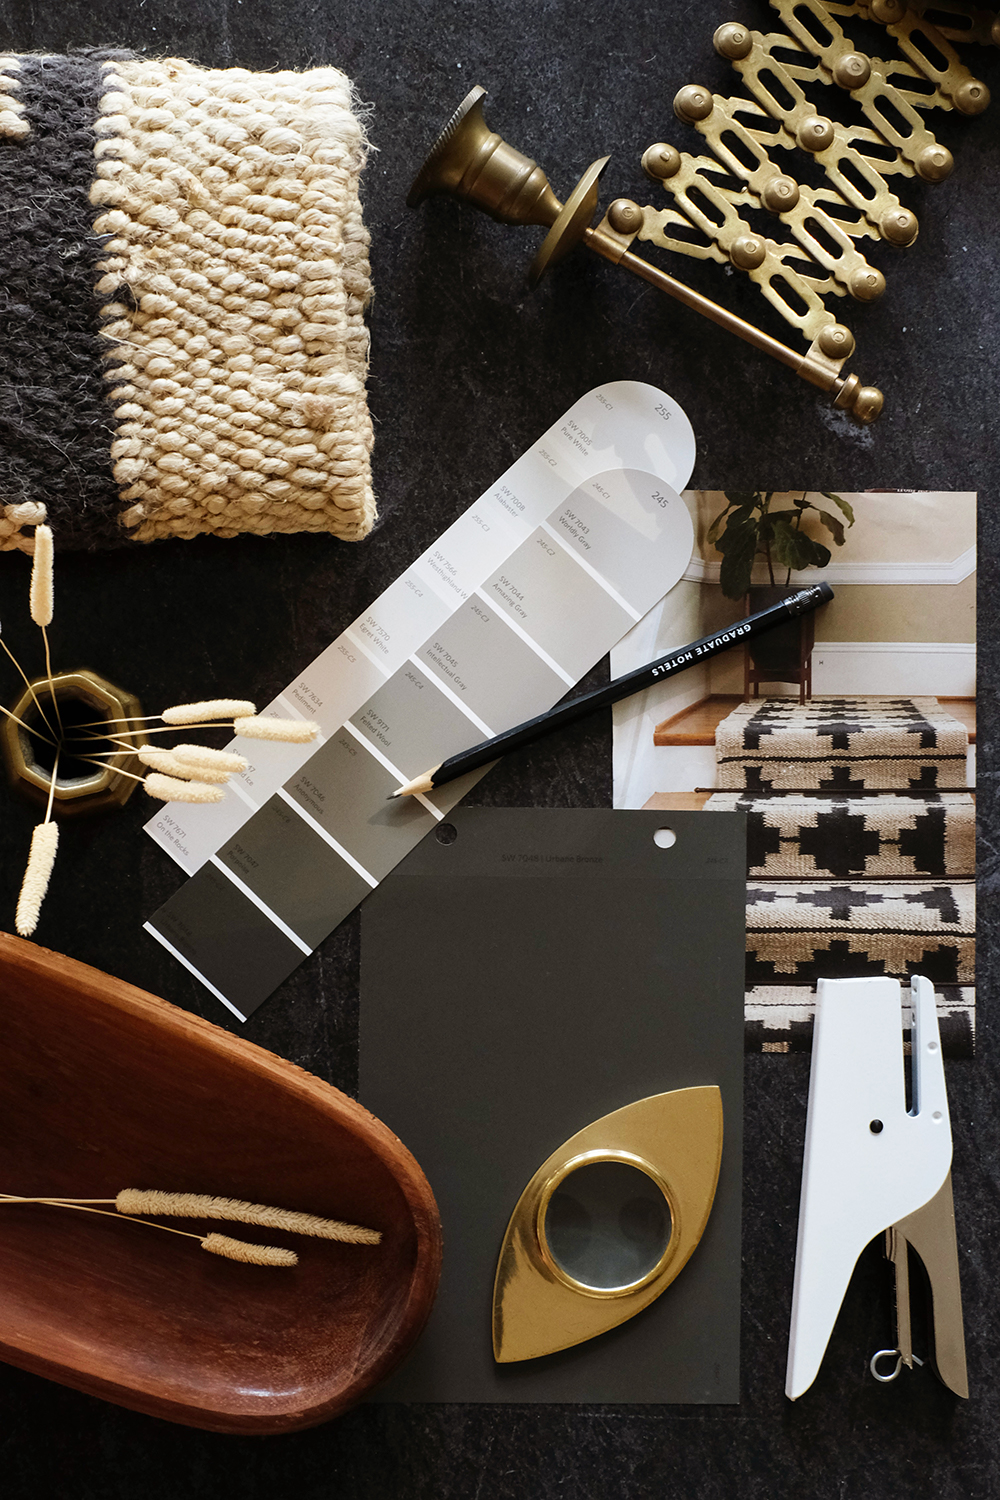
Above is the plan and below is the finished product!!!
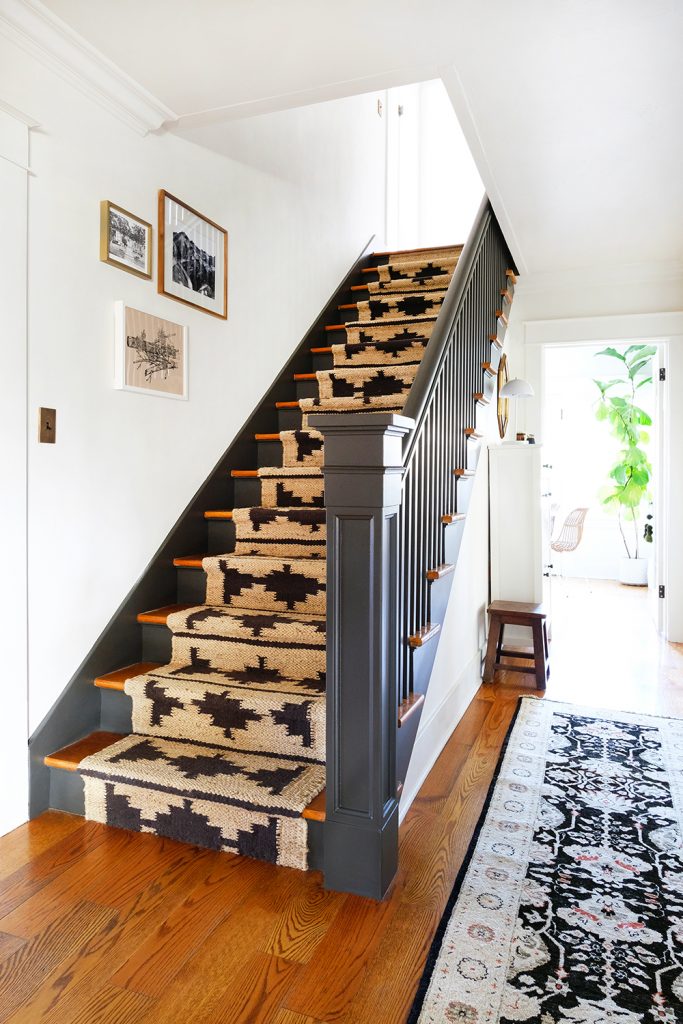
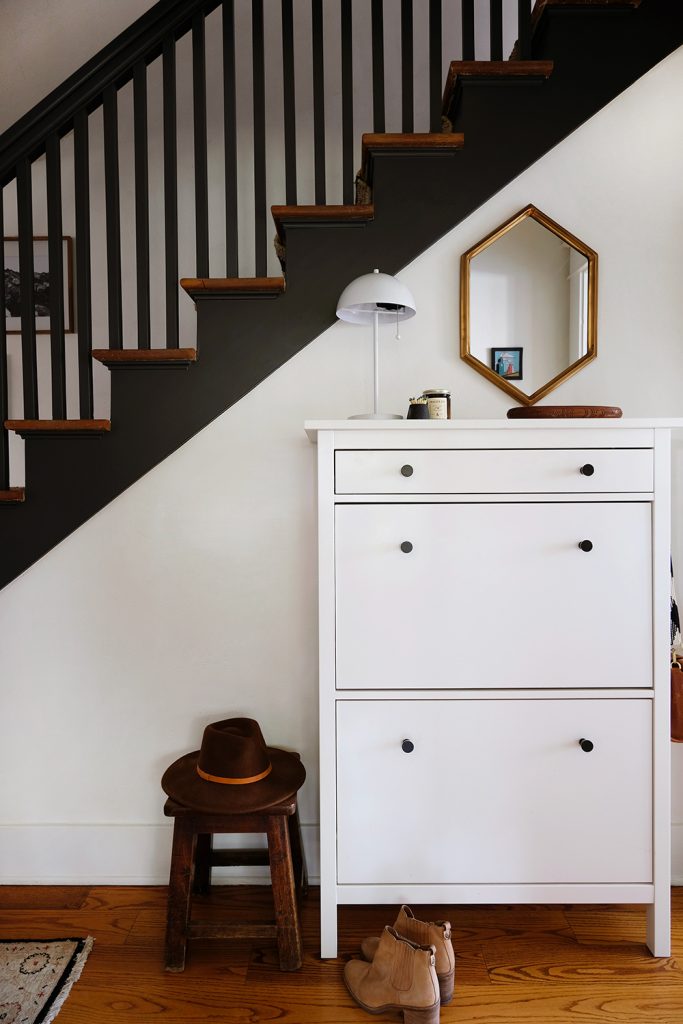
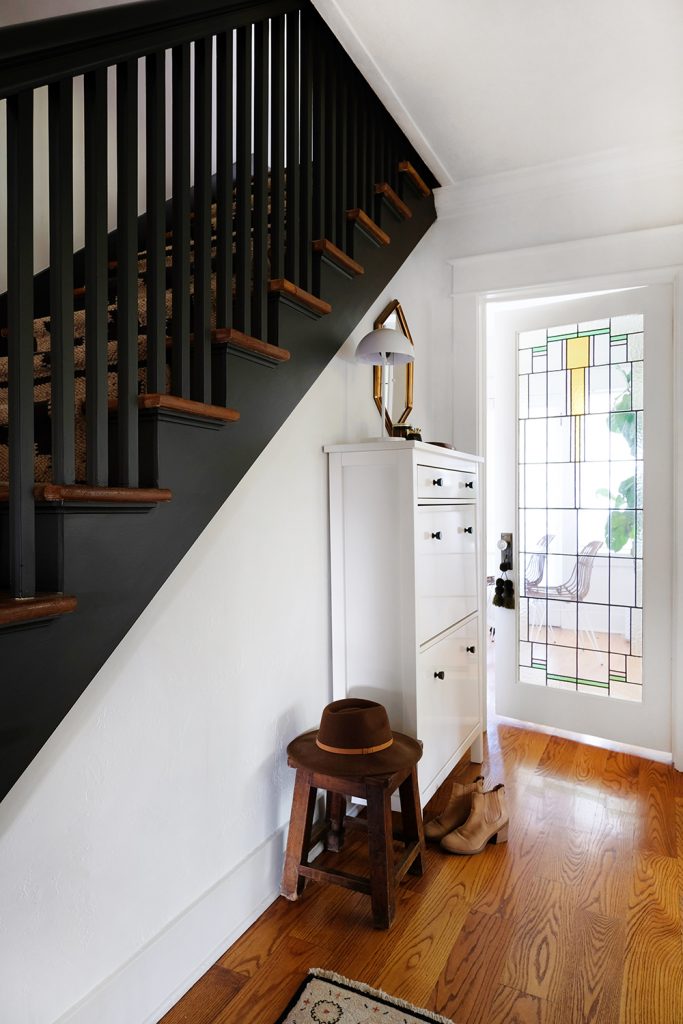
I had originally thought I would paint the banister black, but when I saw Urbane Bronze, I was smitten. It’s a rich charcoal grey, but with a warm, almost green undertone. It felt so much more sophisticated than just black. I love high contrast, and in many rooms of our house, we have the original wood trim paired with white walls. I felt like Urbane Bronze would compliment the warm wood tones throughout our house. I white banister just didn’t seem right in this 100 year old house. I wanted something that felt a little historic and not out of place with our 1918 craftsman.
So, let’s take a look at the BEFORE. There was a lot of work to be done. You can see that the trim was half painted, the banister and stair backs are all a yellowed dingy cream, and the rug was so sad and worn. To give us a little credit, when we moved in there was floor to ceiling yellow striped wallpaper. We scraped and peeled that paper off for weeks and gave it a nice coat of crisp white paint (Alabaster White).

And here’s the BEFORE BEFORE! This is what the house looked like when we bought it, with the dreaded wallpaper that did not come off easily.

I think it’s pretty clear to see that this stairway makeover made a HUGE improvement to our home. Because, it’s a room we actually walk through all day long, it’s made our whole house feel fresh. Before it was a space I hoped guests wouldn’t notice, now (once we make it through this pandemic) I can’t wait for folks to see it.
Now for the how-to and what we used. First, you are going to need to make sure you have a handy, perfectionist type brother that is will to help you. My brother Ash, put in so many hours, I was just his assistant. I don’t have a lot of process images here. But, I am putting together some videos that will be on instagram. But, here’s a pretty extensive list of all the steps and materials we used.
- Demo – for this project it was just tearing out that old worn out carpet runner and all the staples that got left behind.
- Prep – this is the most important step in any painting job. Ash sanded these banisters for DAYS. We also knew that the runner would cover up the center of each tread, so we eliminated most of the squeakiness but screwing down each step in a few places.
- More Prep – a lot of tack cloth and shop vacuuming to get all the dust from sanding under control.
- Taping and Tenting – we taped and tented the banister area so that we could use a sprayer to get a polished and professional finish on all the railings. But, we also needed too leave a passageway for the kids to come up and down the stairs and also go to the bathroom at night. We knew that this would probably take 3 coats, so with at least a day between each coat, we had to create a pretty involved tent. I would say the taping along took about a day and a half.
- Prime – we used our favorite bonding primer because the paint used previously on the banister was oil based. in order to get a nice even coat on all sides, it took two spray sessions. We use a Graeco sprayer with a fine tip. It’s kind of a pricey machine but, we’ve really gotten our money’s worth out of it since we DIY almost everything.
- Dry Time – this was a really important step that we almost messed up. While we do live in sunny California, it was late November and our house can be pretty cold. We figured out that we had to vent the tent at both the top and the bottom of the staircase tent and then add some space heaters. Overnight, the coats of paint dried nicely.
- Paint – We used Sherwin-Williams Emerald Enamel Trim Paint in Satin. We painted the banisters in 2 passes. Many light coats is so much better than heavy paint that can drip or run.
- Carpet Pad – we used carpet tape to adhere the runner pad in place before stapling it down. Most of the staples are in the back of each step and just under the nose of each tread.
- Runner Installation – we used more carpet tape, a lot of it to hold the run in place. Carpets and rugs can stretch over time, especially on stairs. The tape helps prevent some of that slipping and stretching, it’s the staples that really hold it in place. We started with the very top step and worked our way down. We also stapled the runner in place as well. Because this is a very chunky weave rug, we used a wider staple than just an average carpet staple. We wanted to make sure it would grab the fibers and not just pull all the way through.
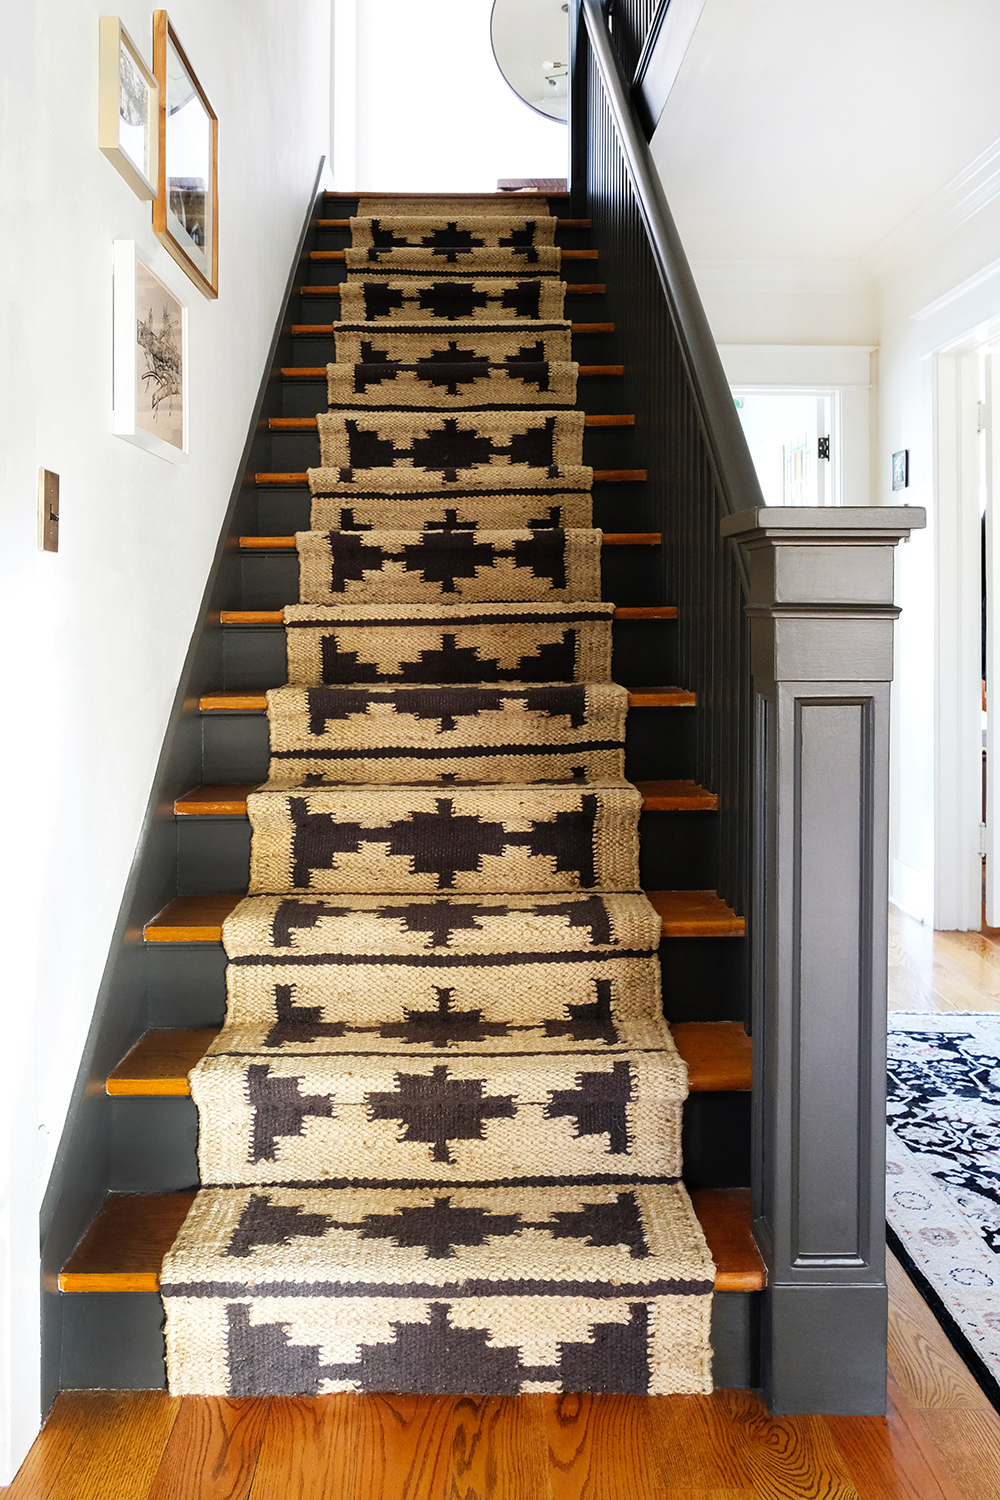
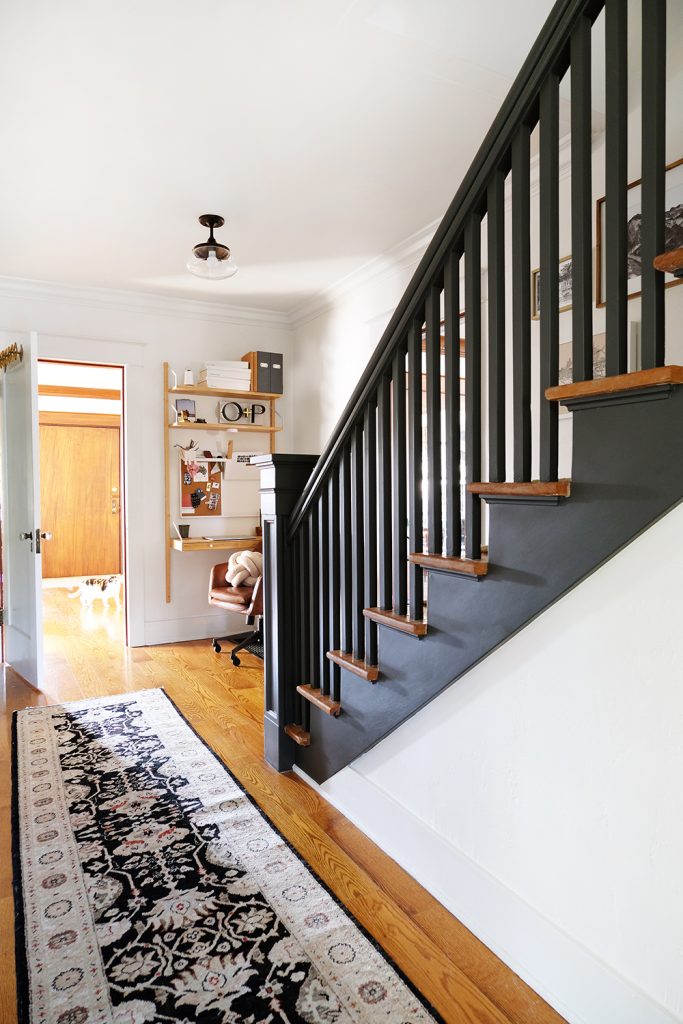
The new runner plays soooo well with the new paint.
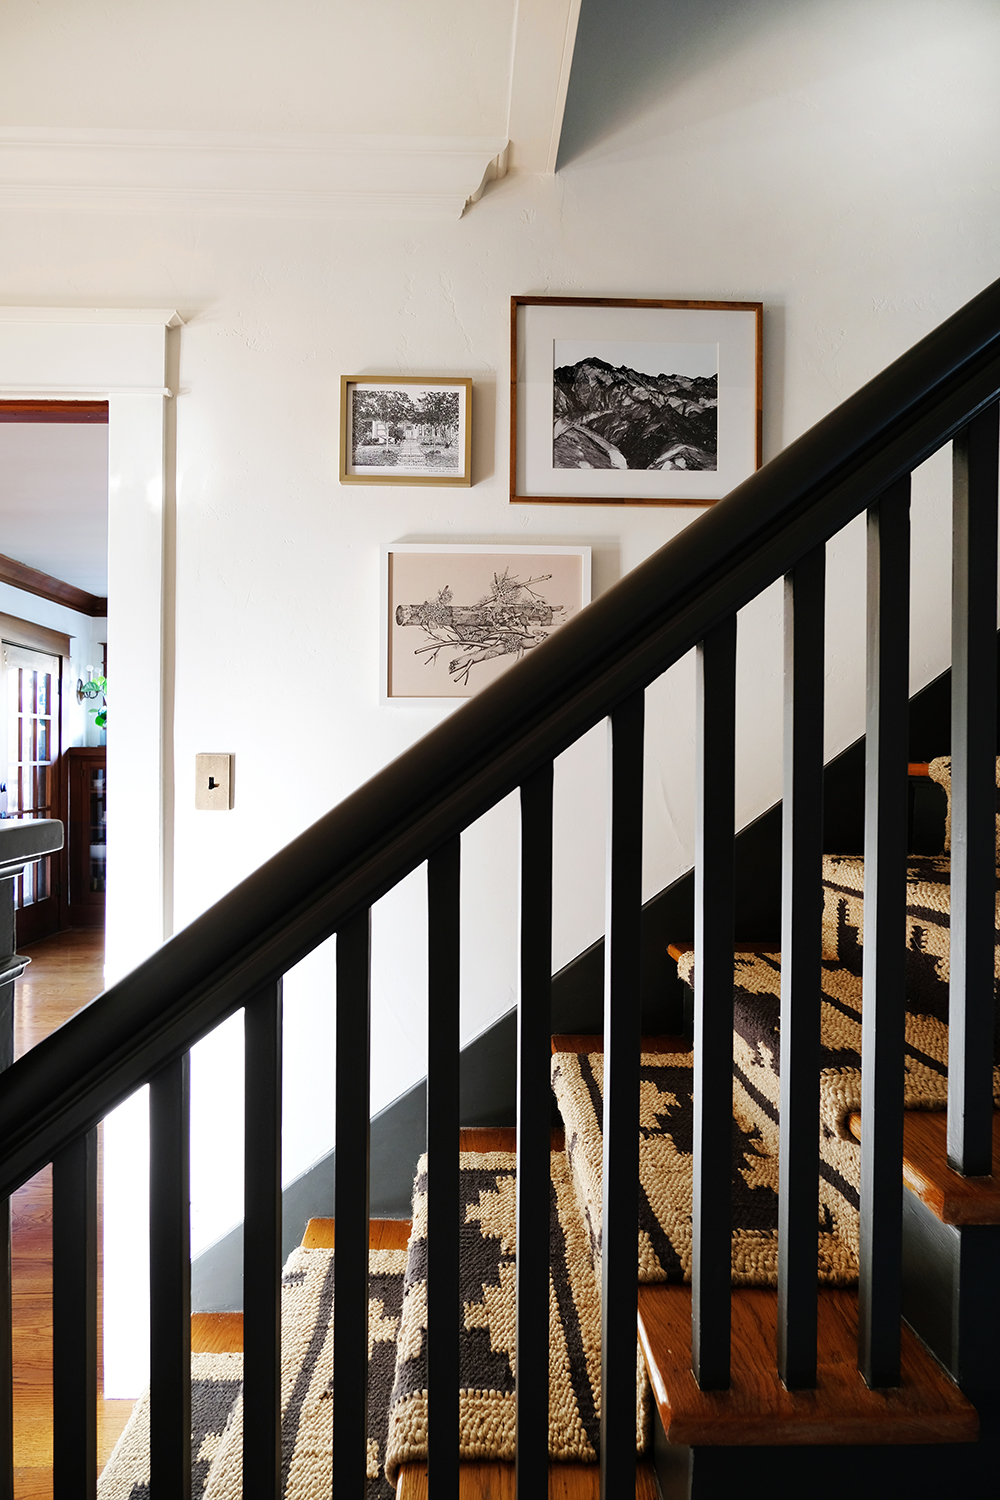
It feels like a “real” room now. So, I even hung art! The top right piece is a photograph I took in Iceland of a glacier. The top left is a sketch of our first house and the bottom piece is a sketch of a log covered in lichen, I bought it at an estate sale in Kansas City and framed it in a clean, modern white frame.
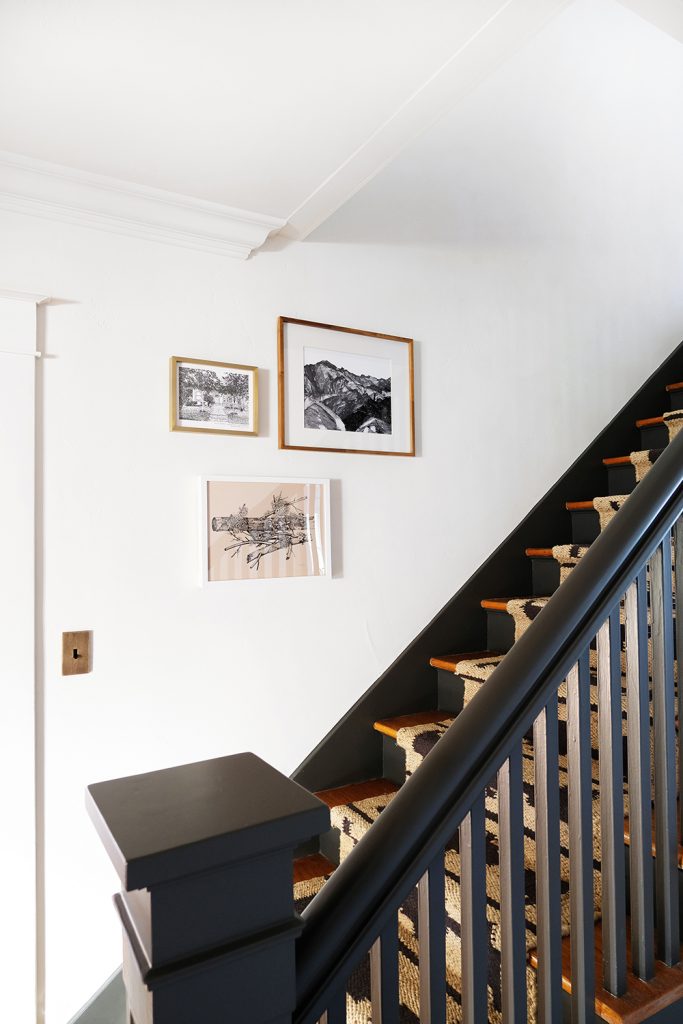
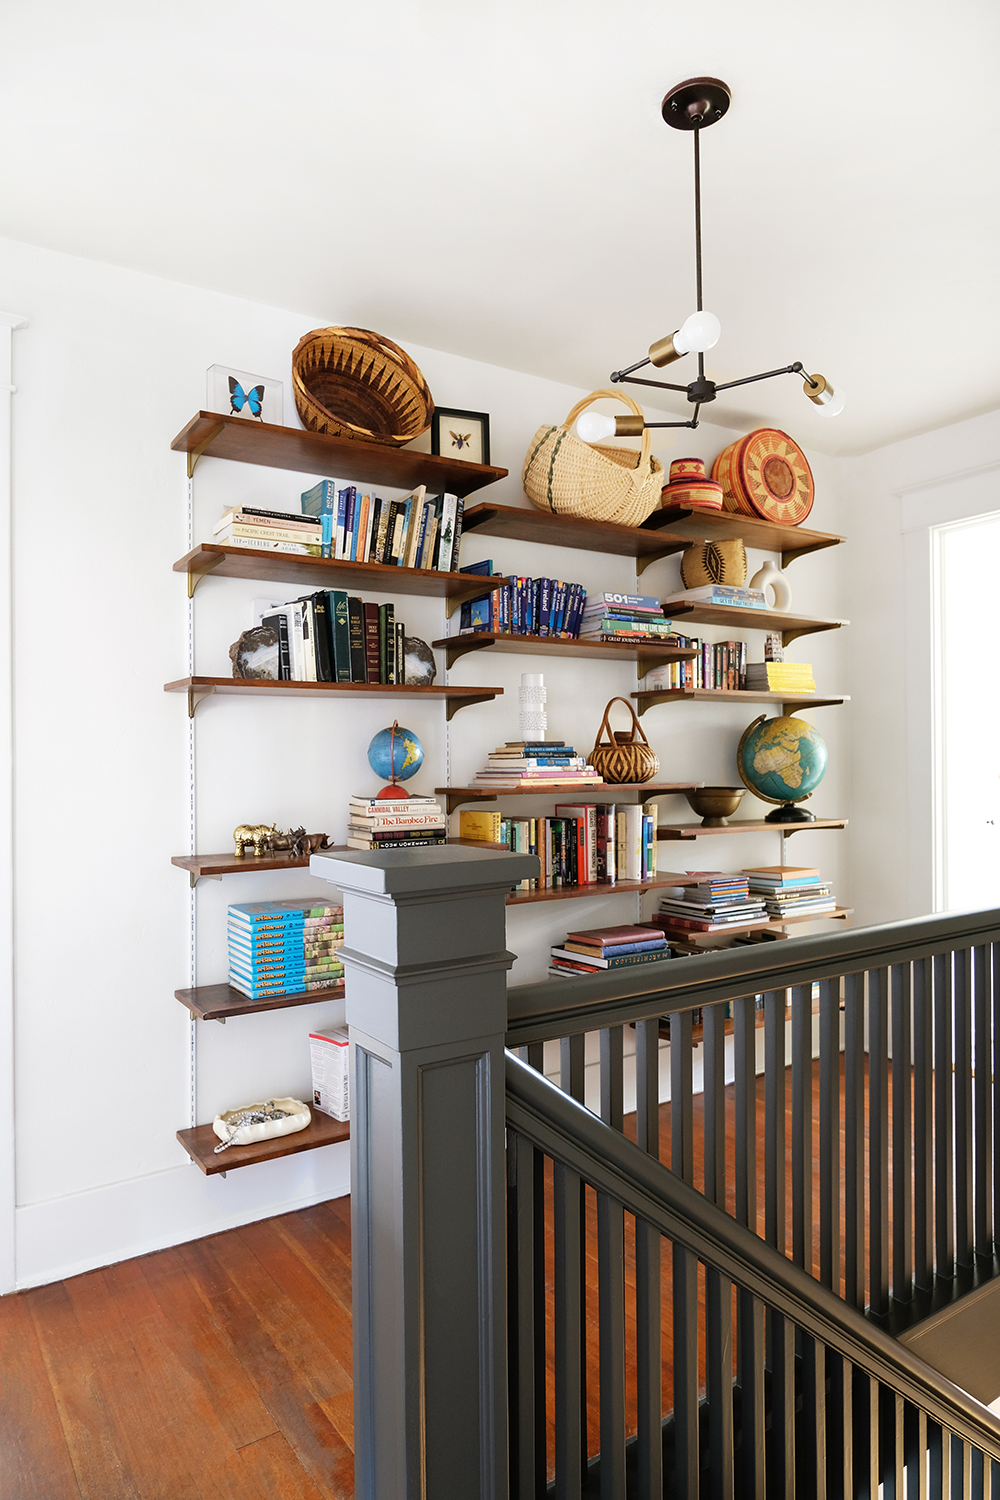
And when I say it changed our whole house, I mean it. Every room upstairs leads to this staircase and banister as well. The banister completely grounds this space. And this dark color feels like it was always meant to be there.
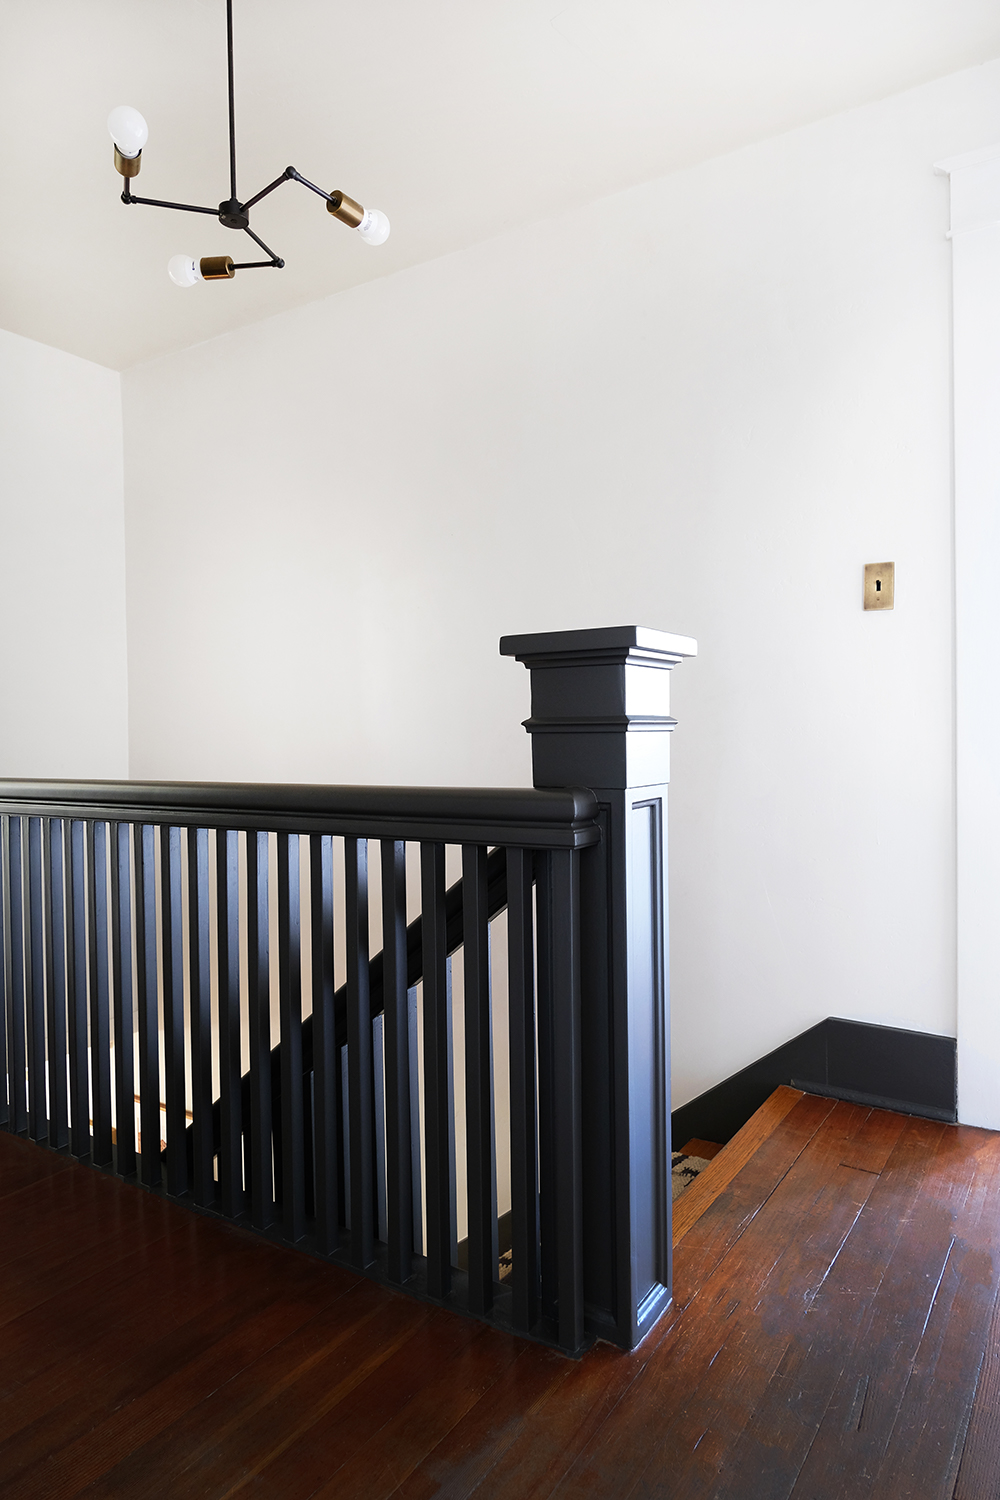
We left all the stair treads their natural wood color, and I’m so glad we did. I love the layers of colors and textures with banister, treads and runner.
Wouldn’t you agree that my little “office” has a much better view now?
gorgeous!
Oh my gosh. What a beautiful statement for your entry. I want to use this color at ny daughter’s house.
Just sat down after day one of sanding the stairs in my own 1918 farmhouse. Found your beautiful post.
Had been debating whether to take the risers and bannister to “the dark side” and now I am convinced.
Thank you so much for the time and energy you added to your project by posting!
I live the carpet runner can you tell me more about where to purchase it?