Design

Houses Painted All White

January 23, 2018

Ok, we bought our house a year and a half ago and we’ve known that it has needed to be painted since day one. It’s just a huge undertaking with a lot of scraping and sanding ahead of us. But, I think we are ready to start thinking about it. Here’s the deal – our house is a 1918 Craftsman. Craftsman are typically painted earthly tones and colors. My gut would be to go a shade of green or grey, but our neighbors on either side are green and grey. I feel like it might just end up looking blahhhh. I want it to stand out. Sooooo, I’m considering something a little controversial for a craftsman house, I’m thinking about painting our house all white! All White Houses are popping up all over in modern builds, and I LOVE the look. I’m hoping this will work with an old home as well. My mission has always been to show folks that you can live in an old house, preserve it’s character, and still have it feel fresh, young and current.

Here’s our house:

Here’s my main concern with painting the house all white – I’m worried that we will lose all the beautiful detail in trim and the different roof lines. It’s not a box of a house, it has a lot of unique shapes and angles.

My true heart’s desire is to paint a house, any house,  all black (I’ve shared this desire with you before). But, the husband will not approve that. He wants our house to be as energy efficient as possible. And I have to agree that a black house in the desert is probably not a good idea. So, the plan is now to swing the opposite directions and maybe paint our house all white and add so black details. I’m sure what details will be black yet, but the thought has me pretty excited. I’m really not a beige house kind of gal. Yet, both of our houses have been beige. I didn’t pick the colors, we’ve just never painted an entire house, we’ve only lived with someone else’s choice. Oh, and as much as I LOVE the color green, I think the fence needs to be either black or white as well. A change sounds good right now!

Someone in the neighborhood also told us that she remembers for the house being all white in the 60s or 70s, so maybe we would be taking it back to it’s roots.

All White House

source

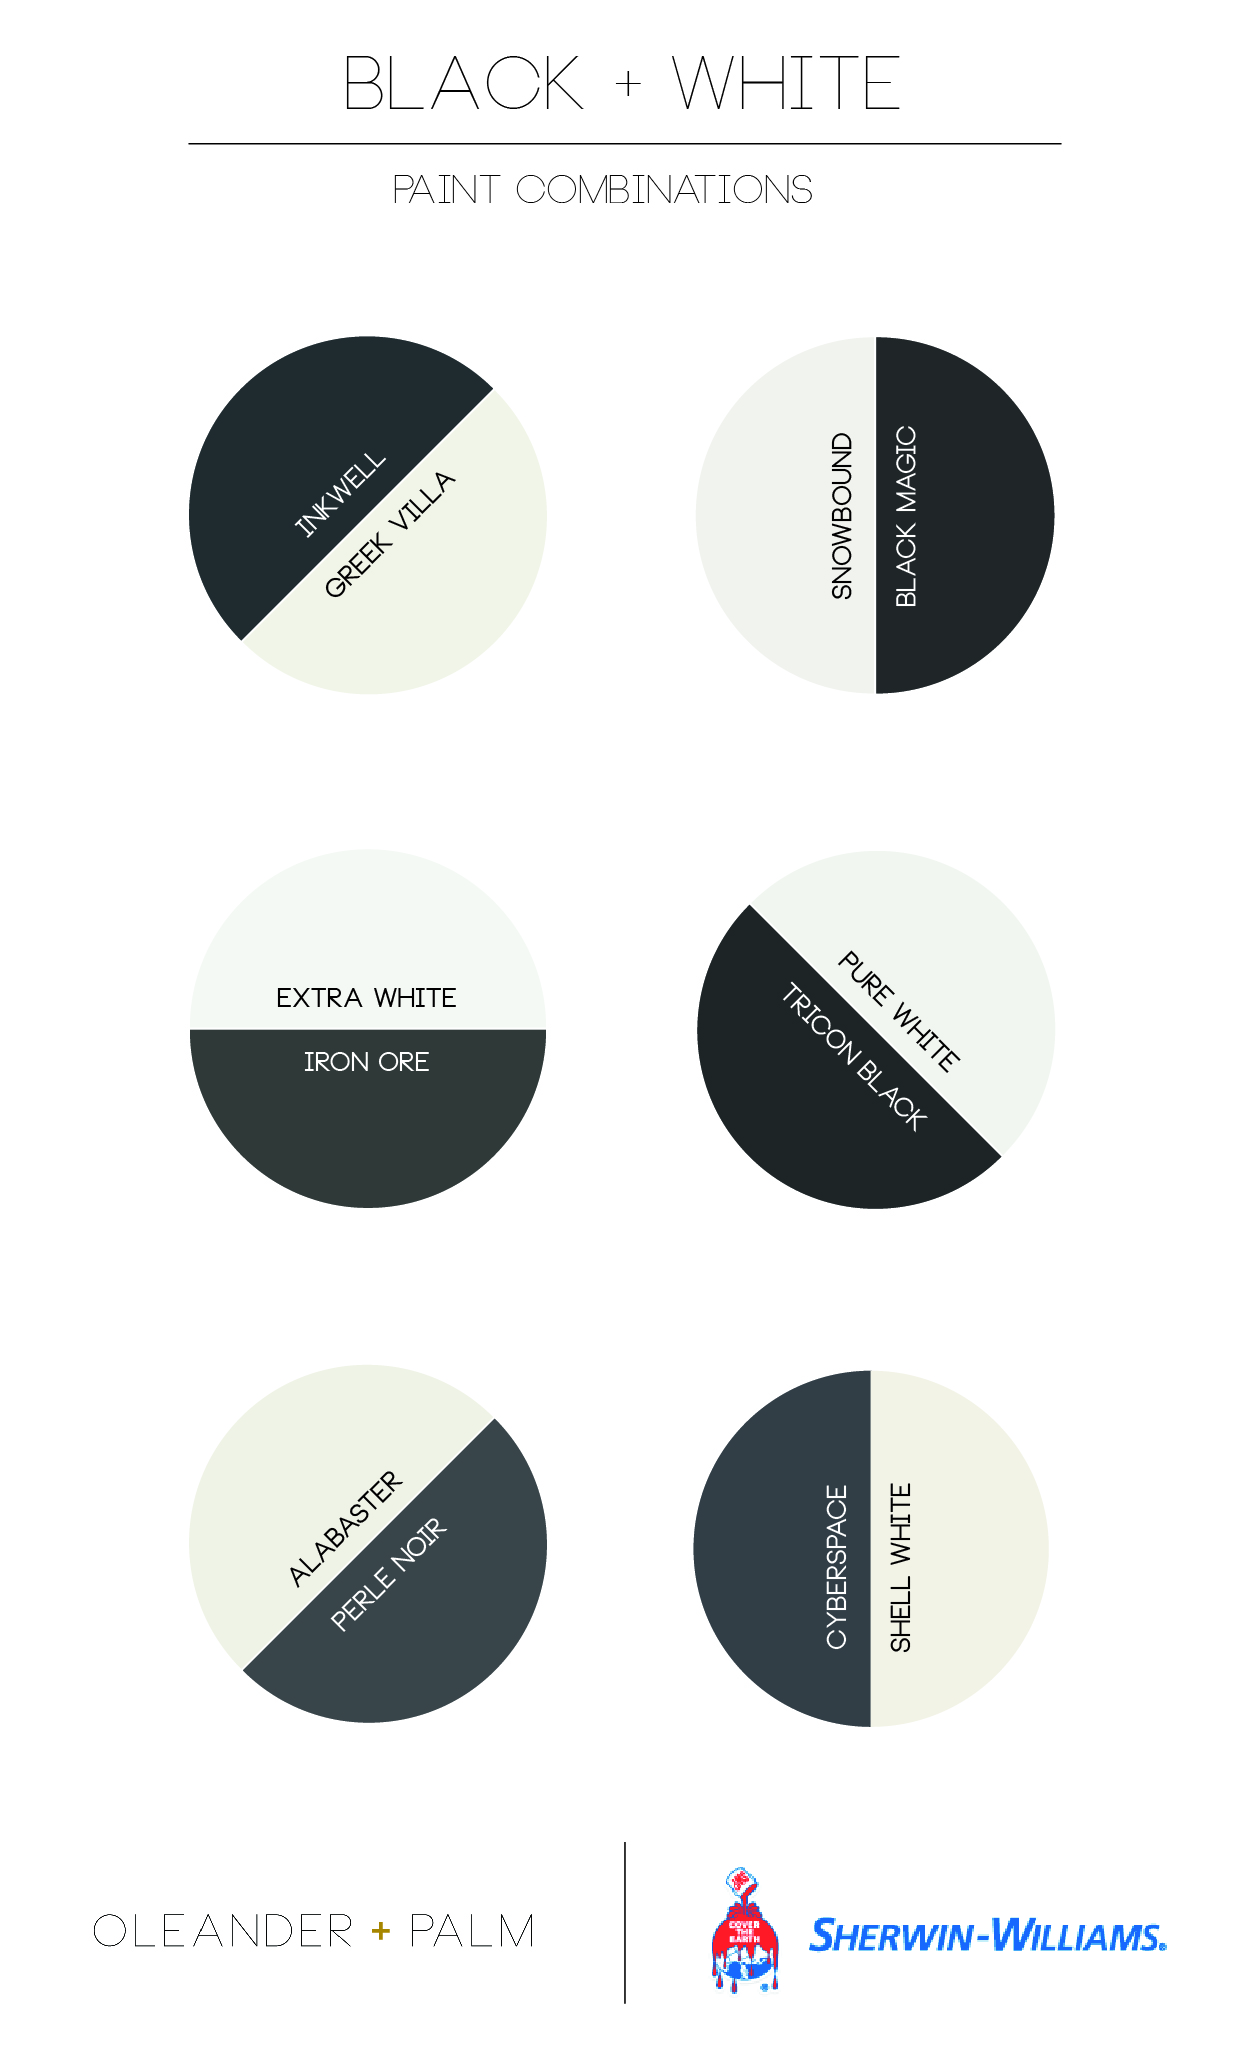
I might be getting ahead of myself. But, I’ve been looking at white and black paint samples and I’ve come up with some great combos. Sherwin-Williams is my go-to paint store, we have had such good results with their products. If you haven’t shopped for a paint color in a while, there are A LOT of blacks and whites out there. I’ve narrowed done my selections, so the next step is to paint them on the house and take a look at the colors in sun, shade and all the times of day in between.

Black and White Paint Combinations from Sherwin Williams

Ok, to backup my all white plan, I did a little searching for some good examples of craftsman and craftsman-like houses painted all white. I’ll tell you, they are not easy to come by. I don’t know if that is a good thing or a bad thing.

Now, go take a peek at what I’ve found and let me know what you think. Do you think this could work for our house? Can a craftsman be white? One thing I know for sure, these examples I’m sharing with you today are total show stoppers. You can’t deny that a white house feel crisp, clean and has a modern edge.

White House, Black Details

source

White Craftsman with Black Trim

source

All White House

source

All White House

source

White Craftsman House with Black Trim

source

All White House

source

All White Craftsman House

source

All White House

source

I’d love to know what you think. It’s going to be a BIG job and one that we won’t want to tackle again in the near future. So, we want to make the RIGHT choice.

Food & Drink

Juniper Berry Cranberry Tonic

January 18, 2018

Juniper Berry Cranberry Tonic Mocktail

It’s about time a shared a new mocktail. I know many of you are attempting a Dry January, so maybe a little treat well help you through. This Juniper Berry Cranberry Tonic is the perfect nonalcoholic drink. It’s sophisticated and full of unique flavors, you definitely won’t feel like you are missing out.

I don’t know about you, but I’m just not ready to be done with cranberries. This wintery mocktail is refreshing and earthy all at the same time and juniper berries and rosemary are perfect for this season. Mocktails really are for everyone, but tonic water give this drink a grown up taste and feels like so much more then just a spritzer.

Juniper Berry Cranberry Tonic Mocktail

You can find the full recipe for this yummy mocktail over on Bonterra’s beautiful blog. Take a minute and look around, there are some really fantastic recipes there.

Juniper Berry Cranberry Tonic Juniper Berry Cranberry Tonic Mocktail


DIY

Phone Food Photography 101

January 15, 2018

We’ve all done it, we’ve waited to take that first bite of our meal until we have taken a picture or 20 with our phones. Sometimes the restaurant it just do dang cute or the latte and plate of food is just too delicious not to share. For some reason we just gotta take a quick pic to make all your internet friends hungry. I’m just as guilty as the rest of you, probably a little more guilty than the average instagrammer, if I’m being honest.

Phone Food Photography 101

But, if we are going to share all these foodie pics, let’s do it in the best way possible. Today I’m sharing all my tips for taking better shots of the food we order at our favorite restaurants. No fancy equipment needed, just your phone camera. I have an iphone 6, and all of these images were taken with that phone.

Phone Food Photography 101

1. LIGHT

Without good, natural light, I think getting a great shot can be almost impossible. Whenever possible, I ask for a window seat, or even better, I sit outside.  Try to avoid overhead light bulbs, because they can cause a glare on the plate or table. Artificial lighting will also cast a very yellow tone to your food and drinks.

In the picture above, I moved to the window sill in the cafe to get this shot of this pretty rose latte. The table tops were all to far from any natural light.

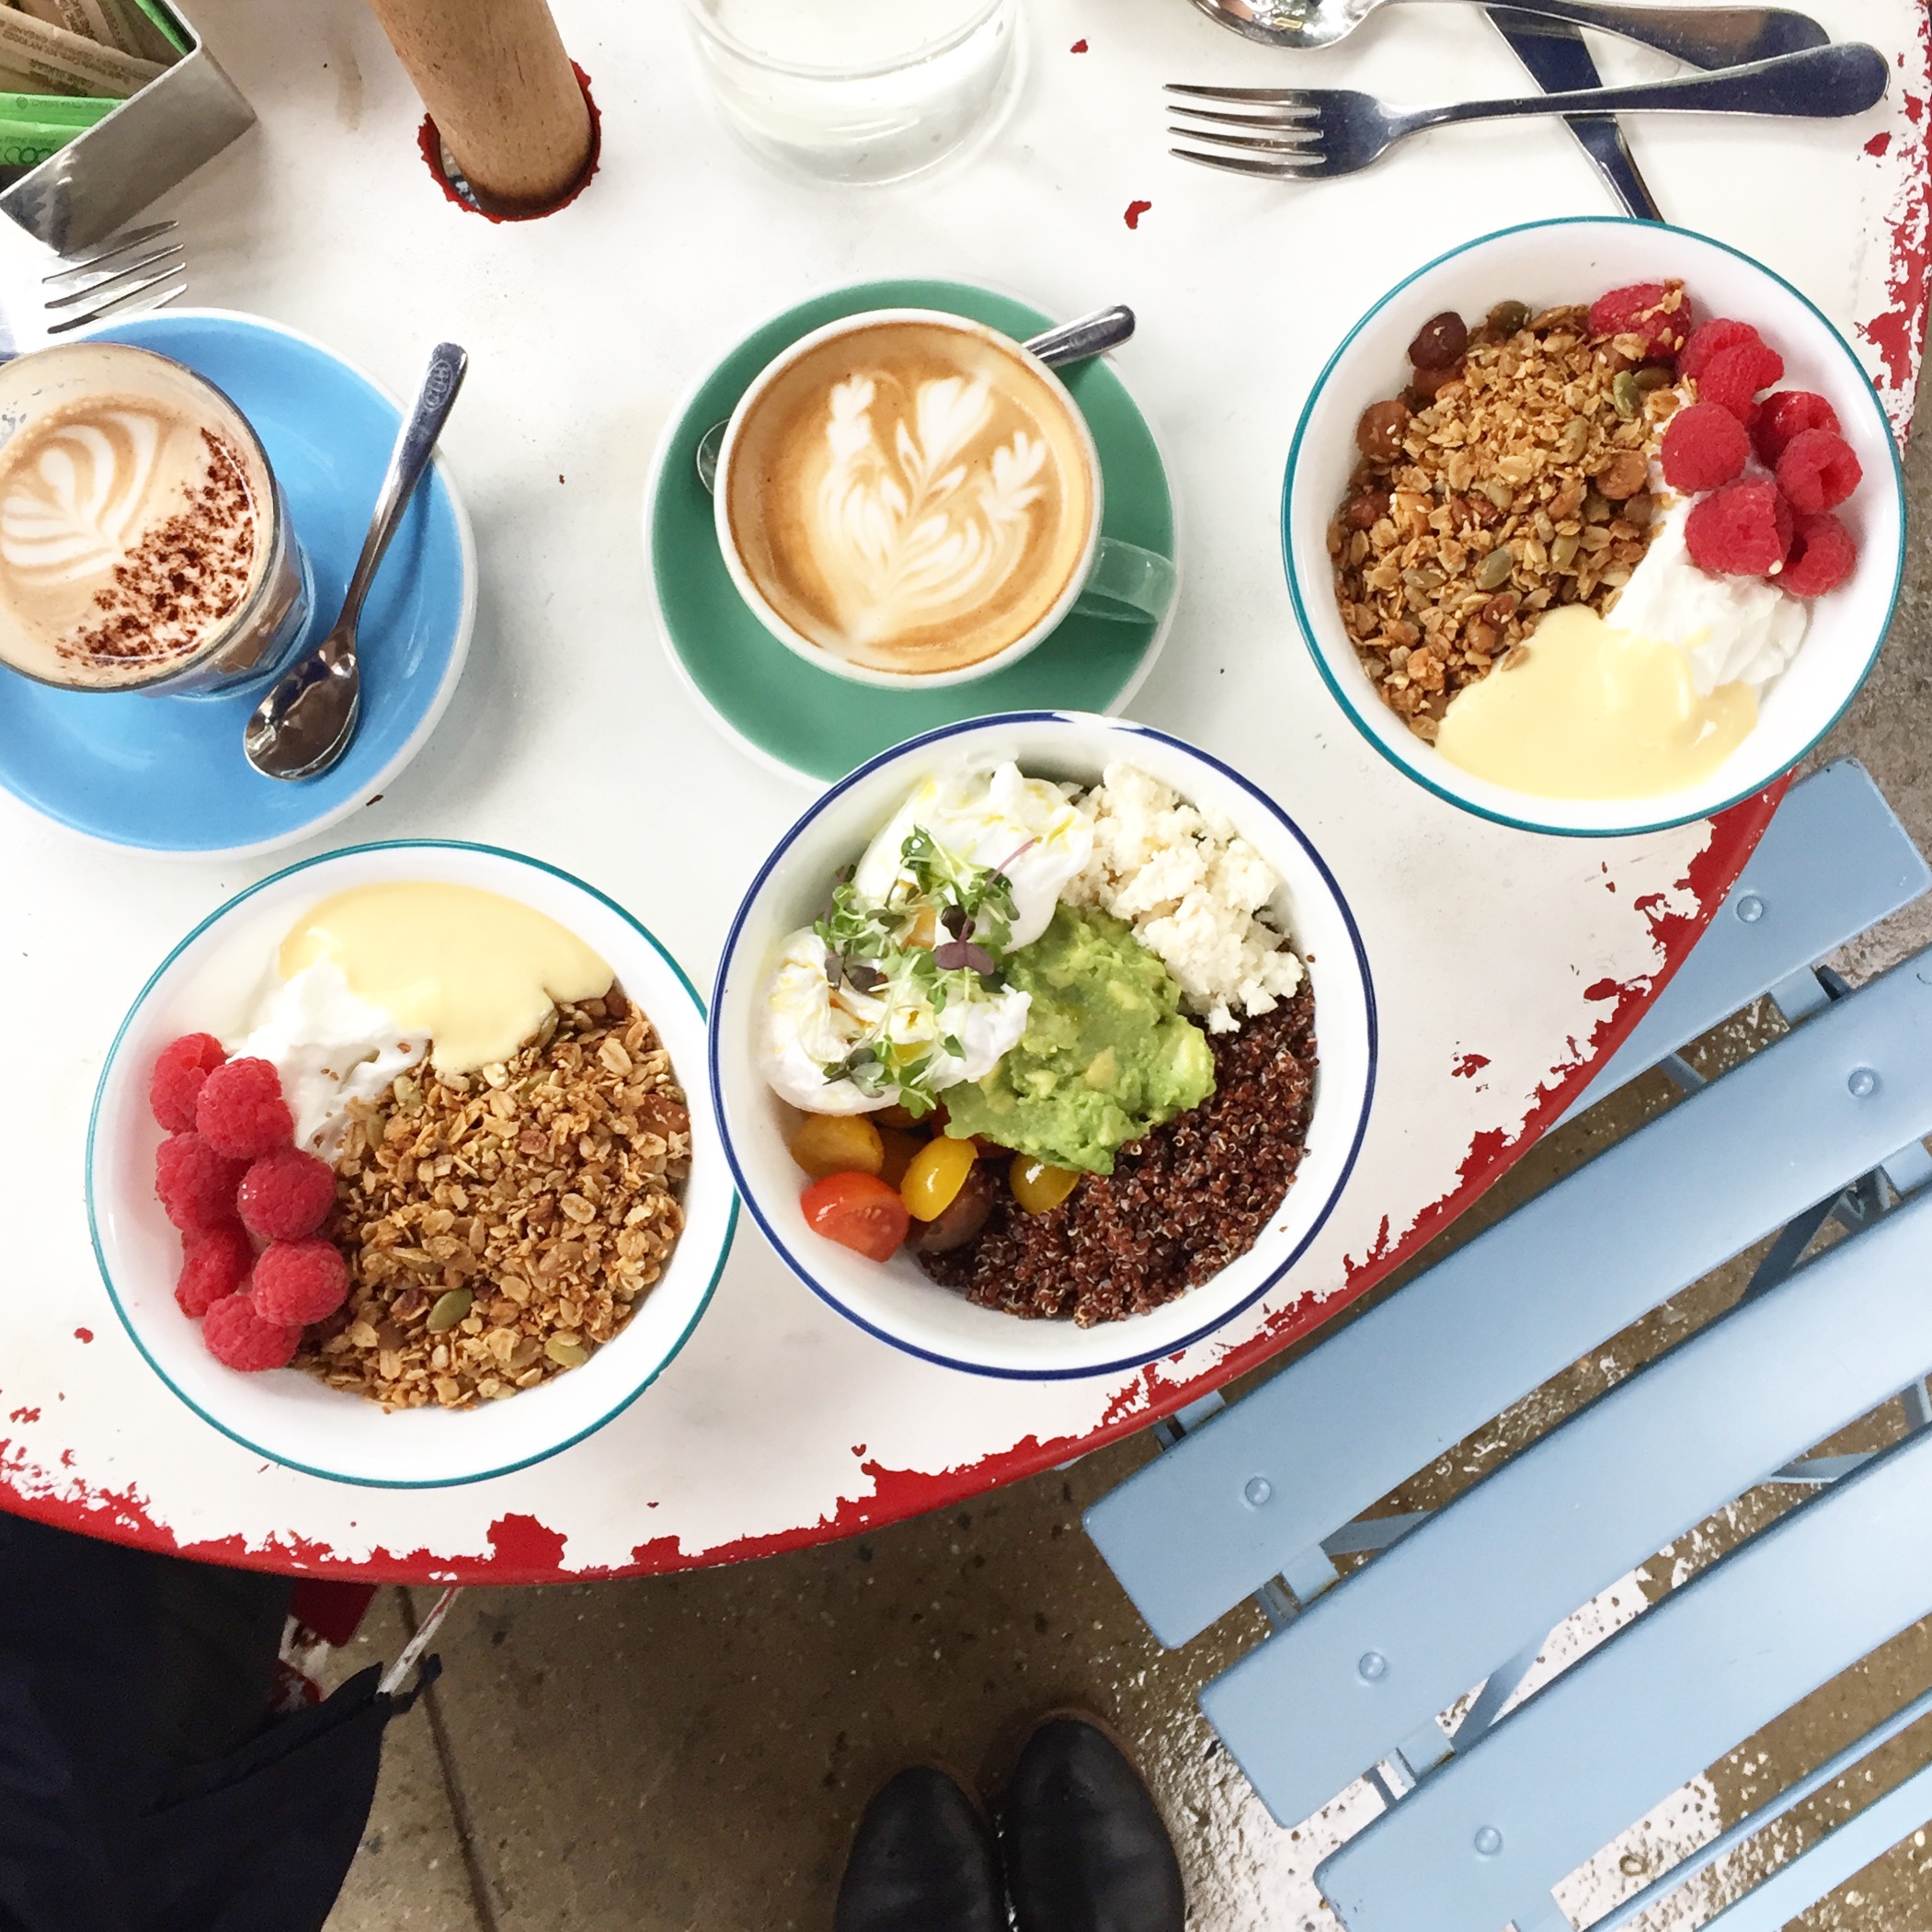
Below is a shot of a yummy brunch at Bluestone Cafe. The restaurant was actually very small and very dark because it was in the annex of an old church. So, even though it was a rainy day in NYC, we sat outside under an umbrella. But, the lighting couldn’t have been better. If we would have eaten inside, this colorful photograph would not have happened.
Phone Food Photography 101

2. BOUNCE + FILTER

Now that you have found the light source, you can direct it were you want it to go. Unless the sun is directly overhead, usually one side of your table will get more light than the other. Bouncing light on that shady side can give your image a boost and eliminate dark shadows. To bounce light, you usually need something white or very close to the color white. Most times, restaurants have white napkins. Simply have a friend hold the napkin or a menu directly opposite to the light source. By holding this white object on the side of the food that is in the shadow or furthest away from the light source, you can “bounce” light onto that side. The sun will hit that bright object and then reflect a little more light to the other side. Often food and objects can look flat in very shady light. Bouncing light can help bring a little more depth back.

If the sun is very harsh and direct, filtering or blocking the light can eliminate some of those harsh contrasts and dark shadows. Holding up a white cloth napkin to filter the direct sun through can be very helpful. If it is really bright, you might just want block the sun with a menu or even or date. I’ve made my kids or husband stand by my plate of food so that it is entirely in the shade just for a great picture.

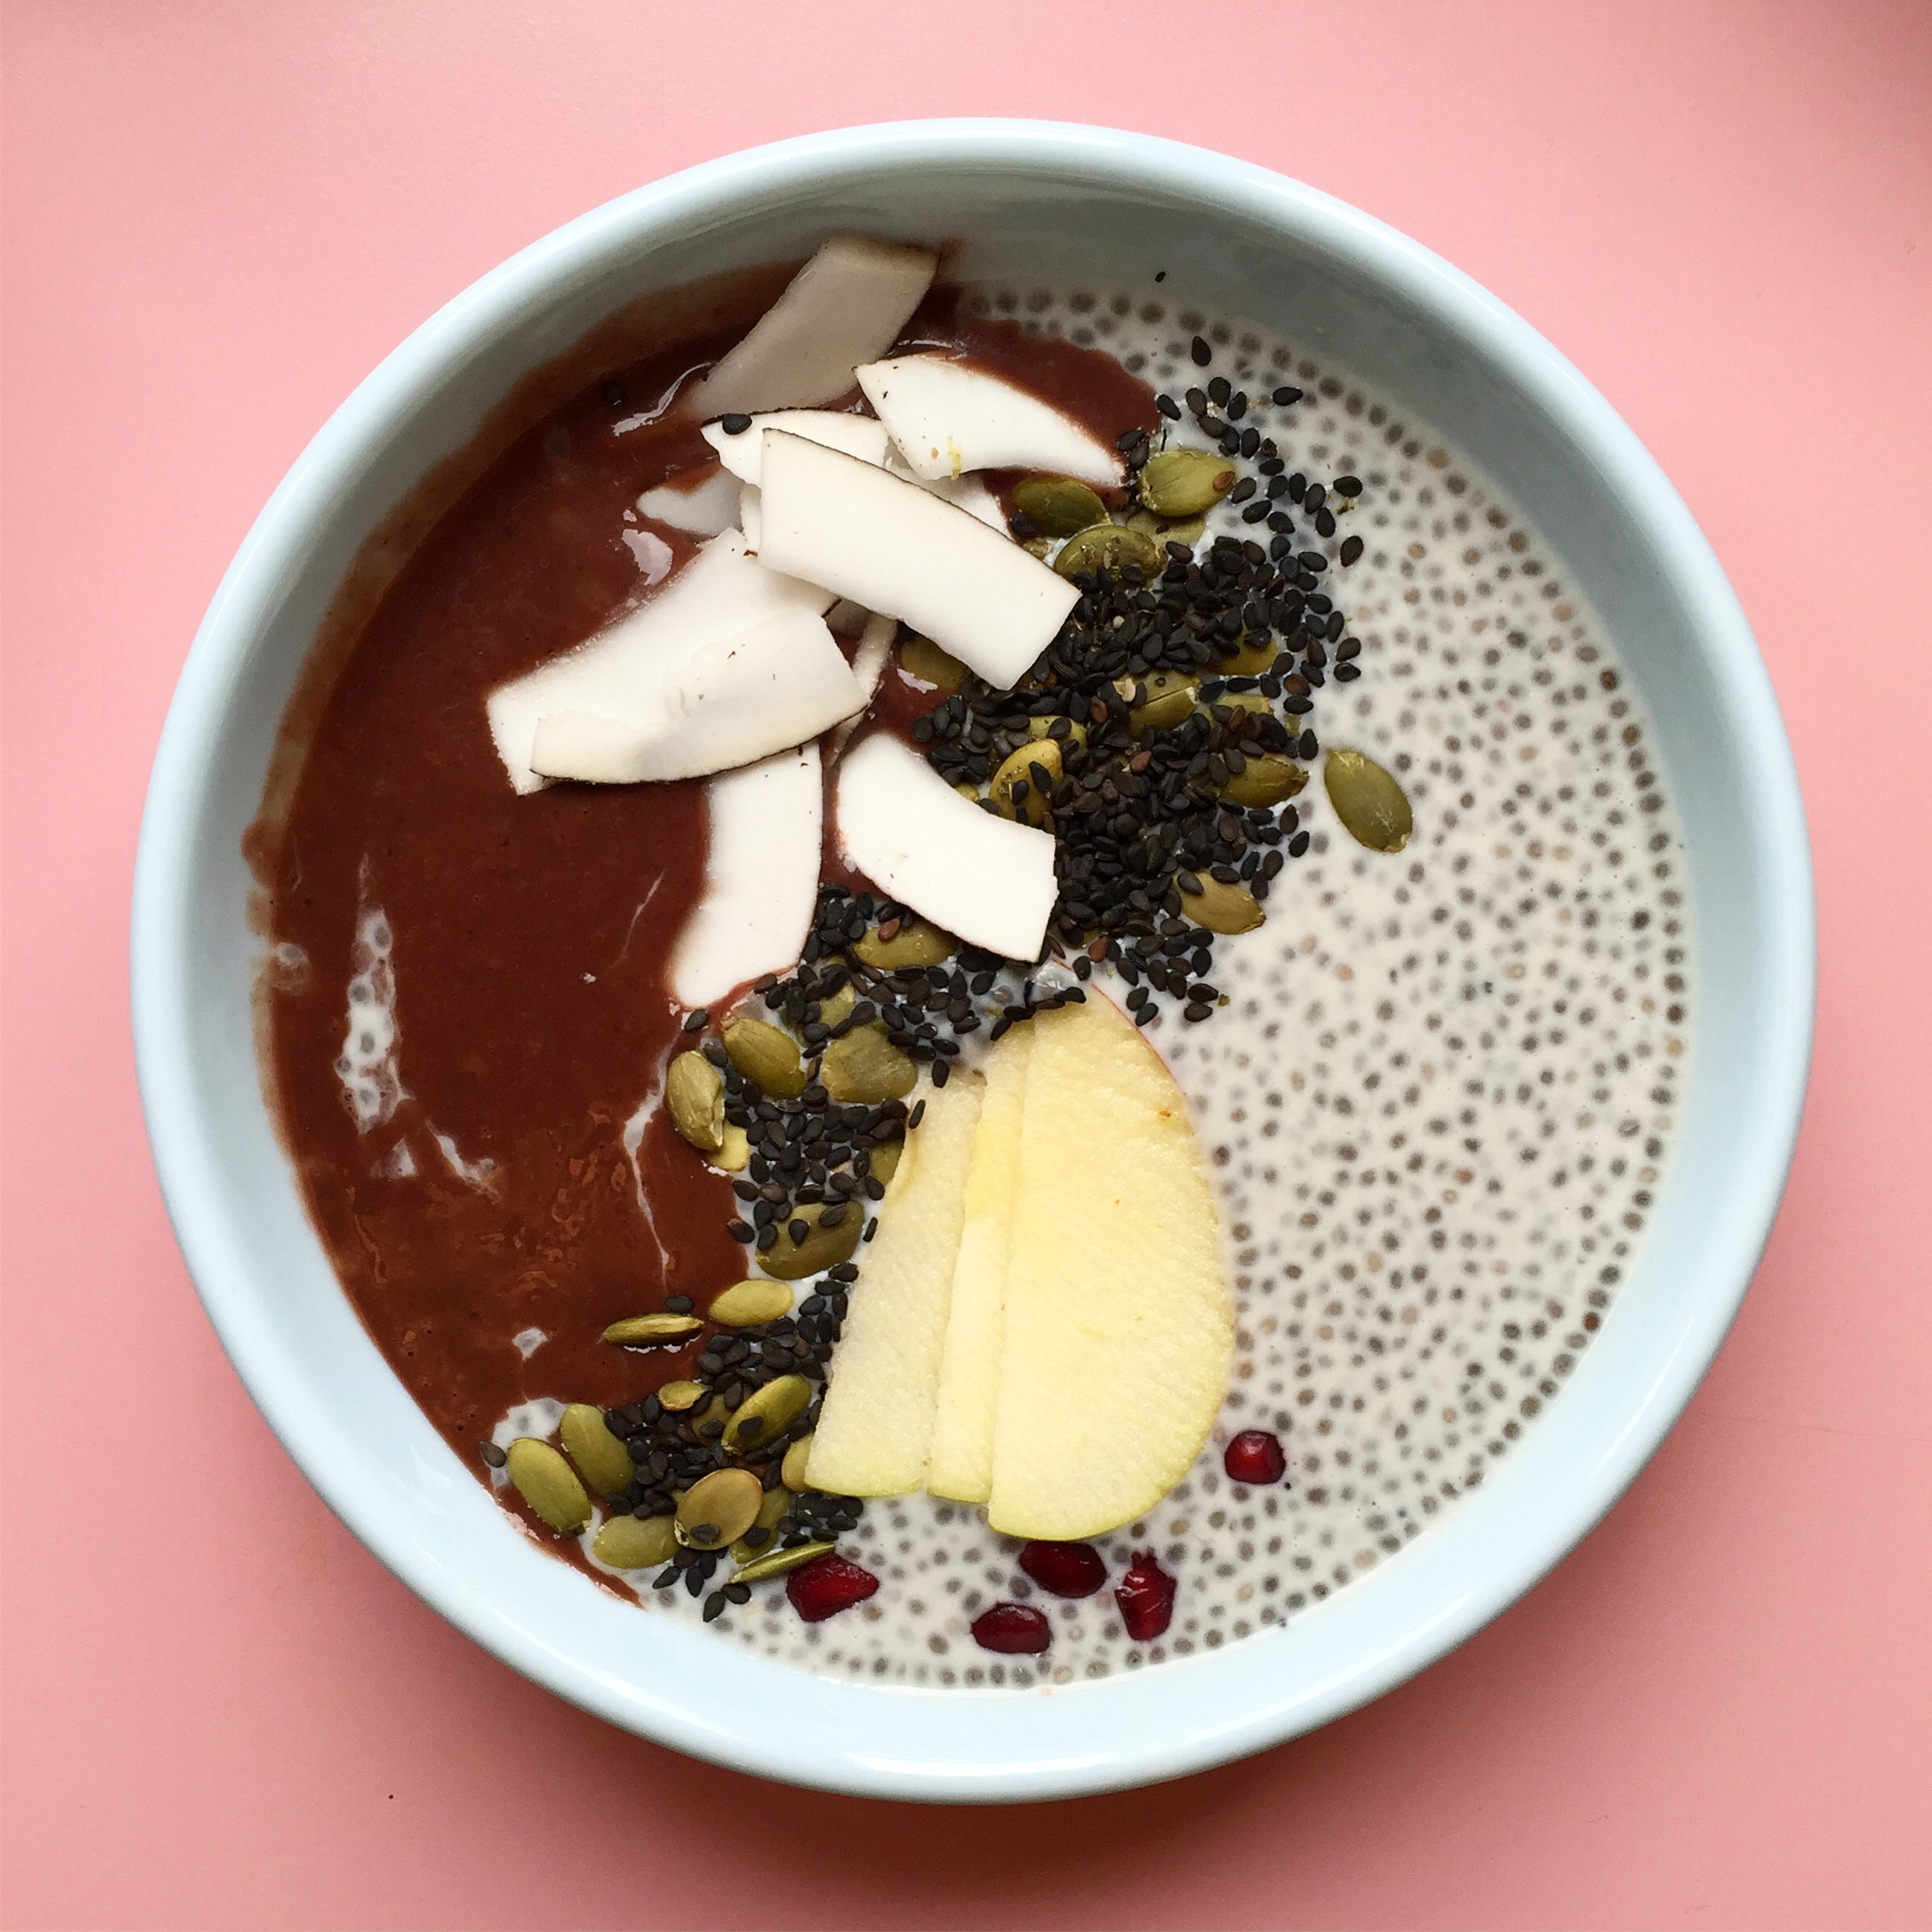
Outside of this shot below, my husband is holding up a napkin to bounce light from the window so that the left side of the bowl and table is not dark and shadowy.
Phone Food Photography 101

3. BACKGROUND

Often the background to an image can distract from the food or drink you are trying to spotlight. It can be hard to achieve a soft blurred background very closeup with a smart phone. So, if the table top is not attractive, there are other backgrounds that can be considered – your napkin, menu, floor, chair or bench, a wall, and even the clothing you are wearing can work.

Phone Food Photography 101

I have been known to carry a treat quite a distance before taking a bite. This meringue, donut, and Swedish pastry were all carried for a few blocks until I found the right wall to photograph them against. The restaurants were both crowded and cluttered, I didn’t like the dishes they were served on, and a top down image just wouldn’t have done them justice. So, walking to find a wall that would complement and not compete with my subject worked for me.


Phone Food Photography 101

The table top that this coffee was sitting on was a little busy and completed with the pattern and art of the latte. So, I laid out my napkin, in a kind of haphazard way, to create a more calm and bright background.

4. COMPOSITION

Ok, first of all, don’t order the meatloaf and mashed potatoes, order food that you know is going to have color and texture. Fruits and veggies are always going to have more vibrant colors.

This is when you can add your personal style to the image. Bringing people into the shot will give the food a little more life and personality, even if it’s just your hand in the shot.  Don’t be afraid to play with what’s already of the table – add a glass to the frame, move the flowers, place the napkin, scatter the cutlery and unfold the napkins, or even pull the condiments out of sight if they are too busy.  And then add some of your own props into the image – a hand, your phone, purse, a scarf, keys, a notebook. When you bring a personal object into the shot, immediately your personal style will come through. If you are a brand, this is where you can tell your story, not just share pretty food that is on the plate.

Phone Food Photography 101Phone Food Photography 101

I like to play with black and white patterns in my feed. This top was a much better contrast to my coffee then the wooden bench behind it. Also my red nail polish was a perfect match to the straw

phone food photography 101

5. ANGLE

Smart phones have a wide-angle lens and the depth of field cannot be adjusted, so closeup images can appear distorted. This is why top-down food photography is so popular. Straight on can also work well. Holding the plate or glass in your hand or lap, or take the donut and walk over to a wall. (You can see a good example of straight on above where I’m holding the iced coffee.)

If you keep scrolling down, you will see that I tried to take a few pictures of the mugs side on, to show the handles. But, the images were just too distorted. I just fell back on the top-down angle because it is the easiest to work with when you are shooting with a phone camera.

6. SHOOT

The first step is to clean your lens with the corner of your shirt. You’ve seen it before, just a foggy, blurred image.  Next, hold the camera steady (tuck in your elbow). Touch a focus point on your screen and shoot way more images than you think you need.

And as embarrassing as it might seem in public, take way a lot of pictures. It’s probably mostly strangers around you, so who cares? You can see that I tried a lot of different angles and played with pulling way back and then coming in on some details as well. To get the full table, I was definitely on my tippy toes. Because I took such a variety of shots, this one lunch date has given me at least 4 instagram images over the last year.

Zoom out and zoom in – there is something beautiful about the big scale mess of all the dishes and cutlery on a table and also the close up details of a meal can be just as interesting. I should mention that I am not using the zoom feature on my iphone, simply hold the camera higher or move it in closer to the subject.

7. EDIT

First rule – NO instagram FILTERS. Now if you have created your own custom filters on VSCO or consistently use the same filters on A Color Story app, this can be ok. But, sticking with clean, crisp colors  is best when sharing images of food. The Instagram app can do most of the work for you. I use brighten, warmth (especially in the shade), contrast, crop, and tilt (keep those horizons straight). I also like Google’s Snapseed app. I can clean up spots and more detailed lighting issues with this app.

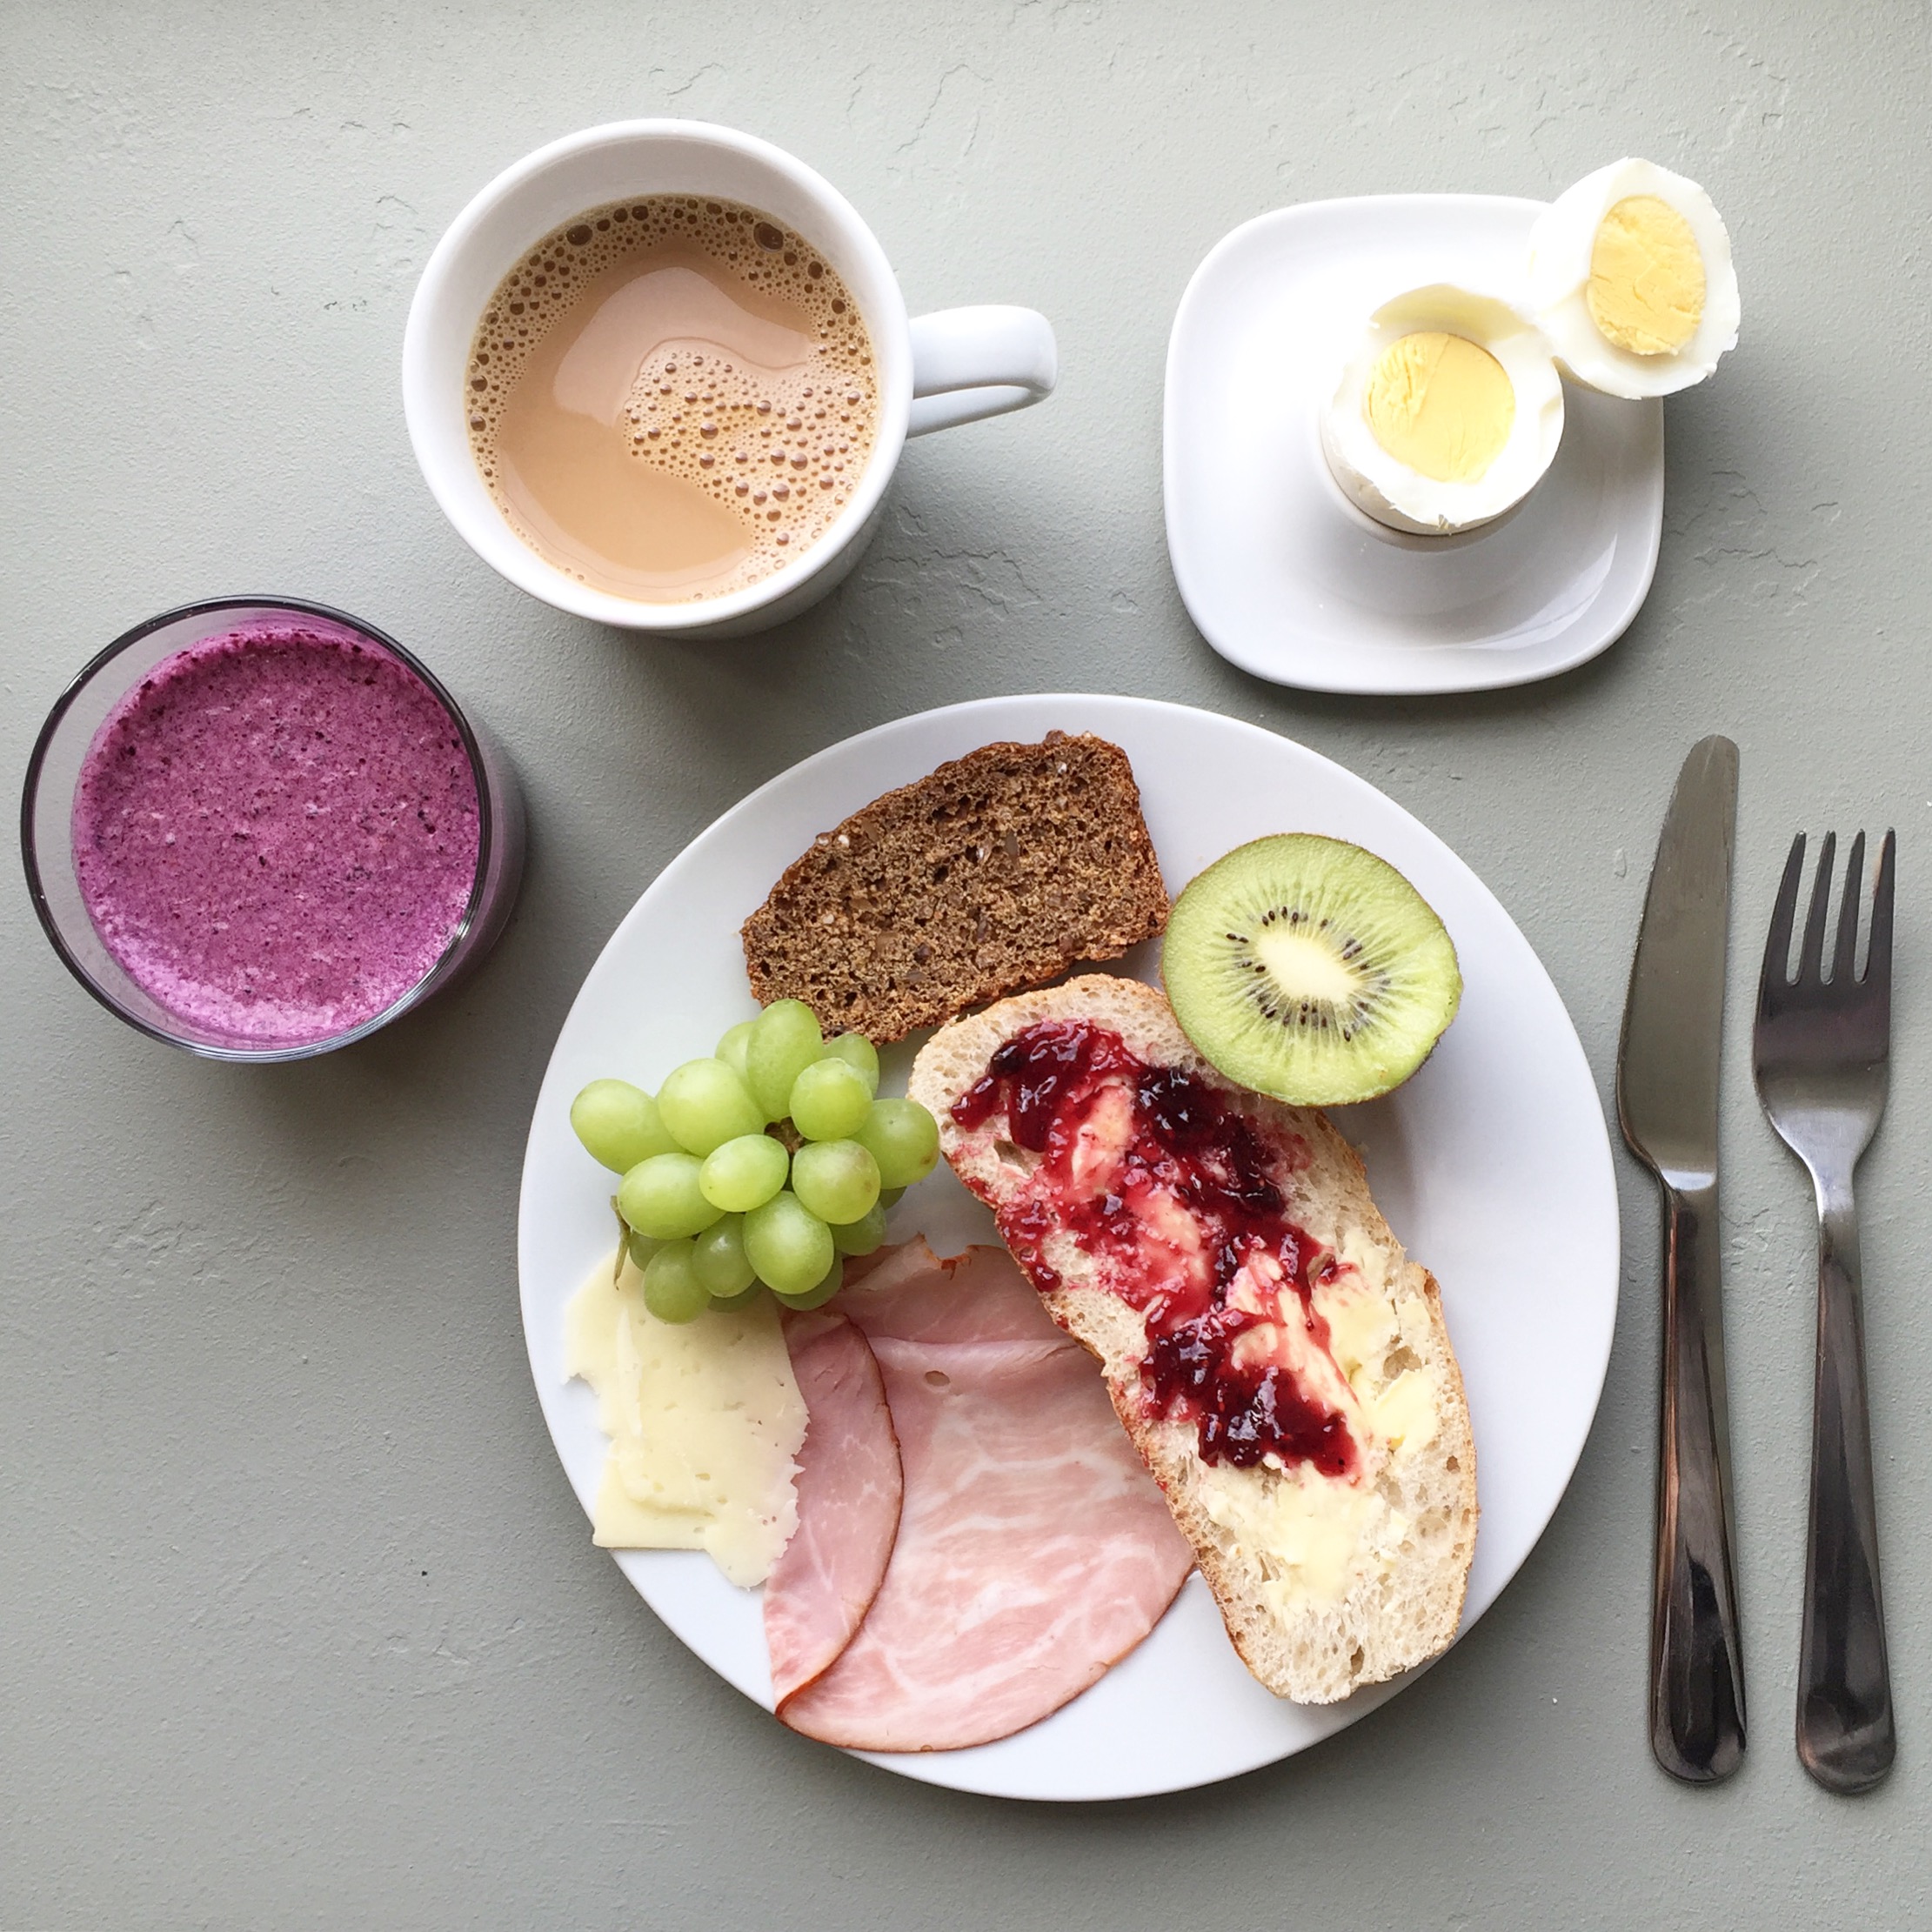
The morning I took this photo of this coffee cup, it was pretty grey and cloudy. Adding a little brightness and some contrast make the colors pop just a little more. I little editing can go a long ways.

Phone Food Photography 101

I hope you find this helpful. No more ugly plates of food in dark restaurant corners. I can’t wait to see what your next meal looks like.

Food & Drink

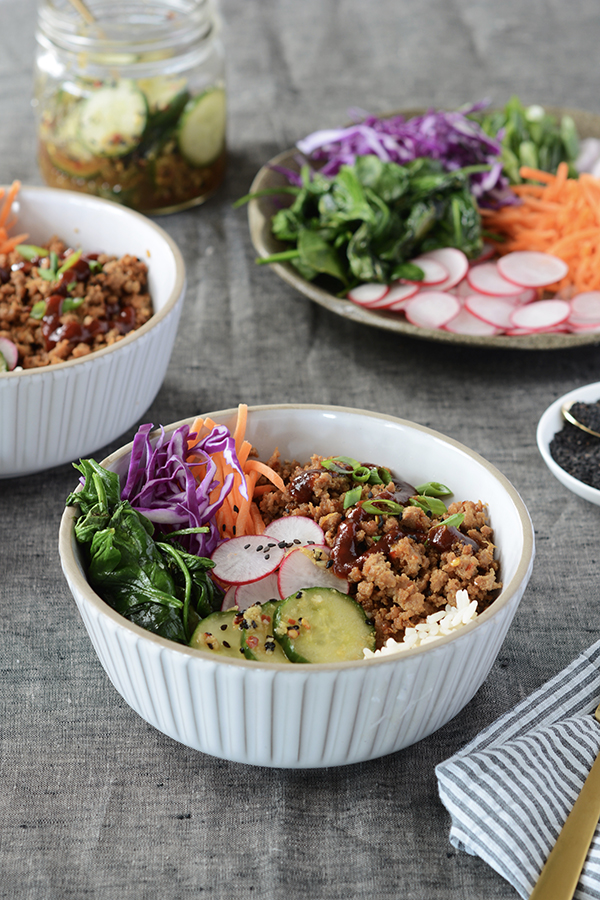
Ground Turkey Korean Rice Bowls

January 10, 2018

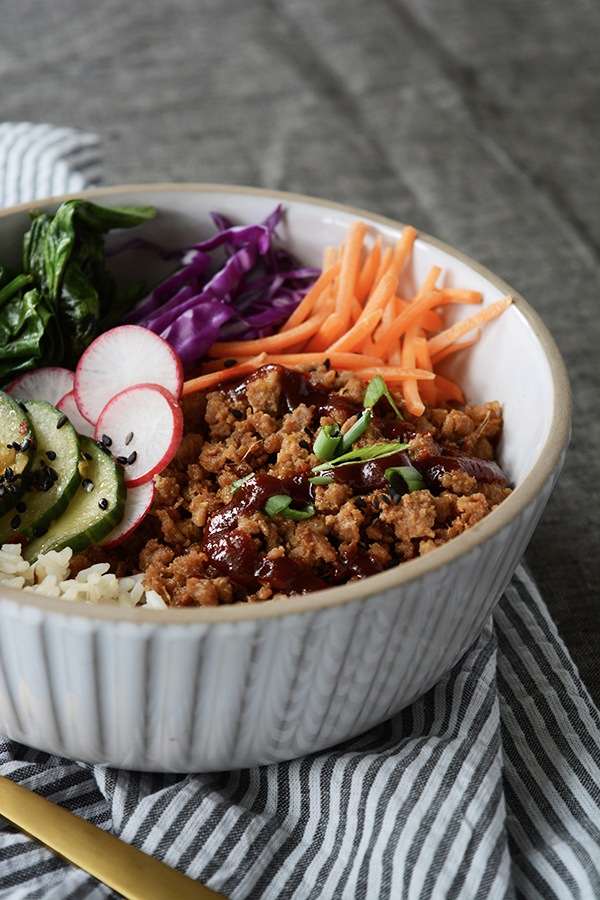
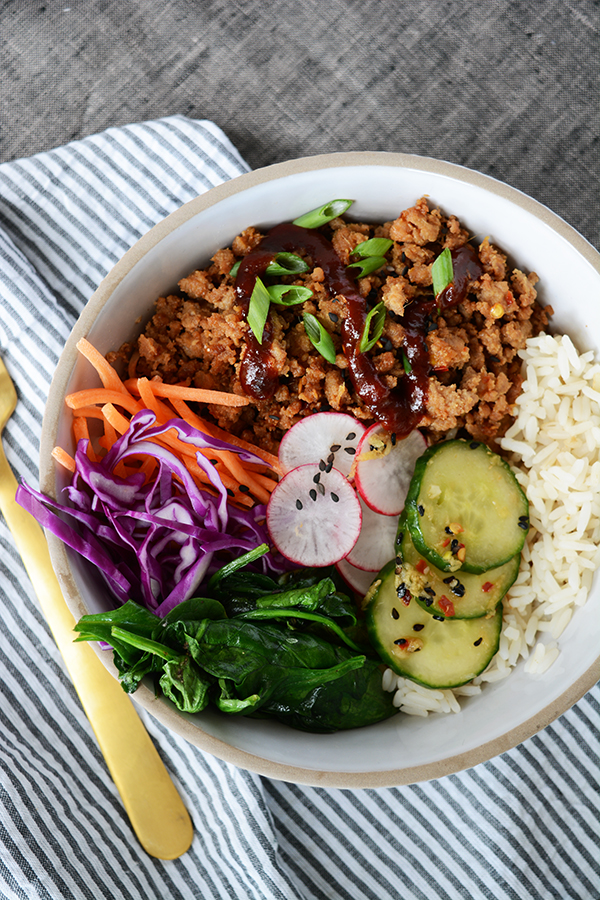
Ground Turkey Korean Rice Bowls

Happy New Year!

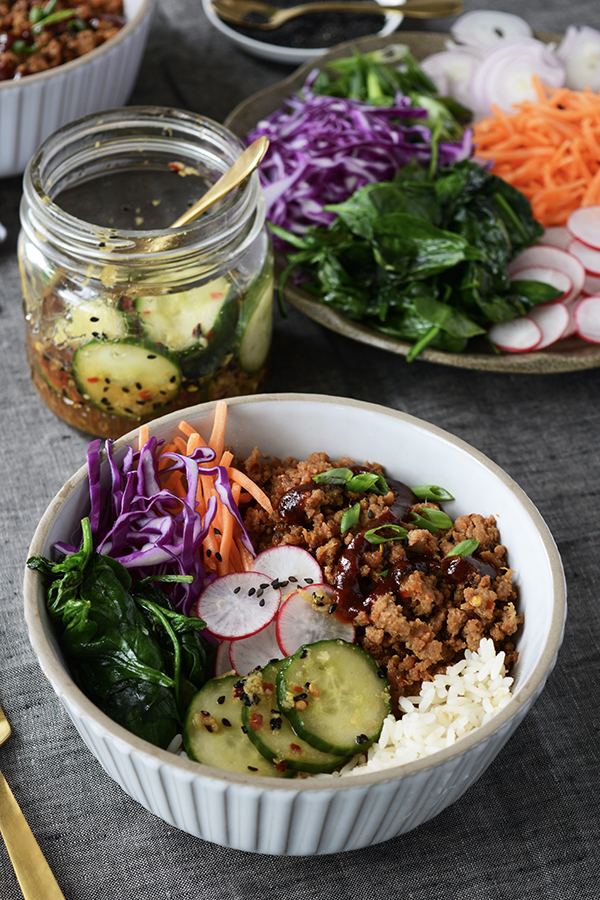
Usually, I start the new year with a good health and fitness plan, but this year the I’m not there yet. There has been no trips to the gym yet. I’m starting with baby steps – a few new healthy recipes to add to add to our weekly menus. As the main cook in our house, I find myself getting into ruts and struggling to find fast, healthy meals that my family will actually eat. But, these Ground Turkey Korean Rice Bowls, made with Foster Farms Organic Turkey are a winner. This recipe literally takes less then 30 mins to make and it’s soooo delicious. This is not a boring meal, it’s full of flavor and packs so many veggies into one bowl.

My kids aren’t really picky eaters, but having choices definitely gives them a little more control. I added the rice and turkey to their bowls and then they topped with with all their favorite vegetables.

Ground Turkey Korean Rice Bowls

As you may know, I’m married to a Biology and Environmental Science teacher. I wrote a lot about it here, with this yummy Turkey Meatball Gyro recipe. It’s a long story, but we are always looking for ways to eat in a way that creates less of a negative impact on our environment.
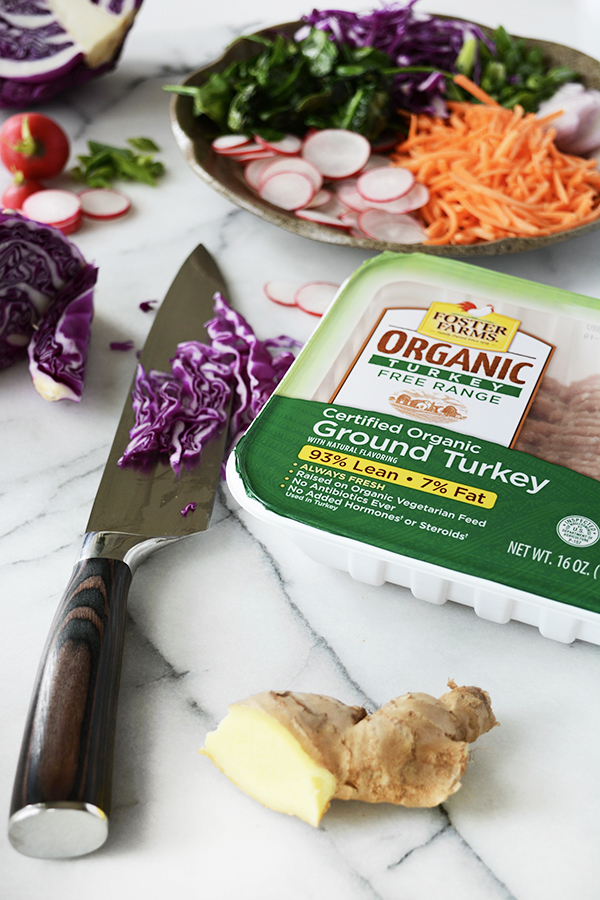
That’s why Foster Farms Organic Ground Turkey is great choice for our family. Ground turkey is a healthy, leaner and lower calorie alternative to ground beef and is an easy substitute for leaner meals. Foster Farms Organic Ground Turkey is USDA Certified Organic and raised free-range on organic land. It’s100% natural with no antibiotics, no GMOs and no added hormones or steroids. The land on which the flocks are raised has been certified organic. This requires a 3-year transition during which time the land must be managed under organic methods (or lie fallow). The land is farmed without synthetic pesticides, herbicides and fertilizers. These are all things that make the nerd I’m married to very happy.

I trust Foster Farms for their organic ground turkey, they are the leading producer of organic turkey in the Western United States. And for me, they are even local, Foster Farms turkeys are raised right here in California’s Central Valley.

Ground Turkey Korean Rice Bowls

  • 2 lbs. Foster Farms Organic Ground Turkey
  • 1/4 soy sauce
  • 2 tbsp. coconut sugar (brown sugar can by substituted)
  • 2 tbsp. minced garlic
  • 2 tbsp. finely grated fresh ginger
  • 1/2 tsp. crushed red pepper flakes
  • 2 tsp. sesame oil
  • 1 tsp. fish sauce

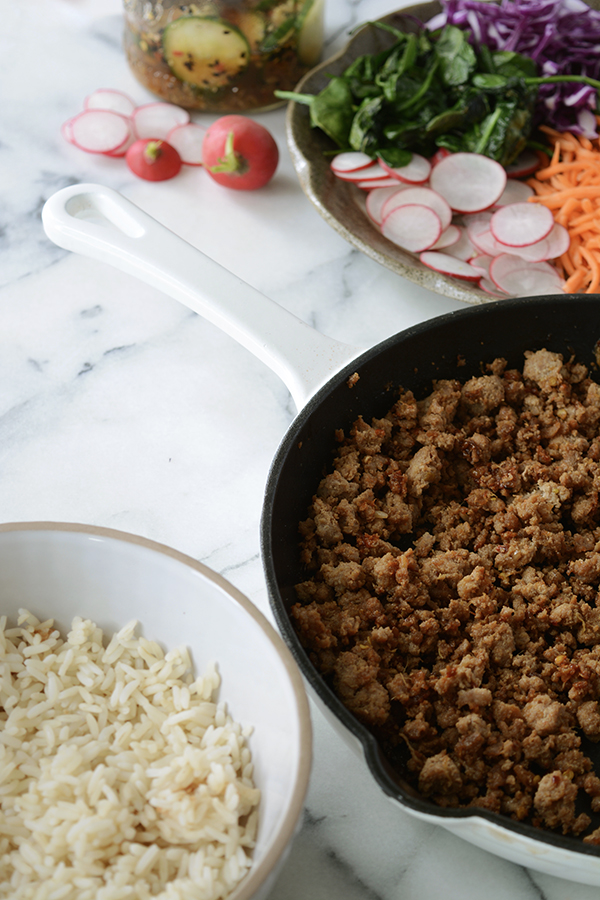
In a fry pan, cook the ground turkey completely. Use a spoon to break apart the meat as it cooks.

In a small bowl combine the remaining ingredients listed above. Pour the mixture over the cooked ground turkey. Stir and cook another 5 mins on medium heat. You want to make sure the garlic and ginger is completely cooked.

Ground Turkey Korean Rice Bowls

  • 3 cups of brown rice
  • carrots, shredded
  • green onions, sliced
  • radishes, thinly sliced
  • red cabbage, shredded
  • baby spinach
  • black sesame seeds
  • Spicy Cucumber Salad (see recipe below)

You can really add any of your favorite veggies. I think bell peppers, zucchini, and mushrooms would be super yummy with these bowls as well.

Cook the rice however you normally cook rice. I got a rice cooker for a wedding gift almost 20 years ago and it’s the only way I make rice. But, you can definitely make rice in a regular pot, the old-fashioned way.

In a small frying pan, with tbsp. of vegetable oil, saute the spinach until it is just wilted. Season with salt and pepper.

Ground Turkey Korean Rice Bowls

Assemble the bowls. Start with a bed of rice, add about 1/2 cup of the ground turkey and then either arrange the veggies in little piles or let every top their rice bowls with all their favorite vegetables. Garnish with a sprinkling of sesame seeds, green onions and a little Korean Sweet and Spicy sauce.

This recipe serves a family of 4 (or 5 in our case).

Ground Turkey Korean Rice BowlsGround Turkey Korean Rice Bowls

Spicy Cucumber Salad

  • 1 cup sliced cucumber (1 small cucumber or about 1 cup when sliced)
  • 1/2 tsp. salt
  • 1/2 tsp. crushed red pepper flakes
  • 1 tbsp. minced garlic
  • 1 tbsp. finely grated fresh ginger
  • 1/4 cup rice wine vinegar
  • 2 tbsp. coconut sugar (brown sugar can be substituted)
  • 1 tsp. sesame seed oil
  • 1 tsp. black sesame seeds

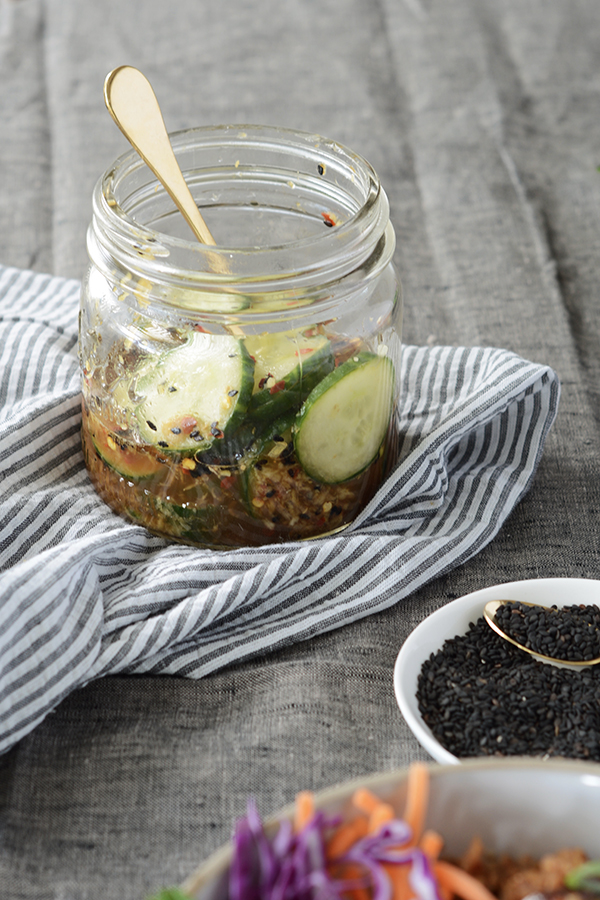
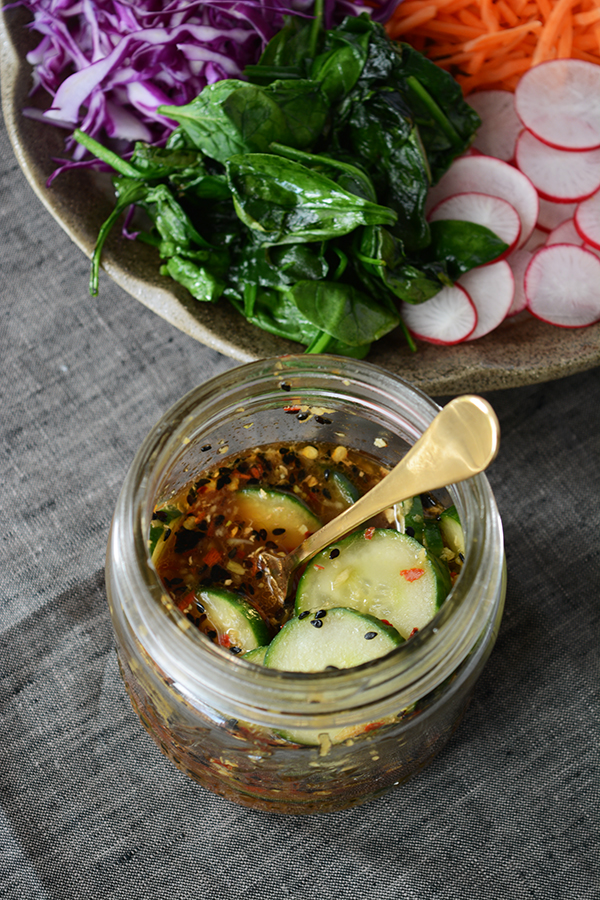
These spicy cucumbers make the bowls. They are sweet, spicy and tangy. These can be made in the morning or up to a day before.

Slice the cucumbers in thin rounds. Place in a bowl and sprinkled with salt. Allow the cucumbers to sit for about 15 mins. Then drain off the water. Add the remaining ingredients. Stir, cover and place in the refrigerator.

Ground Turkey Korean Rice Bowls

I hope your New Year is off to a great start. Here’s to eating healthy and having dinner together as a family!

This post is sponsored by Foster Farms. Thank you for supporting the companies that help make this blog possible. 


DIY

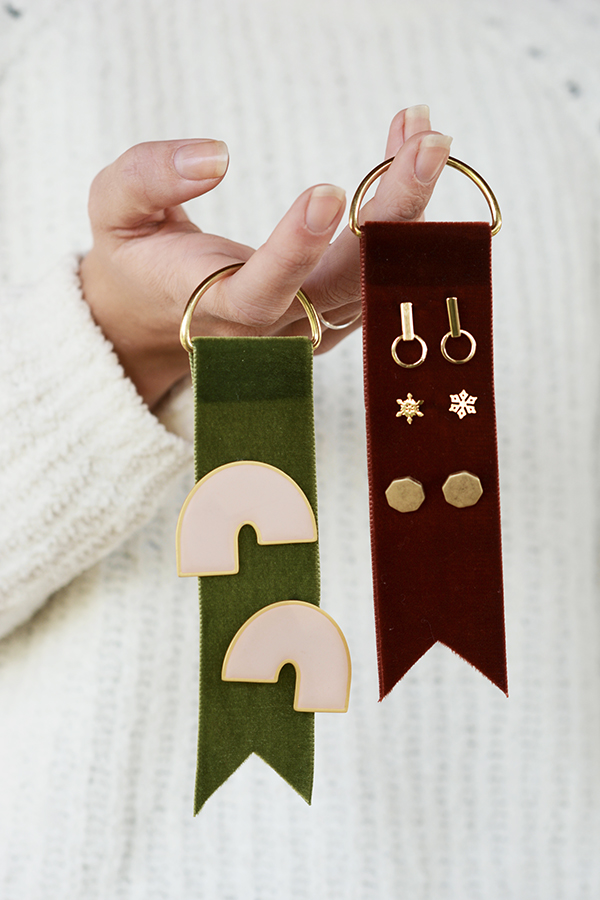
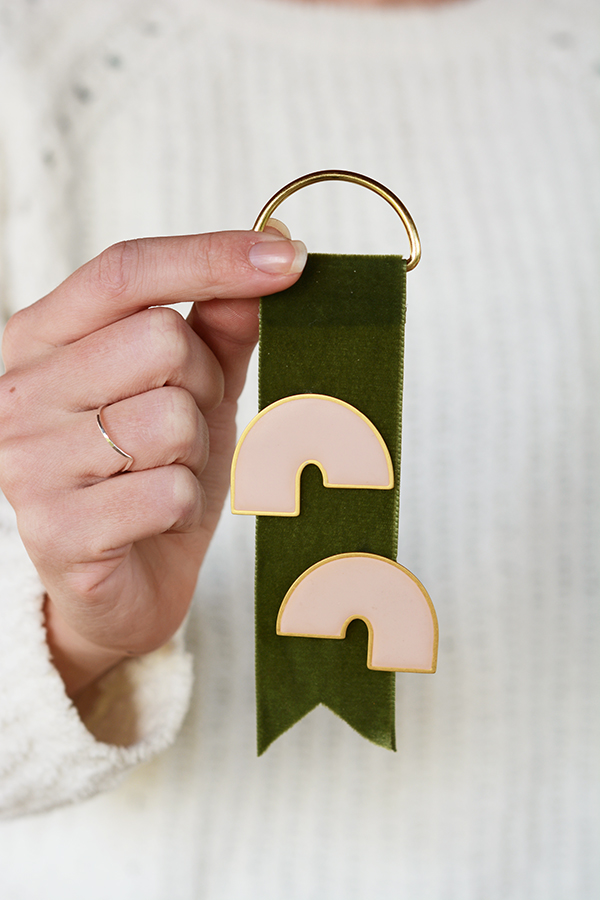
DIY Velvet Earring Tags

December 23, 2017

DIY Velvet Earring Tags

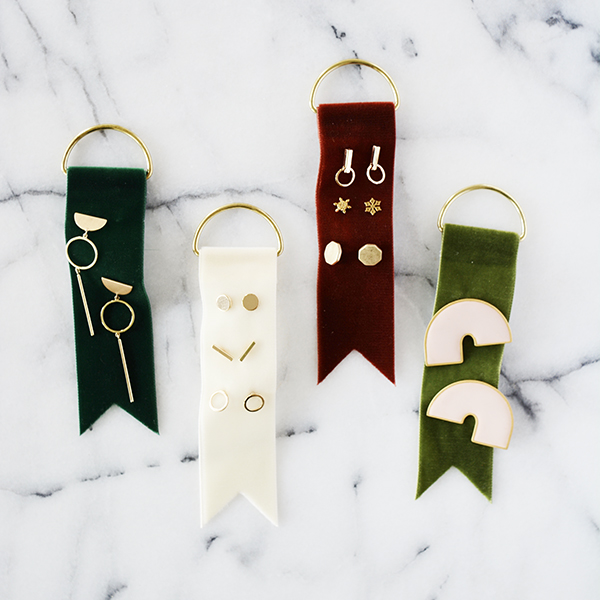
This little DIY is a Anthro hack. When I was in Chicago earlier this month, I saw a cute set of studs all displayed on a velvet tag. I decided this was a great little gift idea I needed to recreate for folks on tighter budgets (like myself). Don’t get me wrong, Anthropologie does everything so well, it’s just a little out of my price range most of the time.

DIY Velvet Earring Tags

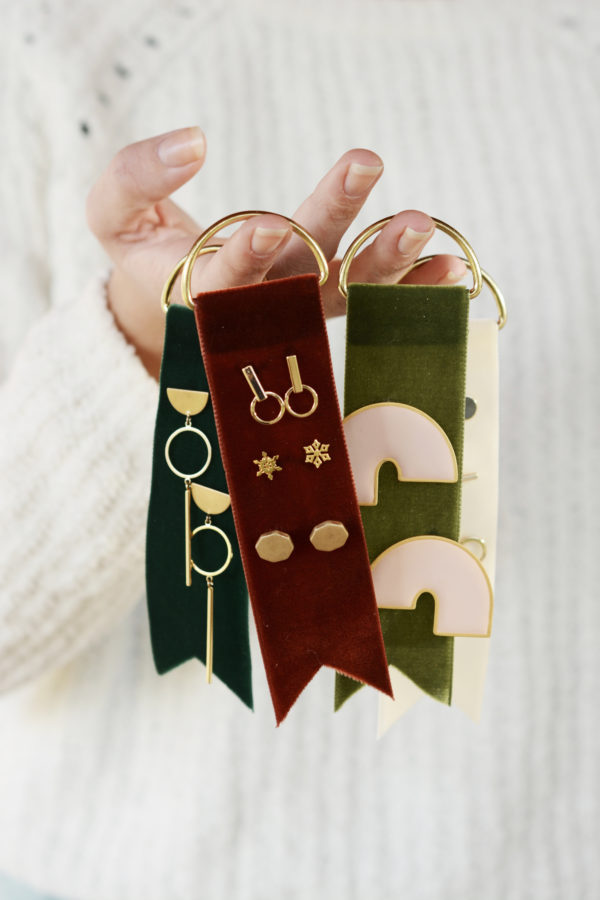
So, with a 6 inch length of velvet ribbon, a brass D ring and some hot glue, I gave some inexpensive earrings from H&M, Target, and Forever 21 a much classier presentation. This is a great last-minute stocking stuffer idea, or just a fun gift to hang on the tree for Christmas morning. One of these sets will be going in my daughter’s stocking for sure.

DIY Velvet Earring TagsIt’s pretty self-explanatory, but simply glue down about a 1/4″ of the end of the ribbon to secure the D ring and then cut a V out of the bottom of the ribbon. Then you can just push a few pairs of earrings through the ribbon and secure them with their backs. So easy, and so much better to give then a set of earrings on a cardboard or plastic card!


DIY Velvet Earring TagsDIY Velvet Earring Tags

I now, I better FINALLY finish my Christmas shopping.

Design / etc.

The Frame by Samsung

December 20, 2017

This post was created in partnership with Samsung.

The Frame by SamsungThe Frame by Samsung

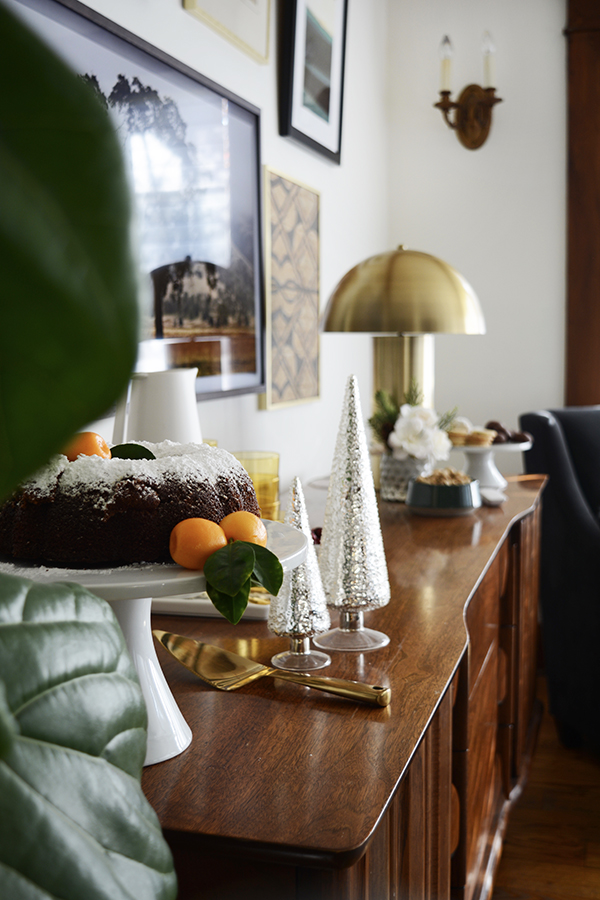
Christmas came early to the McConnel house. After 10 years with the same small-ish TV, we have made a huge upgrade with The Frame by Samsung. If you recall, in the Summer I played around with the idea of hanging The Frame over our credenza in our living room (see the original post here!). I tried out a few different gallery wall options and dreamed about the possibilities of living without the ugly black box. And now it’s a Christmas Miracle, because we have a new piece of art that we can change and customize. Using the phone app, I simply uploaded one of my own favorite images. I took this picture of a giant oak tree last fall just outside of Bakersfield. I love being able to display my own work. When Spring and Summer arrive, I’m sure I’ll want to change the image to some wild flowers or a warm beach scene.

The Frame by SamsungThe Frame by Samsung

TVs can be such an eyesore when you are trying to decorate your home. I’m always trying to find ways to hide and disguise the traditional TV in a room. The Frame hangs flush to the wall, like a real framed picture, so you can treat it as another piece of art in your room. When you aren’t watching your favorite Christmas movie with 4K UHD viewing, The Frame can display your favorite family photos or you can load it with one of 100 pieces of curated art that Samsung provides.

The Frame by SamsungThe Frame by Samsung

We are hosting a Christmas Open House, and I am soooo excited to have our credenza free of electronics so that I can make it festive and even put out drinks and snacks on it. I love when a party can move from room to room, and folks can mingle and snack in every space. Often with parties, everyone gets crowed right were the food is, usually the kitchen or dining room. But, this year I can put out treats in the living room as well. Anytime I can clear up a surface and hang things on the walls, I feel like I’m winning the decorating and organizing game.

The Frame by Samsung

I’m still playing with the gallery wall in our living room, because I just have too many favorite pieces that I still want to display. But, now I can share a favorite holiday photo in The Frame or switch out the art piece to go with the season without making anymore holes in my walls. You guys, I feel like this is such a design game changer and we actually live in the future!

The Frame by SamsungThe Frame by Samsung

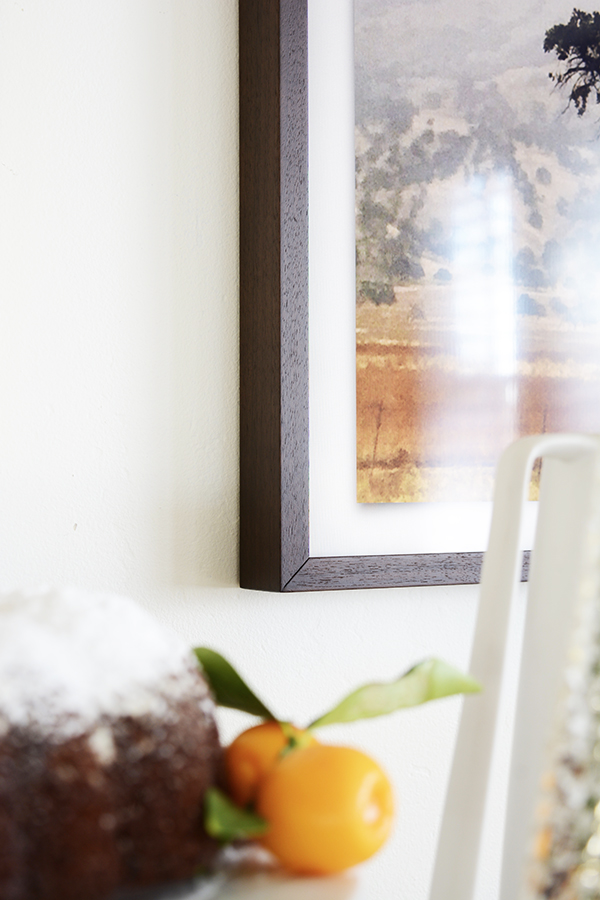
The Frame also has customizable bezels that have the flexibility to perfectly complement your home décor, with three additional bezel options in wood, white or metal. I played with the walnut frame to play with all my wood trim in the house.

The Frame by Samsung

Also, to make the holidays a little sweeter, The Frame 55″ and 65″ sizes are currently $200 off in stores and online! It’s not to late to add to your Christmas wishlist.

Find

A few of my favorite things…

Oleander + Palm Favorite Things

I teamed up with a few of my favorite companies to send out some treats to some of my favorite bloggers. This job I have can be lonely at times, but I am so grateful for the women that support, encourage and inspire me across the internet.

I’m also so grateful for my faithful readers. Ya, that’s you! Without you, there would be no O+P. Thank you for following along on this little blogging journey of mine. I can’t send everyone a gift box. But, I do want to giveaway one box full of all these very fun treats. You can enter on Instagram. Simply go to the post that shows all these treats, tag a friend, and make sure you follow Oleander + Palm on Instagram. I’m only going to run this giveaway till Friday morning so that I can get this in the mail and shipped before Christmas. So, head over there now to enter! And again, thanks for making this job possible for me.

Oleander + Palm Favorite Things

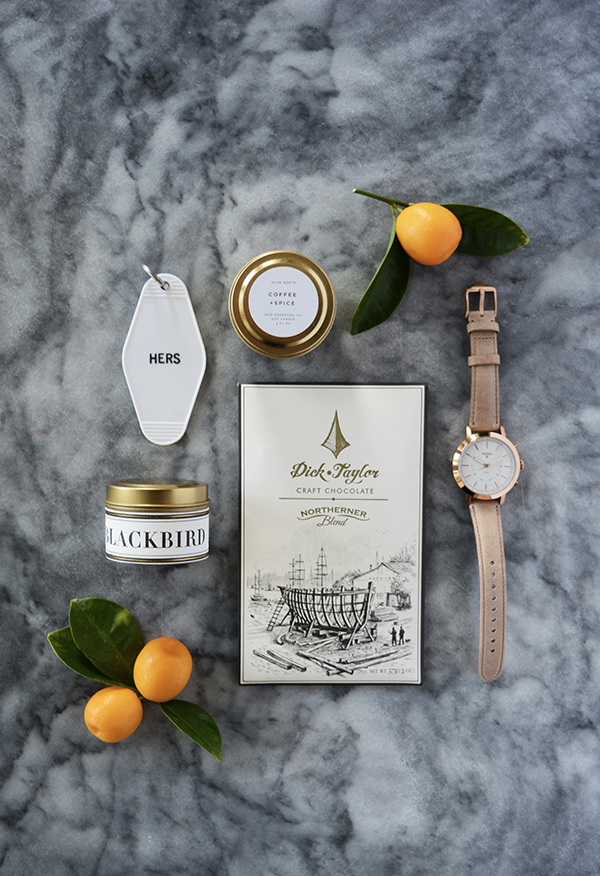
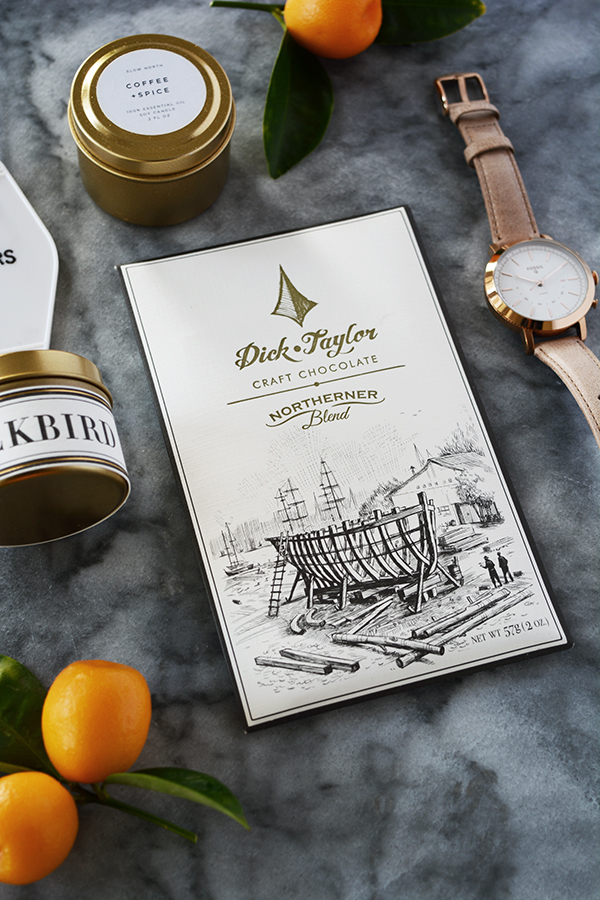
Now, let’s talk about the fun treats in the box. First of all, there is a gorgeous Fossil Hyrbrid watch. It has a gorgeous rose gold face and a tan leather strap. This is more then just a pretty face, it connect to your phone to give you notifications for social media, you can take pictures, it can track you sleep, and so much more. This is a watch you will be wearing for years to come.

Oleander + Palm Favorite Things

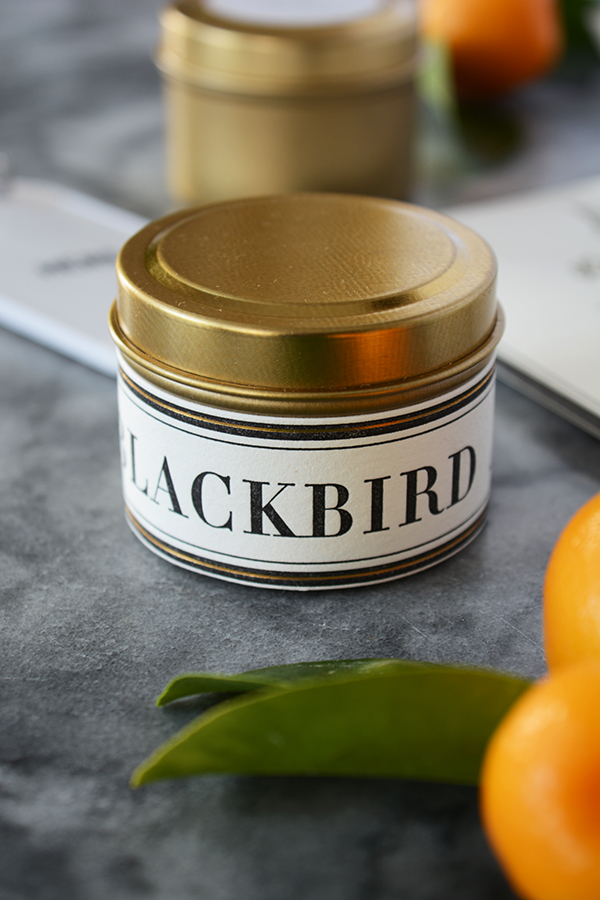
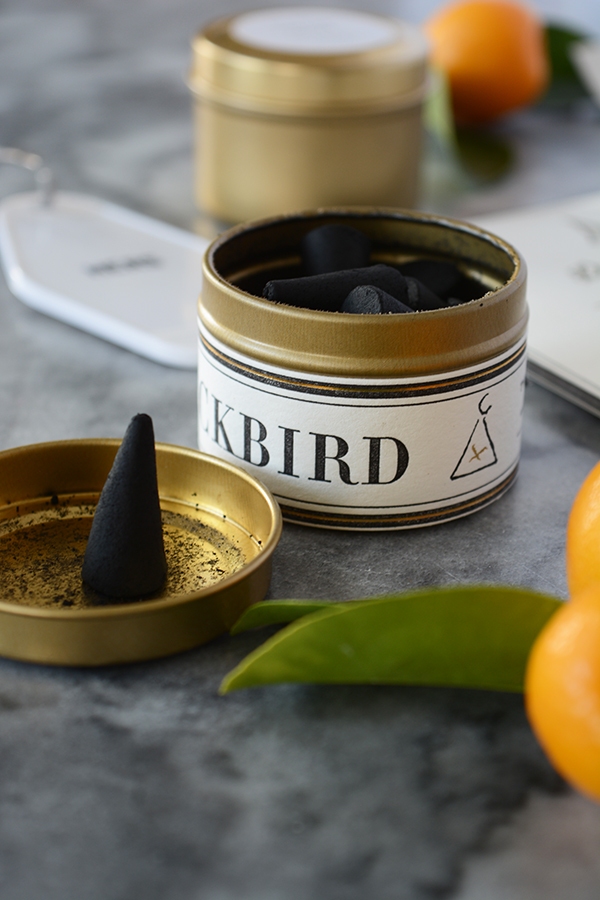
If you have followed me for a while now, you will know that I am obsessed with Black Bird incense cones, especially TENOVERSIX! I try to limit myself to burning just one a day, but they smell just so darn good.

Oleander + Palm Favorite Things

Dick Taylor Craft Chocolate is probably the both the prettiest and yummiest chocolate you will ever have! Their shop is located in Eureka, CA (where my parents live), so I always stop in for a bar or two, when I’m in town.

Oleander + Palm Favorite Things

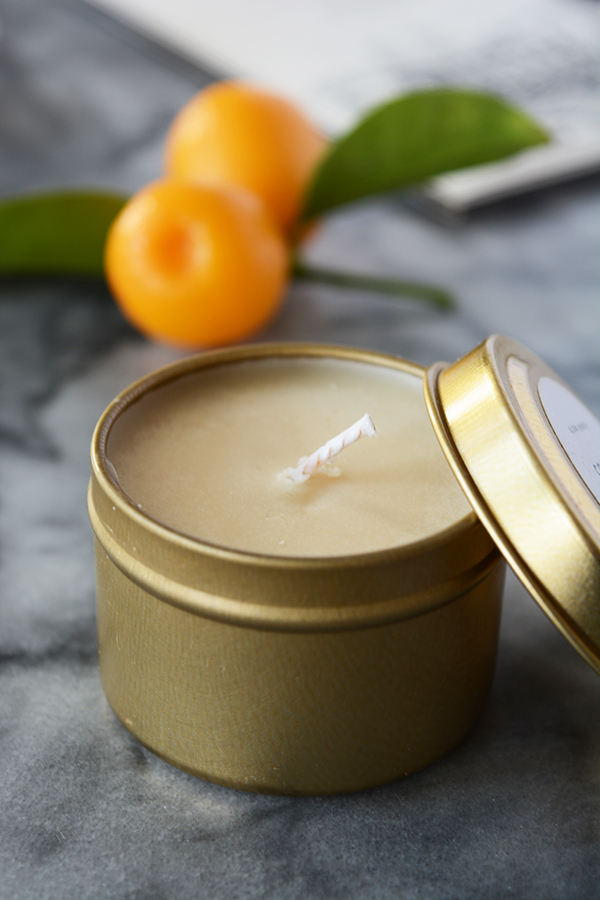
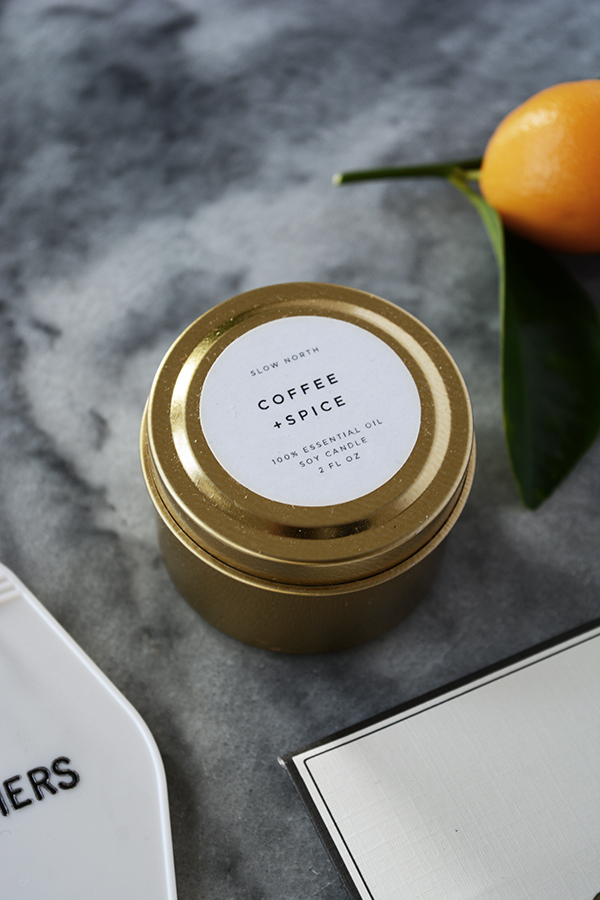
I’m all about a good smell. And I recently discovered Slow North this year. These candles are divine and they have the best smell combinations. They are bright, fresh and burn so clean (oh, and they are pretty candles, they come in lovely glass jars with cork tops and these cute little brass tins).

Oleander + Palm Favorite Things

Oleander + Palm Favorite Things

And last, but definitely not least, the cutest “HERS” key chain from Schoolhouse Electric & Supply Company. If I was to pick one store that represents my style most closely, I would have to say Schoolhouse. You guys, when there catalogues come in the mail, I study every inch of every page. They make and sell the most beautiful things.

Oleander + Palm Favorite Things

Ok, that’s enough chit chatting, now head over to Instagram and enter!

etc.

Gingerbread Ice Cream with Crystalized Ginger

December 18, 2017

You know how folks go crazy over PSL (Pumpkin Spice Lattes), well I think they are good, but Gingerbread is where it’s really at for me. It’s my favorite holiday flavor.

If you are a fan of gingerbread like I am, you might like this Gingerbread Cake + Toffee Sauce recipe, these Gingerbread Milkshakes, these Gingerbread Cookies with Lemon Buttercream, or maybe this homemade gingerbread syrup recipe as well.

Gingerbread Ice Cream with Crystalized Ginger

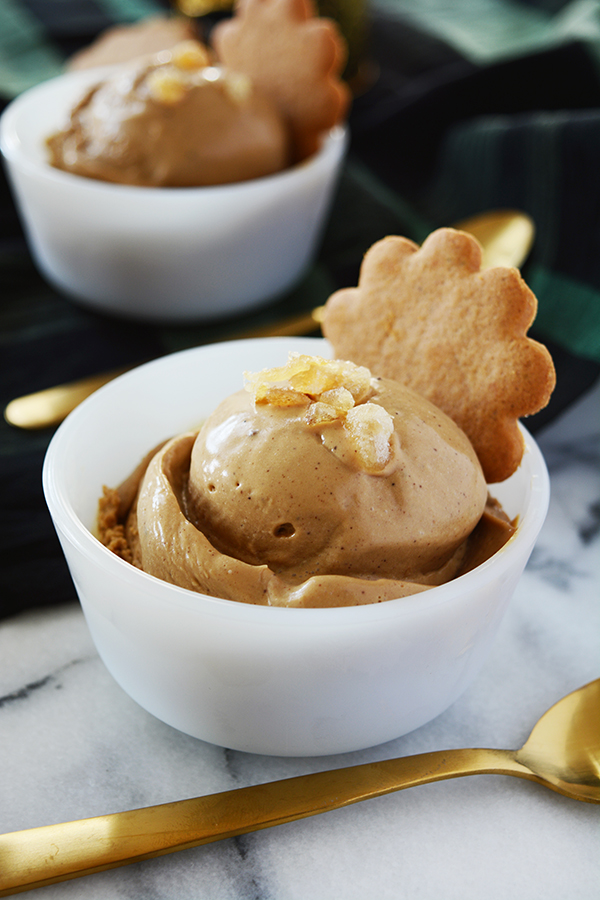
There is no messing around with this ice cream, it’s bursting with flavor – sweet molasses and spicy ginger. And this is the creamiest ice cream you will ever have. It’s actually a cooked custard made with whipping cream (yep you heard me right) and 4 egg yolks.

Gingerbread Ice Cream with Crystalized Ginger

Gingerbread Ice Cream with Crystalized Ginger

  • 2 cups heavy whipping cream
  • 4 egg yolks
  • 1/4 molasses
  • 1/2 cup brown sugar
  • 1 tsp. ginger
  • 1/4 tsp. each cinnamon, allspice and cloves
  • 2 tbsp. crystalized ginger (finely chopped)
  • gingersnap or gingerbread cookies for garnish

In a small sauce pan, combine all the ingredients except the crystalized ginger. Whisk together well. Turn the heat to medium and continue to whisk. It will take about 8-10 mins, but cook until it begins to thicken. It should coat the back of a spoon. Do not bring to a boil, keep the heat on medium.

Pour the custard into a glass bowl, cover with plastic wrap and place in the fridge. Cool for at least 2 hours. When the custard is completely cooled you can place it into your ice cream maker and freeze according to your machine’s specific directions. I have a Cuisinart Ice Cream Maker and it takes about 20 mins to freeze ice cream. When the ice cream is done, add the crystalized ginger at the end and let the machine mix it in well. Transfer the ice cream to an airtight container and freeze overnight. Because this is made with cream, it will stay a softer ice cream.

Gingerbread Ice Cream with Crystalized Ginger Gingerbread Ice Cream with Crystalized Ginger

I topped my ice cream with a couple more pieces of crystalized ginger and a Swedish Gingersnap (Pepparkakor). I bought this cute little tin of cookies in Sweden, but THESE are very similar.

Gingerbread Ice Cream with Crystalized Ginger + Swedish Gingersnaps (Pepparkakor)


Find

Last Minute Stocking Stuffer Ideas

December 17, 2017

Eeek! Christmas is just about here and I’m NOT ready! While I’m seaching the interwebs for fun stocking stuffers that can be shipped QUICKLY, I thought I’d share with you some of my favorite finds. Amazon Prime is my friend these days, knowing I don’t have to pay shipping and these items will be on my doorstep before Christmas is saving me a lot of time and energy. You know I don’t want to be going to the mall. Thank goodness it’s 2017 and we can shop in our PJ’s on the sofa!

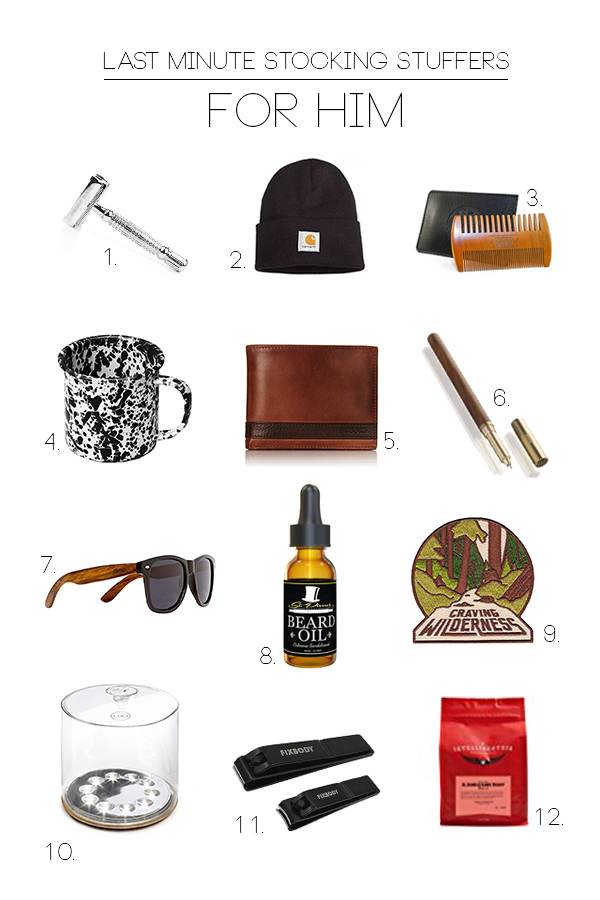
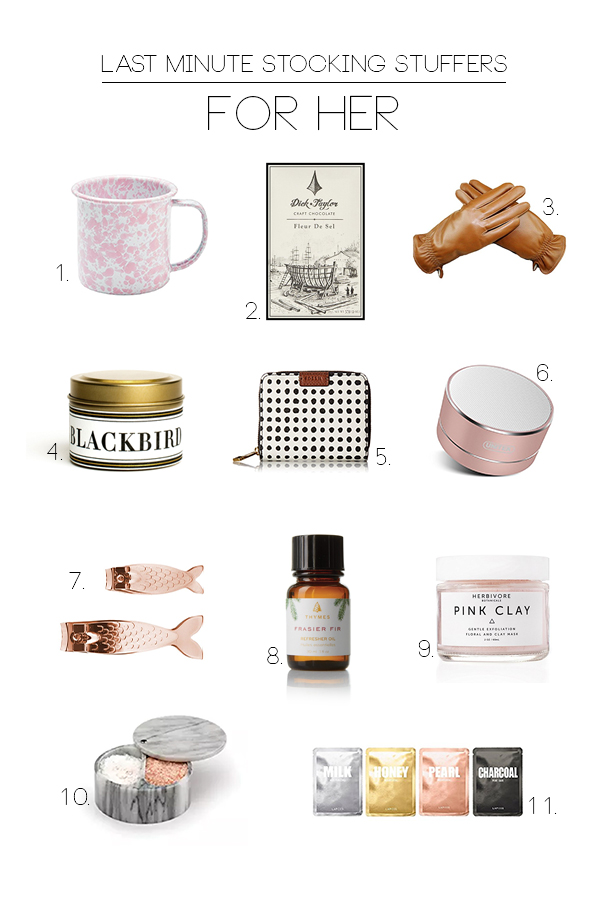
So, I’ve rounded up some goodies that I’m filling stockings with and also I few things I hope to find in my stocking. I’ve put together a Last Minute Stocking Stuffers gift guide for HIM and for HER. Maybe this will help you out as well.

  1. Razor
  2. Carhartt Beanie
  3. Wooden Comb
  4. Enamel Mug
  5. Leather Wallet
  6. Wooden Pen
  7. Sunglasses
  8. Beard Oil
  9. Craving Wilderness Patch
  10. Solar Camping Light
  11. Nail Clippers
  12. Coffee

  1. Enamel Mug
  2. Dick Taylor Chocolate
  3. Leather Gloves
  4. Blackbird Incense
  5. Black + White Wallet
  6. Portable Speaker
  7. Fish Fin Nail Clippers
  8. Frasier Fir Refresher Oil
  9. Pink Clay Mask
  10. Salt Box
  11. Sheet Face Masks

So, do you have all your shopping done or are you still scrambling like me? Maybe there are a few items in these guides that will help you out as well.

**This post contains affiliate links to Amazon.

DIY

Christmas Cards

December 13, 2017

Christmas cards are ready! This feels like a huge accomplishment with all the things that are going on this time of year. I think mostly I make photo Christmas cards so that the grandparents have something up to date to put on their fridge. If you can keep the Grandma’s happy, it always feels like a win.

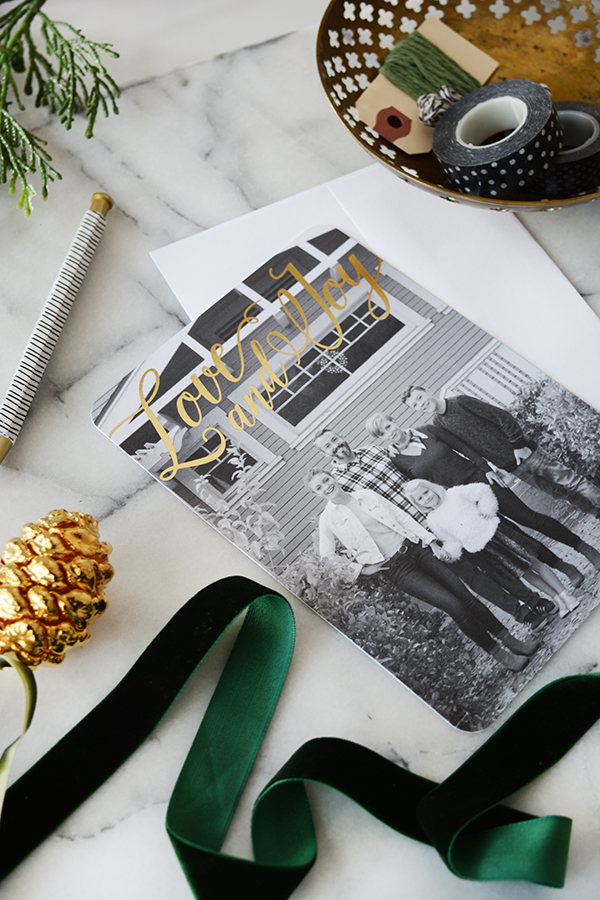
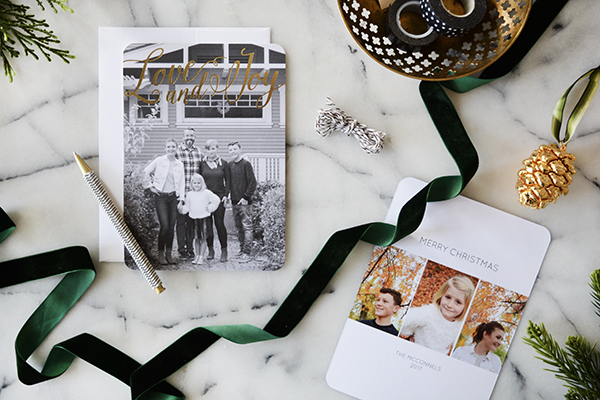
This year, I hired a photographer friend to take our pictures so that I wouldn’t have to stress about it. But, totally out of her control, she got really sick and couldn’t make our shoot. So, I set up a tripod in front of our house and took a family picture before we headed to church. It’s kind of guaranteed that everyone will look halfway pulled together, and I know everyone will be home at that moment. The picture isn’t fantastic, but it’s pretty darn good. It just goes to show that often we like to overcomplicate things. I’m pretty sure the grandmas will be just as happy with this family shot as they were with last year professional images. I kind of like that our house is in this picture too. Who knows how long we will live here, it’s nice to have this landmark in pictures so we can remember or time here. And, when all else fails, slap a black and white filter on the picture and pick a pretty good foil design.

Mixbook makes holiday card making super easy and they have sooo many gorgeous metallic foil designs now.

I ordered this simple Love and Joy design in gold foil. On the back of the card I added more pictures of my cute kids (remember, these are really just for the Grandmas). Their drag and drop feature, makes it so easy to move around images and try out different layouts.

If you hurry and order cards today, you can get 50% off your order. Check out THIS Instagram post for the coupon code.

Now all I have to do is bribe my kids to write out all the addresses on the envelopes. A candy cane and the threat of Santa not showing up should help.

I know I love to get photo holiday cards from friends and family. Do you send out cards? And more importantly, do you have yours ordered and ready to by shipped?

This post is sponsored by Mixbook. Thank you for supporting the companies that help make this blog possible.