etc.

Halloween Party Food

October 28, 2011

Here’s some of the fun food I served at our Halloween Party.  I have linked the recipes for you.  The Pumpkin Spice Poppycock and Donuts were apart of Oleander and Palm’s Pumpkin Spice Week.  I have also included a free printable download of the food labels at the end of this post.

Black Cats and Bats and Pumpkin Sugar Cookies
Cockroach Nests (Pumpkin Spice Poppycock with Pecans)
Pumpkin Spice Donuts (recipe will be shared during Pumpkin Spice Week)
Bare Bones
Mini Mummies (Pigs in blankets)
Bat Wings (Honey BBQ Chicken Wings)
Eye Balls (Meat Balls)
Goblin Goo (Orange and black Chips and Nacho Cheese Sauce)
Halloween Party Food Labels

Feel free to print these labels for your next Halloween Party.  

etc.

Halloween Decorations

October 25, 2011

Here are a few pictures of some of my Halloween Decorations around the house.  I shared yesterday that I’m not a fan of the scary or spooky, so this is my type of mild Halloween.  More Spunk, less Spook.

Mini Pumpkins in a row with a deer antler (from my father in laws garden) 
Orange Mercury Glass Owl (Homegoods)
Mini Pumpkins perched on candle sticks.

Cupcake Paper Garland on mantel (instructions will be posted soon)
China Cabinet decorated with Pedestal Candy Jars, Silver Pumpkins, and spiders.

How do you decorate for Halloween?  Do you decorate with Spunk or Spook?

etc.

Olivia’s Birthday!

October 18, 2011

I wanted to share a few of my favorite pictures from Olivia’s 1st day with us. 
Here we go! 
Nice to meet you.

The Girls

Daddy’s first kiss

Olivia being comforted by her big bro and sis.

etc.

Pedestal Candy Jars

October 17, 2011

Can’t get enough Halloween candy, especially when you are preggo or nursing.  I’m embarrassed to say that I had to refill the Peanut Butter M&M’s three times before I got a picture of these pedestal candy jars I made.  I did have some help eating them, but I’m pretty sure it was mostly me that ate them.  Should have bought something yucky, like black licorice.

I have to give credit to this fantastic blog, for the inspiration.  They had made these jars for Easter Candy.  I decided to make a Halloween version.

Supplies:
glass candle sticks (I got mine at a thrift store for 25c each)
assorted jars (I used a pickle jar, a pesto jar, and a pasta sauce jar)
E 6000 glue
Martha Stewart Crafts Glossy Black paint
glittered plastic spiders
spanish moss
candy

To make these jars, paint the candle sticks and the jar lids with the black paint. It may take a couple of coats.  Let dry over night.  Then attach the candle sticks to the bottom of the jars with E 6000 glue.  Let dry overnight again.  Fill with assorted candy.  Oh, and I glued a few spiders to the jars (I got the spiders at Michaels for $1).  For some spooky, I displayed these on a tray with some spanish moss.

etc.

Before and After

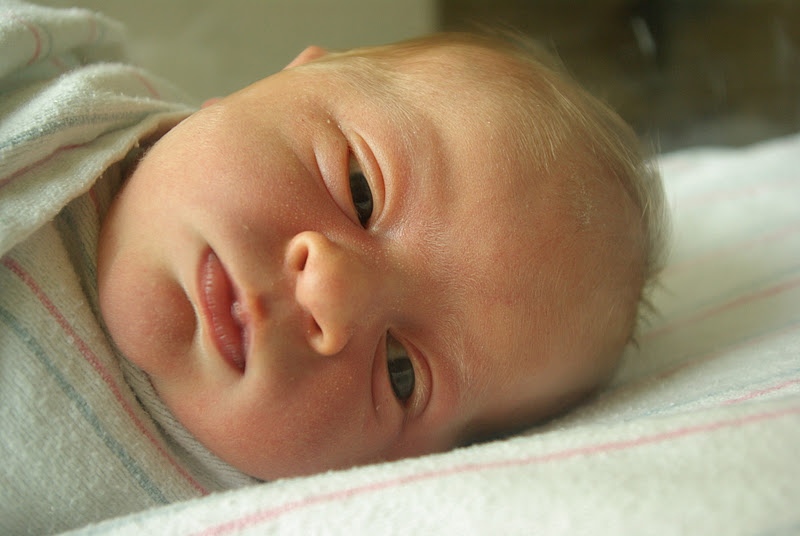
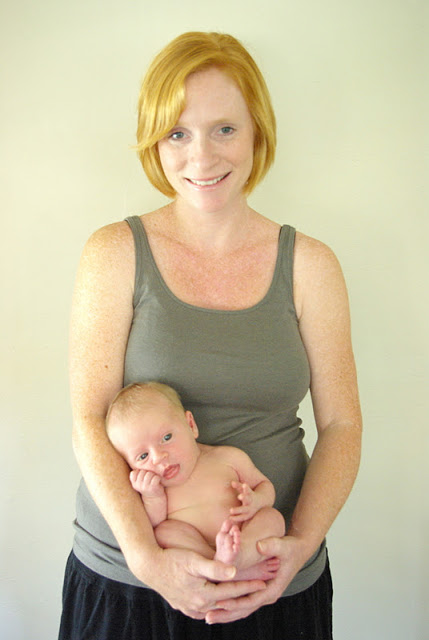
Well, I’m sure you have guessed by my absence in posting that I had a baby.  Olivia Cali McConnel was born or Sept. 29th at 3:59pm.  She was a healthy 9 lbs. 2 oz. and 21 1/2 inches.  We are so blessed to have her in our lives.

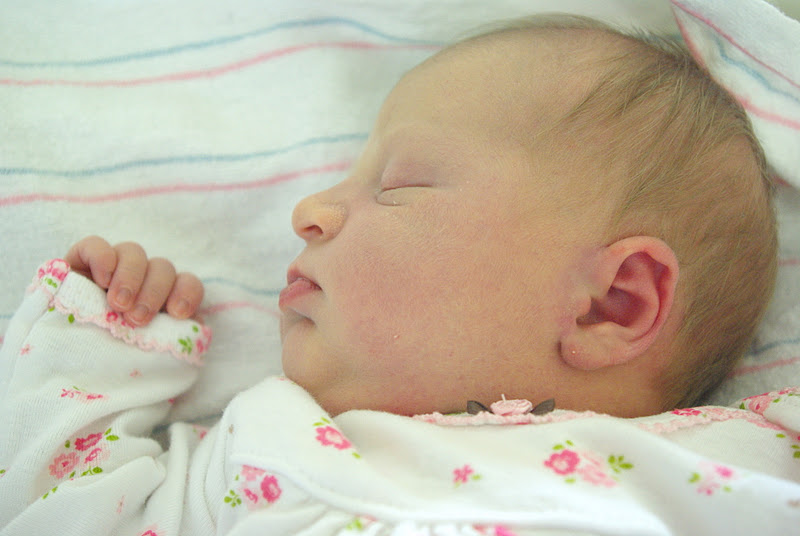
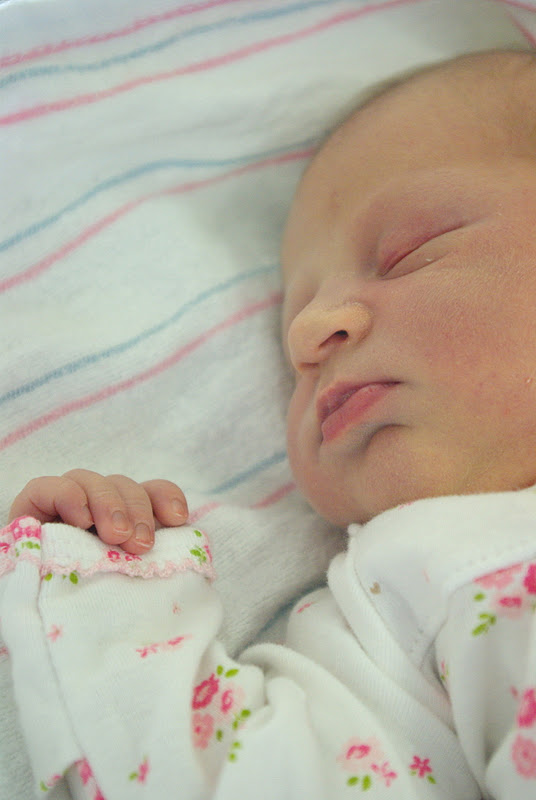
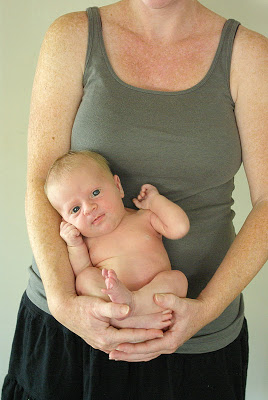
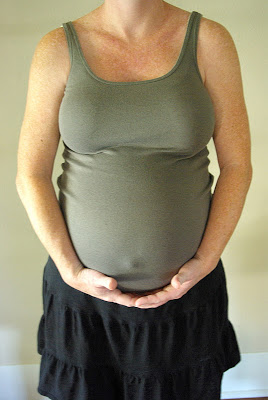
Here’s my Before and After.  We took the “before” picture the morning I went into labor and the “after” is our cute Olivia at two weeks old.  She was really packed in there.

It’s been a long two weeks, so I will try to summarize as much as possible.  She did have a bit of a rough start to life.  We ended up spending two nights in the hospital and then she was admitted to the NICU for another three days.  Olivia was very jaundice and had to have light therapy.  She was a precipitous, face up birth (that means really fast).  So, she had a lot of bruising on her face which made her jaundice spike even more.  It was a very stressful and emotional time.  Leaving the hospital without your baby is a very hard thing to do.  I cried all the way home and most of the time I was home without her.  Looking back at the empty car seat was really painful.  I spent very little time at home, mostly just the pump and then I was back at the hospital by her side.  It is truly amazing how much love you can have for your baby when you really have only known her for just mere hours.  Life without her seemed totally impossible as soon as our eyes met.  

Once we finally got her home she was not gaining weight and was dehydrated, so I had to stop nursing and start pumping and giving her bottles (so we could monitor exactly how much she was getting).  The poor little girl had to be at the hospital, doctors office, and lab everyday of the first two weeks of life.  In the middle of all this, I lost my milk supply due to acute stress the doctor believes.  So, I have been pumping to bring back my supply for over a week now (it’s like a full time job).  But, we are so thankful that she is healthy now and we are trying to get into a routine of some kind.   We appreciate all the prayers and support from friends and family.  I have shed a lot of tears, but God is good, and he has carried us through this.

Needless to say, blogging has not been on my to do list.  We are kind of in survival mode still.  I have lots of ideas, but just not enough hands or time it feels like.  Hopefully with posting this, I’ve given myself a kick start.  I have a week of Pumpkin Spice recipes coming very soon.  Thanks for reading.

etc.

Freezer Paper Stencils on Vintage Fabric

September 26, 2011

When I first started blogging, I shared pictures of a quilt that I made for my youngest brother.  He had found some great vintage fabric for the back of the quilt.

I finally made a throw pillow with some of the left over fabric.  Oh, this is for my bro too, he needs a pillow to go with the quilt, right?

Using my cricut, I cut out a stencil on freezer paper.  This is the first time I’ve worked with freezer paper, and it’s fantastic!  Then I ironed the stencil onto the fabric (plastic side down).  I used Martha Stewarts new paints and fabric medium.  I ended up applying one coat of paint, letting it dry and then applying a second.  Then, I just peeled off the stencil.  To set the paint, I ironed it once it was completely dry.

The Supplies

 I think it turned out pretty fun.  I’ve got lots of ideas for cute stenciling projects in my head now.  I love learning and trying something new.  Anyone else out there ever tried freezer paper stencils on fabric?

BE A FRIEND!  Leave a comment, follow Oleander and Palm by email, PinterestFacebook, or Twitter.

etc.

Crib Skirt Pattern

September 19, 2011

The girls room in coming together.  I finished up the crib sheet and crib skirt this last week.  If I couldn’t find a grey crib sheet, I knew for sure I wouldn’t be finding a grey crib skirt.  So, I made one with fabric that is in the baby’s quilt.  This skirt is made to just touch the floor when the mattress is on the lowest setting.

I opted for a straight skirt that has just one pleat in the center of each panel.  I’m not one for ruffles and fluff, so the simple lines of this skirt appealed to me.

I am including a pattern and instructions for making a crib skirt.  Please feel free to print off a copy or share it with others.  The numbers on the images below correspond with the instructions above.

No. 5
No. 5
No. 6
No. 6
No. 7 (the completed project)

Hope these are clear and easy to follow.  Please leave a comment and picture if you make your own crib skirt or sheet.  I’d love to see how it goes for you.

etc.

Under Bed (or crib) Storage

September 13, 2011

I don’t think you can ever have enough storage, we definitely can’t in our little house.  I needed some extra storage for the girl’s room especially.

I actually found these 2 old drawers at a garage sale and paid $2 for each of them.  I have had in my head for a while that old drawers would make great under bed storage, but I thought I would probably have to buy a cheap dresser in order to have drawers.  I lucked out with a random garage sale that was selling just the drawers.

Lonnie painted these with the leftover crib paint.  I added 4 caster wheels that I picked up at Lowes for $5 a package to each drawer.  Then I added a antique-style clear glass pull to the front of each.

I already have them full of extra baby blankets, diapers, and clothes for the next season, and toys.  I think these are really going to come in handy.

etc.

Crib Sheet Pattern

September 7, 2011

 I made this crib sheet for two reasons:

1. You can’t find grey crib sheets or bedding.

2. The materials cost less then $7, so that’s cheaper then buying just a plain white crib sheet.
I have included a pattern and pictures to make this sheet.  Feel free to print the pattern and instructions.  This really only took 30 mins to make.  
Follow the instructions on the pattern.  I have numbered the images below to go along with the instructions.  
No. 4
No.  6
No. 7 and No. 8
No. 8
No. 8
I hope you find this helpful.  I plan to make another sheet in a cuter fabric, but I needed to get one done as least.  You always need more then one sheet, leaks and spit-ups do happen. 

etc.

Thrift Store Entryway Table – the finished product

September 3, 2011

Well, I’m not a very patient person.  When I get an idea in my head, I have to get started right away.  So, I decided what I wanted to do with my thrift store find.  I decided to keep the white laminate top.  I wasn’t willing to tackle trying to strip that off right now, plus I think it adds to the fun retro feel (and it should be easy to clean).

I opted to paint the sides and legs white to match the top.  I felt like the white would frame out the drawers.  I just gave it a light sanding and then painted it a semi-gloss white.  With a little TLC and some Zap! Professional Wood Restorer, I cleaned up the drawer fronts.  They really have some nice wood grain and color to them.  It mirrors the family silhouette with the chocolate brown framed in white.

I kept the original hardware, partly because I wasn’t sure what to replace it with and party because I like the brass color.  I tend to lean toward silver and pewter accents, a little brass seemed like a fun change.

I’m loving the opportunity to style the top of this piece of furniture.  I put out some of my favorite picture books, some fun things from my travels, and a new retro shaped lamp (see below).  It will be fun to change up things with different seasons and holidays.

Mercury glass lamp – Home Goods
Hand Made Recycled Glass Bowl – Fire and Light
Antique Quill and Ink Holder – bought in Yemen
Porcelain Painted Elephant – Mlesna Tea, bought in Sri Lanka
Basket Tray – bought in Papua New Guinea
Chubby Brown Vase – leftover product from a shop I owned a few years ago (Mango)
Assorted Books – collected over the years

Now doesn’t that look better?  I’m actually kind of embarrassed of the look I had before (or lack of look I should say).