etc.

Thrift Store Entryway Table

September 2, 2011

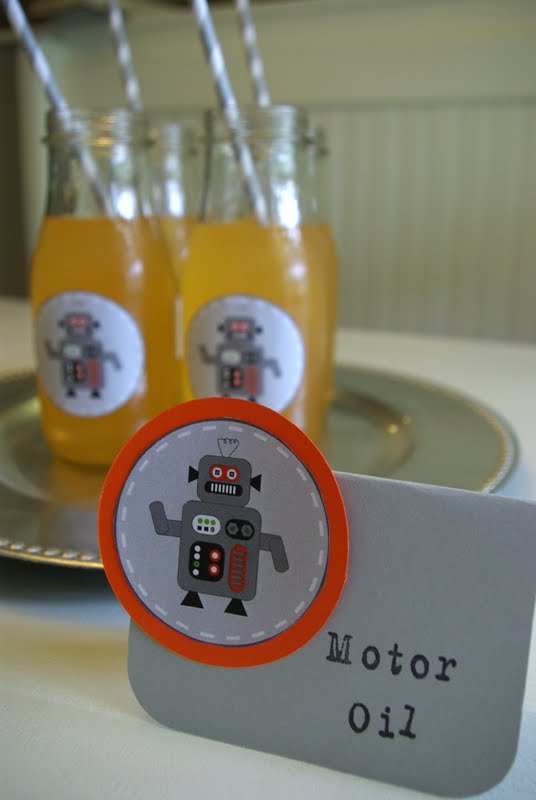
Well, this entryway has been a long time in the making.  Back in January I started thinking about how I could dress up my entryway.  I finally made this addition in June by hanging my family silhouette.

A couple weeks ago I found this dresser at a thrift store (Salvation Army).  I think it’s from the 70’s, but it has a fun mid century feel to it.  It’s made by Broyhill and actually has dovetailing on all the drawers.  The top is covered in white laminate, which I’m not sure how I feel about yet.  It was priced at $75 and I was just not willing to spend that much on it.  So, I came back a week later and it had been reduced to $56 dollars.  Salvation Army discounts there stuff every couple weeks to make room for more items.  I still wanted to pay less and I knew that if I held out the would drop the price to 50% off.  I was willing to take the risk, I didn’t think anyone else would see the potential it had, at least I hoped they wouldn’t.  So yesterday when I went in it was priced at $37, cha-ching!  It’s mine.

I originally thought I wanted a table with a couple shelves for display and something that combined industrial metal and wood.  But, pieces like that a hard to come by and they are pricey.  The more I thought about it, the more I felt like extra storage was the way to go.

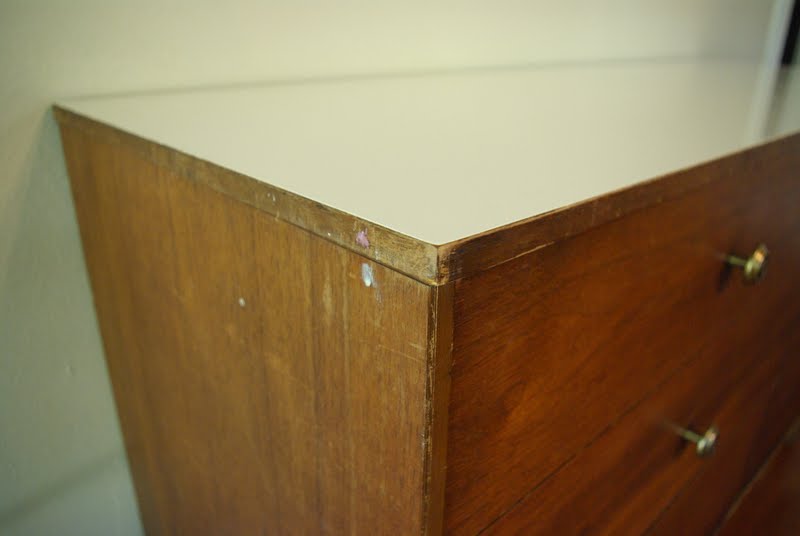
My plan in to paint part of the piece, either the drawer faces or the sides and legs.  I will share my finished product when I’m done.  I think there is some potential here folks, does anybody else see some possibilities?

Click here to see the finished product.

etc.

Bicycle Baby Quilt

August 25, 2011

The quilt arrived this week!  It is so cute, I love it.  Thanks Grandma.

I mentioned earlier that Lonnie’s mom was making the quilt.  She made Denali and Dylan’s quilts when they were babies as well.  Their quilts and well loved and worn.  They still sleep with them every night.   It came together so beautifully.  I had no idea what pattern or design she was going to do.  We had picked out the fabric together.  And I was really excited about the cute bike fabrics we had found.

The back of the quilt is a really fun grey and white polka dot.  I would like to do the crib skirt in it, but I am having trouble finding anymore of that fabric.

She also made another quilt for my niece that is due to arrive around the same time as our baby.

The thought of snuggling up with a quilt about makes me want to crawl out of my skin right now.  I am feeling very large and it’s still 100 F here.  I’m at that awful stage when your stomach touches your legs when you are sitting.  I am hoping that I only have a few more weeks of this.  But, I do know our new little one is going to love this quilt.

Design / DIY

Vintage Crib Refinished

August 20, 2011

The Finish Product

I truly can call this a vintage crib, because it was my crib when I was a baby.  Not only did I use it but so did my brothers, and my first two kids.  This Jenny Lind crib is such a classic design, you can still buy this crib, and the design has not changed.

The before – a classic in need of some updating.

Because it’s been stored in our garage for years, I decided I might like it refinished and painted for this last baby.  We decided to match Denali’s bed and paint it an every so slight off-white.

My wonderful husband did all the work.  I am a bit of a control freak, so I was a struggle for me to step back and let him do all the work.  I needed to stay out of the dust and paint fumes, so he took on the project.  I don’t know why I was worried.  He did a fantastic job (I couldn’t have done better) and it looks like a brand new crib.

Supplies needed:

sand paper
steel wool
tack cloth
Sherwin Williams ProBlock Primer
Rust-Oleum 2x Painter’s Touch Satin Spray Paint in Antique White

If you would like to refinish a piece of furniture that has a lot of details, here’s what worked well for us. Lonnie spent a good part of a day sanding all the curves and spindles on the crib.  Then he made sure to remove all the dust with a tack cloth.  He applied the primer and when that was dry he used the steel wool to smooth out any imperfections.  Then before applying 2 coats of the Rust-Oleum paint he prepped that crib with the tack cloth.  I was really surprised at how well spray paint worked.

Design / etc.

Making Room for Baby

July 25, 2011

I am now 30 weeks pregnant, but as of my last visit to the doctor this week, I am actually measuring 2 weeks ahead of schedule.  I’m not to sad about that.  My due date is Oct. 1st, but I had hoped I would have this baby sometime in September.  Denali and Dylan were both 9lb babies and Dylan was even 10 days early.  So, I am kind of counting on a big baby again.  With that in mind, my nesting is kind of in “full-speed-ahead” mode.  In no time at all our sweet baby girl will be here.

Our little 1920 Arts and Crafts Bungalow has only 3 bedrooms.  We knew the baby would be either sharing a room with Dylan if it was a boy or Denali if it was a girl.  Ideally, Dylan recently got bunk beds, but then of course she is a girl.  And we are thrilled to be having another girl!  So, Denali’s room needed some rearranging and shifting to make room for the crib.

Denali has a beautiful antique full sized metal bed from Lonnie’s grandparent’s farm.  Lonnie’s parents had it refinished for us we she was baby.  Besides being Denali’s big beautiful girly bed, it has served as our guest bed all these years.  I wasn’t sure I was ready to move it out, so I am attempting to fit the bed, the crib, Denali’s desk and dresser, a night stand, and a new dresser for the baby all in the same small bedroom.

I measured and drew up a few plans, and in all of the scenarios, I needed to find a narrow (24 inch wide dresser/chest) for the baby.  There was really only one wall/corner that it could be placed.  The room has 3 really large windows, which are great for natural light, but hard for furniture placement.  I had hopes of finding a used, old, or antique dresser that I cold refinish.  But, no such luck.  Then I found this dresser at for a great price and free shipping, I went for it.  It looks great in it’s little corner and we have already filled it with adorable baby clothes.

As you can see, Denali has plenty of pink in her room.  That is why I went with the Pink and Grey for the nursery colors.  The brown rug is making it’s way out of the room and I will probably be changing at least the bed skirt on Denali’s bed as well.  Her PBteen bedding is still really cute and is mostly pink with just the tiniest amount of brown, so I can’t justify buying new bedding (even though I am IN LOVE with this bedding in the gray dottie).

The crib is in the process of being refinished.  As soon as it’s done, I will share pictures of it and the rooms new arrangement.

etc. / Food & Drink

Melon Mint Granita

July 1, 2011

When temperatures reach 100 F here in Cali, I only want to eat COLD things.  Last summer I made some Granitas – Maui Mango Ginger and Nectarine Mint .  This year I am trying Honeydew Melon with fresh mint.  

Melon Mint Granita


1/4 of a ripe Honeydew Melon, pealed and cut into chunks
1/2 cup water
1/4 cup sugar
Juice of one fresh lemon
2 tsp. mint 
Combine all ingredients in a blender and puree.  Pour into a 8″ glass pan.  Freeze for at least 2 1/2 hours, scraping it with a fork every hour.  Mixture should be frozen, but fluffy. 
What do you like to eat when it’s too hot to cook?

etc.

Entryway Update

June 20, 2011

I have been wanting to make a change to my entryway for a long while.  I came up with these plans back in January, but haven’t followed through yet.  Well, in February I found a table for my entryway at Cost Plus World Market.  It was of course on back order and is still unavailable.  So, I gave up waiting for the table and decided I needed to hang my family silhouette at least, before our family changed.  And I enjoy looking at it, because I actually have a waist in the picture unlike my very round figure now.  It’s just a start, but I think this is looking a lot more updated.  I was really over the iron piece many years ago, but I didn’t want to take it down until I had something to replace it with.  I’m pretty happy with the change.  I’m a slow decorator, having a limited budget and being picky make for combination that can take a while to achieve.  But, sometimes that wait is worth it.

BEFORE
AFTER

etc.

Robot Themed Birthday Party – Part IV (all the other little details)

June 16, 2011

Ok, this will be my last Robot Party post. There are just a few more little details left that I haven’t shared.The details are my favorite part.  I had a lot of fun drawing this robot on Adobe Illustrator (I took a class this last year in using this program).  My robot drawing was the inspiration for the cake and pinata.  I printed him up in all different sizes and attached him to the drinks, banners, bags, and just about everything.  It gave the party a very custom made feel.  I think I will be making these for all my parties from now on.

We got the girls special Robot necklaces from Forever 21.

Everyone decorated their own robot.  I provided makers, metal washers, nuts and bolts, metal pipe cleaners, buttons and glue.  I love a craft at a party.  Other then when the kids are eating their cake, it is the most quite activity at a party

Since my daughter’s 1st birthday, I’ve made fabric treat bags for their party guests to go with the theme. It’s something my mom used to do for my brothers and I.  They are quite useful even after the party.  Sometime I’ll share all the bags I’m made over the years.  I found this great Robot fabric at Joann Fabrics.  The kids filled them with the pinata spoils and then all the other candy and treats they collected at the party.

Finally, square silver plates in 2 sizes mimicked the shape of a robot.

I love party planning, someday maybe I can make it a paying job.  Now that would be a lot of fun.  Does anyone else love throwing a party as much as I do?

etc. / Food & Drink

Robot Birthday Party – Part III (The Food)

June 15, 2011

I love coming up with themed food for birthday parties.  Here’s what we served at Dylan’s Party.

I used Martha’s recipe for nuts and bolts.  It’s super yummy and used fresh garlic and rosemary.  I served the nuts and bolts at the table and also packaged them up for the kids to take home as well.

I filled this bucket with Chocolate Robot Pops.  I found the mold on amazon for less the $5.  They were surprisingly easy to make.

To drink, we served “Motor Oil” (Sparkling Peach Lemonade) in glass bottles with cute grey and white striped paper straws.

I always feel like I should serve my guests a real meal, not just cake and snacks.  Dylan loves to cook, so we each made our own Robot Shaped Pizza.  I made the pizza crusts ahead of time and then just had toppings cut and ready for the kids to top their Robot Pizzas.  I think they really enjoyed making their own lunch.

I also like to have a little candy bar for the kids.  It’s a fun way to add decoration to the table in the color theme and the kids LOVE scooping their own candy into bags.

Finally, in an attempt to offer something healthy at a party, I had orange slices and green grapes (plus they went with my color theme quite nicely).

DIY / etc.

Robot Birthday Party – Part II (The Pinata)

June 9, 2011

Pinatas are always a good time.  What’s not to love about hitting something and having candy fall out of it.

I covered this pinata with silver foil tissue paper.  To give it the fringed look I used Martha Stewart’s fringing scissors from Michael’s.  I cut 2 inch strips of the foil paper and then fringed one side of it.  Starting at the bottom on the pinata, I hot glued the strips on in layers.

I used my cricut cutter to cut out a variety of shapes for eyes, buttons and nobs.  Dylan helped me decide where they should go.  We also glued on metal washers for additional buttons.  The arms were made of TP rolls wrapped in foil, the legs where paper cups, and the ears where made from cupcake papers.

He was one tuff pinata to crack.

etc. / Food & Drink

Robot BIrthday Party – Part I (The Cake)

June 8, 2011

To celebrate my son Dylan’s 8th birthday, we had a robot themed party.  We chose grey and orange for the colors, I’ll share some of the party details over the next week.  The details are my favorite part of planning a party. To start, this is the cake, we named him Robo.

I struggled to mix grey buttercream.  In the past, I have tried to make grey icing and it usually ends up being a light purplish color.  You would think that adding black food coloring gel would make grey – wrong.  With a little google researching, I found that others had experimented with adding a little yellow to the black as well.  I tried this, and I worked!  I’m really happy with the grey I achieved.

I made three rectangular cakes for the base of this cake.  One for the head, one for the body and one for the arms, ears and legs.