This post is sponsored by Sherwin-Williams. Thank you for supporting the companies that help make this blog possible. And thank you to Sherwin-Williams for providing the paint for this project.
After weeks of scraping, sanding, priming and painting. I’m so excited to share with you Dylan’s fresh new bedroom. This is such a good example of the power of paint to transform a space. And you can see already that we definitely had some FUN with paint. And I have some new favorite Sherwin-Williams colors that I want to share with you.
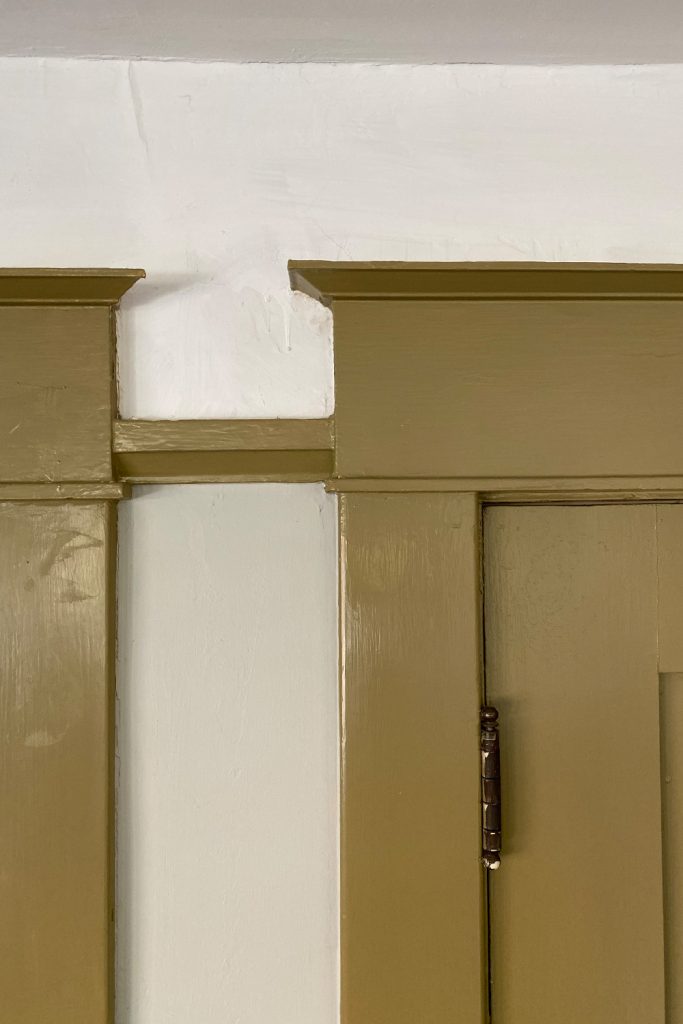
Before I share all the AFTERS with you, let’s go back and look at the BEFORES. And, I need to explain, we bought the house with it this way, we just hadn’t had the time or money to tackle it before now. So, for more then 3 years, Dylan has lived with dingy, army green trim and windows ( and not a pretty shade) that was peeling and chipping everywhere. He definitely didn’t complain, but it wasn’t a room I was proud to show off either.
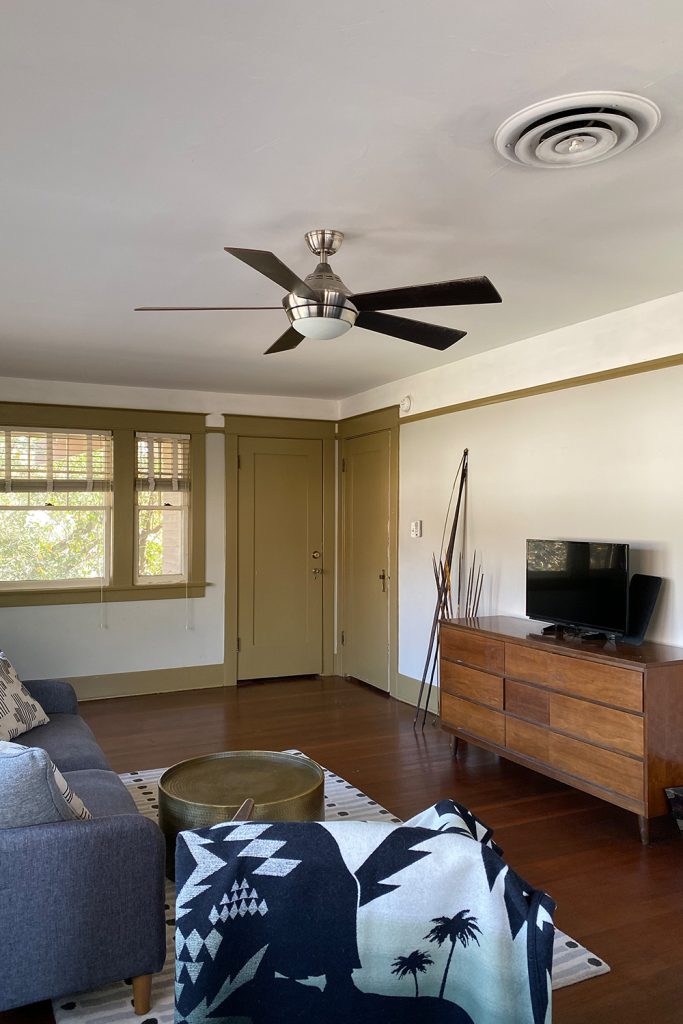
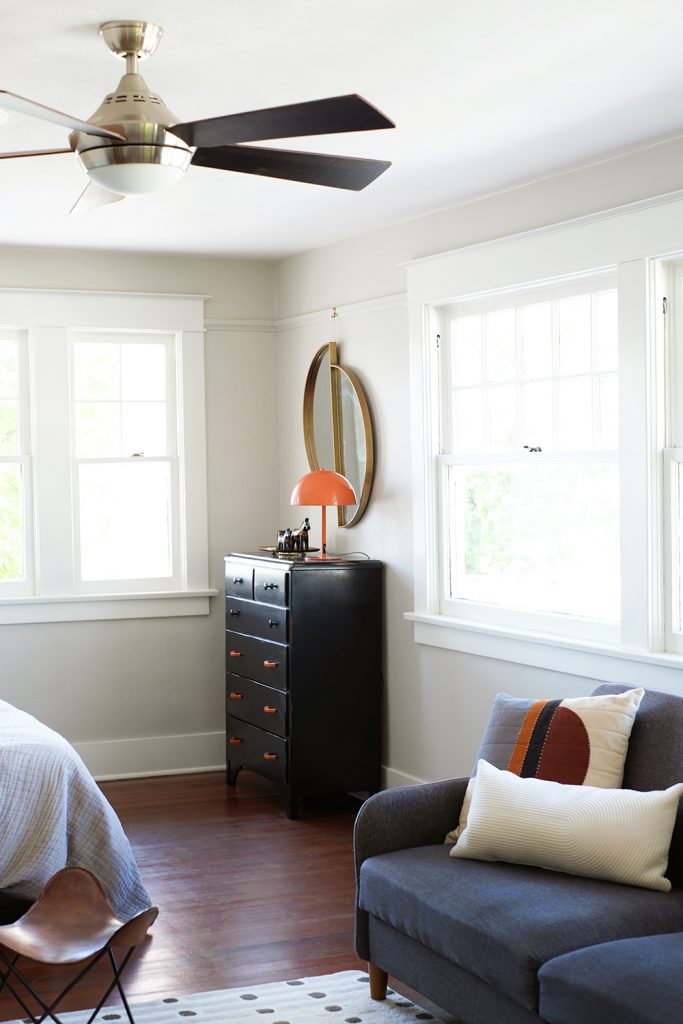
You can see right away that Dylan’s room is HUGE. We bought an inexpensive futon/hide-a-bed sofa when we first moved in to use as an extra guest bed. He even has space for a TV (because I didn’t want video games in our living room). I’m going to be a little bit of a tease and not show you ALL the room quite yet, because while we didn’t replace everything, we did make a couple of really cool upgrades to the space. And I have to say that this was probably the best timing for a room makeover now that Dylan spends most of his days in here. While he can’t be hanging out with his friends or even attending school, at least he has a clean, bright spot to live in while we are sheltering in place.
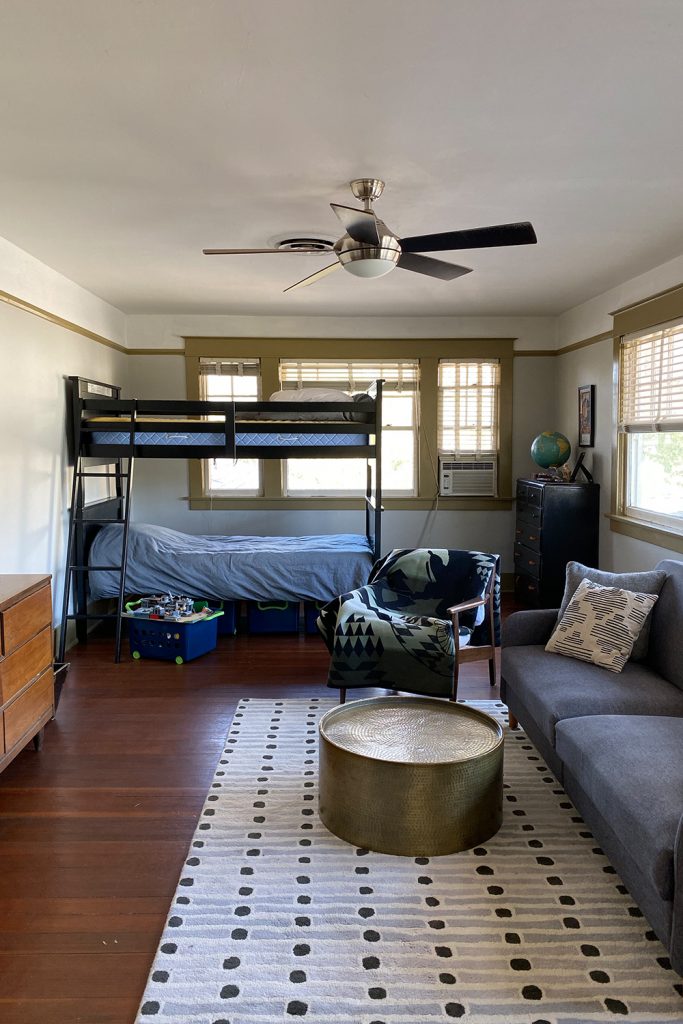

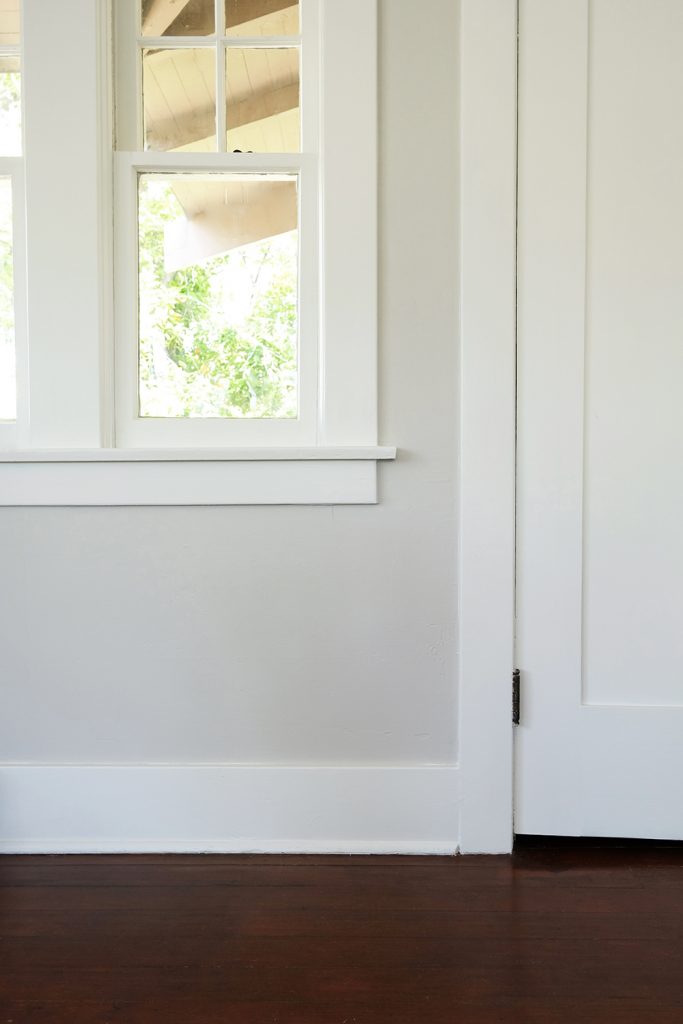
Ok, now let’s look at that after again. Ahhhhh, it’s like a breathe of fresh air. Above and below you can see the real difference. This is the same window and trim, but with a brand new look.
Now let’s talk paint and PREP. I can’t emphasis enough how important prep is when it comes to painting, especially in a 100 year old house. When I say I’m going to “paint” a room, the actually paint-brush-in-hand time is really is only about 20% of the time, the rest of the time is spent sanding, tack clothing, priming, sanding again, tack clothing again, taping, painting, maybe sanding a bit more, then painting another coat, and then hours of taking down tape and scraping windows.
So, here’s my process:
- Sand and Scrap
- Wipe down with TSP solution or tack cloth.
- Tape all the windows.
- Prime (if you have an old house, don’t mess around with a cheap primer you may be painting over oil based paint). Sherwin–William’s Extreme Bond Primer will cover EVERYTHING!.
- After I have primed, then I go back and look for areas that might need to be filled with caulk or sanded a bit more.
- Tack cloth again to remove any dust.
- Paint the trim and windows first. I had to do 2 coats on everything.
- Finally, paint the walls.
Here’s the paint sheens and colors I used. NUMBER 1 – only buy the BEST – Sherwin-William’s Emerald. I trust Sherwin-Williams products because for more then 150 years, they have been an industry leader in the development of technologically advance paint and coatings. And if you have ever gone into one of their 4,000 neighborhood stores, you know that you are going to get expert help and advice.
- For the windows, trim and doors, I used Emerald in a satin sheen in the color Alabaster. If I was painting trim in a kitchen or bathroom, I would probably step of the sheen a notch and use semi-gloss.
- For the walls, I love Emerald in a matte sheen. And I used the color Gossamer Veil SW 9165.
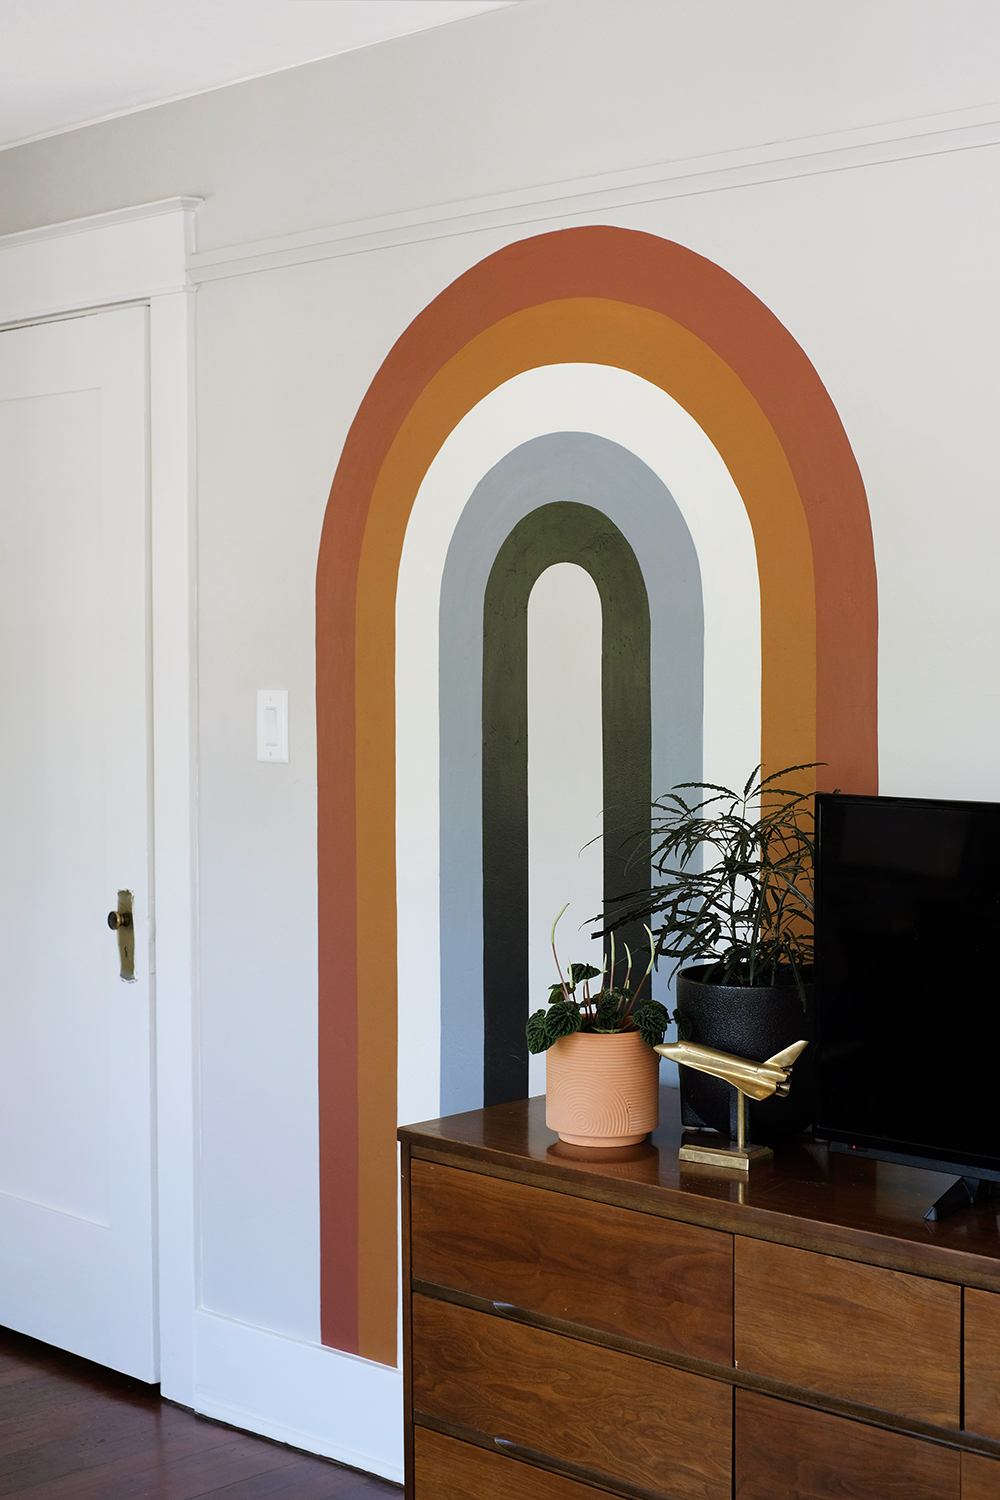
- For the Arch Mural (aka the rainbow), I used (in this order) Sierra Redwood SW 7598, Brandywine SW 7710, Alabaster SW 7008, Lazy Gray SW 6254, and Black Magic SW 6991.
Gossamer Veil is my new favorite grey. It’s perfectly soft and even a little warm. I really didn’t want a blue or cool based warm at all. This is actually one of the only rooms in our house that does’t have Alabaster White on the walls. I had a grey and charcoal moment about 10 years ago and stuck with it in our last home. But, when we moved here, I was ready for crisp white walls. Dylan really wanted grey though, so I gave the boy his desire and I’m actually really glad I did. His room has AMAZING windows. And now that they are all white, the soft grey walls really help them stand out.
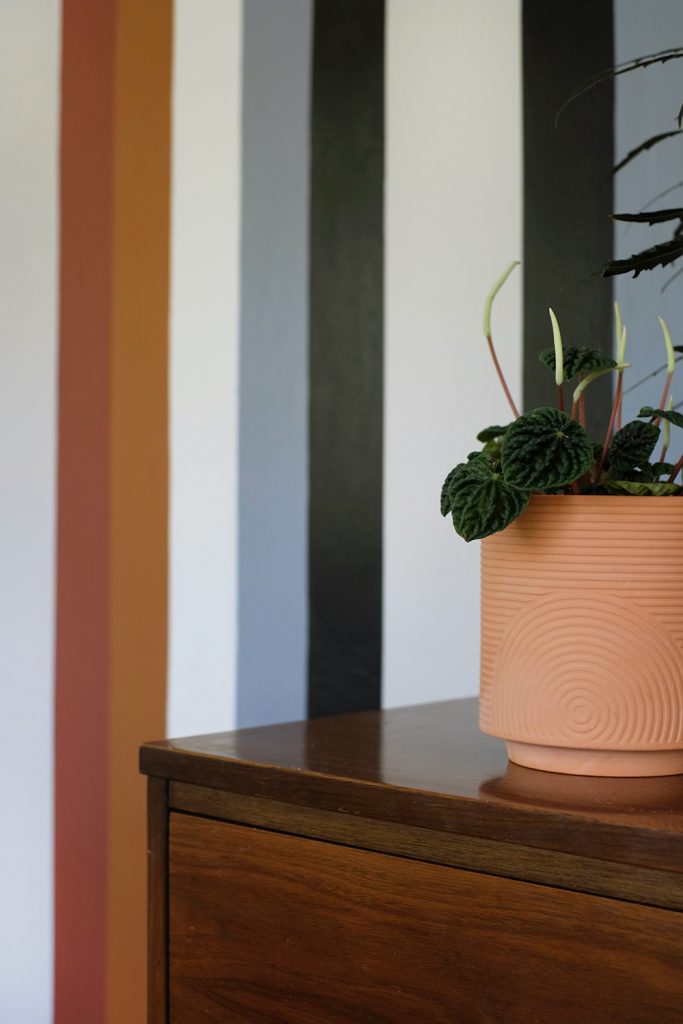
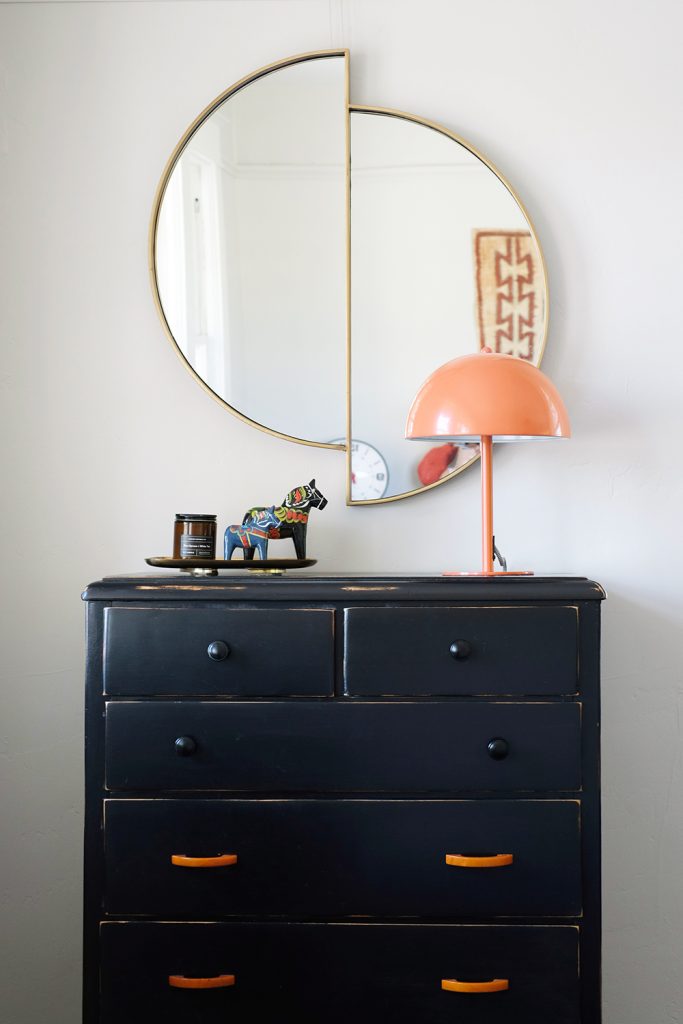
Now, let’s talk about the Arch Mural. I have know for a good year, that I wanted to do something like this is Dylan’s room. Dyl is 16, but he’s very artistic and I knew he would appreciate it. He has opinions all colors and patterns and really has pretty great taste. We drew up so many different shapes and ideas, but I really wanted a retro 70s 80s vibe for him and you know I have a thing for Arches. We played with lots of color combinations, and finally landed on this one. Every time we added too many colors, it just felt like a rainbow, and we really wanted something kind of masculine. For the longest time, I assumed there would be the color green in this room, but when I found that cute orange lamp last month the whole color scheme shifted.
This really was not that hard to paint. I didn’t even use tape, I just drew the lines on with a pencil and painted in each stripe. I started by making 4 inch wide stripes with a level. I made them all 5 feet tall. Then with a thumb tack, a pencil and a string, I drew half circles to line up with the stripes. It’s definitely NOT perfect but when you step back it looks really pretty great.
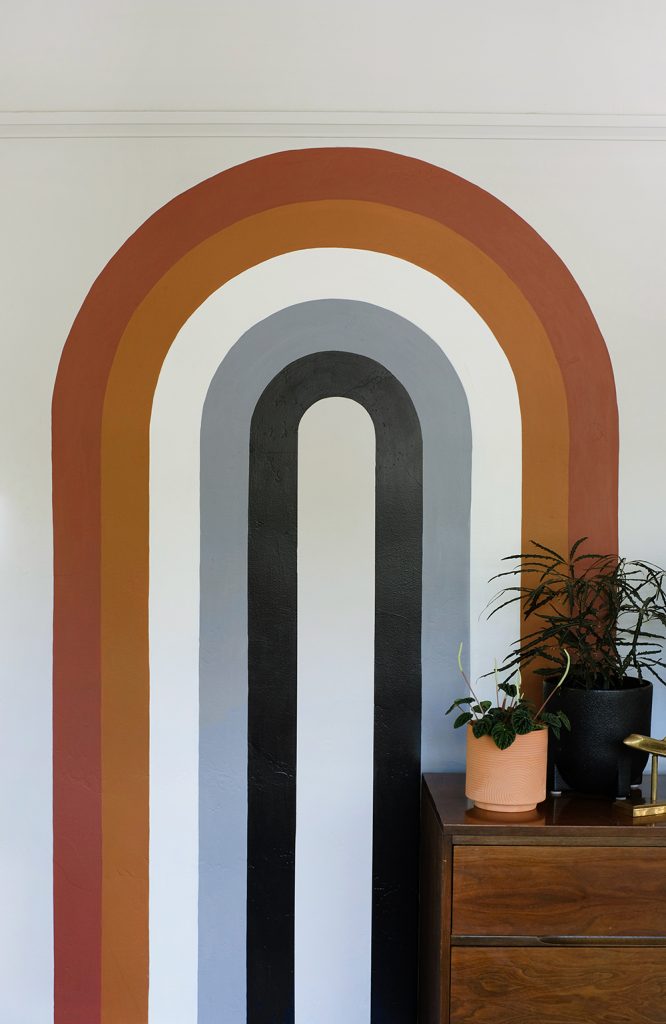
I kind of liked the idea of tucking this mural behind the dresser a little bit. I originally thought maybe there should be more to this mural, but once I got it up I decided it really was a bold enough statement as is.
There is lots more to share with this room (it’s a big room). Stay tuned, I’ll be back with more.