etc.

Yarn Wrapped Birthday Number

September 18, 2012

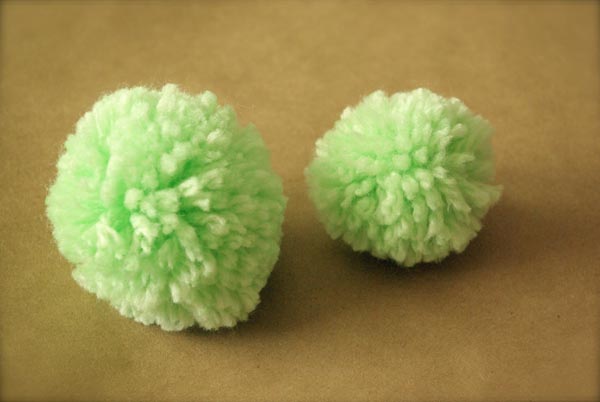
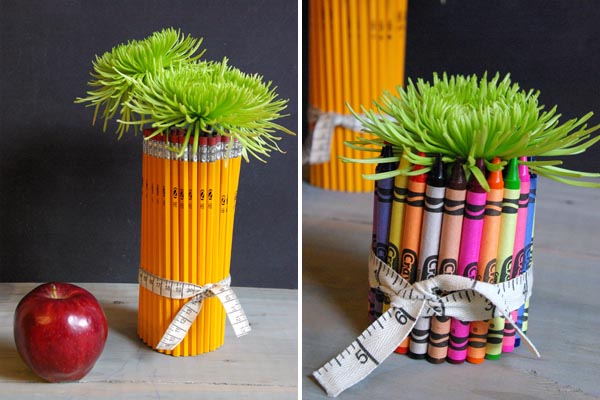
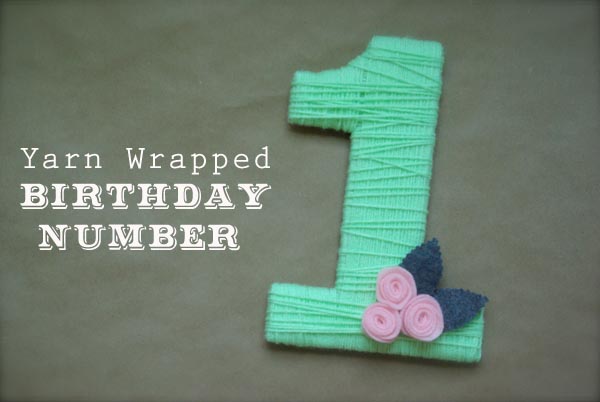
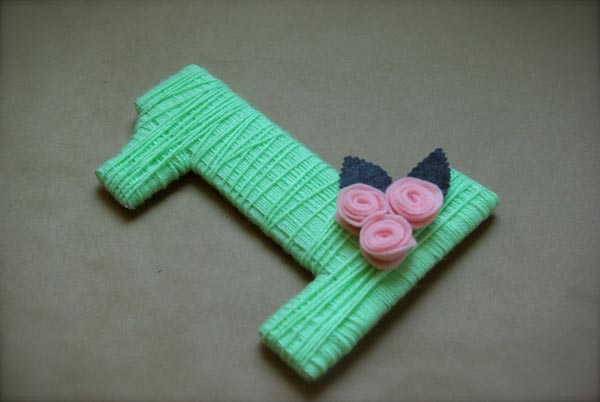
I’m still having fun putting together Olivia’s first Birthday Party.  The party is less the 2 weeks away, so I’m making lists and trying to check off at least one thing everyday.  After making all the pompom for the Pompom Bunting, I still had some yarn left over.  So I decided to make this yarn wrapped 1.  It was easy to make and I think it will look cute somewhere on the day of the party.  Maybe I’ll put it on the dessert table or the front door, not sure yet.  

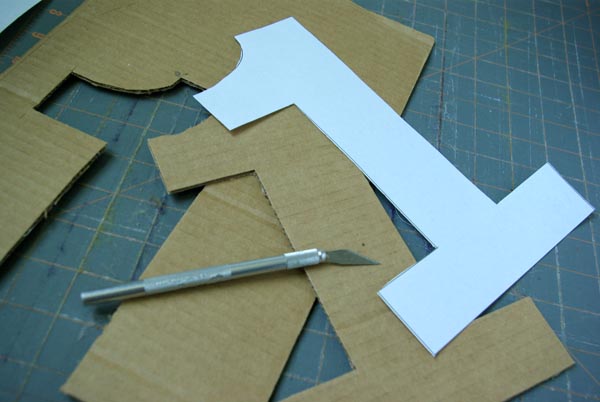
I simply printed out a large number one.  I chose the font Verdana because it has a great classic number one shape.  Then I cut two number ones out of card board using an exacto knife and straight edge.  Then I taped the two pieces of cardboard together.  
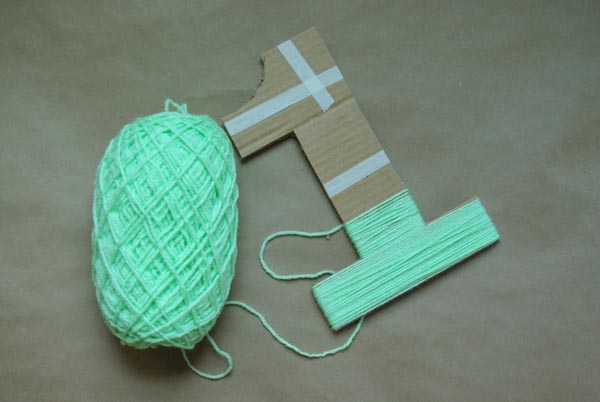
Next I started wrapping the yarn around the number.  I went all one direction first and then the other direction next to cover all sides.  On the final wrap, I placed a little dot of hot glue on the corners to keep then yarn in place there.  And, as you can see, I wrapped the last layer in a kind of hap hazard manor to give it more of the homemade feel.  But, it would look great wrapped perfectly even and straight as well.  

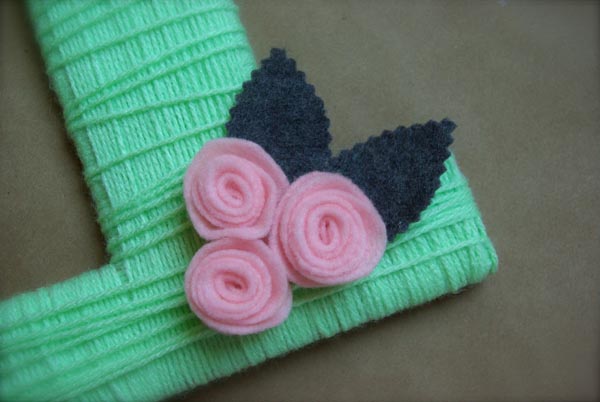
To finish it off, I made a few rosettes and leaves with felt.  These are the rosettes are showed how to make in my Yarn Wrapped Wreath DIY video
It could be cute to do the birthday child’s initials as well for a party.  Don’t you just love custom decor that costs pennies? 

etc.

Fabric Balls for Baby

September 11, 2012

I’ve made these fabric beach ball a couple times now.  I made them for my Idaho nephew and my San Diego nephew.  I’ve been meaning to make these for Olivia since she was born.  They are perfect for babies to play with.  They’re soft, light and easy to hold onto.  I had saved scraps from you quilt for this very purpose. And finally this week I got around to making them.  She has been enjoying them.  We have a really long hallway, so I such all the bedroom doors and she loves scooting up and down the hall after them.  

I used the pattern from Purl Bee for these.  It’s super easy to follow.

And I got some exciting news this morning, my San Diego nephew just got a baby sister this morning.  I’m so excited to meet her.  Of course, we were just in SD this weekend for his 2nd Birthday, she had to come the day after we left.  I’m itching to get down there and meet her.  Maybe I should make her some pink, girlie fabric balls too.  Congratulations Josh and Jacq, she is a lucky baby to have you as parents.

etc.

A Scooter Themed Party in the making

September 10, 2012

Last week I shared my inspiration for Olivia’s 1st birthday party.  I’ve been collecting, making and gathering things for the party. I like to start working on a party a couple months ahead of time.  It gives me plenty of time to find what I’m looking for and at a good price. Cuz, I’m a girl on a budget.  I wanted to show you a little of what I’m working with.  This is just the beginning stages of my party prep, but here’s some of the components to the party.

I illustrated the invites and have already printed them off.  Since the party is only 3 weeks away and need to get them mailed off.  
I am in the process of making LOTS of pompoms for garland and other cute things.
I usually sew goody bags for the guests.  They are going to be made out of this sweet mint green and grey fabric.

I made Olivia and birthday party bib. This fabric was just too cute to pass up.  It will appear somewhere else in the party as well.

What’s a party without paper straws?  I have lots of scooter decals to decorate with (these scooter decorations are available on my etsy shop).  And there will of course be candy, but how perfect is this mint green rock candy. 
So, what do you think so far?  Have you got any other great ideas or sources for me?  Please share.
Here’s the goody bags I made with the fabric shown and the yarn wrapped birthday number.  And here’s the party.

etc.

Birch Bundle

September 4, 2012

Very sad story, recently our birch tree died.  So, I had lonnie save some of the branches for me.  I love birch trees and their beautiful white bark.

I had recently gotten rid of the topiary that sat on my mantel in our living room.  It was cute 7 or so years ago, when I first bought it.  But, I was ready for something new and fresh.  I felt like something with some height was needed in that corner.  I decided to fill my white pot with a bundle of birch branches (say that quickly 3 times).  I cut the branches all to 3 ft in length.  I got to use a drop saw to do this, power tools are always fun.

I think it brings the outside in, adds texture, height, and modernizes my decor for no cost at all.  This is a decorating win for me.  What do you think?  Have you got any other creative ideas of how to display some birch branches?  Or what else would look great in that corner of my room?  I’d love to hear what you think.

etc.

Olivia’s 1st Birthday Party Inspiration

September 3, 2012

Olivia is 11 months old! Wow, where has the year gone. I’m really excited for her first birthday party though. I wanted to share my inspiration for the party. Olivia does not crawl, she scoots on her butt everywhere. And she is fast.  We call her “our little scooter”. So a scooter themed party seemed appropriate. We’ve also has had a scooter for about 8 years.  When I can get away without kids, it’s really fun to drive. We are quite fond of scooters around here.

This beautiful image of a pink vespa kicked off the party palette for me (found via pinterest). Minty green and pink will be the main colors. But, grey will serve as the neutral backdrop and maybe a little peachy pink to add to the vintage vibe I want the party to have.

I’ve already started working on some of the decorations, I have some scooters up on my etsy shop already. I’ll share more of my party prep with you as I put it together.

Oh, the fun circular image and color palette layout is from the fantastic blog, Pugly Pixel.  She offers great tutorials and layouts for photoshop. 

etc.

A New Front Door

September 1, 2012

If you follow my pinterest, you might have noticed me pinning entry doors lately, especially in the Craftsman and Arts and Crafts style.  My Shut the Front Door board has some really great looking doors.  Our little bungalow home, built in 1920,  has needed a new door since the day we bought it, that was over 9 years ago.  Our old door offers absolutely no privacy, hence the silly pull down shade.  It also is single paned glass so heat and cold both escape and enter our house, driving our electricity bill up.  To be super inconvenient, the door cannot lock from the outside either.  So, we could let guests in, but if we wanted to leave or enter the house, we had to always use the back door.  Even the lock set cannot be replaced because of the door’s vintage.  And really it’s just way too cottagey for me (that’s my new word).   So, it was time.  We had to bite the bullet, and look for a new door.  

I knew it was going to be super pricey.  Our door is really wide, like 42 inches wide.  Like special order wide – ouch!  I had looked a few years ago and the prices has frightened me away.  But, this time Lowes really came through.  The salesman was very knowledgable (amazing right?) and he really got a good price for me.  

We ordered this door through Escon Doors. To have the door stained and finished by them, it was going to add $500 to the price.  So, I’m going to do that part myself.  I think I’m going to stain it a dark, dark brown (not a yellowy oak brown, more on the ebony side).

the old door 

Sometimes home ownership just costs a lot of money.  I know this was expensive, but I think it’s really going to help our curb appeal and just be safer and more convenient for us.  Have you had to put money into your home recently on a necessity?  It’s hard right?  We just want to spend money on the “fun” things.

etc.

Mason Jar Monogram Light

August 31, 2012

I was recently invited to compete in the Mason Jar craft challenge.  This was a little difficult, seeing there are so many unique and creative ideas out there using Mason Jars.  I came up with a few ideas, googled them, and they had already been done.  But, I’m pretty excited about my Monogram Light and believe it truly is an original idea.  I came up with this Monogram Light using canning jars as the bulb covers.

I originally designed this light to use outside on our back patio, to enjoy on warm California evenings.  But, now that it is finished, I kind of love the modern touch the plywood and white adds to the interior of my house.  It a playful accent in our 1920’s bungalow.

Supplies:
2ft square piece of 1/2″ plywood
11 quilted canning jars and rims (you may need more or less depending on your letter)
1/2 wood screws
white paint
blue painters tape
power drill with a 3/4″ bit
1 string of outdoor lights
1 nail and hammer
measuring tape

It looks more complicated then it really is.  Once I had the right supplies, it didn’t take me long to make.    Start by taping off your monogram, mine is an M.  Then paint it white.

Lay out the jar rims on your monogram and trace the center of each, so you can remember where to place them.  Then, using a good sized nail and hammer, punch 2 holes in the center of the jar rim.  This will make it much easier for you to put in the screws.Then, using a 3/4″ bit, drill out the center of each marked circle.  Lastly, using the 1/2″ screws, secure the rims to the board.

Insert the light socket in the holes and then screw in the light bulbs.  Screw down a jar over each light bulb. Plug it in and you are done!

You can see my entry at Buzzfeed‘s Craft Wars.  
If you like what you see, BE A FRIEND!  Leave a comment, follow Oleander and Palm by email, PinterestFacebook, or Twitter.

etc.

Squares in Pairs Baby Quilt

August 29, 2012

I’m sorry for the absence of posts.  I’ve been pretty busy with projects, sewing, and not to mention the first weeks of school and trying to figure out pick up and drop off schedules.

I finished my new niece’s baby quilt this week.  She is due to arrive in a few weeks.  I made her big brother’s quilt and helped out with his nursery.  I went totally girlie on this quilt.  They have painted the nursery a pale grey and have super cute white birch tree decals on the walls.  They also have some calico birds perched on the branches (and I made them a fun mobile, here it is).  I took the quilt colors from the bird colors and patterns.

I’m calling this quilt “Squares in Pairs”.  I took 4 pairs of fabrics and put them together in rows.  It’s a pretty eclectic and free quilt.  I gave it a couple simple borders and then backed the whole thing in a grey tree branch fabric that my sister in law picked out.

etc.

Thrifting Thursday: Vintage Globe Bank

August 23, 2012

This find was given to my husband right away.  He has had a thing for globes for a long time.  It works out well for me.  He is happy to visit antique stores and flea markets with me, because he can hunt out globes, atlases and maps for his collection.

I found this little guy the same time I found my Bay Blanket.  This little globe doubles as a piggy bank.  It’s a metal bank with just the right amount of rust and scratches.  I love the faux wood painted base on it.  We need to find a new stopper for it, but Lonnie plans to put his change in it at the end of the day.  From my quick look at the political lines, the globe is from the 60’s, but Lon will have to look into it more.  He can date them a lot better then I can.

Here’s a tip for antiquing or thrifting: When buying more then one item, offer to pay a combined lower price. For example, they wanted $15 for the blanket and $15 for the globe.  So, I asked if they would take $20 for both items.  And they accepted my offer.  They want to move inventory, so group your purchases and you’ll save.  

Do you have any great tips for getting a lower price then the asking price?

This post is being linked up at The Blue Eyed Owl.

etc.

Back to School Bouquets

August 22, 2012

Well, the kids are definitely back in school.  We are starting to get into a bit of a routine.  I like to start the year off with a gift for my kid’s teachers.  It’s simple Math – Happy Teacher = Happy Students!  Last year I made fresh Apple Scones for the teachers and the year before, I made reuseable coffee cup sleeves.  
This year I thought a flower bouquet would brighten their day.  These we easy to make and really didn’t cost too much.  
Supplies:
Pencils (about 32)
Crayons (about 25)
An empty baby food jar
An empty Starbucks Frappacino Bottle
2 rubber bands
Ribbon
Flowers

For the pencil vase, I wrapped an empty frappacino bottle with an elastic band and the inserted the pencils all the same direction.  And for the crayon vase I just used an empty baby food jar.  Then I simply tied a cute ribbon around the rubber band to hide it and then filled them with flowers.

Are your back into a routine with the start of school?  Is that routine welcomed or are you longing for more summer?

If you like what you see, BE A FRIEND!  Leave a comment, follow Oleander and Palm by email, PinterestFacebook, or Twitter.