etc.

London Fog Shortbread

August 17, 2012

I think it’s a Canadian drink, but a London Fog is a Earl Grey Tea Latte with Vanilla.  This is my cookie version of this warm, comforting drink.  It’s a buttery, tender cookie that has the distinct and unique flavor of Earl Grey Tea infused in it.  The perfect partner for a warm cup of tea.

London Fog Shortbread
1 cup butter
2/3 cup powdered sugar
1 3/4 cup flour
1 tsp. vanilla
1 vanilla bean split and scraped (1 tbsp. vanilla bean paste)
2 tbsp. Earl Grey Tea (about 3 tea bags)

Cream the butter and sugar with an electric mixer.  Add the vanilla, vanilla bean, and the tea.  Add the flour and mix until the dough comes together.  Wrap the dough in plastic wrap and chill for at least 30 mins.  Pre-heat the oven to 350F.  Roll out the dough to a little less then 1/4″ on a well floured surface.  Cut out desired shapes.  Place on parchment lined baking sheets.  Chill the cut cookies for at least 20 mins. before baking.  Bake the cookies for about 12 mins. or until the edges are just barely brown.  Cool on wire racks.

These cookies freeze well in an air tight container.

etc.

Thrifting Thursday: Hudson Bay Blanket Remnant

August 16, 2012

I love Hudson Bay Blankets and all the National Park Blankets, but there is no way I will ever be able to afford a new one.  Last year I scored a beautiful one at the Pasadena Flea Market.  It was in excellent condition and even had the original seal on it.  I had it professionally cleaned and gave it to my brother for Christmas.  I’m always on the look out for another one at antique stores and flea markets.

I lucked out and found this piece of a blanket at Old Town Antiques in Eureka (where I got my grey pitcher).  They wanted $15 for it, but I got them down to $10.

I have plans to make something out of this remnant for Riley, my vintage trailer.  If you remember Riley’s inspiration board, I had hopes of a Bay Blanket there.

Is there a certain item that you are always on the look out for when you are thrifting?

This post is being linked up at The Shabby Nest and The Blue Eyed Owl.

etc.

Blackberry Vanilla Sauce

August 14, 2012

I’m back up in Northern Cali (Eureka, at my parents place).  We are escaping the heat one last time before school starts.  The blackberries are one and we’ve been picking gallons of them.  We usually make batch after batch of blackberry jam, but this year I’ve changed it up.  So far I’ve made Blackberry Apple Jelly, Blackberry Curd (to die for), and this amazing Blackberry Vanilla Sauce.  This sauce is perfection.  It’s bright and tangy, not too sweet, and the vanilla adds a warm layer to the flavor.  So far we’ve had it on vanilla ice cream, but I can’t wait to serve is on warm crepes or belgium waffles.

Blackberry Vanilla Sauce
10 cups of fresh blackberries
1 cup water
2 vanilla beans scraped (or 2 tbsp. vanilla bean paste)
1 tbsp. vanilla
3 tbsp. lemon juice
4 cups sugar

In a blender, puree the blackberries well.  Then strain as much juice off the pulp as possible.  I put mine berries through a fine mesh sift and used a spoon to move the pulp around.  I got 6 cups of juice from my berries.

In a large pot, combine the juice, water, lemon juice, vanilla, and sugar.  Mix well.  Cut and scrape the vanilla beans.  Put the vanilla scrapings and the whole bean in with the juice/sugar mixture.  Bring to a rolling boil, then reduce the heat to medium low and simmer for 20-30 mins. or until the sauce reduces 1/3 in volume.

Pour the hot sauce into prepared jars (5-6 half pint jars).  Wipe the rims, put the lids on, and process for 10 mins. in a water bath.

Don’t be intimidated by canning and preserves.  It’s so much fun.  I love that the finished product lasts for a long time.  It’s so nice to have things like this yummy sauce on hand in your pantry.  You can easily turn a simple dessert into something very special. 

etc.

Thrifting Thursday: Green Frame

August 9, 2012

Often I like to improve or update a thrifted find in some way. But, sometimes they need no facelift or sprucing up at all.  This frame is a good example.  I love how the paint is worn off and chipped in places.  And this perfect shade of green is what caught my eye.

I bought this frame in a little antique mall, downtown Bakersfield.  I paid $8 for it.  That seems kind of pricey when I actually write it down.  But, that’s the beauty of thrifting.  Because I save on so many other things, like my $1.42 tray, I can afford to spend a little more on other fun finds.

It’s a little bigger then a  5X7″ frame, so I just backed my picture with a some grey card stock.  The Paris ladies in waiting wasn’t my style, so my cute kids replaced it.  Oh, if the original image appeals to you (it’s from the 1940’s), let me know, maybe I can send it your way.

What have you found thrifting lately?  Leave a link in my comments so I can check out your finds.  

etc.

Instagram Necklace

August 7, 2012

This is fun DIY folks.  Are you digging instagram like I am these days?  I’m having so much fun playing with filters and sharing my stylish pictures instantly with my friends.  I’m such a visual person, so thumbing through all my instagram friends images is quite addictive.  I love how nothing really needs to be said or explained.  It’s fascination having a peak into someones else instant life.  I’m amused and entertained by what people share on instagram.  It’s quite revealing.

Sometimes I think my instagram pictures are some of the best pictures I take.  I think a lot of it has to do with the unplanned nature of taking a picture with your phone.  It can be whipped out in a seconds notice and then that spontaneous moment in time is captured.

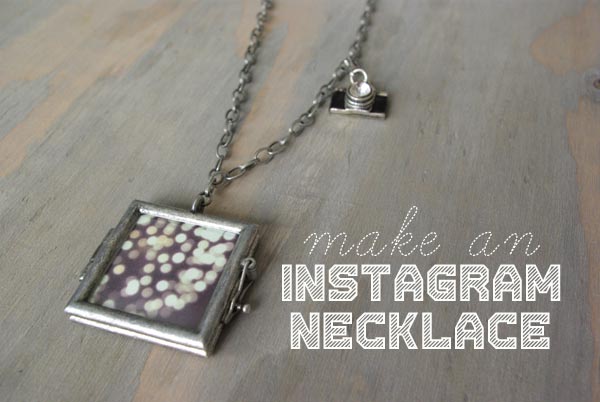
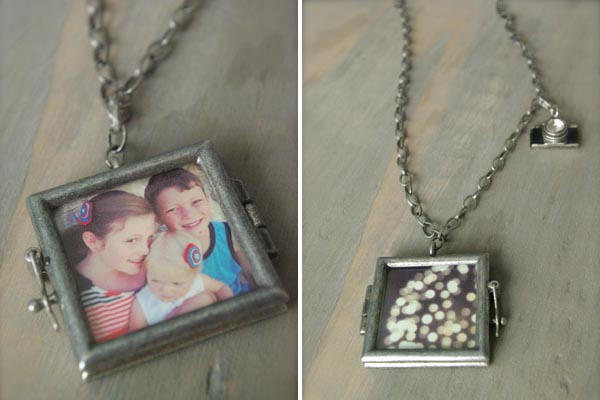
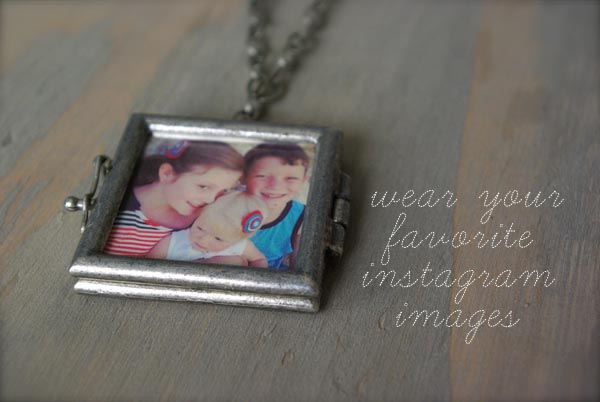
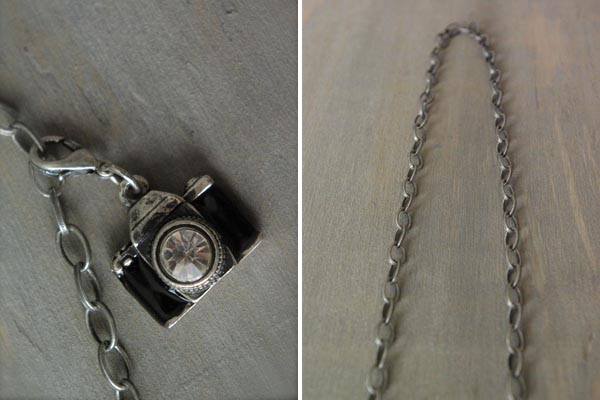
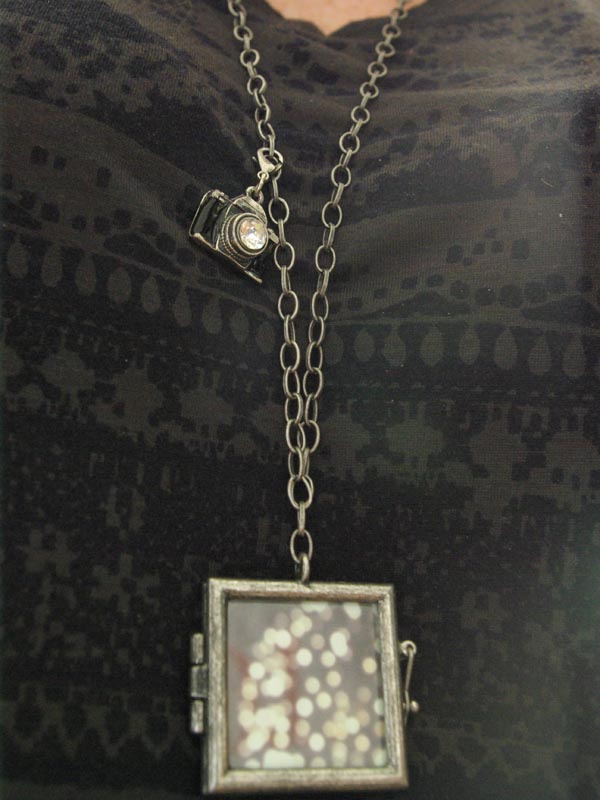
I decided it would be fun to have a modern twist on the traditional locket.  So, here’s my Instagram Necklace. This is a two sided locket that fits 1 1/4″ square images, perfect for instagrams.  For now, mine has 2 images from the 4th of July.  We were in Carlsbad, NM for the 4th.  The first is my beautiful kids and the second is some fireworks.  The beauty of this necklace is that you can trade out the pictures whenever you want.

Supplies:
1 Beading Landing (Bezels, Frames, and Filigree) Square Pendant  – available at Michaels
1 42″ length of metal chain (Blue Moon Beads, Oval chain in Burn Silver) – available at Joannes
Needle nose pliers
Scissors
Two 1 1/4″ square images (Instagrams!)
Oh, and I added the cute little camera charm – available at Target for $4.99

I’m sorry you are going to have to actually go to the store for these items.  I looked all over the internet and couldn’t find either the square pendant or chain.  Sorry friends I tried. Oh, but these items where very inexpensive. I got the pendant for $2.40 and the chain for $2.40 (both bought with 40% off coupons).

Here’s what you do:
1.   From a mac, in iphoto, select the instagram image you would like to print.  In the print window, go  to Print Size and select custom. Then enter 1.25 ” by 1.25″.
2.   Print the image on photo paper.
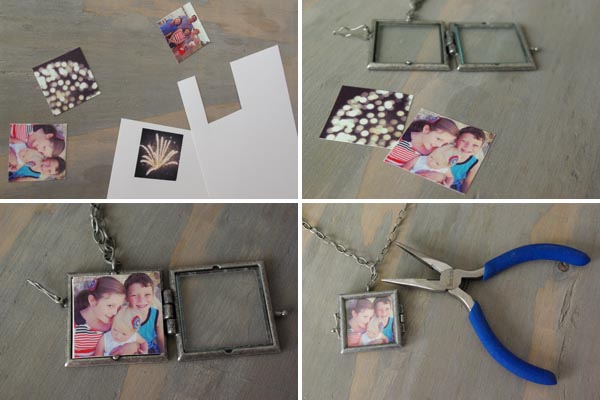
3.   Cut out your 2 images.
4.   Place them back to back in the pendant.
5.   Measure the length you would like your necklace to be.  Mine is about 36″.
6.   Remove one link from the chain and slip it onto the top of the pendant  (leave the link open).
7.   Then attach that open link to one end of the chain and using the pliers pinch it closed.
8.   And finally, close the necklace by attaching the lose end of the chain to the link you just attached.

I’ve been wearing mine a lot this week.  Does this look like a project you might attempt?

Oh, and if you are not already following, my instagram name is jeranmcconnel.  And if you like what you see, BE A FRIEND!  Leave a comment, follow Oleander and Palm by email, PinterestFacebook, or Twitter.

etc.

DIY Ikat – YouTube Video

August 6, 2012

Last week I shared with you the thrift store tray I hand painted an ikat pattern onto.  Well, here’s the DIY video.  I have step by step instructions, so you can easily paint your own ikat pattern.

Remember I put together a DIY video for my Spring Wreath.  That was months ago, so I thought it was about time I tried another.  I’m a visual learner, so reading instruction sometimes just doesn’t work for me.  So hopefully some of you will find this method helpful.

Once again I feel like a total dork and I’m not sure why I talk the way I do or make the faces and hand gestures that I do.  It’s hard to watch yourself on video, very humbling.

I’d love your feedback.  Please let me know if this is helpful and whether or not my instructions are clear and easy to follow.  Happy painting friends.

etc.

Thrifting Thursday: Ikat Tray

August 2, 2012

To see my a DIY YouTube video for painting this tray, click here

I’m pretty excited to share this post.  This was a really great thrift find.  Granted it was ugly, but I only paid $1.42 for this wooden tray at my local Salvation Army.  Now that’s a deal!  But, what I’m really excited about is the transformation.  Using paint I already had, I hand painted on this Ikat design in grays and green.  Now it’s a tray I would happily pay much, much more for.

See, it was ugly.  The yellow was awful and chipped and scratched.  And it had some faux cork looking vinyl stuff stuck to it.  I scraped all that off and then gave the whole thing a coat of white paint.

Then I drew out my design and painted on my custom ikat pattern.  It was a lot of fun to do.  I tried to take good DIY pictures along the way, and I hope to have instructions and my technique posted on how to create your own Ikat on the blog tomorrow (maybe I’ll even do a short DIY YouTube Video).  Wouldn’t this be fantastic on the front of a dresser or along on a wide frame?

I plan to have a piece of glass cut for the top on the tray.  Then I don’t have to worry about water rings or scratches.  But, I was just too excited to share this, so the glass will come later.

The color combinations are endless.  I chose my usuals, two tones of gray and little green.
Is this something you would like to attempt?

Just for interest, here’s what the items on the tray are:
A brass camel shaped lock that I bought in the souq in Sanaa, Yemen.
A couple hand painted green bowls that I bought in the Grand Bazaar in Istanbul, Turkey.
And the little green vase has a few sprigs of vintage mercury glass Christmas ornaments that I bought at the Pasadena Flea Market.

etc.

Decorating My Vintage Trailer

August 1, 2012

I’ve been wanting to find a way to hang pictures and art in Riley.   But, because the interior walls are in such excellent condition, I didn’t want to make any holes in them.  And, whatever you hang in the trailer needs to be light and nearly unbreakable.  I decided a string or wire to hang things on would work best.  

 I had wanted to add a few more birds to go with the birds that are already cut out of the shelves.  Then, miraculously I came across this Birds on and Wire at target (I sure do love target).   I was going to cut out birds with a jig saw and rig up some wire/string contraption.  Target saved me.

One problem was that they only came in black.  So, I quickly fixed that with a little white spray paint.  The hanging mechanism for this set required 2 screws.  That was not going to happen.  These wall have stayed in near perfect condition since 1948, I don’t want to be the one to put holes in them.
So, I used 3M’s command strip clear hooks and with a little wire I attached the photo wire to the hooks.

It’s going to fun to have a place to hang postcards, prints, photos and little memories from our trips.  And I can add colors and patterns to the space, just like I would any interior. 

etc.

Modern Animal Prints

July 29, 2012

I’ve been working on some new prints for my Etsy shop.  This is easier said then done with a 9 month old on the go.  Olivia is moving everywhere.  She doesn’t crawl, she scoots on her rear, and she’s pretty efficient.  So, it’s hard for me to find time to sit still for a few minutes.

But, I did manage to work on these illustrations this weekend.  These modern animal prints would add a great addition of color and whimsy to any room.  I’ll have more animals and in other great color combinations really soon.

I hope you stop by my etsy shop.

These are 8×10 prints.  But, I’m really happy to print them any size or custom color combination.  If you’re interested in anything special just send me a message.

I would love your feed back.  Please leave me a comment and let me know what you like and dislike.  I value my stylish reader’s opinions.

etc.

Rosemary Strawberry Shortcake

July 27, 2012

This is what summer is supposed to taste like.  Really a wasn’t sure if there was a better summer dessert then classic strawberry shortcake.  The rosemary in this shortcake is so earthy and bright and gives a great twist to this classic.  I’ve served this a couple times now.  I haven’t told my guests what secret ingredient was in it, and they have been pleasantly surprised by this flavor combo.  Rosemary can often be thought of as a savory herb only, but it is terrific with strawberries.  

Rosemary Strawberry Shortcake
2 cups flour
1/4 tsp. baking soda
2 tsp. baking powder
3/4 tsp. salt
2 tbsp. fresh rosemary (finely chopped)

1/4 cup cold butter
3/4 cup sour cream
1/4 strawberry jam
1/4 cup milk

Mix together the dry ingredients in a large bowl.  Cut in the cold butter using a pastry blender (till it resembles course meal).  In smaller bowl, whisk together the sour cream, milk and jam.  Pour the sour cream mixture into the flour/butter mixture and gently toss with a fork until the dough just comes together.  Pat the dough into a round about 8 inches across on a well floured surface.  Then using a floured knife cut it into 6 or 8 wedges.  Or cut out circles with a biscuit cutter.  Place on parchment lined baking sheets.  Dust with sugar on the tops.   Bake at 400 F for about 15 mins or until they are golden brown and firm.

Cool, then slice in half.  Fill with sugared strawberries and whipped cream and top with more whipped cream, strawberries and a sprig of fresh rosemary.

I will be making this again very soon.