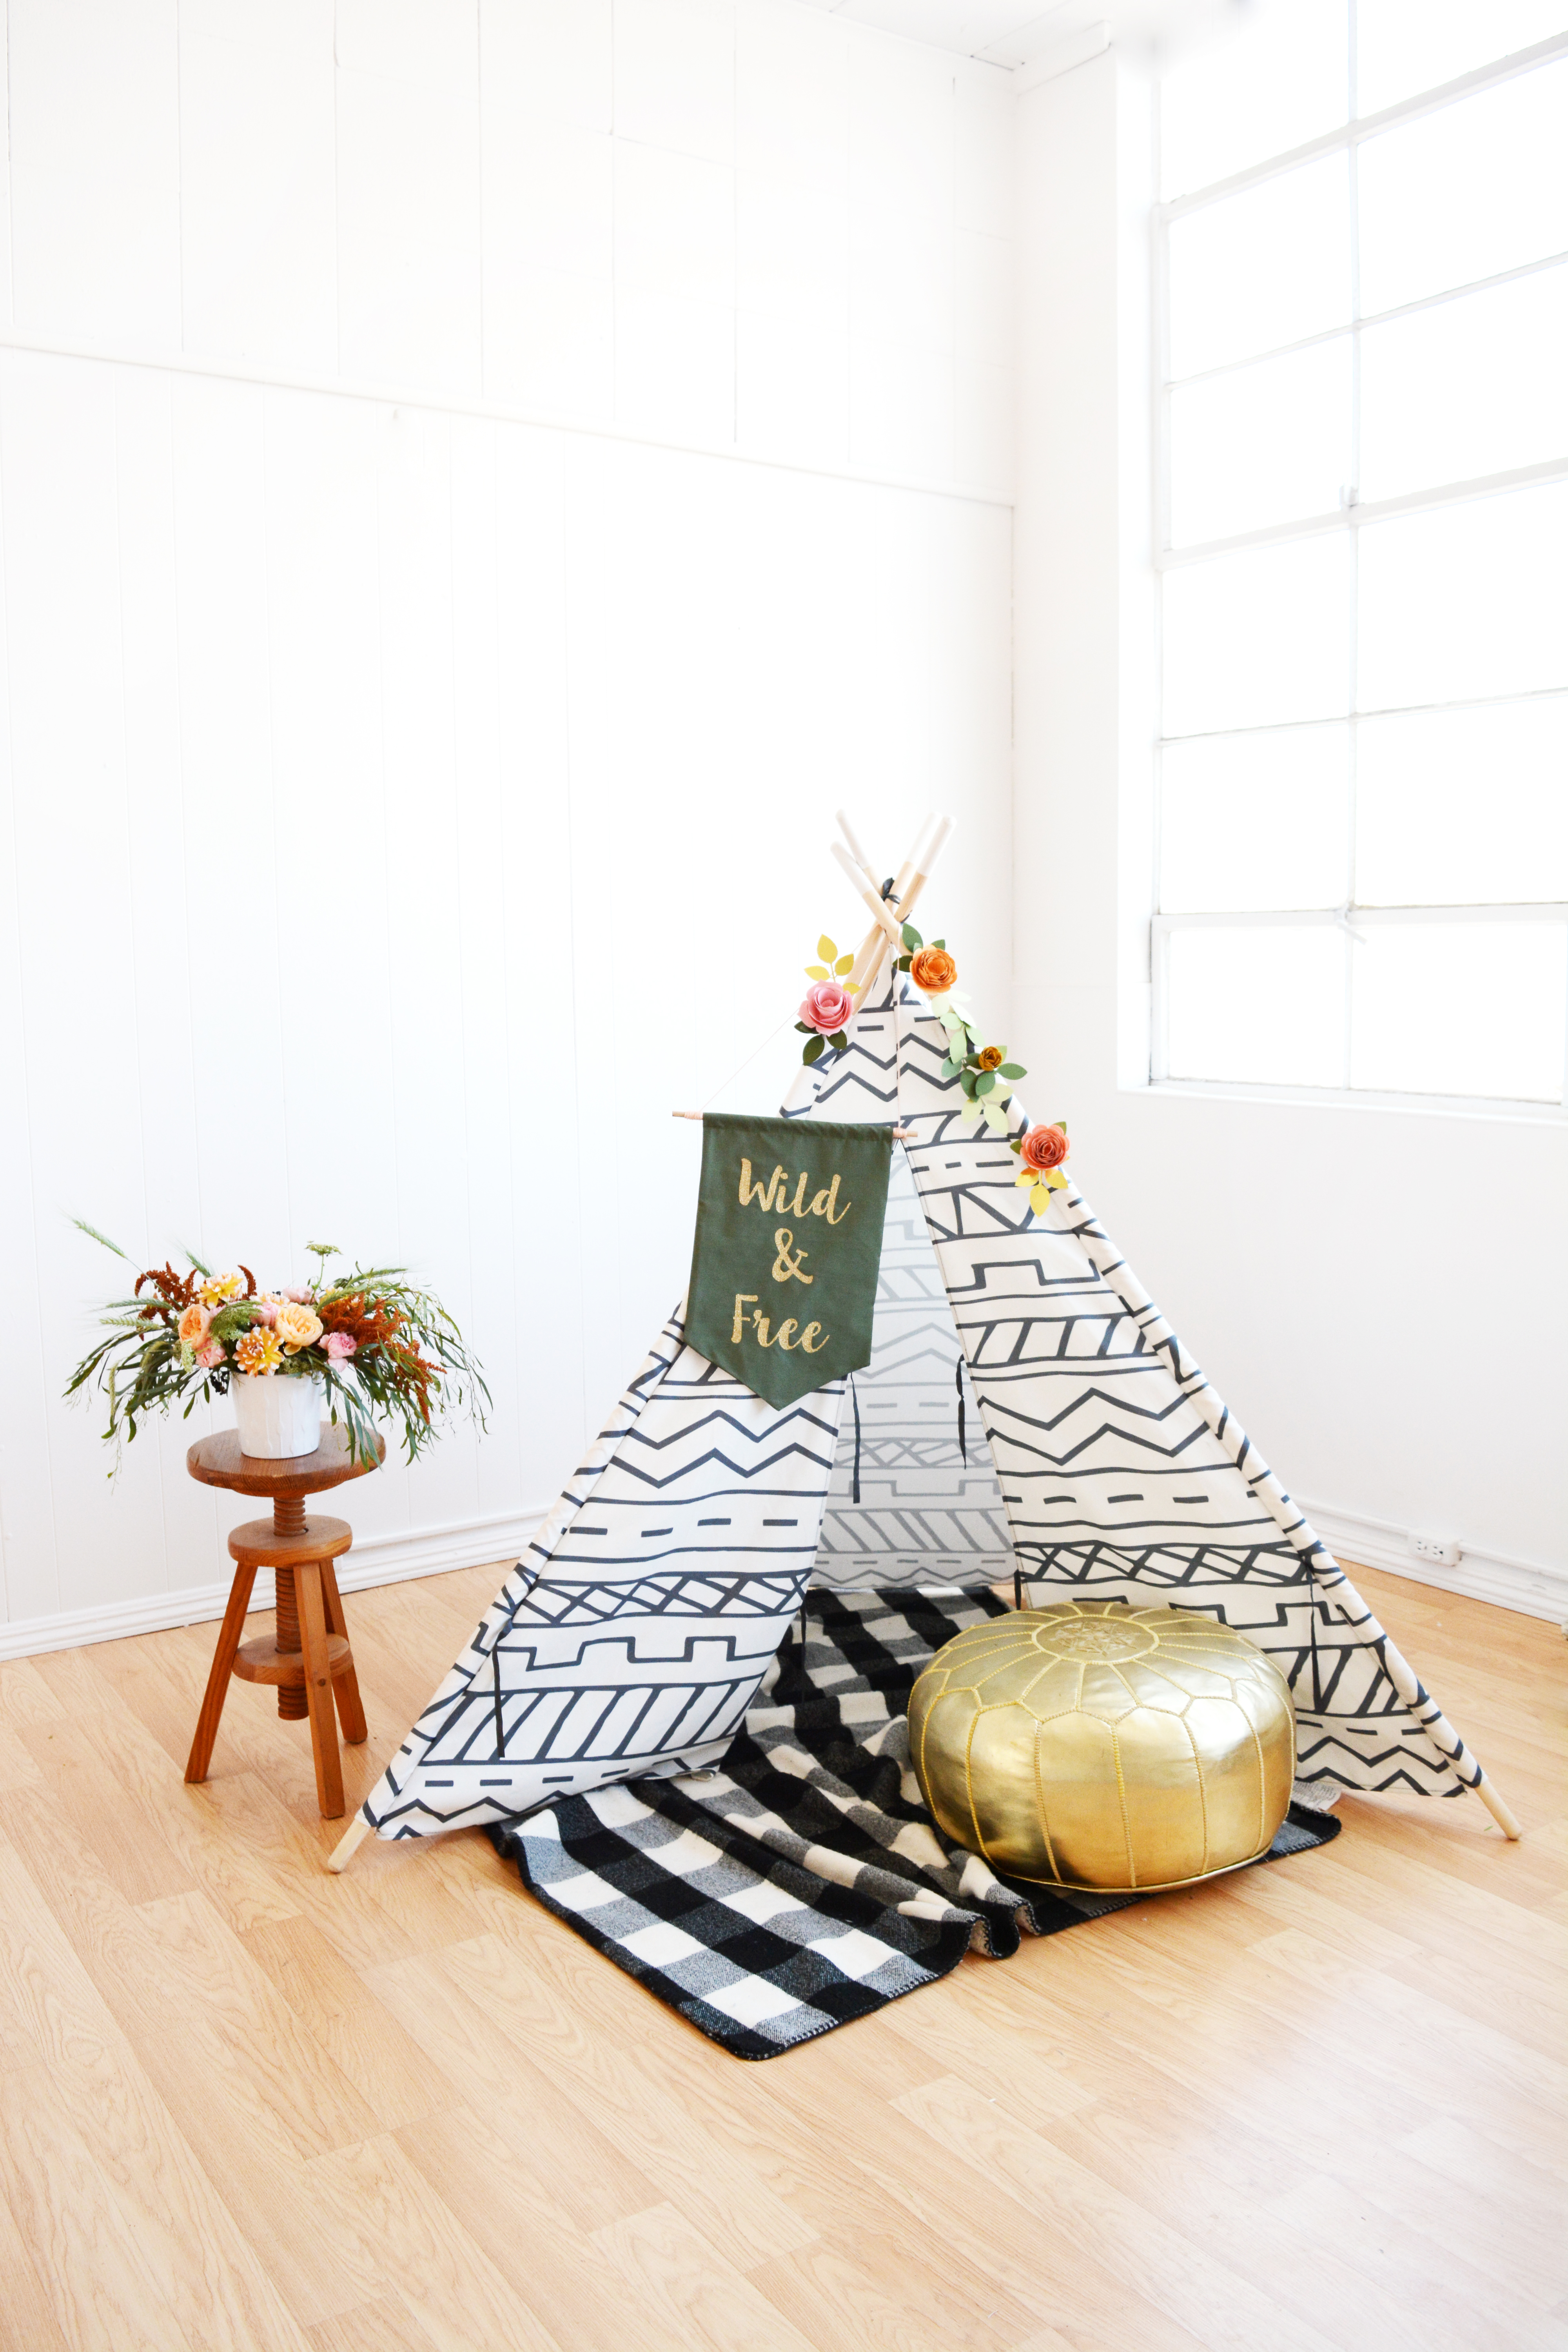
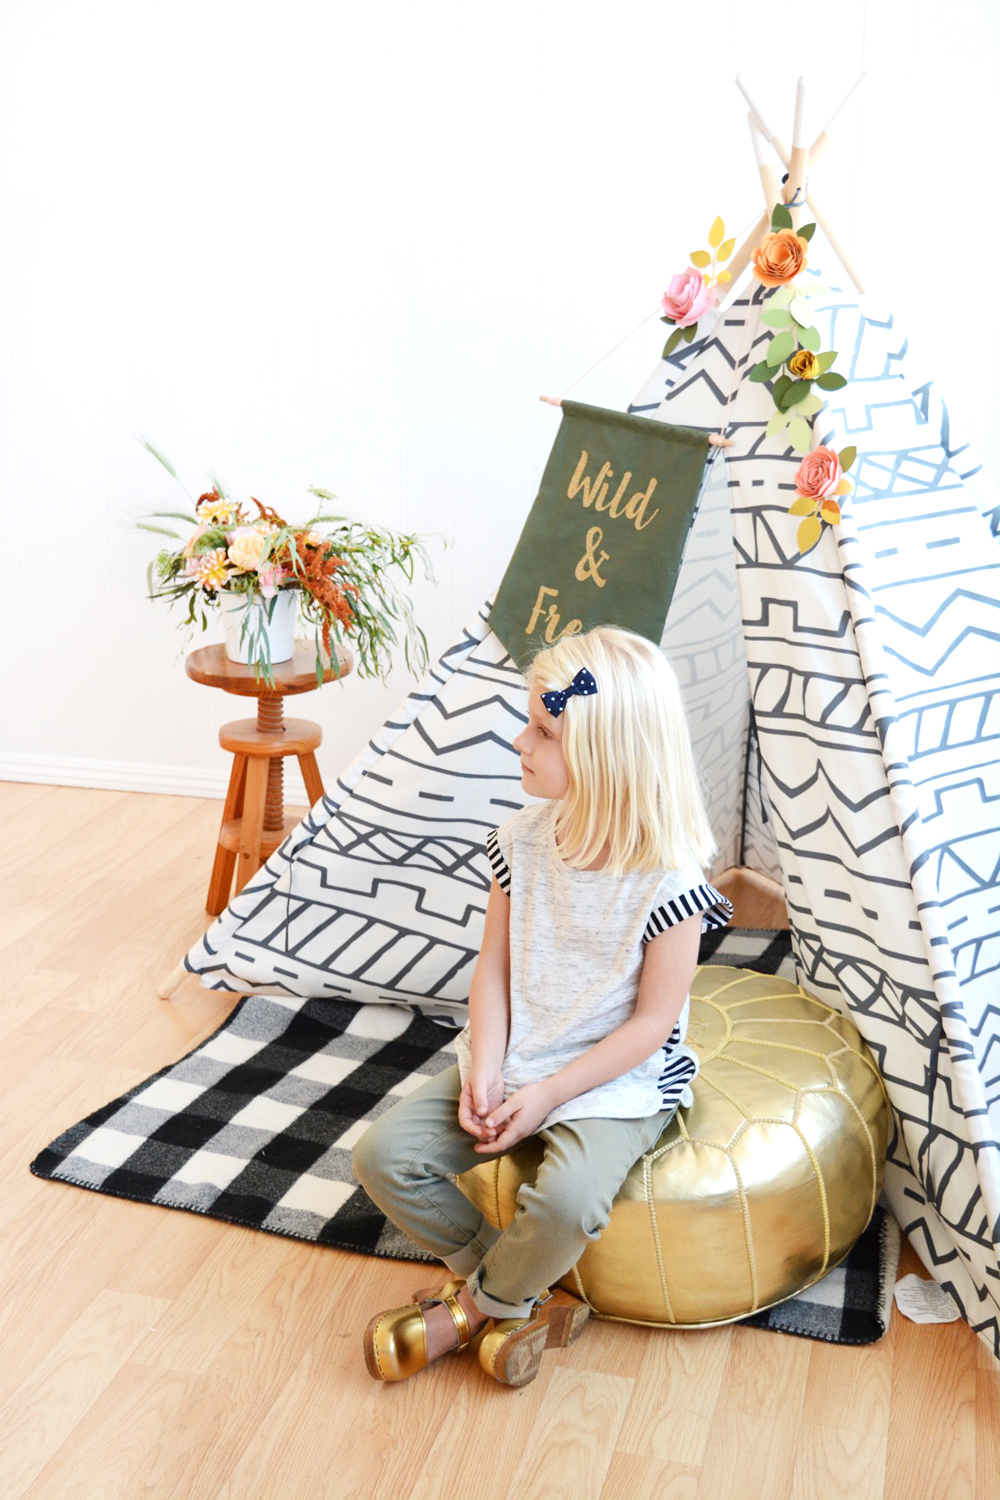
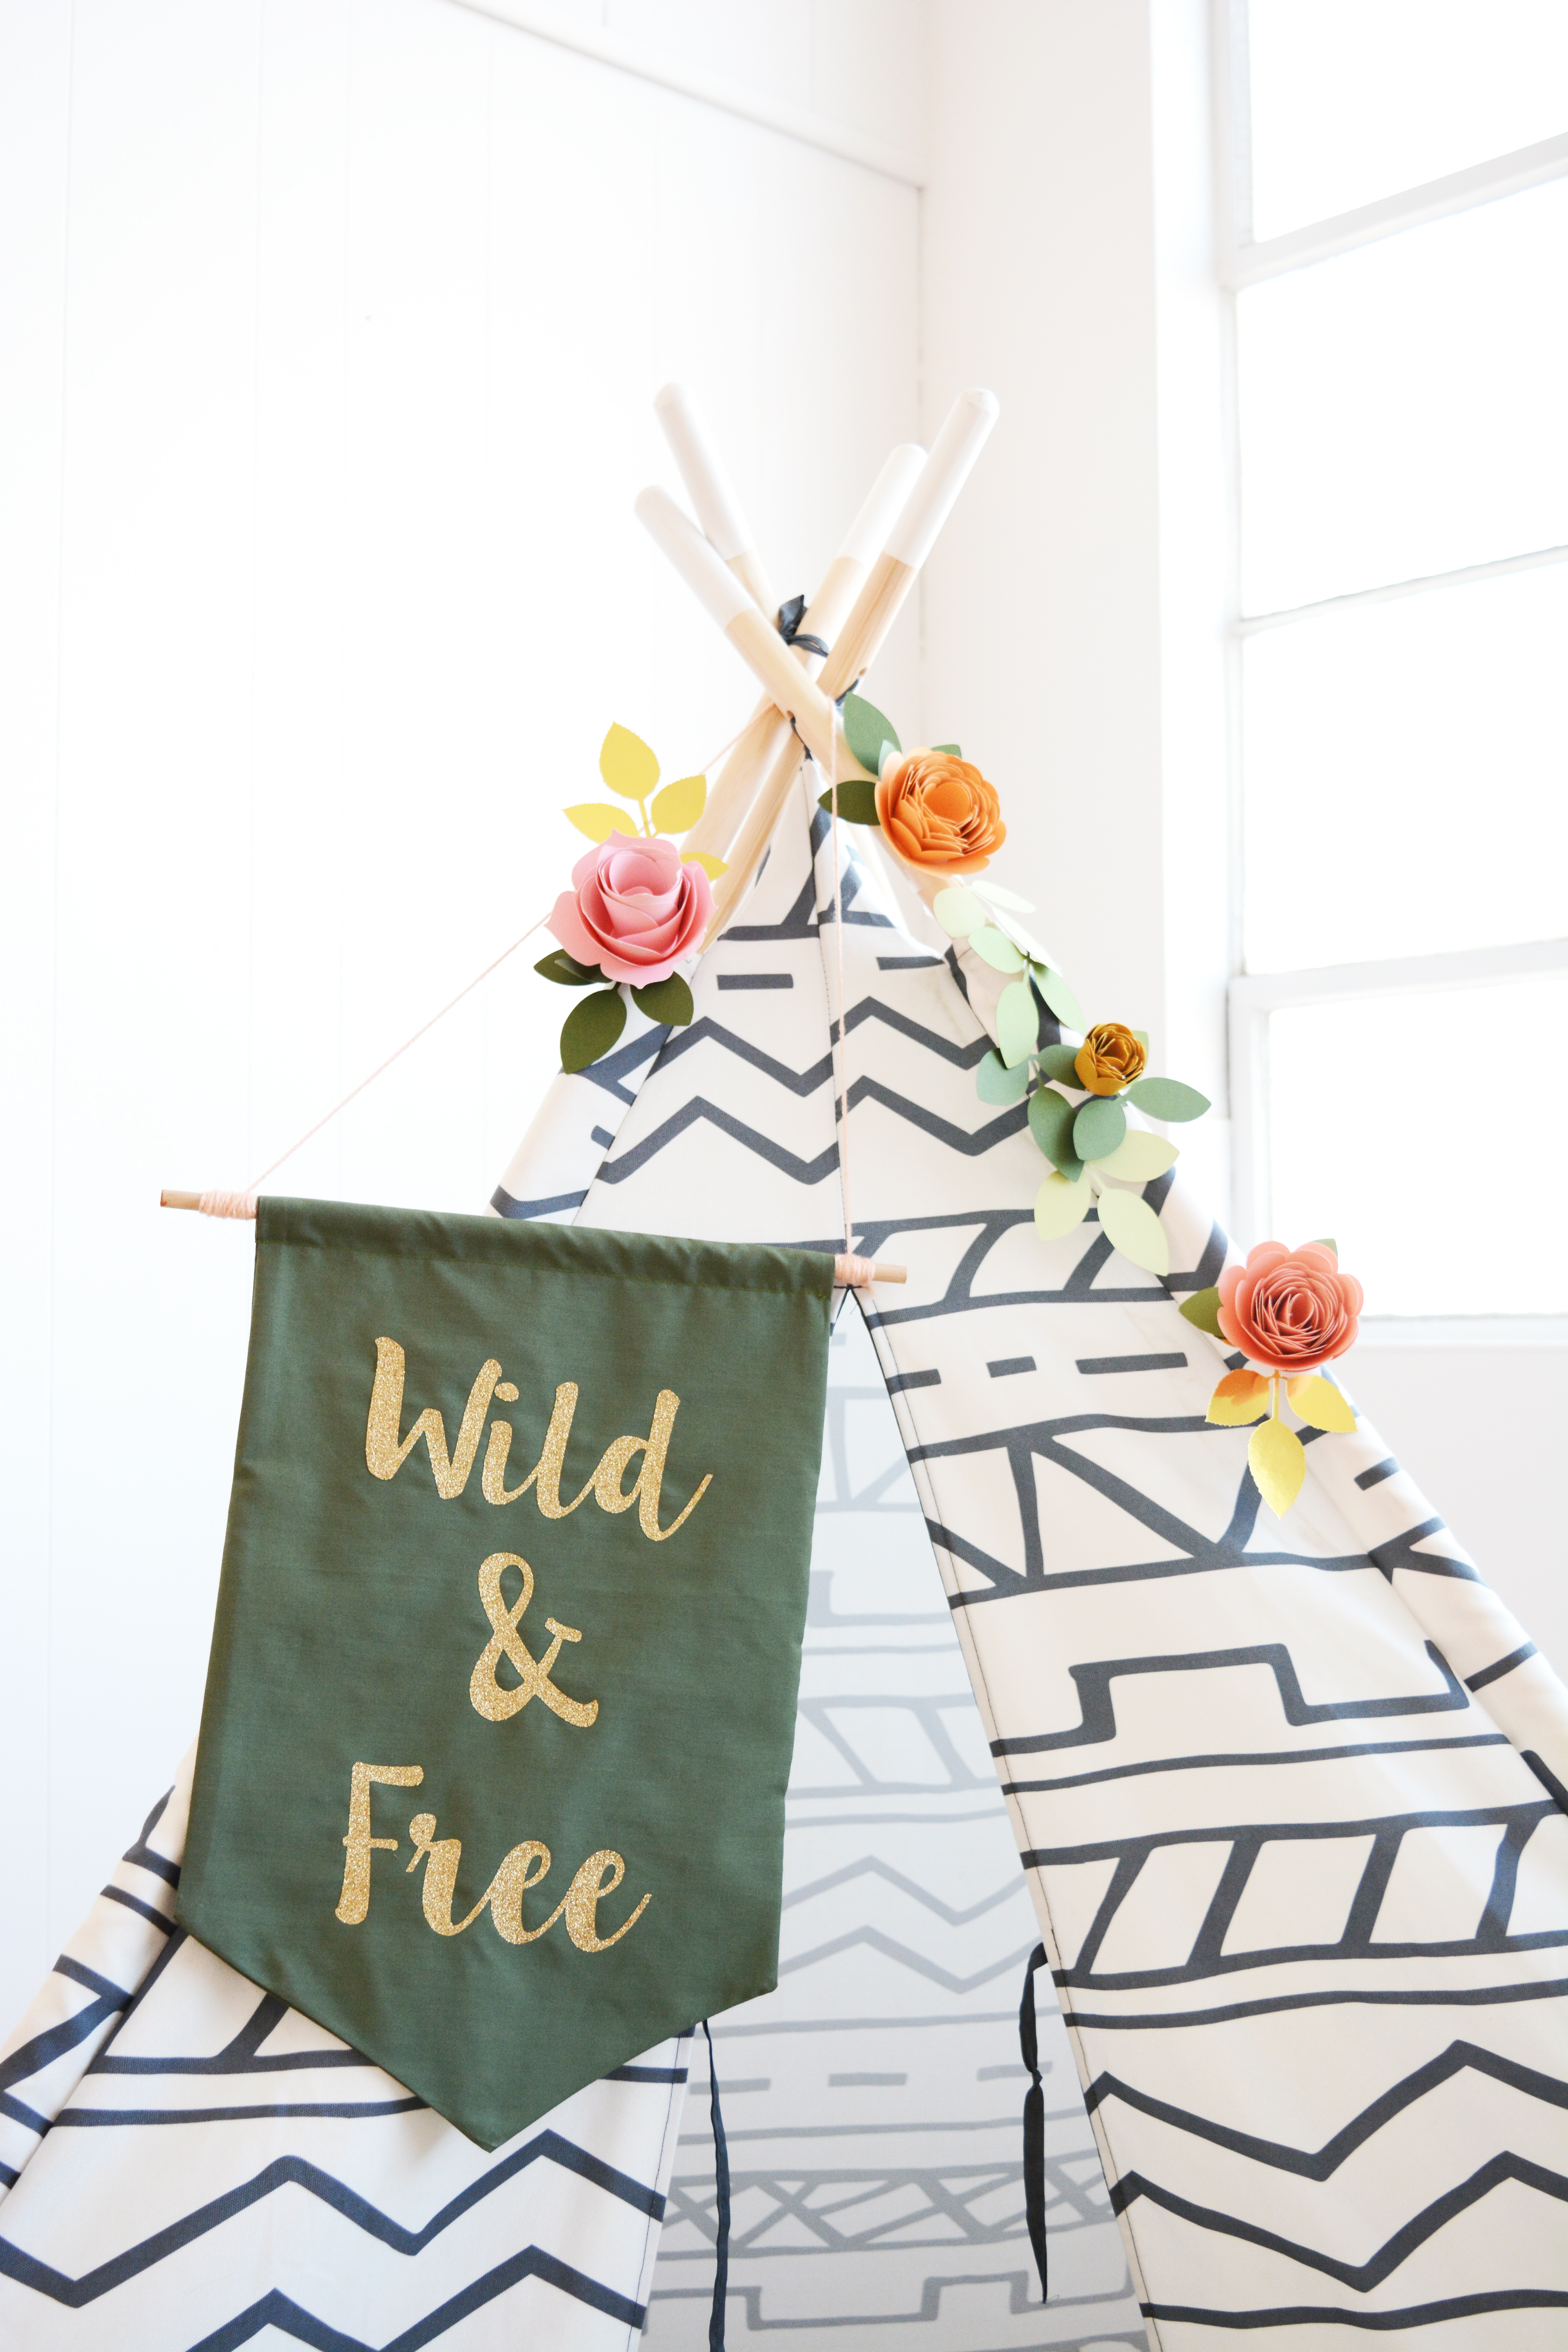
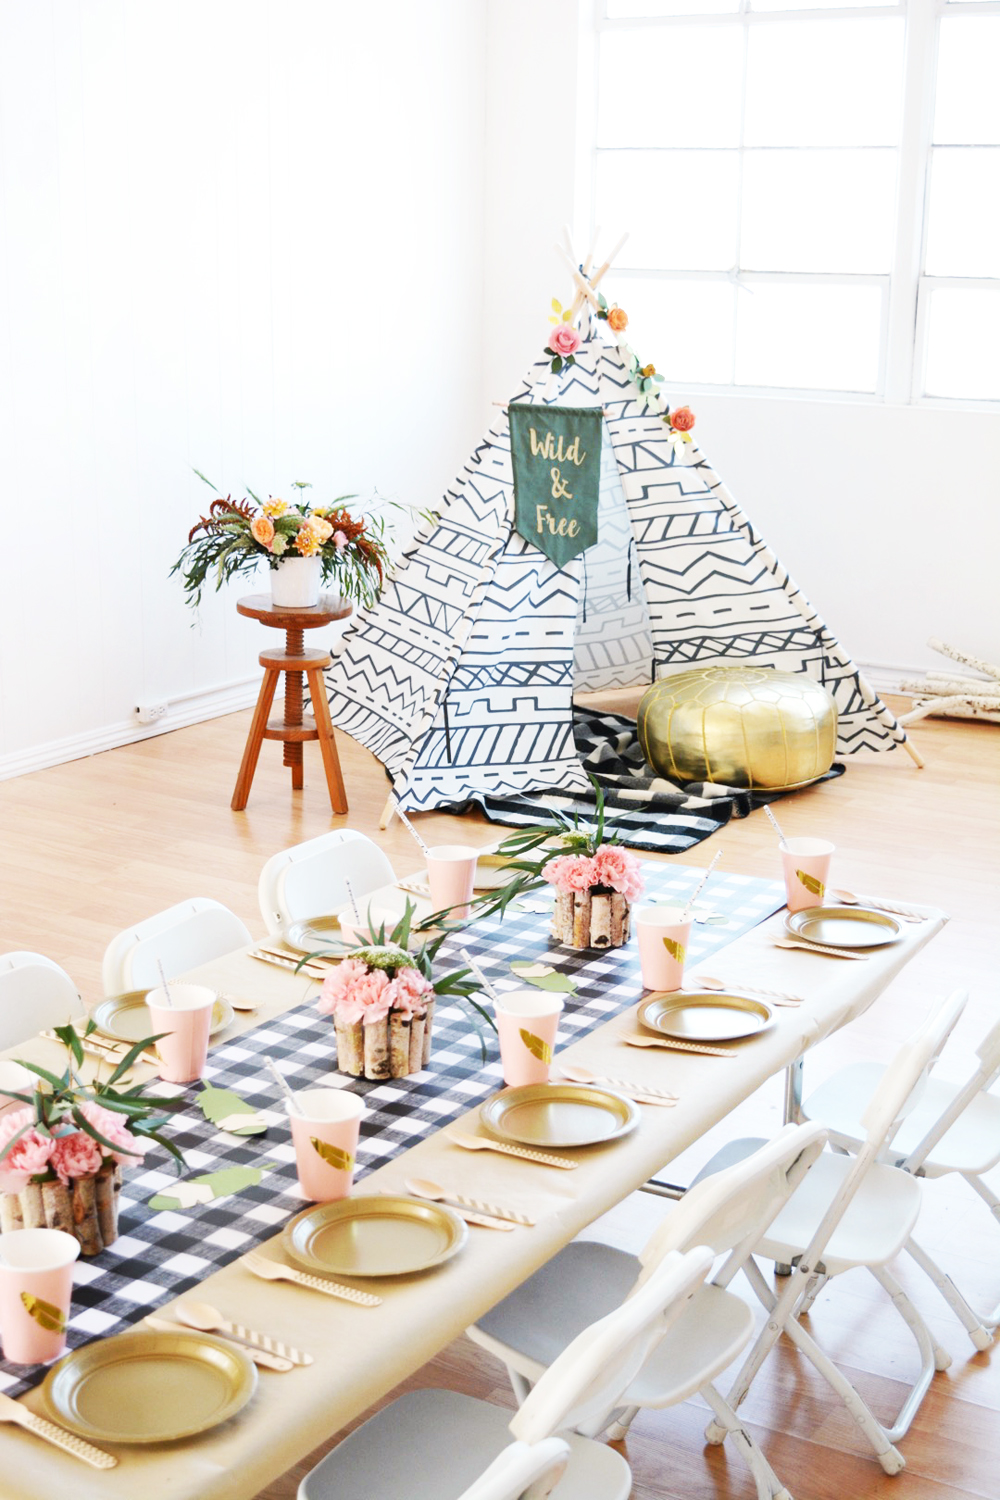
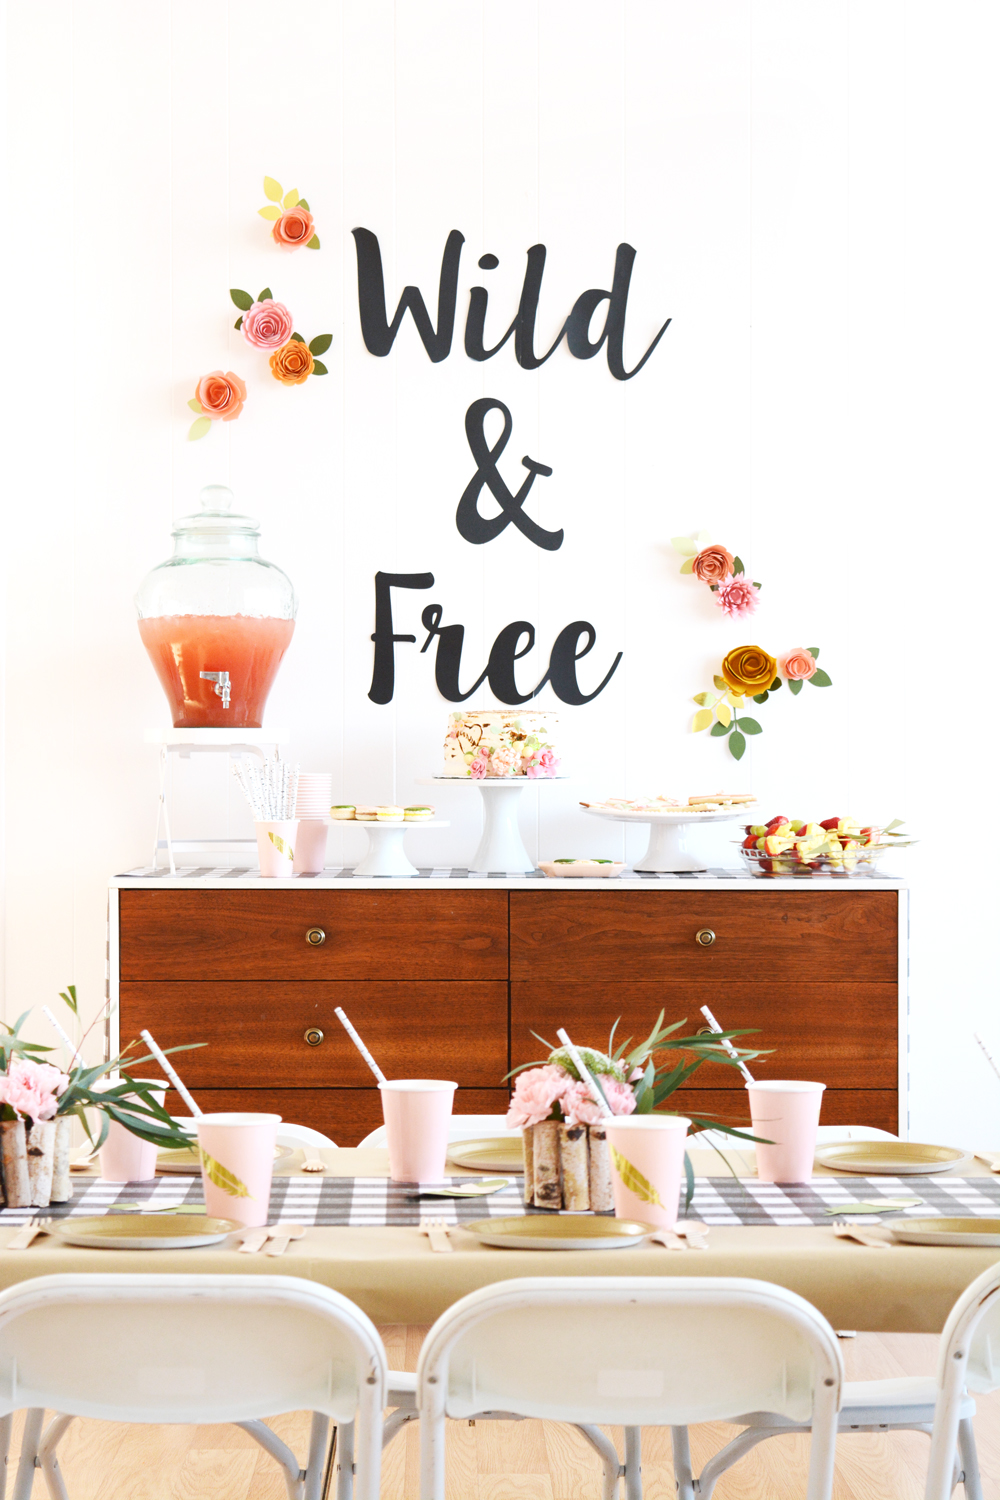
This last weekend we celebrated Olivia’s 5th birthday. How is my baby 5? She’s a wild women and definitely has a free spirit, so I chose a sweet, boho camping themed party for her and called it Wild & Free. I’ll take any excuse to set up a teepee and play with flowers.
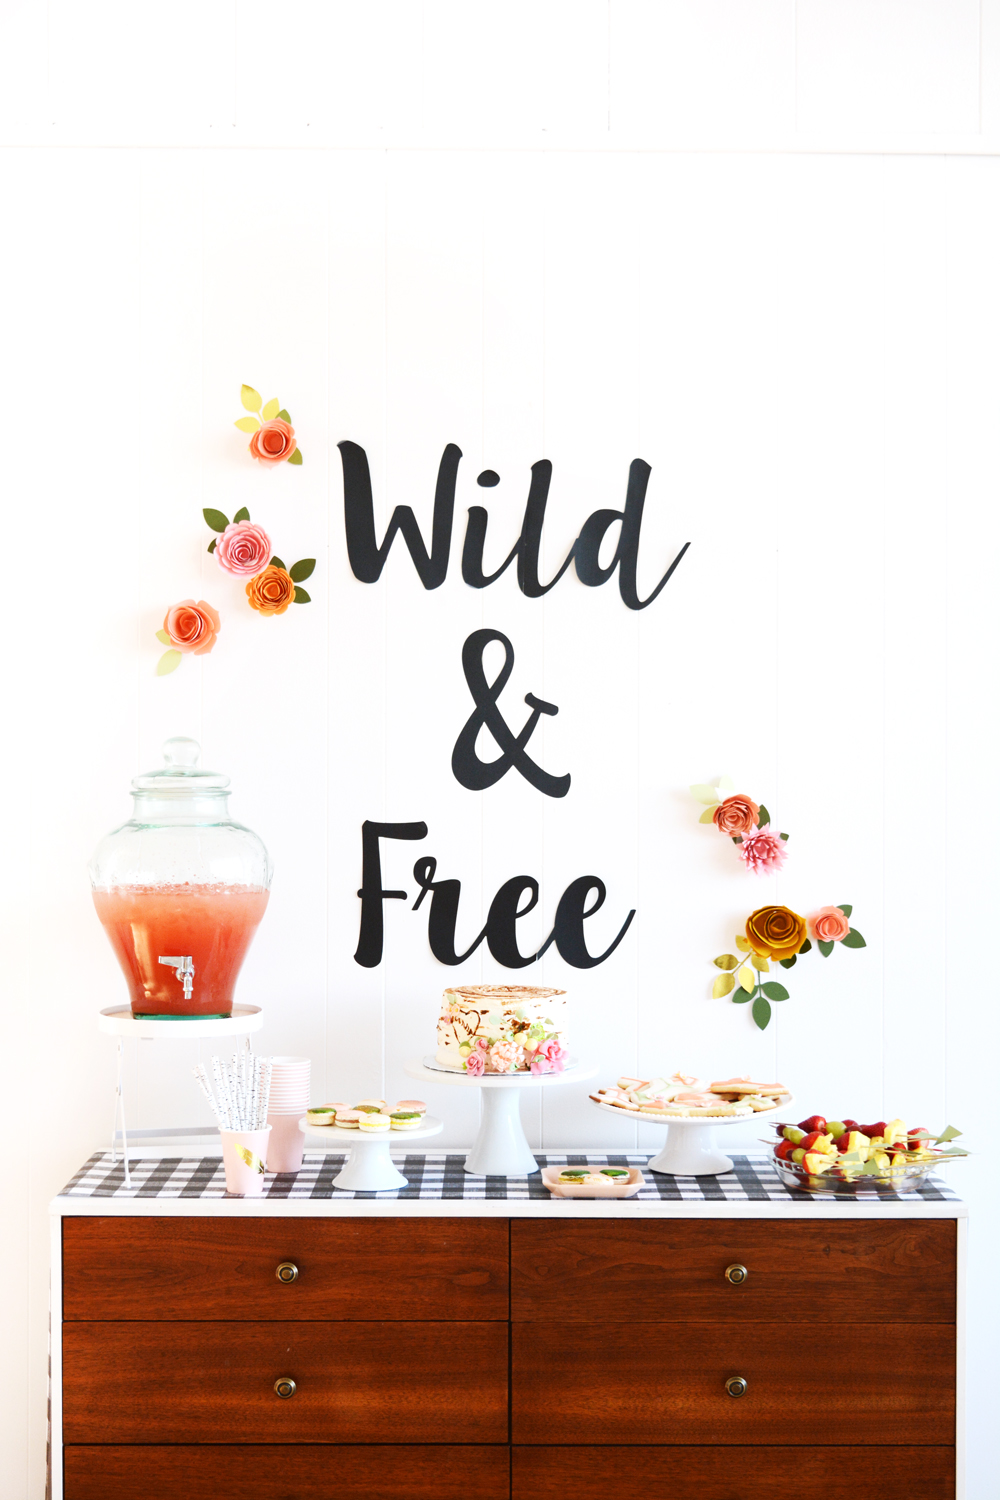
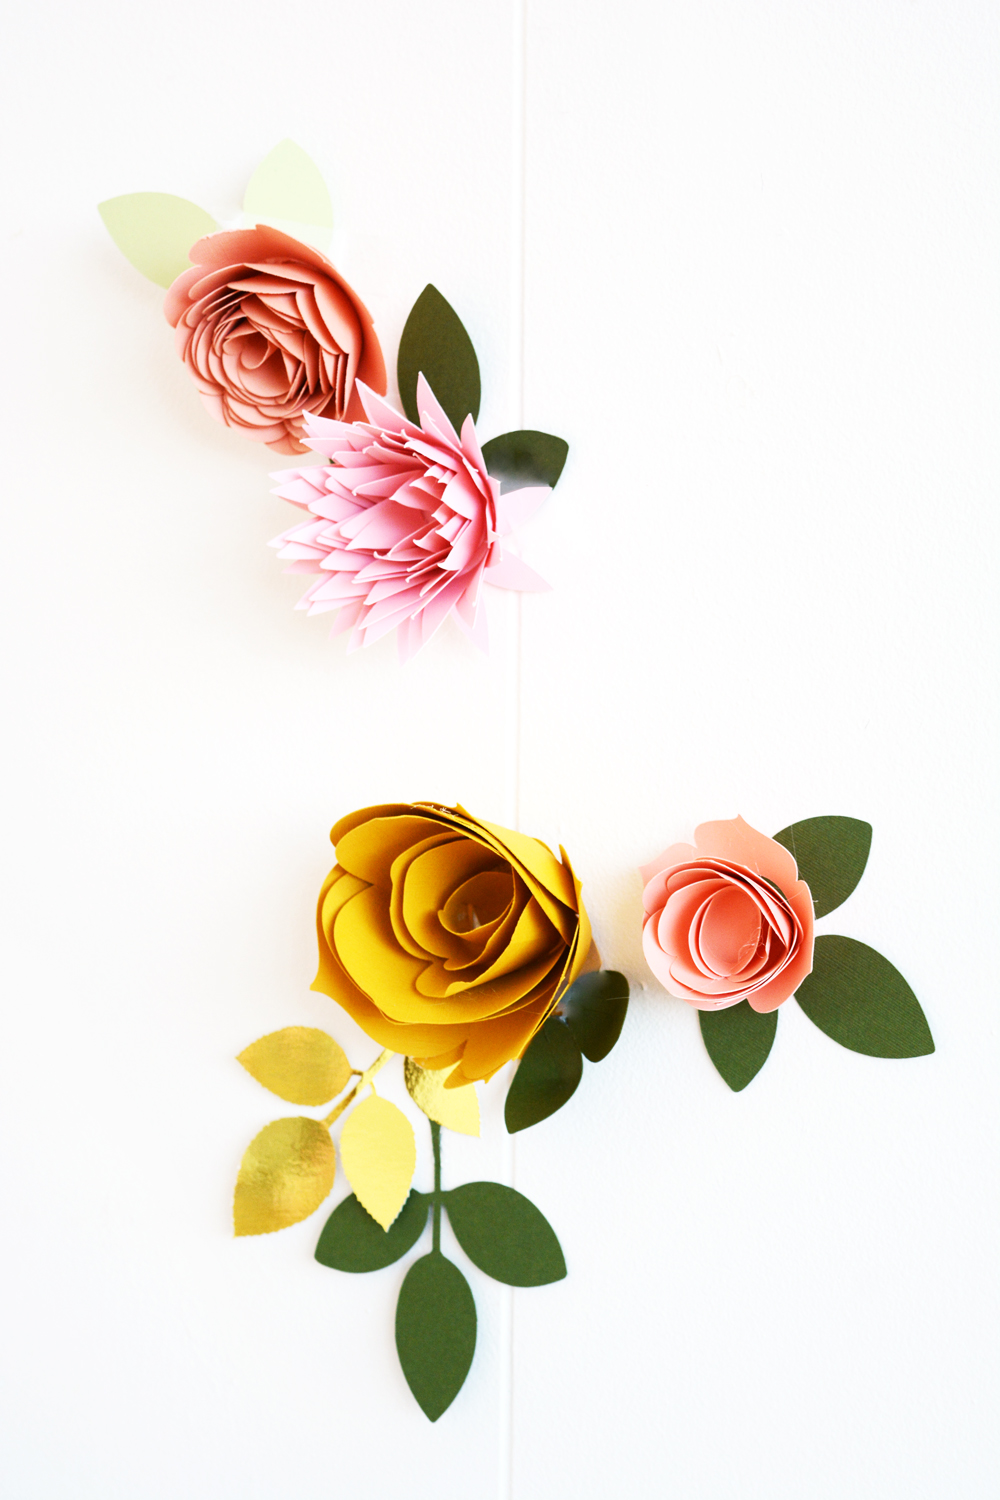
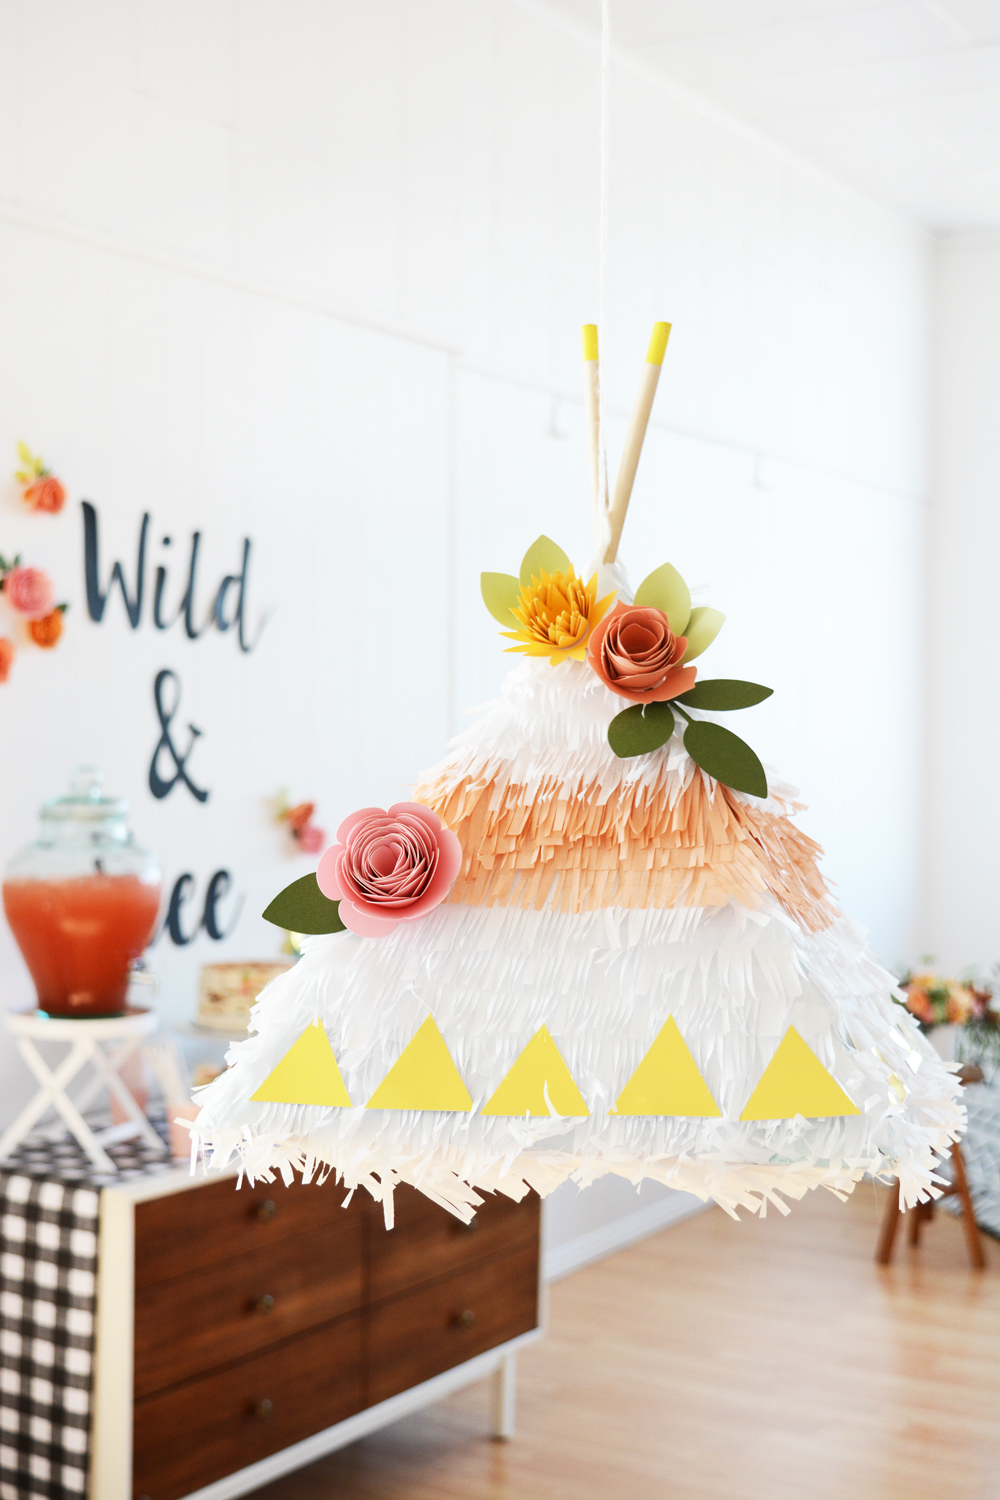
I put my Cricut machine to work for this party. I cut 3D paper flowers, gold feathers for the paper cups and “Wild & Free” lettering for the little banner hanging on the teepee and also for the sign above the dessert table.
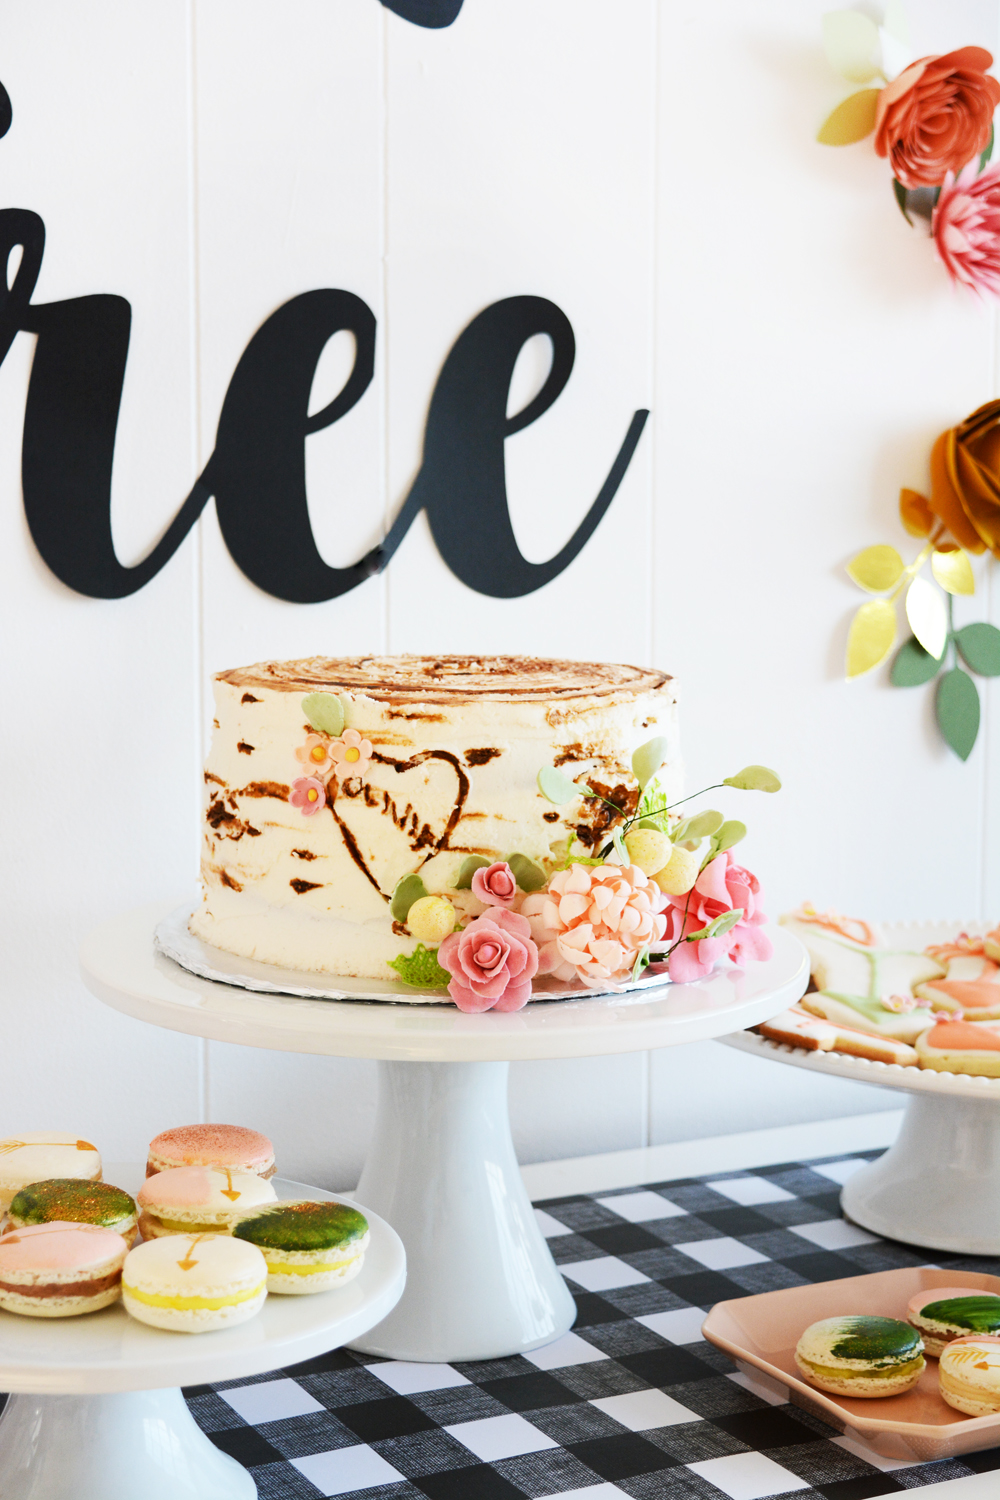
I was lucky to have my super talented mom in town the week before the party. She makes AMAZING cakes. She made the most adorable birch bark log cake with handmade sugar paste flowers for Olivia. I actually would have loved to have had this for my wedding cake. It turned out so cute.
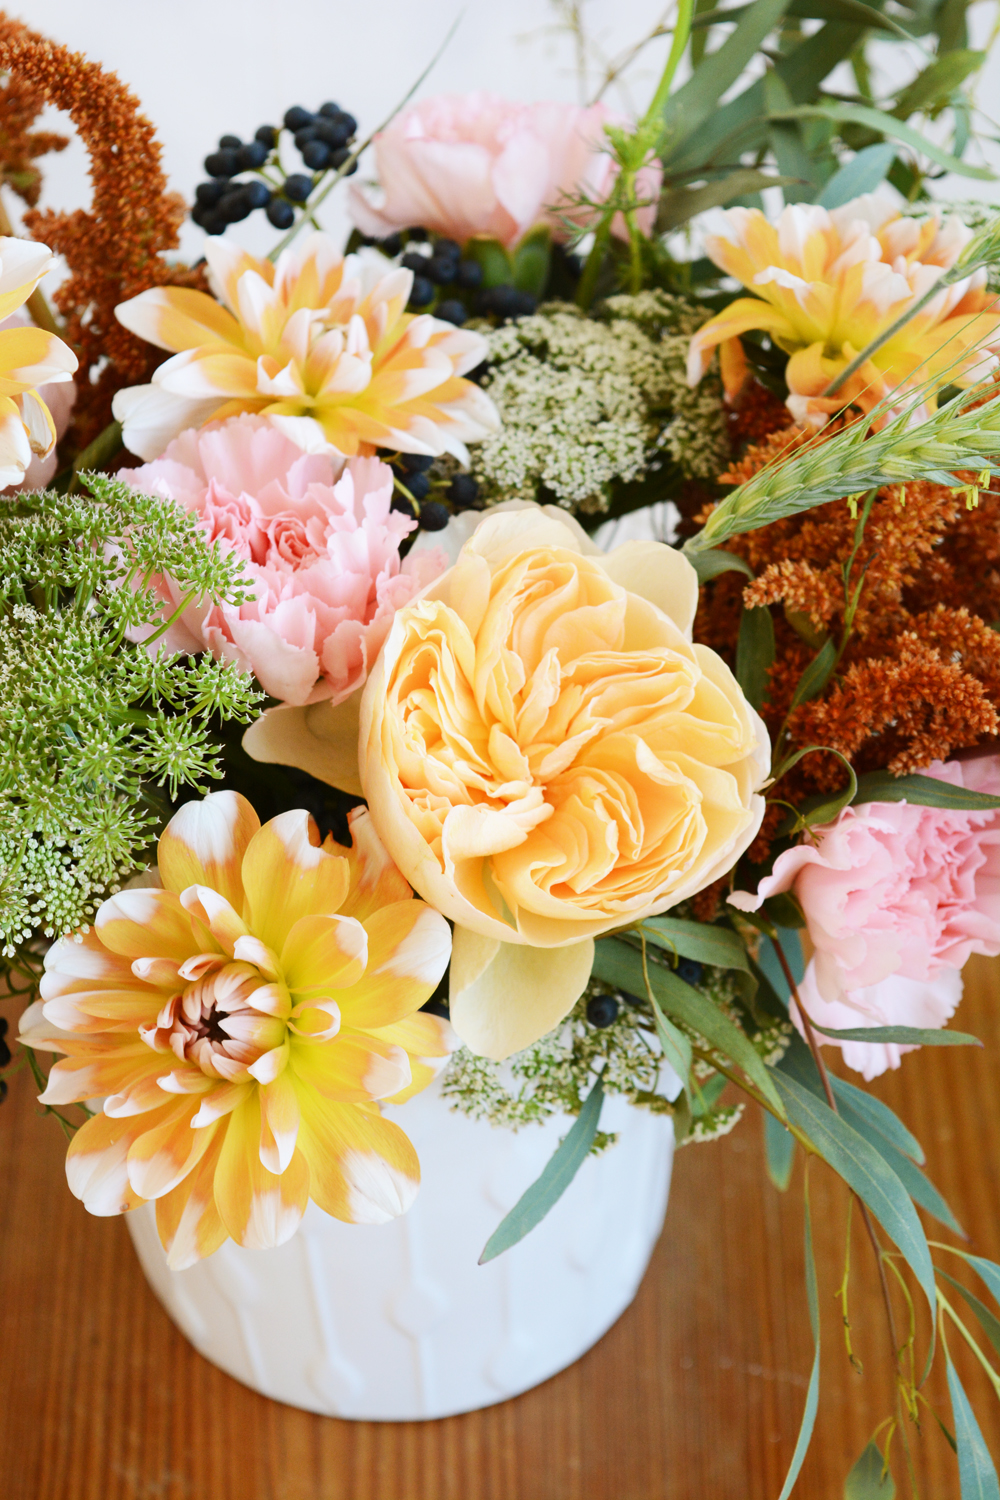
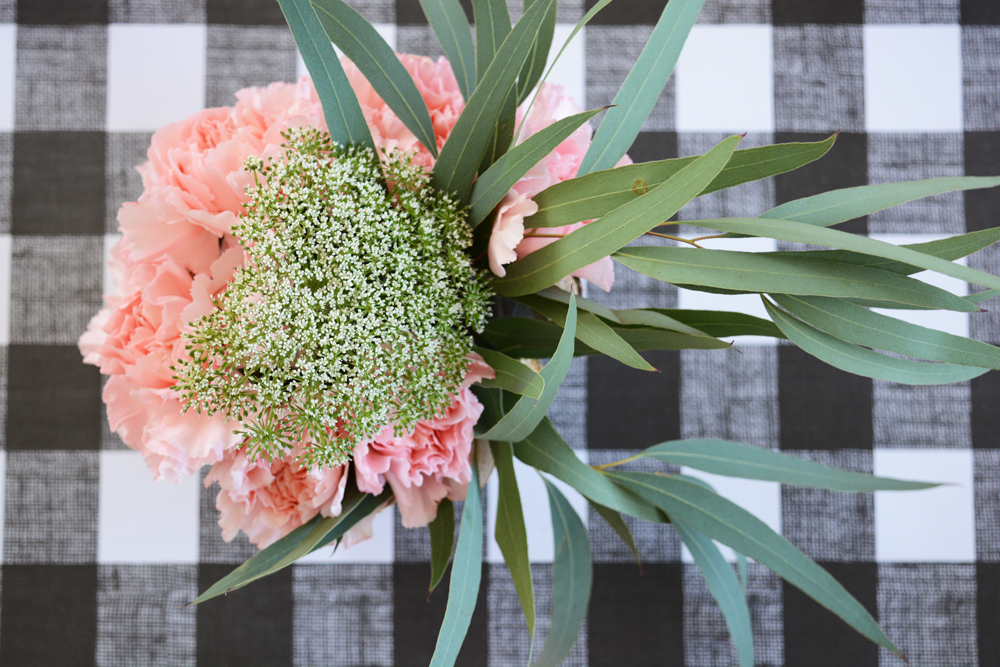
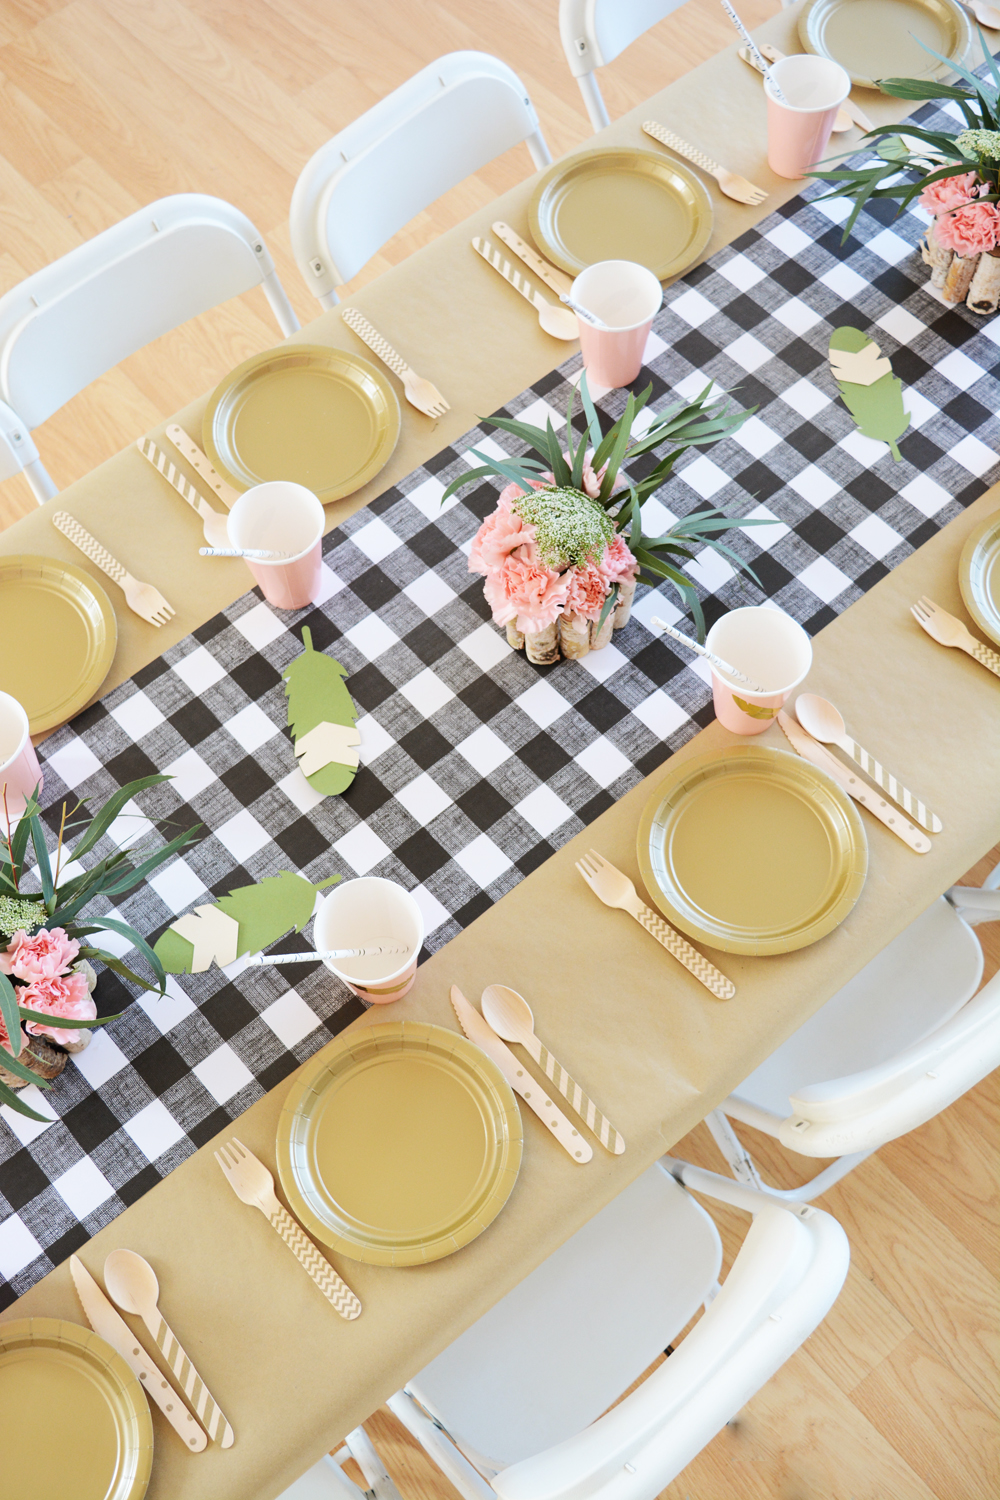
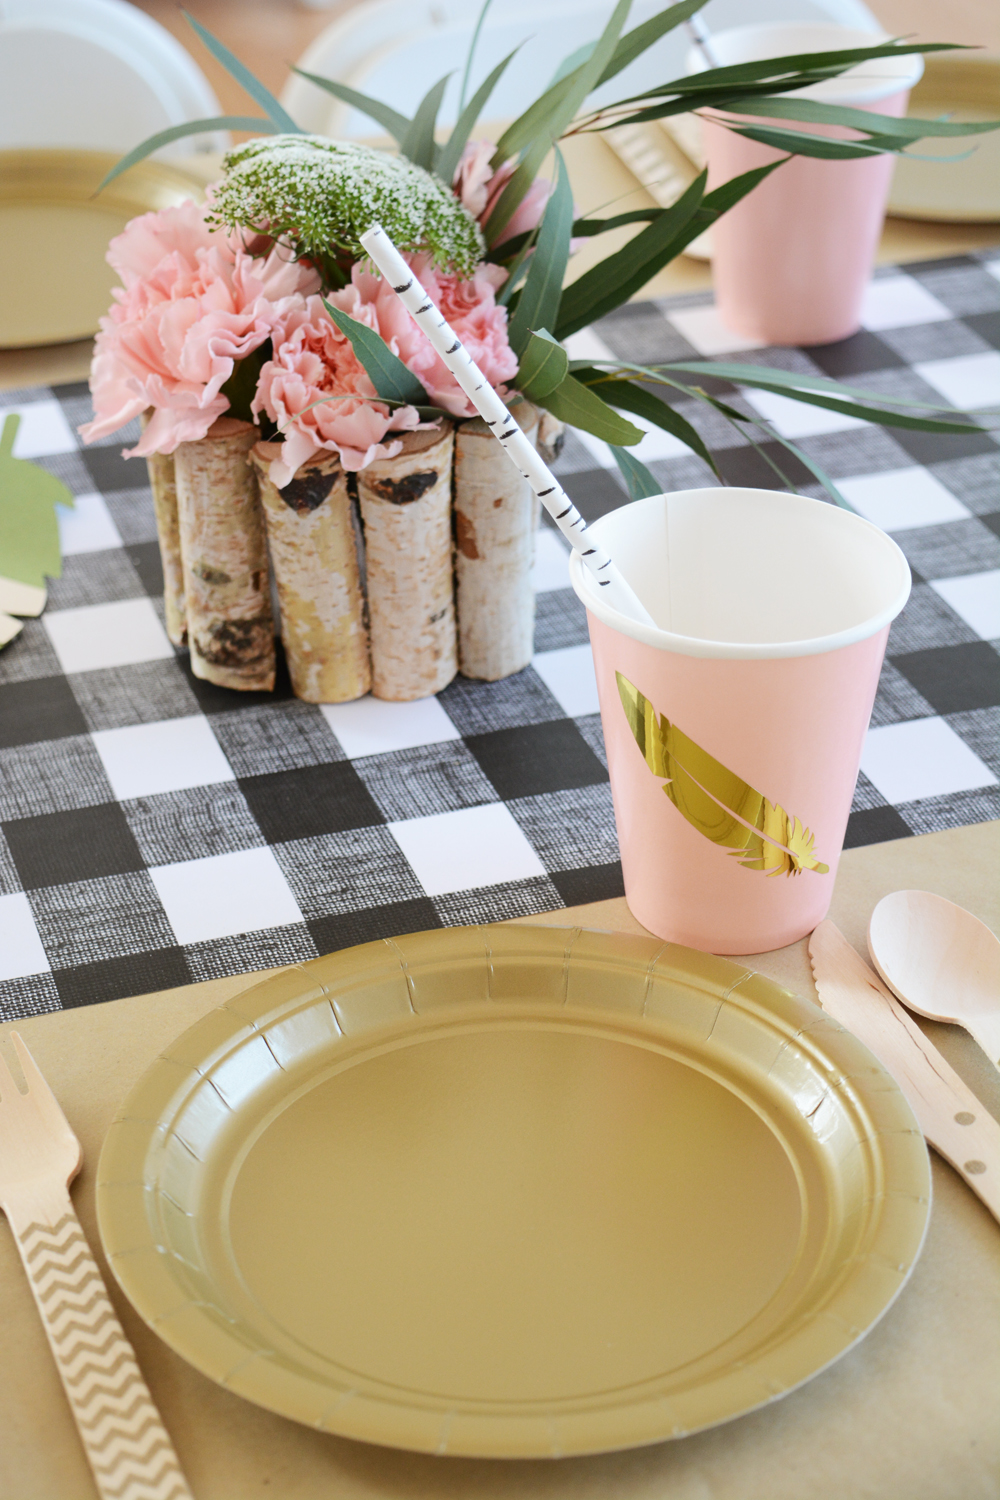
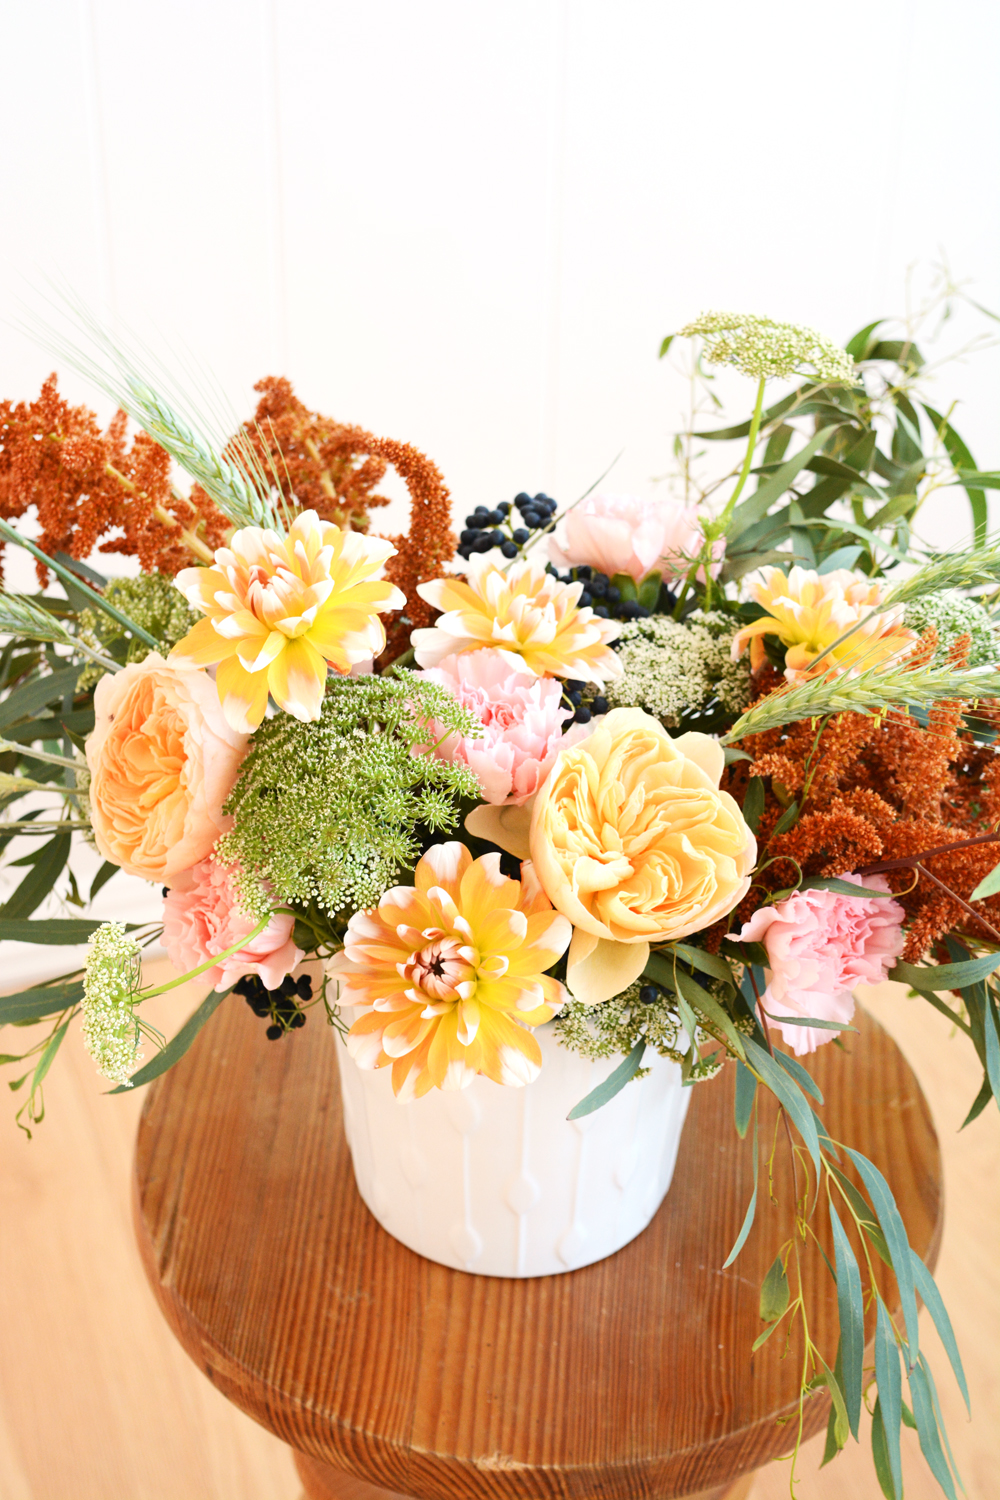
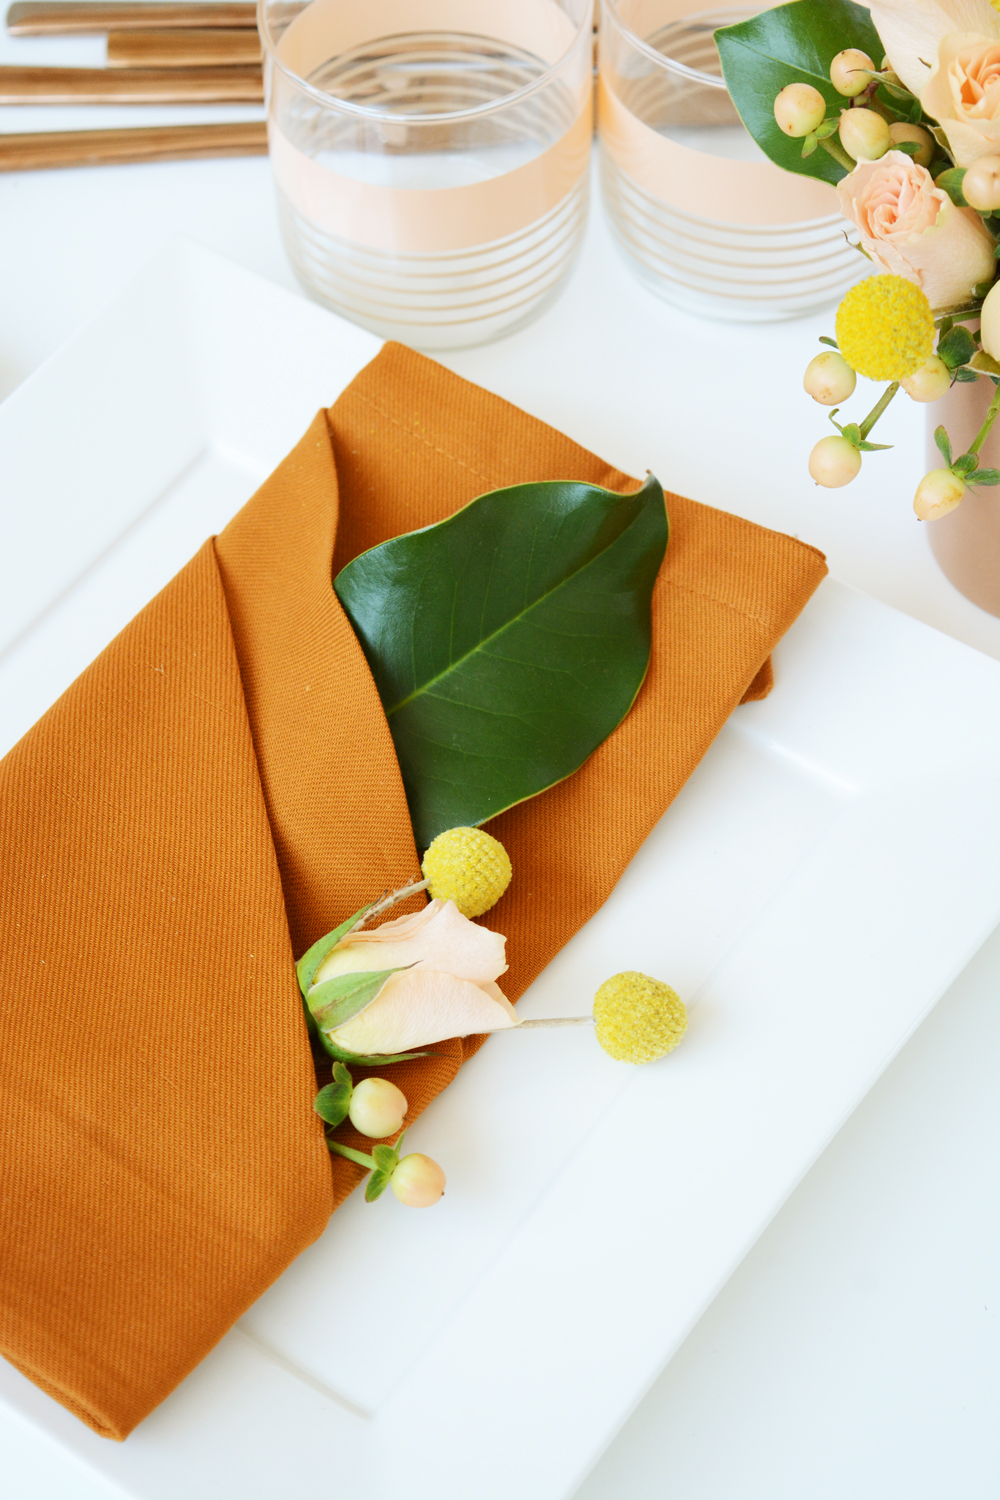
I think I’ve decided fresh flowers are so much better then balloons when it comes to decorating for a little girl’s party. I played with some really fun colors and textures to create some wild and free arrangements. (House of Flowers, my local florist sourced all the gorgeous blooms and foliage for me.)
I’m a huge fan of renting kid-sized tables and chairs for parties. Number 1 – they are stinkin adorable and number 2 – kids are more likely to actually sit down and eat in one spot (I’m always trying to reduce the mess situation).
This might be the cutest pinata I’ve ever made. And I’ve made a lot (between my 3 kids, I’ve thrown almost 30 themed birthday parties). I took a square box and cut down the sides to triangles and then taped them together. Then I fringed the whole thing and added simple gold triangles and a few paper flowers.


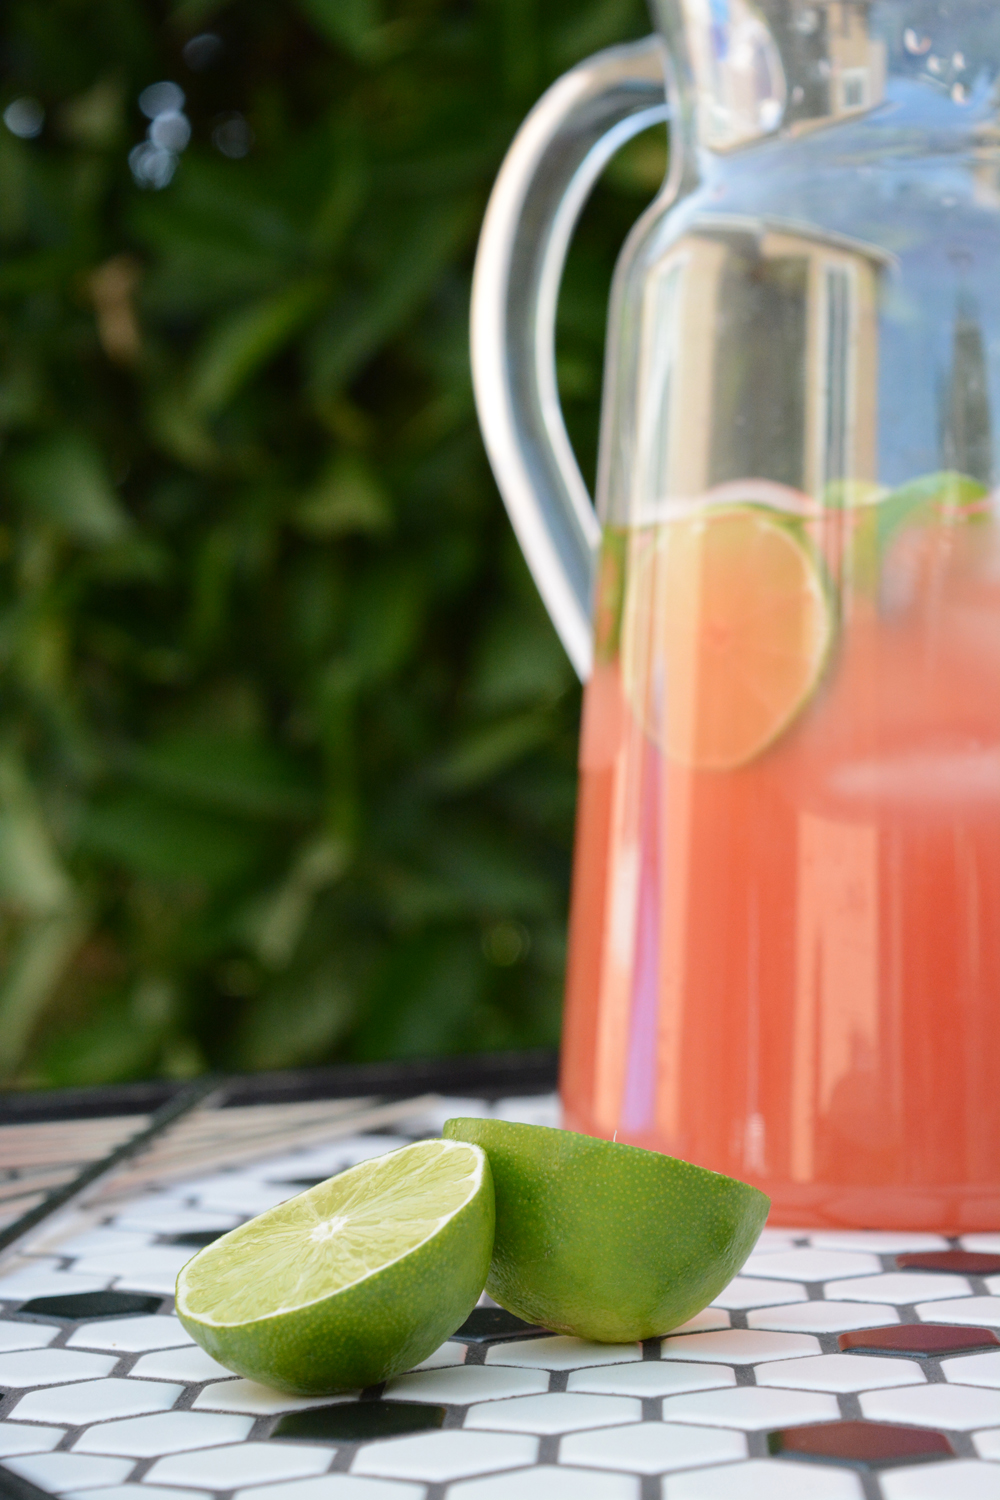
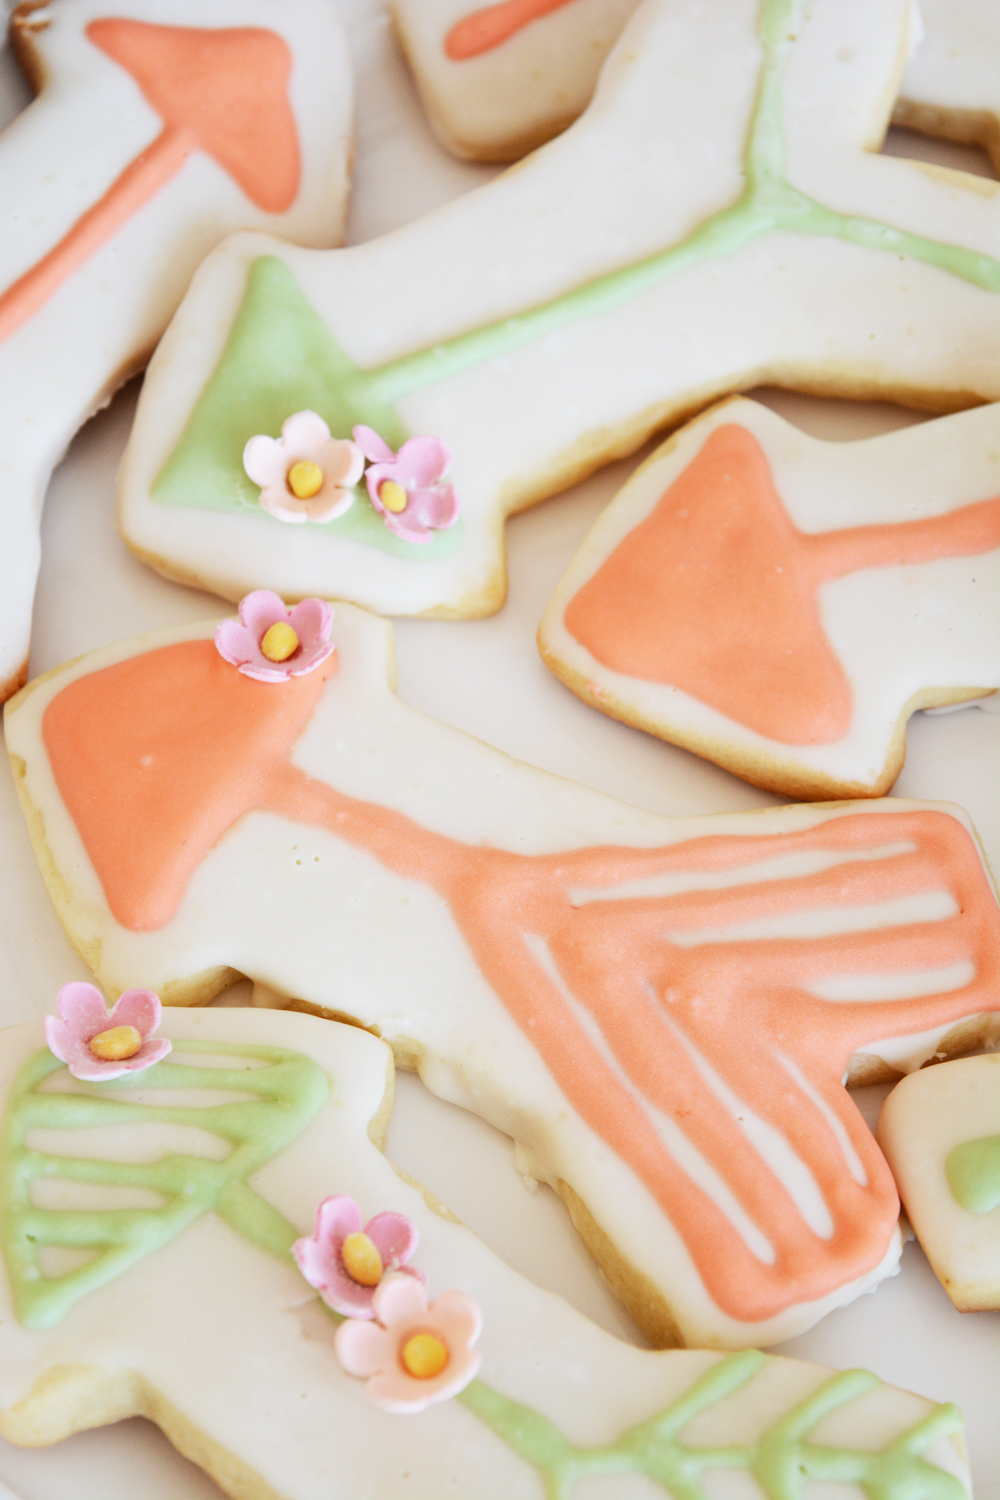
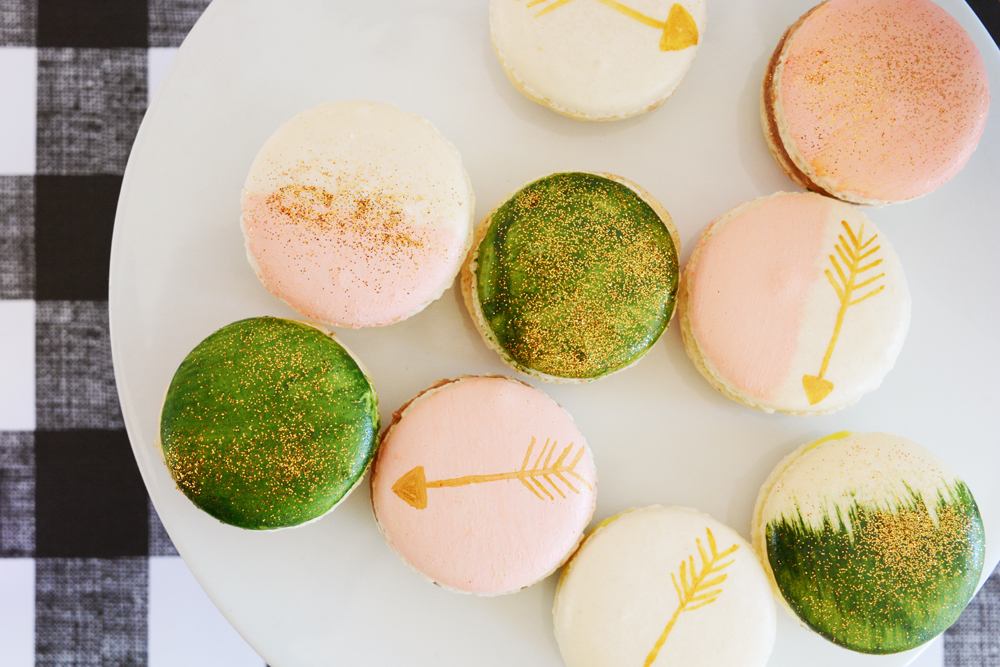
I kept the food pretty simple. On the dessert table we had cake, arrow sugar cookies, fruit skewers with arrowheads and the sweetest little macarons from De Coeur Bakeshop (they are Olivia’s all time favorite treat). And then I also made 3 different savory hand pies and a big veggies and dip tray. I made Buffalo Chicken and Blue Cheese, Creamy Chicken Taco, and Ham and Cheese (for the picky eaters) hand pies.
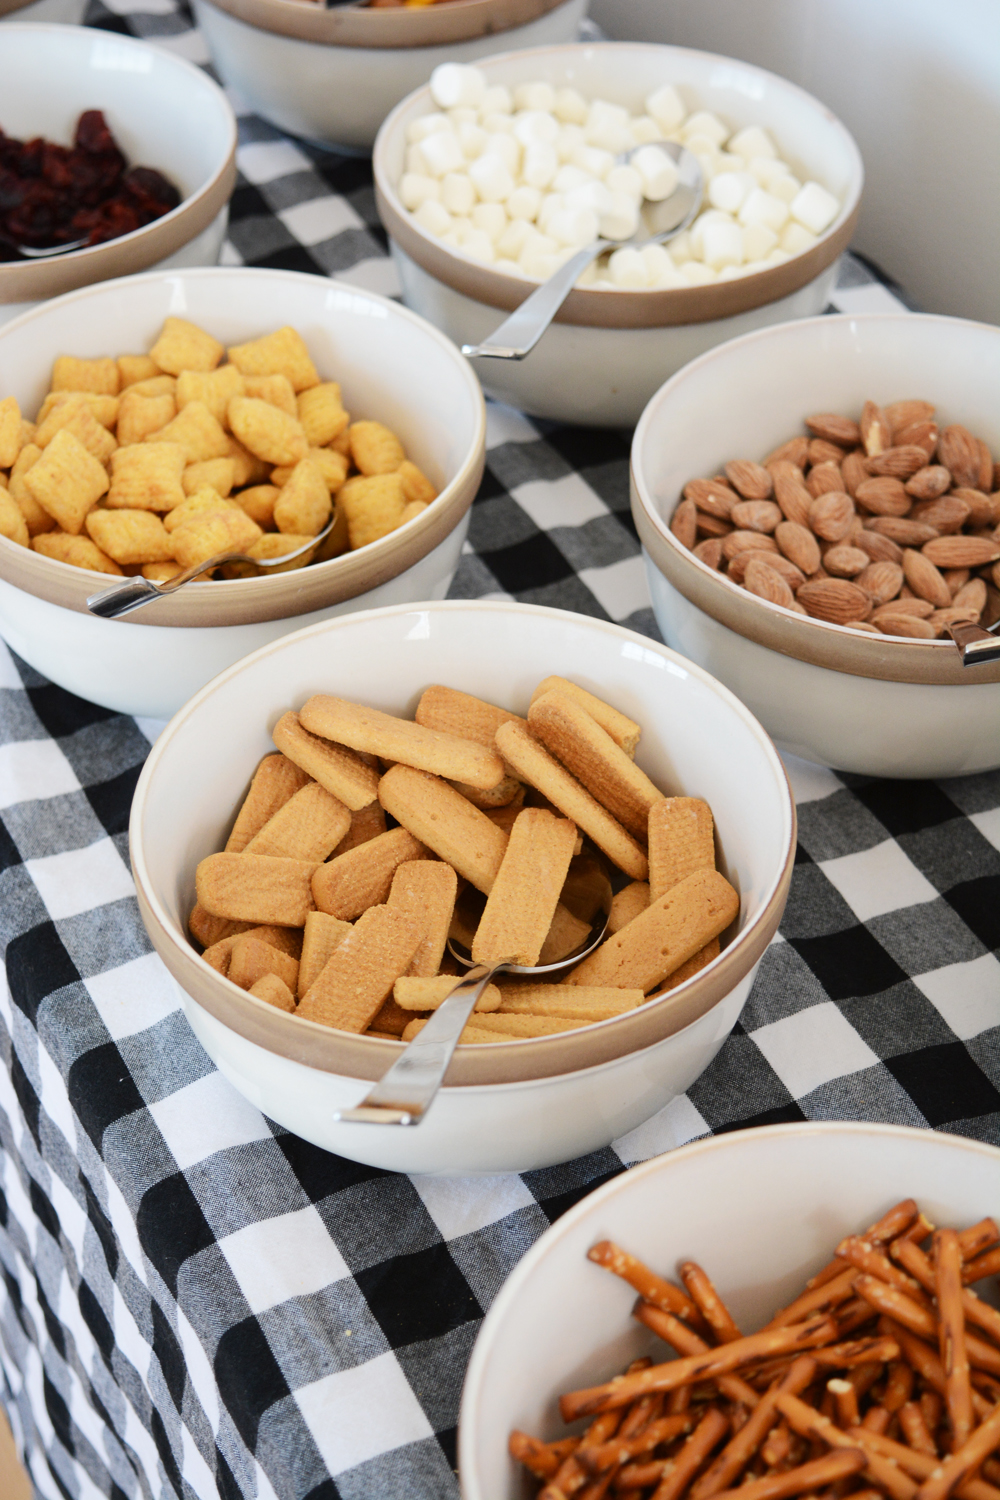
As part of their take-home treat, I set up a trail mix station. Guests could fill little baggies with all their favorite ingredients.
We also played “pass the parcel” and every decorated their own arrows and birch branch walking stick with feathers, yarn, and paint pens.
It was a really fun party. Often, by the time the party arrives, I’m just too tired to enjoy it. But, everyone was very relaxed and 5 year old really can entertain themselves quite well. So, I got to sit back and enjoy the festivities.
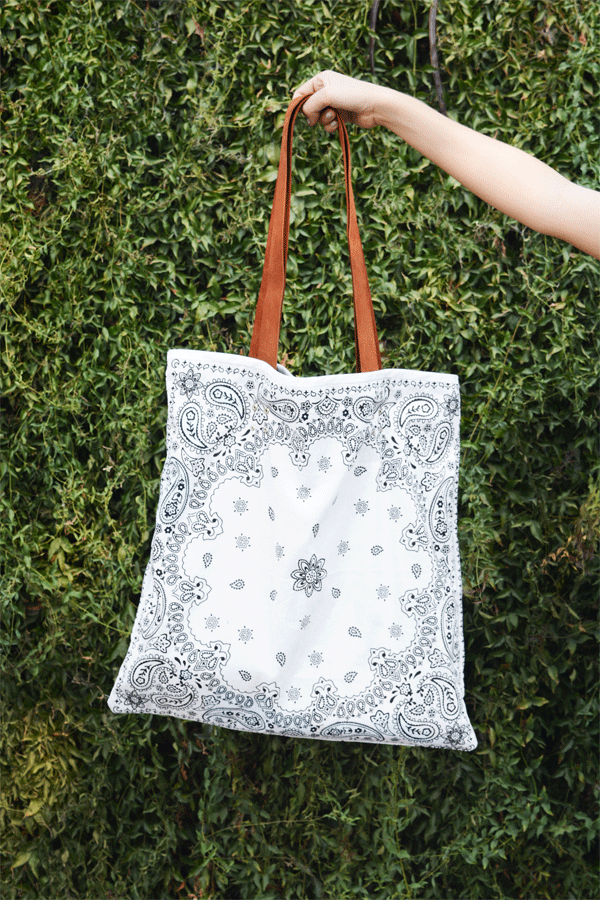
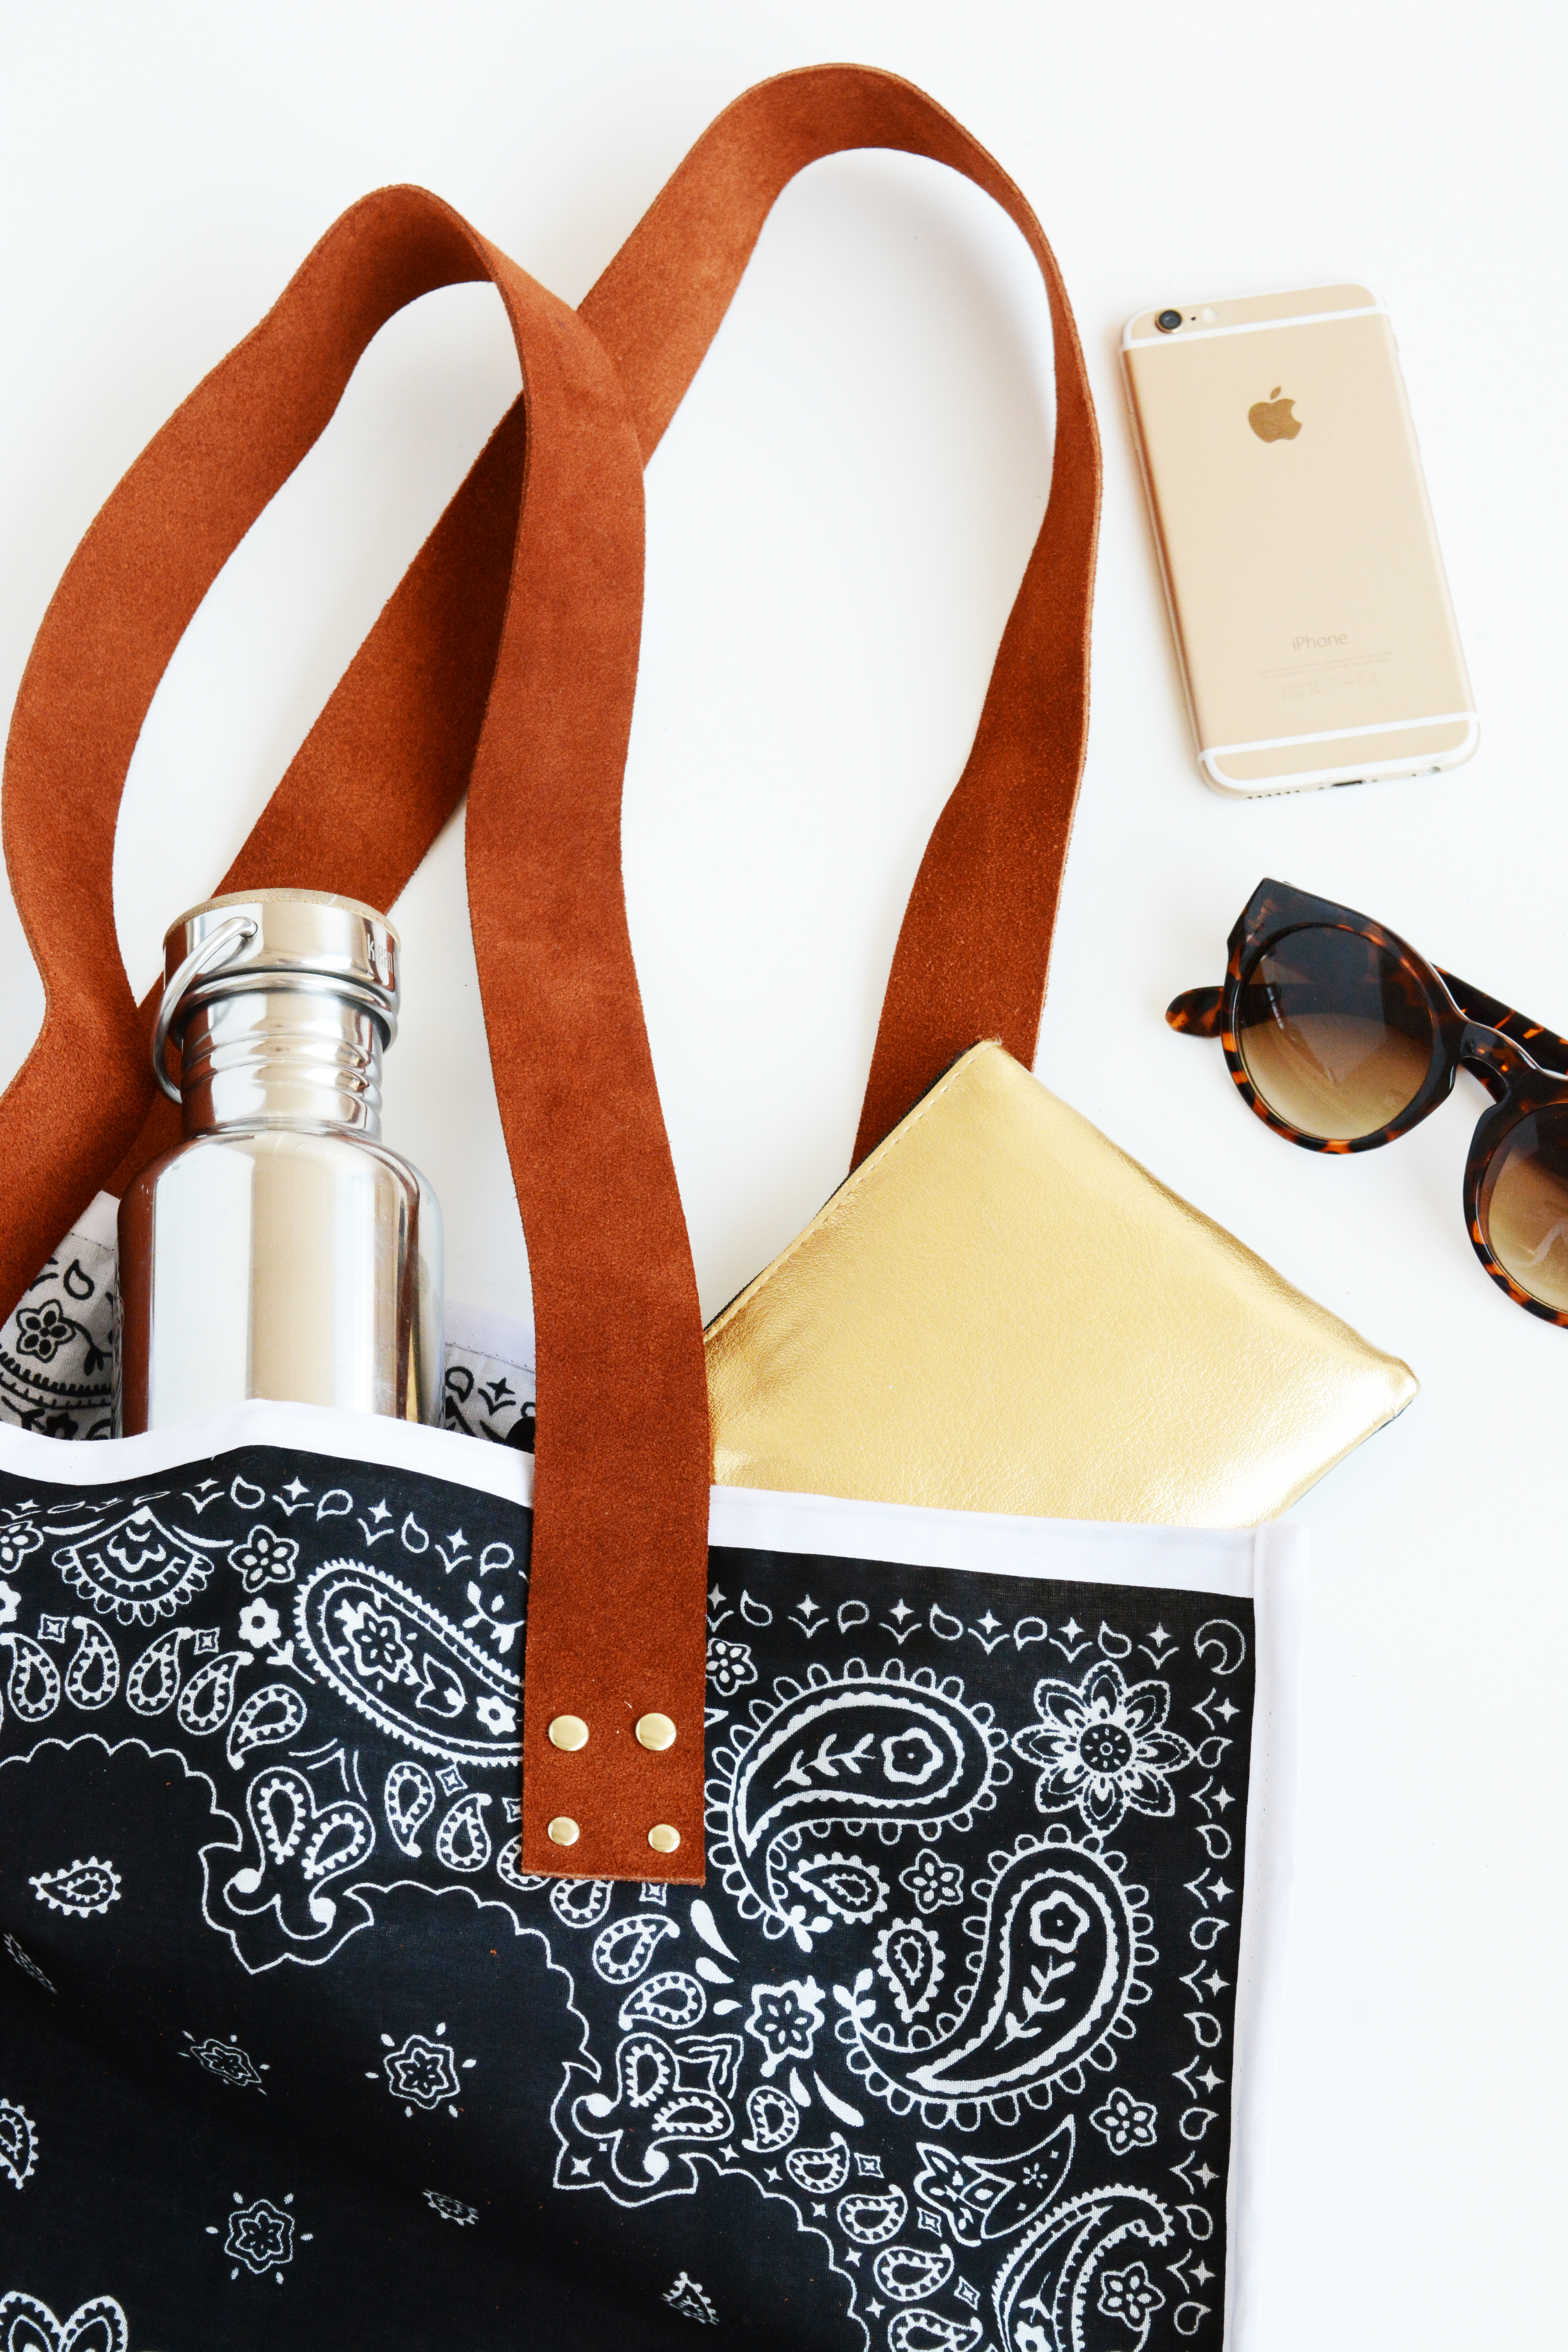
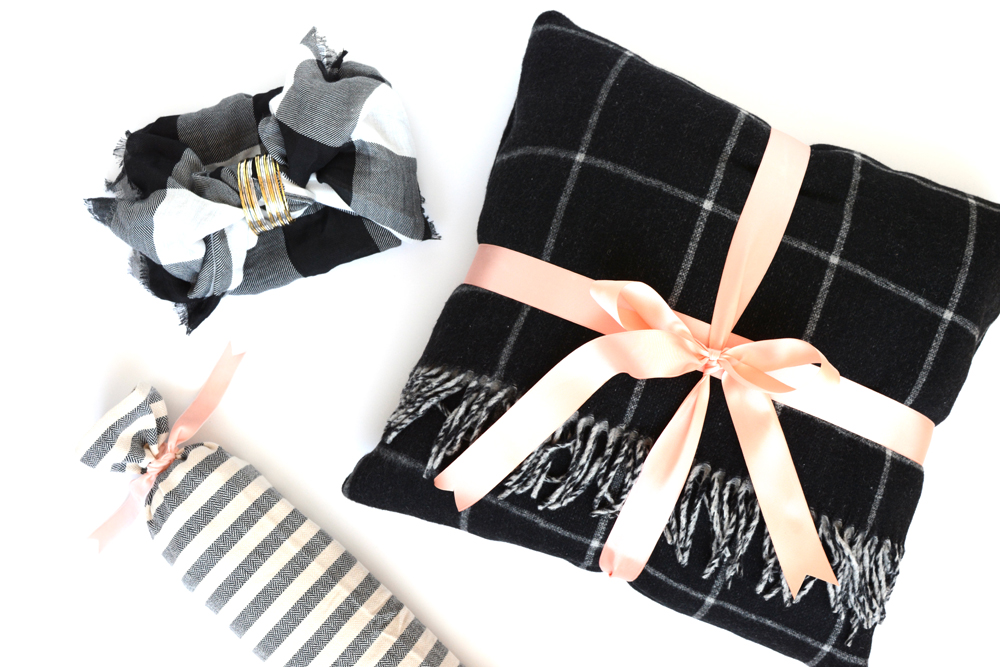 I’ve got 3 creative gift ideas, where the wrapping is part of the gift. Be sure to head over to
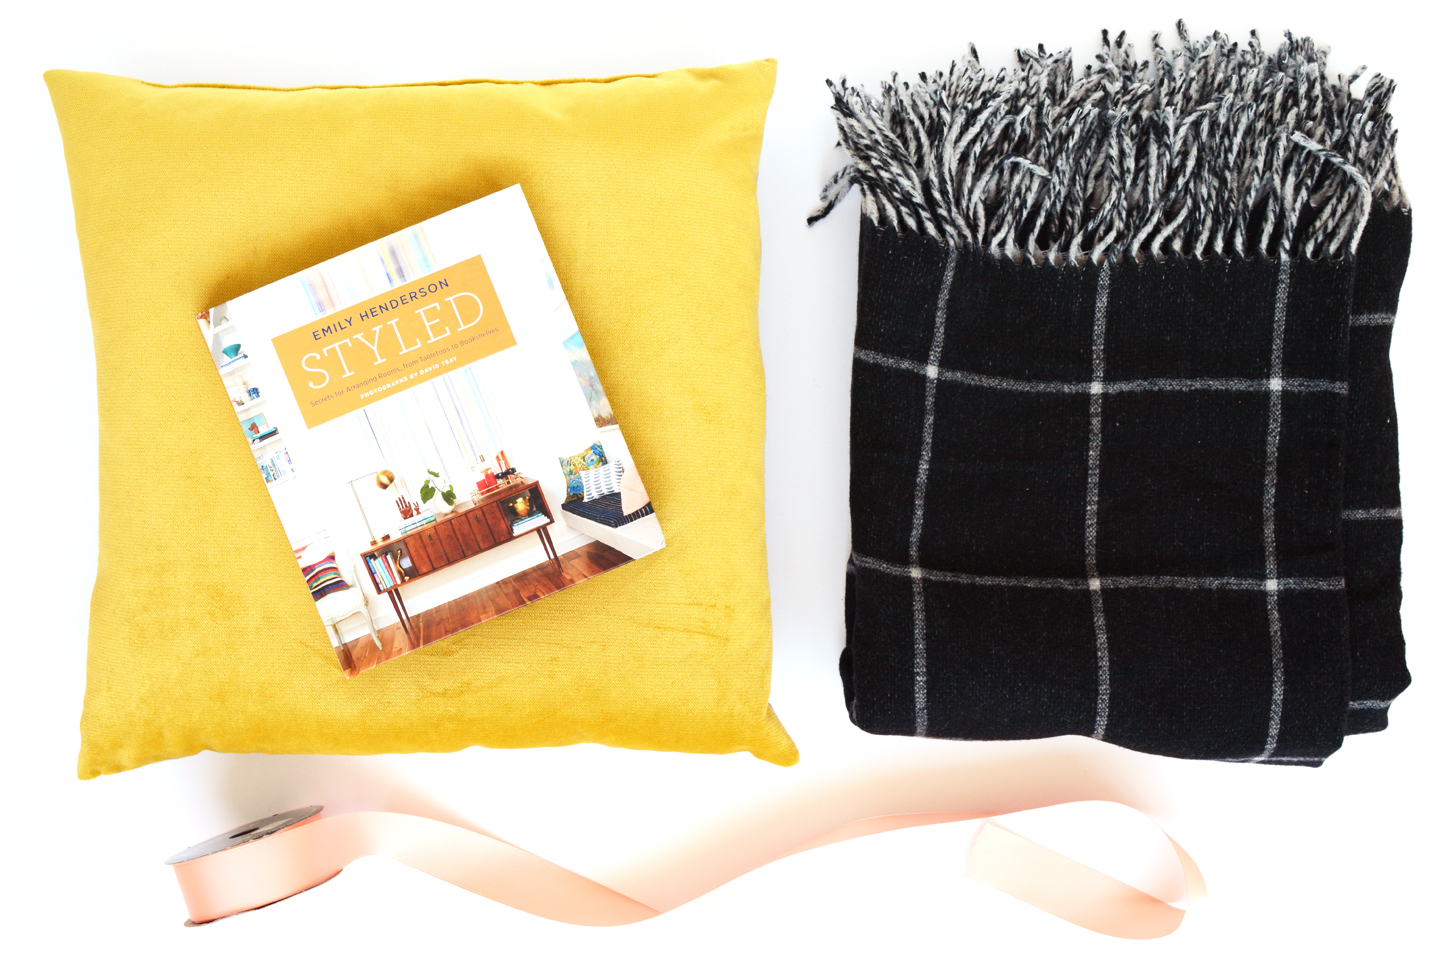
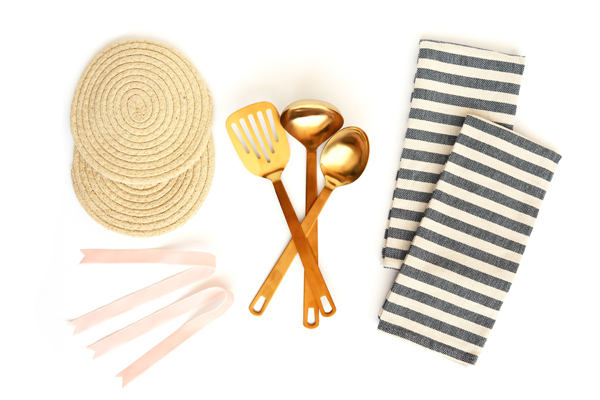
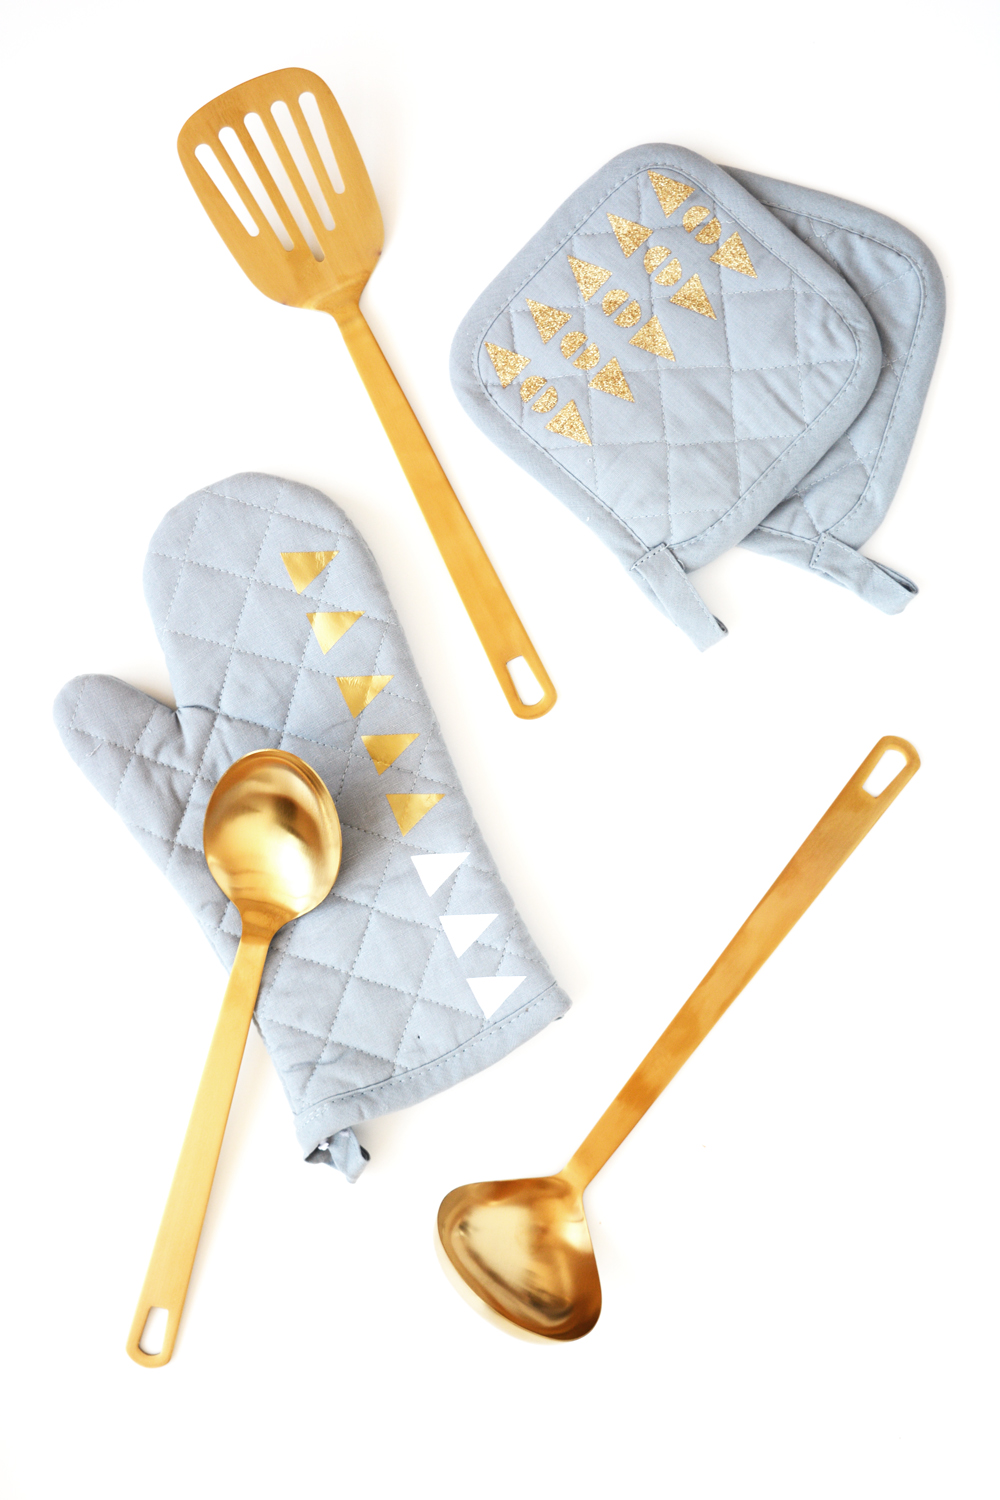
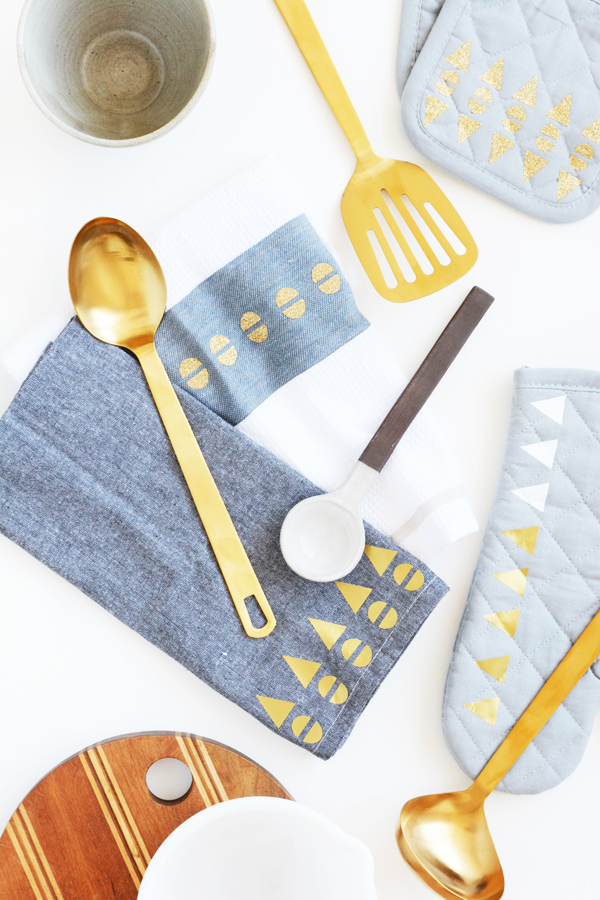
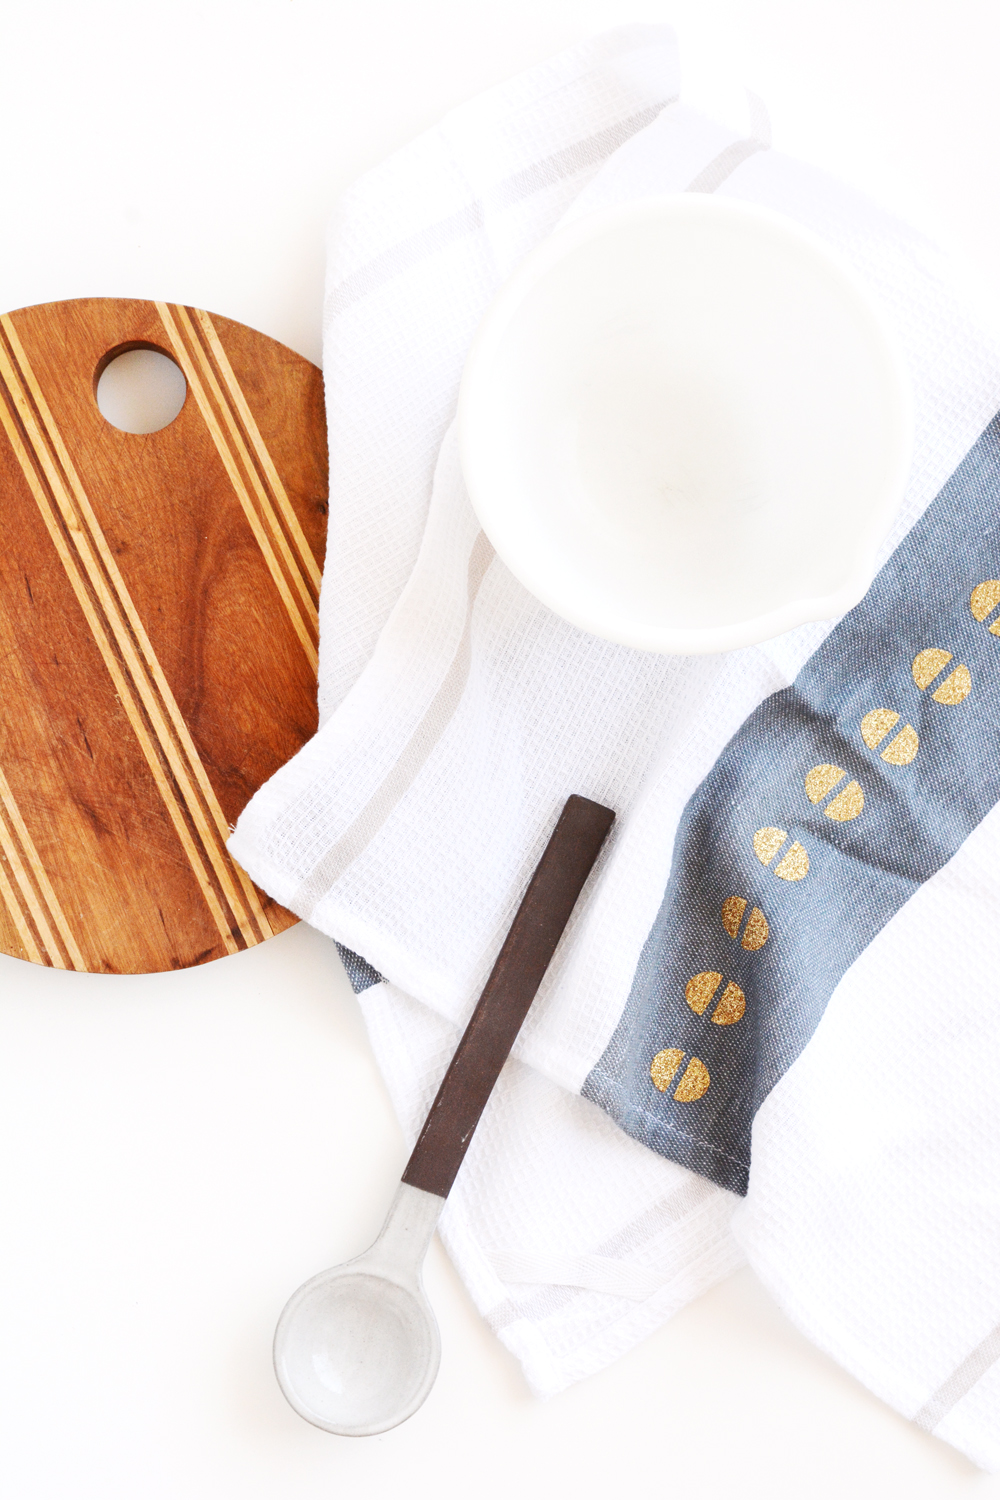
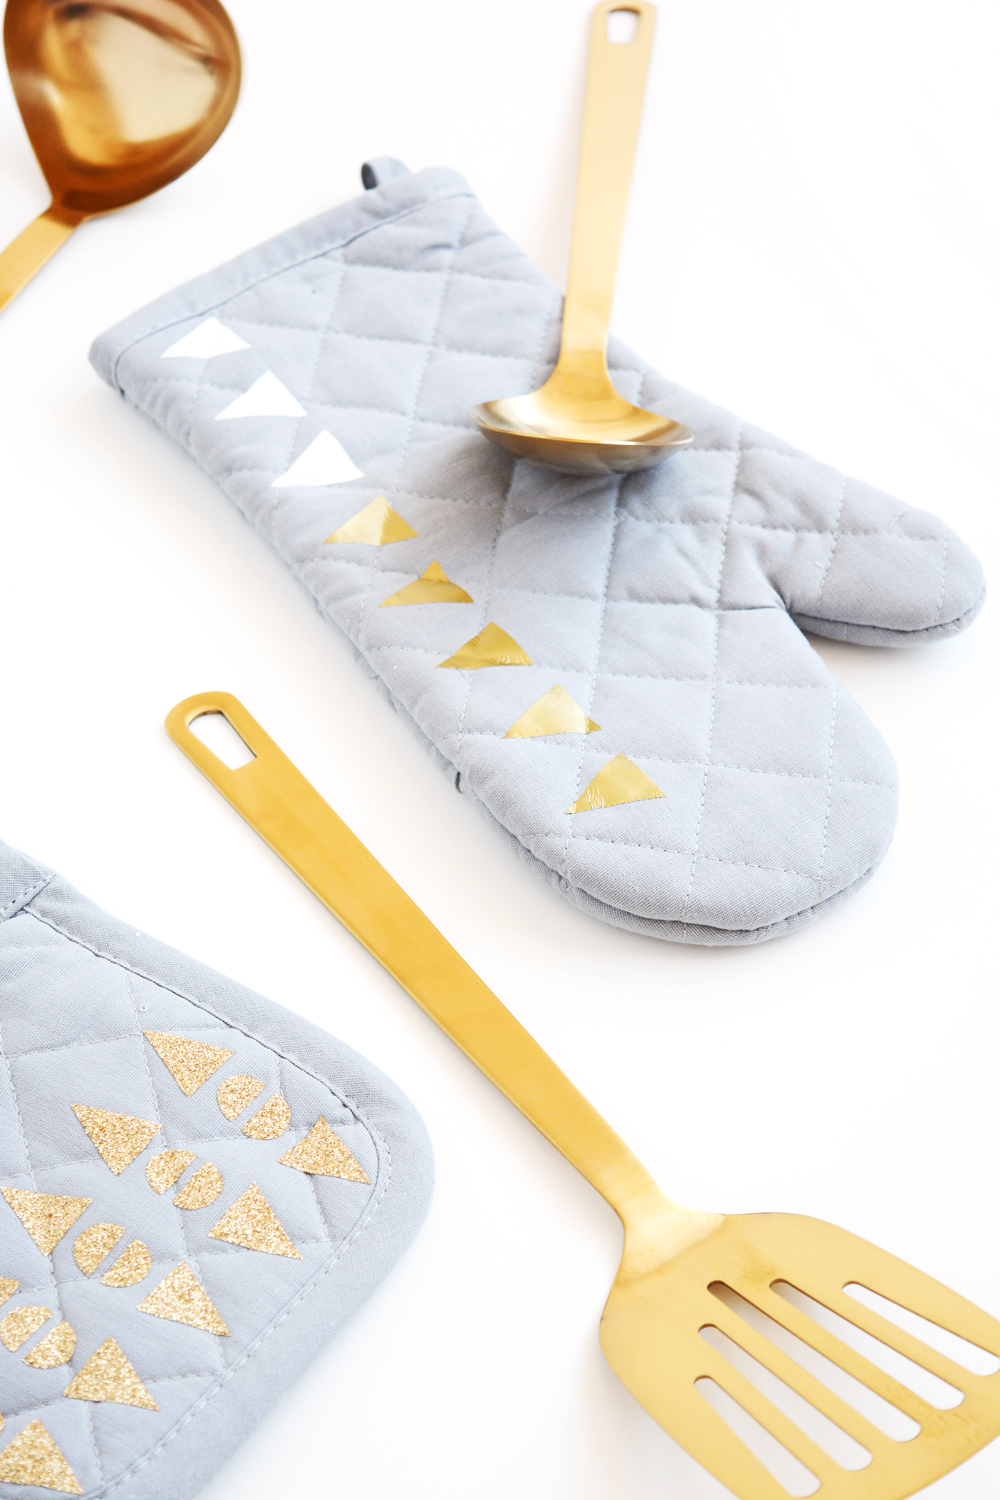
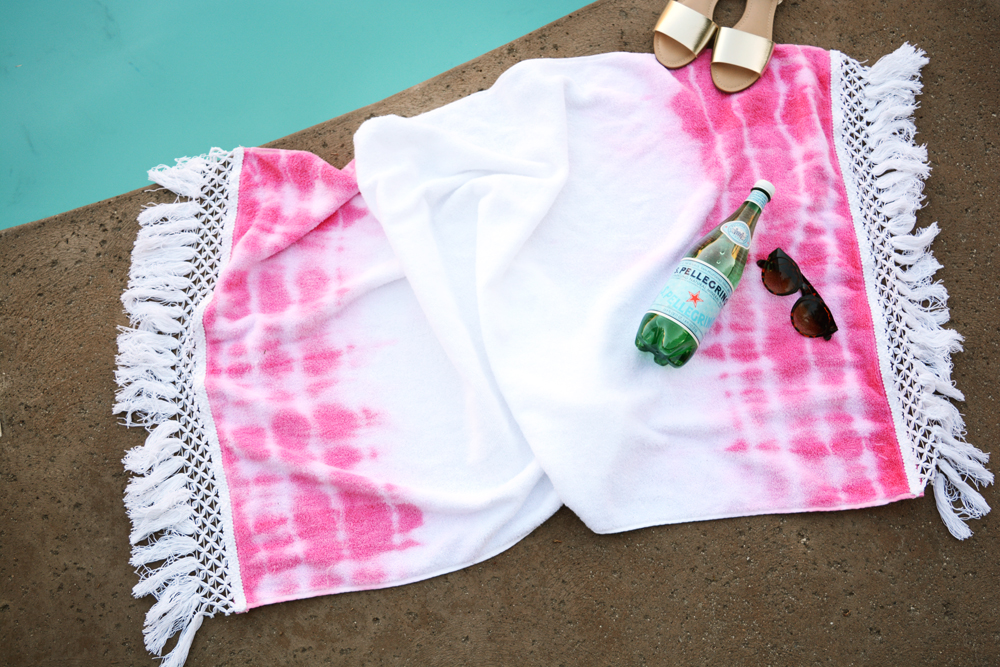
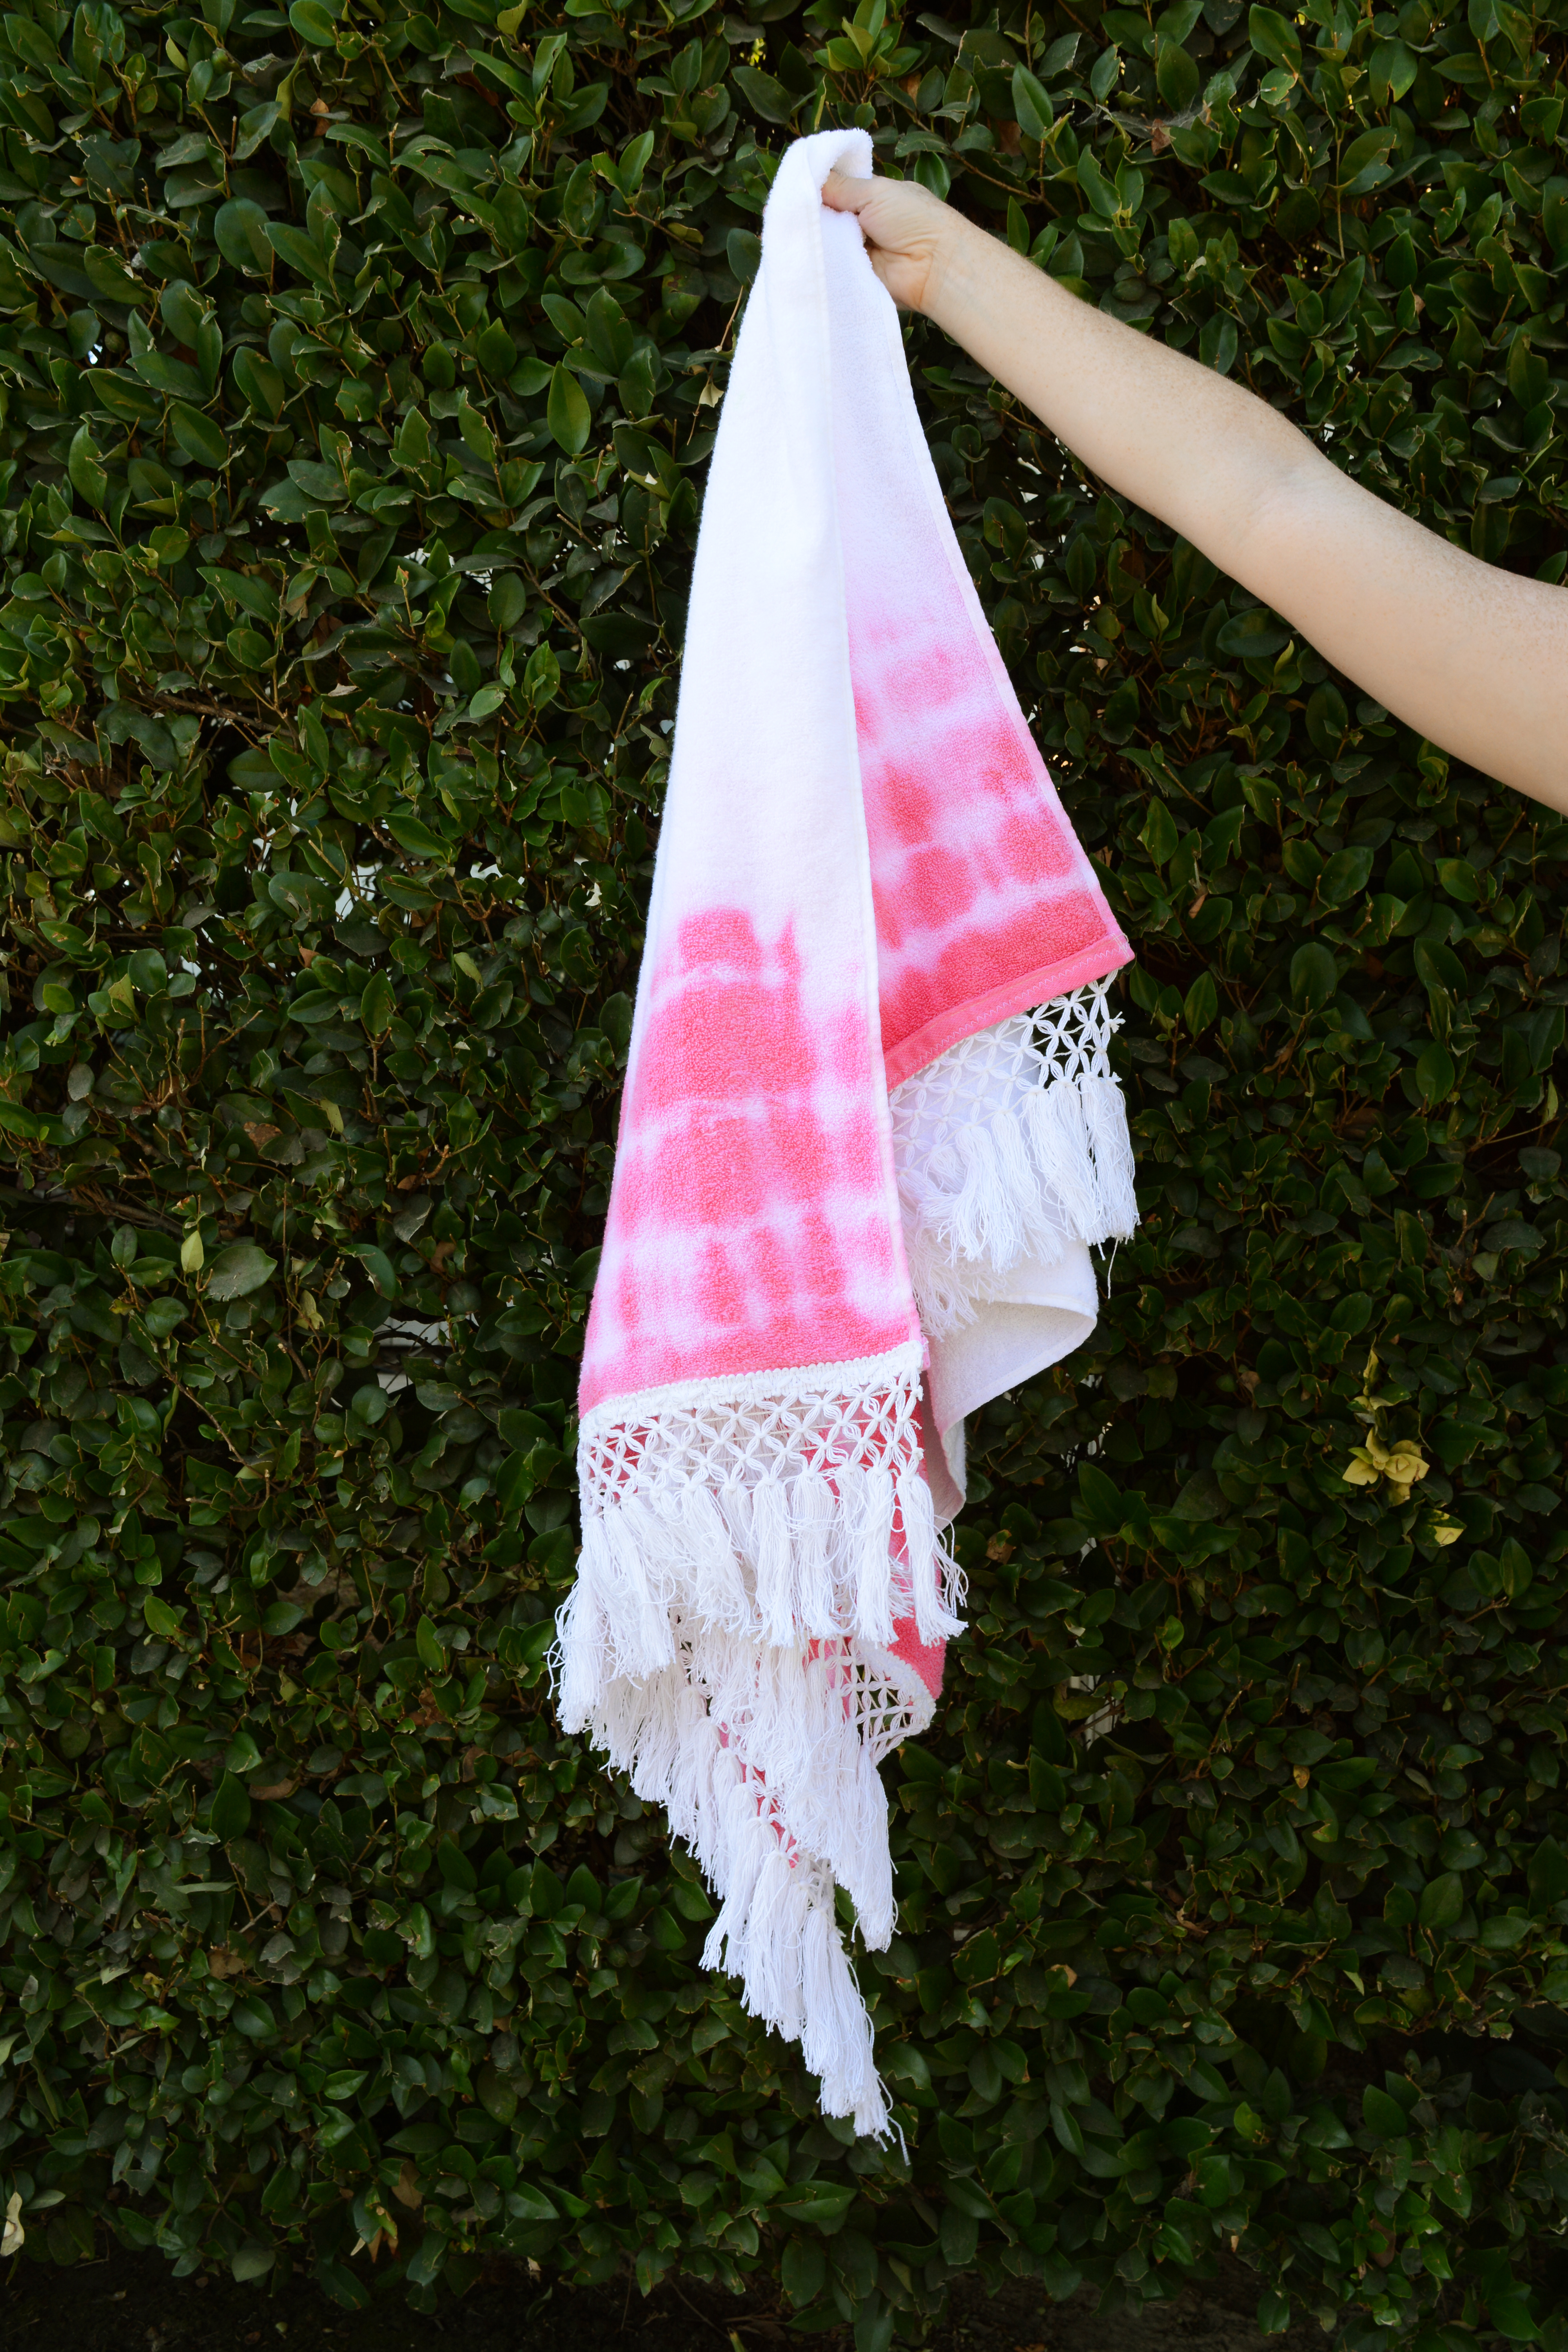
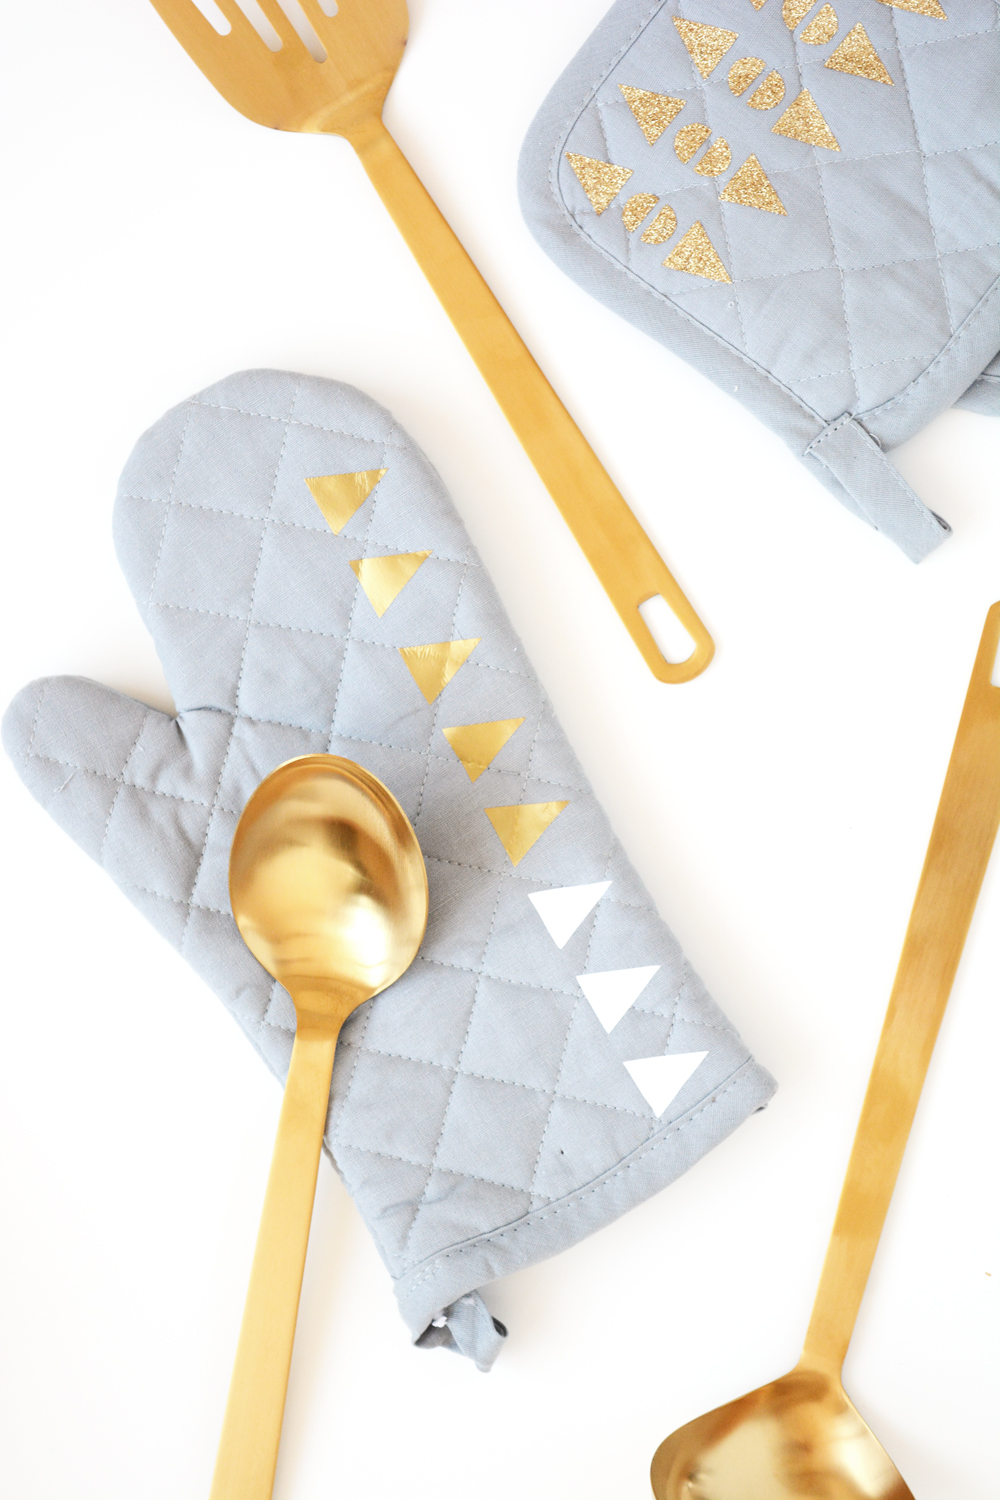 When we moved this last month and I unpacked our kitchen boxes, I realized that my kitchen linens had seen better days. My oven mitts, pot holders and dish towels were stained and just down right ugly. So, I decided to add a little style to our kitchen linens by customizing them with some of the modern geometric patterns I’d designed for the
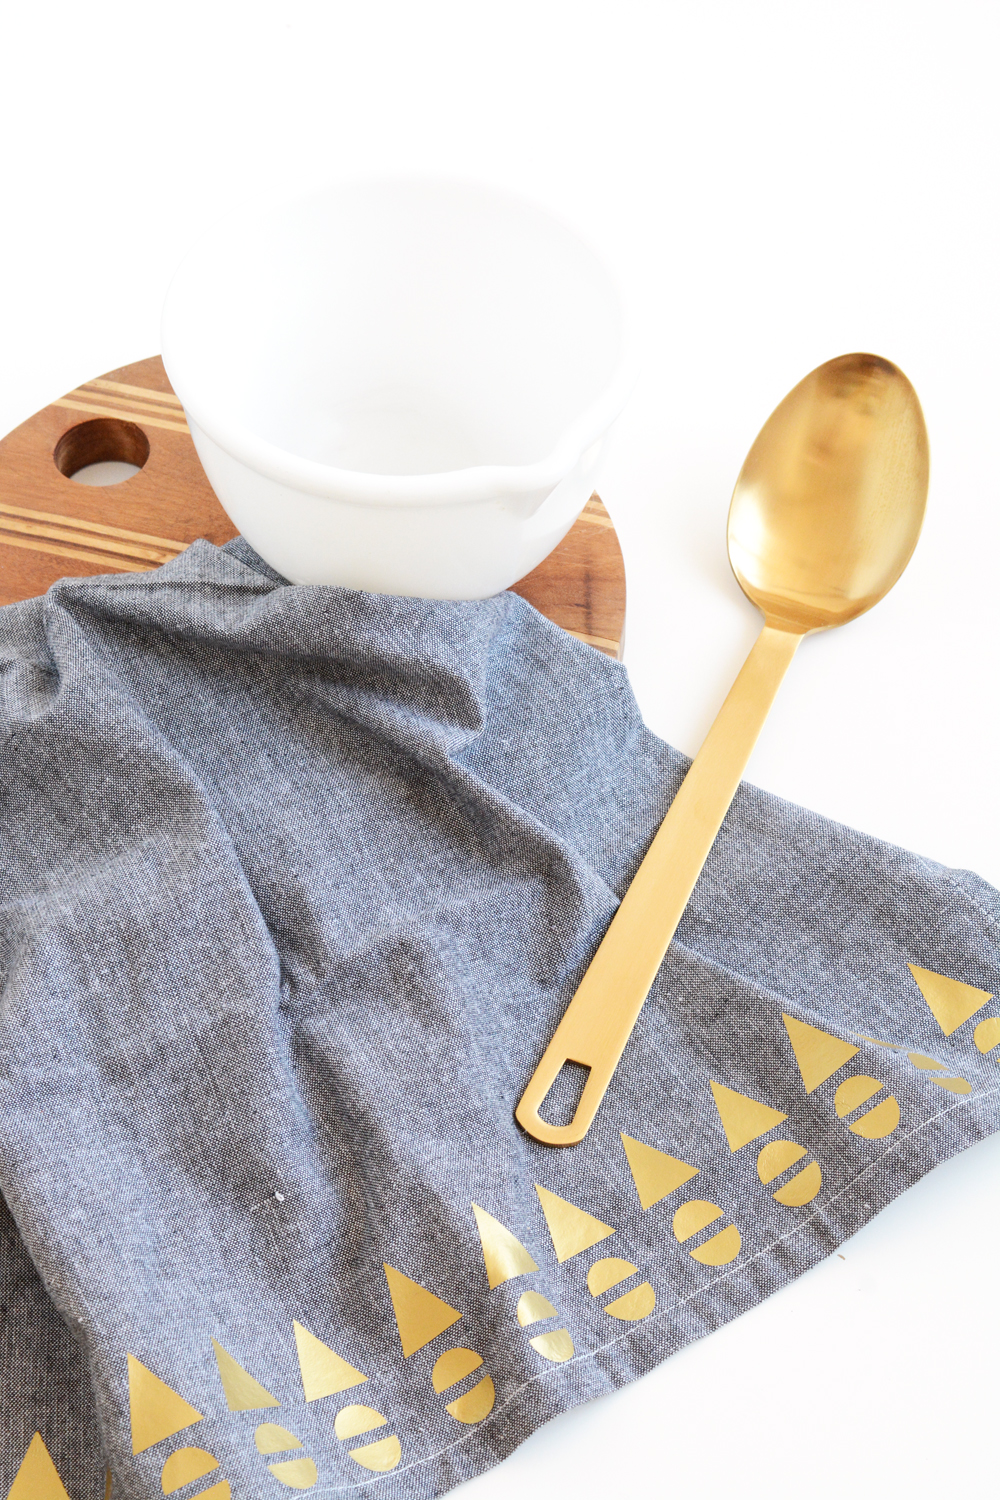
 Please don’t be tempted to paint over wallpaper. This is not a shortcut you want to take. You’re walls will look so much better if you strip all the wallpaper off and start with clean bare walls.
 You’ll need:
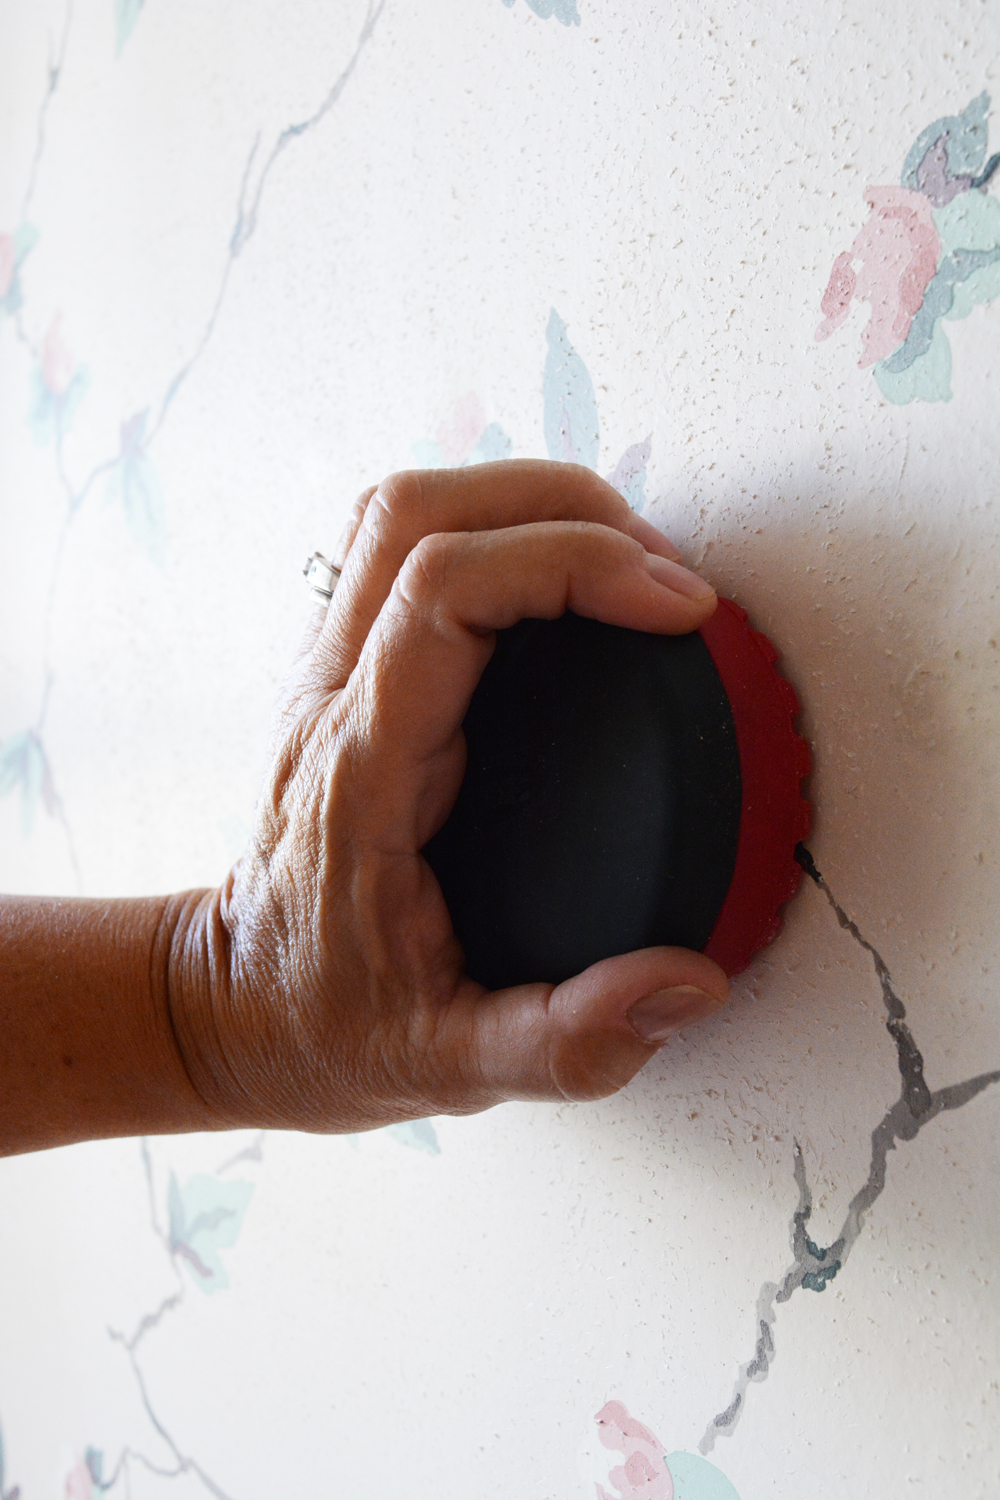 Step 3:
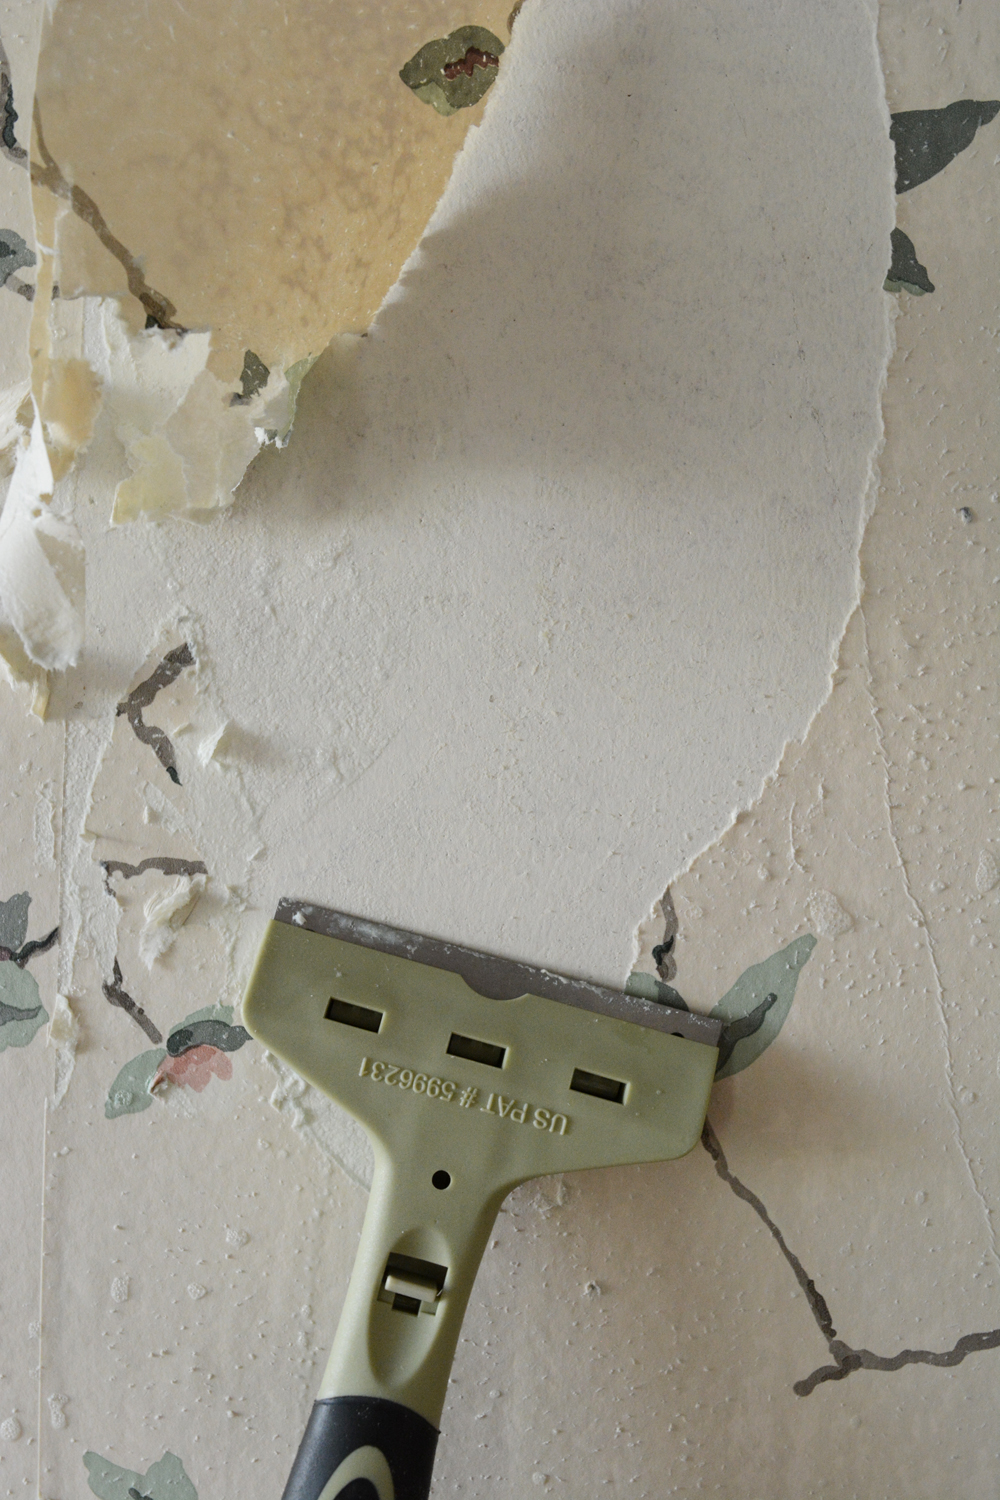 Step 4:
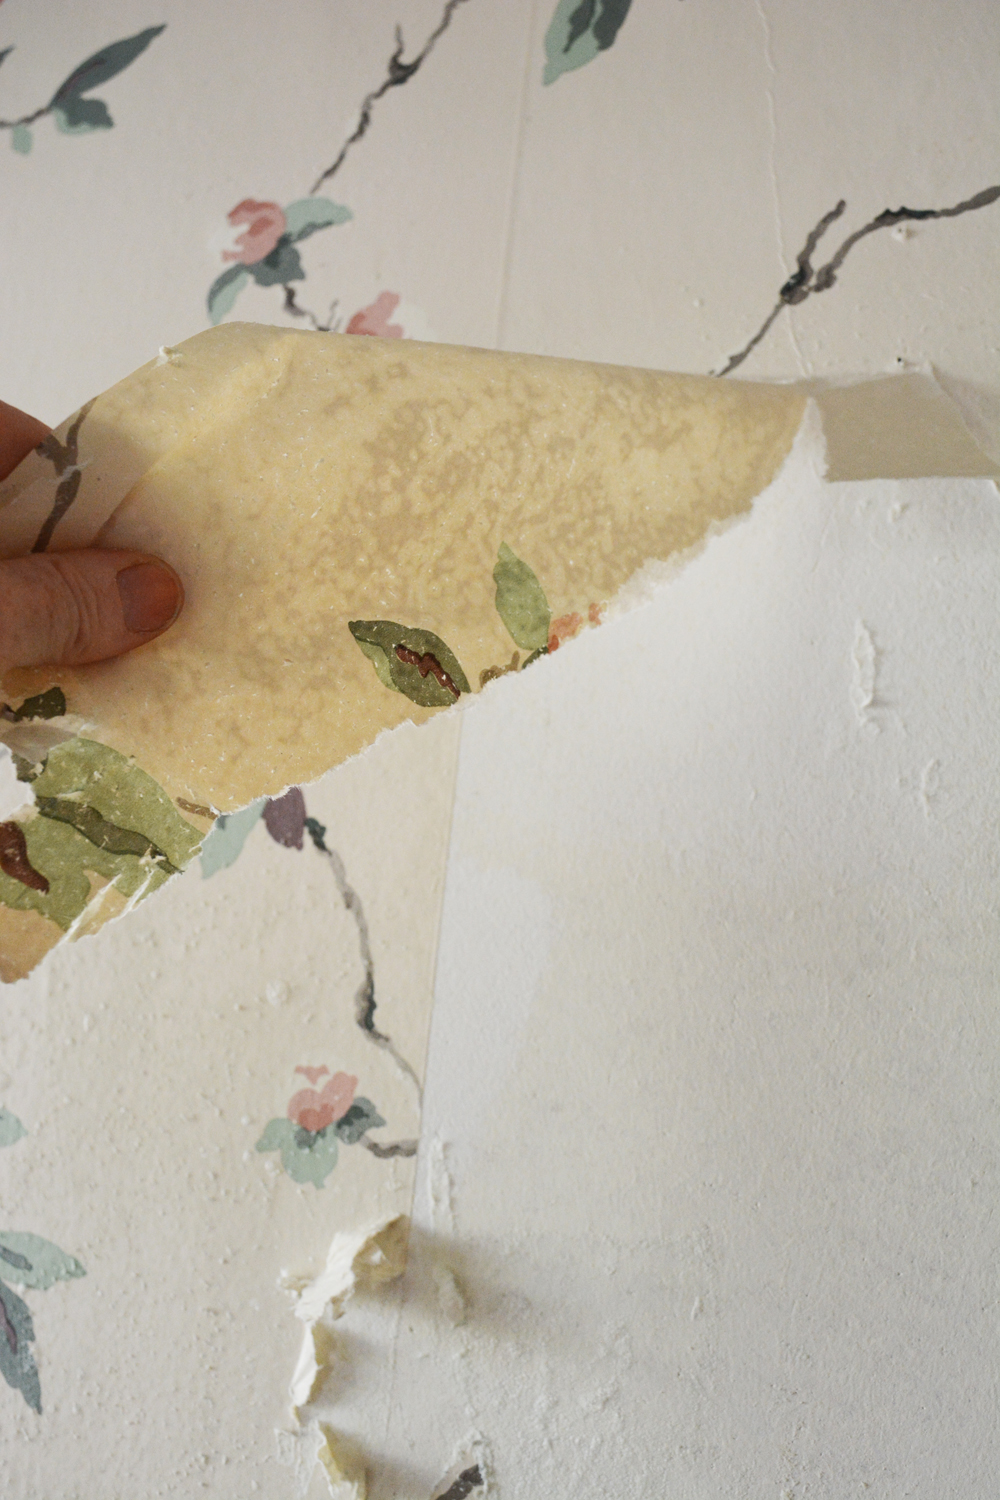 Step 5:
 And now you can paint!!!! I know wallpaper is making a strong comeback, but this room feels so much bigger and brighter without busy, floral wallpaper. I do plan to add some wallpaper to a room or two in this house, but whether I paint or re-wallpaper, starting with clean, bare walls is definitely the first step.
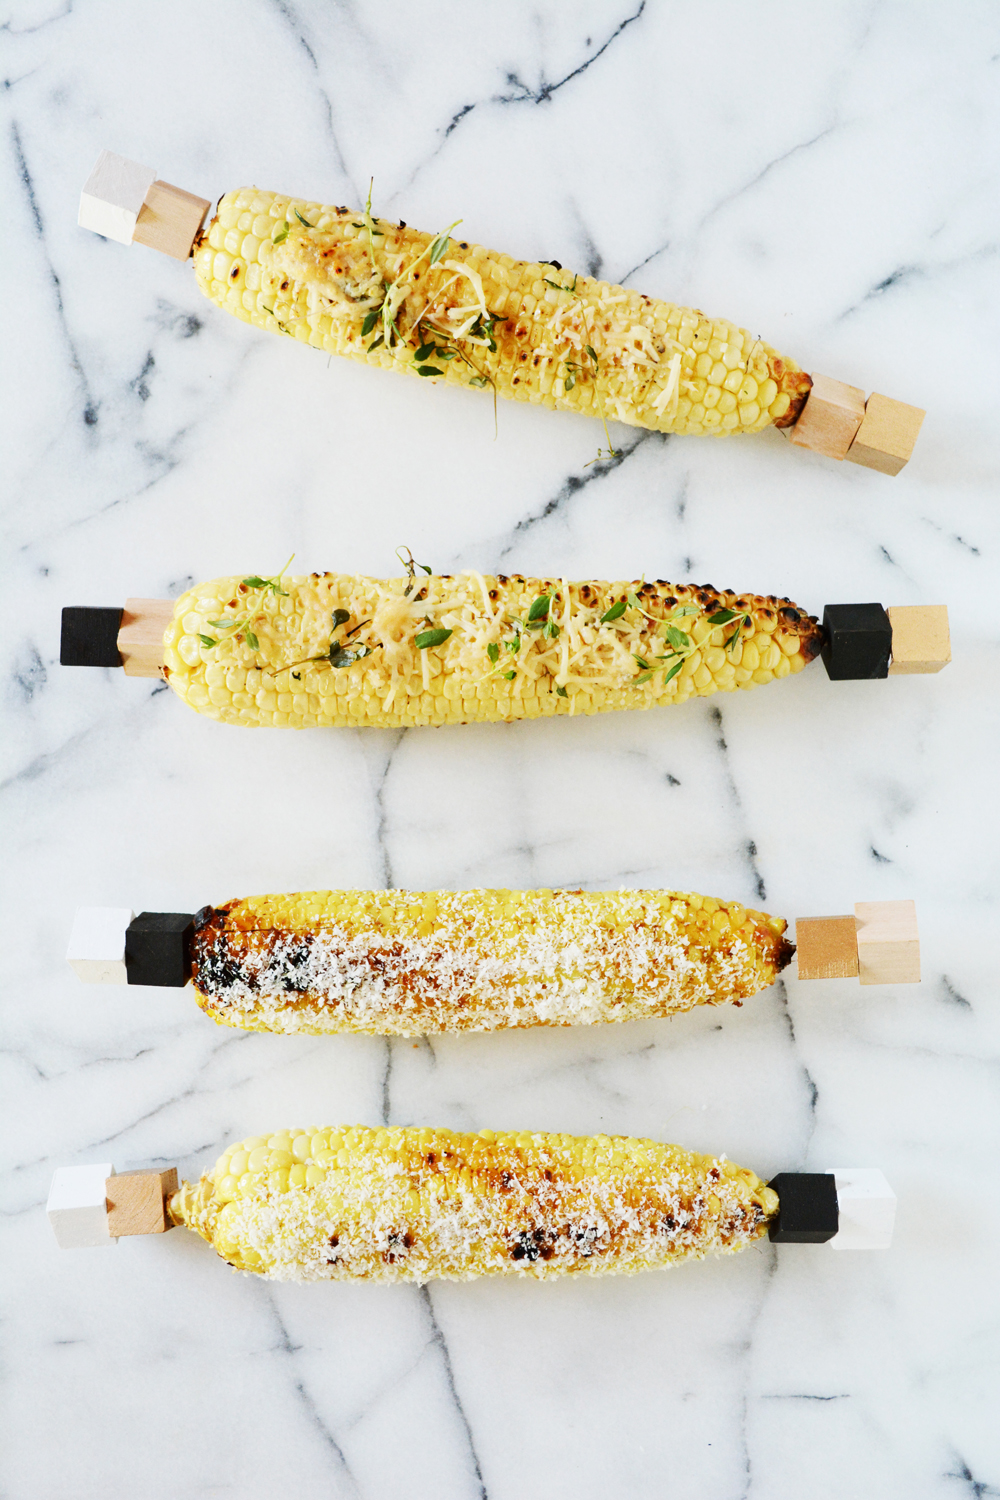
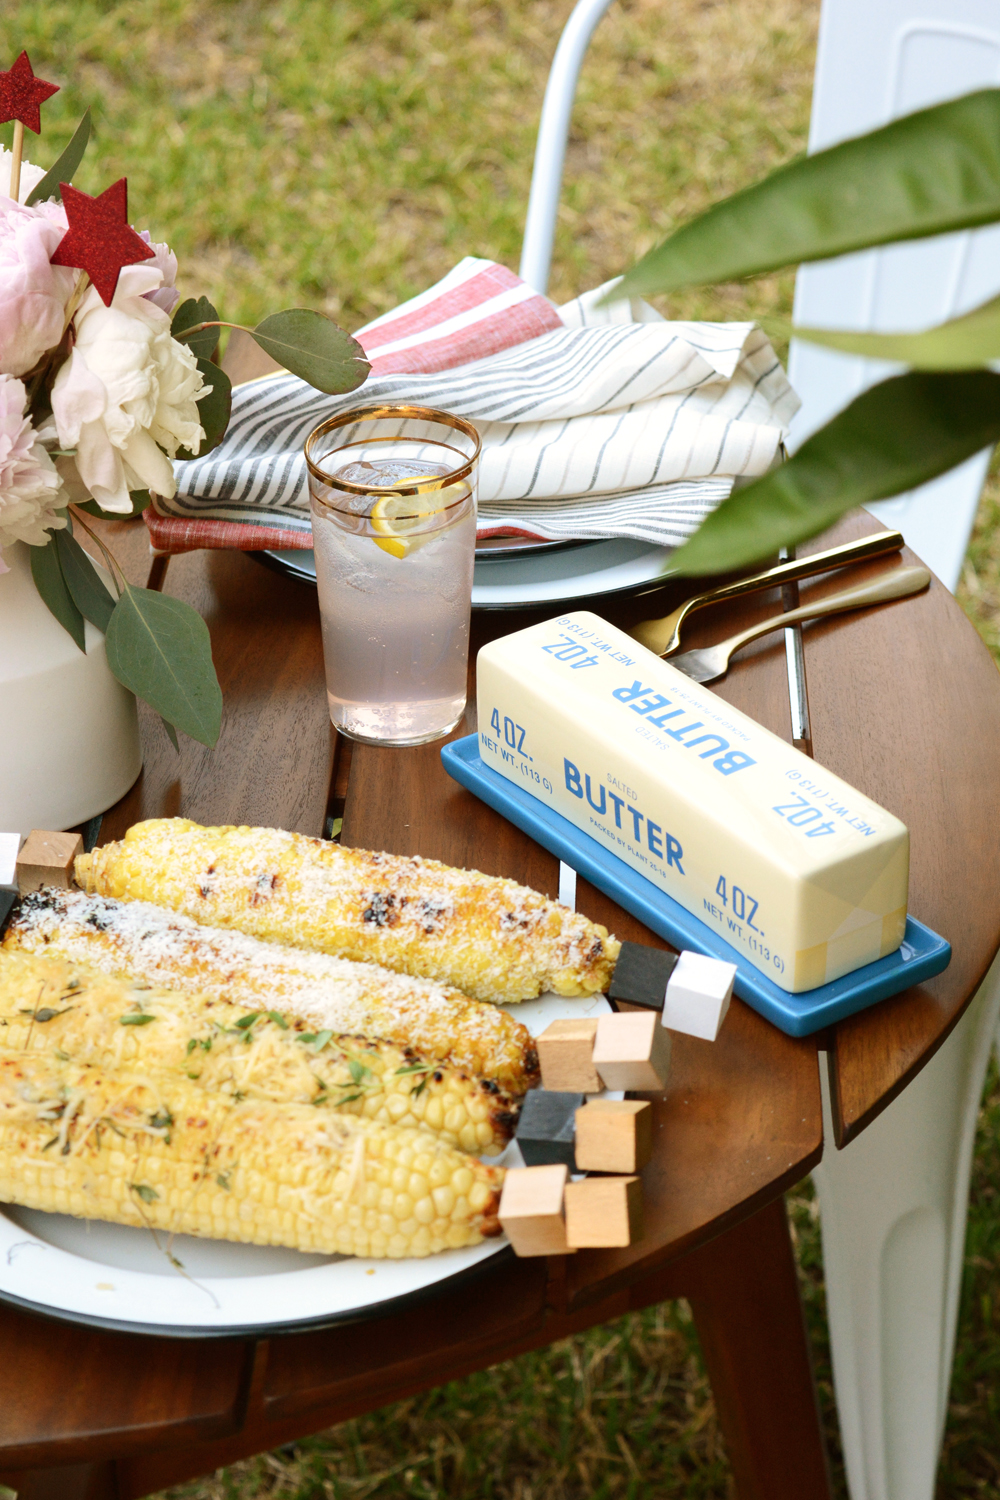 ‘Tis the definitely the season for eating outdoors and cooking on the grill. And corn on the cob is on the menu often at our house. Corn is one of those versatile foods that goes well with everything. I love corn with hot sauce and Mexican cheese and also with fresh herbs and pestos, so I came up with a couple new favorites for this Summer – Parmesan Thyme and Coconut Curry (come back tomorrow for the recipes). And if you are going to drench corn in yummy, messy flavor, corn on the cute cob holders are a must.
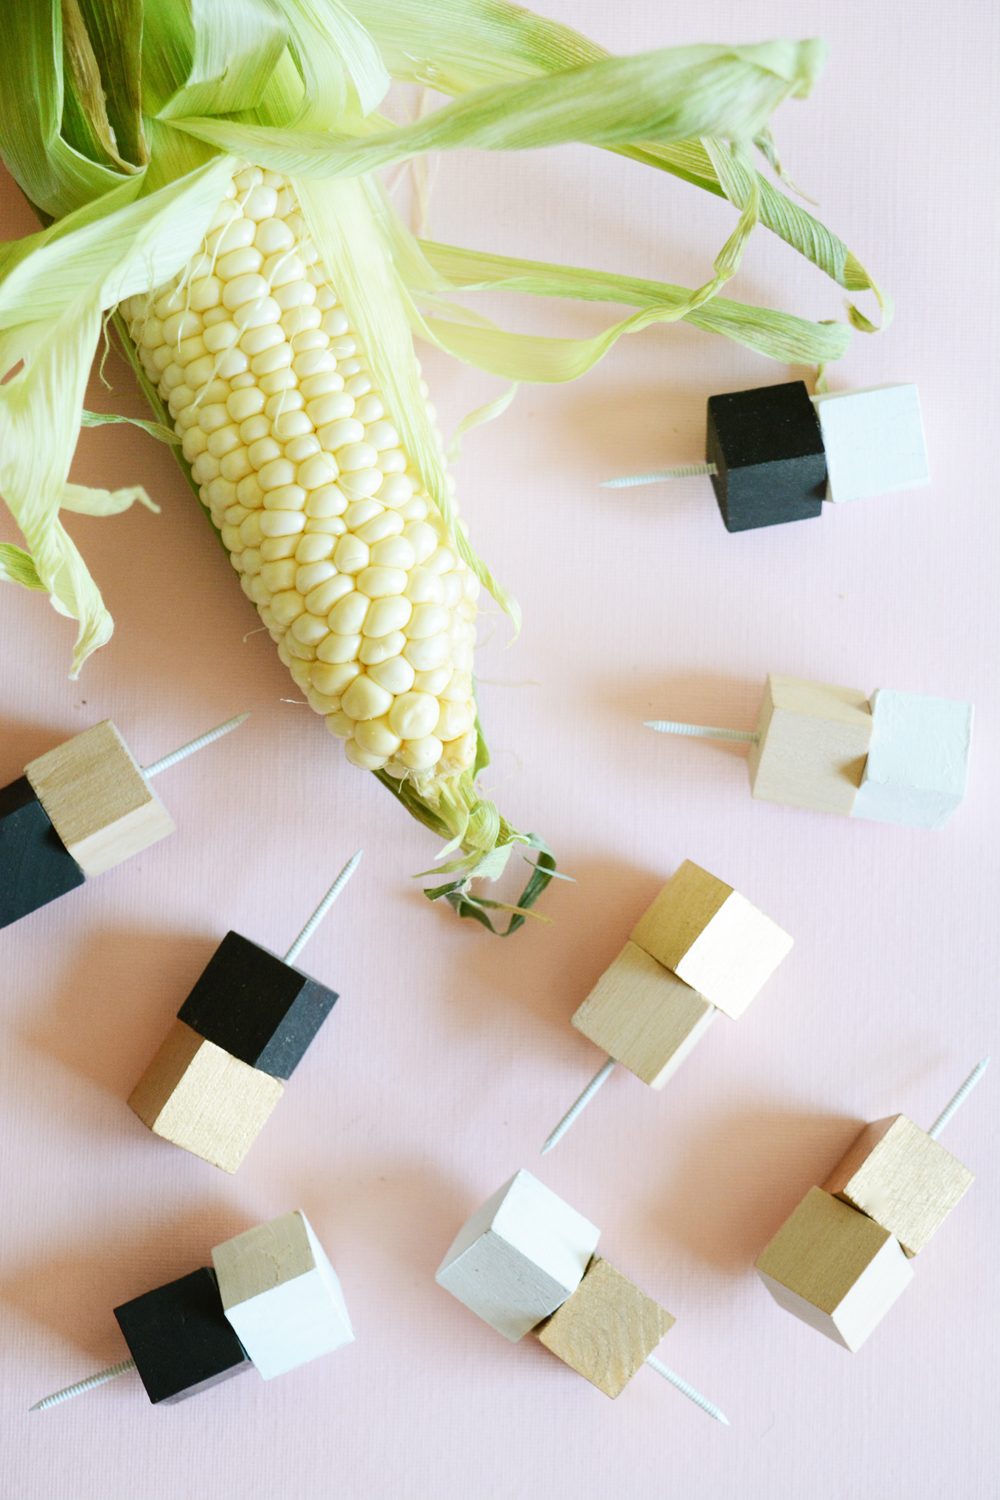
 Here’s what you’ll need:
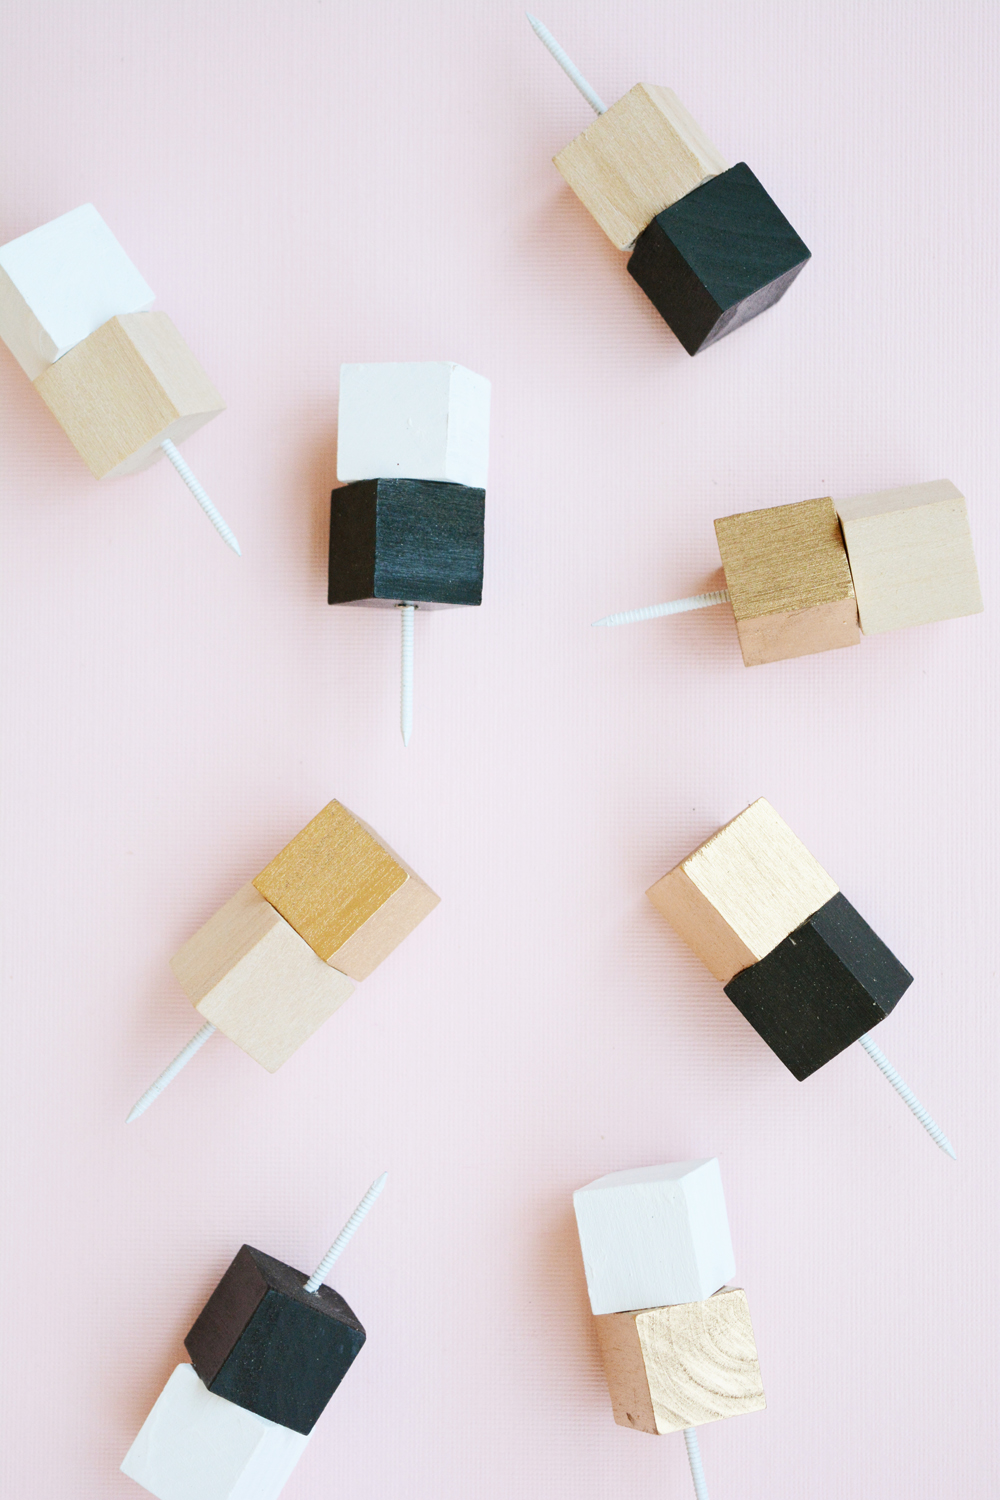
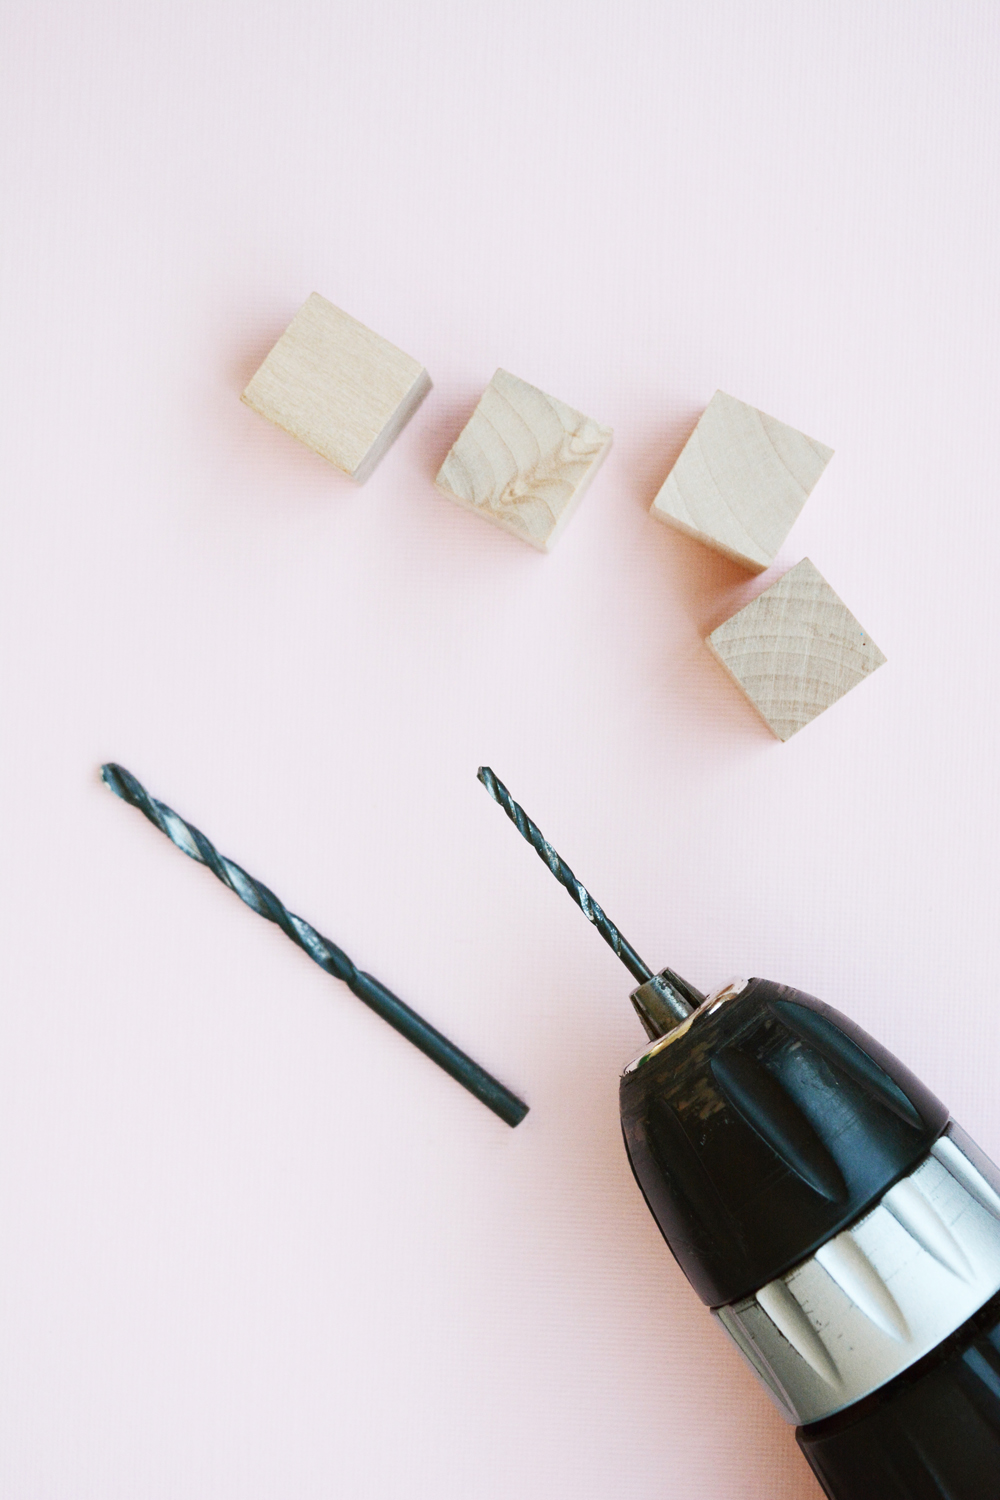 Start by drilling, with the smaller drill bit, a hole in the center of half of the wooden blocks.
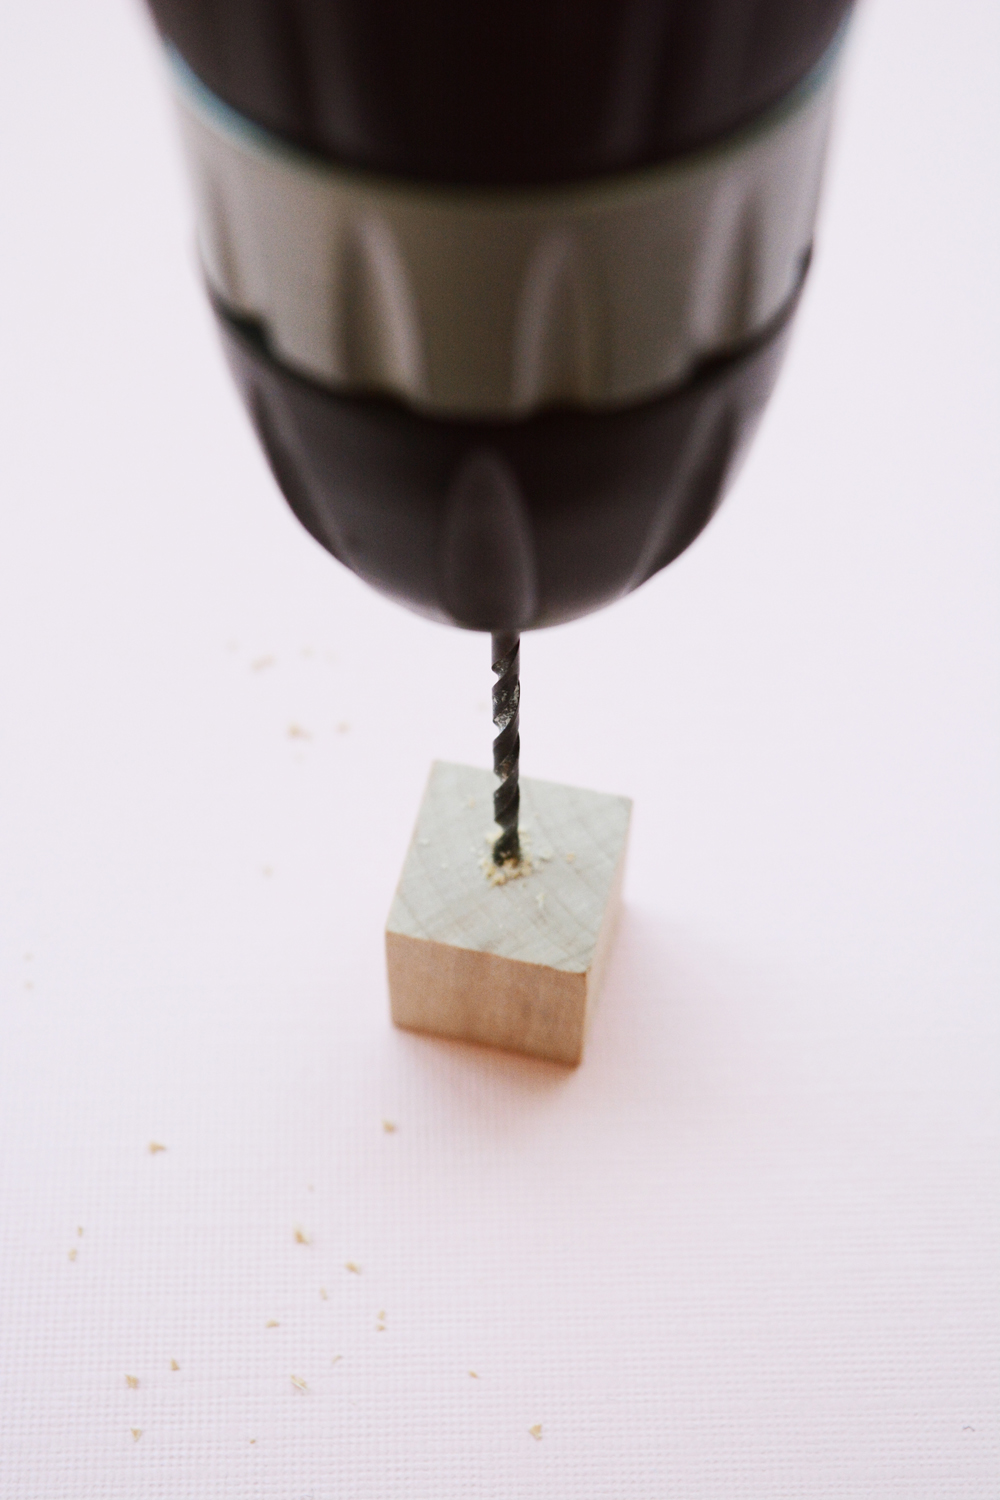 Then attach the larger drill bit and drill just a short distance into the wooden block. This is to create a space for the nail head to sit, so that is is flush with the surface of the block.
 Place a nail into the hole and make sure that the nail head sits flat.
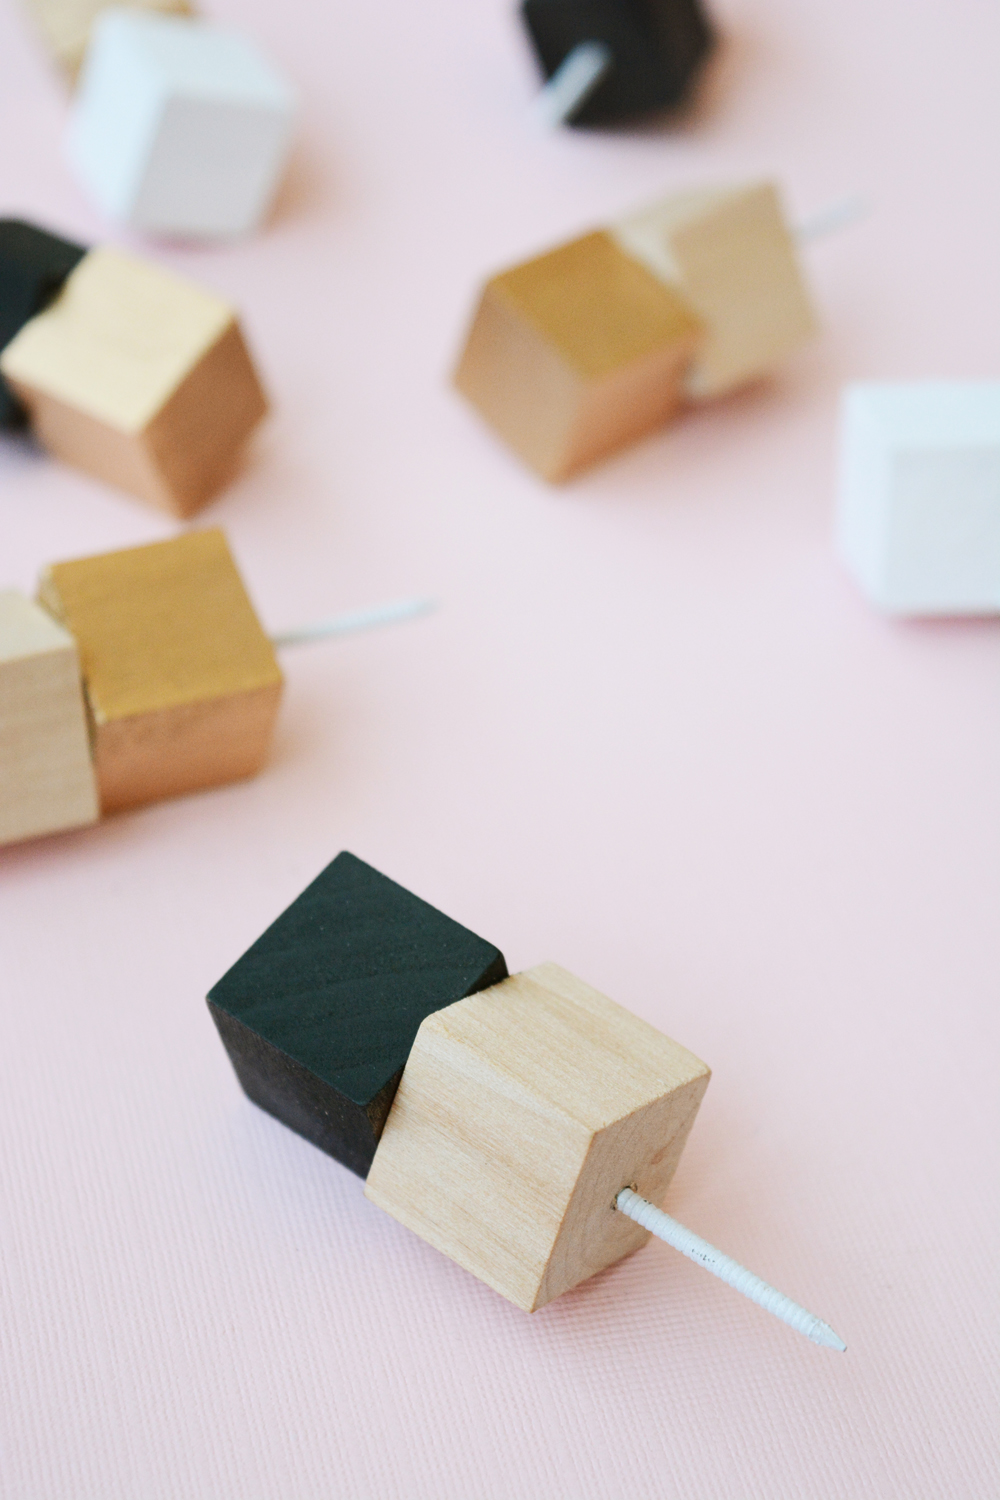
 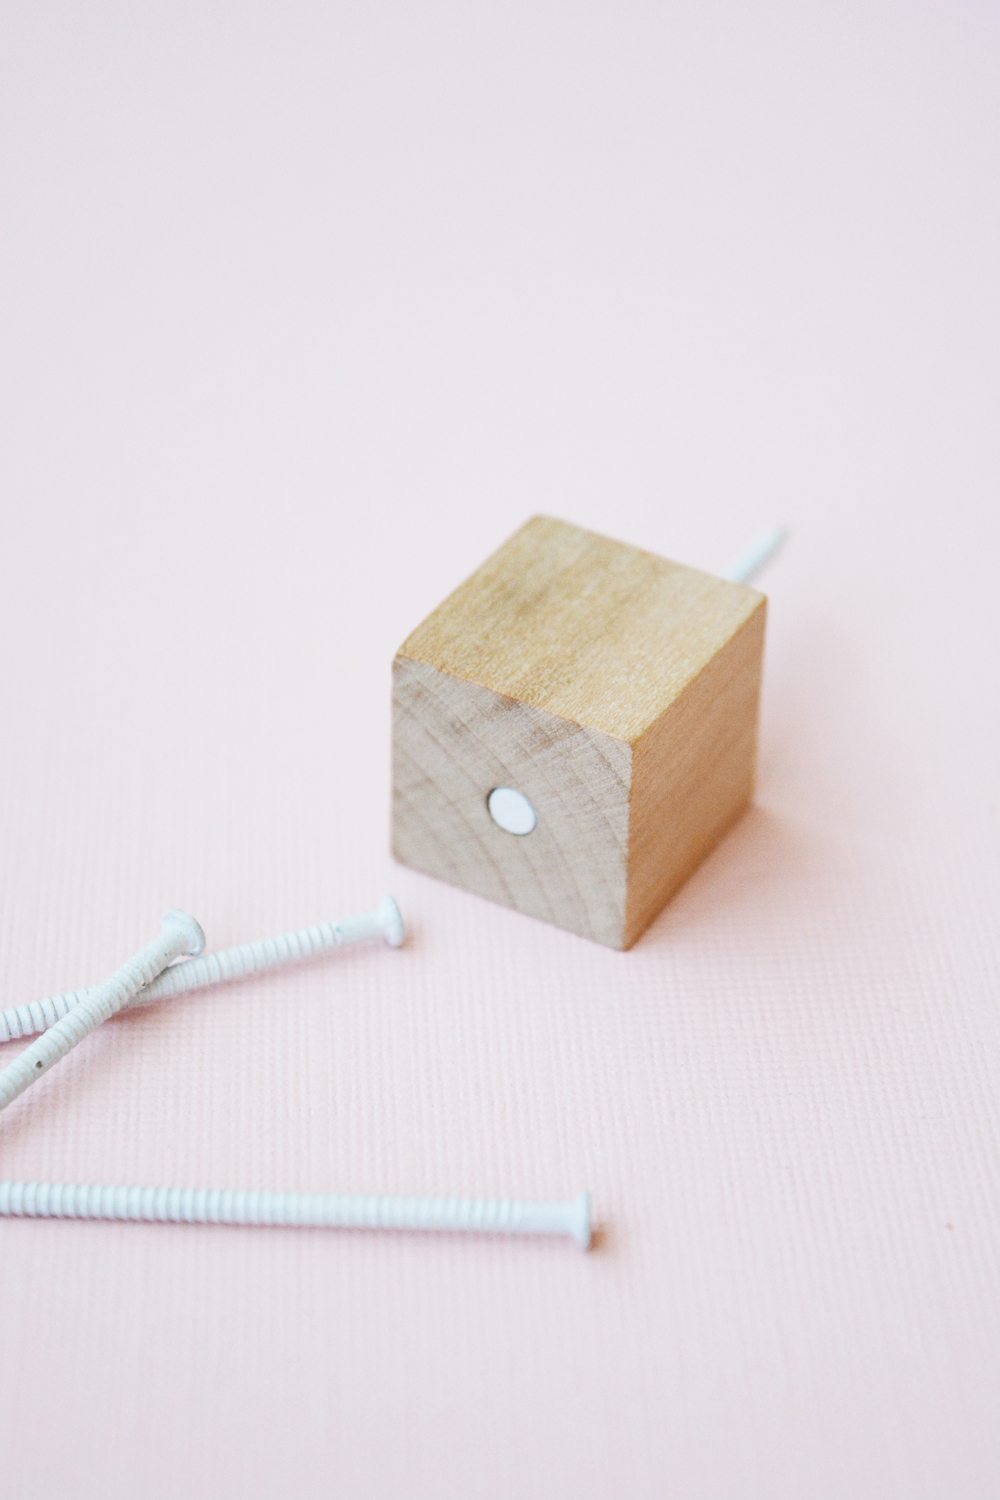 Add a small amount of E6000 glue to the top of the block, where the nail head is and then adhere another wooden cube at a 45 degree angle. Allow them to dry overnight.
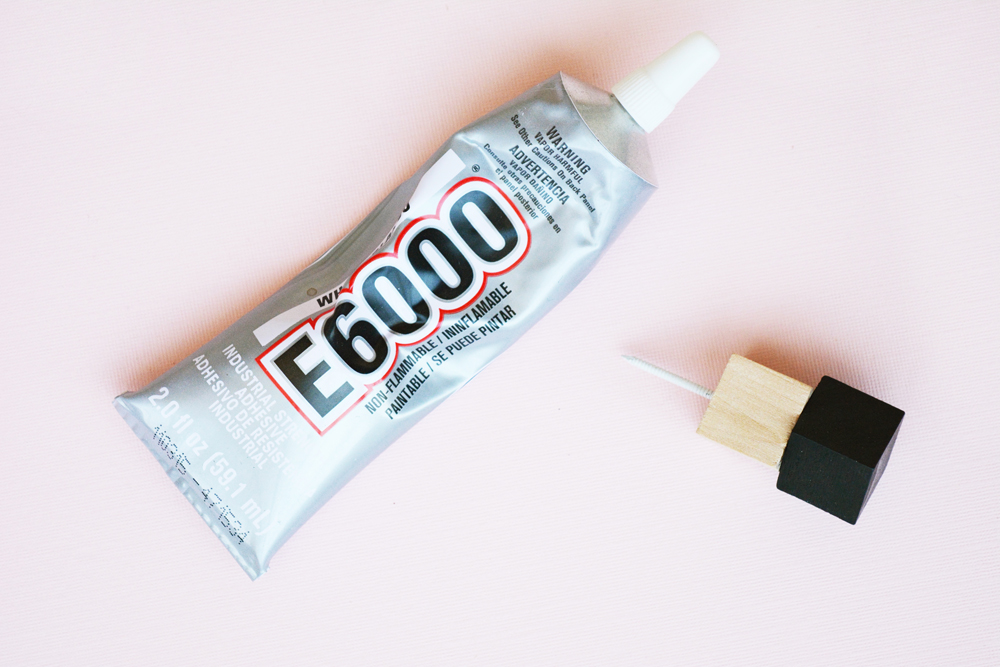
 Be sure to come back tomorrow for two yummy grilled corn on the cob recipes – Coconut Curry and Parmesan Thyme.
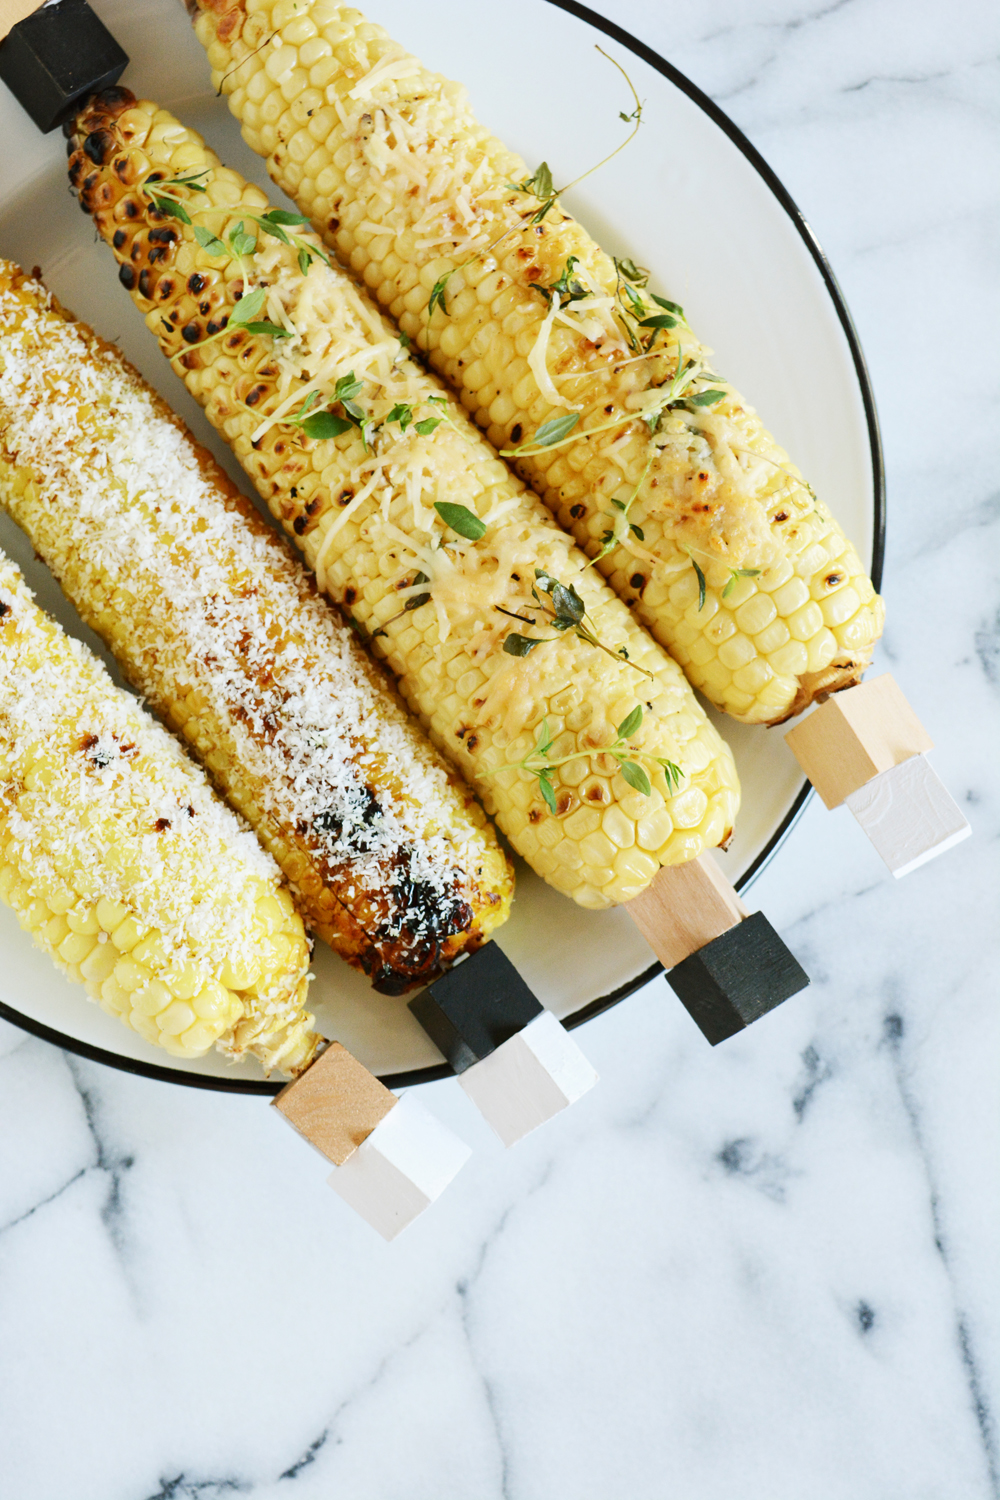


 And I can’t tell you how many times I’ve made these yummy