etc.

AIM – my goal for 2015

January 14, 2015

Last year I followed my dad’s lead and decided on a word for the year. Simplify was my word for 2014.  I’m not sure if I truly embraced the word in my everyday life, but I definitely thought about it more and tried to take baby steps to keeping life in perspective.

This year I am feeling energized and ready to take some big leaps.  I always have dreams and ideas, but this year I want to set some concrete goals and really AIM for those specific things. As a creative person, I tend to jump from one good idea to another.  I want this year to be more planned out so I can take specific steps to reach my goals. That doesn’t mean I’m going to lose spontaneity. There will be some risk taking if I want to reach my end goals. No more excuses, if my personal and professional dreams are going to become a reality, it’s going to have to be me who does it.  I’ve always said I’m one of those folks who will “Die Trying!”, I just want my efforts to be more methodical and organized. Maybe I won’t see the results I want at the end of the year, but I don’t want to live with regrets.  Our life here on earth is so short.  I want to use every possible minute wisely.

I know that I am so blessed and live a life full of love, provision and opportunity because of Jesus Christ. I want my life to reflect my gratitude and love for my Savior. I can do nothing without Him.


Proverbs 3:5-6 Trust in the Lord with all your hear, and do not lean on your own understanding. In all your ways acknowledge him, and he will make straight your paths. 


Thanks for joining me on this journey. Have you set some goals for 2015?  I’d love to hear where you hope 2015 will take you.

DIY

Gem Boxes

January 13, 2015

You guys, that Target dollar spot gets me every time.  Last week I came across these cute faceted boxes for just $3 each. I decided they needed a little customizing and they’d be perfect for Valentine gifts for special folks in my life. 

Keeping with the gem like shape of the containers, I added “You’re a Gem” and “Shine Bright” in gold vinyl letters to the lids of these cute boxes.

There’s a lot of fun things you could do with these boxes. I cut my letters with my Cricut Explore machine, but it would be easy and cute to add a message just using metallic sharpies as well. And maybe you don’t want a message, but a pattern would be really cute as well.  I’m thinking a bunch of stars or hearts could be really fun. 
Have you come across any great Target dollar section or just dollar store finds lately.

etc.

Top 10 for 2014

January 9, 2015

I thought it would be a good idea to look back at what has been popular on my site this year (you can check out the top 10 for 2014 here).  This week I’m trying to look ahead to 2015 and create content that my readers really want to see.  I am so grateful for the tiny bit of success I’ve seen this year, it’s really thanks to you, my loyal readers who come back week after week to see what I’m up to.  As I plan for 2015, I’d love your input. I think I will be putting together a little reader survey shortly.  I hope you’ll take a second to fill it out for me. Or, just leave me a comment below letting me know what you like, don’t like and what you’d like to see more of on O+P. 
I hope your year is off to a great start.  I can’t believe how fast January is flying by. It’s going to be a GREAT year! 

Design

Blush Crush

January 7, 2015

I’m really loving this blush color, I must be ready for Spring.  Peach, rose, pale pink, whatever you call it.  It’s here for another year and I love it.  I am a huge fan of the color green, I never get tired of crisp black and white, and if you have followed me for a while, you know grey is my neutral of choice. But, I think I need to change things up a bit and add a splash of something new to my palette, I think this pale blush might just be the color for me.  
I added a few fun Ferm Living accessories to my kitchen last year and I love how it looks with my green tile backsplash.  
Is there a color you are loving right now?  How do you feel about pastels?  Can they be grown up and sophisticated? And does taking down all your Christmas decor make you want to redecorate your home like it does for me?  

Food & Drink

Gingerbread Cake and Toffee Sauce in Jars

January 5, 2015

It’s still the season for treats and entertaining at our home. It will be till Valentine’s day 🙂
You’re going to want to make this recipe for someone you love.  These individual Gingerbread Cakes with Toffee Sauce are totally portable and can be enjoyed anywhere.

This is a recipe from the early days of my blog, but today I’m sharing this updated version over on Honest to NodThe Land of Nod‘s blog. 

DIY / etc.

A New Year and A New Closet

This post is part of a social shopper marketing insight campaign with Pollinate Media Group® and Newell Rubbermaid, but all my opinions are my own. #pmedia #HomeFreeLowes http://my-disclosur.es/OBsstV
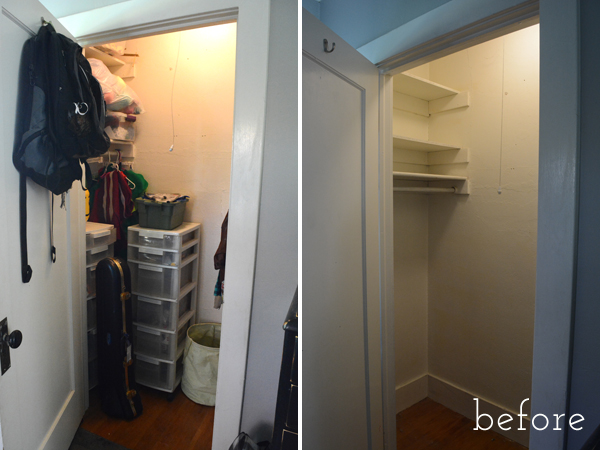
Now that’s how you start the new year, A SUPER ORGANIZED closet!!!  Living in a small 1920’s bungalow, maximizing your storage spaces is a MUST. The tiny closet in Dylan’s room is home to a whole bunch of Lego, Dylan’s clothes and my sewing machine and sewing stuff.  I was so tired of temporary plastic storage drawers and having to dig my sewing machine out of a corner on the floor of the closet.  I’ve had those custom closet companies come out and give me an estimate on how much it would be to add shelving to this closet.  The last quote I got was over $900 – ouch.  But, can you believe that I (all by myself, me!) installed this amazing Rubbermaid HomeFree Closet System in just a few hours and for about $200?  
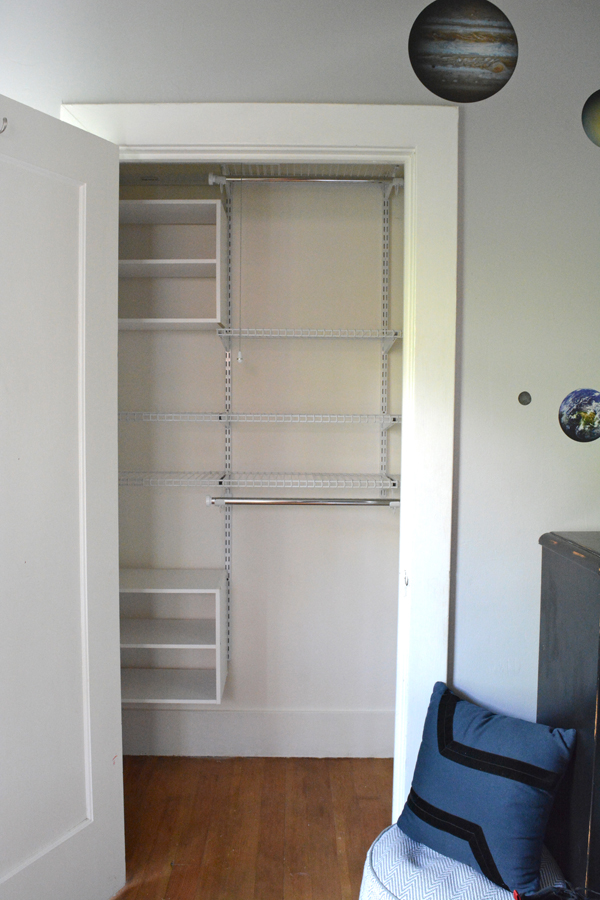
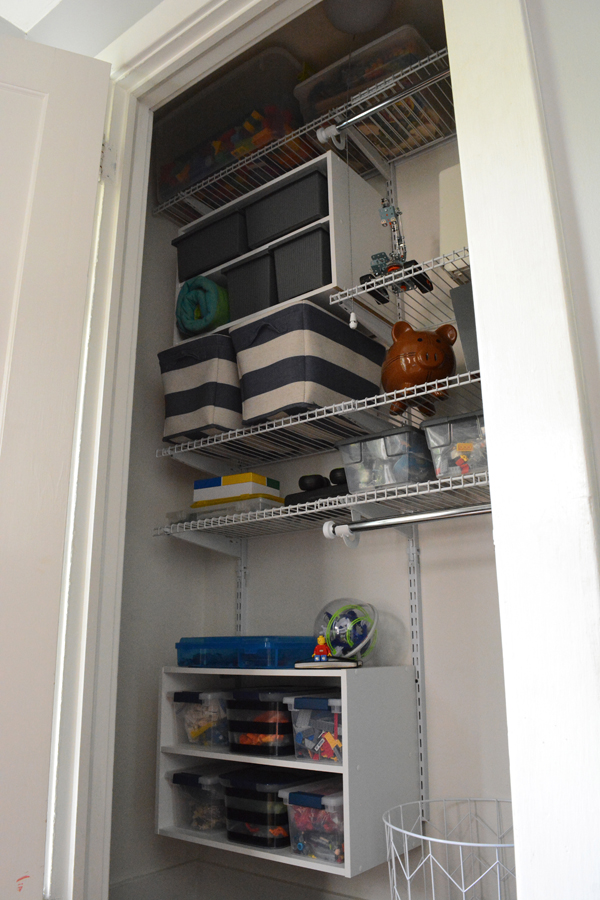
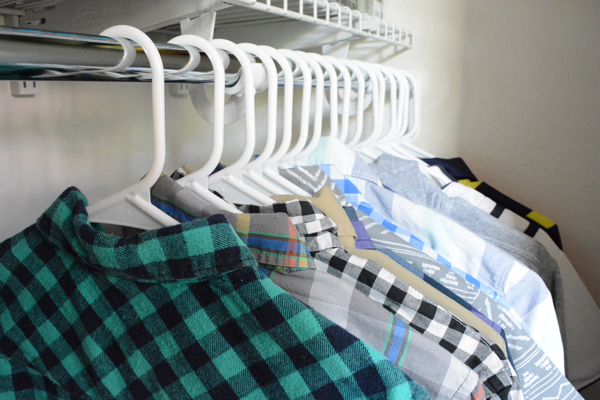
I fit everything back in this closet and more.  And now we can actually get to all the stuff. This closet might just be my new favorite room in the house. 

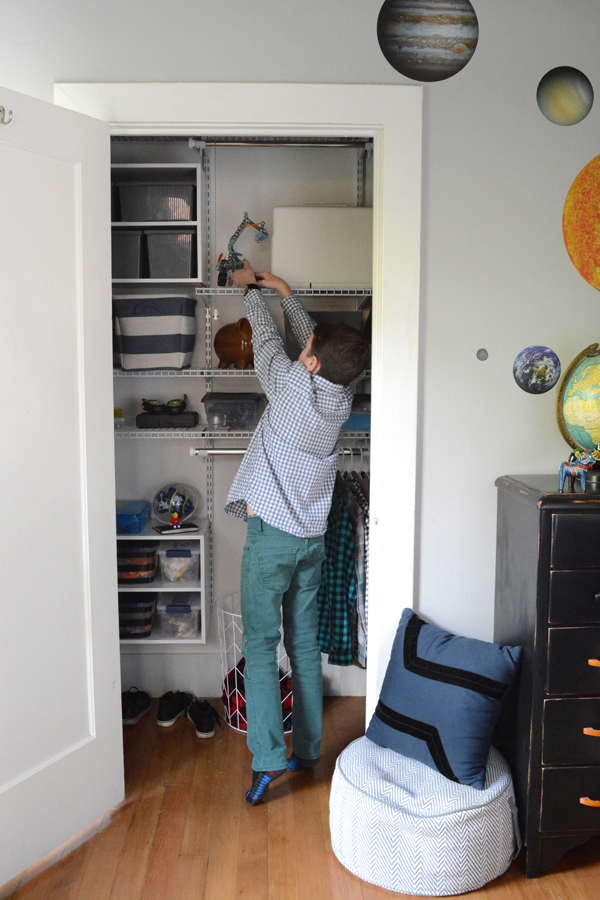
This is so embarrassing. I can’t believe I’m showing you my mess. But, this is an really what my son’s closet looked like just a couple days ago. Yikes!  Our house has small closets with regular doors on them, so a lot of the usable space is tucked into the two sides of the closet. The original shelves and hanging rails were just not providing enough storage. I had purchased many plastic drawer thingys trying to help the issue, but you just couldn’t easily access everything in that tiny closet.

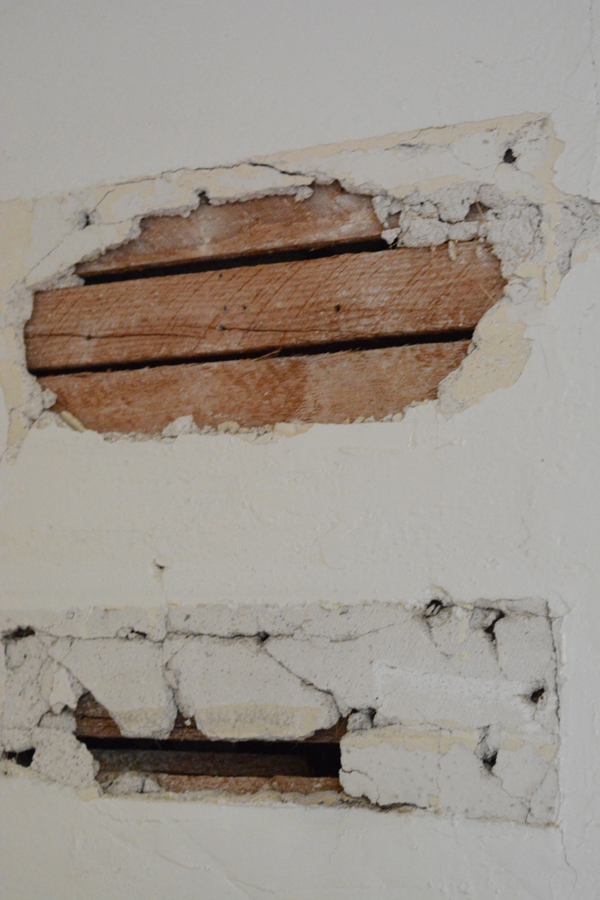
Before I could install the Rubbermaid HomeFree Closet System, I needed to remove the existing shelves and patch a few holes. I bought a little jar of spackle thinking I would just need to cover a few screw and nail holes. Nope, I had to go back to Lowes for 3/8″ dry wall, mud and tape. After a day of patching, mudding sanding, repeating, and then finally painting the closet at 11pm, I was finally ready to install the new Rubbermaid HomeFree series.

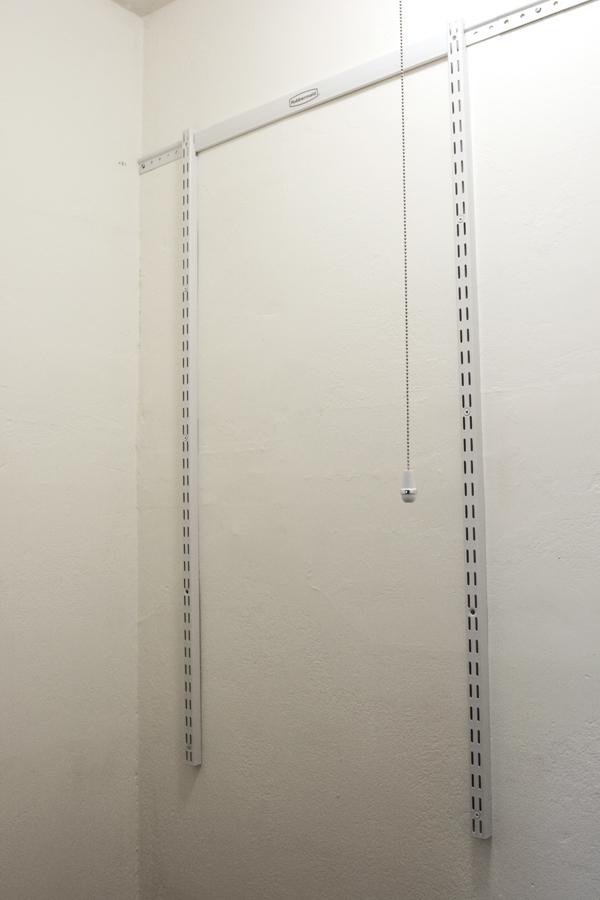
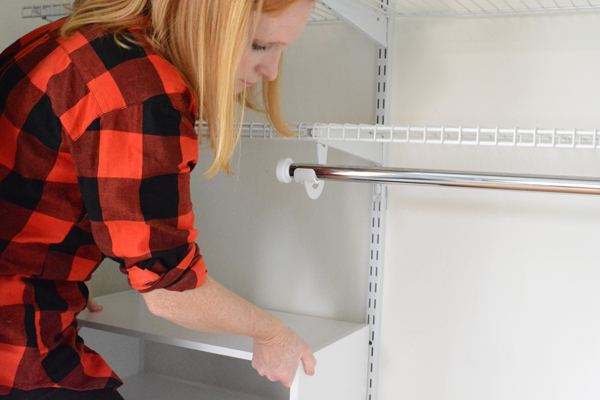
Now, if you know anything about the lath and plaster walls that come with an almost 100 year old house, then you know that they are a huge pain in the rear. These houses don’t have the usual studs that are found in newer homes, so attaching the rail system to old house’s walls can be a bit tricky. You are going to need different anchors then the ones provided with the kit.  Other then that, everything you need is in the kit.

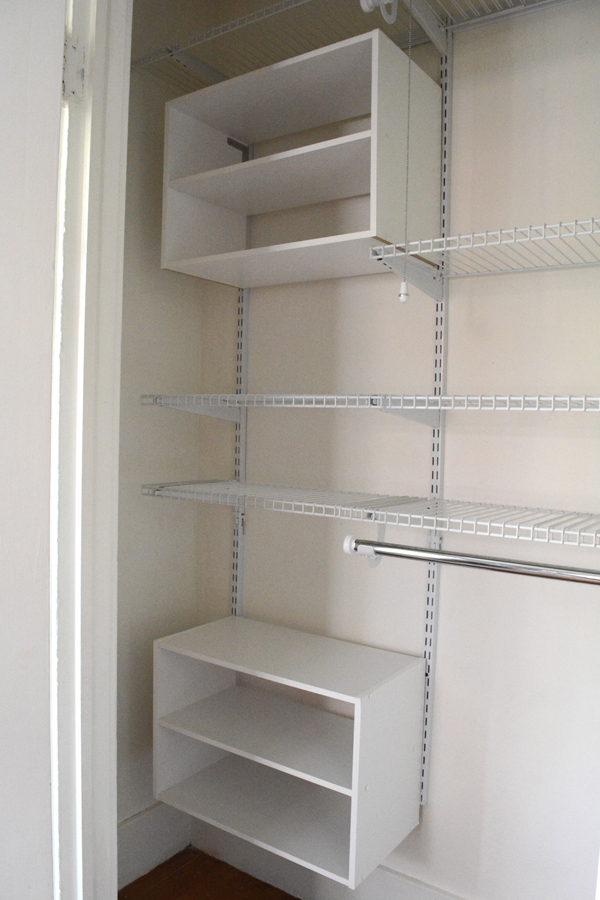
This HomeFree system is so easy to install, once you attach the top rail to the wall, you simply hang the vertical rails from the top rail and then secure them to the wall.

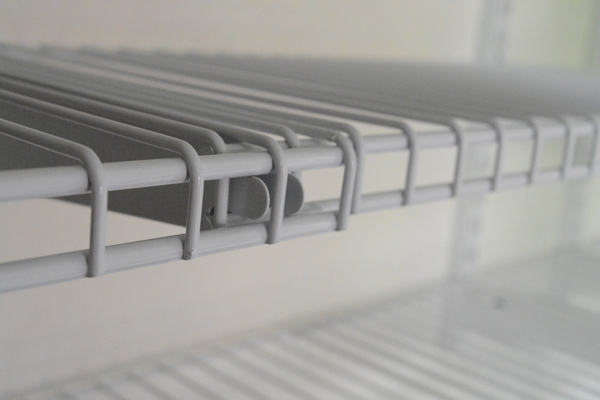
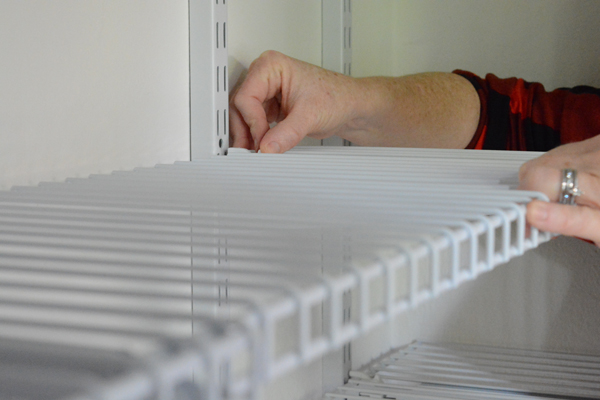
There is NO cutting of any of the rails, shelves, or rods. You can fit this closet system in any odd shaped closet, like mine, with ease. All the pieces overlap to give you a perfect, 100% customizable fit.

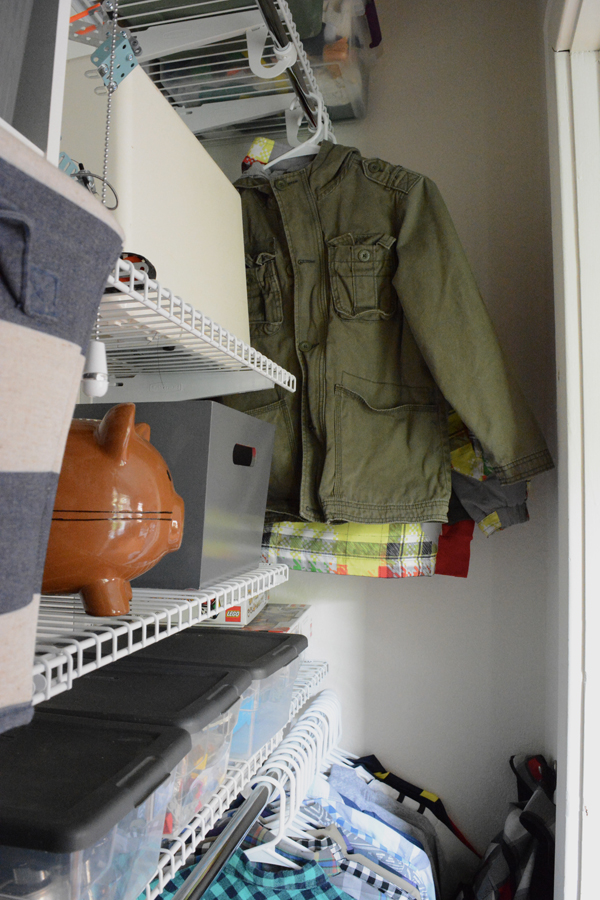
Once the rails are in place, you simply clip in all the brackets and shelves.  I added some extra pieces to the 6 Foot Adjustable Mount Wire Shelving Kit, like these White Wood 3 Shelf UnitsUpright Extensions, and a couple extra shelves. I wanted to use every inch of this tiny closet.

The shelves all lock into place with a simple flip of a button. 

 And now to fill the closet!

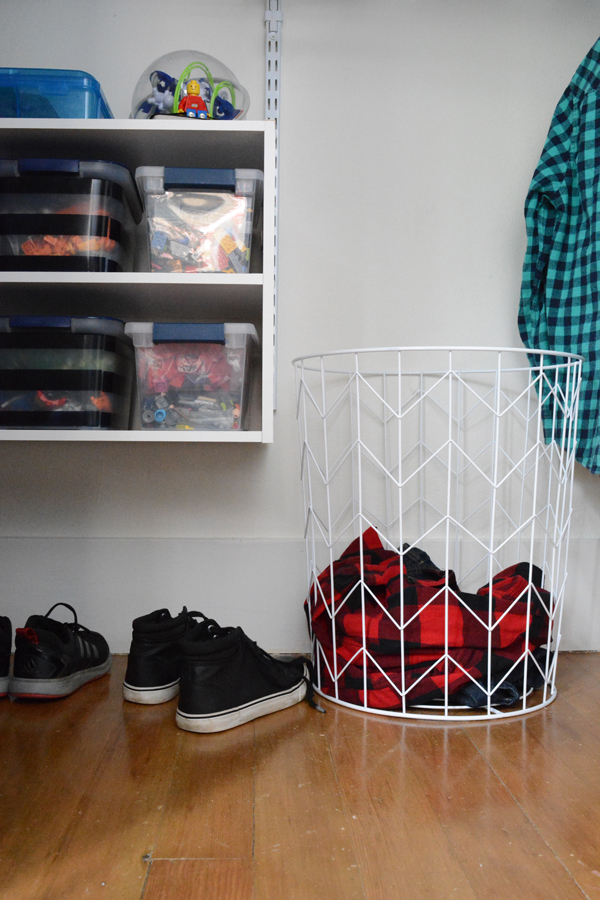
Everything has a home and a specific place.  I even added hooks for hats and school backpacks to get things up off the floor.

I shopped at Lowes for everyday low pricing on Rubbermaid and home solutions including the HomeFree Closet System. For more information about these products be sure to check them out on Facebook
Do you have a problem area in your home that needs tackling? Maybe a closet or laundry room that needs to organizational help. If this closet system can work in our tiny, old closets, I guarantee they’ll work in yours.  

etc.

2015 Calendar Tea Towels

December 31, 2014

Well, the new year is just about here.  Time for a new calendar to help keep our home organized and up to date. I’ve always loved vintage calendar tea towels. I have one from the year I was born, made into a curtain for Riley, our vintage trailer. This year I ordered a couple pieces of fabric from Spoonflower to make into towels.  They have an amazing selection of designs for 2015. Here are a few of my faves. One of them will be making an appearance in my kitchen very soon.

Thanks for staying with me while I took this much needed break from blogging. I’ve had some great quality time with my family and I feel ready to take on the 2015. I sure hope you’ve had a Very Merry Christmas and here’s to a Happy New Year!

If you need a good NYE treat recipe, you might like these Sparkling Cider Cupcakes. It’s a family friendly take on Champaign Cupcakes.

DIY / etc.

Decorate a Christmas Tree for Just $10

December 20, 2014

Yep! I decorated this whole tree for just $10! I made 3 different ornaments and even a topper for just a few bucks and I think this tree looks pretty great.  You don’t have to go into debt just to have a nicely decorated tree in your home.  
I kept with my Swedish inspired Christmas and made more salt dough dala horses and painted them metallic gold.  I whole batch of salt dough costs less then $2 to make.  I also made simple white paper stars.  Just cut out a classic star shape and then crease the star from the center of each point to create a 3Dish look.  And the final ornament was just a piece of cute gingham ribbon cut in a V at the bottom and hot glued down at the top for a string.  A hung all the ornaments from the same fun black and white baker’s twine.  The star topper is just a larger version of the star ornaments.  I used a 12×12″ piece of glittery gold scrapbook paper for this.  
Your Christmas tree should reflect your personality and taste, so customize your look by cutting salt dough ornaments in shapes that mean something to you and add a splash of color and pattern with any 2″ wide ribbon.
  
Here’s what I spent:
$2 – Salt Dough
$2.50 Spool of Ribbon
$1 – Glittery Gold Scrapbook Paper
$1 – 4 Sheets White Card Stock
$2 – Black and White Baker’s Twine
$1.50 – 1/2 yard of Fabric
Total = $10

This cute No. 2 Pencil Christmas Tree from Treetopia is the perfect tree for a small space. I’m telling you guys, for a fake tree, this one is really good. The branches are full and life like with lots of texture and color variation.  This is an unlit version.  I decided I liked the look of no lights on this tree.  It allowed the ornaments to stand out and not be cluttered with bulbs.  Next year I may add a few strings of lights, but for now I’m happy with it the way it is.
And I tree isn’t fully decorated without a tree skirt, I made a baby one for this skinny tree out of a 1/2 yard of fabric I had.  I’m pretty “mad for plaid” lately.  I can’t get enough of buffalo check and ginghams. 

Thank you Treetopia for providing the tree.  And thank you to my readers for supporting the companies that make this blog possible. 

etc.

Thrifting Thursday – Caroling Vases

December 18, 2014

This week I hit the Christmas vase jackpot at my local thrift store.  I just can’t get over how cute this little pair of carolers (that’s what I’m calling them) are. 
I paid quite a bit for thrift store prices, $15 for the pair.  But, to be honest, I would have happily paid more. I’m going to have so much fun pulling these out every Christmas.
The bottoms are marked “Margaret”, I googled it, but came up with nothing. So, if you have an idea when these were made or where, I’d love to know.  Even if they are of no value at all, I still LOVE them. 

What a handsome couple the make with some simple ever greens in them.

I really haven’t been thrifting all month.  I sure glad I stopped at my favorite thrift store this morning.  Have you found any treasures lately?  

Food & Drink

Lemon Linzer Cookies

December 17, 2014

These might be the prettiest cookies ever. Each cookie offers two buttery shortbread cookies with blackberry jam sandwiched between them. My mom bought me a Linzer cookie cutter set (this is a similar one) a couple years ago, I like to make them for Valentine’s day with a heart cut in the center.   A star feels festive for the Christmas.

Lemon Linzer Cookies
1 cup butter
1 tsp. vanilla
2 cups cake flour
zest of one lemon
1/2 cup powdered sugar
Blackberry or Raspberry Jam
Mix the butter , vanilla and lemon zest together with an electric mixer. Add the powdered sugar and mix well. Finally add the flour one cup at the time, and mix well. Wrap the dough in plastic wrap and chill for about 30 mins in the fridge.
Roll out the dough on a well floured surface to 1/4″ thick.  Cut about 16 of each the tops and bottoms of the cookies.  Place the cookies on parchment paper lined cookie sheets.  Place the cookies in the fridge for about 20 mins before baking in a 350 F oven for about 12 mins.  

Cool the cookies on the rack completely before filling with blackberry or raspberry jam. Dust the tops of the cookies with powdered sugar. 
This recipe is adapted from the recipe that came with the cookie cutter.