Category Archives: etc.

etc.

White Nectarine Mint Sorbet

September 24, 2012

It’s STILL warm here in Southern California, so we are enjoying cool treats.  Not quite ready to heat up the house with baking and warm drinks yet.  But, nectarines and peaches have been super yummy lately.  I just picked up some white nectarines at the farmers market.  This sorbet is such a beautiful color.  It’s silky smooth and just the right amount of sweet, with very little sugar at all.  And nothing brightens up flavor like fresh mint – so refreshing.

White Nectarine Mint Sorbet
6 ripe white nectarines
1/2 cup sugar
1/2 cup water
juice from one lemon
pinch of salt
2 Tbsp. finely chopped fresh mint

Bring to a broil and then immediately reduce to a simmer.  Simmer on medium low for about 15 mins. or until the nectarines and their skins are tender.  Puree in a food processor until completely smooth.   Chill completely.  Pour into ice cream maker and follow the manufacturers directions.  A minute before the sorbet is done, add the mint.  Freeze in an airtight container until ready to serve.

What’s the weather like where you are?  We are still in the 90’s.  Are you still trying to beat the heat with cool treats, or are you warming up with all the pumpkin spice everything?

etc.

I love being an Auntie

September 22, 2012

I had to share just a couple pictures of my very sweet new niece.  Meet Adelaide Amelia.  Adelaide is such a beautiful name and it’s special because it’s my Grandma’s middle name.
Olivia and I drove down to San Diego Tuesday night to meet her.  We could only be away for the day, but I’m so glad I got to hold her and meet her in person.  There is nothing better then a newborn.  Ah, almost makes me want another baby. 
See ,she likes her quilt I made.  I am so blessed to have so many nieces and nephews.  In the last 3 years I went from having none to having six now!  It’s so fun for my kids to have cousins.  I sure wish I lived closer to all of them.

etc.

Adventures Abroad: Roma (a decade later)

September 21, 2012

I thought I’d share another installment of Adventures Abroad.  I just got busy blogging away, and kind of forgot that I was going to share some of my travels with you here on Oleander and Palm.  So, this is our trip to Italy that we took just over ten years ago.  We were young, brave, brand new parents (Denali was only 3 months old) we spent just over a week in Rome and Naples.  Denali was such a great traveller and everywhere we went, people said “Bella Bebe” to her.  She bounced along the cobblestone streets in her little umbrella stroller.  
This was a fantastic trip, and Italy is somewhere I really want to go back to.  We drank amazing cafes and ate gelato everyday that we were there.  I have to say that of all the countries I’ve been to, Italy had the BEST food.  From the pasta to the pizza, it was to die for.  

I had fun flipping through the photo album, looking back at this trip.  I took many rolls of film in Italy and more then half of it was black and white.  I used to shoot in black and white all the time.  I miss film and I kind of want to go back to it sometimes.  Do you miss film?

etc.

Fabric Party Goody Bags

September 20, 2012

Every party has to have a goody bag for all the guests to take home.  When I was a kid, my mom threw us the most fantastic themed birthday parties.  She always decorated a cake, and usually sewed goody bags to go with the theme or colors of the party.  She did all this all in Papua New Guinea – the remote, very tropical, 3rd World, island in the South Pacific.  When I started throwing my kid’s birthday parties (11 years ago – eek), I wanted to continue her tradition.  So, for most of my kids parties, I have sewn goody bags for the guests (I’ll have to find them all and share pics with you sometime).

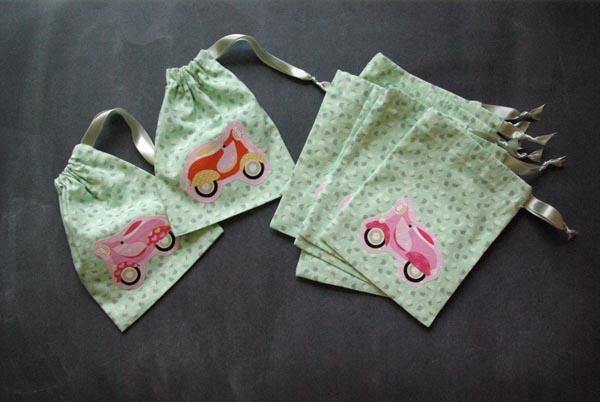
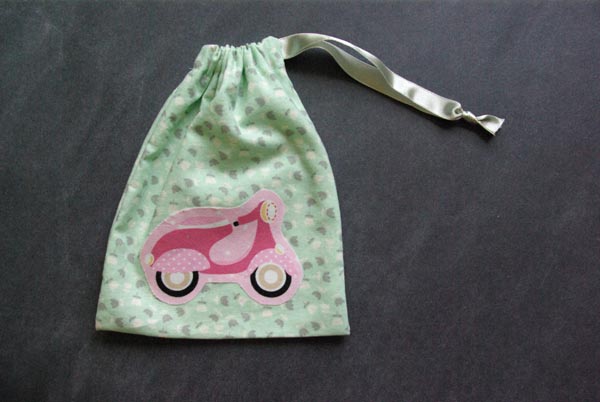
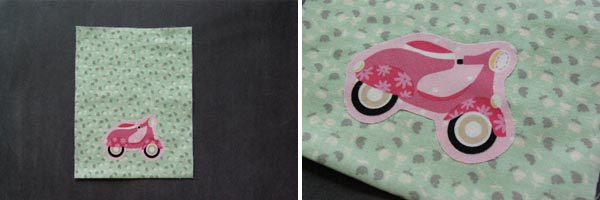
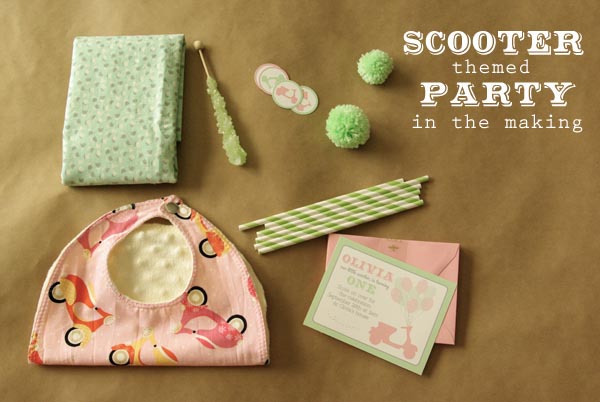
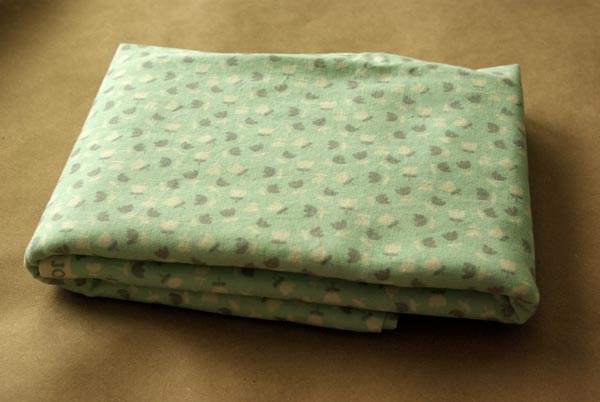
For Olivia’s 1st birthday, I needed to make something with scooters on it.  But, I just couldn’t find the perfect fabric.  I wanted something with both the pink and minty green, and I definitely wanted scooters.  Months ago I picked up this cute scooter fabric and this sweet minty green floral.  I decided to use both fabrics for the bags.  I made 12 bags with 1 yard of the green floral, a swatch of the pink scooter fabric, a little square of heat ‘n bond, and 1 spool of grey satin ribbon.  I’m pretty proud that the  grand total was under $9 for all 12 bags.

These take very basic sewing skills to make. And if you get an assemble line going, you can have them all made in just over an hour.  I have lots of step by step pictures for you to follow.

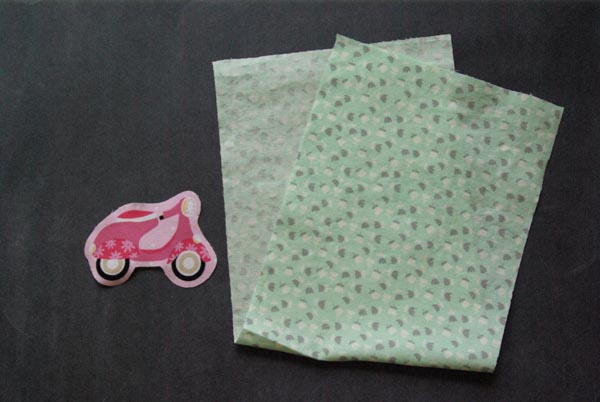
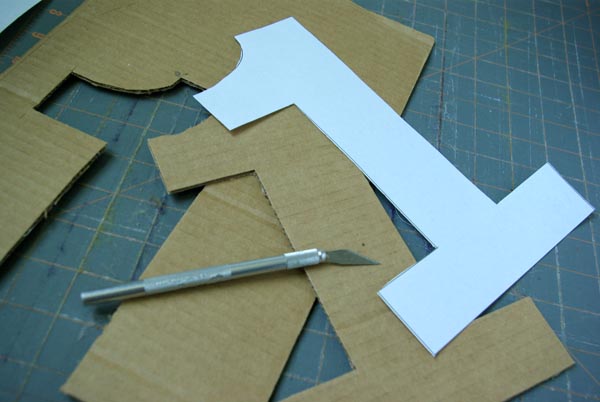
Start by cutting out the rectangles for the bags.  Using 1 yard of fabric and making 12 bags, you need to cut rectangles that are 6 1/2″ by 16″.  This will give you finished bags that are about 6″ by 7″.  Also iron on a piece of heat n’ bond to your accent fabric (mine is the scooters) and then cut out the shape that you want to adhere to the bag.

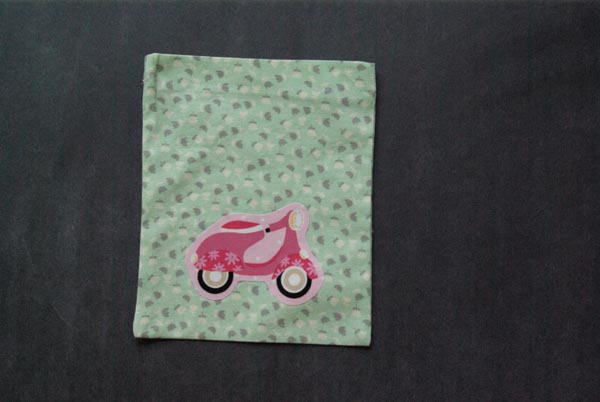
Fold the bag piece in half and iron on the scooter shape where you want it.

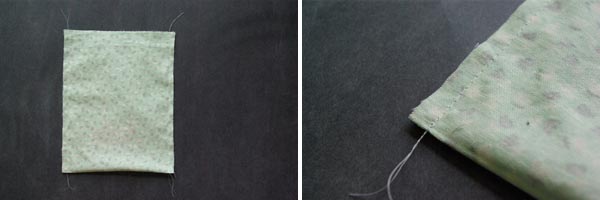
Fold the bag good sides together now and stitch down each side with a 1/4″ seam allowance.

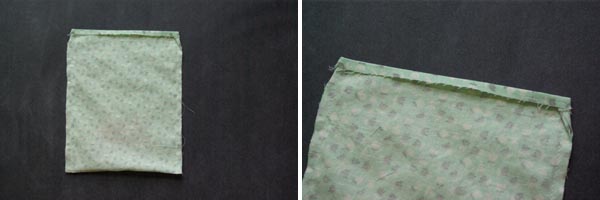
Now, fold down about 1/4″ of fabric around the top of the bag.  Iron this flat.

Then, fold the top down again, this time just less then 1″.  Iron it flat again.

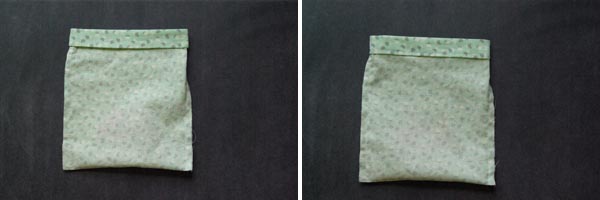
Stitch down the top of the bag.  I sewed mine 6/8″ seem allowance (I have that marking on my machine).  Turn the bag right side out.

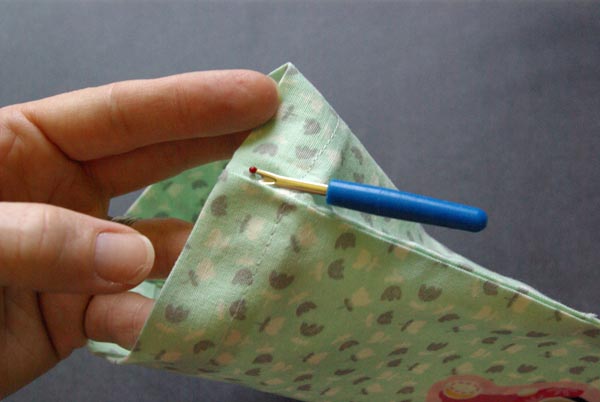
Now you are going to use a seam ripper to open a small bit of the seam so that you can thread the ribbon drawstring through.

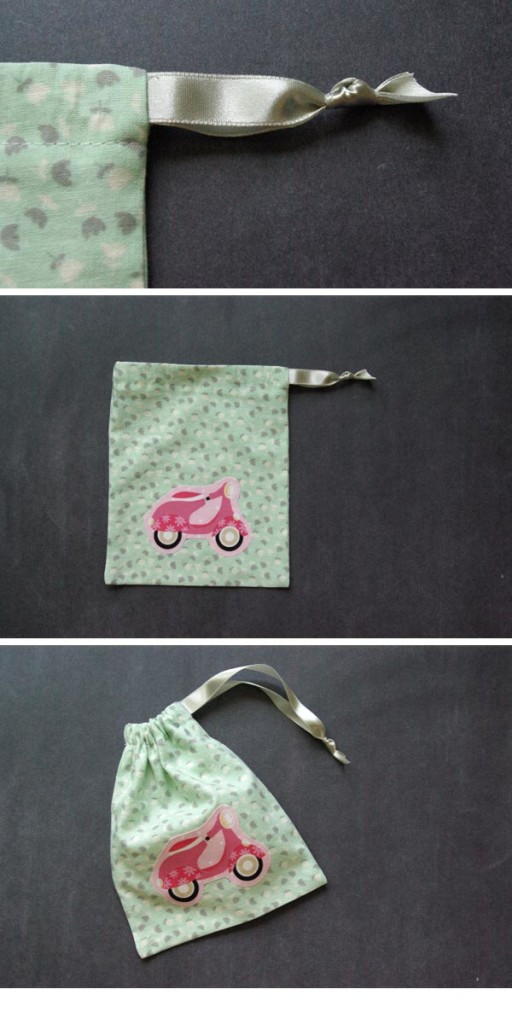
Using a large safety pin, thread the ribbon through the opening and tie it off.

And really these are such great keepsake from parties.  My kids use past birthday bags for all kinds of things.  They store their favorite rocks in some and use them for toiletries when we travel.  Do you have birthday traditions for your kid’s parties?

etc.

Yarn Wrapped Birthday Number

September 18, 2012

I’m still having fun putting together Olivia’s first Birthday Party.  The party is less the 2 weeks away, so I’m making lists and trying to check off at least one thing everyday.  After making all the pompom for the Pompom Bunting, I still had some yarn left over.  So I decided to make this yarn wrapped 1.  It was easy to make and I think it will look cute somewhere on the day of the party.  Maybe I’ll put it on the dessert table or the front door, not sure yet.  

I simply printed out a large number one.  I chose the font Verdana because it has a great classic number one shape.  Then I cut two number ones out of card board using an exacto knife and straight edge.  Then I taped the two pieces of cardboard together.  
Next I started wrapping the yarn around the number.  I went all one direction first and then the other direction next to cover all sides.  On the final wrap, I placed a little dot of hot glue on the corners to keep then yarn in place there.  And, as you can see, I wrapped the last layer in a kind of hap hazard manor to give it more of the homemade feel.  But, it would look great wrapped perfectly even and straight as well.  

To finish it off, I made a few rosettes and leaves with felt.  These are the rosettes are showed how to make in my Yarn Wrapped Wreath DIY video
It could be cute to do the birthday child’s initials as well for a party.  Don’t you just love custom decor that costs pennies? 

etc.

Fabric Balls for Baby

September 11, 2012

I’ve made these fabric beach ball a couple times now.  I made them for my Idaho nephew and my San Diego nephew.  I’ve been meaning to make these for Olivia since she was born.  They are perfect for babies to play with.  They’re soft, light and easy to hold onto.  I had saved scraps from you quilt for this very purpose. And finally this week I got around to making them.  She has been enjoying them.  We have a really long hallway, so I such all the bedroom doors and she loves scooting up and down the hall after them.  

I used the pattern from Purl Bee for these.  It’s super easy to follow.

And I got some exciting news this morning, my San Diego nephew just got a baby sister this morning.  I’m so excited to meet her.  Of course, we were just in SD this weekend for his 2nd Birthday, she had to come the day after we left.  I’m itching to get down there and meet her.  Maybe I should make her some pink, girlie fabric balls too.  Congratulations Josh and Jacq, she is a lucky baby to have you as parents.

etc.

A Scooter Themed Party in the making

September 10, 2012

Last week I shared my inspiration for Olivia’s 1st birthday party.  I’ve been collecting, making and gathering things for the party. I like to start working on a party a couple months ahead of time.  It gives me plenty of time to find what I’m looking for and at a good price. Cuz, I’m a girl on a budget.  I wanted to show you a little of what I’m working with.  This is just the beginning stages of my party prep, but here’s some of the components to the party.

I illustrated the invites and have already printed them off.  Since the party is only 3 weeks away and need to get them mailed off.  
I am in the process of making LOTS of pompoms for garland and other cute things.
I usually sew goody bags for the guests.  They are going to be made out of this sweet mint green and grey fabric.

I made Olivia and birthday party bib. This fabric was just too cute to pass up.  It will appear somewhere else in the party as well.

What’s a party without paper straws?  I have lots of scooter decals to decorate with (these scooter decorations are available on my etsy shop).  And there will of course be candy, but how perfect is this mint green rock candy. 
So, what do you think so far?  Have you got any other great ideas or sources for me?  Please share.
Here’s the goody bags I made with the fabric shown and the yarn wrapped birthday number.  And here’s the party.

etc.

Birch Bundle

September 4, 2012

Very sad story, recently our birch tree died.  So, I had lonnie save some of the branches for me.  I love birch trees and their beautiful white bark.

I had recently gotten rid of the topiary that sat on my mantel in our living room.  It was cute 7 or so years ago, when I first bought it.  But, I was ready for something new and fresh.  I felt like something with some height was needed in that corner.  I decided to fill my white pot with a bundle of birch branches (say that quickly 3 times).  I cut the branches all to 3 ft in length.  I got to use a drop saw to do this, power tools are always fun.

I think it brings the outside in, adds texture, height, and modernizes my decor for no cost at all.  This is a decorating win for me.  What do you think?  Have you got any other creative ideas of how to display some birch branches?  Or what else would look great in that corner of my room?  I’d love to hear what you think.

etc.

Olivia’s 1st Birthday Party Inspiration

September 3, 2012

Olivia is 11 months old! Wow, where has the year gone. I’m really excited for her first birthday party though. I wanted to share my inspiration for the party. Olivia does not crawl, she scoots on her butt everywhere. And she is fast.  We call her “our little scooter”. So a scooter themed party seemed appropriate. We’ve also has had a scooter for about 8 years.  When I can get away without kids, it’s really fun to drive. We are quite fond of scooters around here.

This beautiful image of a pink vespa kicked off the party palette for me (found via pinterest). Minty green and pink will be the main colors. But, grey will serve as the neutral backdrop and maybe a little peachy pink to add to the vintage vibe I want the party to have.

I’ve already started working on some of the decorations, I have some scooters up on my etsy shop already. I’ll share more of my party prep with you as I put it together.

Oh, the fun circular image and color palette layout is from the fantastic blog, Pugly Pixel.  She offers great tutorials and layouts for photoshop. 

etc.

A New Front Door

September 1, 2012

If you follow my pinterest, you might have noticed me pinning entry doors lately, especially in the Craftsman and Arts and Crafts style.  My Shut the Front Door board has some really great looking doors.  Our little bungalow home, built in 1920,  has needed a new door since the day we bought it, that was over 9 years ago.  Our old door offers absolutely no privacy, hence the silly pull down shade.  It also is single paned glass so heat and cold both escape and enter our house, driving our electricity bill up.  To be super inconvenient, the door cannot lock from the outside either.  So, we could let guests in, but if we wanted to leave or enter the house, we had to always use the back door.  Even the lock set cannot be replaced because of the door’s vintage.  And really it’s just way too cottagey for me (that’s my new word).   So, it was time.  We had to bite the bullet, and look for a new door.  

I knew it was going to be super pricey.  Our door is really wide, like 42 inches wide.  Like special order wide – ouch!  I had looked a few years ago and the prices has frightened me away.  But, this time Lowes really came through.  The salesman was very knowledgable (amazing right?) and he really got a good price for me.  

We ordered this door through Escon Doors. To have the door stained and finished by them, it was going to add $500 to the price.  So, I’m going to do that part myself.  I think I’m going to stain it a dark, dark brown (not a yellowy oak brown, more on the ebony side).

the old door 

Sometimes home ownership just costs a lot of money.  I know this was expensive, but I think it’s really going to help our curb appeal and just be safer and more convenient for us.  Have you had to put money into your home recently on a necessity?  It’s hard right?  We just want to spend money on the “fun” things.